
Focusing is an integral part of any camera operation. Whether you are using a basic point-and-shoot model, or something that enables you to fine-tune your focusing, picking the right mode and getting the sharpness where you want it is the difference between a poor image and a stunning one. For many people, focusing is something that is regarded as a given, but, as with all photography techniques, it is not quite that straightforward. There are other things to bear in mind, not least the many creative ways in which focusing can be used to change a picture.
 Camera Focusing for Beginners – Your Camera’s Focusing Modes
Most consumer digital cameras often have more than one focusing mode, but the two main ones are autofocus and manual focus.
In the Menu
Within the menu you can pick the focus mode you wish to use.
On the LCD
This screen allows you to pick the specific focus area via the toggle on the back of the camera
Camera Focusing for Beginners – How Does Autofocus Work?
Autofocus is the mode on a camera that instructs the lens to focus on a subject. First, however, the camera has to collate enough information for it to be able to create a sharp image. It can also save time – compared to manual focusing – and ensure sharper images.
What this setting actually does is instruct a computer within the camera to run a motor that focuses the lens. Focusing is the moving of the lens elements until the sharpest possible image is achieved. Depending on the distance of the subject from the camera, the focusing elements have to be set a certain distance from the camera’s sensor to form a clear image.
A typical autofocus sensor uses a charge-coupled device (CCD). This provides input to algorithms (step-by-step guides to calculations) that compute the contrast of the actual picture elements. The CCD is typically a strip of 100-200 pixels, and, as the light from the scene penetrates this strip, the microprocessor analyses the values from each pixel assessing the difference in intensity among the adjacent pixels. If the scene is out of focus, adjacent pixels have very similar intensities. This being the case, the microprocessor will then move the lens elements to see whether the intensity between the adjacent pixels has got better or worse. The microprocessor will then search for the point where there is maximum intensity difference between adjacent pixels and decide on that as the best point of focus.
This method of focus must have light and subject contrast to do its job. If you try to take a picture of a blank wall, for example, the camera has no adjacent pixels to compare and, therefore won’t be able to focus.
Most types of autofocus look for contrast on horizontal areas of the AF points, but more cameras today have the ability to assess contrast on the horizontal and the vertical, known as ‘cross-type’ autofocus.
Camera Focusing for Beginners – Autofocus
At its simplest, when using autofocus mode, focus is locked when the shutter-release button is pressed halfway. The LCD screen or electronic viewfinder indicates when – and sometimes where – focus is locked. A visual indicator in the viewfinder confirms when focus is achieved, and this will change colour. Alternatively, you may hear a beep when the camera is focused.

There are various types of autofocus:
Single AF
Single-area AF is when the camera focuses on a subject in the particular area of the screen, depending on which AF point is selected – usually the central point. Once the focus has been set it stays locked at that distance until the shutter button is released, even if the subject moves in the meantime.
Continuous AF
This method continually focuses on the subject, and is useful when shooting moving subjects. Selecting this option enables the camera to constantly focus on, and track, the subject, even with the finger on the shutter.
Multi-area Autofocus
Nowadays, camera technology gives increased control to the user over the picture they are taking. Multi-area, or multi-spot, focusing is an example of this, by which we mean a set of points seen through the viewfinder that give the photographer the opportunity to focus on specific areas. Some cameras may have as little as three AF points in the viewfinder, tohers will contain a good deal more – the Nikon D4s, for instance, has 51.
With this method, the camera automatically focuses using one or more points, with the focus positions changing according to the position of the subject being photographed. The user has the option to let the camera automatically decide which point to focus on, or manually select it themselves.
De-focusing
There may be times when you’re feeling particularly creative, and just as blur can be created in an image using slow shutter speeds, so it can be achieved using focus. By deliberately making the subject out of focus you can create feelings of mystery, alienation, romance and much, much more. Simply use Manual focus mode to blur the subject as much as you feel necessary. You may want to deliberately miss the main subject and concentrate on another element in the frame or make the whole image blurred, creating an impressionistic painterly feel.
Manual Focusing
This method was the original method of focusing before autofocus. By rotating the focus ring, which moves the lens elements, the user achieves focus. This method is particularly useful for close-ups, or for low-light situations, where the autofocus fails. As the lens is focused, the image in the viewfinder will become clearer. Often a central split image in the centre of the viewfinder will enable finer detail to be focused. Some cameras allow the user to fine-tune the focusing manually while in the AF mode.
 Predictive Autofocus
If it’s a constant focus that you require on a moving subject, then Continuous AF maintains the focus but is, however, not always accurate for taking a sharply focused picture. This is because there is a short time lag between when the shutter is pressed and when the picture is actually taken – this is referred to as the release time lag. The way to solve the problem is the Predictive Focus Tracking System, a feature on many DSLRs. This method forecasts the position of the subject at the moment the image is captured based on the measurement of the subject’s movement, and shifts the lens elements accordingly. In essence, it detects the subject’s speed of motion by taking the release time lag into consideration.
This option is effective for taking pictures of an object moving at a constant speed towards the camera, but it does not provide maximum focusing performance for a subject that abruptly changes direction or one with low contrast moving randomly. To focus accurately on such a subject, the autofocus system must accumulate more data on the subject’s movement using multiple focus areas – as mentioned earlier – so that an appropriate judgment can be made.
Camera Focusing for Beginners – What to Focus On?
In terms of portraiture, the eyes are the obvious focus point, being as they are the ‘windows of the soul’. If the person is further away then you would be better advised to concentrate on the face, to really bring out the features. And by opening the aperture wider you will create a shallower depth of field, drawing the viewer’s attention to the face and not have them drift off to the background. If, on the other hand, you are attempting a landscape image, you could focus on a particular point of the composition – say, a hill in the foreground. An aperture of f/11 or smaller would work well here, but do bear in mind that you are trying to draw the viewer in so a certain focal point is key.
Depth of Field and Focusing
Precise focus is possible at only one distance. At any other distance, the object will be de-focused, and will produce a blurred image. This is where depth of field becomes involved. Depth of field describes the range in a photograph, from near to far, that appears to be in focus. The more a lens is opened up – for example, to an aperture of f/4 – the less depth of field there will be (i.e. the foreground will be in focus and the background will appear blurred). If you require all the elements of your composition to appear sharper, you should stop the lens down to an aperture with a higher numerical value, such as f/16.
When you are taking headshots of people a shallower depth of field proves beneficial, as this isolates them from any distracting background detail, whereas for a landscape shot, a deeper depth of field often ensures that every detail is bought into focus.
How to use focus lock
 You don’t always want to put your subject slap bang in the middle of your frame when composing a photo.
In fact according to the rule of thirds you should consciously avoid doing so. Most pictures generally work best when the subject is off-centre – ideally one-third of the way into the frame from either side.
The trouble is, most compact cameras, pretty well all cameraphones and even a few DSLRs have not been told about the ‘Rule of Thirds’ and seem to insist on focusing on whatever is in the centre of the frame.
The further from the centre your subject is placed, the more they struggle to work out what the focal point should be.
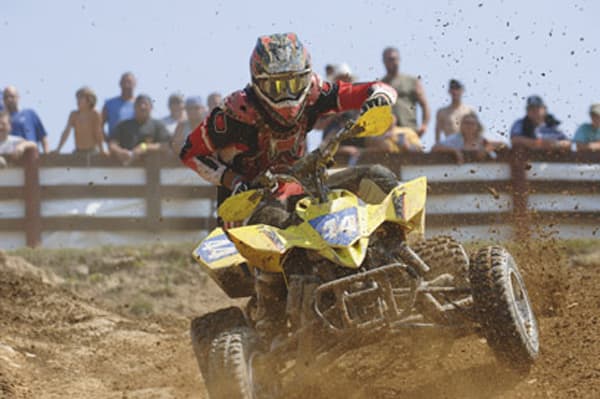
Even sophisticated cameras with multiple focusing points often get it wrong, especially with small or intricate subjects like this one in the picture above.
Fortunately every camera, even the cheapest of compacts and cameraphones, has a two-stage shutter release button which incorporates a focus lock as the first stage.
This enables you to pre-focus on your subject before taking the picture, and using it is easy. Here’s how the focus lock works in two easy steps…
How to use focus lock – Step 1: Lock on to your subject

Place your subject in the centre of the frame and press the shutter release halfway down.
The camera (or phone) will lock the focus and exposure but not take a picture.
How to use focus lock – Step 2: Reposition

Without releasing your finger from the shutter, reposition your subject to where you want them within the frame, then press the shutter the rest of the way to take the picture.


