Amateur Photographer verdict
Intuitive and friendly to use, this is worth getting to know properly as can produce fantastic results with the right application of tools- Easy sky replacement
- Extensive range of adjustments
- One click for complex edits
- Limited catalog functionality
- AI tools are hard to predict
- Preset editing can be awkward
Skylum Luminar Neo is available to purchase with a one-time payment or as a subscription. So, how does this photo editing software stack up?
Skylum Luminar NEO at a glance:
- From $79 / £79 per annum, $99 / £95.92 for 24 months, $249 / £149 one-off for lifetime
- Subscription
- Works as a standalone or plugin
- Mac or Windows
- https://skylum.com/
Skylum developed Luminar Neo from the ground up to be different from previous Luminar editors like Luminar 4 and Luminar AI. It has all the Luminar AI tools and a very similar layout, but has additional features and more ‘state-of-the-art technologies’. Unlike previous editions, Luminar Neo has a modular engine that enables faster image processing.
The one-time purchase includes Luminar Neo and all the maintenance and feature updates delivered for this software version (but not future versions). It can be expanded by purchasing ‘Extensions’. Alternatively, a Pro subscription gets you the Luminar Neo software, all future updates and versions, plus all extensions released during the subscription period. It’s worth keeping an eye on the Skylum website as there are frequent discounts and best deals.
Standalone or plugin
Luminar Neo can operate as a standalone package for working non-destructively on JPEGs and raw files, or as a plugin for Adobe Photoshop, Adobe Lightroom Classic and Photos for Mac OS.
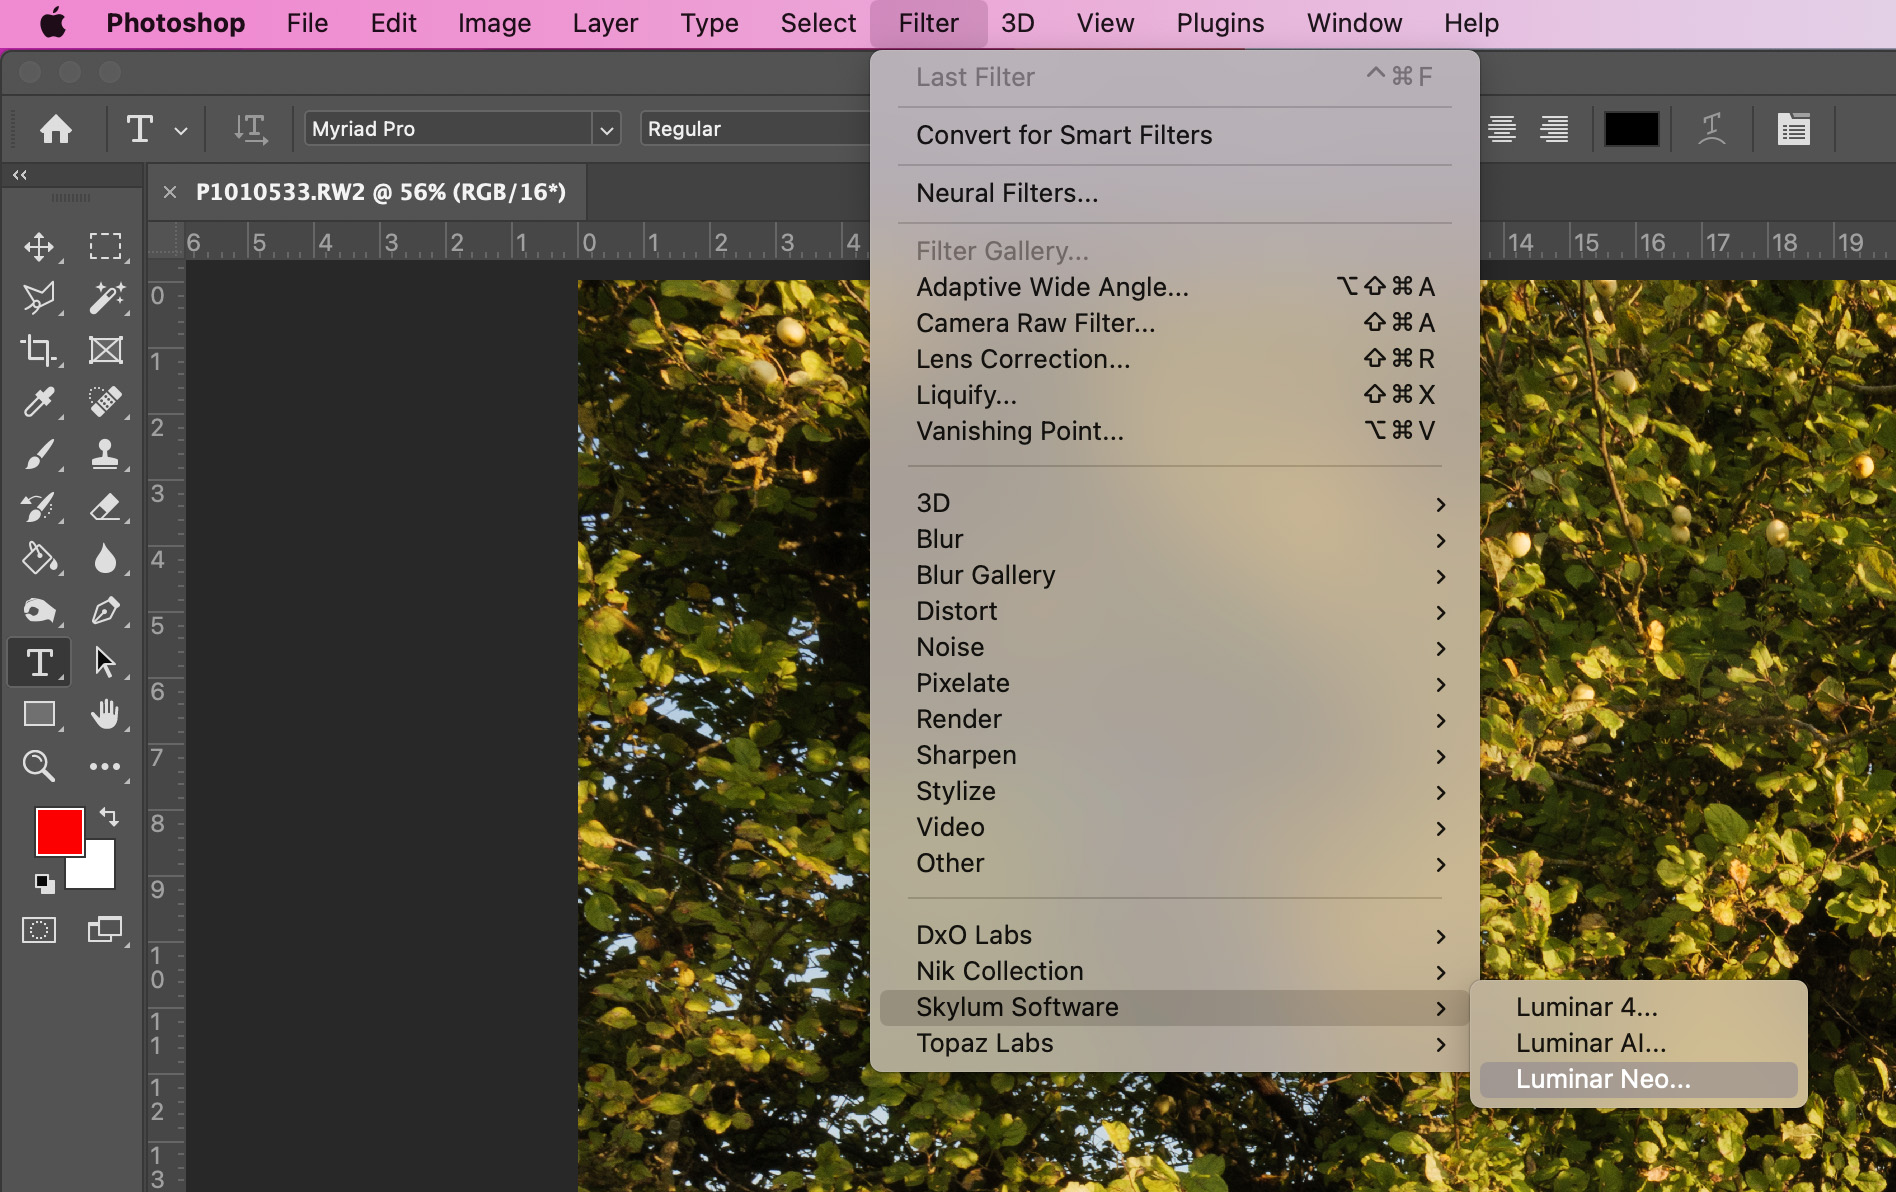
In this review, I’ve focused on using Luminar Neo as a standalone package, but it’s easy to access the same tools from within the host software. With an image open in Photoshop, select Filter > Skylum Software > Luminar Neo. In the Develop module of Lightroom select File > Plug-in Extras > Transfer to Luminar Neo. In Apple Photos the route is Edit > Extensions > Luminar Neo.
Extensions
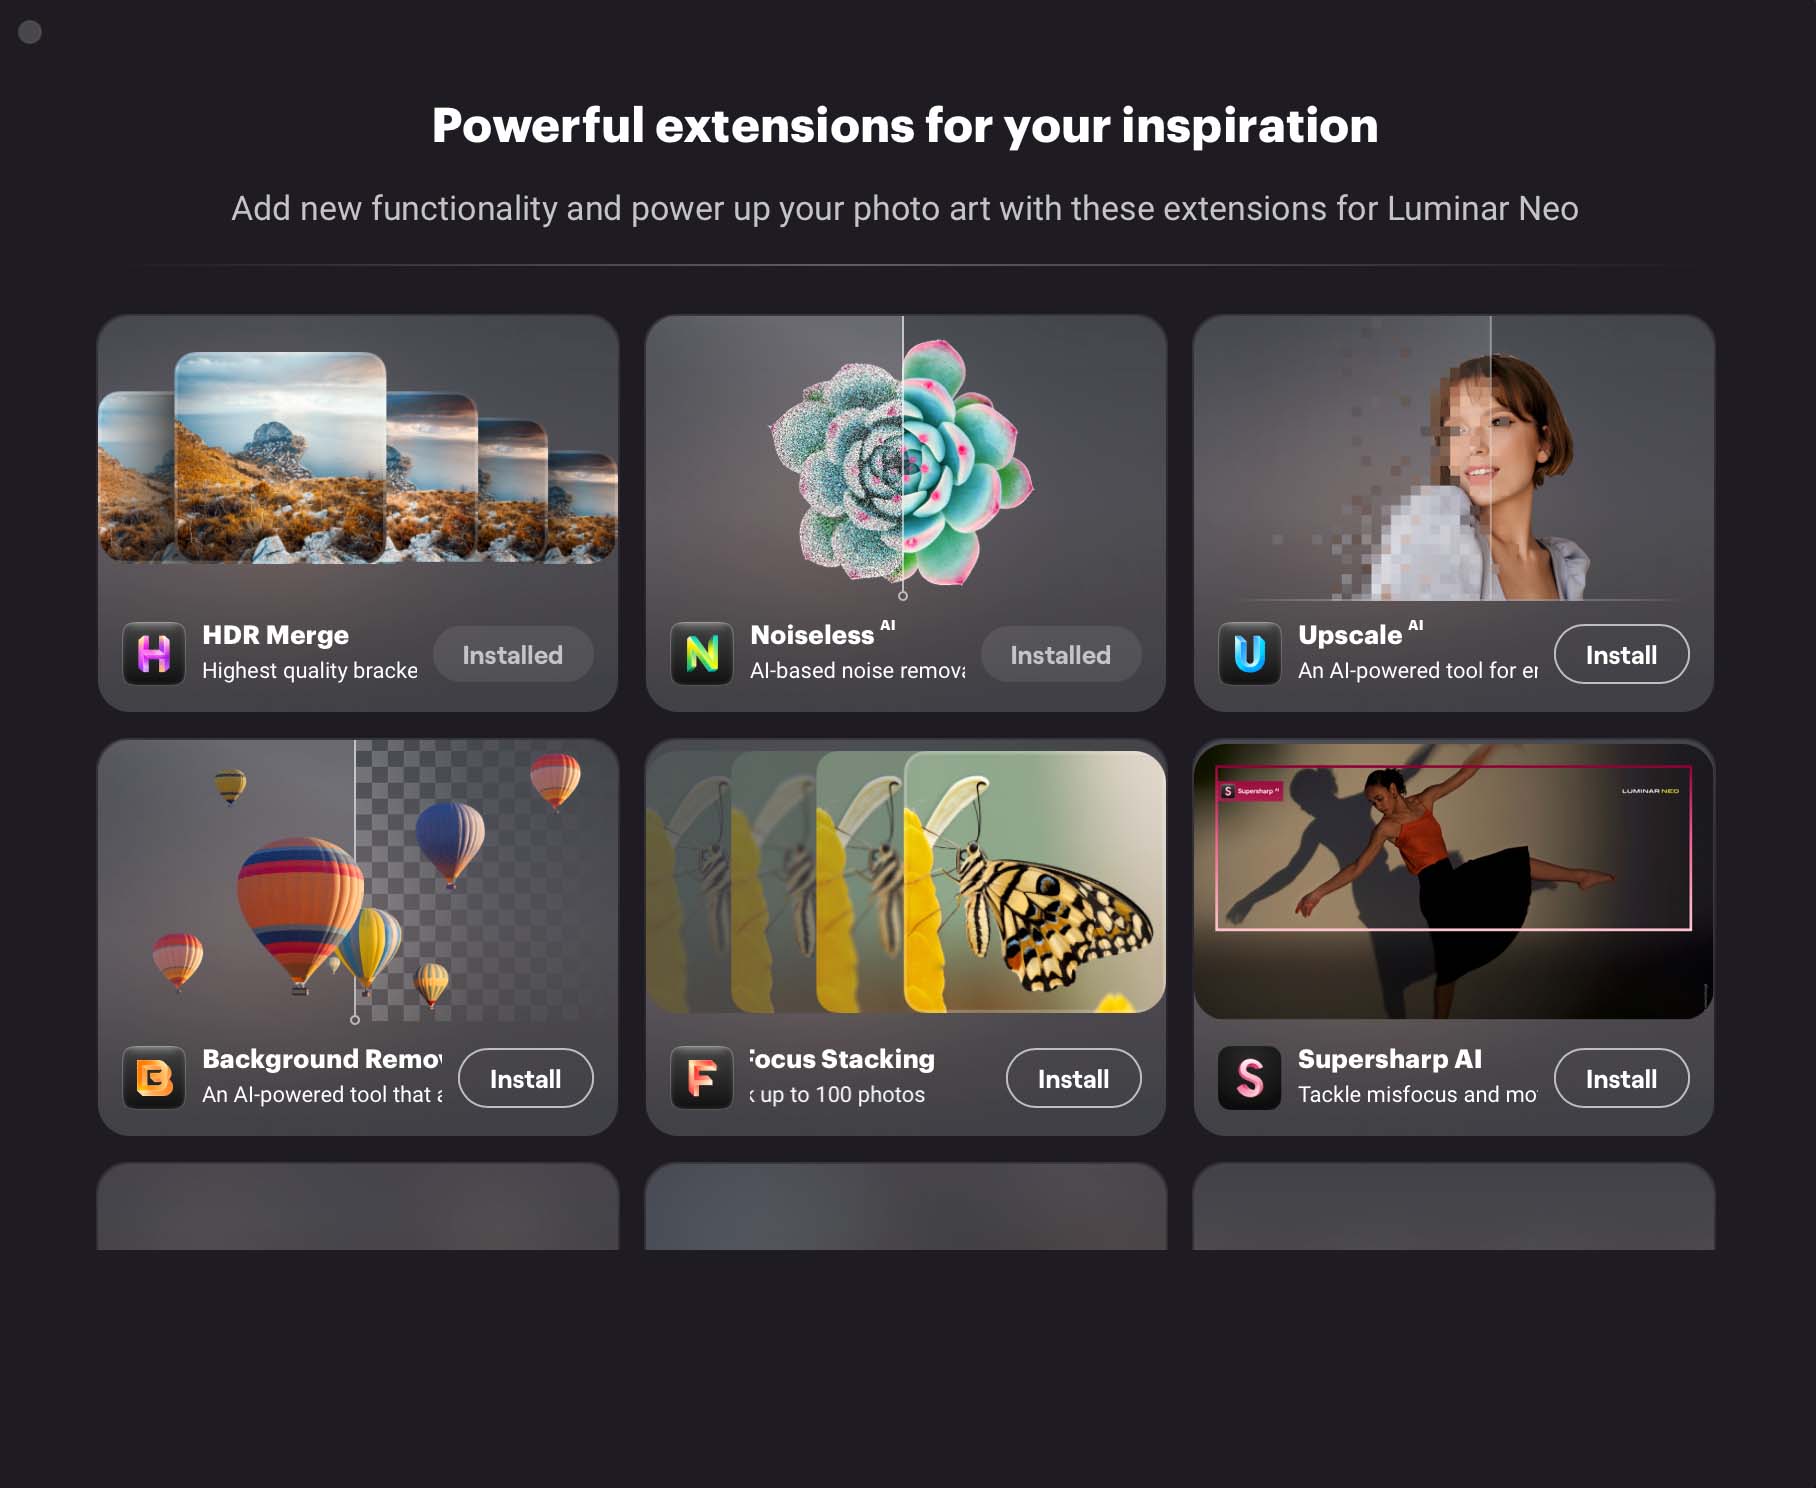
Skylum has committed to developing Luminar Neo into a complete creative editing package and is expanding its functionality with ‘Extensions’. These include HDR Merge, Upscale AI, AI Background Removal, Noiseless AI, Supersharp AI and Focus Stacking Extensions. This review concentrates on the main software and doesn’t look at the Extensions.
Number of devices
Skylum offer licenses for one or two devices, which the company refers to as ‘seats’. Two seats allow you to install and activate Luminar Neo on two devices at once, regardless of their operating system. For example, you can use one seat to activate Luminar Neo on a Mac and the other on a Windows computer. Both seats can also be used for Windows or macOS computers.
Moreover, you can always manage your activations in your Skylum Account. Further seats can be acquired there for those with multiple computers, or want to share a license with others.
It’s also possible to reset a license from your old machine at no cost and activate that license on your new device. Just log in to your Skylum account to reset activations for the professional photo editing software Luminar Neo.
Getting started
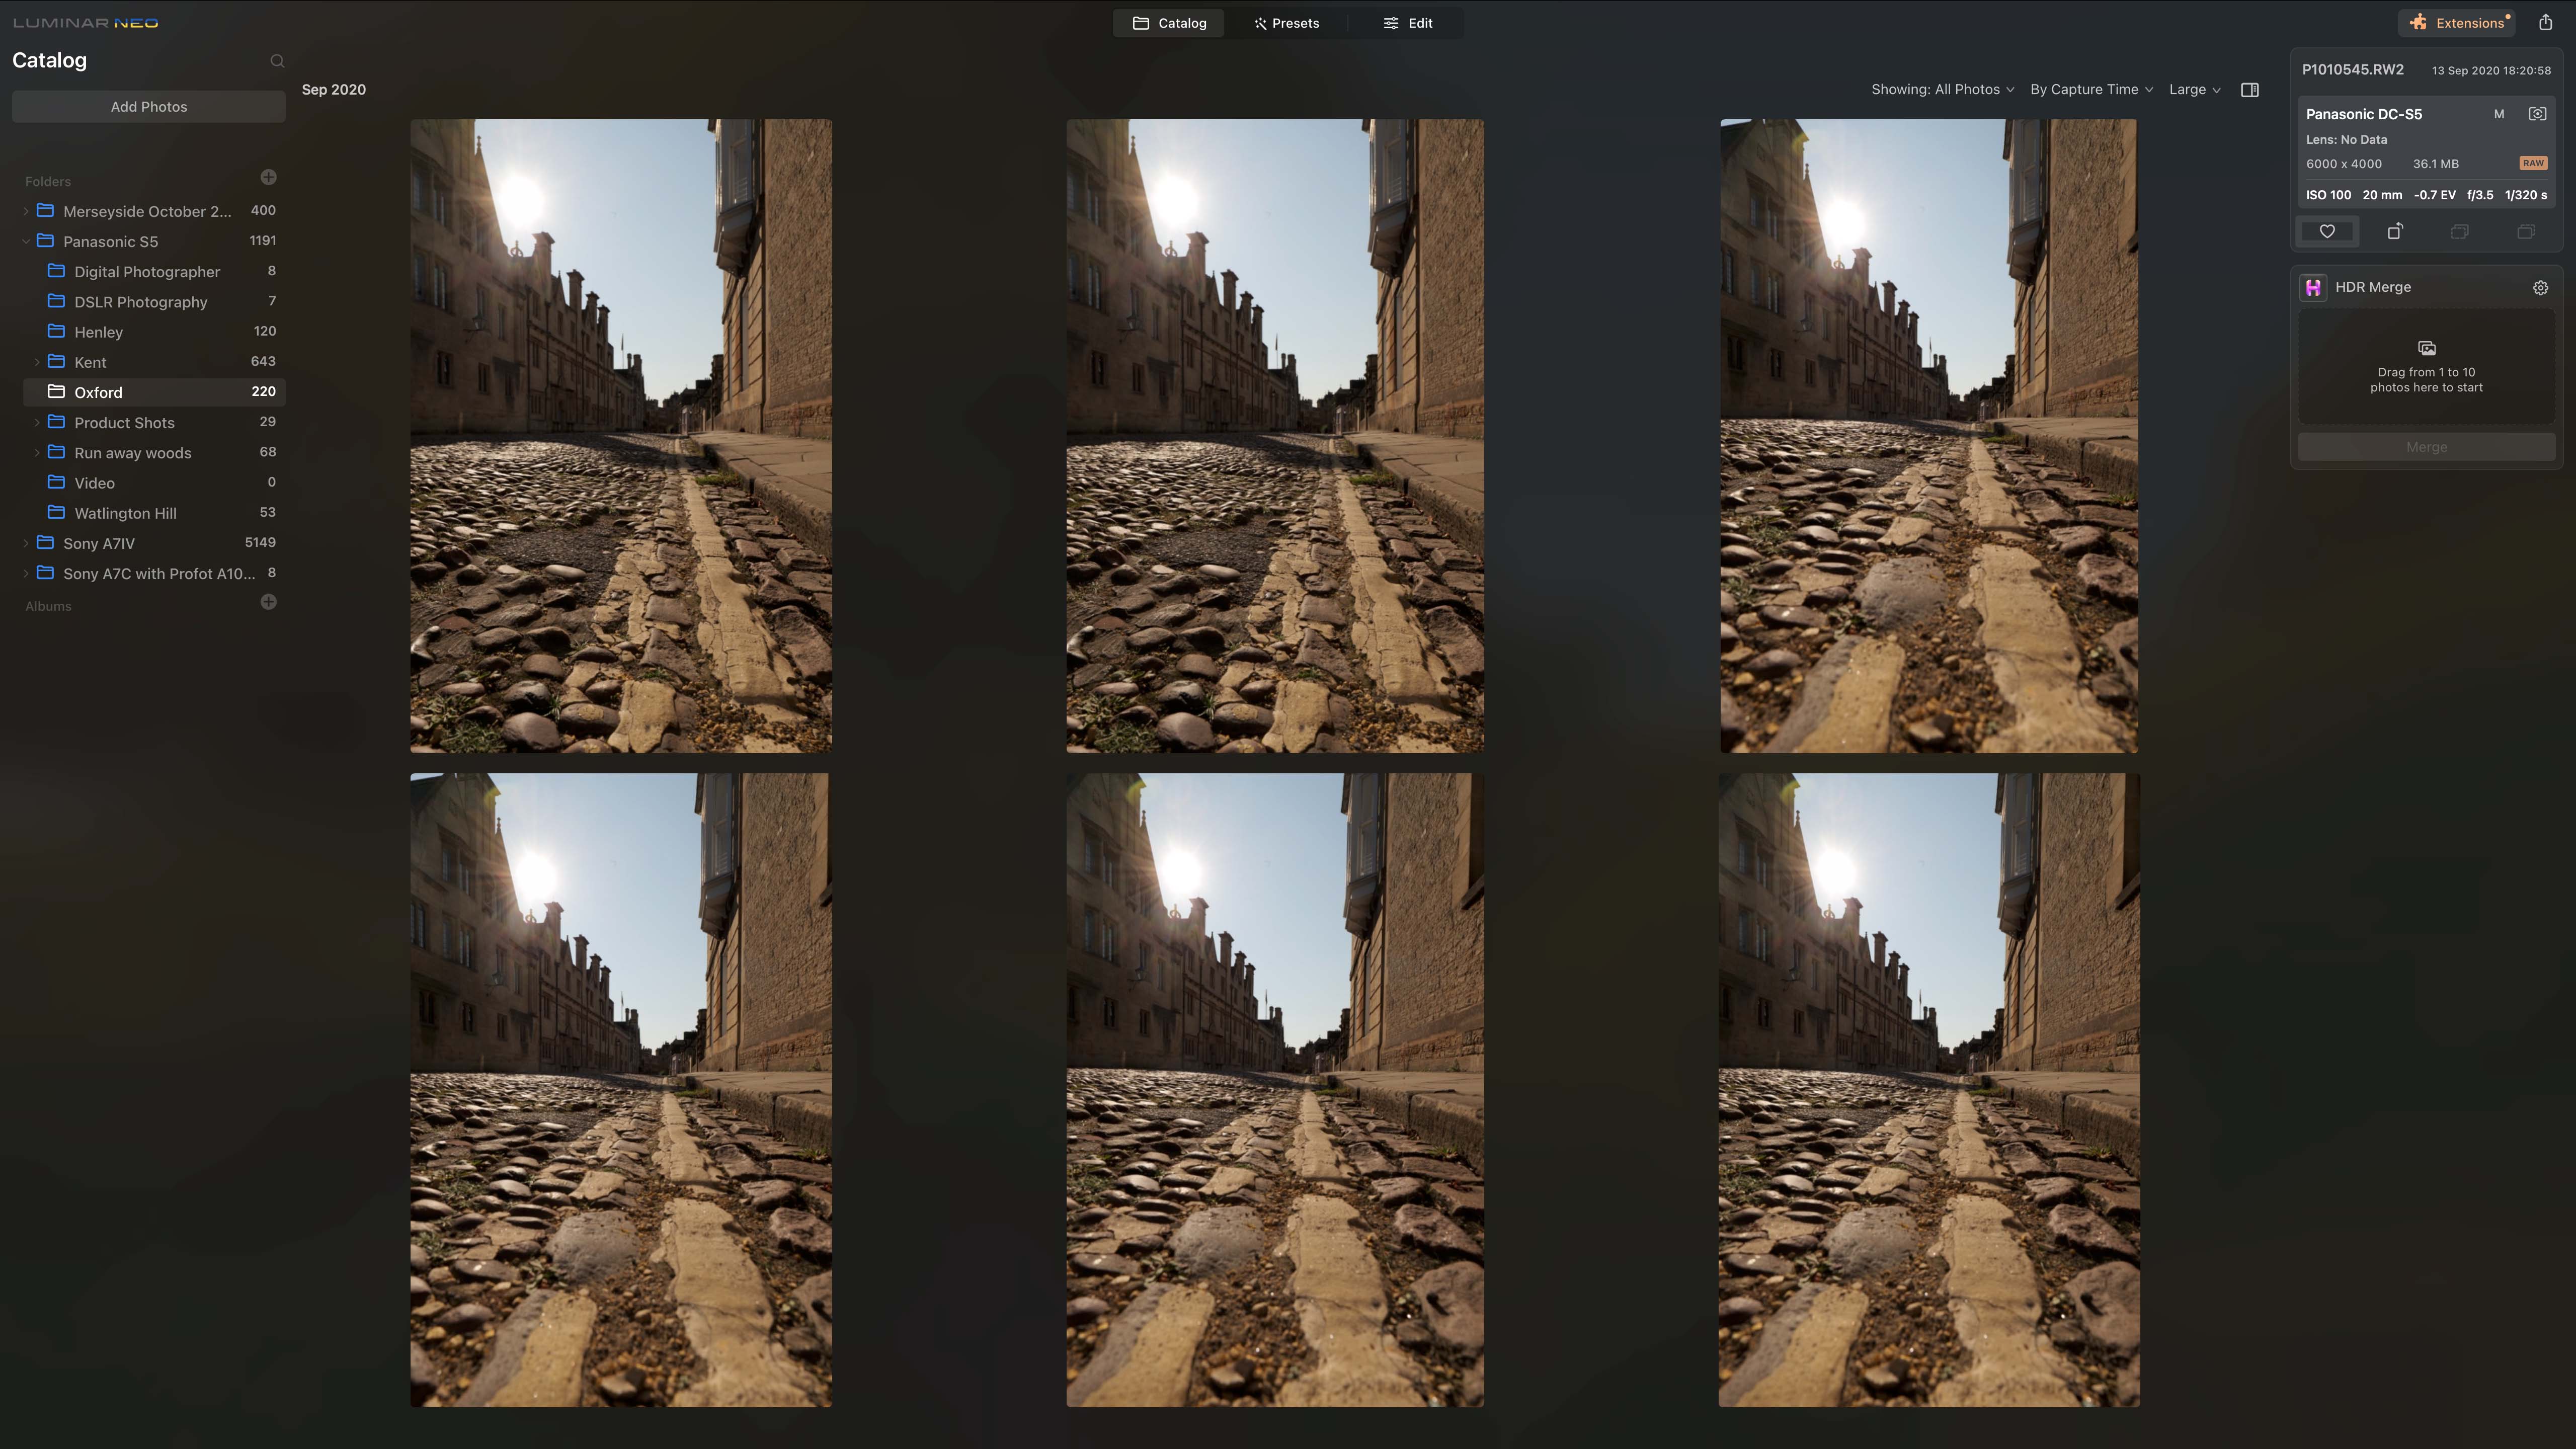
As usual, the first step is to open an image. Luminar Neo has a catalog section which works with your computer’s filing structure, and you don’t have to import images into it. You simply specify which folders you wish to work with. It’s also possible to work on individual images using the ‘Add Image’ button in the top left corner of the page to locate the file.
The catalogue is really just a file browser, but comes with the ability to create albums. These are virtual collections of images that can be gathered together from different folders. The images aren’t copied or relocated – Luminar Neo just holds the location data and allows you to see all the images in a particular album on the same screen. It’s a handy function.
Double-clicking on an image in the catalog enlarges it so that it fills the frame. Clicking once on the larger view zooms into 100%. Double-clicking again returns to the browser view.
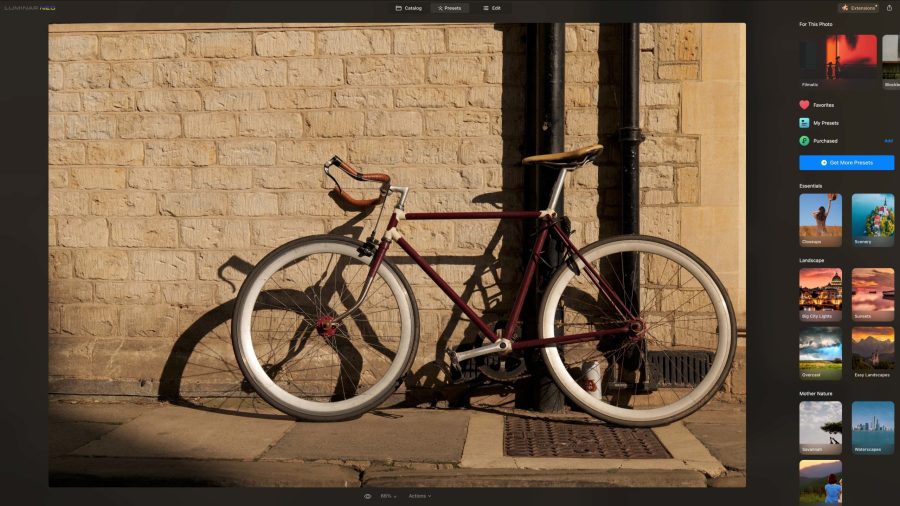
To start editing an image, select it in the catalog. Then click on either ‘Presets’ or ‘Edit’ at the top of the screen. Presets are a great starting point as they enable a number of adjustments to be applied with one click.
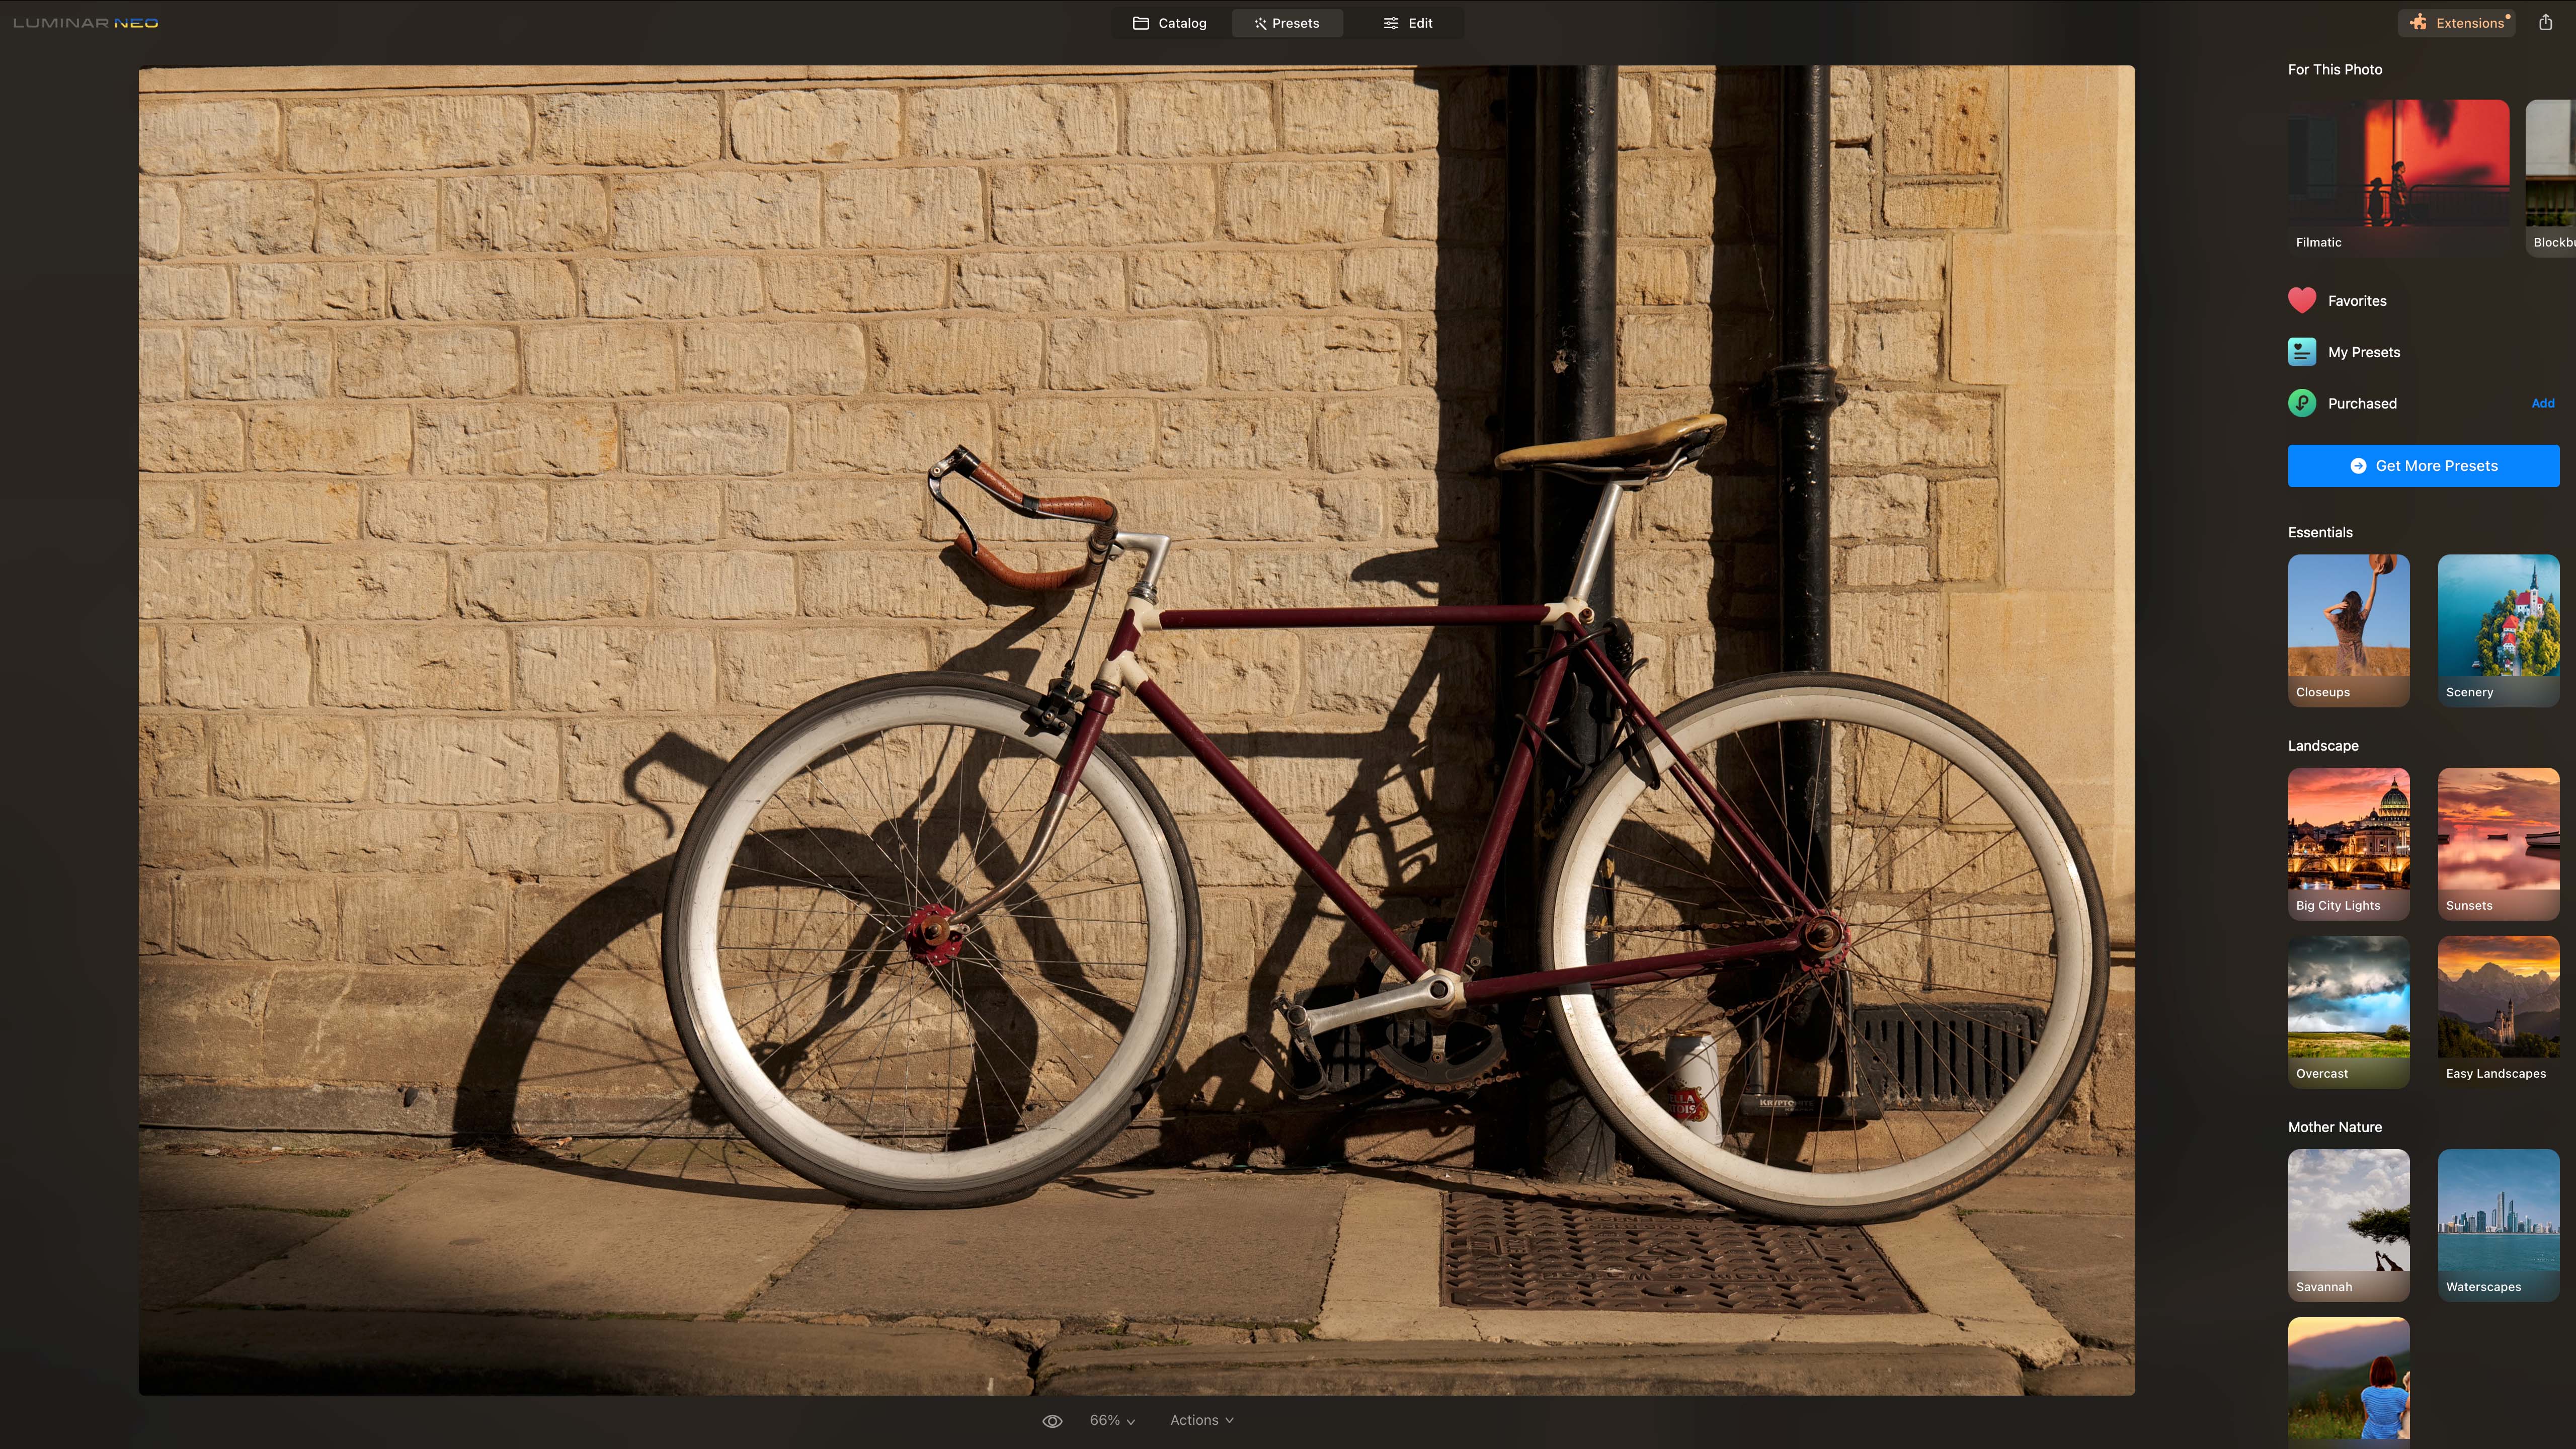
Upon selecting ‘Presets’, Luminar Neo suggests a few Preset Collections that it considers appropriate for the image [top of the column, right of the screen]. Below it are a host of other Preset Collections included with the software. [Buy others by clicking on the ‘Add’ button].
Each of the Preset Collections contains a number of Presets to be applied with a single click. For example, the Nature Preset Collection has six presets called ‘Newt Noir’, ‘Sunny Small’, ‘MicroWorld’, ‘Distinctive Drops’, ‘Best Close up’ and ‘Arctic Atoms’. Clicking on each in turn lets you see their effects.
When working on a 2019 8-Core Intel Core i9 iMac and editing 61MP raw files from the Sony Alpha A7R IV, I experienced a couple of seconds lag between selecting a Preset and its effect becoming visible.
[If you particularly like a Preset, add it as a favourite by clicking on the heart next to its name]
[Remove a preset effect by clicking on the curved arrow next to its name in the column on the right or by selecting ‘Revert to Original’ in the Actions dropdown list at the bottom of the screen].
After a Preset has been applied, access the controls to tweak its impact by clicking ‘Edit’. In the ‘Edits’ column, Luminar Neo automatically reveals the adjustments that have been applied to an image by a Preset. You can adjust the sliding control settings in the column on the right as you wish.
The uppermost and most recently applied Edit is ‘expanded’ to reveal the sliders. Click on others below it to reveal and adjust their settings.
Using the applied Edits controls to adjust a Preset reverts the image to that point in the history of the Preset editing process. For example, after applying a black and white preset, I was presented with a list of Edits controls, with the first I had used at the bottom:
[In order, Film Grain at the top, then Black & White, Supercontrast, Color, Enhance, Structure, Face AI, Skin AI. Skin AI was the first edit applied].
Similarly, a click on Supercontrast – applied before the Black & White conversion was made – and the image reverts to colour. Then, after you’ve made the Supercontrast – or adjusted any earlier Edits – you can return the image to monochrome with the new edits by clicking on the top Edit: in this case Film Grain.
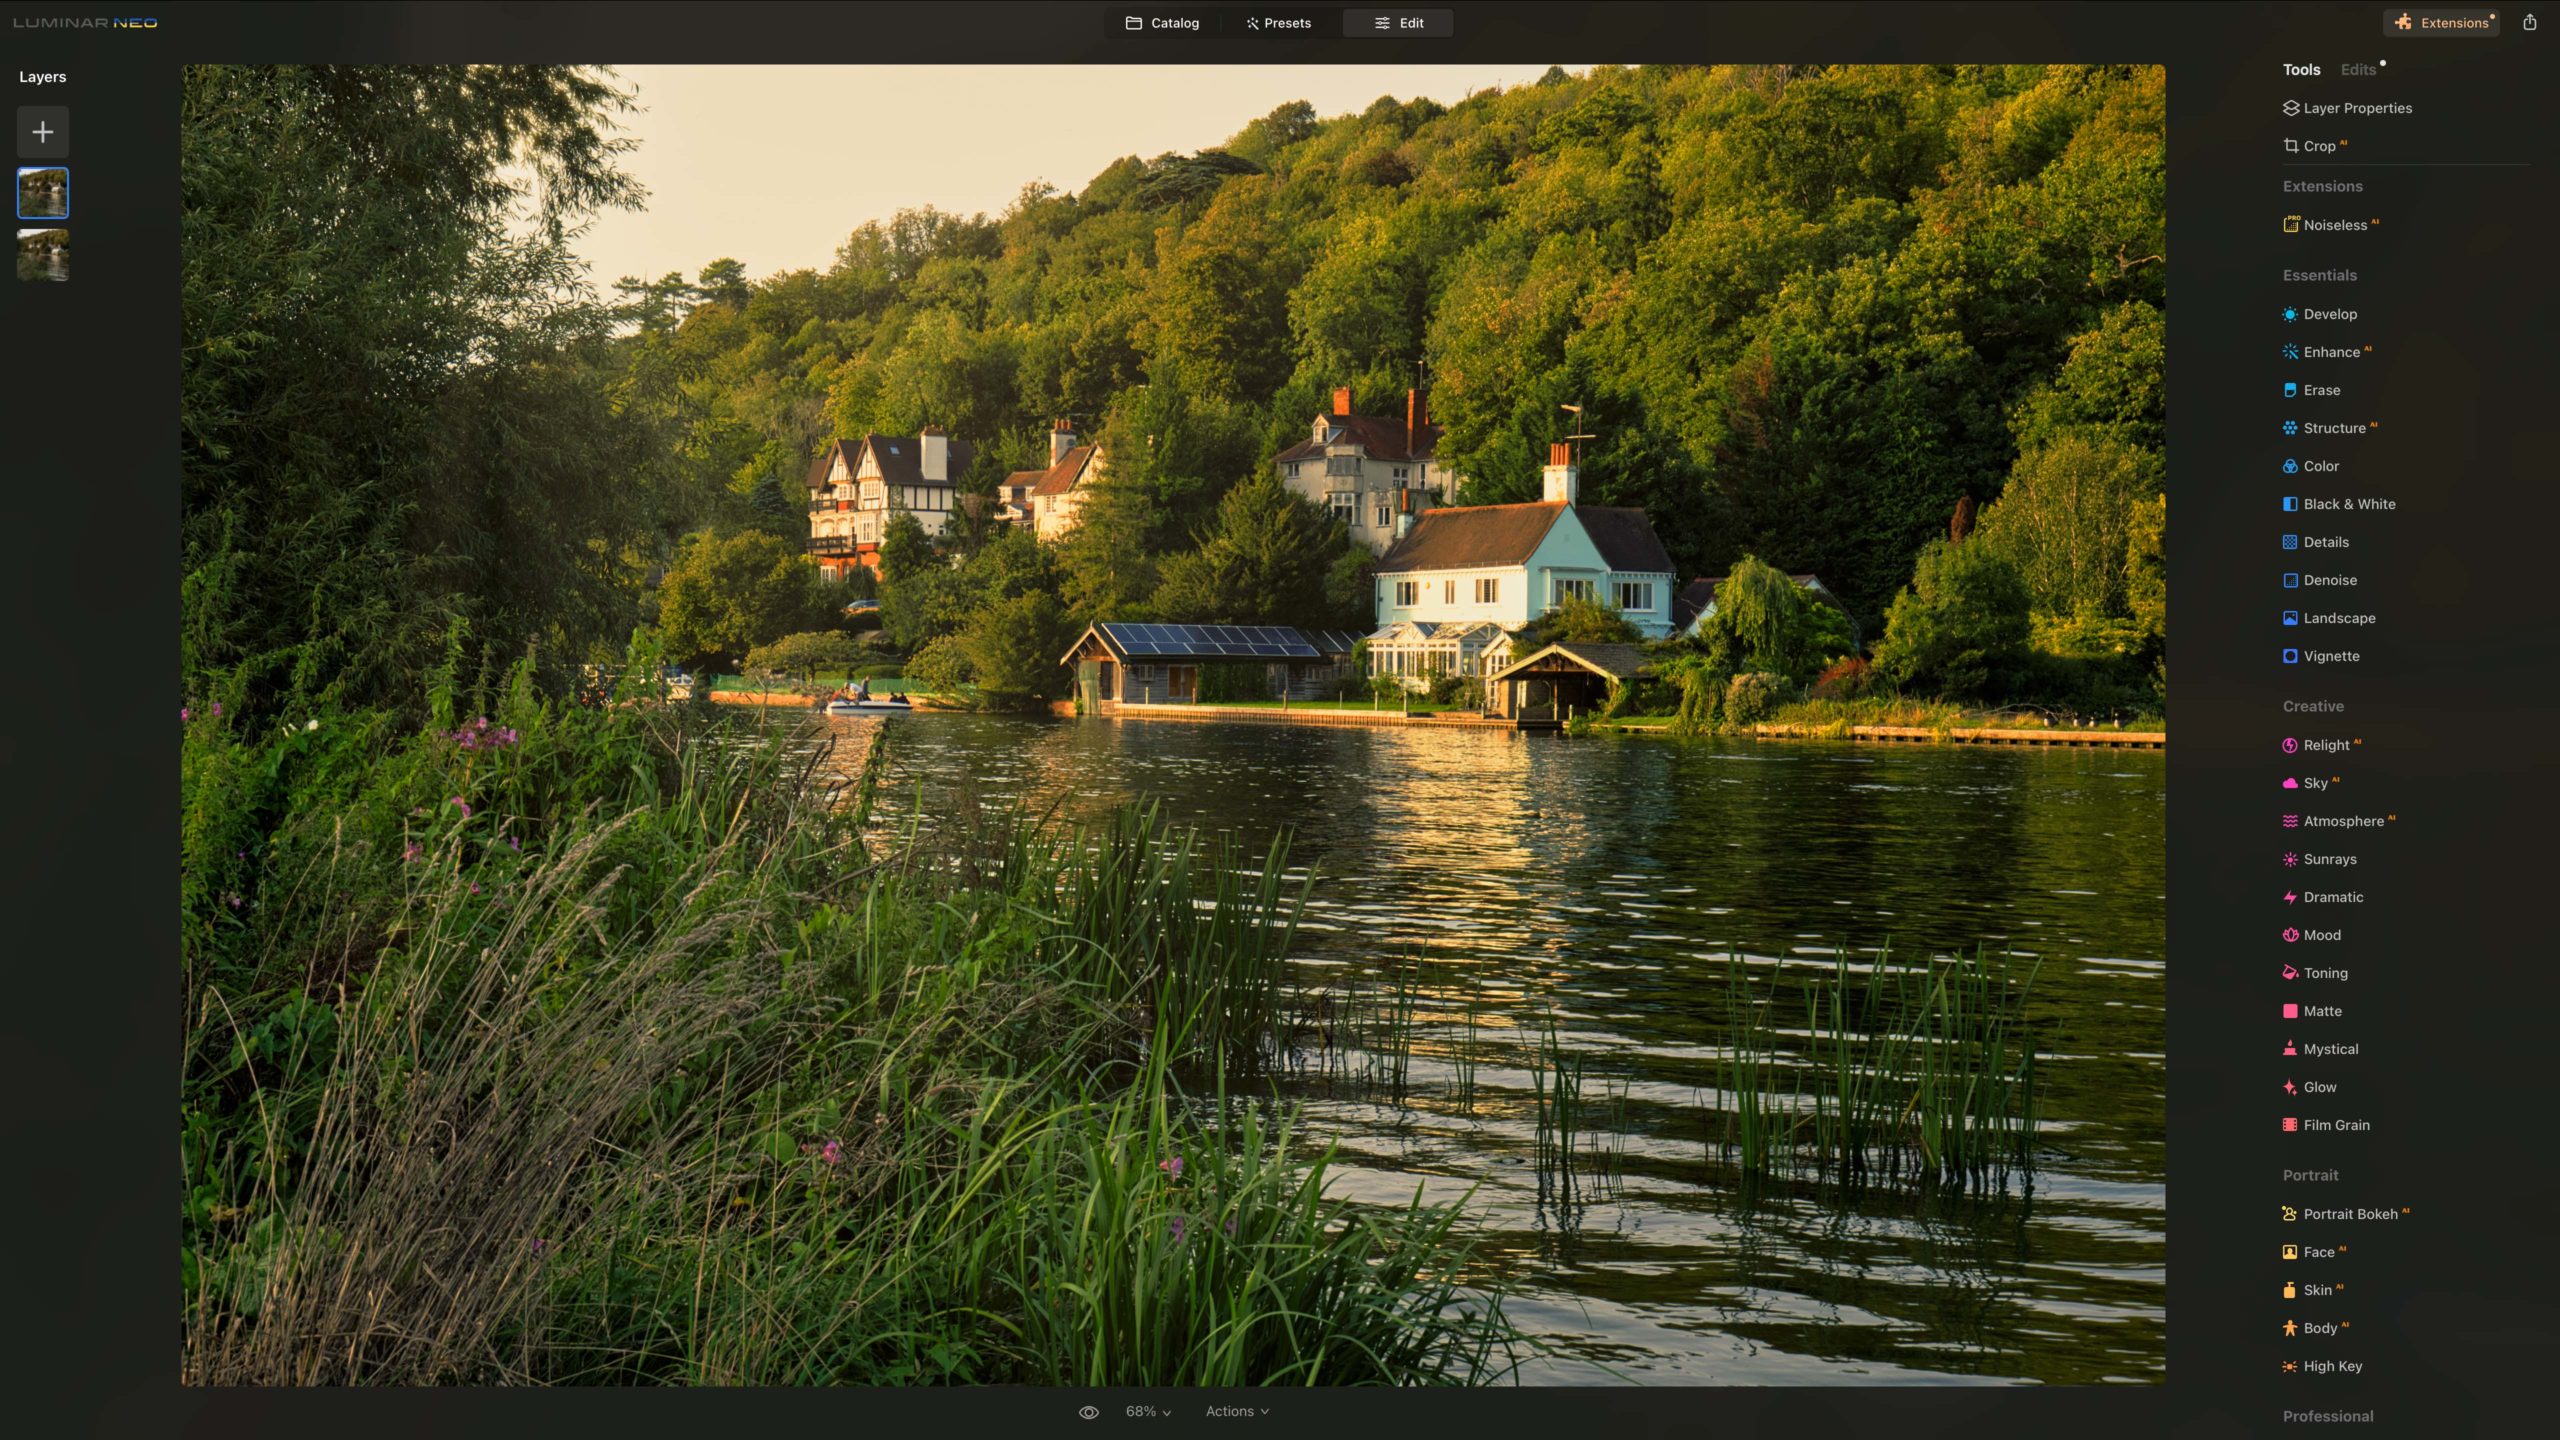
There’s a ‘Tools’ tab alongside the Edits tab and clicking on that reveals loads of additional tools which also have sliding controls. These are grouped into ‘Favourites’, ‘Extensions’, ‘Essentials’, ‘Creative’, ‘Portrait’ and ‘Professional’. There’s a more comprehensive list there than you’ll find in the Edits section.
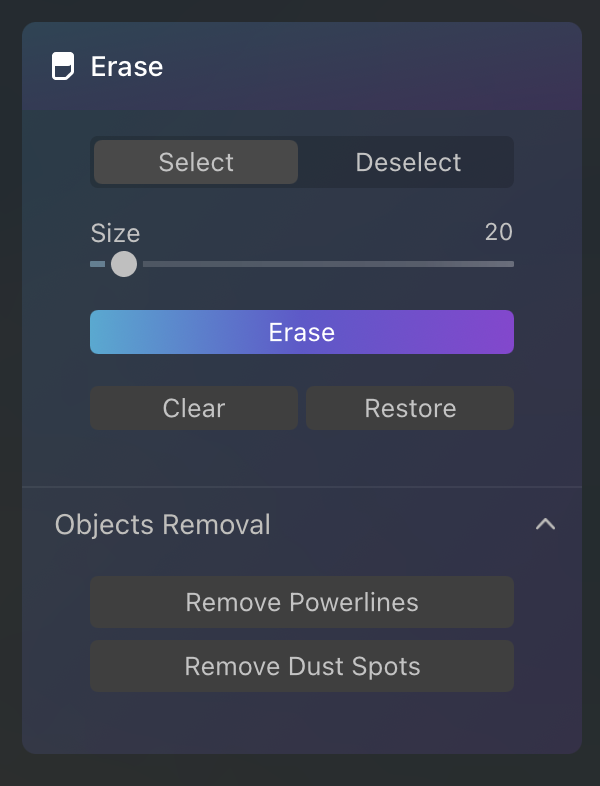
The Essentials section has tools such as Develop Raw (with the typical controls you’d expect to adjust a raw file), Enhance AI, Erase, Structure AI, Colour, Black & White Denoise and more. Basically, the tools to enable exposure, contrast, colour and sharpness of an image to be adjusted.
The Creative section, however, has options such as Relight AI, Sky AI, Atmosphere AI, Sunrays and more. These tools enable you to make dramatic edits to images, significantly changing their mood. They can be very effective and are easy to use, but are not suitable for use for entering competitions, like Landscape Photographer of the Year.
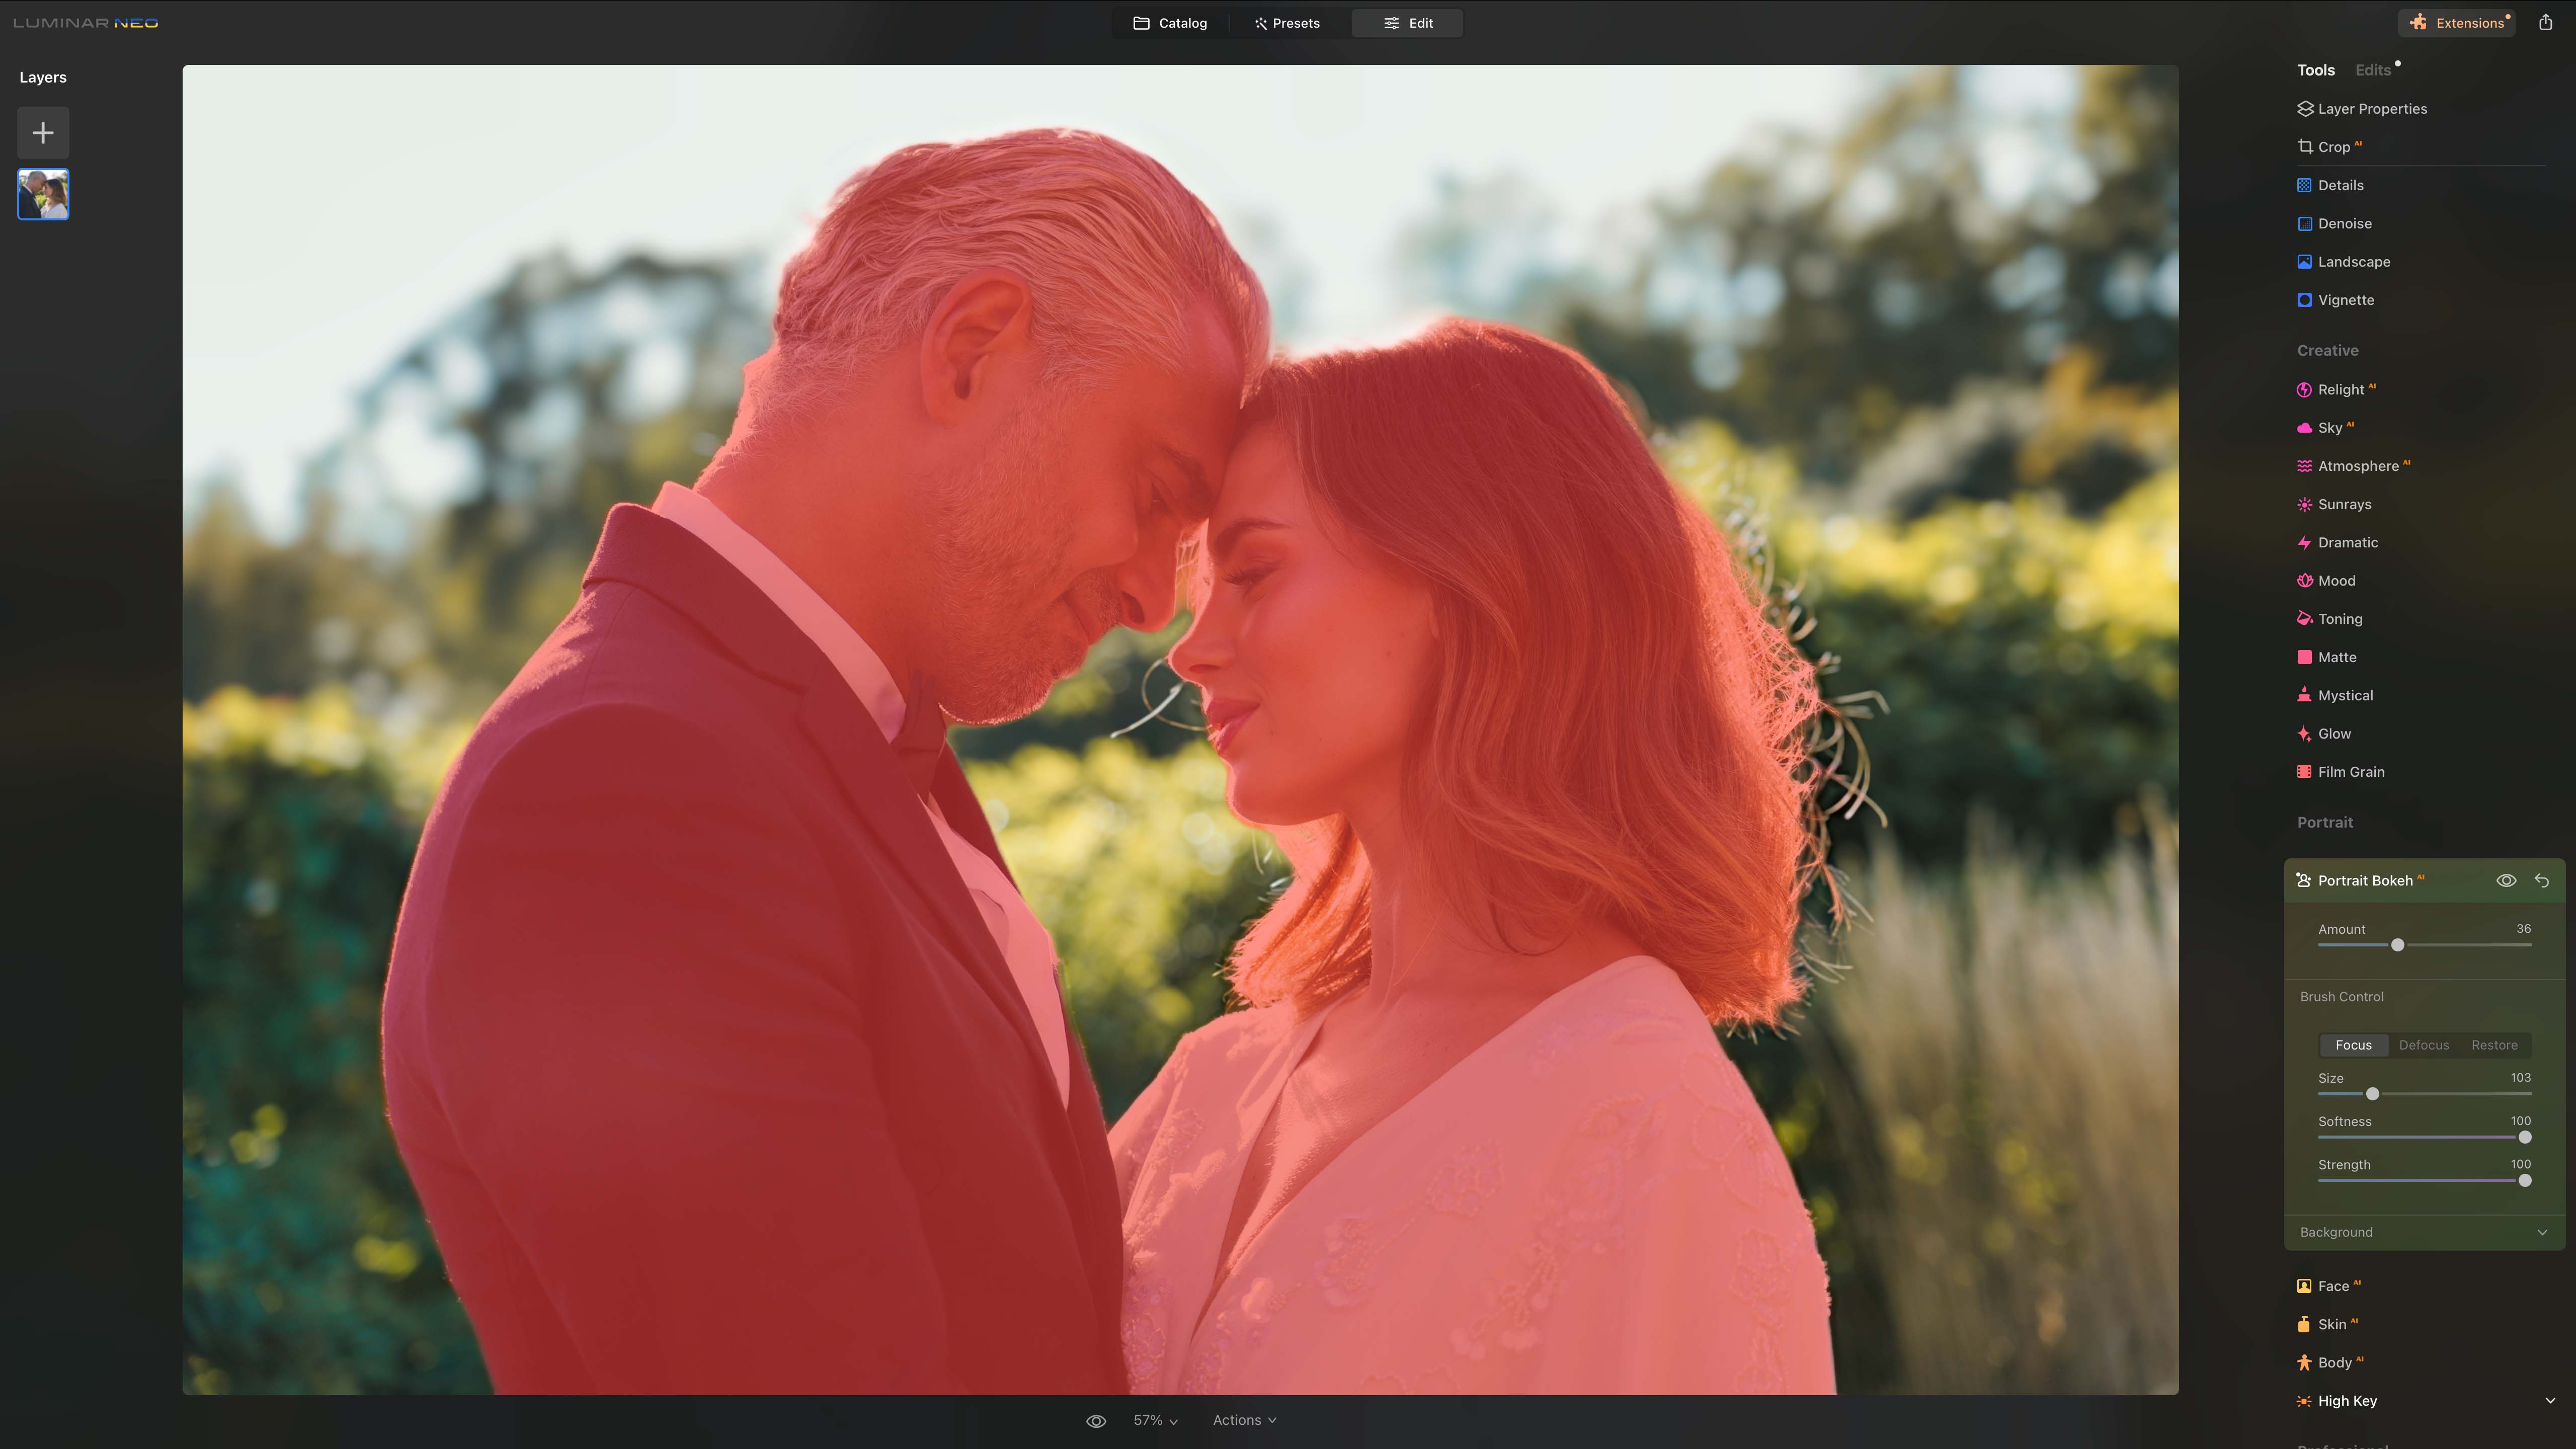
Four of the five tools in the Portrait section use AI to help you improve the appearance of photographs of people. They generally work well, but their effects aren’t entirely predictable. The automatic Skin defects Removal tool, for example, removed one freckle on a models face but left another nearby in place.


[TIP: Before you start work on an image, right click on the image thumbnail in the Layers column left of screen, and select ‘Duplicate Layer’. Then you’re not working on your original image].
As well as duplicating, deleting or hiding a layer, Luminar Neo allows you to add new layers to an image. There are four layer collections with a selection of flare, light leak, sparkle and bokeh effects that you can apply.
Selecting the ‘Load Image’ option allows you to create a layer from another of your images. Choosing this option opens a standard file browser rather than the catalog. It’s a good idea to know which image you want to add in advance. The new layer is added with 50% opacity by default so that you can see the layer(s) beneath; but cannot adjust the opacity to suit.
Each of the Edit and Tool adjustments can be applied with a mask. The mask can be applied as a brush, a linear gradient, a radial gradient, or by AI. Whichever method you select, the effect of the adjustments disappears at first and reappears where you apply the mask. There’s also an eraser to remove the mask.
Using the brush to paint in the effect presents controls to adjust the size and softness of the brush, along with a third slider to set the effect strength. The Strength slider adjusts the visibility of the edit from that point onwards. It doesn’t affect the area you have already painted.
However, you can adjust the opacity of the layer using the Layer Properties control. When finished, hit the return key, and select a previous Tool to make further edits.
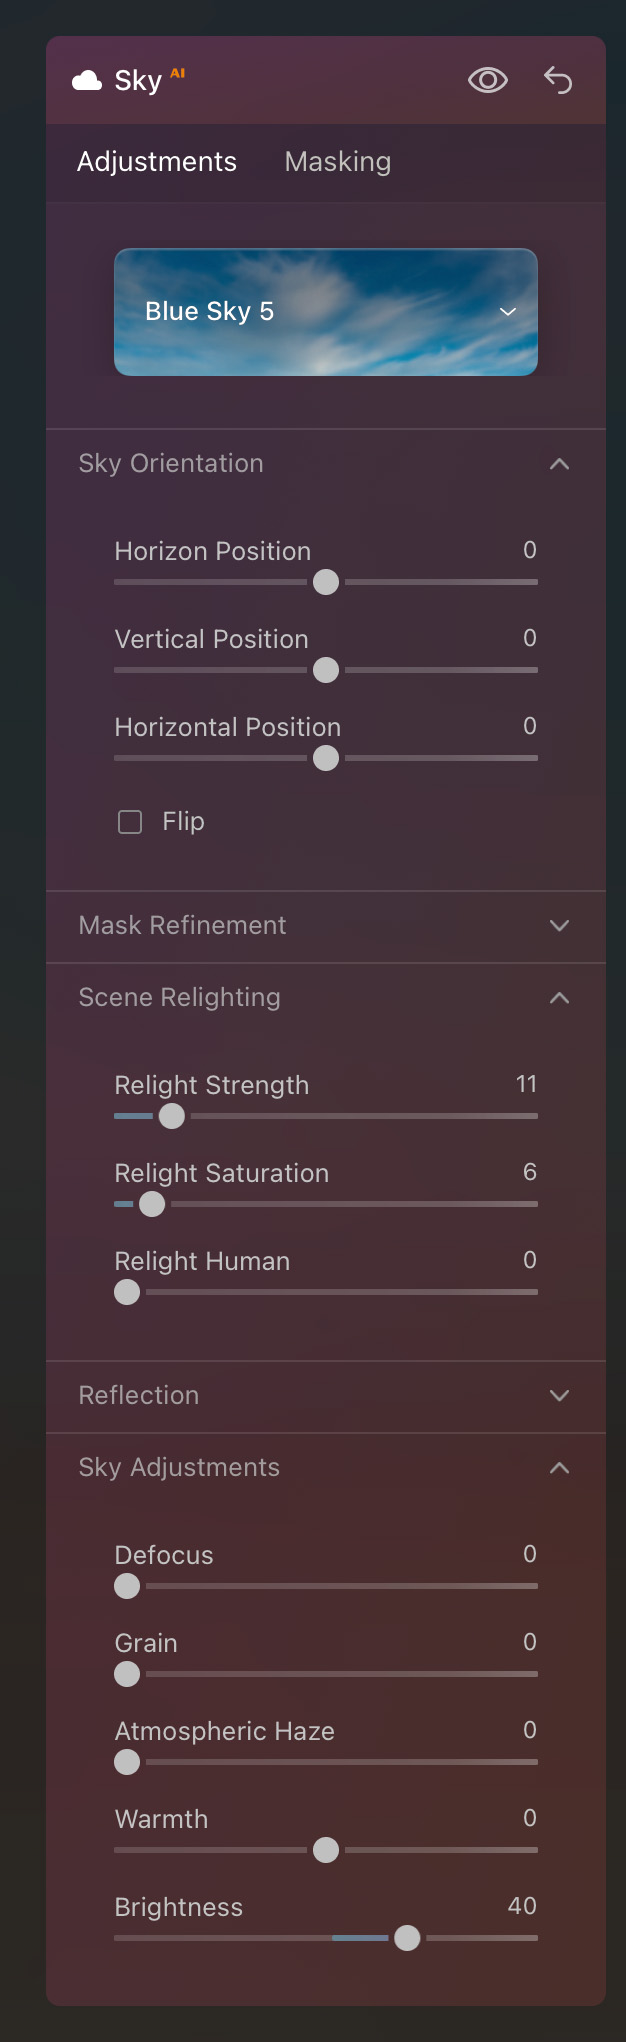
Replacing a sky


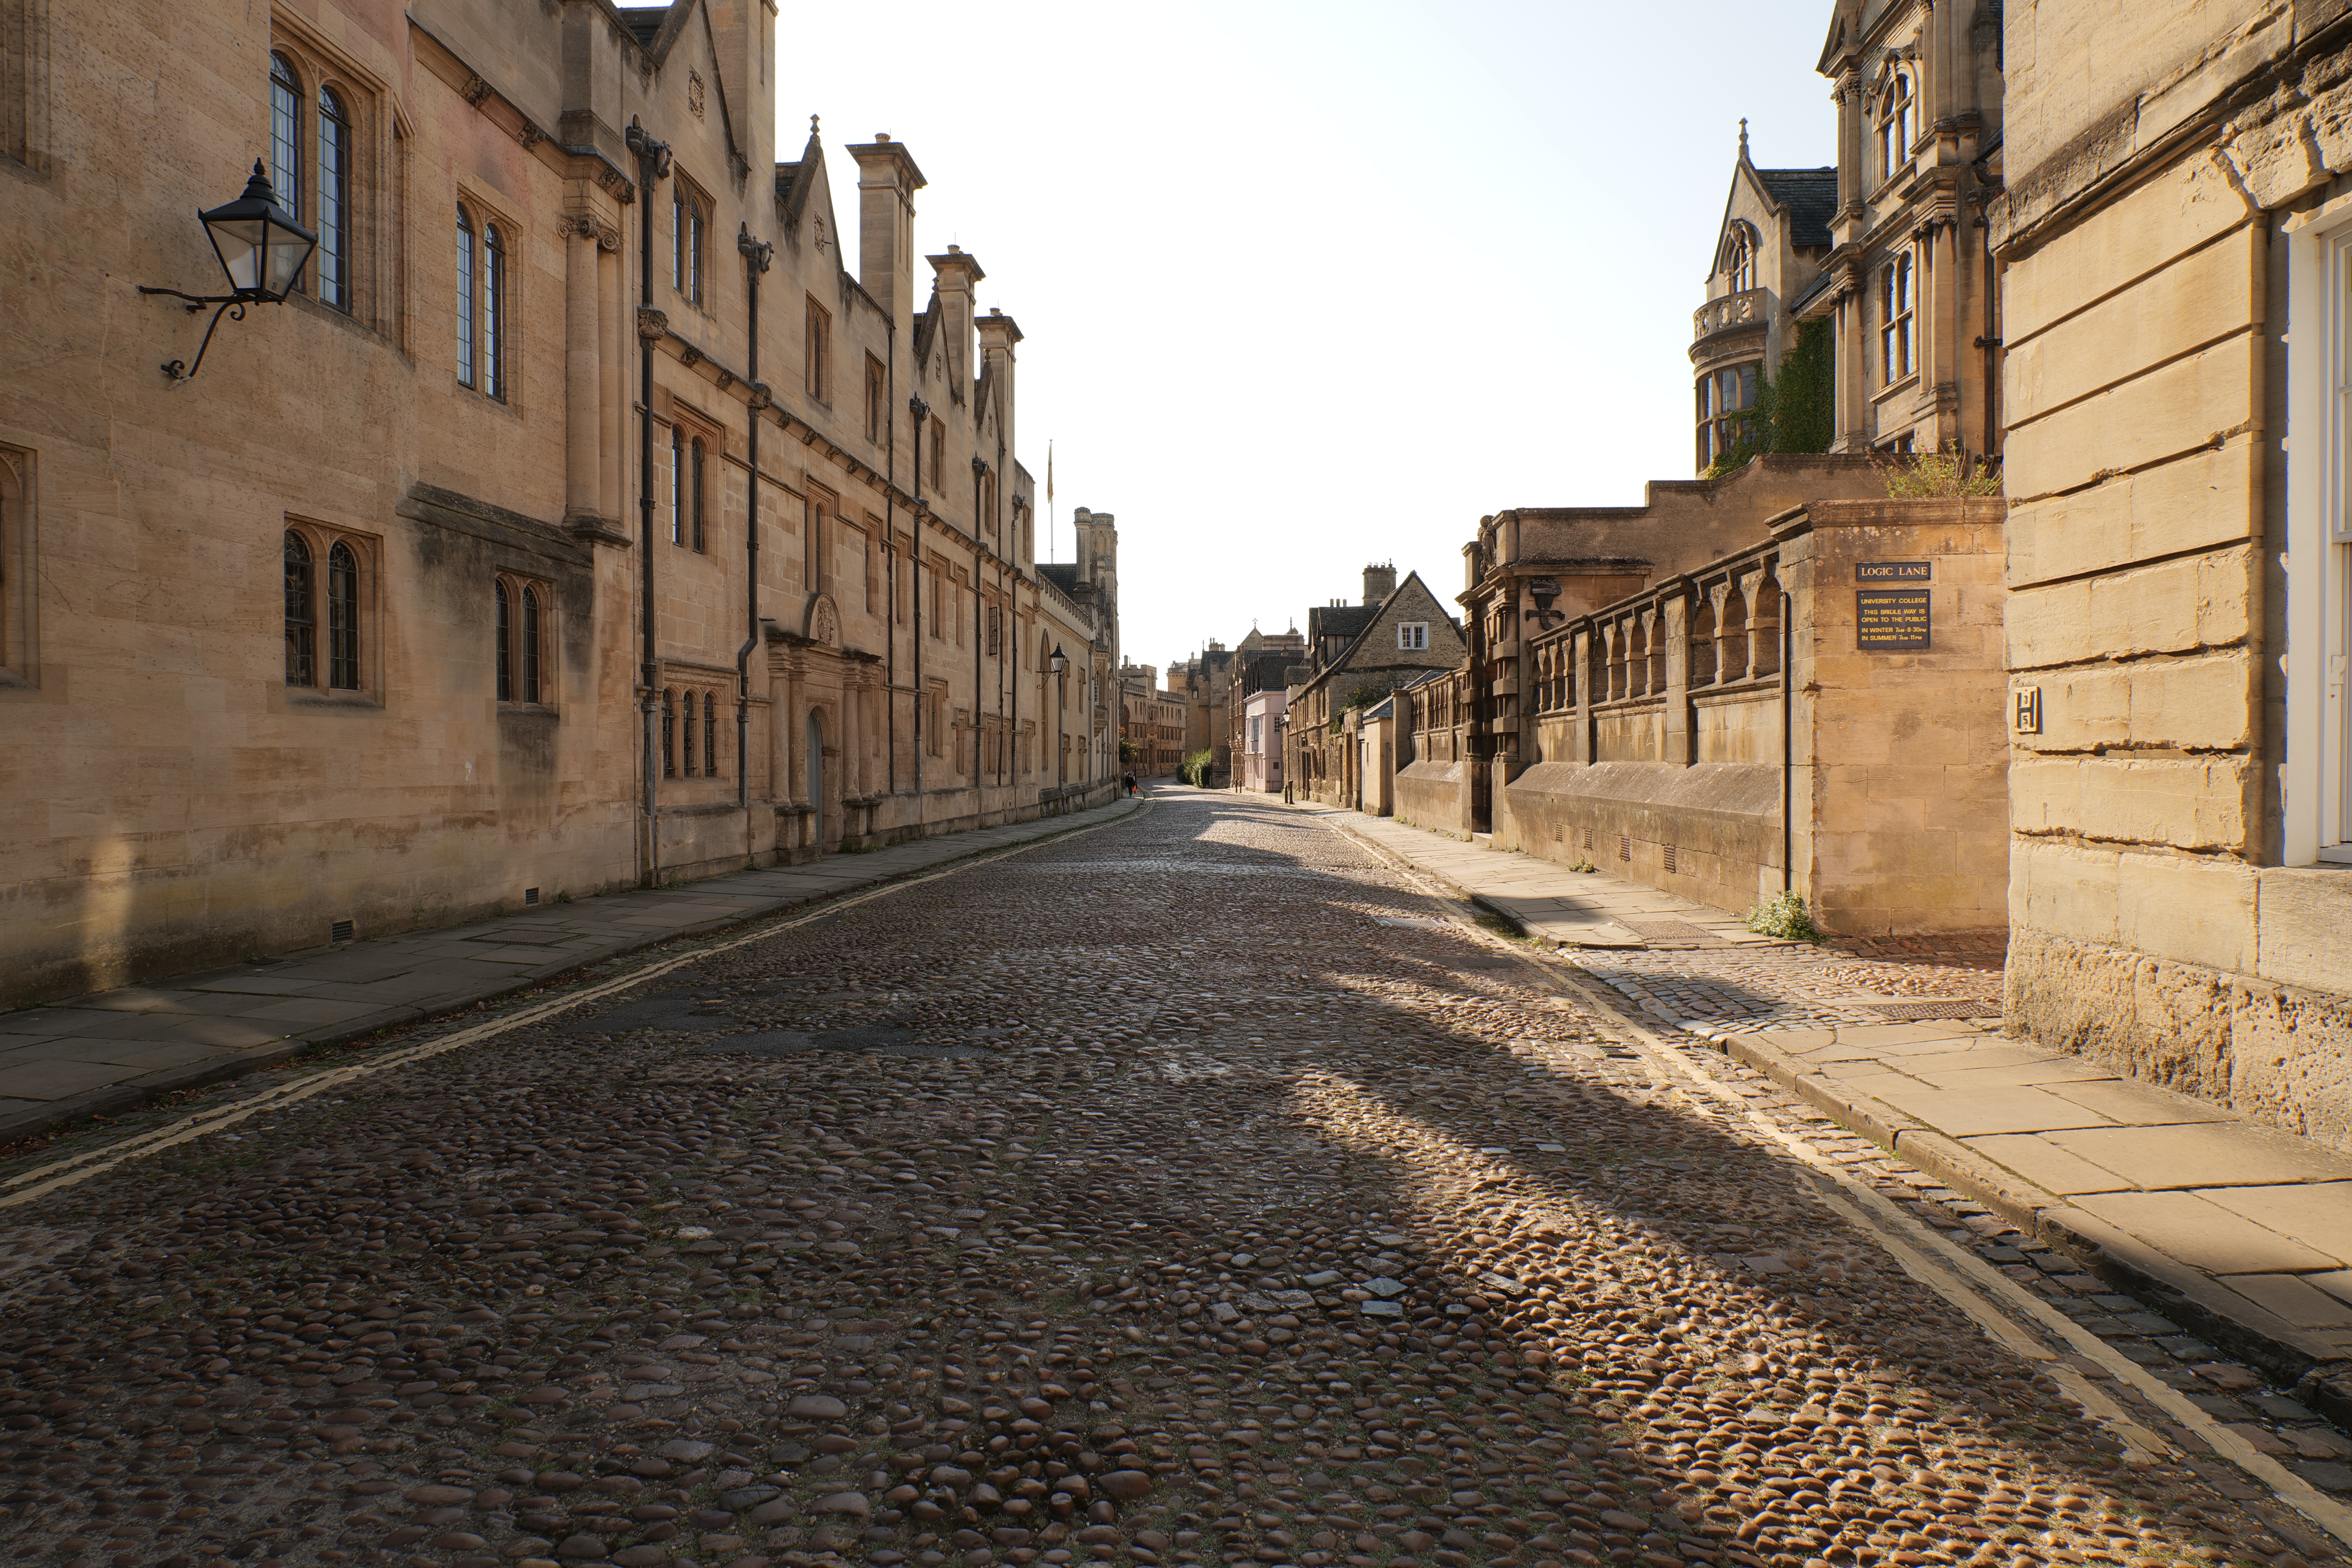
Sky AI is one of the most impressive aspects of Luminar Neo. A dull sky can be replaced in a few clicks. The software does a remarkably good job of blending sky into the foreground, handling even a swathe of leaves and twigs that reach into the sky.
If you swap a bright overcast sky for an intense sunset, it will likely look a little strange around complex areas with fine detail. There are other skies to choose from that may fit the scene better. Or upload your own. Alternatively, duplicate the image layer and use Sky AI to replace the sky in the duplicate. Then reduce the opacity a little to produce a much more natural effect.
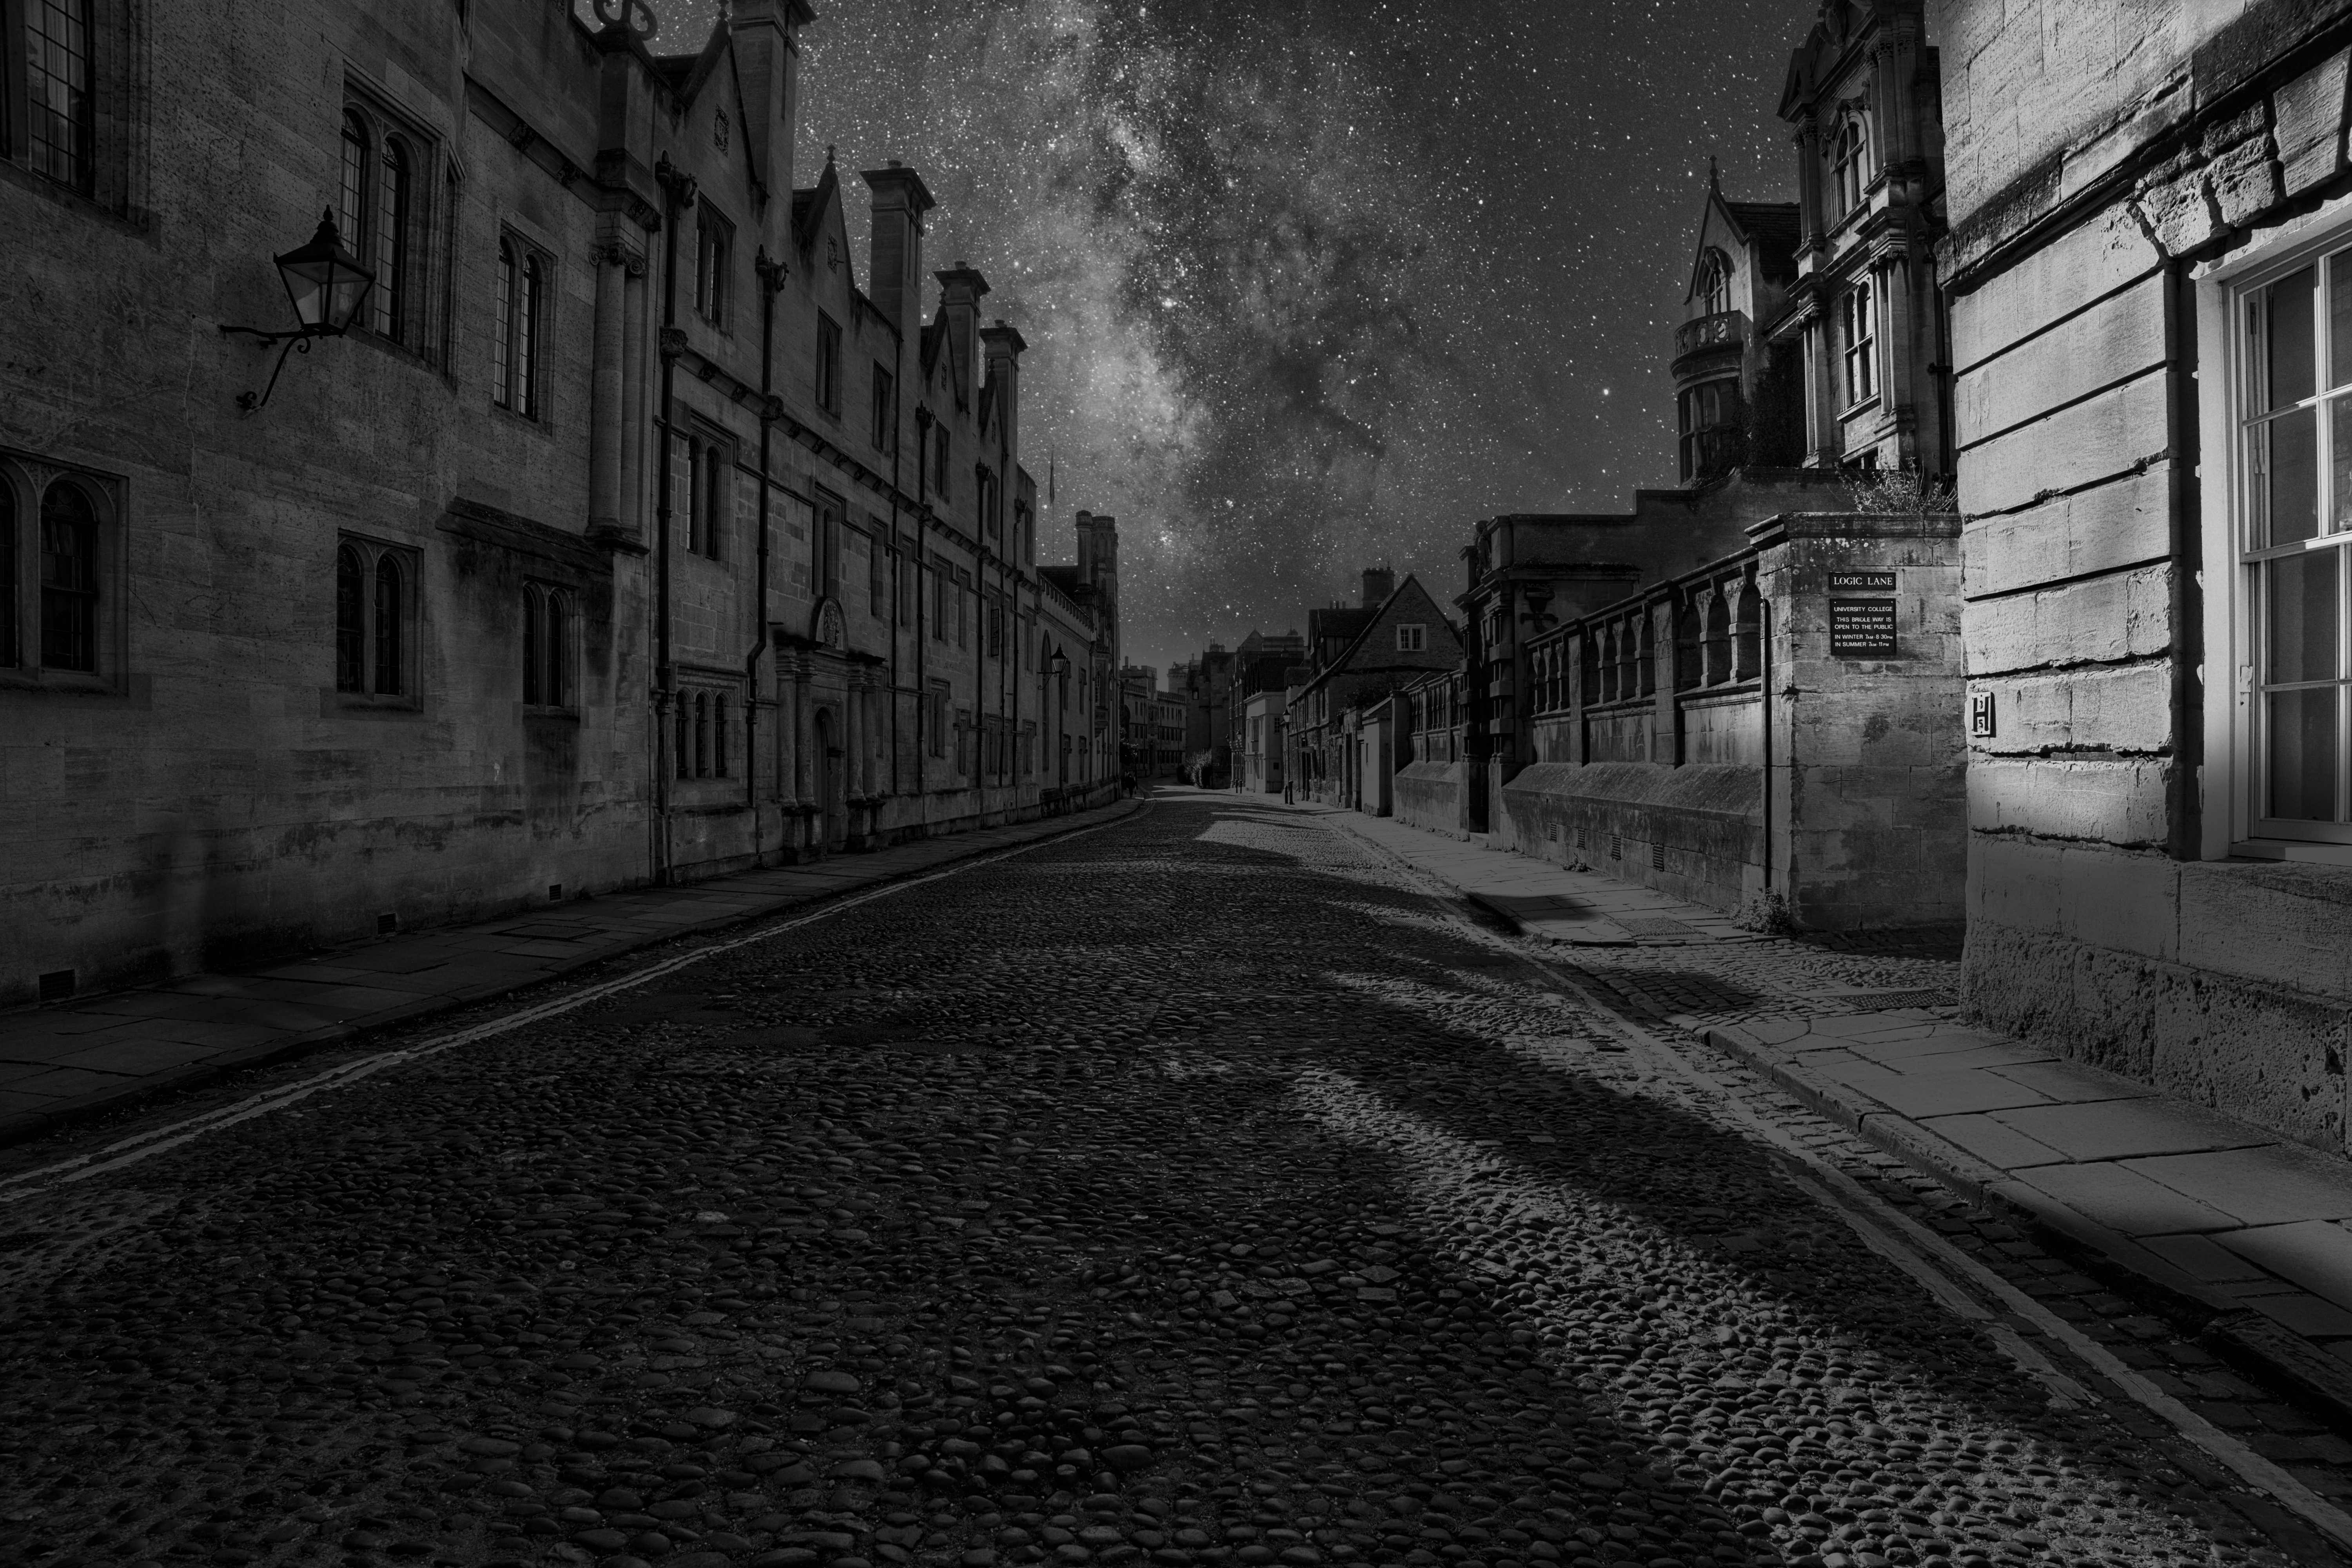
With your sky selected and applied, you can then move it up or down, left or right, or flip it horizontally. It’s also possible to soften the sky: handy if you’ve shot your subject with a wide aperture. And, you can add a reflection of the sky to any water in the scene. There are also controls that let you adjust the rest of the image to match the colour of the sky more closely.
As with all of the Tools and Edits, it’s possible to create a mask of the sky and paint on it using a brush or one of the gradient tools. In most instances, I found this unnecessary as the software does a great job of recognising the sky. But it can be helpful when there are areas of uniform tone in the non-sky areas that cause confusion.
Skylum Luminar NEO verdict
While the impact of the Presets and some of the AI-powered tools can be hard to predict, I enjoy using Luminar Neo. It is capable of producing some great results.
The Presets can produce attractive-looking images by themselves, but it’s good to be able to tweak the final image and apply additional edits using the Tools. Remember that the order in which the tools are applied affects the end result. Turn an image black and white, for example, and then add a blue sky, and you’ll have to revisit the black and white conversion controls to take the colour from the sky.
In the early stages of using Luminar Neo, you’re likely to spend time investigating the impact of the Presets and Tools, but they are easy to apply and their impact can be removed quickly if they don’t work for you. After a while you’ll find those that you like and you can create your own Presets for future use.
Unsurprisingly, Skylum pushes the subscription model for purchasing Luminar Neo and it can be hard to find the one-off purchase option.
There’s also an option to buy ‘X Membership Premium’, which gives access to educational materials, an exclusive community and extra skies, Presets, LUTs and overlays. This, plus the selling of extra presets and skies within the software can give something of a marketplace experience. On its own though, Luminar Neo has lots of functionality for creation of one’s own presets and skies to add – these may well be enough.

Related articles:
- Best free photo editing software for computers and mobile
- Best photo editing software – subscription free
- Adobe Photoshop review
- Best video editing software