The G9’s electronic shutter and fast burst-shooting modes were used numerous times to nail the perfect positioning of bikers in the frame. Panasonic Lumix G X Vario 35-100mm f/2.8 II Power OIS, 1/1000sec at f/6.3, ISO 640. Credit: Dan Milner
Panasonic Lumix G9 at a glance:
- £1,499 body only
- 2 0.3MP Micro Four Thirds MOS sensor
- ISO 200-25,600 (expandable to ISO 100-25,600)
- 60fps continuous shooting
- Five-axis Dual IS II image stabiliser
- 4K video up to 60fps (150Mbps)
Dust, dirt and damp are part of any mountain bike shoot anywhere in the world, and can be tough on camera gear. So when I had the idea to document a pioneering mountain-bike trip to a remote and stormy island off the southern tip of South America, I only increased the potential for equipment disaster. Luckily for me, I was offered a new Lumix G9 for the trip, so not only could I let someone else’s gear take the beating that would no doubt ensue and simply hand it back at the end (after a quick wipe down), but also I’d get the opportunity to give the latest mirrorless offering from Panasonic a good field test.
Pitched as an outdoor and wildlife and action camera, the G9 should be more than capable of dealing with whatever a sub-Antarctic location throws at it. But committing to an unproven and unfamiliar camera for a shoot three days’ travel away is a risk. I’d need to trust Panasonic’s claims of weather sealing and robust build, but I threw in a back-up Lumix GH5 body, too – just in case. Would I need it, or would the G9 deliver?
As a professional ‘adventure’ photographer, I use whatever gear is best for the job, swapping between set-ups depending on the assignment. I’ve used Nikon DSLRs, Canon EOS 35mm and digital bodies, Leica rangefinders and a Contax G2 to document expeditions to places such as Afghanistan, Ethiopia and Svalbard. Since much of my work is at high altitudes, I’m always looking for portable solutions – after all, my back isn’t getting any younger.
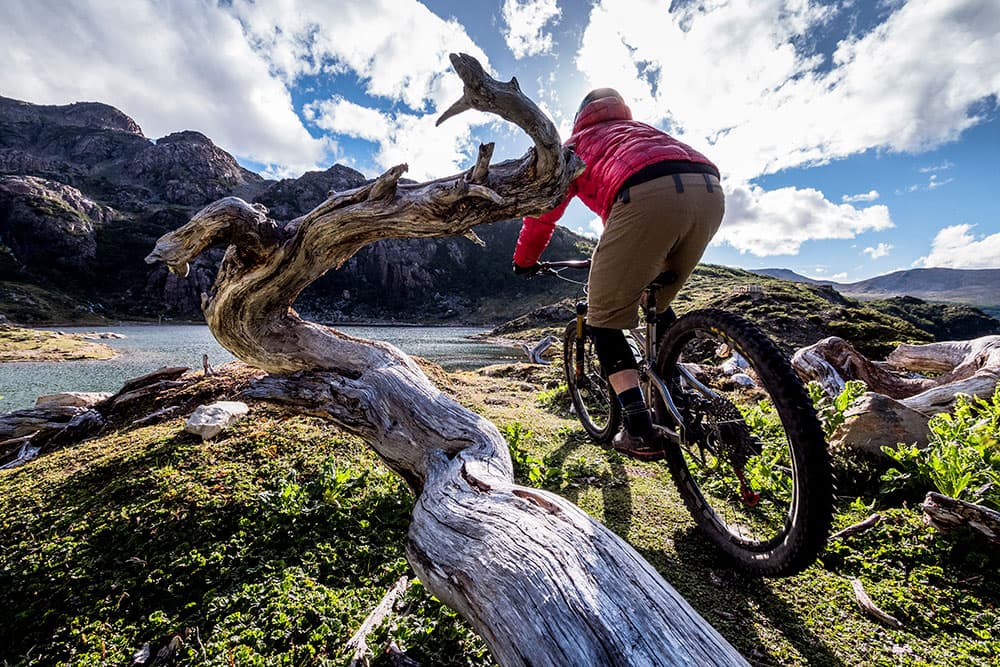
Sunny days on Navarino island are not uncommon. Panasonic Lumix G Vario 7-14mm f/4, 1/1000sec at f/5.6, ISO 500. Credit: Dan Milner
Weighty issues
When I picked up the G9 body, I was surprised by how hefty it was; it certainly didn’t feel as if it would instantly halve my physiotherapy bills. It weighs 658g – a decent 200g saving over my Nikon D750 – but is 200g heavier than the Fuji X-Pro2 body that has become my lightweight go-to. Of course, the body is only part of the gear you need for a shoot. Where Micro Four Thirds comes into its own, at least weight-wise, is as a system. Going lightweight usually means choosing primes such as the Zeiss 18mm f/3.5 and Nikon 50mm f/1.4 instead of heavier zooms to complement the essential 70-200mm f/4. Even my ‘lightweight’ Fuji kit gets pared down to 12mm, 23mm and 90mm primes, and while this delivers a more manageable backpack, it means more legwork to nail the desired composition – something that adds time – and risks dustier sensors from the many lens changes.
Grabbing the Lumix lenses, I could almost hear my physiotherapist sigh. Packing the G9 with the 7-14mm f/4, 12-35mm f/2.8 and 35-100mm f/2.8 – covering the full-frame equivalent of 16mm to 200mm – hacked a whopping 1.5kg off the equivalent Nikon gear. It even pipped my Fuji X-system kit by a kilo. When you’re packing to survive a multi-day mountain bike ride in extremes of weather, every lesser gram helps. Despite their small size and weight, the lenses felt balanced on the G9.
The trip was an eight-day exploration of Navarino Island, a remote Chilean outpost on the southern side of the Beagle Channel – the same stretch of water sailed by Fitzroy and Darwin 200 years earlier. Navarino is wild and windy, and its steep and imposing Dientes de Navarino mountains rise straight from the cold waters of the Beagle to almost 1,200m. The summits here are snowcapped year round, but a 35km hiking trail threads across the mountain passes and through southern, beech-choked valleys just below. This Circuito de Navarino trail is wild and rudimentary, and lacks any infrastructure aside from occasional waymarkers; once you’re out among these mountains, you’re on your own. This is the most southern hiking trail in the world, and it would be the focus of our mountain bike story.
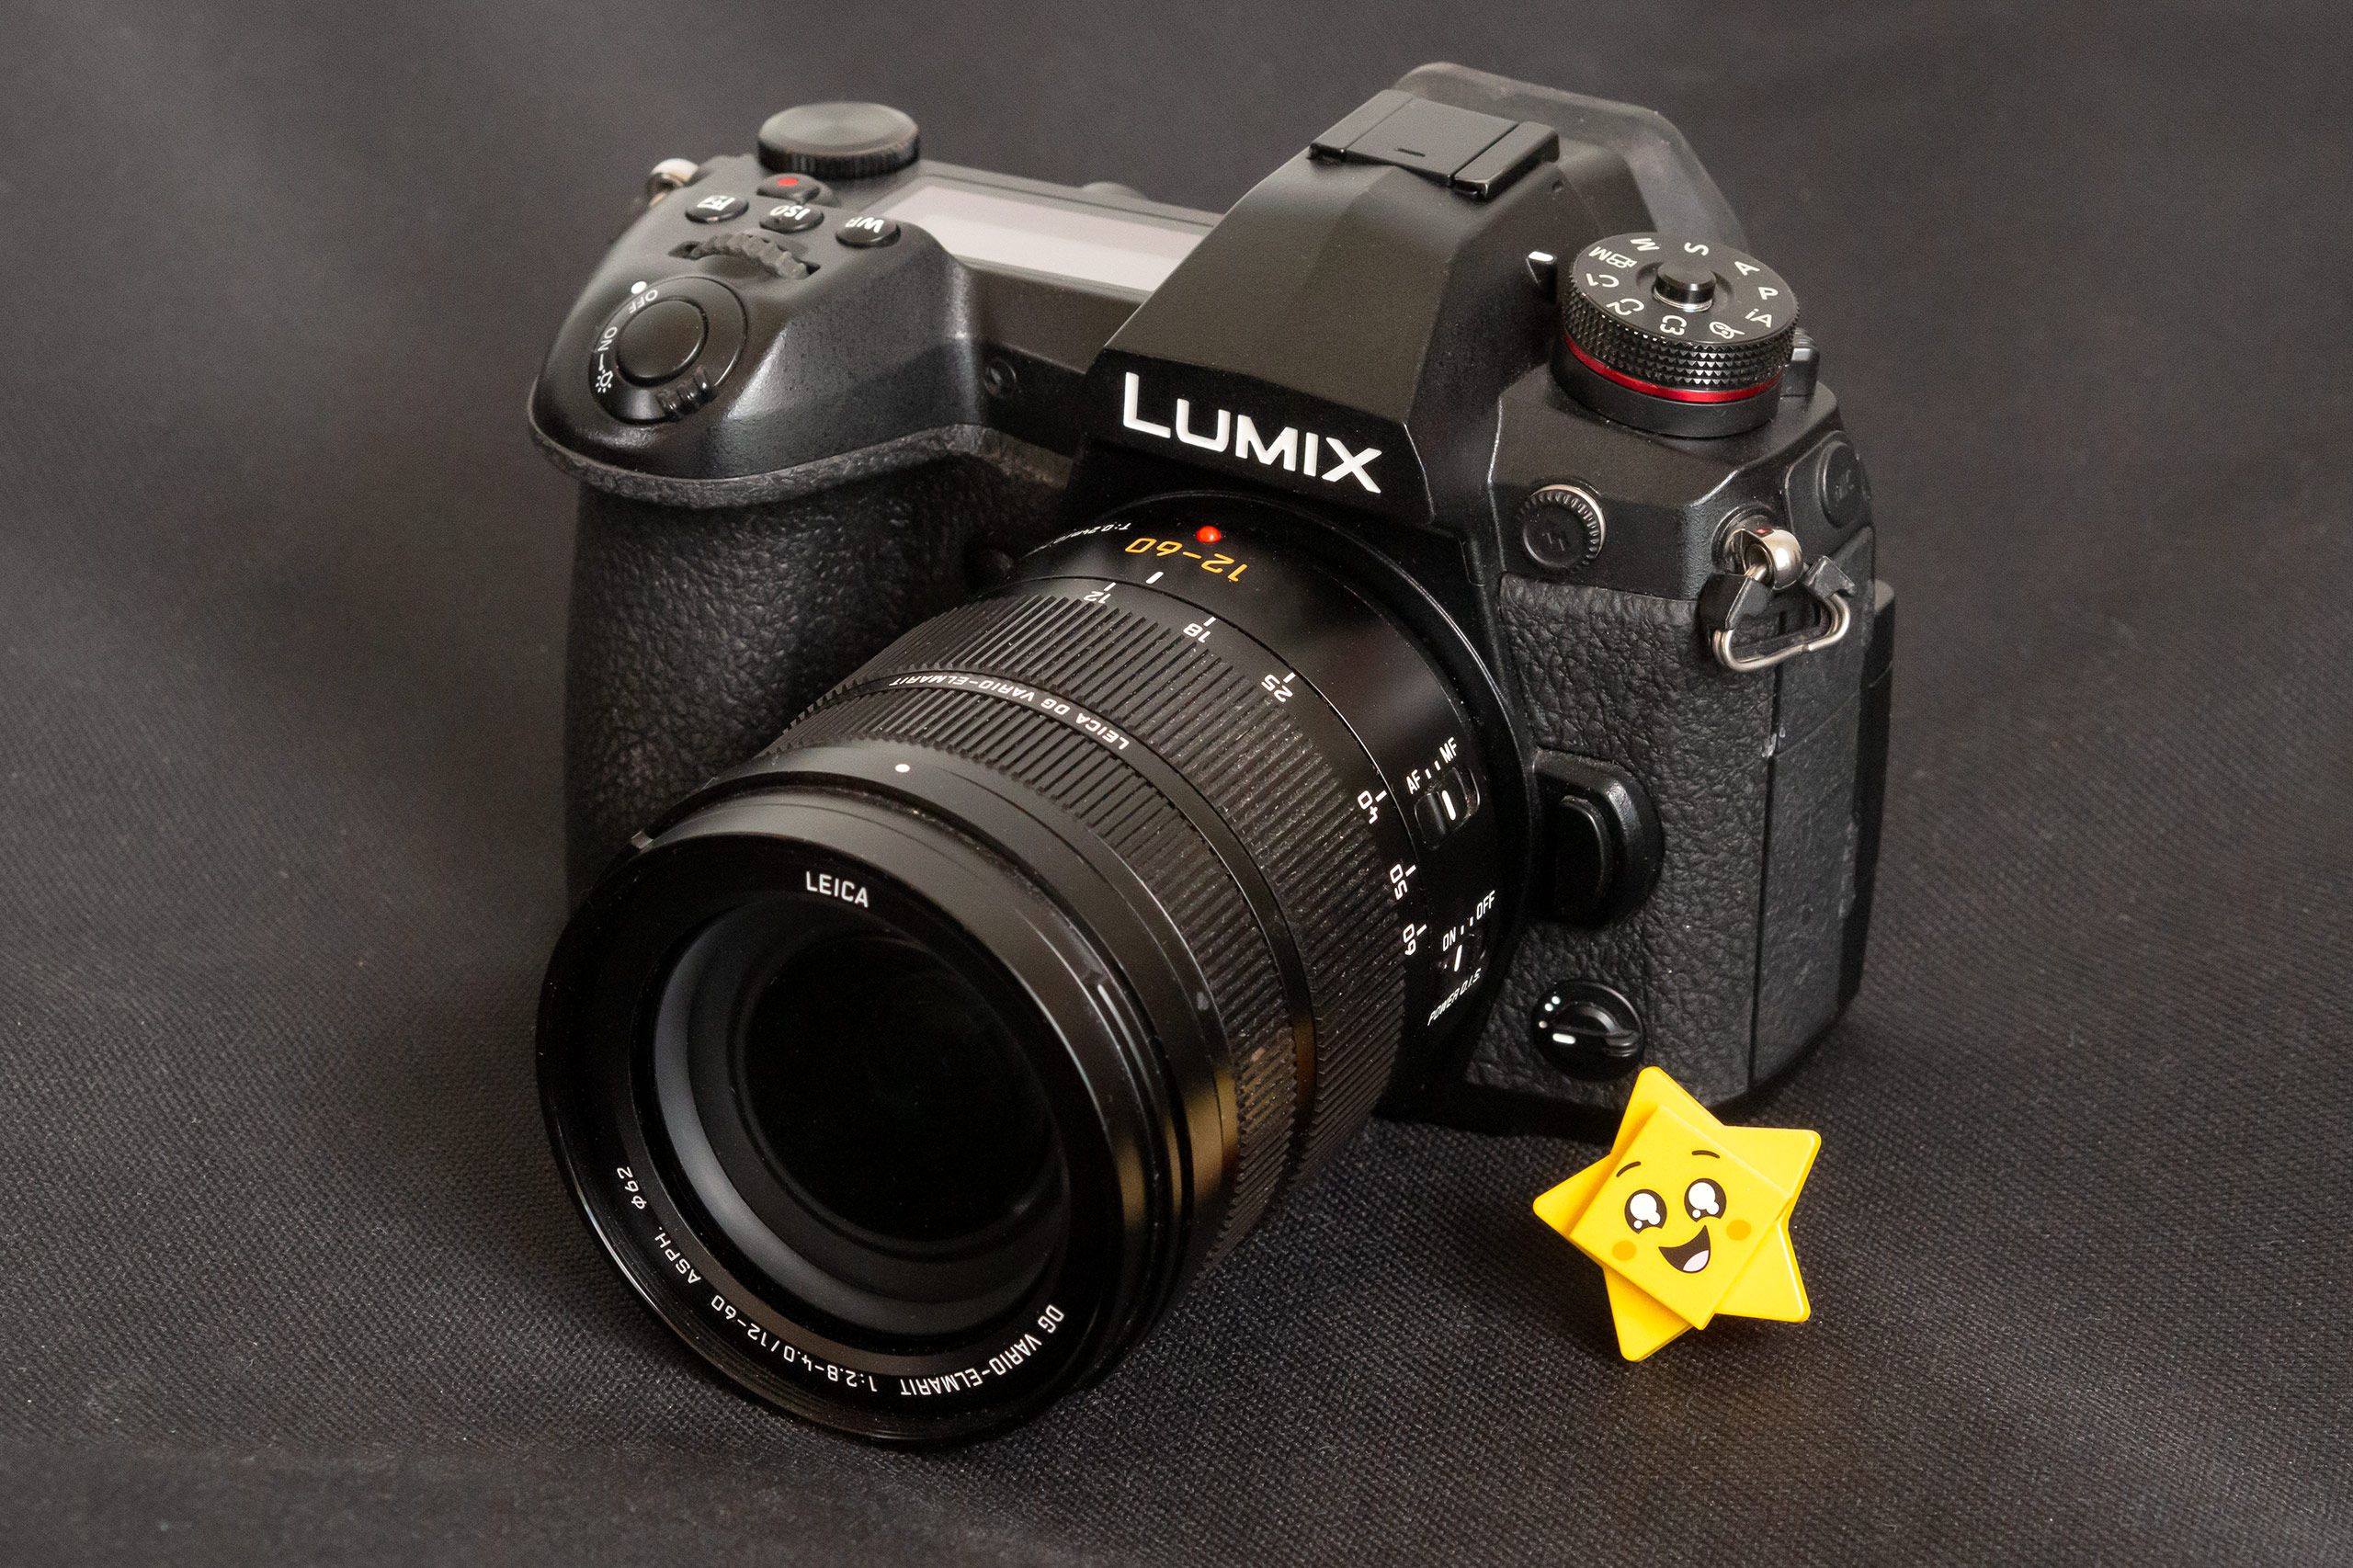
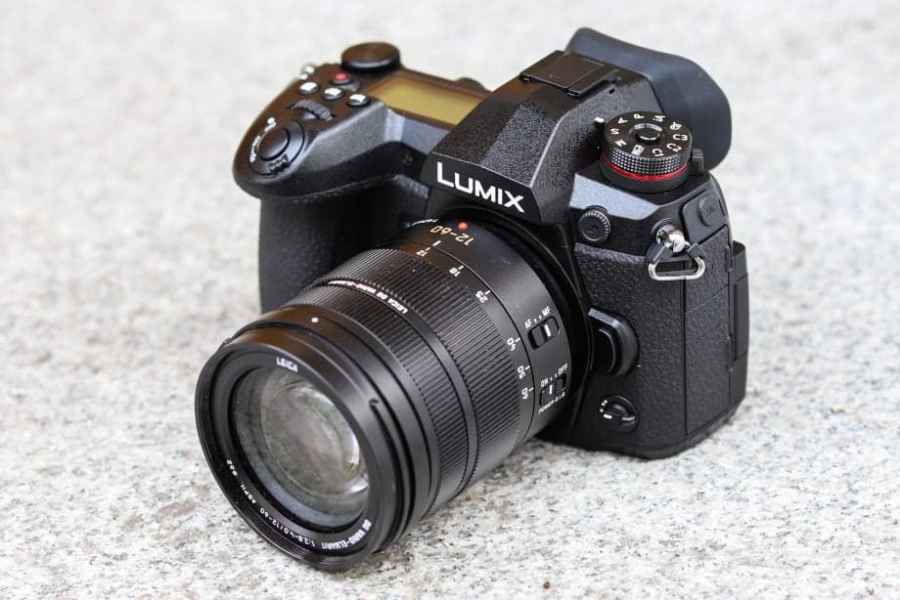
Panasonic Lumix G9 with Leica 12-60mm lens, Photo: Joshua Waller / AP
Our plan to basecamp a third of the way into the circuit meant getting all my camping gear and clothing stuffed into, and strapped on to, my F-Stop Kashmir UL photo pack, and made me glad of the tiny lenses. Even after adding the beautiful Leica DG Summilux 15mm f/1.7 for portraits, the whole lot fitted into a space about the size of a workman’s lunchbox. Of course, the small size of the G9 set-up is due to the cropped sensor size, but I’ve always been an avid fan of the resolving power of full-frame cameras. As such, I didn’t commit to taking the G9 on this trip until I’d fired some test shots at home. But not only did the Lumix lenses show impressive edge-to-edge sharpness (including the G Vario 7-14mm wide open) but the rich tonal range and strong detail of the G9’s raw files showed how very capable its 20.3MP MOS sensor is. In fact, the initial test shots proved so solid, I used the G9 on a commercial shoot in the dusty north of Argentina en route to Navarino, and I’m confident they’ll easily stand up to billboard use.
The G9’s Four Thirds sensor has a native file format of 4:3. You can easily switch between this and the more familiar 35mm-proportioned 3:2 (or 1:1 and 16:9) in the set-up menu, but the full 4:3 sensor coverage remains visible in the EVF as shaded bands above and below the brighter 3:2 image. Even though I’m familiar with framing lines in rangefinder cameras, this extra visible coverage took a little getting used to on the G9 when shooting, but ultimately it helps with composition by letting you see what lies just outside 3:2 framing, at least above and below. As the camera records 4:3 format files whatever format is selected, you can reframe the final 3:2 image slightly if needed during processing. It’s not something I’d look for, but it’s nice to have.
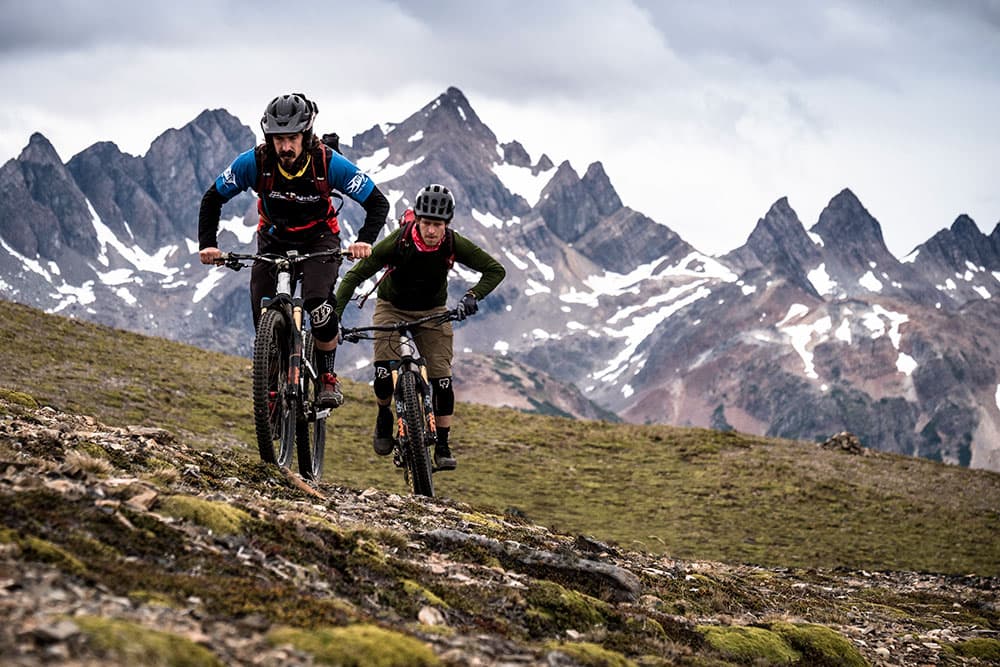
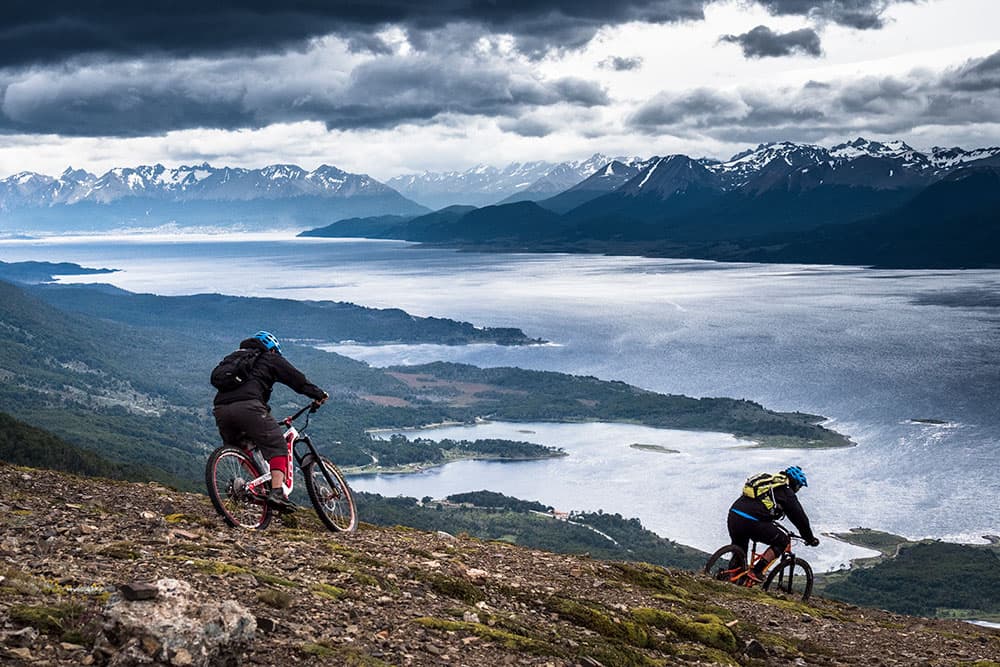
The Dientes de Navarino mountains rise steeply from the sea and provide an impressive backdrop for the world’s most southern trail. Panasonic Lumix G X Vario 35-100mm f/2.8 II Power OIS, 1/1000sec at f/5.6, ISO 500. Credit: Dan Milner
The advantages of EVF
Having no laptop at our wild camp spot deep among Navarino’s peaks meant reviewing images in camera. If, like me, you’re long-sighted and need glasses to view a rear LCD screen, reviewing images gets a whole lot quicker and easier with an electronic viewfinder (EVF). The G9’s EVF boasts a massive 0.83x magnification and I used it for everything – in fact, the rear monitor almost became redundant, aside from when I flipped it out to shoot from ground level or used its touchscreen to delete images. Being able to navigate menus or see shooting data in the EVF while reviewing meant being able to readily check compositions and exposures, but despite its 3,680k-dot resolution, I found the EVF became too grainy when zooming in to check focus accurately. I still needed the rear monitor’s 100% zoom, and my glasses, for that. While not too useful when shooting action, the rear LCD offers a whole host of other possibilities, including using its touchscreen capability to select focus points and shift focus during a sequence. It also offers access to useful, and otherwise menu-buried options, including white balance and image size.
Mirrorless cameras are notoriously power hungry, so committing to a three-day, two-night camp out in what would turn out to be sub-zero temperatures was a gamble. How many batteries could I expect to go through in three days? My Nikon D750 can blast through 1,000 or so shots from one small 1900mAh battery in good weather, but my experiences with the Fuji X-Pro2’s 1260mAh battery have taught me to play safe. I packed four G9 batteries for our three-day camp out, but happily, just two saw me through 812 shots plus a few short video clips in cold weather. Turning off features such as auto-review helps save power and on other expeditions, when our gear is portered for us to camp, I often take a Power Gorilla external power pack to recharge batteries. The G9’s USB 3.0 charging port is a welcome feature for this kind of recharging on serious out-in-the-wild trips.
You don’t venture to the world’s southernmost trails without a good chance of being snowed on, and it came as no surprise when the sunshine that greeted our arrival in camp was followed by rain… then hail and, finally, snow. Shooting my co-adventurers stumbling through a blizzard resulted in images that drive home the endeavour we’d undertaken, but it meant pulling the G9 out in some pretty hostile conditions – all the time knowing we would be returning to cold, damp tents rather than warm hotel rooms afterwards. Such tents don’t make the best drying rooms, but the G9 dealt with the challenge of damp without serious complaint, aside from a hint of fogging under the top LCD screen the next
morning. It’s something I’ve found in almost all my cameras in these kind of conditions, whatever their claims of weatherproofing. Similarly, the Lumix lenses’ seals kept the wet out, despite shooting in conditions that needed me to repeatedly wipe the front element clean of snow. When I popped the images on the computer back home, they proved that the G9s dust-removal function did an admirable job, although this function is buried in the camera’s menu. Luckily, most of the G9’s key controls, such as shooting mode, drive speed and AF/MF selection are managed by top- and rearpositioned manual switches and dials rather than via menus, making them easy to use and change quickly when wearing thin bike gloves.
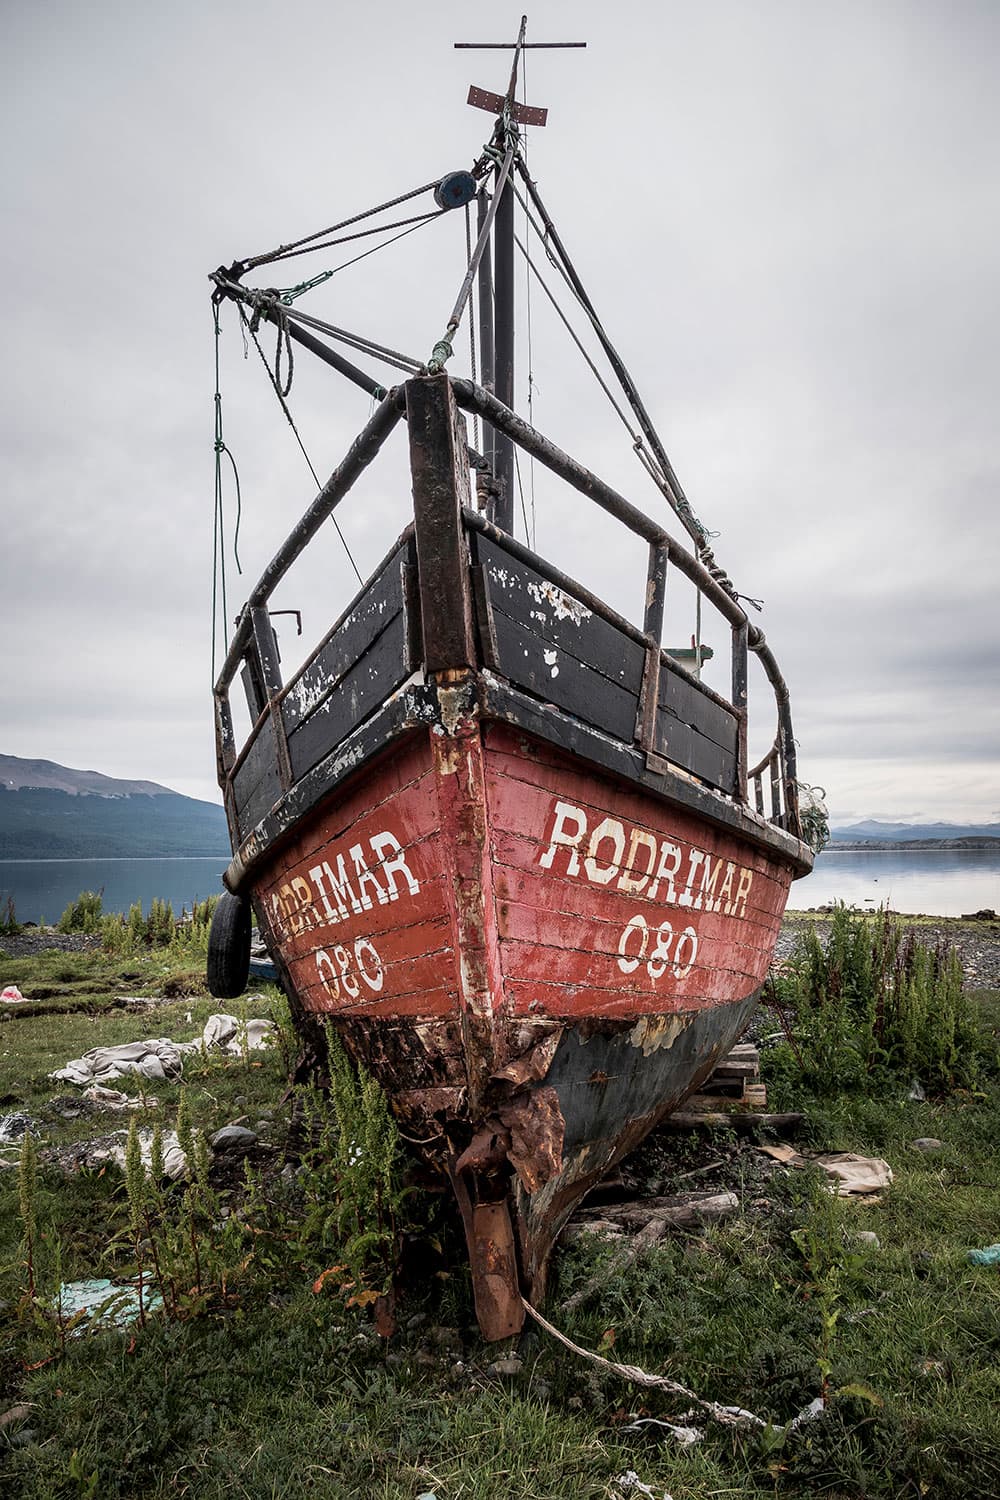
Fishing boat in the one town on the island, Puerto Williams. Panasonic Lumix G X Vario 12-35mm f/2.8 ASPH, 1/200sec at f/4.5, ISO 200. Credit: Dan Milner
Custom functions
Similarly, the AF-point joystick is ergonomically and instinctively positioned for thumb control, but I found the shutter release was a little too sensitive, meaning that a fair few accidental shots snuck on to my SD cards, whether I was shooting with gloves or not. Meanwhile, the front-positioned depth-of-field preview button is useful for checking depth of field, especially when making use of fast lenses such as the Leica Summilux 15mm f/1.7, but I’d rather see this as a dedicated DOF-only button, stopping down to preview only while it’s pressed, rather than cycling through DOF and a shutterspeed-effect preview (why would anyone need that?) each time it’s pressed.
The G9 has a thick, 340-page manual that reflects its vast customisation potential. While JPEG picture modes aren’t my thing, being able to customise the likes of the main control dials and frame rates is key to simplifying my workflow. The G9 boasts a staggering 20fps raw image capability – the most I’ve ever had in a camera – and while there are times that 20fps (or its incredible 60fps capability, with images extracted from a 4K MP4 file) might be useful, say to capture detail of dirt sluicing off a wheel, 12fps is more than enough to capture the adventure element. It’s rare for me to shoot bursts of more than 20 or so frames on mountain bike shoots, burning images to my UHS-II cards never hindered my workflow, as the G9 has a seemingly limitless buffer capacity.
While a degree of speed is crucial to capturing action, the role of AF is often overestimated in many action sports shoots. Certainly an EVF 120fps refresh rate meant I never lost line of sight with my riders as they flowed down a trail, but unlike motor racing or football, in which you track the subject with AF, shooting mountain biking on these adventure trips is about prefocusing on a spot you know the rider will pass through. That way, you have more freedom of composition to paint your subject into the bigger environmental picture, rather than be dictated by AF-point layout. While Panasonic geeks might be disappointed that its claimed world’s-fastest AF wasn’t put properly to the test, I used it to more accurately focus on rocks and roots instead of people, before locking off the focus and calling my riders through. Being able to choose a pinpoint AF point is great for such precision focusing, as is being able to enlarge the subject though the EVF when in manual-focus mode. As I regularly use MF, this zooming ability to accurately check a focus point is something I now miss on my DSLRs with optical viewfinders. Focus peaking swamped the viewfinder of this early G9 sample with red lines, though, so I quickly turned it off. The camera as released now offers two sensitivities of focus peaking, allowing you to customise it in the EVF.
While the photography-orientated G9 follows its video-flavoured GH5 sibling, the G9 is not short on video capability, offering full 4K 60fps MP4 output. Part of my brief was to produce a short film from the trip, and the G9’s stabilisation came into its own when we boarded a 12m inflatable boat for the one-hour journey to the east of the island to ride back from the world’s most southern settlement, Puerto Toro. Combining the in-lens IS of the Vario 35-100mm f/2.8 with the G9’s own in-body stabilisation meant video that was shot handheld as we sped up the Beagle Channel is as steady as that shot with a gimbal. The G9’s dedicated ‘record’ button makes quickly switching to video mode a breeze, and the ability to film using the EVF instead of the rear monitor meant I could see the subject whatever the ambient light. Video is also one of the times I really used the AF, using it to track my subject without reverting to manually pulling focus on the lens. But as with landscape stills, I’d like to see a lower ISO than the extended ISO 100, just to alleviate the need for ND filters when filming or shooting long exposures in bright light.
Adventure trips are as much about shooting your surroundings and the people you meet as they are about action. I’ve built a name for shooting action, but I’m a sucker for a good landscape. With its shake-free electronic shutter, the G9 makes long-exposure landscapes easier. Heading down to Ushuaia’s waterfront at dusk gave me the opportunity to attempt one and use the three-axis pivoting rear monitor to let me compose and shoot with the camera at almost ground level. Using the G9’s self-timer and bracketing +/-1 stop with a slow shutter speed, then combining the images into a single HDR image in Lightroom, gave an arty look to what is perhaps Ushuaia’s most photographed landmark: a shipwrecked steamer perched on a sandbank in the Beagle Channel.
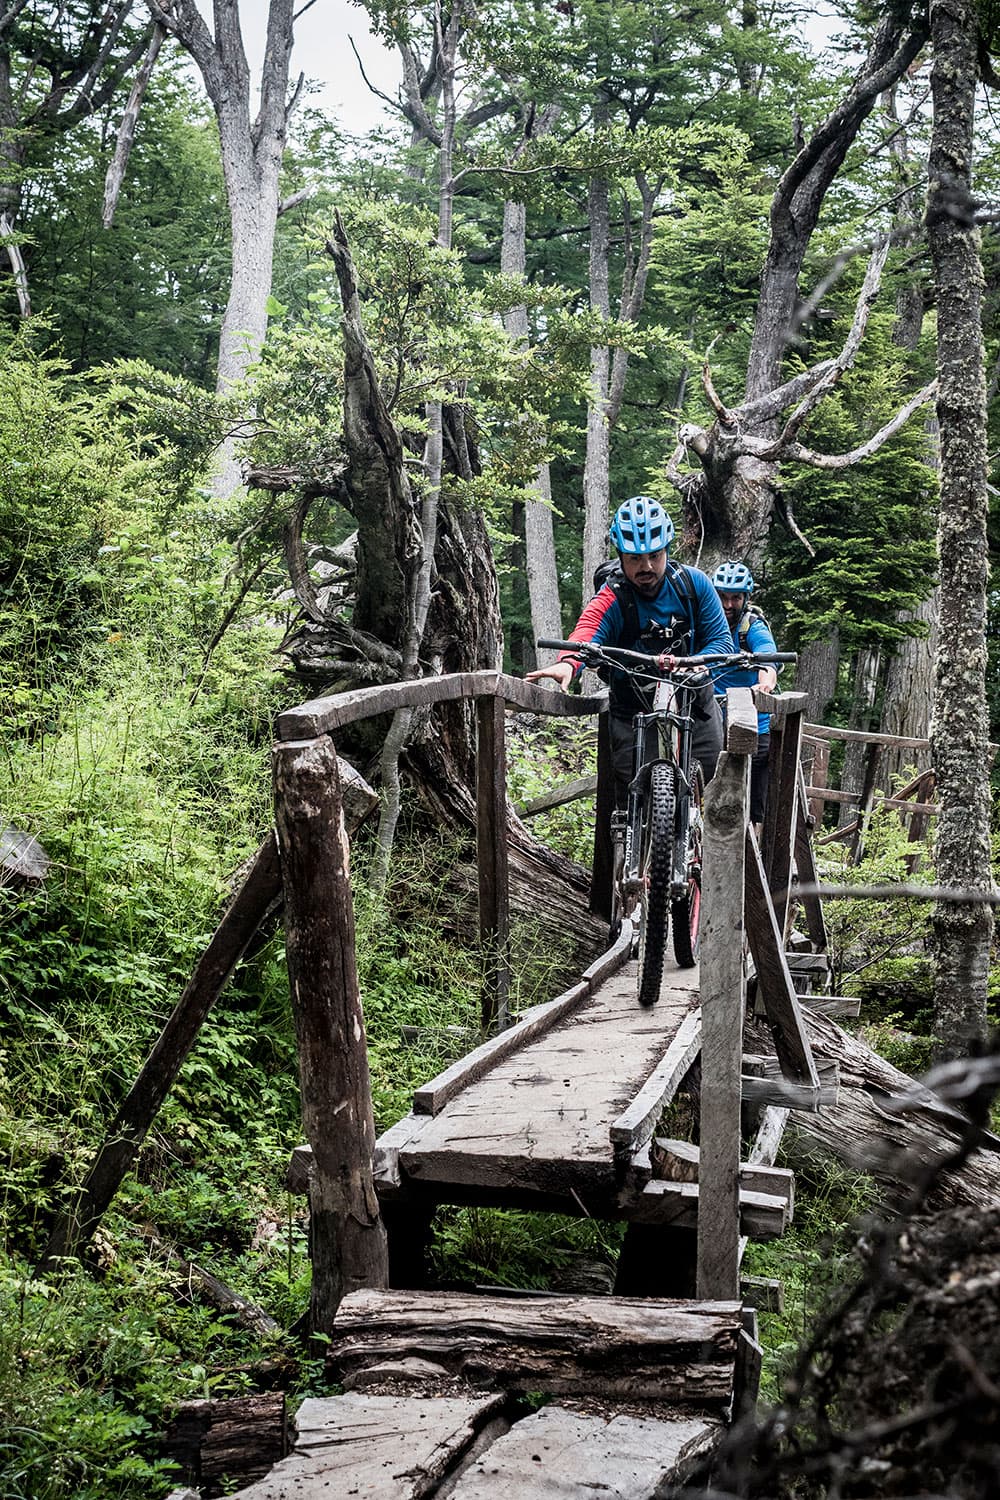
The Circuit de Navarino trail was a tough testing ground for the G9. However, it didn’t falter Lumix G X Vario 12-35mm f/2.8 II ASPH Power OIS, 1/320sec at f/4.5, ISO 500. Credit: Dan Milner
Conclusion
Camera companies won’t like me for saying it, but in my experience, choosing any camera to shoot adventure and expeditions means accepting compromise somewhere. That’s not to say you are necessarily compromising on image quality, but the physical nature of the endeavour means often finding a workaround of weight versus versatility. Over three weeks, I put the G9 though hell, from dust storms and 35°C heat at 4,300m up in the north of Argentina to snow, mud and cold at sea level in the south of Chile. The G9 can stand a beating and is really good for adventure shoots. It has a few quirks: its touchscreen quick menus are confusing and its AF-point joystick won’t let you move the AF point diagonally. My sample also had an EVF that overcompensated for light, resulting in it darkening acutely when shooting strongly backlit subjects no matter what the settings – an issue that has been resolved now.
The Panasonic G9 and its tack-sharp system lenses combine portability, high image quality and reliability to make it possibly the most capable adventure-orientated camera I’ve used to date. And that kind of thing is useful to know when you commit to shooting mountain biking in a snowstorm on a remote island on the other side of the world.
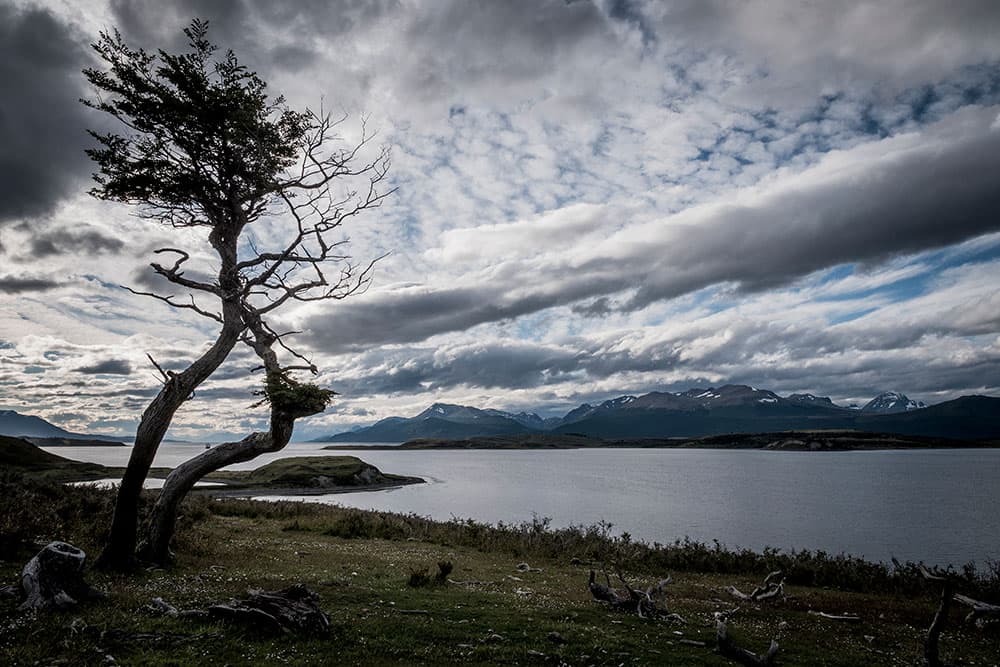
Navarino island is a windy place, but starkly beautiful and unspoilt. Panasonic Lumix G X Vario 0112-35mm f/2.8 II ASPH Power OIS, 1/400sec at f/8, ISO 200. Credit: Dan Milner
Dan’s mountain biking tips
Start by asking yourself what story you are telling. Is it about the rider or the landscape? Commercial bike shoots are usually about capturing the detail of a bike or product, or conveying a feel of this kit in use, while adventure trips are more about capturing the ordeal and the achievements in context. It’s a common misconception that fast autofocus is paramount when shooting mountain biking. If you’re tracking a final sprint, then continuous AF is key, but for most of the mountain bike adventure trips I shoot, I compose the scene that best tells the story of our endeavour and let the riders pass though it. This usually means finding a section of trail that has shape and depth – perhaps a winding S-turn to carve around or a rock staircase to roll down – that also lets me capture the moment when the rider naturally ‘throws some shape’. Body form and language play a big part in adding energy to a shot – you won’t win any praise if the rider in shot looks as if they are on the way to the shops, no matter how dramatic your backdrop.
Unless I’m panning a shot to add motion blur, I use a 1/1000sec shutter speed and, depending on the focal length, f/4 or f/5.6 when prefocusing on a spot the rider will pass through. For wide landscapes I shoot at f/8, knowing these are likely to be printed as a double-page spread. Then I’ll shoot a burst at nine or 10fps as riders move through the scene. If the light dims, I change ISO. Shooting at 18mm wide and 200mm focal lengths adds variety, and helps build a story, but bear in mind a wideangle lens can render round wheels oval if they are too close to the edge of the frame.