Kaiser FilmCopy Vario Kit: At a glance
- £280
- Holder and lightbox kit for copying film
- Works with formats up to 6x9cm
- Inserts included for 35mm film
- Medium-format masks available separately
- www.fotospeed.com
If, like me, you shot extensively on film before digital cameras ever appeared, then you’ll have a collection of valued slides and negatives that you’d like to be able to archive in digital form. With dedicated film scanners becoming increasingly difficult to find, particularly those that can handle medium format film, it’s tempting to look for alternative ways of doing this. One relatively low-tech option is simply to photograph your slides and negatives on a lightbox using a macro lens.

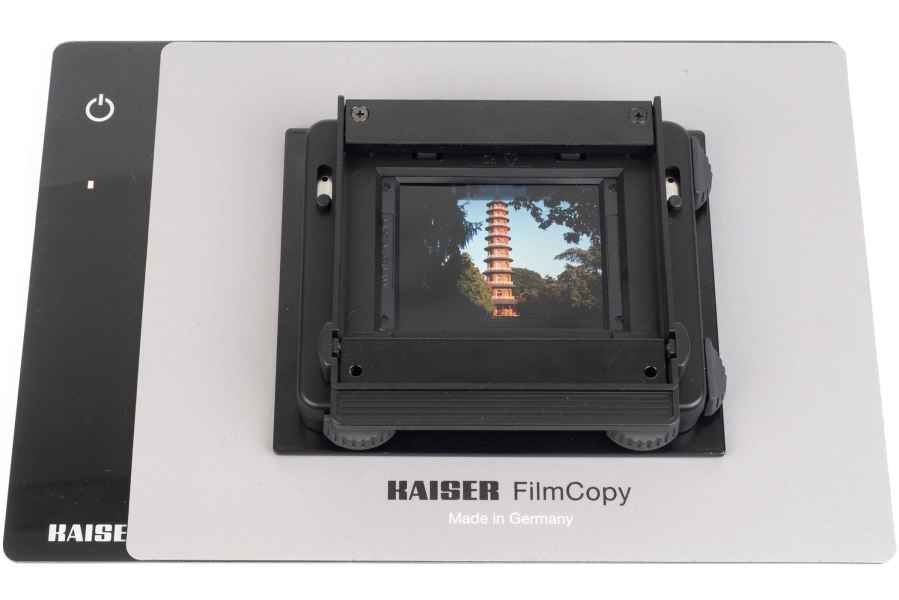
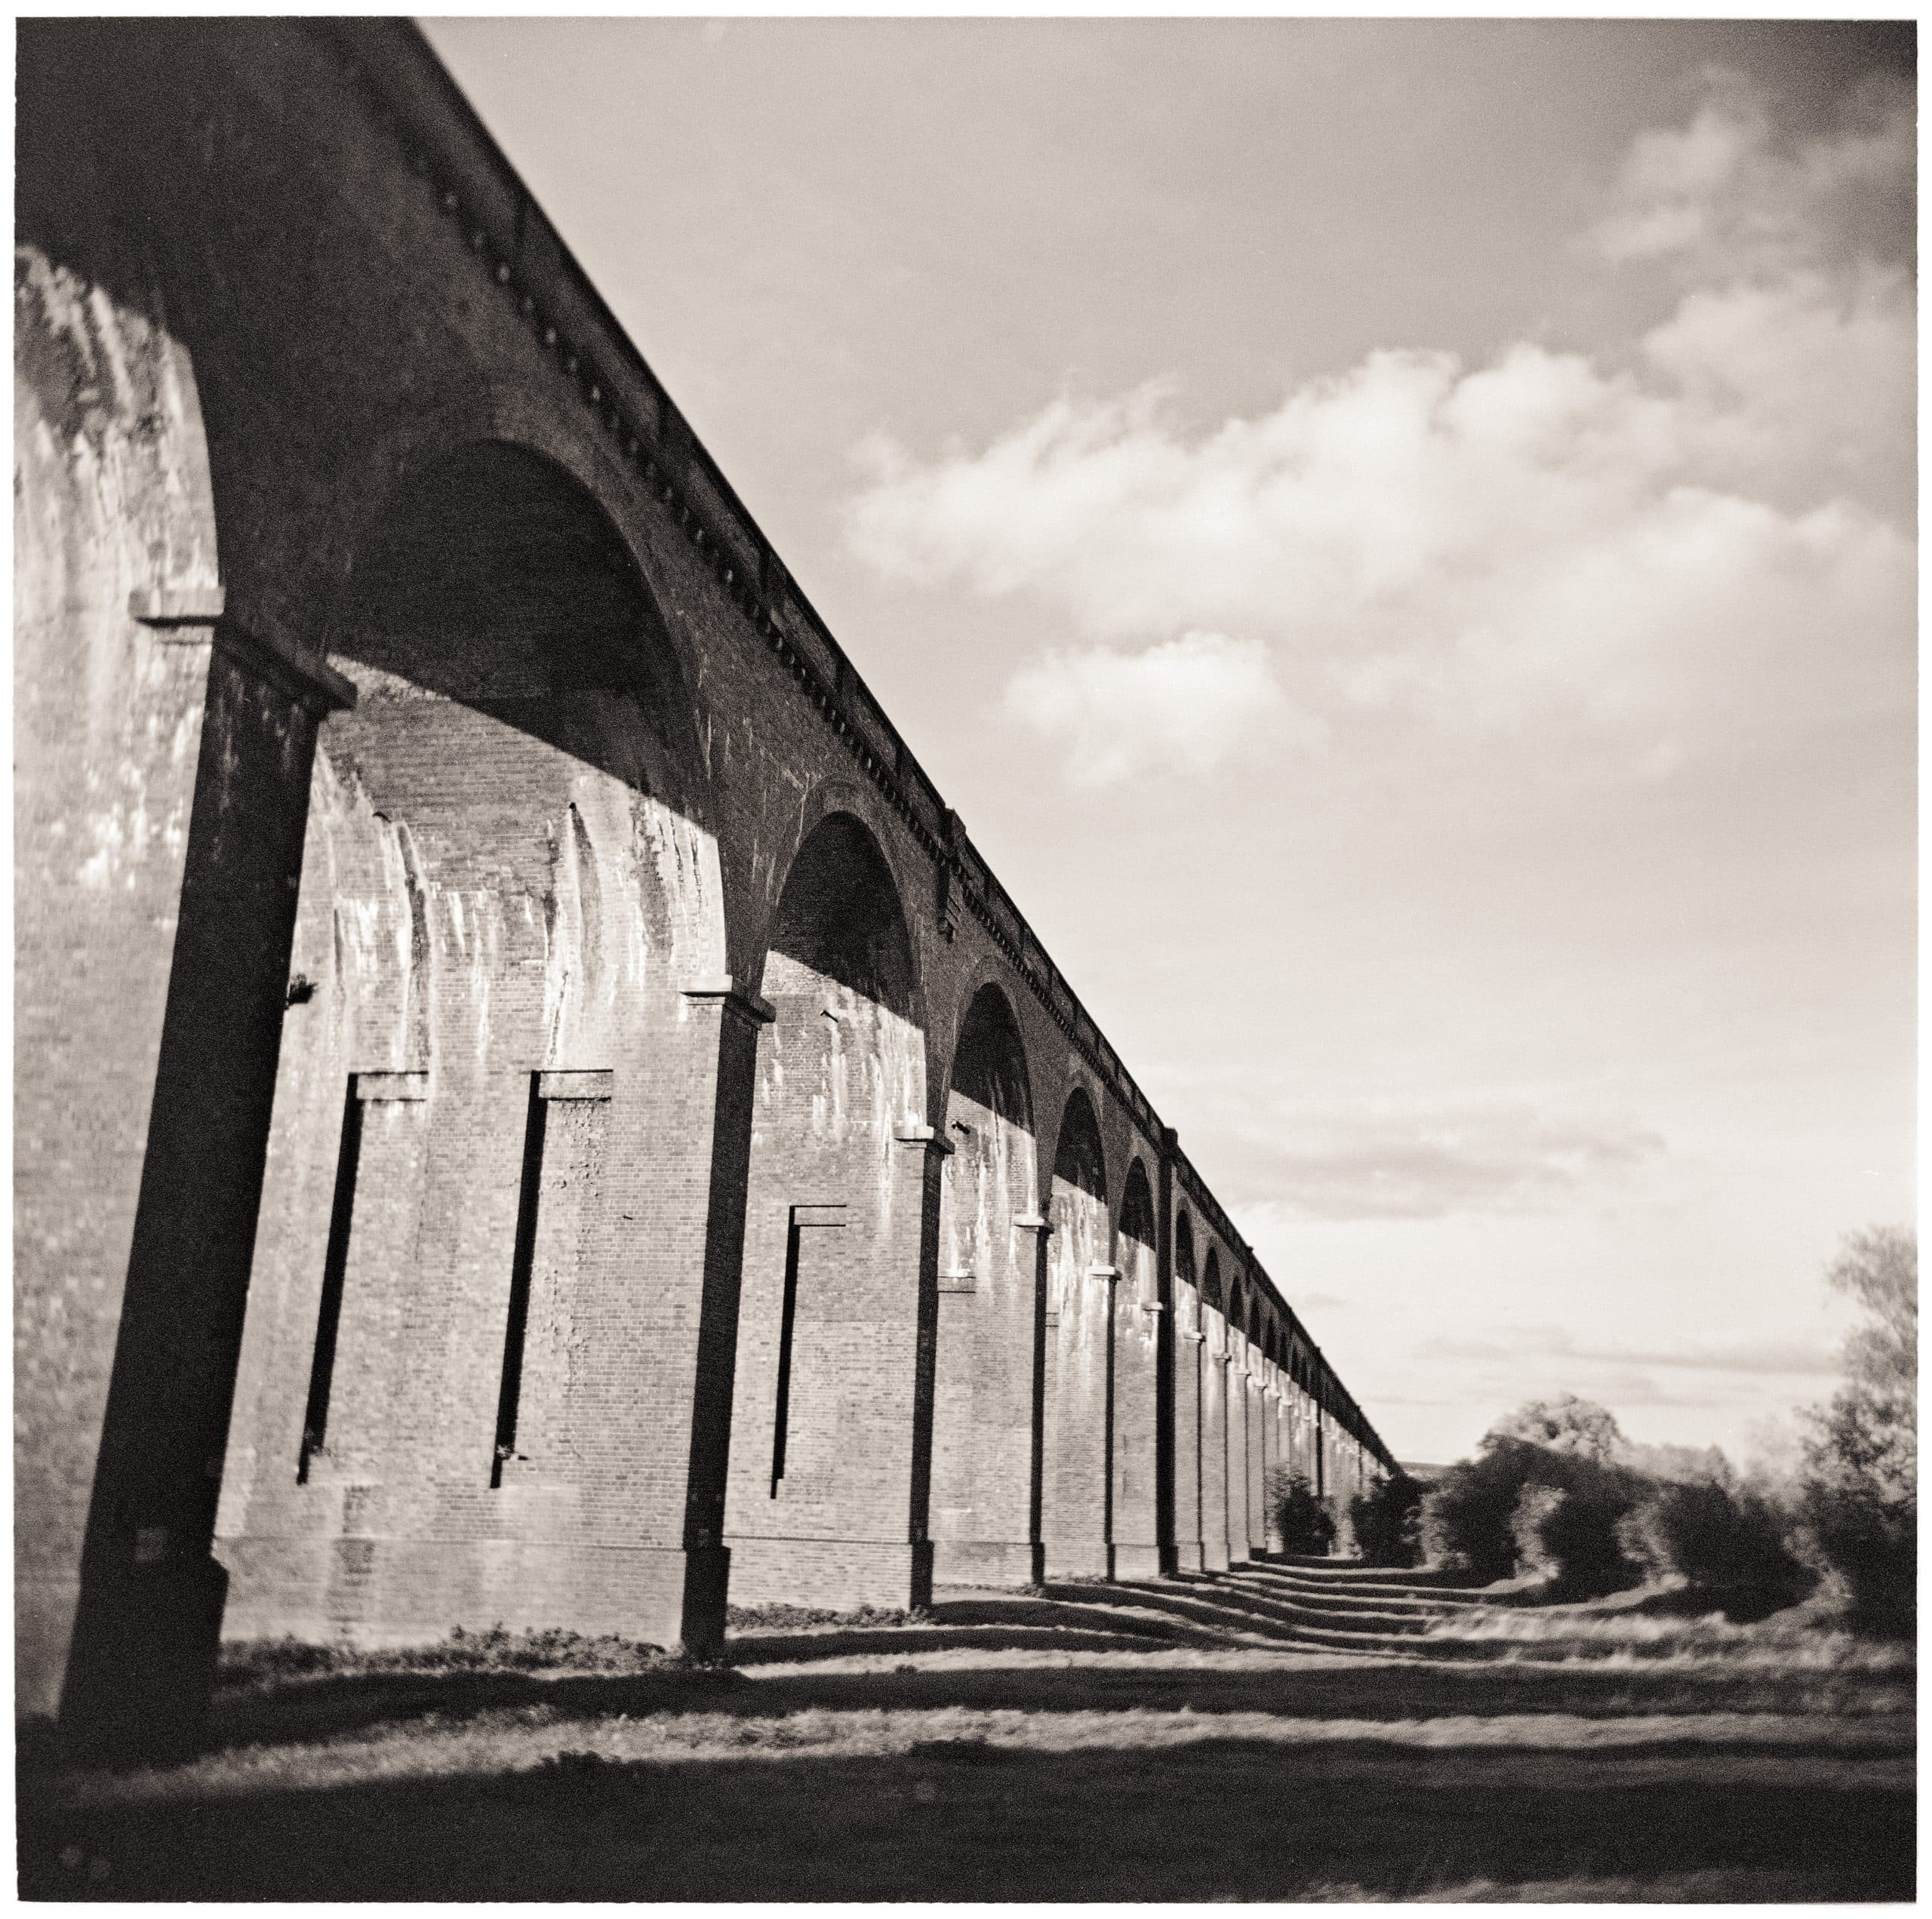
The Kaiser FilmCopy Vario kit with medium-format slide in the 6x7cm mask
This approach turns out to have some real advantages. For example, scanners can struggle with reproducing shadow detail from slide films that have very deep blacks, perhaps most notoriously Fujichrome Velvia, which was long a firm favourite of landscape photographers. Any reasonably modern DSLR or mirrorless camera will likely produce more natural results. You can also deal better with film’s tendency to curve, by using a small aperture to extend depth of field.
The FilmCopy Vario kit with the 35mm slide holder in place
I’ve been using this method for one-off ‘scanning’ for a while, placing the film in carrier masks from a long-obsolete flatbed scanner, and then photographing them on a film-era lightbox. This somewhat ad-hoc approach works fine for reproducing a couple of pictures from a roll of film, but it’s a not great for copying a batch of images. So when Kaiser released its purpose-designed FilmCopy Vario, I was immediately intrigued.
Kaiser FilmCopy Vario Kit: What is it?
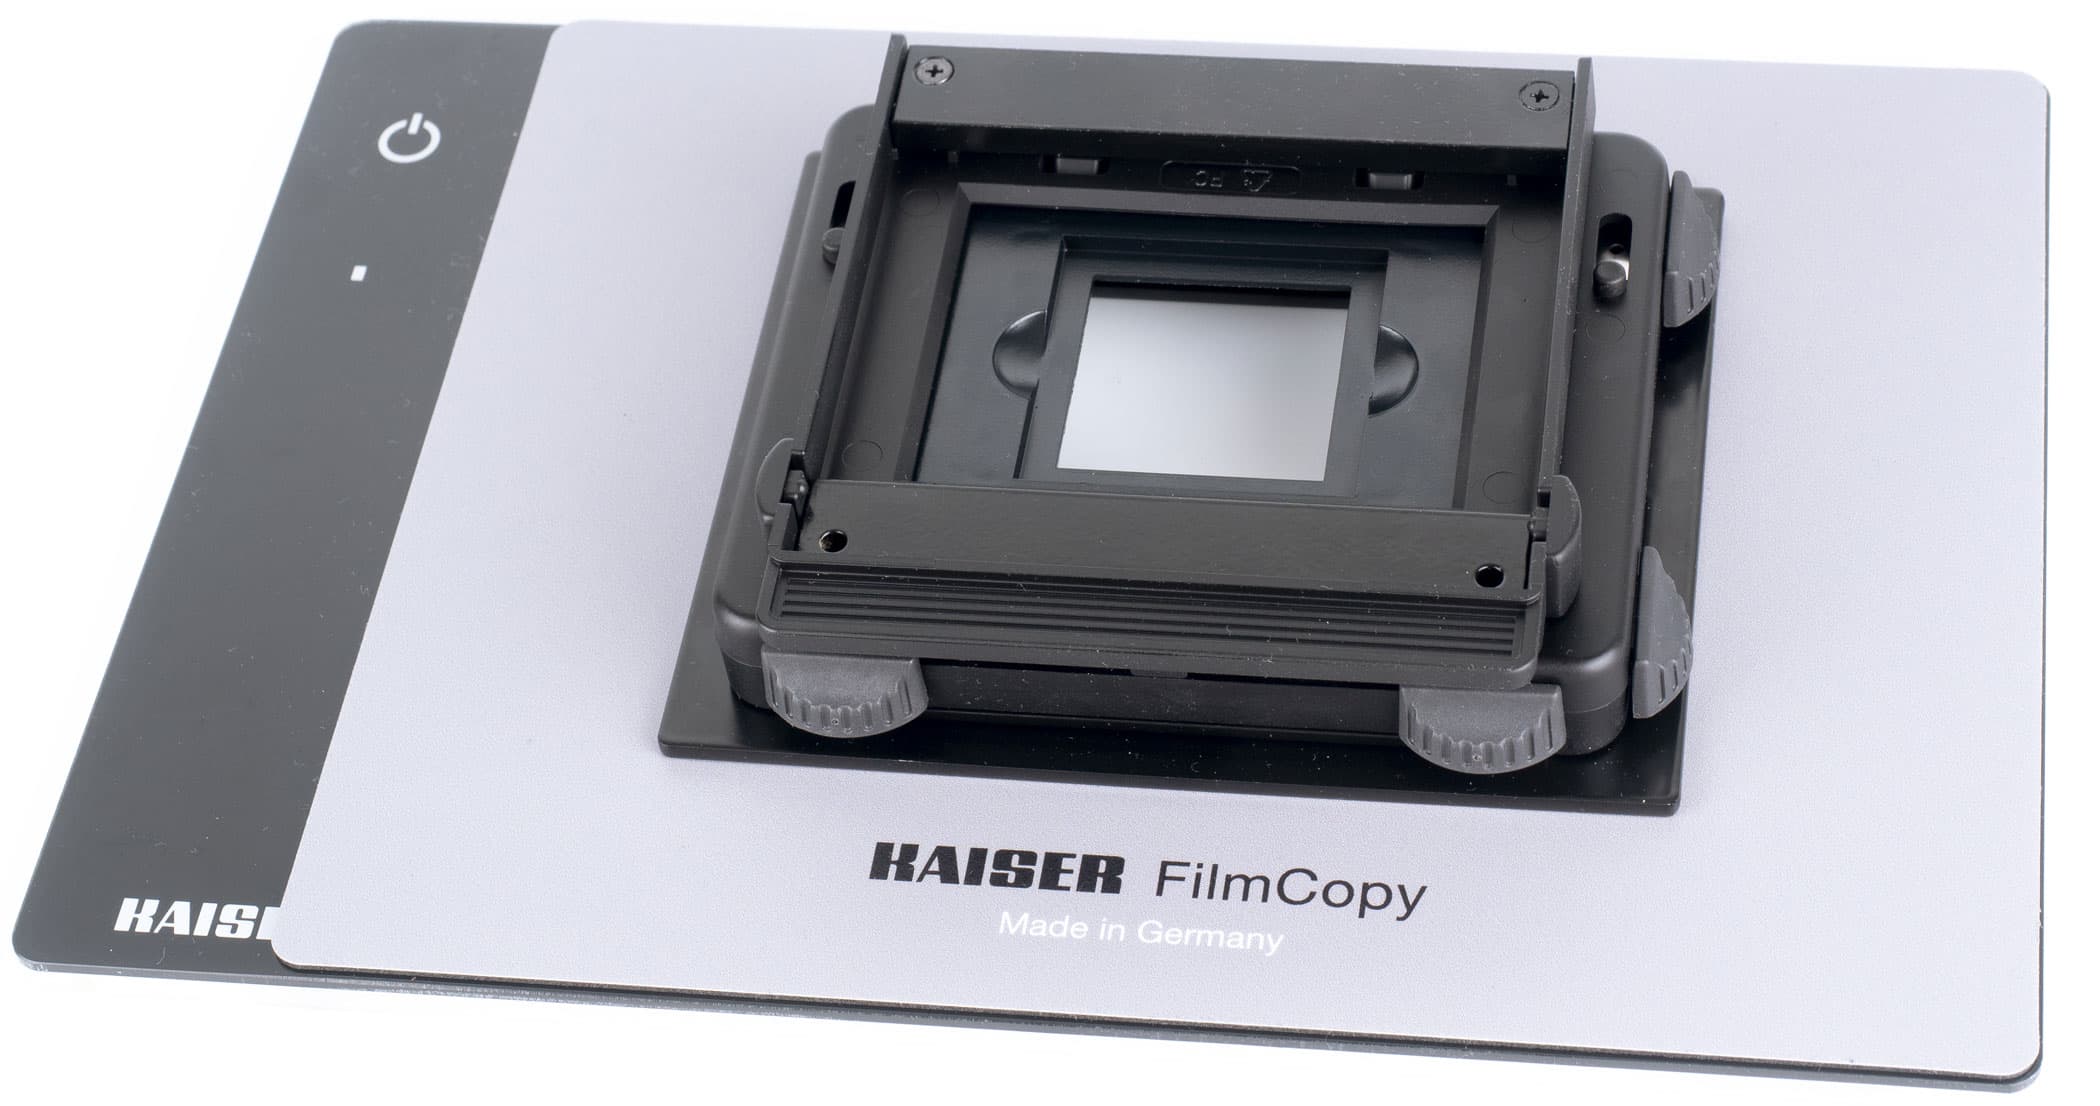
As its name suggests, the FilmCopy Vario is a device that’s designed to hold film of various formats for copying using a camera. It’s based on the film carriers used by Kaiser’s System-V enlargers, and sits on top of a lightbox, accepting holders for 35mm and 120 films. A hinged lid holds the film firmly in place, while sliding masks in the base section can be used for cropping. Position a camera above it using a tripod or copy stand, and you’re good to go.
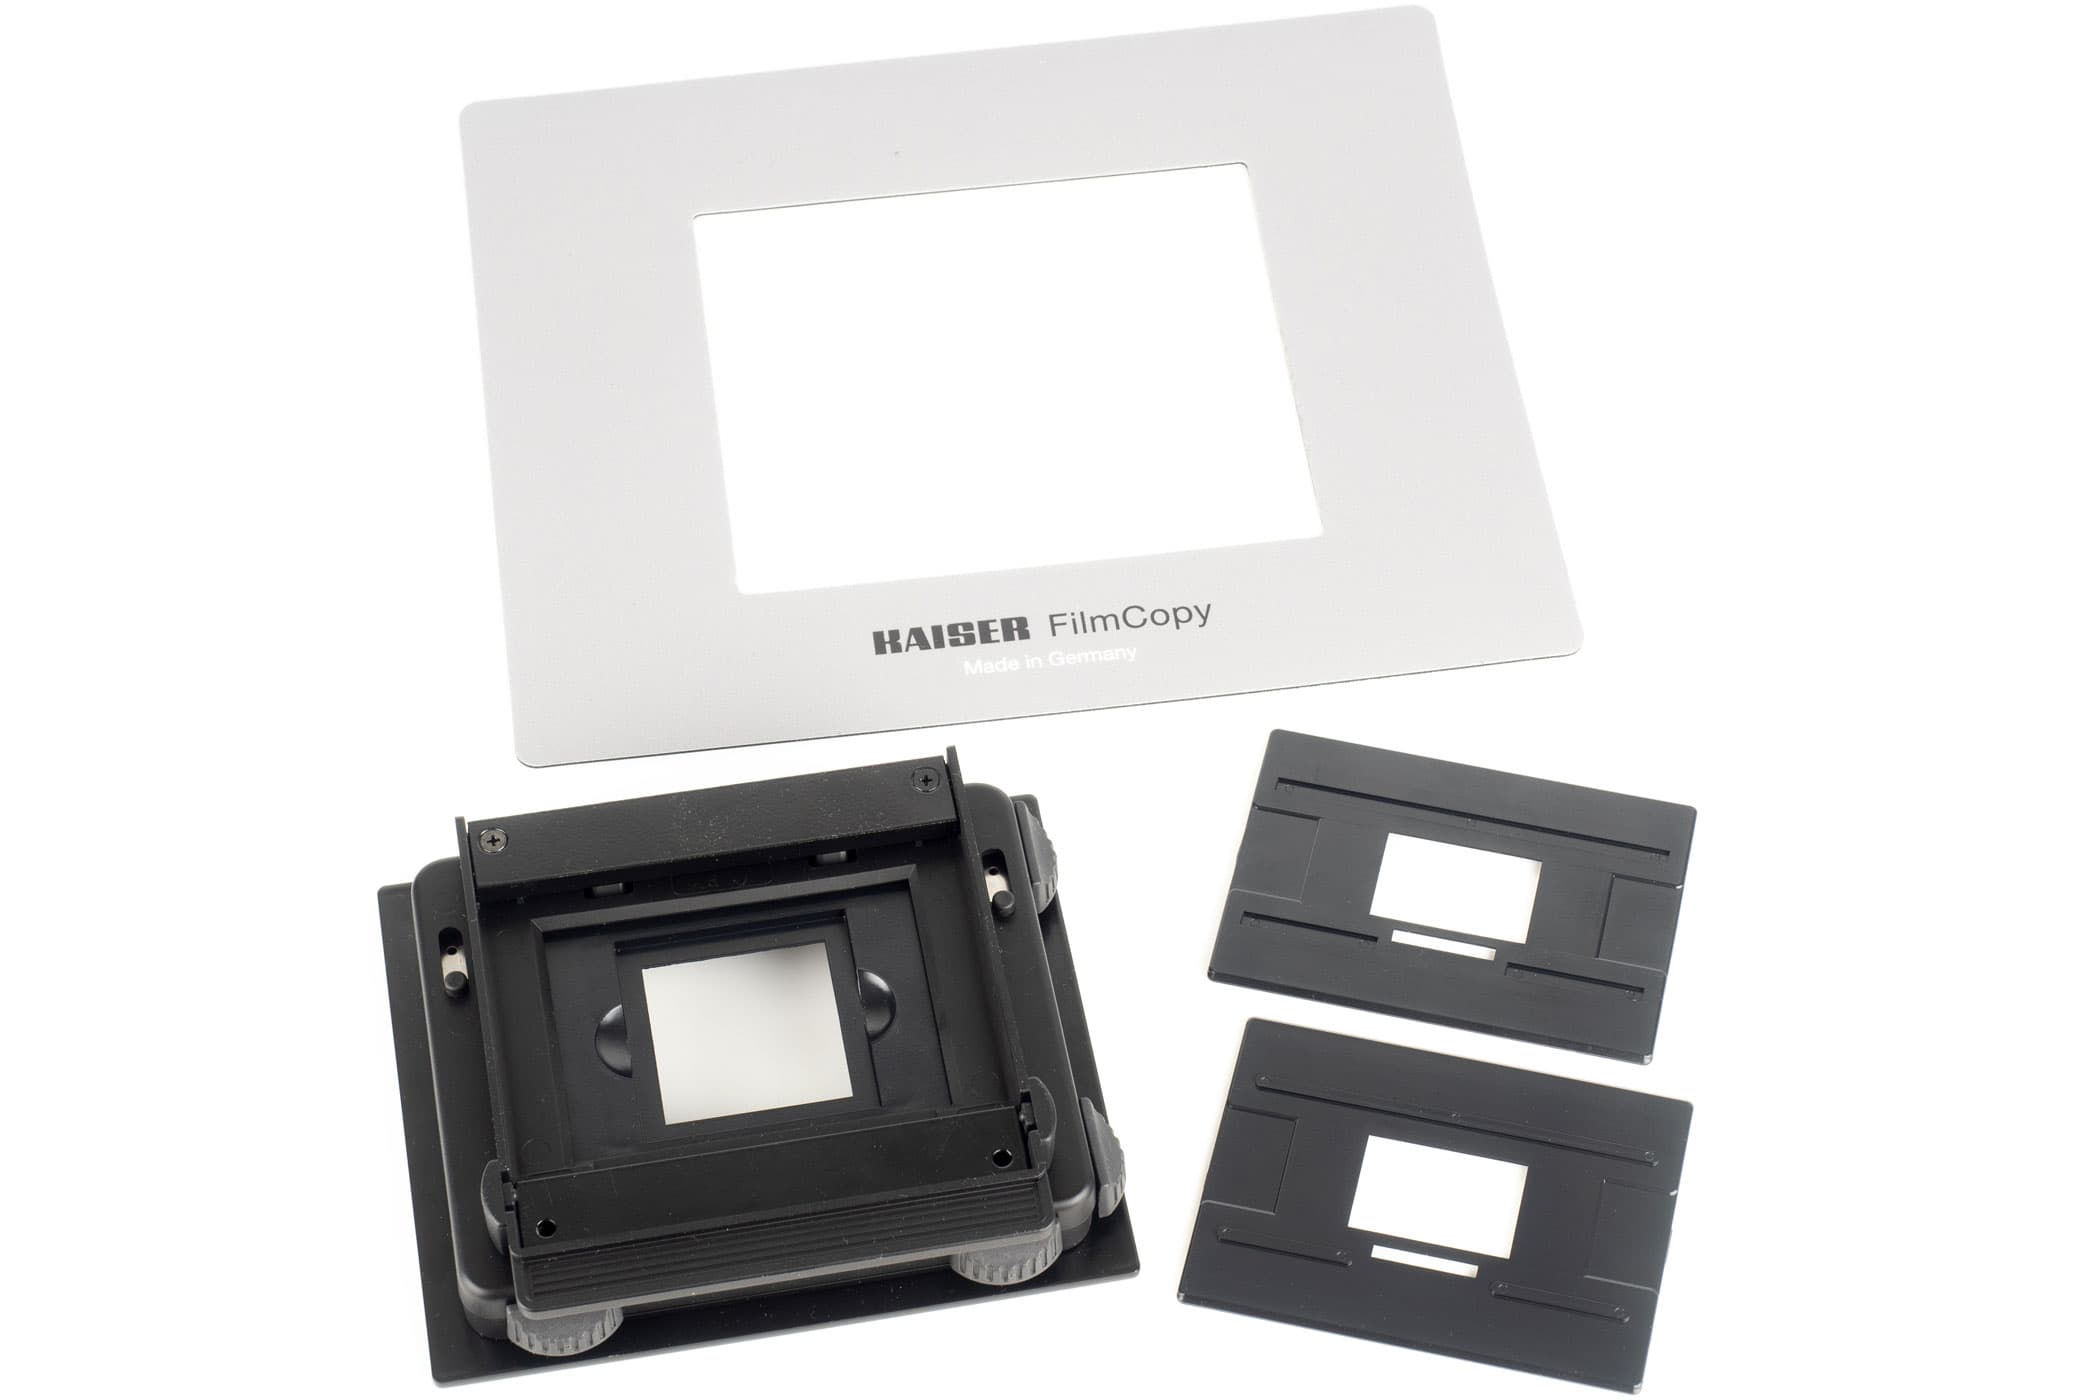
The basic kit comprises the film holder, masks for 35mm negatives and slides, and a lightbox overlay mat
The device can be bought in two different forms. The Kaiser K2457 FilmCopy Vario (£200) contains the film holder unit along with masks to take 35mm negatives and mounted slides, and an overlay mat to block stray light from those areas of your lightbox not covered by the holder. Meanwhile the £280 K2458 FilmCopy Vario Kit under review here adds in Kaiser’s slimlite plano LED light box, which has an illuminated area of 22 x 16 cm, a colour temperature of 5000K, a colour rendition index (CRI) of 95, and a built-in rechargeable battery. In principle, this should offer even illumination across the entire film area, along with high colour accuracy.
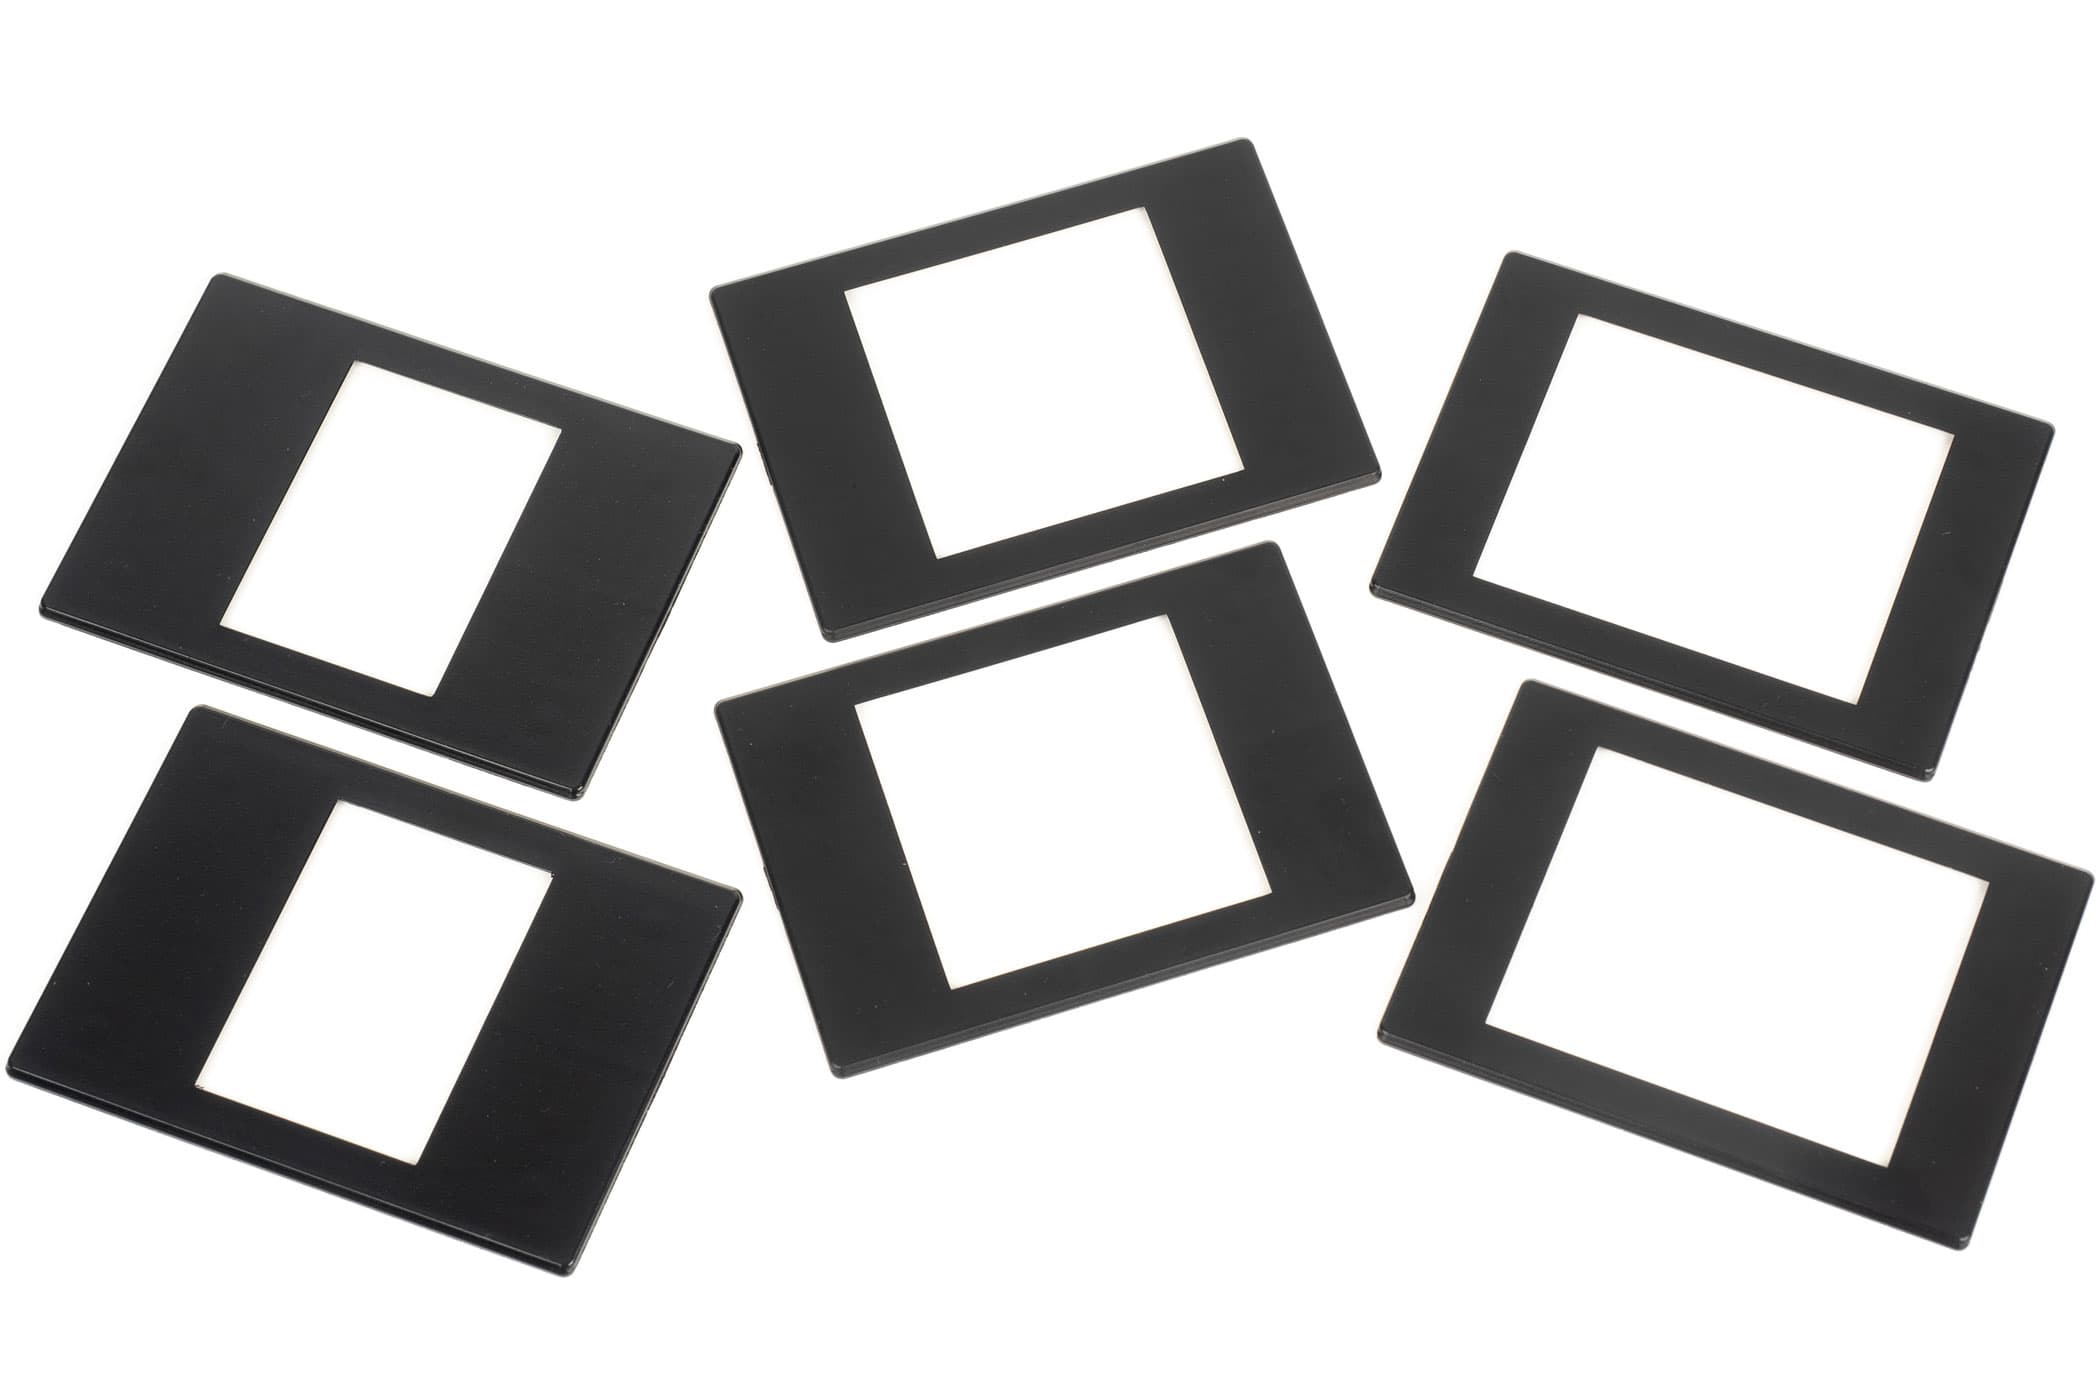
Optional masks are available for 6×4.5, 6×6, and 6×7 cm formats on 120 roll film
If you want to copy medium-format film, masks are available separately for 6 x 4.5, 6 x 6 and 6 x 7 cm formats, with prices ranging from £19 to £26. For copying 6 x 9 cm frames a mask is unnecessary; instead Kaiser recommends using optical glass inserts to hold the film flat, which will set you back £60. It’s also possible to get a mask for the 24 x 66mm panoramic format, as used by the Hasselblad XPan rangefinder.
Kaiser FilmCopy Vario Kit: Build and design
Take the FilmCopy Vario out of its box, and you’ll immediately appreciate that it’s a high-quality piece of kit. The main unit is a reassuringly weighty metal construction, with non-slip rubber feet that mean it’ll stay put on the surface of the lightbox. This is important, because it lets you copy multiple images without having to realign the camera each time. A pair of sliding guide pins helps ensure the film is correctly placed, with click-stopped positions for 35mm, 120 and 127 (4 x 4cm) formats.
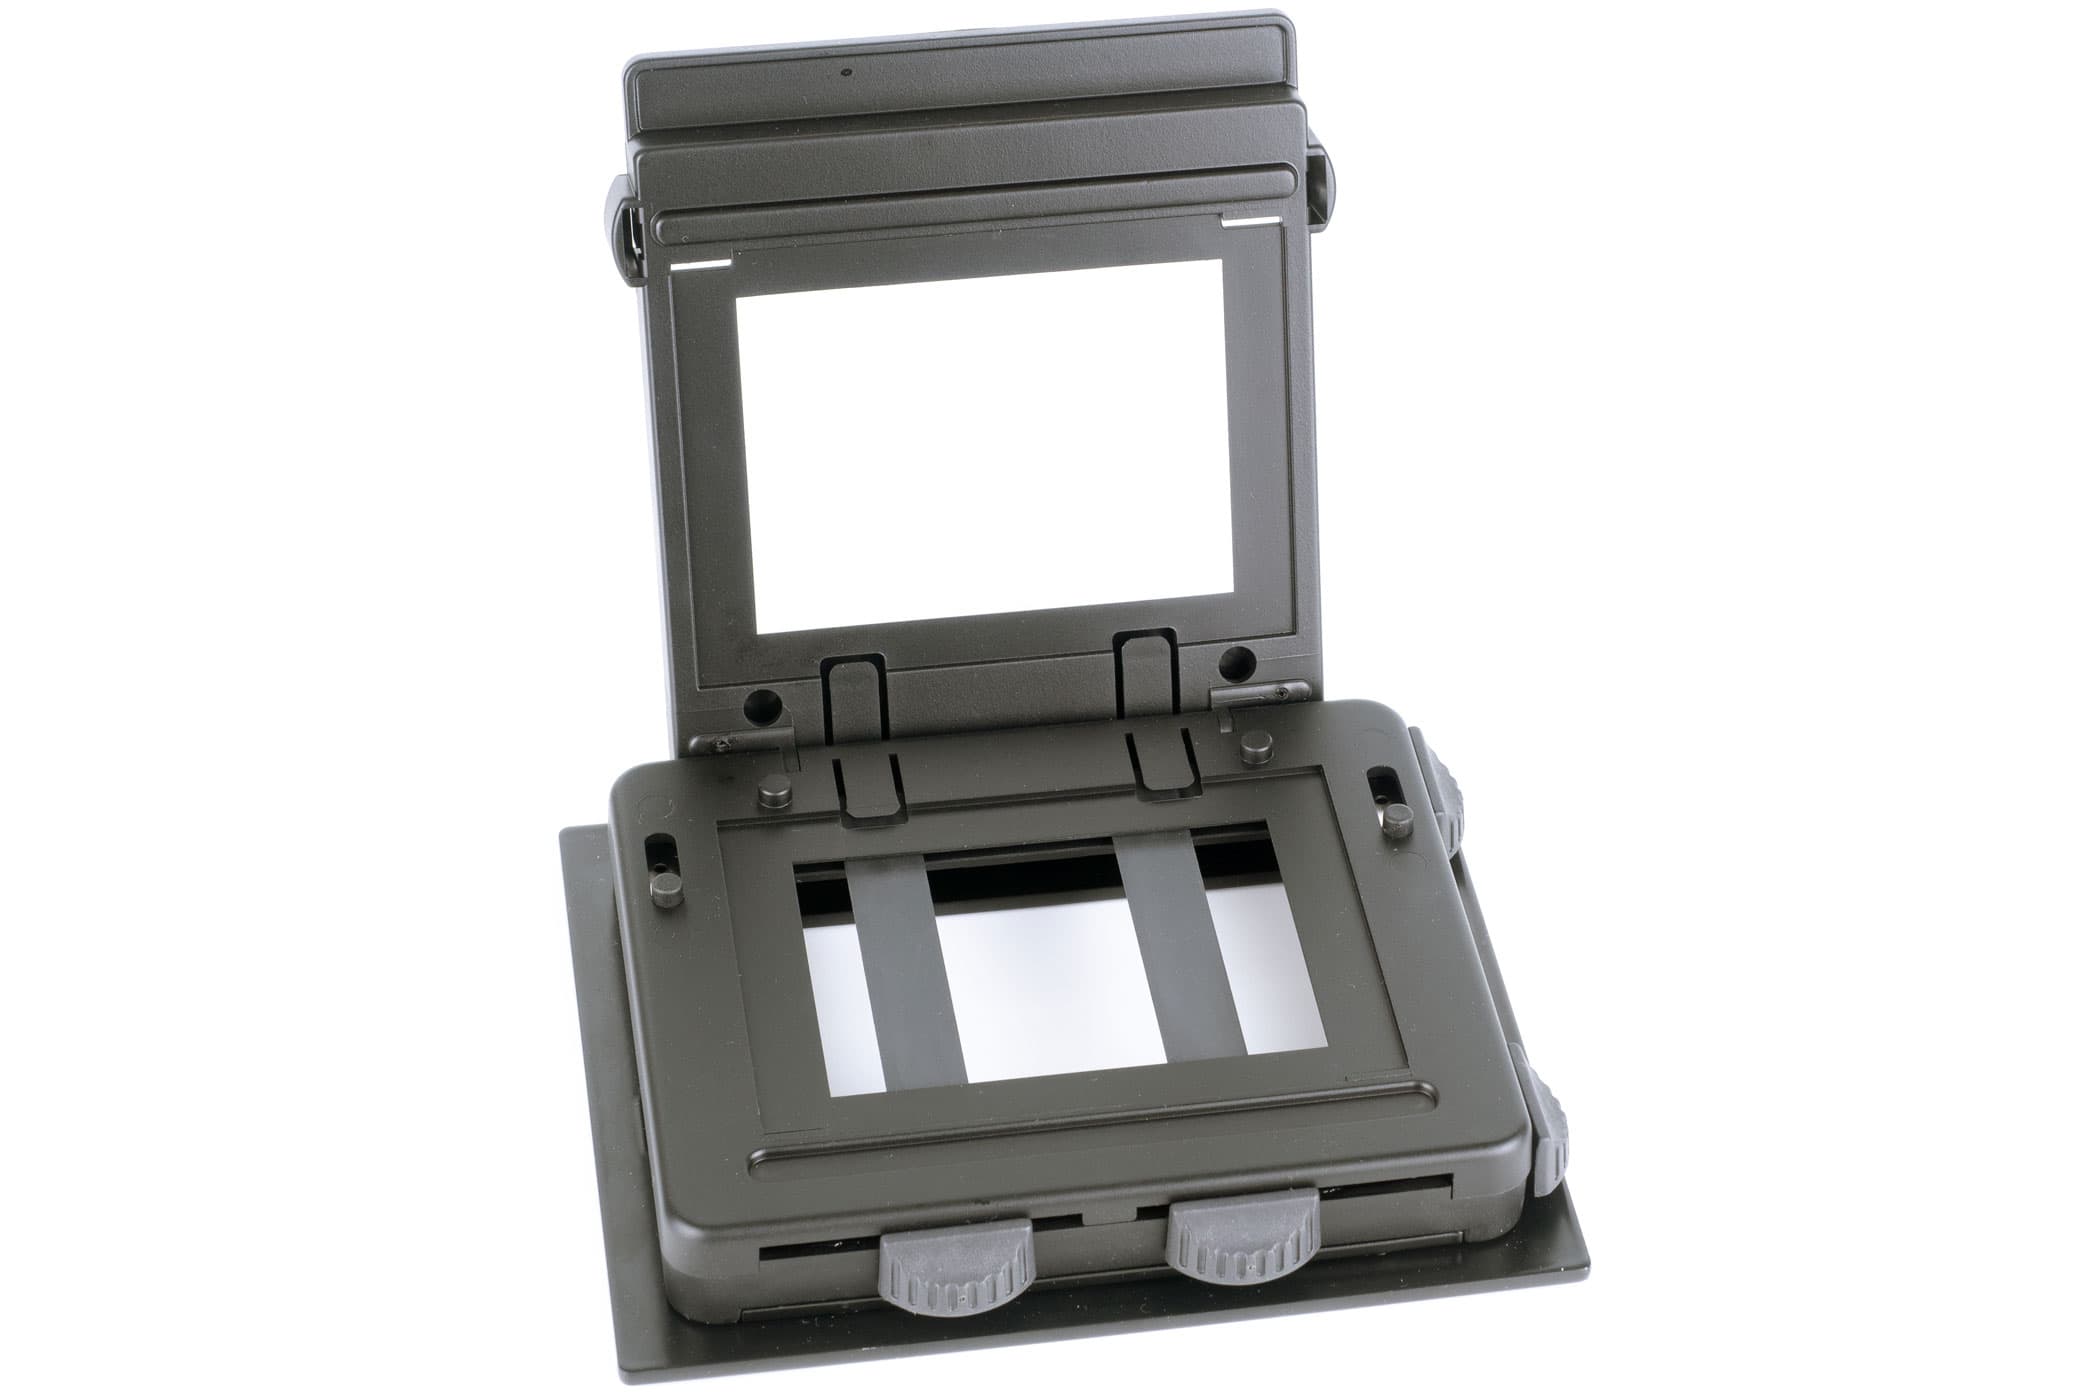
Sliding masks beneath the negative holder can be used for cropping images
The film masks are made from thick black plastic, so don’t feel at all flimsy. They come in pairs, one part for the base, and the other for the hinged lid. Once you get the hang of how they work, they clip easily in and out of the holder, while being held firmly once in place. Crucially, they also grip the filmstrip tightly in position once the lid is closed.
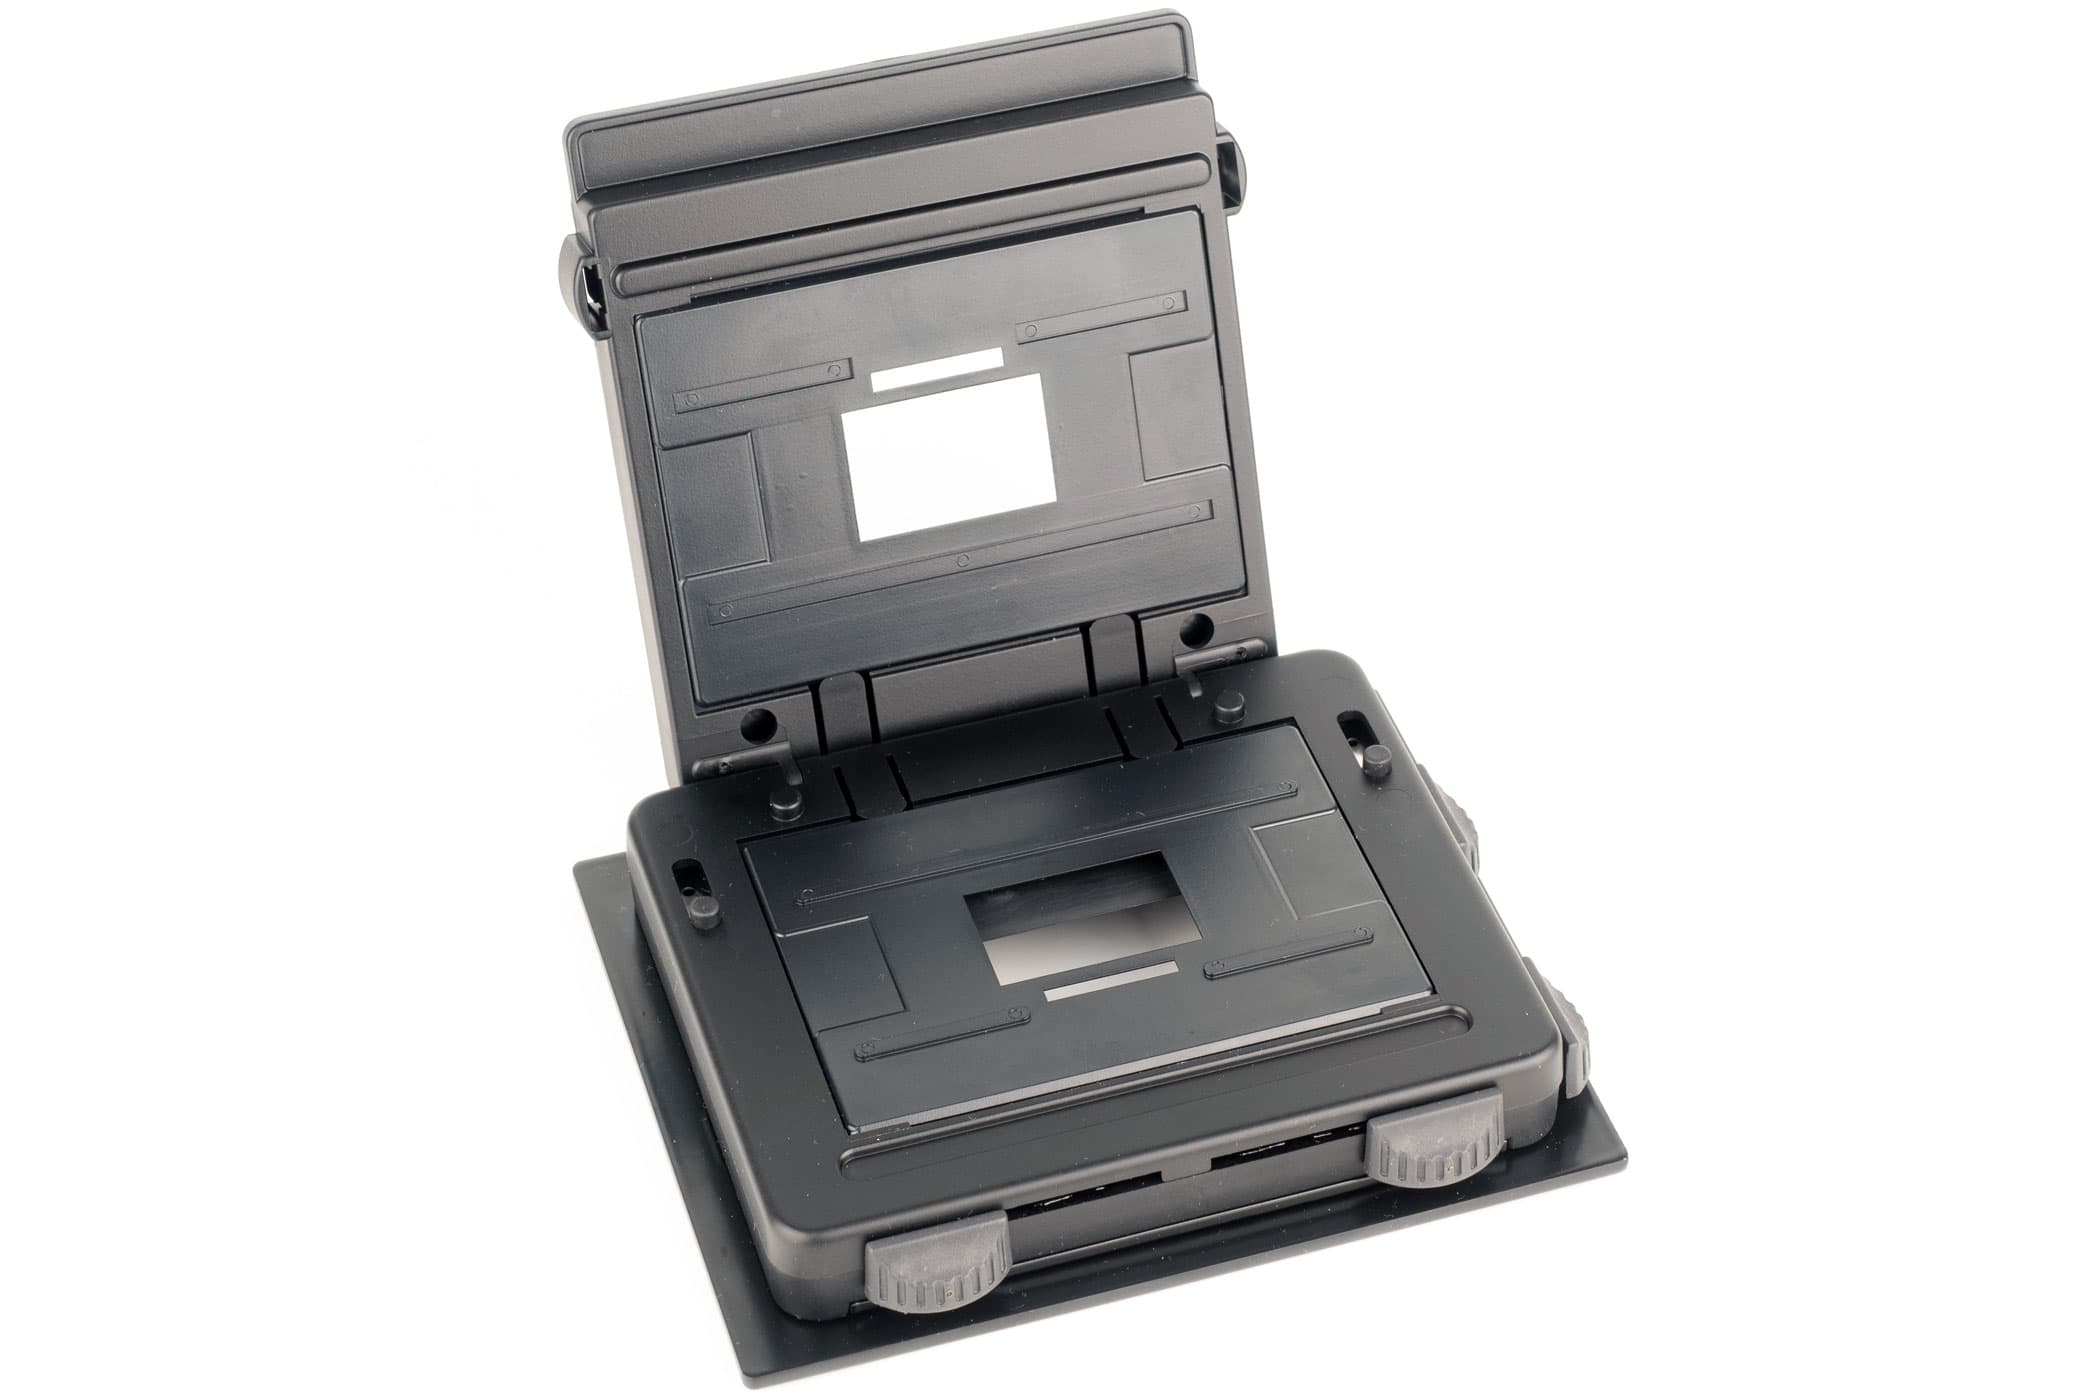
The film holder unit, with 35mm negative masks installed
The kit comes with comprehensive instructions that illustrate clearly how everything fits together and works. But when it comes to actually copying film, and processing negative images to positives, you’re rather left on your own. You’ll need to be prepared to spend a bit of time painstakingly setting up and aligning the camera, but once that’s done, photographing the film is relatively simple.
Kaiser FilmCopy Vario Kit: How to copy film
No means of holding a camera is supplied in the kit, so you’ll need a tripod with an invertible centre column that allows you to point the camera directly downwards unhindered (if you own a copy stand, so much the better). You’ll also need a proper macro lens that’s designed for close-up shooting. The key point is to ensure that the lightbox is placed on a flat, horizontal surface and the lens is pointing perfectly downwards towards it; this is best achieved using a hot shoe spirit level.

For copying film, you’ll need a macro lens, tripod and cable release
Naturally, it pays to employ good technique. Set the lens to manual focus, and engage magnified live view to get the sharpest possible results. Work in manual exposure mode, with your camera’s base ISO and an aperture that will give sharp results across the frame (experiment with this first if you’re not sure). Set the lightbox to its maximum brightness, and use a shutter speed that’s as long as possible without clipping any highlights. When it comes to taking the shot, use your camera’s self-timer or a remote release.
As always when working with film, it’s important to keep everything scrupulously clean and free of dust – the lightbox, film, and your camera’s sensor – to minimise the retouching required. You’ll get best results working in a darkened room, to avoid stray light reflecting off the top surface of the film. This is crucial when trying to capture the full tonal range of slides.
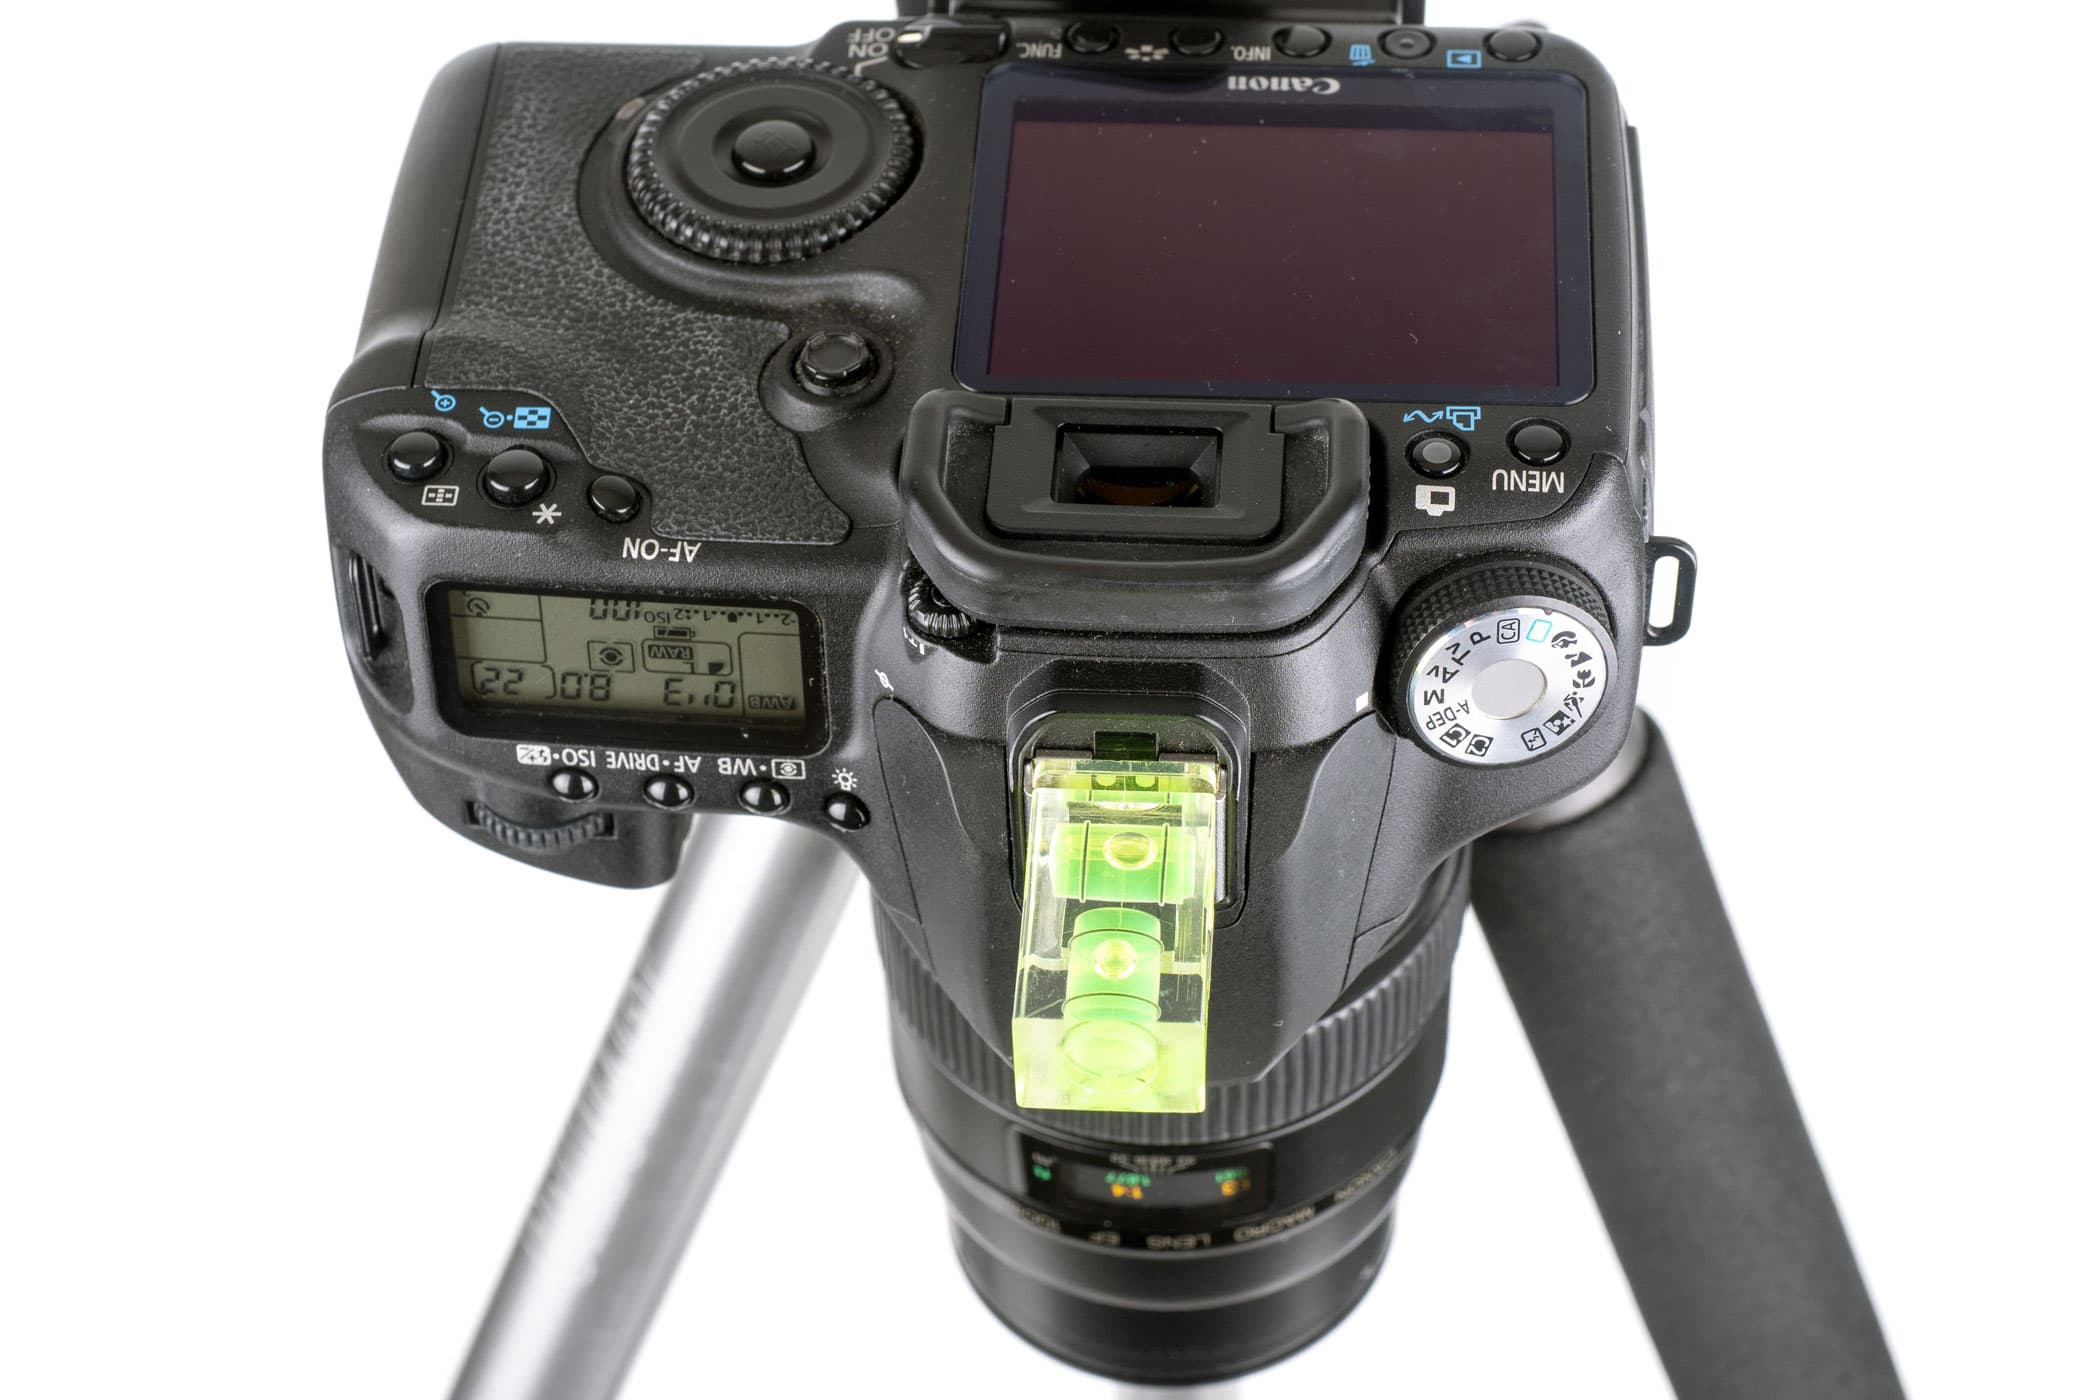
Use a hot-shoe spirit level to ensure the camera is pointing vertically downwards
You don’t get any imaging software with the kit, so you’ll need to employ your usual editor to process the files. Naturally it’s best to work with raw files, using a neutral colour profile to faithfully reproduce the original colours. Minimal further effort should be required with slides – just cropping and brightness adjustments, and spotting out of dust and blemishes. Likewise working with black & white film is relatively straightforward, initially requiring little more than inversion from the negative image to a positive, then levels adjustments to compensate for the film’s base density.
Copied from a 6x6cm B&W negative shot on a Holga 120N, inverted and toned in Photoshop
Colour negatives are much more tricky, due to the coloured base that varies from film to film. You’ll need to make a 16-bit raw conversion, with the black-point slider set to avoid clipping any data. Invert the image, then experiment with levels and curves adjustments to get the colours looking right (use adjustment layers if your software supports them).

Copied from a 35mm colour negative, inverted and colour-corrected in Photoshop
This can be a time-consuming process, but thankfully once you’ve worked it all out, you can apply the same adjustments to other frames taken with the same type of film. However good film scanners have an advantage here, as they come with software that compensates for the film base automatically.
Kaiser FilmCopy Vario Kit: Verdict
I tested the Kaiser FilmCopy Vario using both 35mm and medium-format, and working with slide, colour negative and black & white film. It works really well, and makes light work of shooting a batch of negatives or slides. Indeed the most time-consuming aspects lie with setting up and aligning the camera, then processing the image files after shooting.

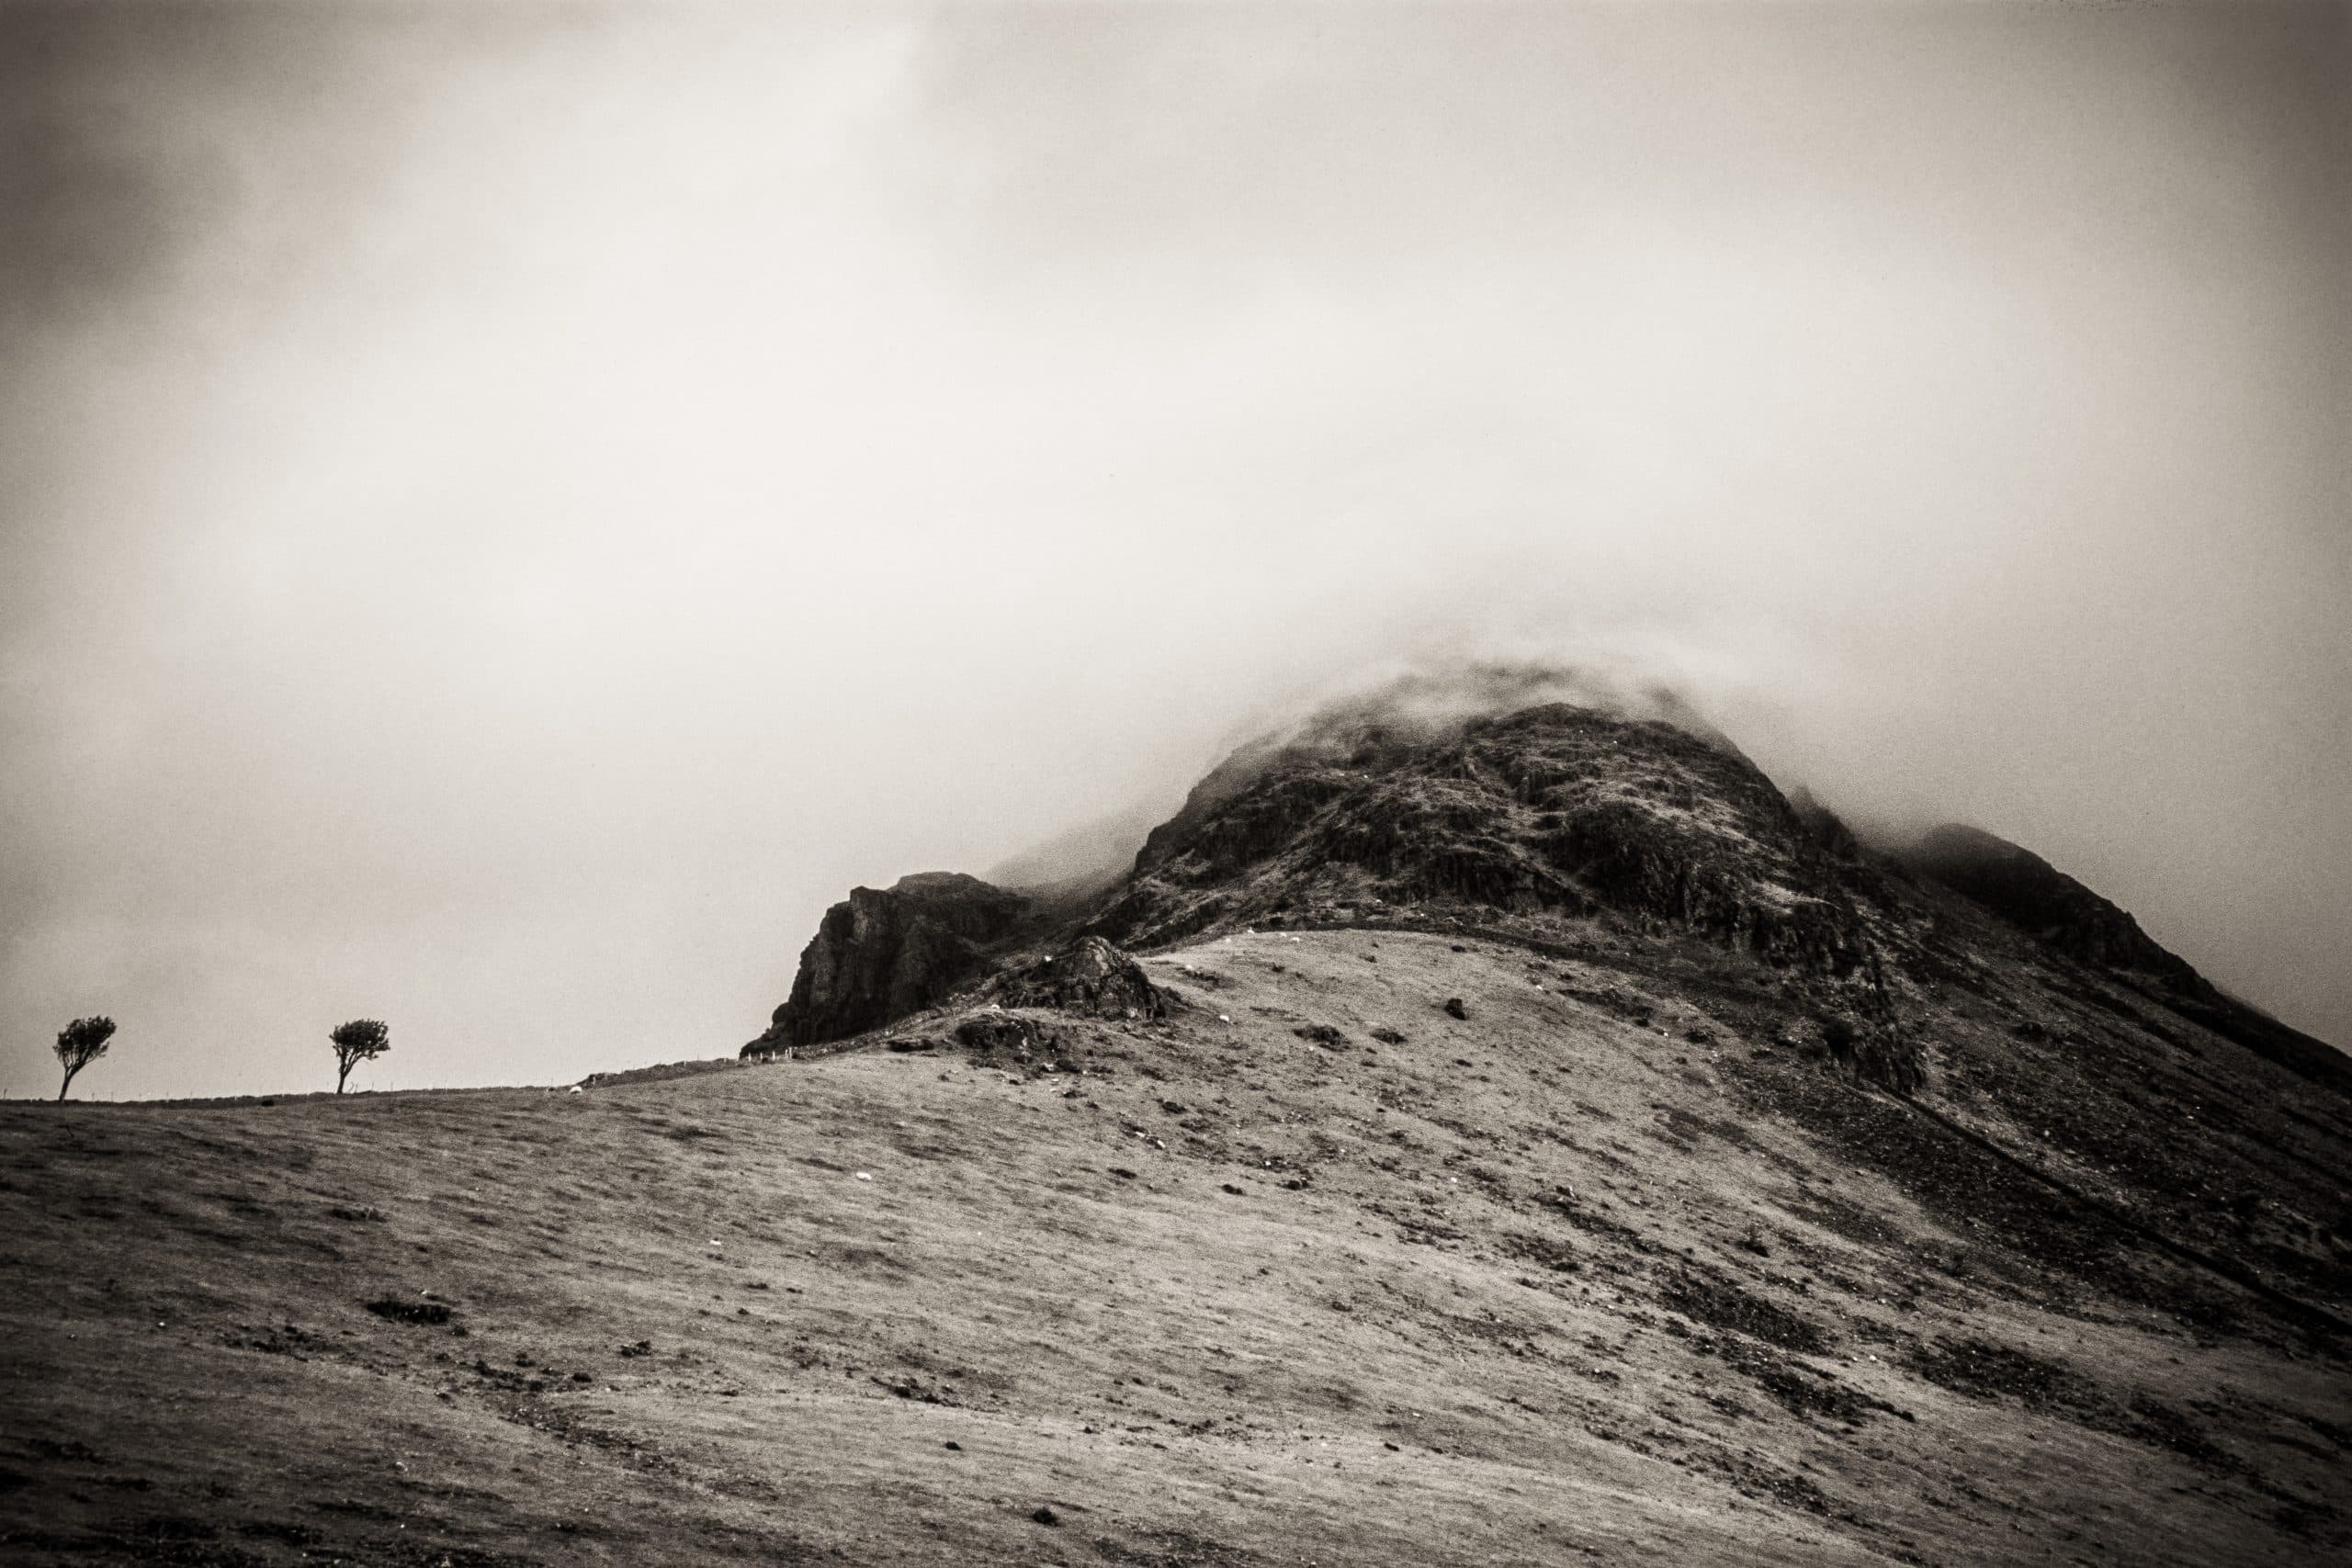
Copied from a medium-format Fujichrome Velvia slide
Probably the biggest drawback is the price, which feels high for a device that is, ultimately, a film holder, if an extremely good one. Buy the lightbox kit with a couple of medium-format masks, and you’re looking at spending £325 or more (assuming you already have all the other kit required). In comparison, the Epson Perfection V600 flatbed scanner offers 6400 dpi scanning, medium-format compatibility and digital ICE automated dust removal for £250. Alternatively if you only need to handle 35mm, then Plustek’s OpticFilm 8200i SE desktop film scanner provides 7200dpi resolution for £300.
Copied from a 35mm colour slide, converted to B+W and edited in Photoshop
However, the FilmCopy Vario has a couple of key strengths. Firstly, it produces better results from medium-format film than I’ve managed to get from flatbed scanners in the past. Secondly, it’s very much quicker to digitise multiple images than any film scanner. So if you have boxes full of slides to copy, it might just be the perfect answer.