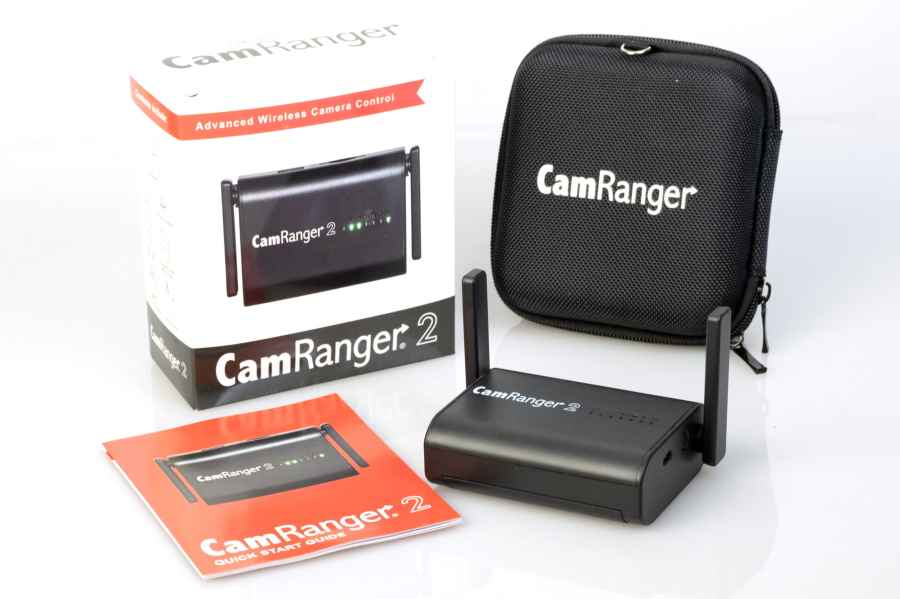
CamRanger 2: At a glance
- Supported cameras: Canon, Nikon, Sony, Fujifilm
- Supported Operating System: iOS 9+, Android 5.0 Lolipop+. Windows 8+, macOS 10.11+
- Battery: Rechargeable 3400mAh lithium ion
- Battery life: 5 hours
- SD card: SD/SDHC/SDHX compatible
- Wi-Fi: AC750 (802.11n/2.4GHz + 802.11ac/5GHz)
- Range: 500ft/150m
- Charging input: Micro USB (5V 2A)
- www.intro2020.co.uk
When it comes to controlling our cameras remotely, there are many different ways of doing so. If you’d like to fire the shutter from short distance and are working in line of sight, a cheap infrared remote control might suffice. Radio remotes tend to fetch higher prices and understandably so – they offer longer working ranges and are generally more reliable.
If your camera has built-in Wi-Fi you may wish to take advantage of your manufacturers app to preview a live view image, tweak the exposure or trigger the shutter from a mobile device. There will be some situations and shooting scenarios though where none of the above offer the range, reliability or practicality that’s needed to get the shot you’re after.
Sports, wildlife, real estate, event and aerial/pole photography are just a few examples of where an advanced wireless camera control device can make a real difference and come into their own.
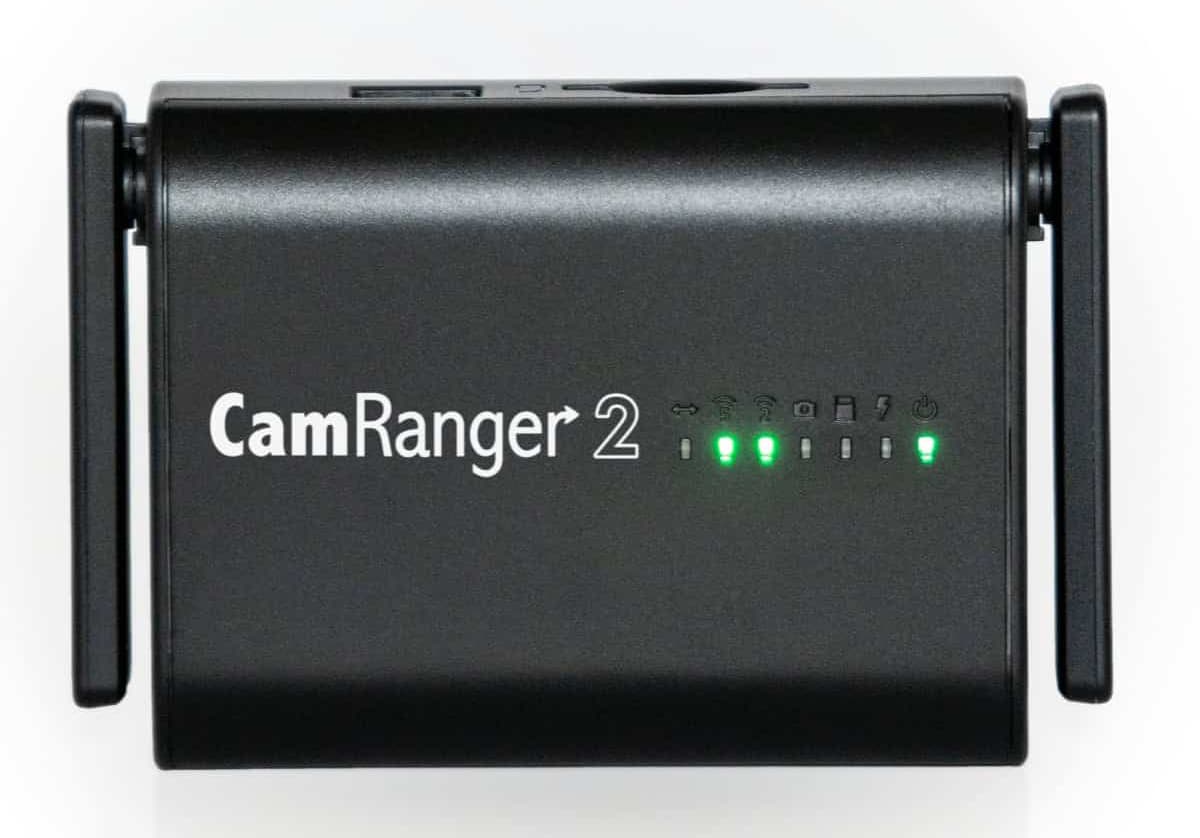
The CamRanger 2 has a series of LED’s on the top and two external, adjustable antennas at both ends. At close distances, the antenna positioning typically has very little impact on performance. However, at longer distances, the orientation can make a difference. In general, performance may be better if the antennas are perpendicular to the user’s wireless device
One such product that has proven popular in the past is the CamRanger and the CamRanger 2 we are looking at advances on the original in a number of ways. Not only does it deliver wireless tethering and camera control five times faster, its wireless range is now three times longer and can maintain a connection up to 500ft/150m between the camera and the smartphone, tablet or computer that’s used to control it.
Better still, its compatibility extends beyond Canon and Nikon cameras and can now be used with Fujifilm and Sony too. All this sounds promising, but what else is there to it and how does it work exactly?
CamRanger 2: Features
In a nutshell, the CamRanger2 is a black box that connects to your camera via a USB cable and creates its own Dual Band 2.4GHz/802.11n and 5GHz/802.11ac Wi-Fi networks ready for pairing with an iPad, iPhone, Android smartphone/tablet, Mac or Windows computer.
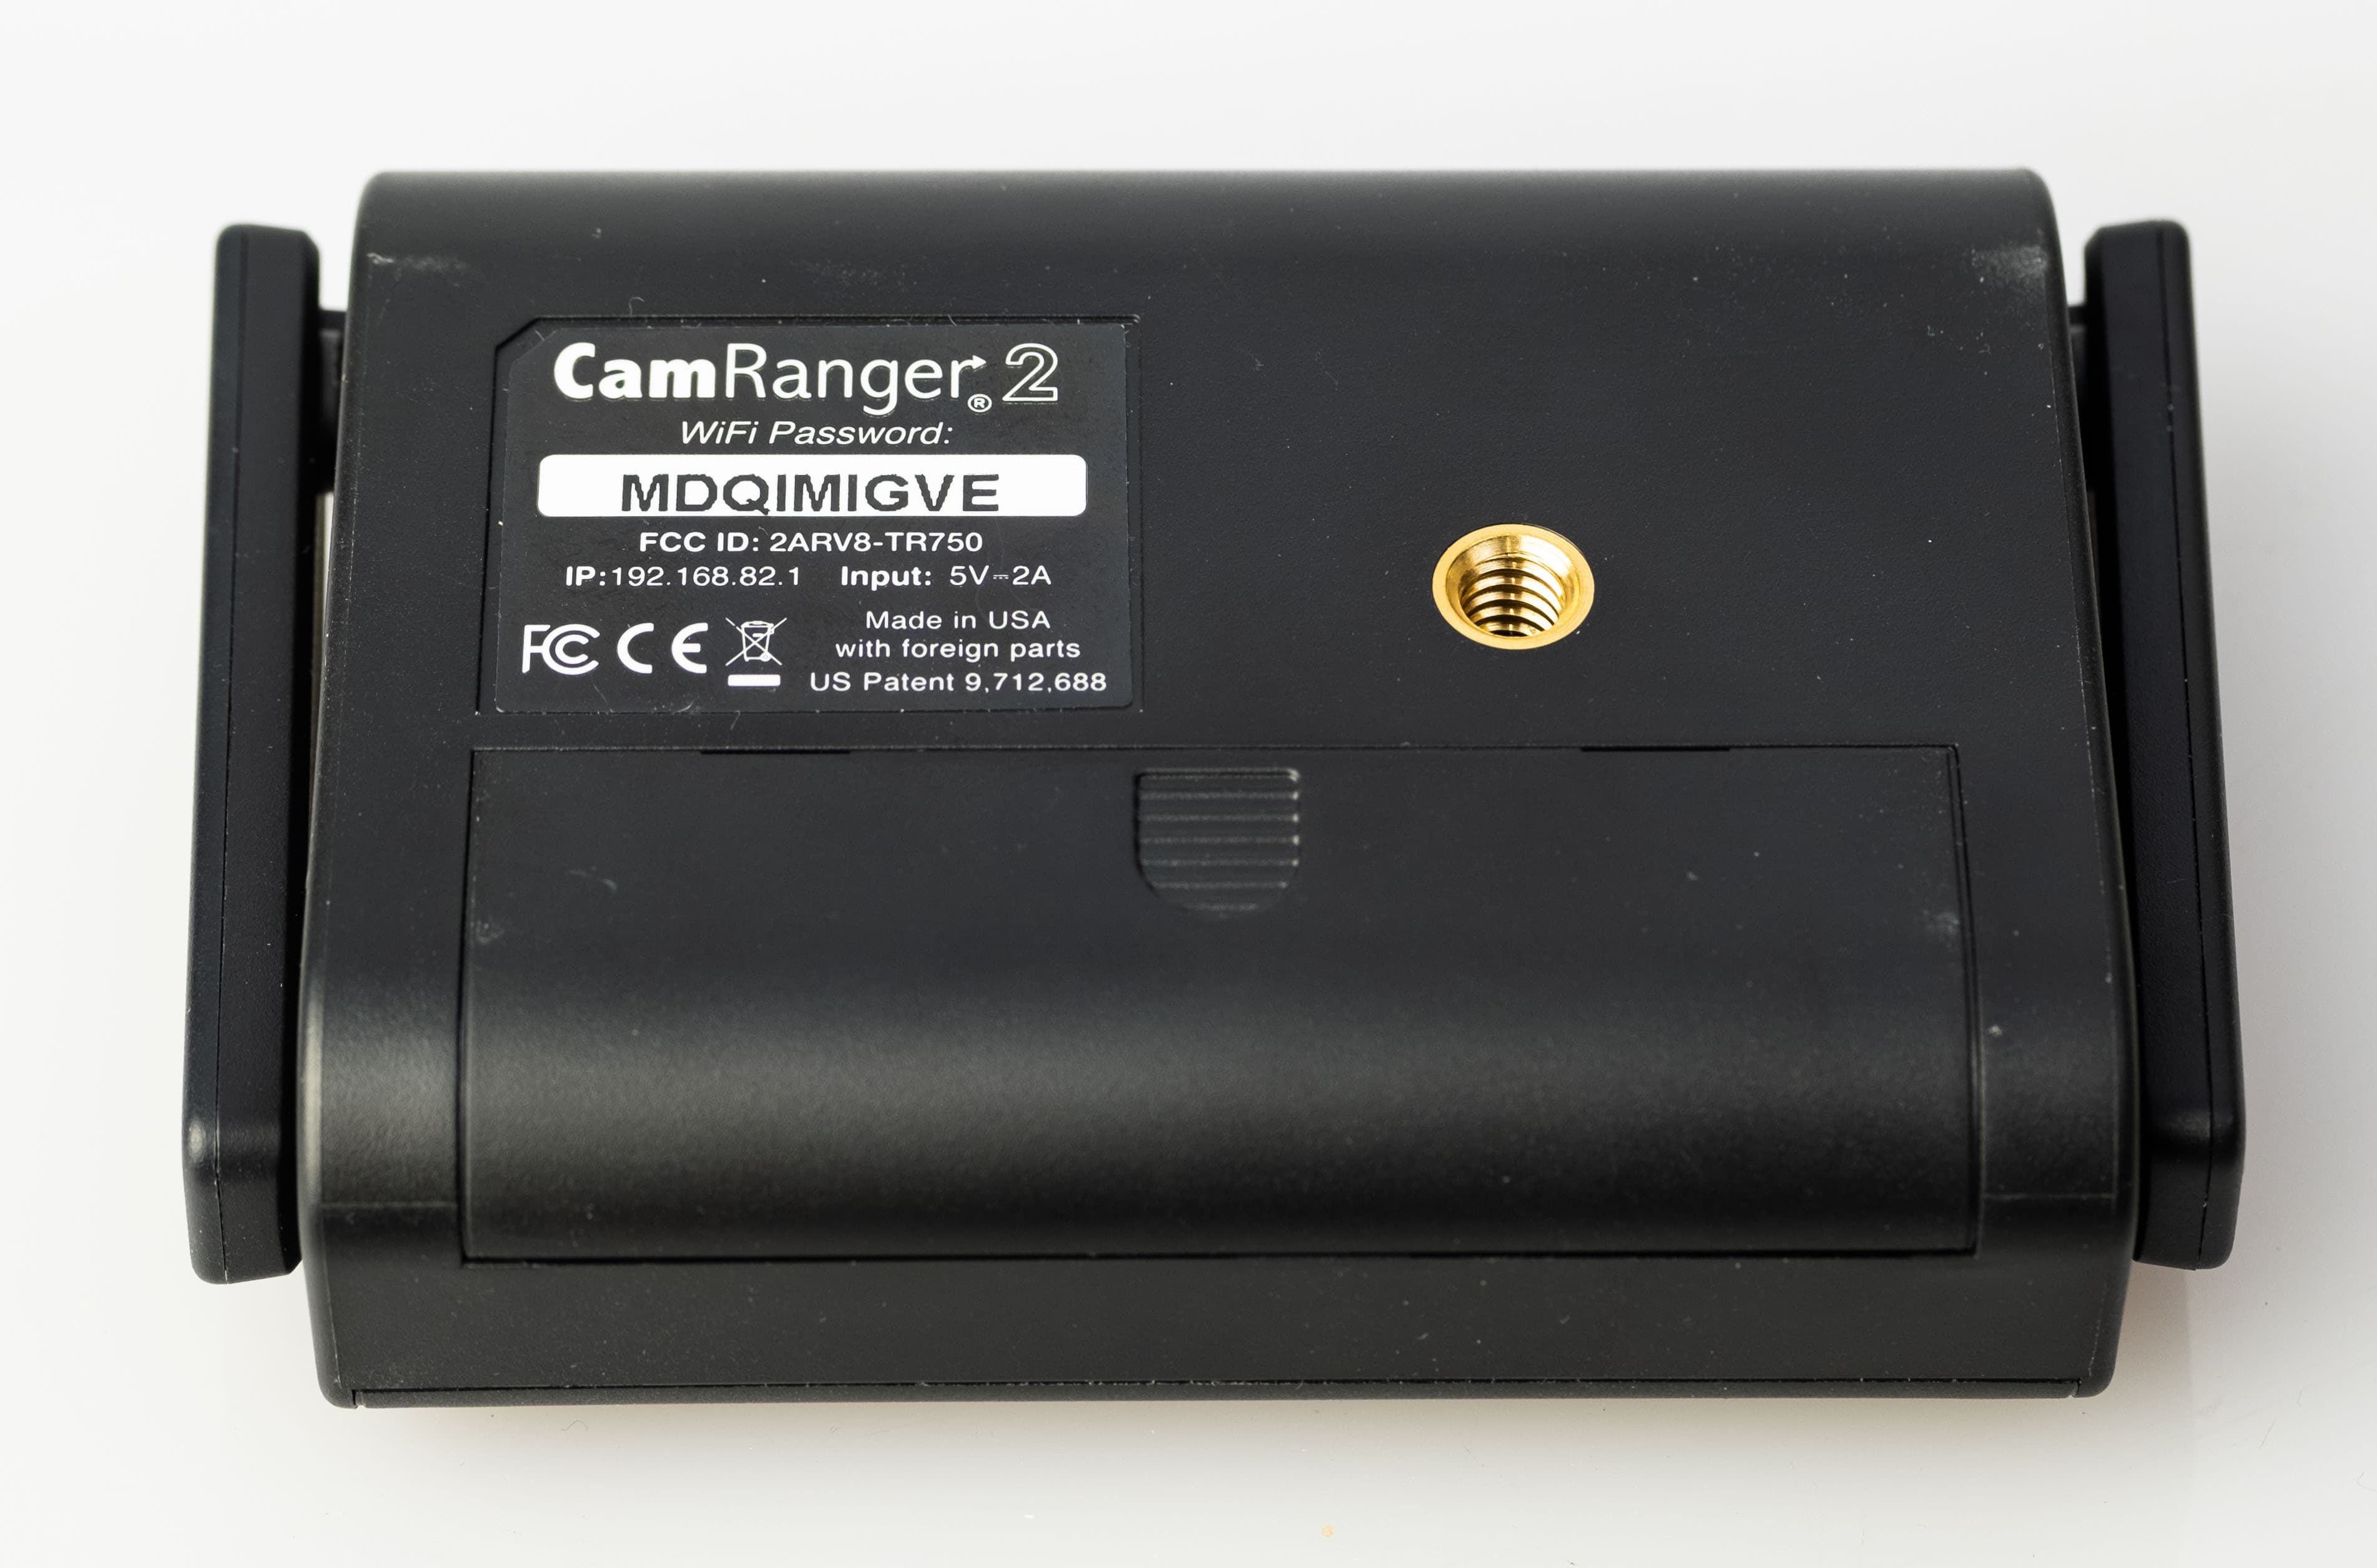
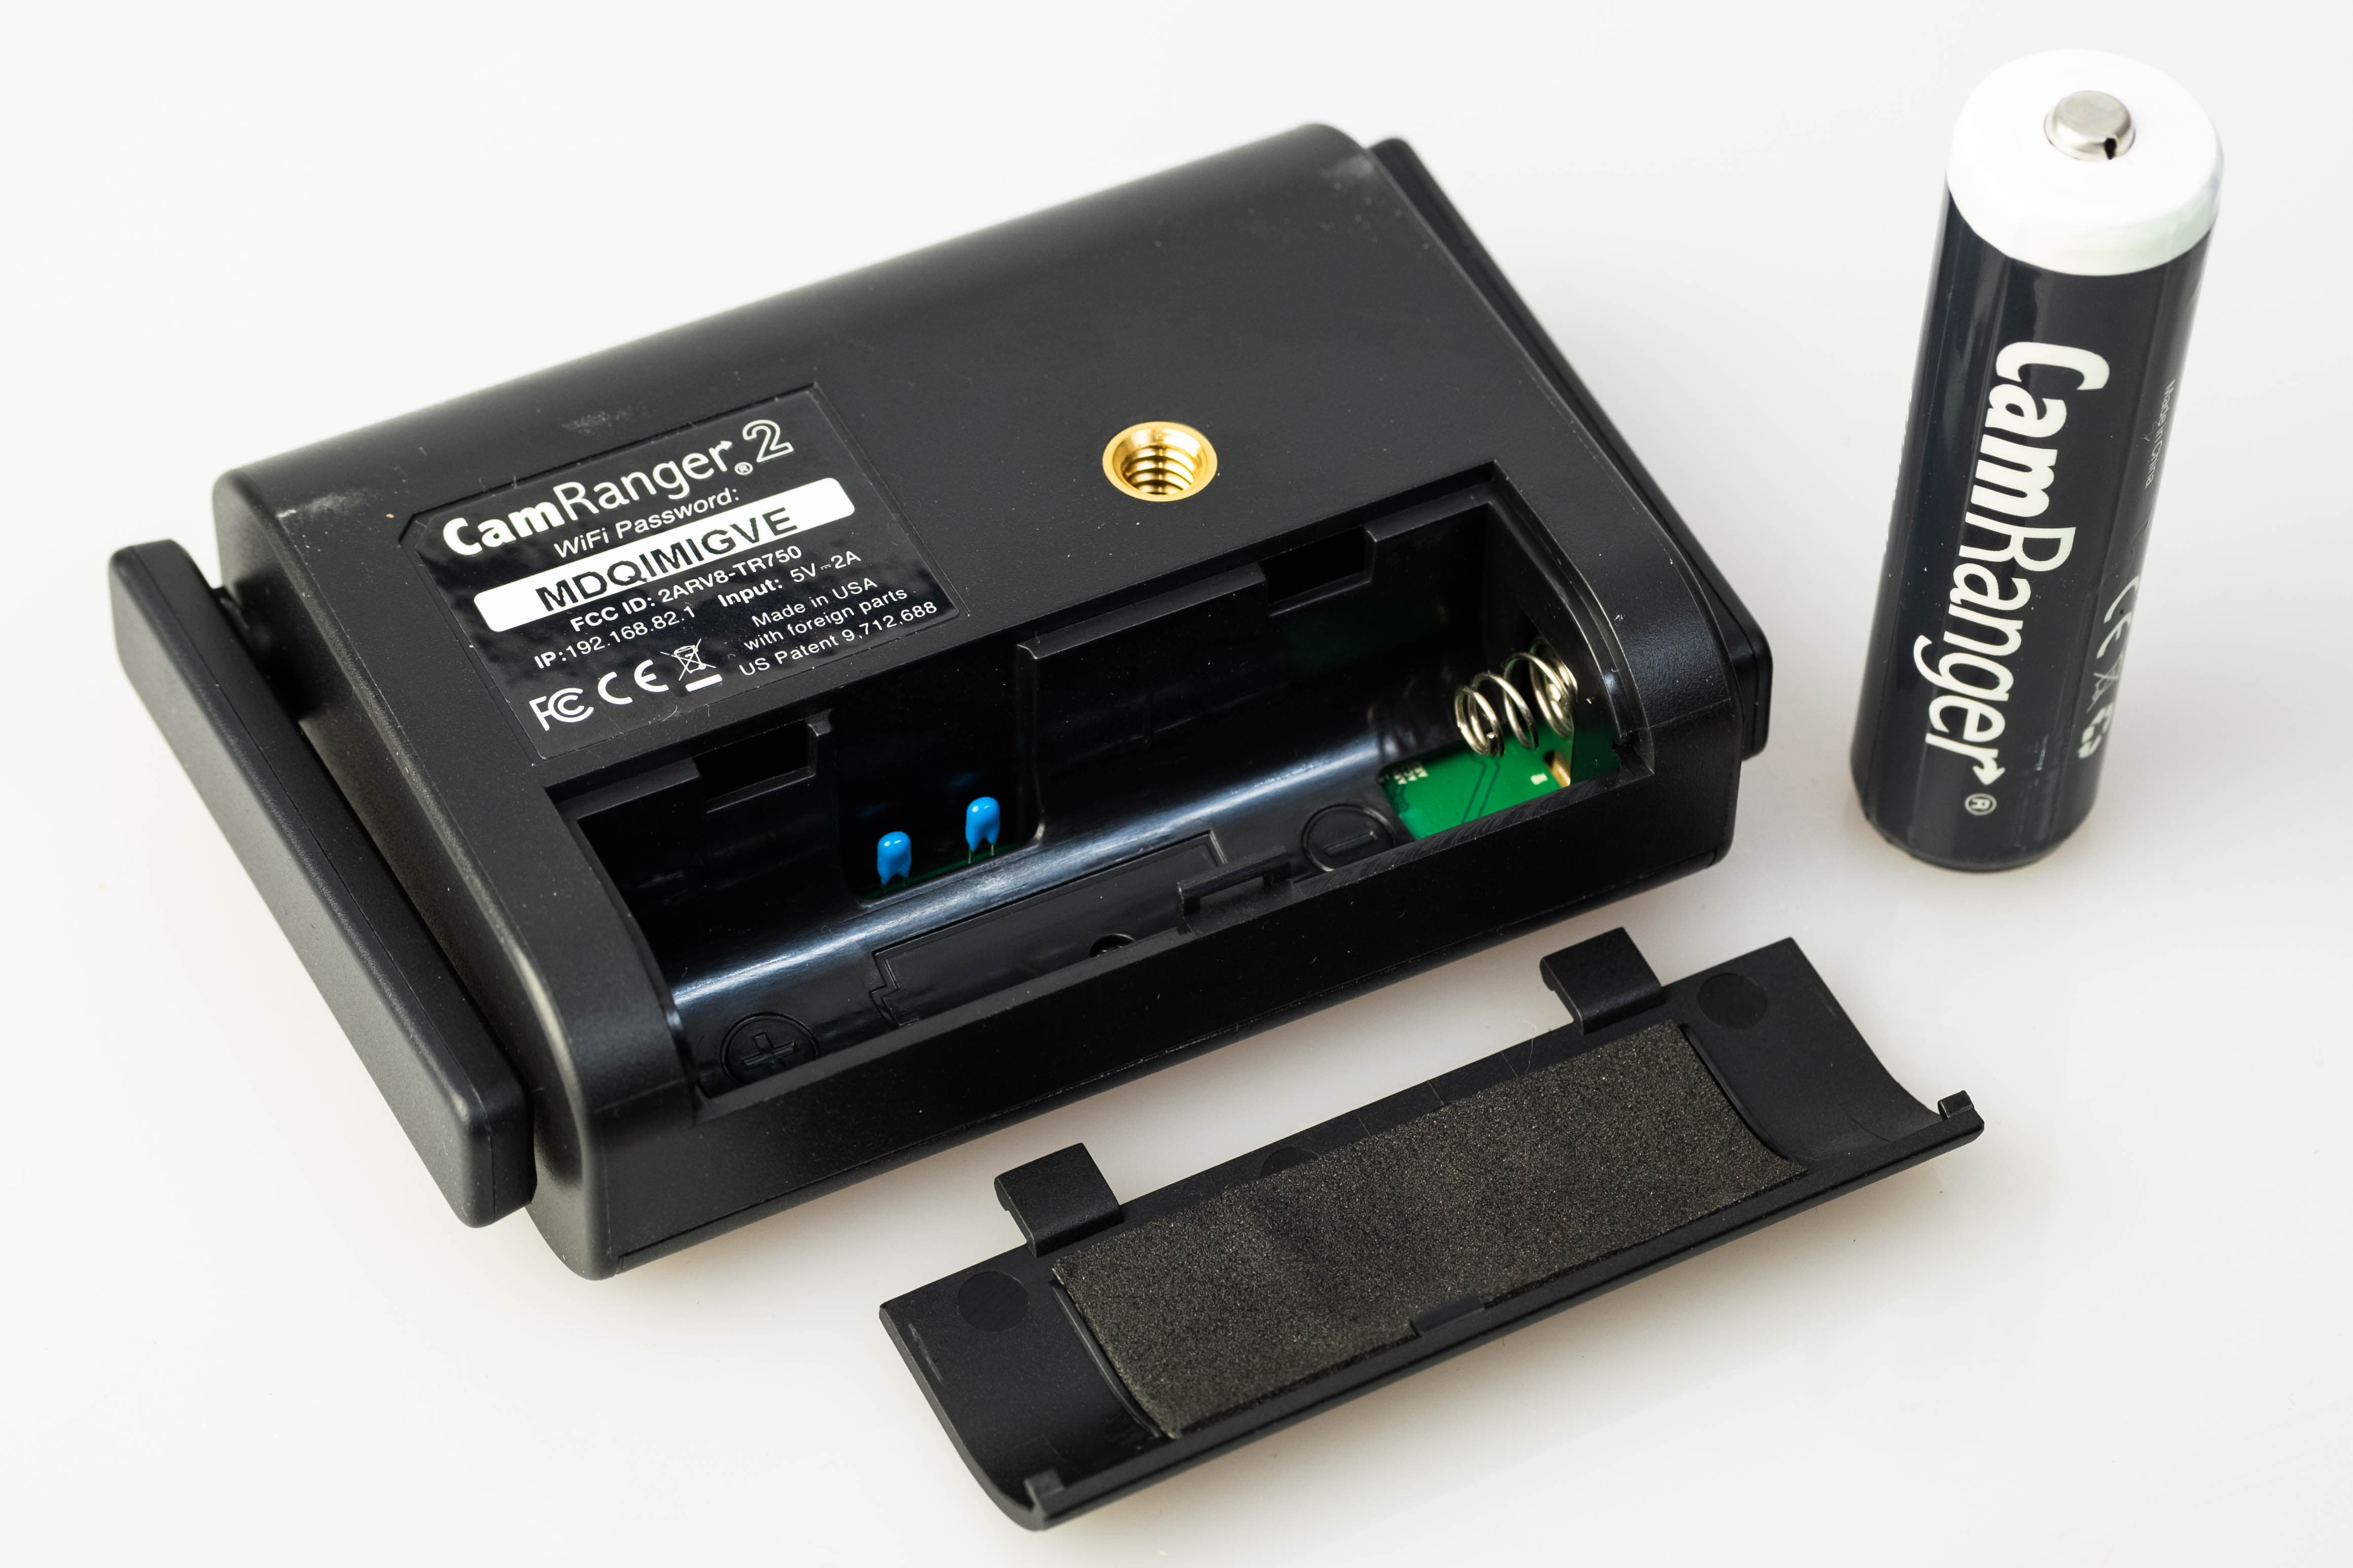
The underside of the CamRanger 2. Note the Wi-Fi password for the device and the standard 1/4in-20 thread
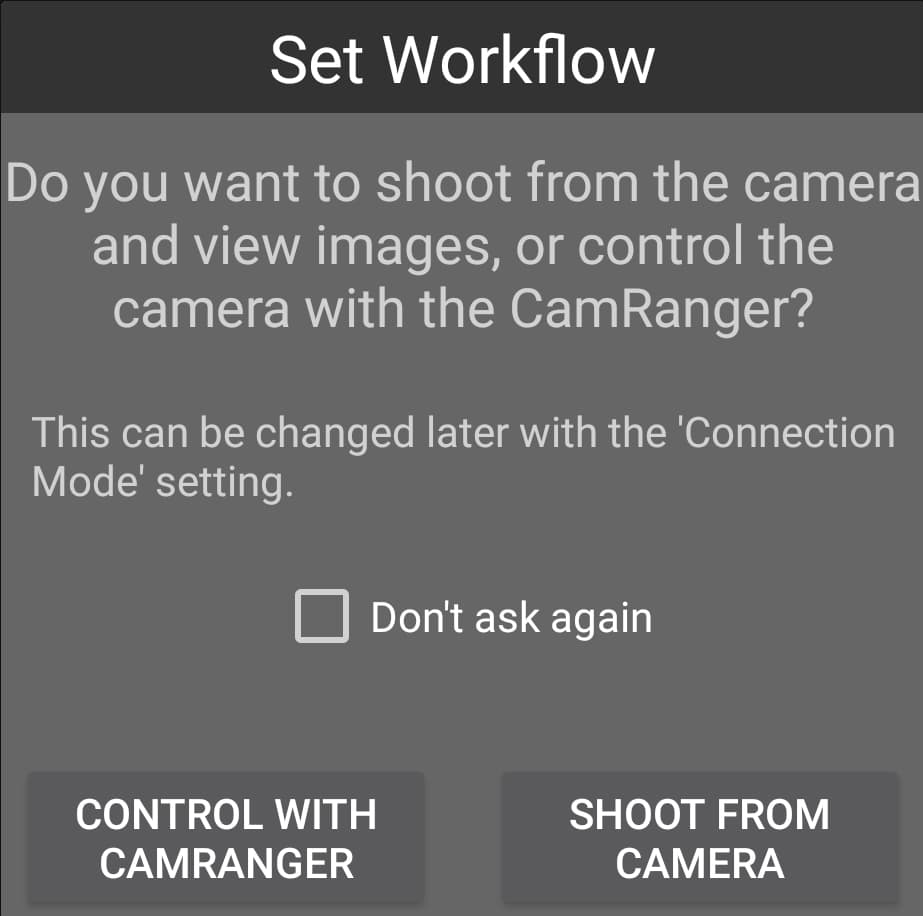
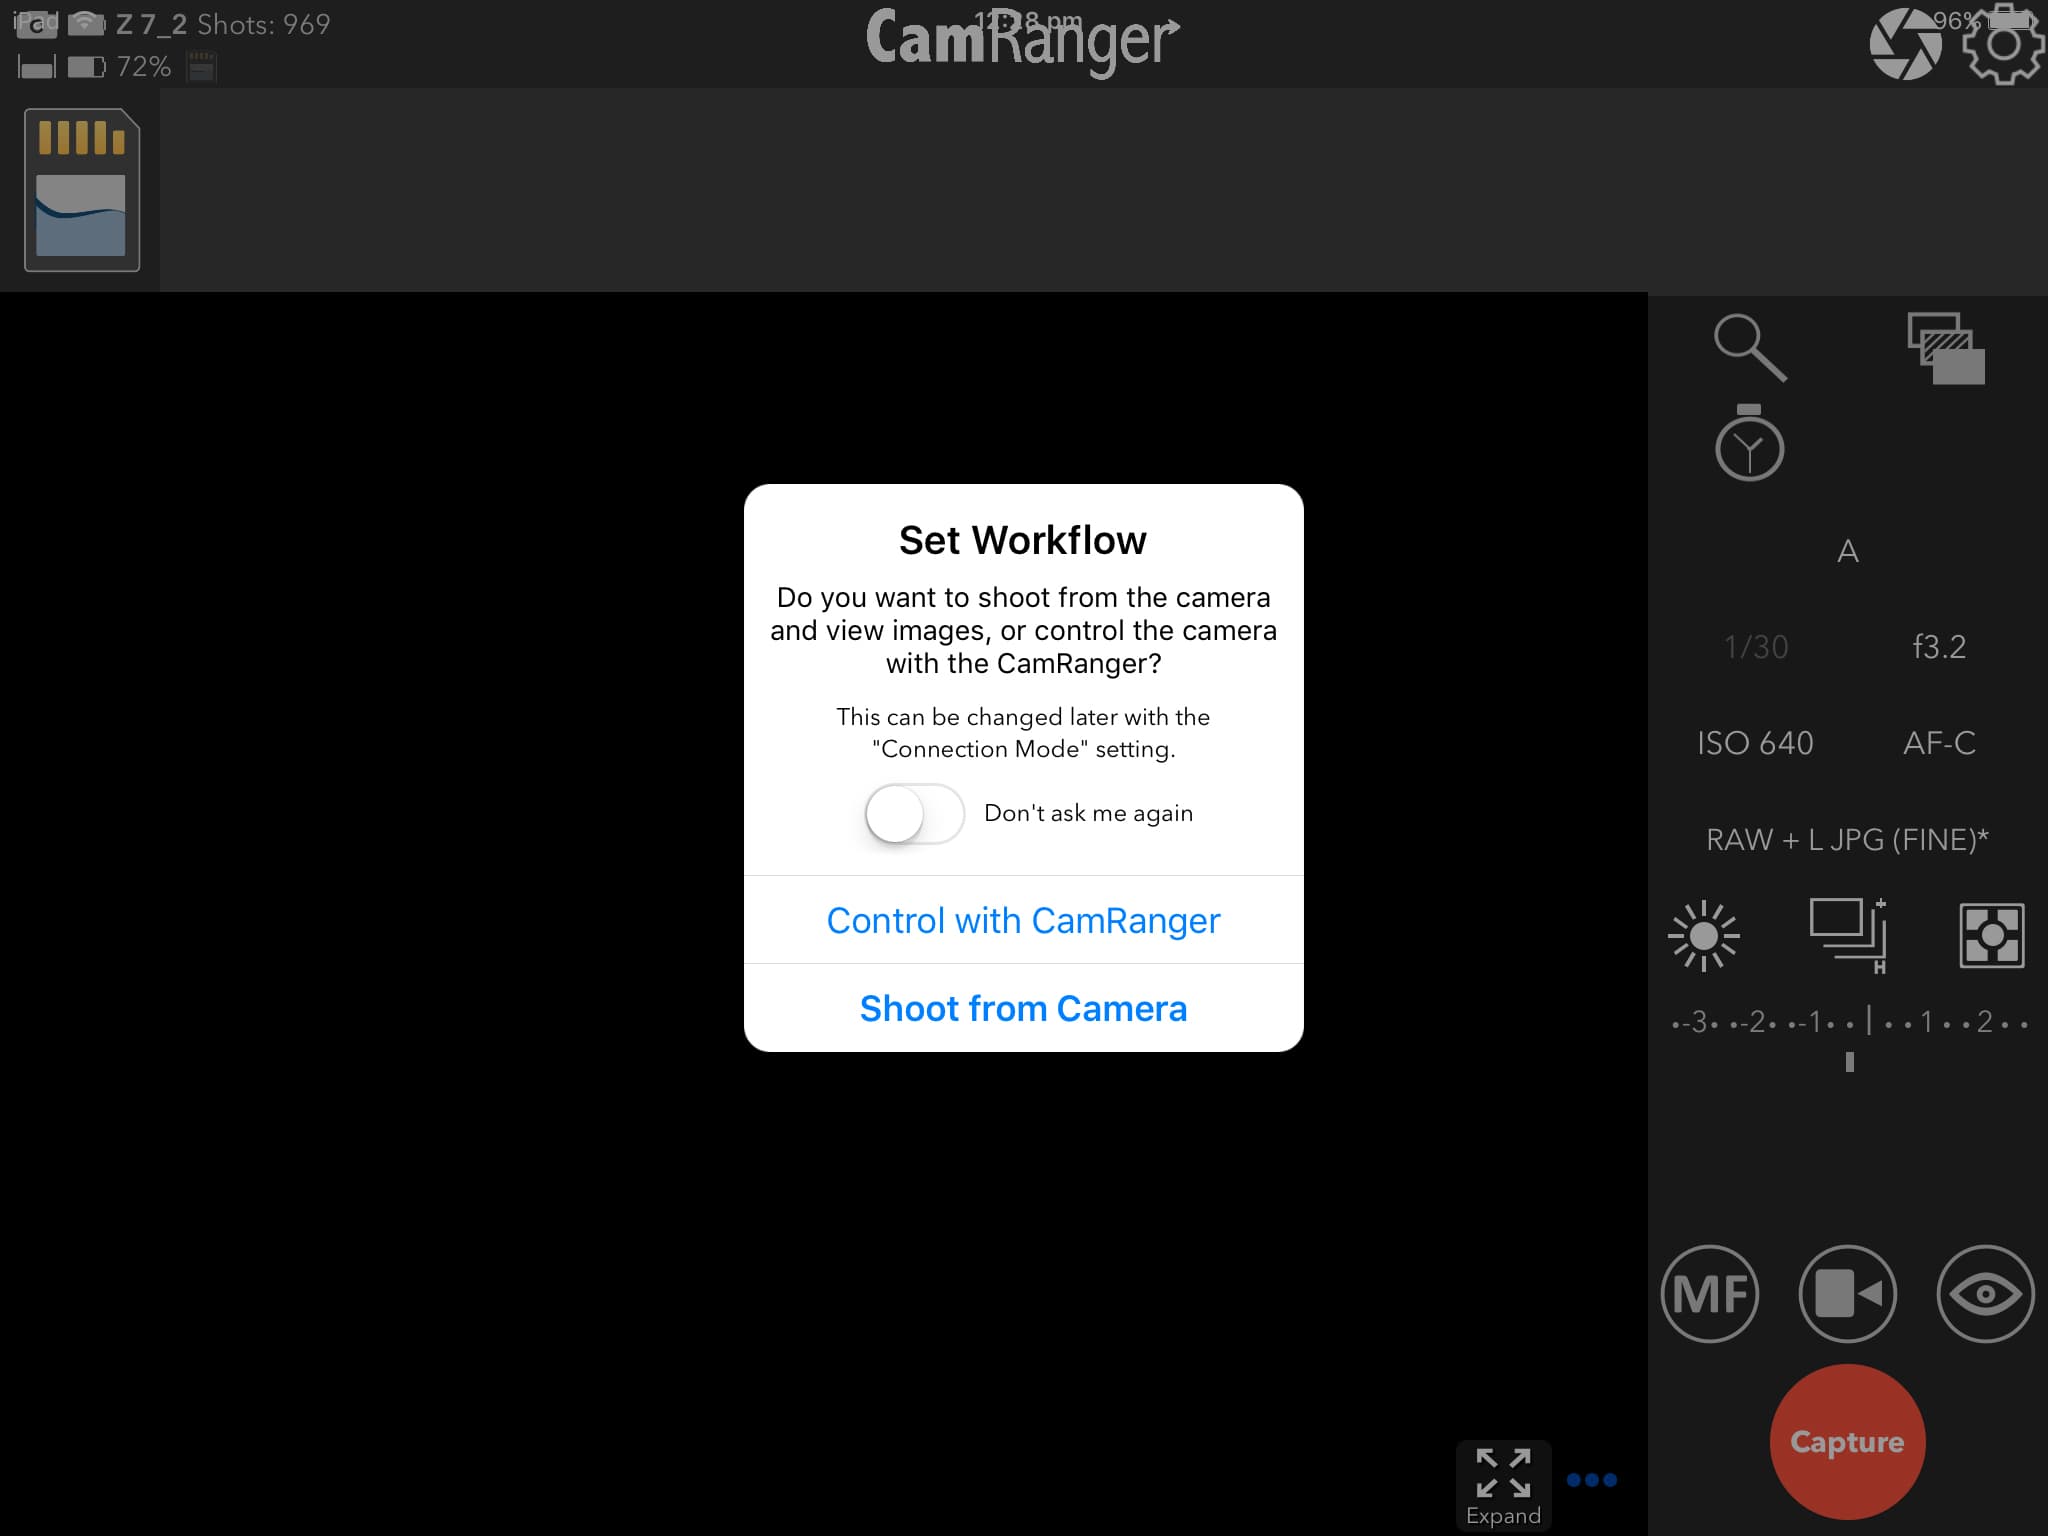
Once the CamRanger2 app has been installed and a connection has been established, you’re presented with two choices; view and adjust camera settings remotely or shoot from the camera and tether shots wirelessly to your device. The tethering option automatically sends images straight to the app after a picture is taken and lets you, or a client who might be overseeing your work, inspect full resolution images at up to 200%, apply star ratings, share images with contacts and other apps like Dropbox, or link to an FTP.
In wireless tethering mode images are always saved to the card loaded in the camera, however there’s the option to save shots locally to your device, plus there’s an SD card slot built-into the Camranger 2 that lets you backup images. The contents of the card in the camera can be viewed in thumbnail form too and lets you select specific shots or groups of images to share or transfer without difficulty.
You’re presented with these two choices when the app is loaded
Switching between wireless tethering mode and shooting mode couldn’t be easier. Tap the eye icon in the app and the live view preview instantly loads. You can add various overlays such as an electronic level or gridlines to assist composition at the same time as inspecting an RGB histogram.
Up at the top left of the interface the battery power of the CamRanger 2 is displayed as a percentage, with all the general settings for the app being located from the cog icon at the top right. The number of remaining shots on the card are clearly displayed and your camera settings can be saved as a preset from the aperture icon should you wish to reload any quickly in the future.

The CamRanger 2 app interface on an iPad in Control with CamRanger mode. There’s a large live view preview with camera control settings on the right. Other general settings are accessed from the cog icon up at the top right. Tapping the SD card icon up at the top left loads thumbnails of the cards contents
If you choose to run the app on a larger device such as a tablet, the key camera control icons are arranged to the right of the preview window. On a smaller device like a smartphone they’re positioned towards the bottom. As well as being able to take remote control of shutter speed, aperture, ISO, metering mode, drive/shooting mode, white balance, image format, focus mode, auto exposure mode, exposure compensation and AF/MF, the app supports touch focus, advanced HDR and exposure bracketing.
Photographers who’d like to make incremental adjustments to focus or create a focus stacked image to enhance depth of field have options to do so and the timer icon loads an intervalometer ready to shoot time-lapse sequences. One of the good things about the latter is that CamRanger 2 and camera continues to capture a sequence should the connection to a tablet, phone or computer be interrupted. Failure to focus is one of the only things that could cause a time-lapse sequence to stop so auto-focus should be turned off, either in the app or via the camera/lens.
CamRanger 2: Video recording
The CamRanger2’s use isn’t limited to shooting stills. It can be used to wirelessly stream a video feed to iOS and Android devices, or a computer, and the video icon between the live view and AF/MF icons can be tapped to enter the camera’s video mode at the drop of a hat. This makes for a good way of eliminating camera shake by not having to physically touch the camera to start/stop recordings.
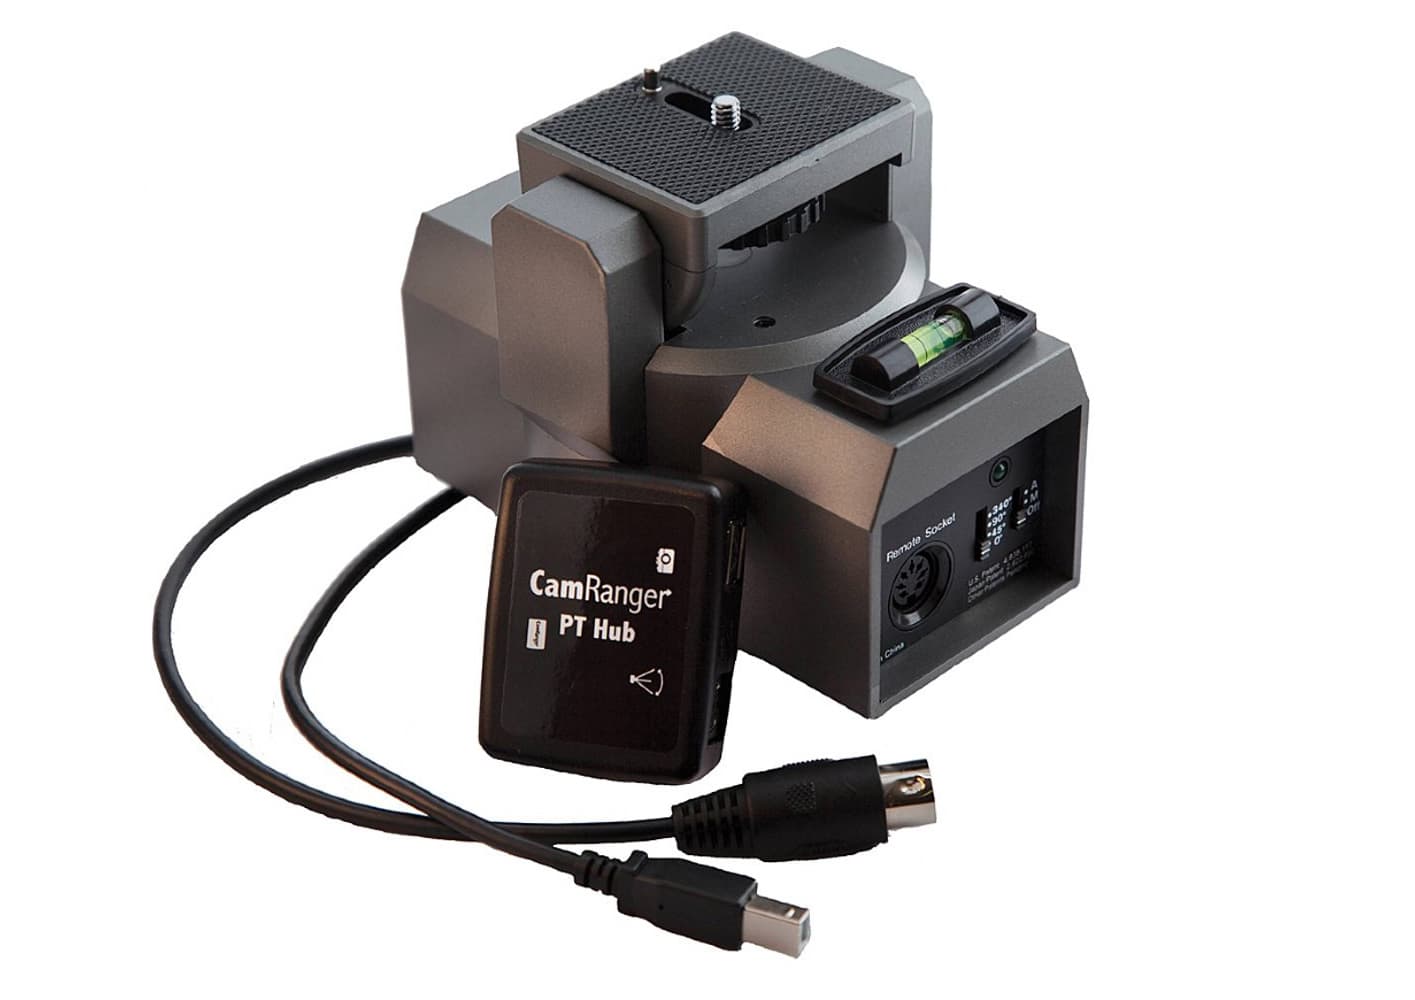
The CamRanger MP-360 Motorised Tripod Head and PT Hub (sold separately) allows you to pan or tilt your camera from the CamRanger 2 app. The MP-360 supports a maximum load of 2700g
There’s the option of remotely adjusting the focus as well as exposure mid-recording too – useful if a subject moves or the lighting conditions change. Videographers will also be appreciative of the histogram and hightlight/shadow clipping warning overlays as well as being able to view audio levels and the duration of recordings.
Advanced users who’d like to add motion to timelapses or videos by remotely panning and tilting the camera can do so by pairing the CamRanger 2 with the MP-360 motorised tripod head and PT Hub that’s sold separately for £249.
CamRanger 2: Kit contents
Inside the box you’ll find the CamRanger 2 is well protected inside its own clamshell carrying case that has a carabiner to easily clip it onto your bag. Users also get a single rechargeable 3400mAh lithium ion battery, hot shoe adapter and three different USB cables to connect the camera to the CamRanger 2. If these cables aren’t compatible or they’re not long enough, you can use the USB cable supplied with your camera.
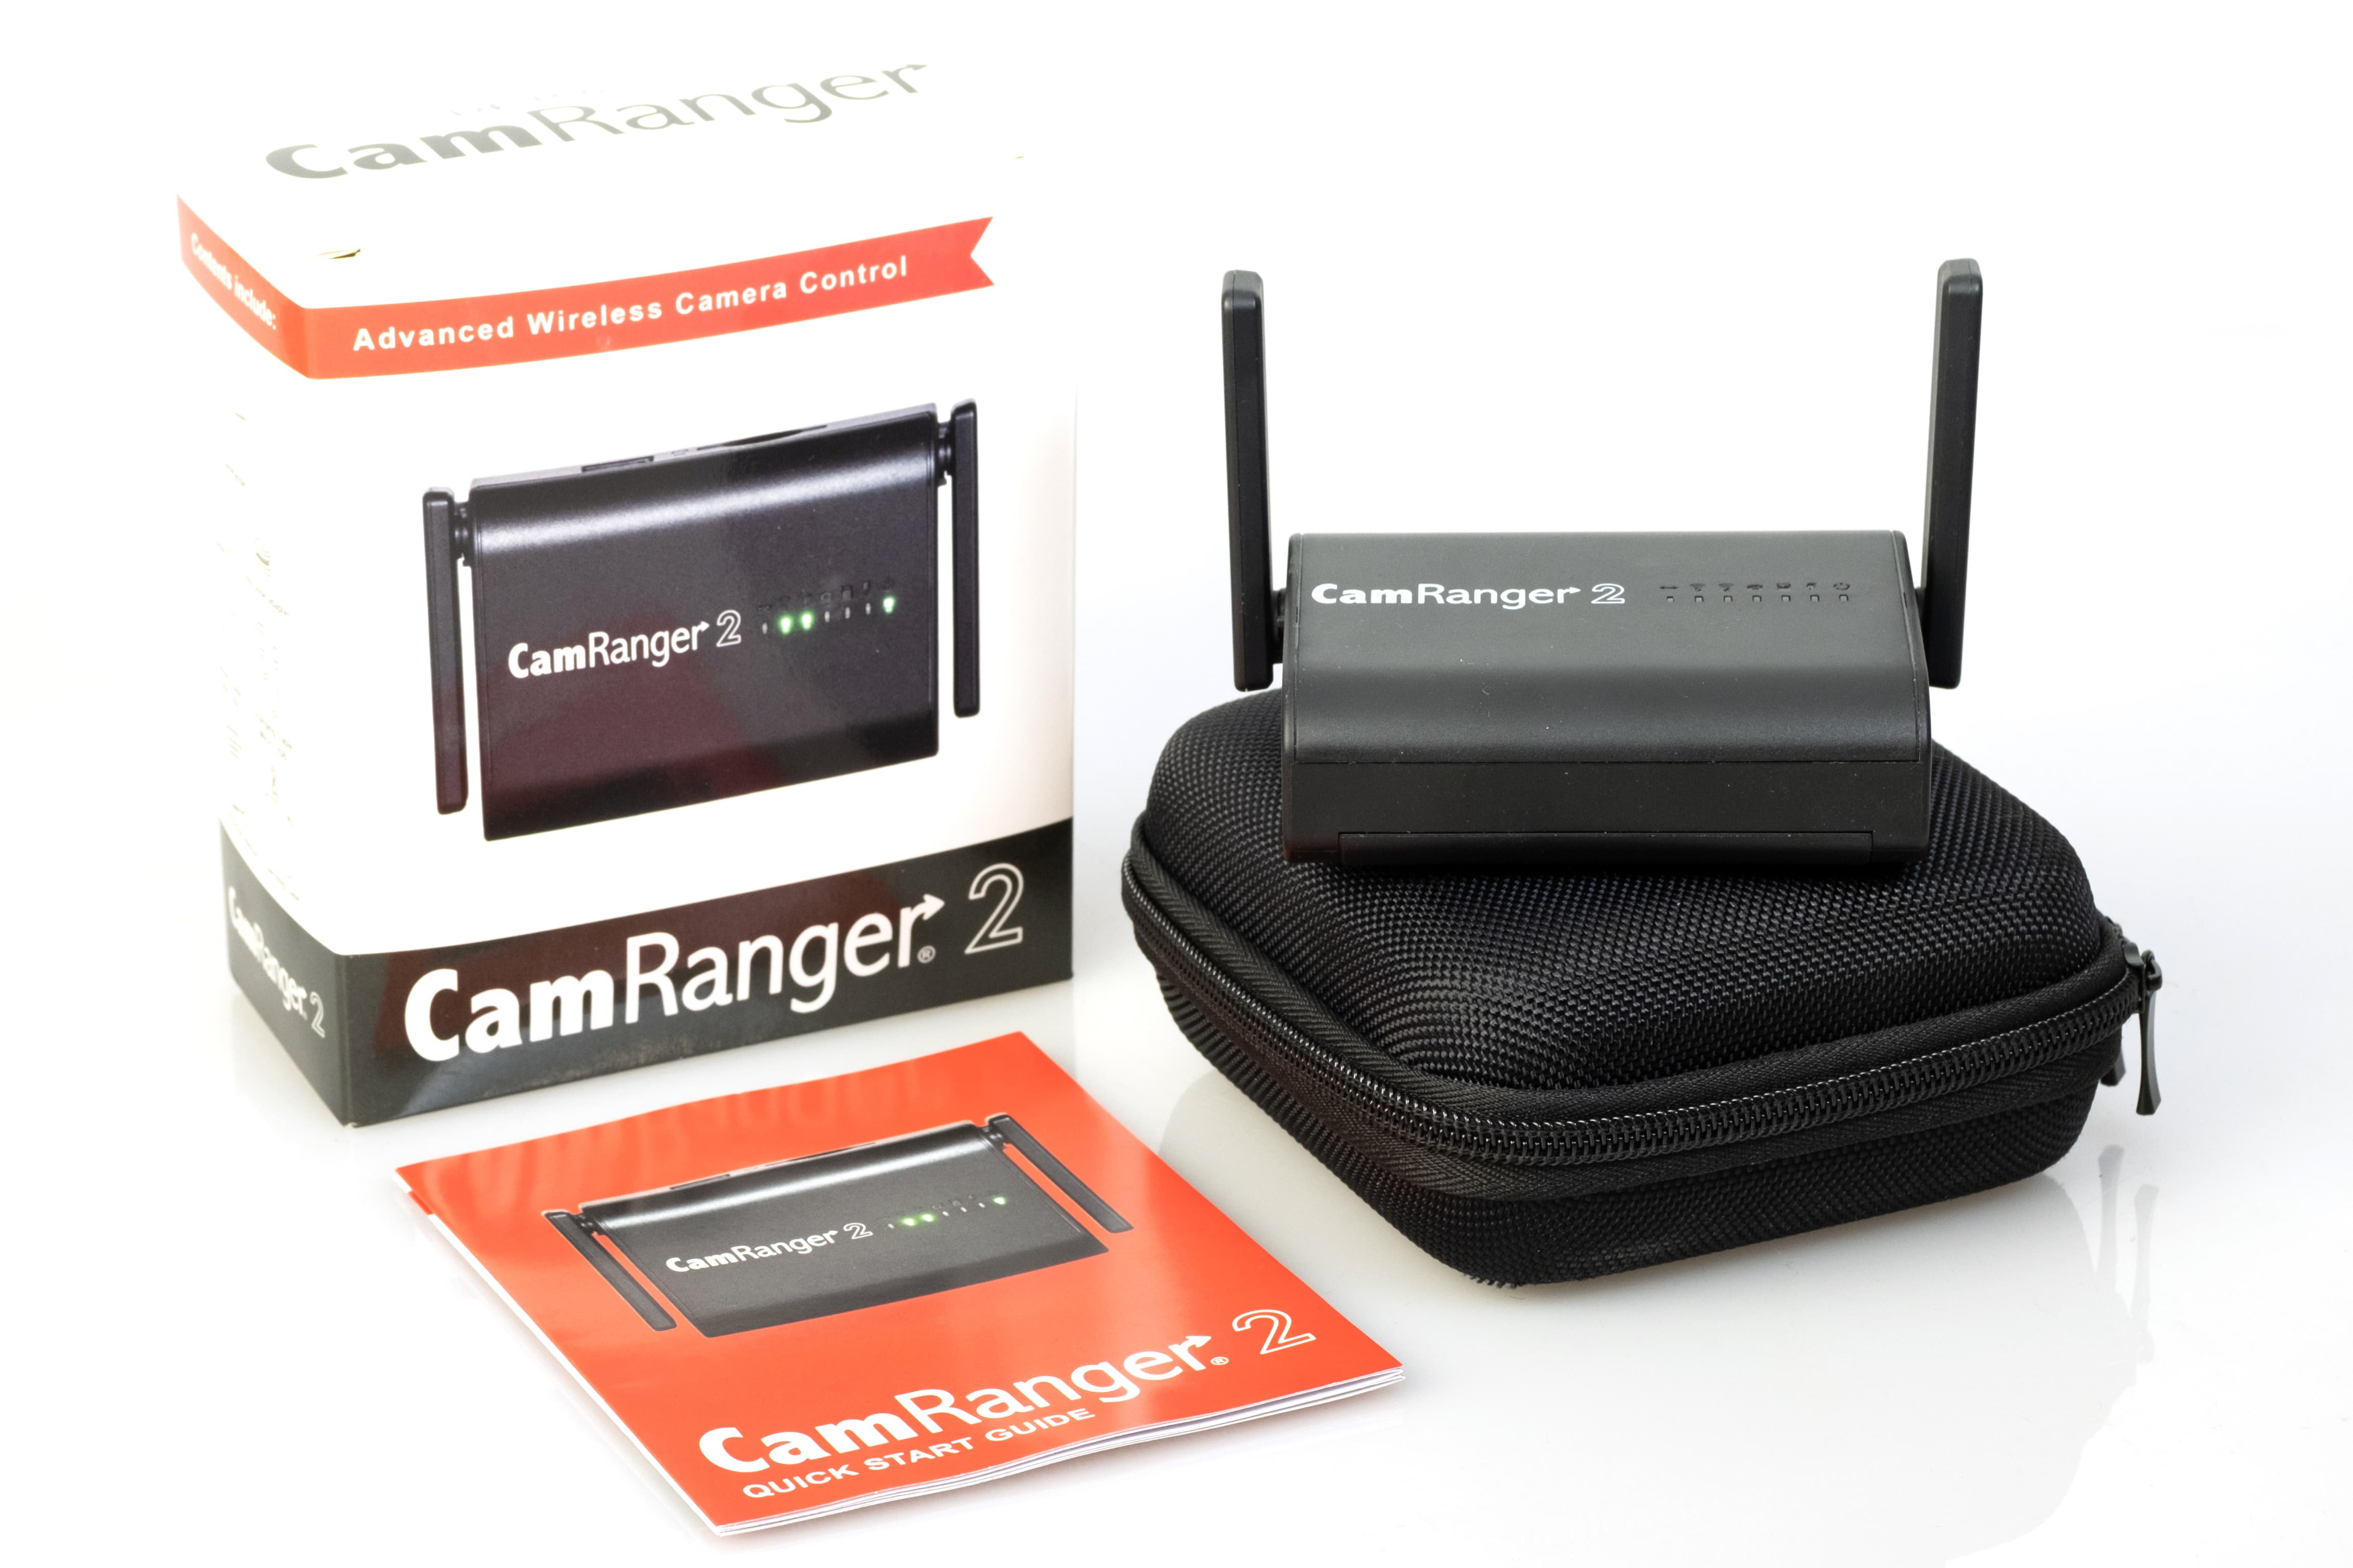
In the box you get an excellent quick start guide and a clamshell case to protect the CamRanger 2 from damage
The CamRanger2 is charged via a Micro USB rather than USB-C port and a charging cable is supplied. There’s also a well-illustrated quick start guide that clearly runs though the process of how to setup the device and offers some quick tips and clear annotations of the app interface.
CamRanger 2: Guide to setting up
Step 1 – Charge the device
You’ll find everything you need to get started inside the clamshell case. Insert the battery into the CamRanger 2 and then charge the device using the supplied Micro USB cable. This can take 3-4 hours. The charging light will illuminate orange when charging and turn off when charging is complete. Also check your camera is fully charged.
The CamRanger 2 comes with a single rechargeable 3400mAh lithium ion battery
Step 2 – Insert SD card
An SD card is required to use the CamRanger 2 with Sony and Fujifilm cameras, however for Canon and Nikon it’s only required for select functionality. There’s a small icon to show you which way to load an SD card and you’ll want to push it in firmly until you hear a click. To remove the SD card push it in before pulling it out.
Step 3 – Download the app
Download the app onto the device you plan to use to control/tether the camera and CamRanger 2 with. The app is available from the iTunes App store, Google Play store, or www.CamRanger.com/downloads. Minimum requirements are iOS 9+, Android 5.0 Lolipop+. Windows 8+, macOS 10.11+
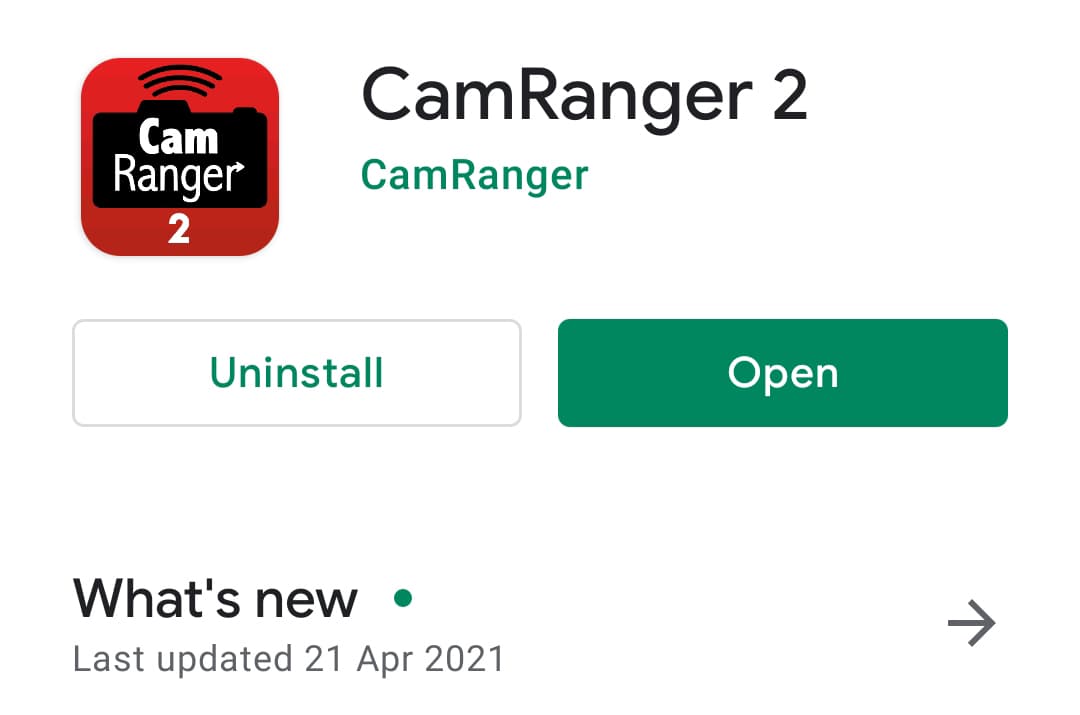
The CamRanger 2 app is available from the iTunes App store and Google Play store
Step 4 – Make the wireless connection
Turn the CamRanger2 on. When the Wi-Fi LED’s illuminate, go to the Wi-Fi settings on your tablet, smartphone or computer and select the CamRanger2 Wi-Fi. The 5GHz Wi-Fi network is typically faster than the 2.4GHz network and the preferred option. The Wi-Fi password is the nine letter code found on the underside of the CamRanger 2.
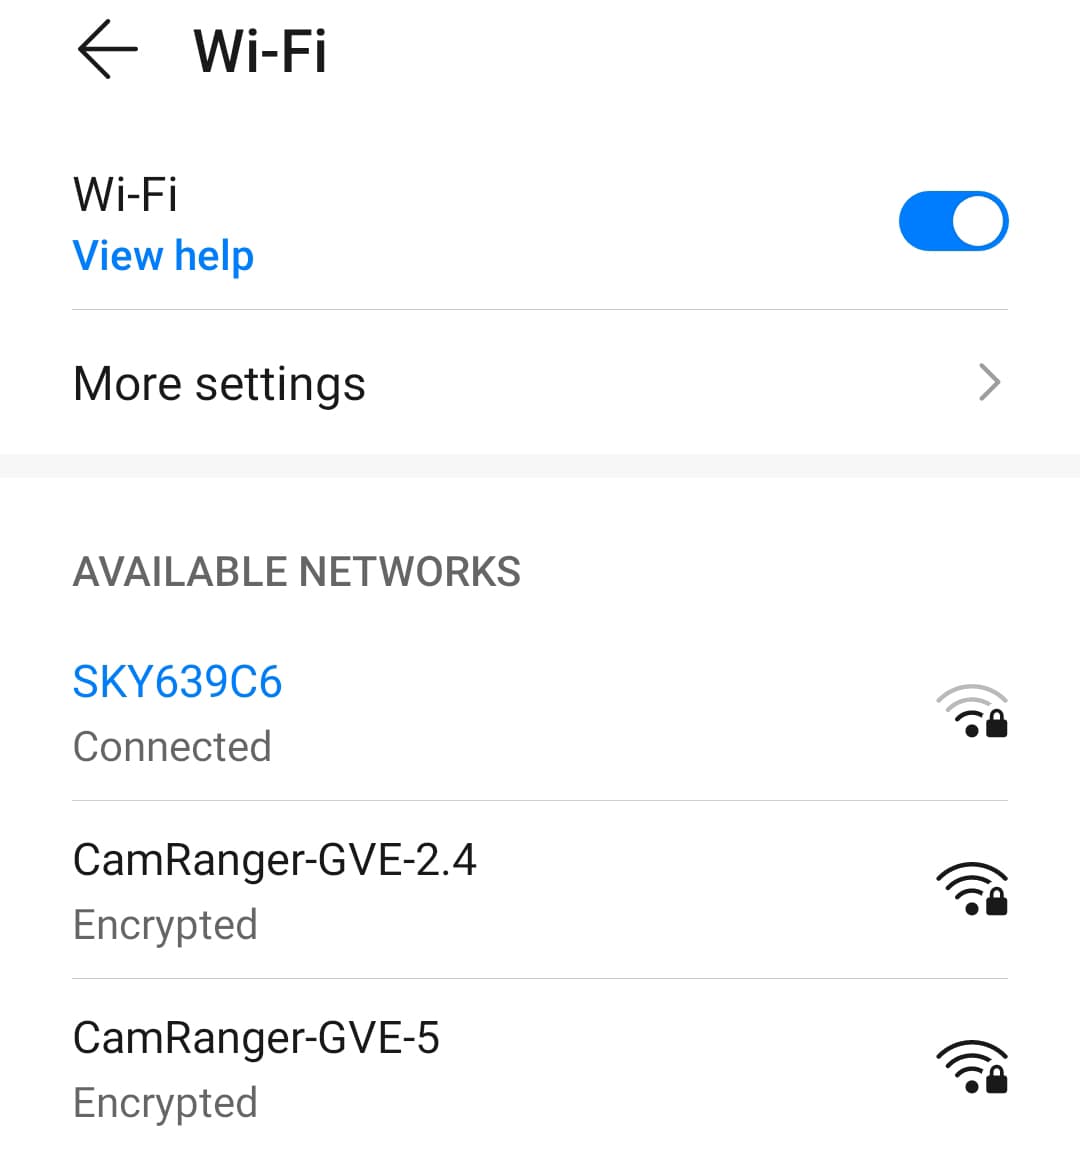
Once turned on, the 2.4GHz and 5GHz networks will show from the available networks list on the device you wish to pair the CamRanger 2 with
Step 5 – Connect to the camera
Turn your camera on and connect the CamRanger 2 to it using the supplied USB cable. You could alternatively use the USB cable that came with your camera. The underside of the CamRanger 2 features a standard 1/4in-20 socket and there’s a hot shoe mount in the box if you’d like to secure it to the top of your camera.
Step 6 – Launch the app
With the CamRanger 2 all setup and the connection established, you’re ready to launch the app. Next you’ll be asked if you’d like to shoot from the camera and view images (best known as tethering mode), or control the camera remotely using the CamRanger 2. You’ll find the app is intuitively laid out and easy to navigate.
You get to set your workflow when you open the app, but you can also change between Control with CamRanger and Shoot from Camera via the ‘Connection Mode’ setting
CamRanger 2: What’s it like to use?
To test the CamRanger 2 I mounted it to the top of the Nikon Z7 II and established a secure connection with my iPad in just a couple of minutes. Some Wi-Fi apps can take quite a bit of time to get used to. Despite there being lots of options in the CamRanger2 app, the clear and logical layout of both the interface and settings menu doesn’t make it too daunting for a first-time user.
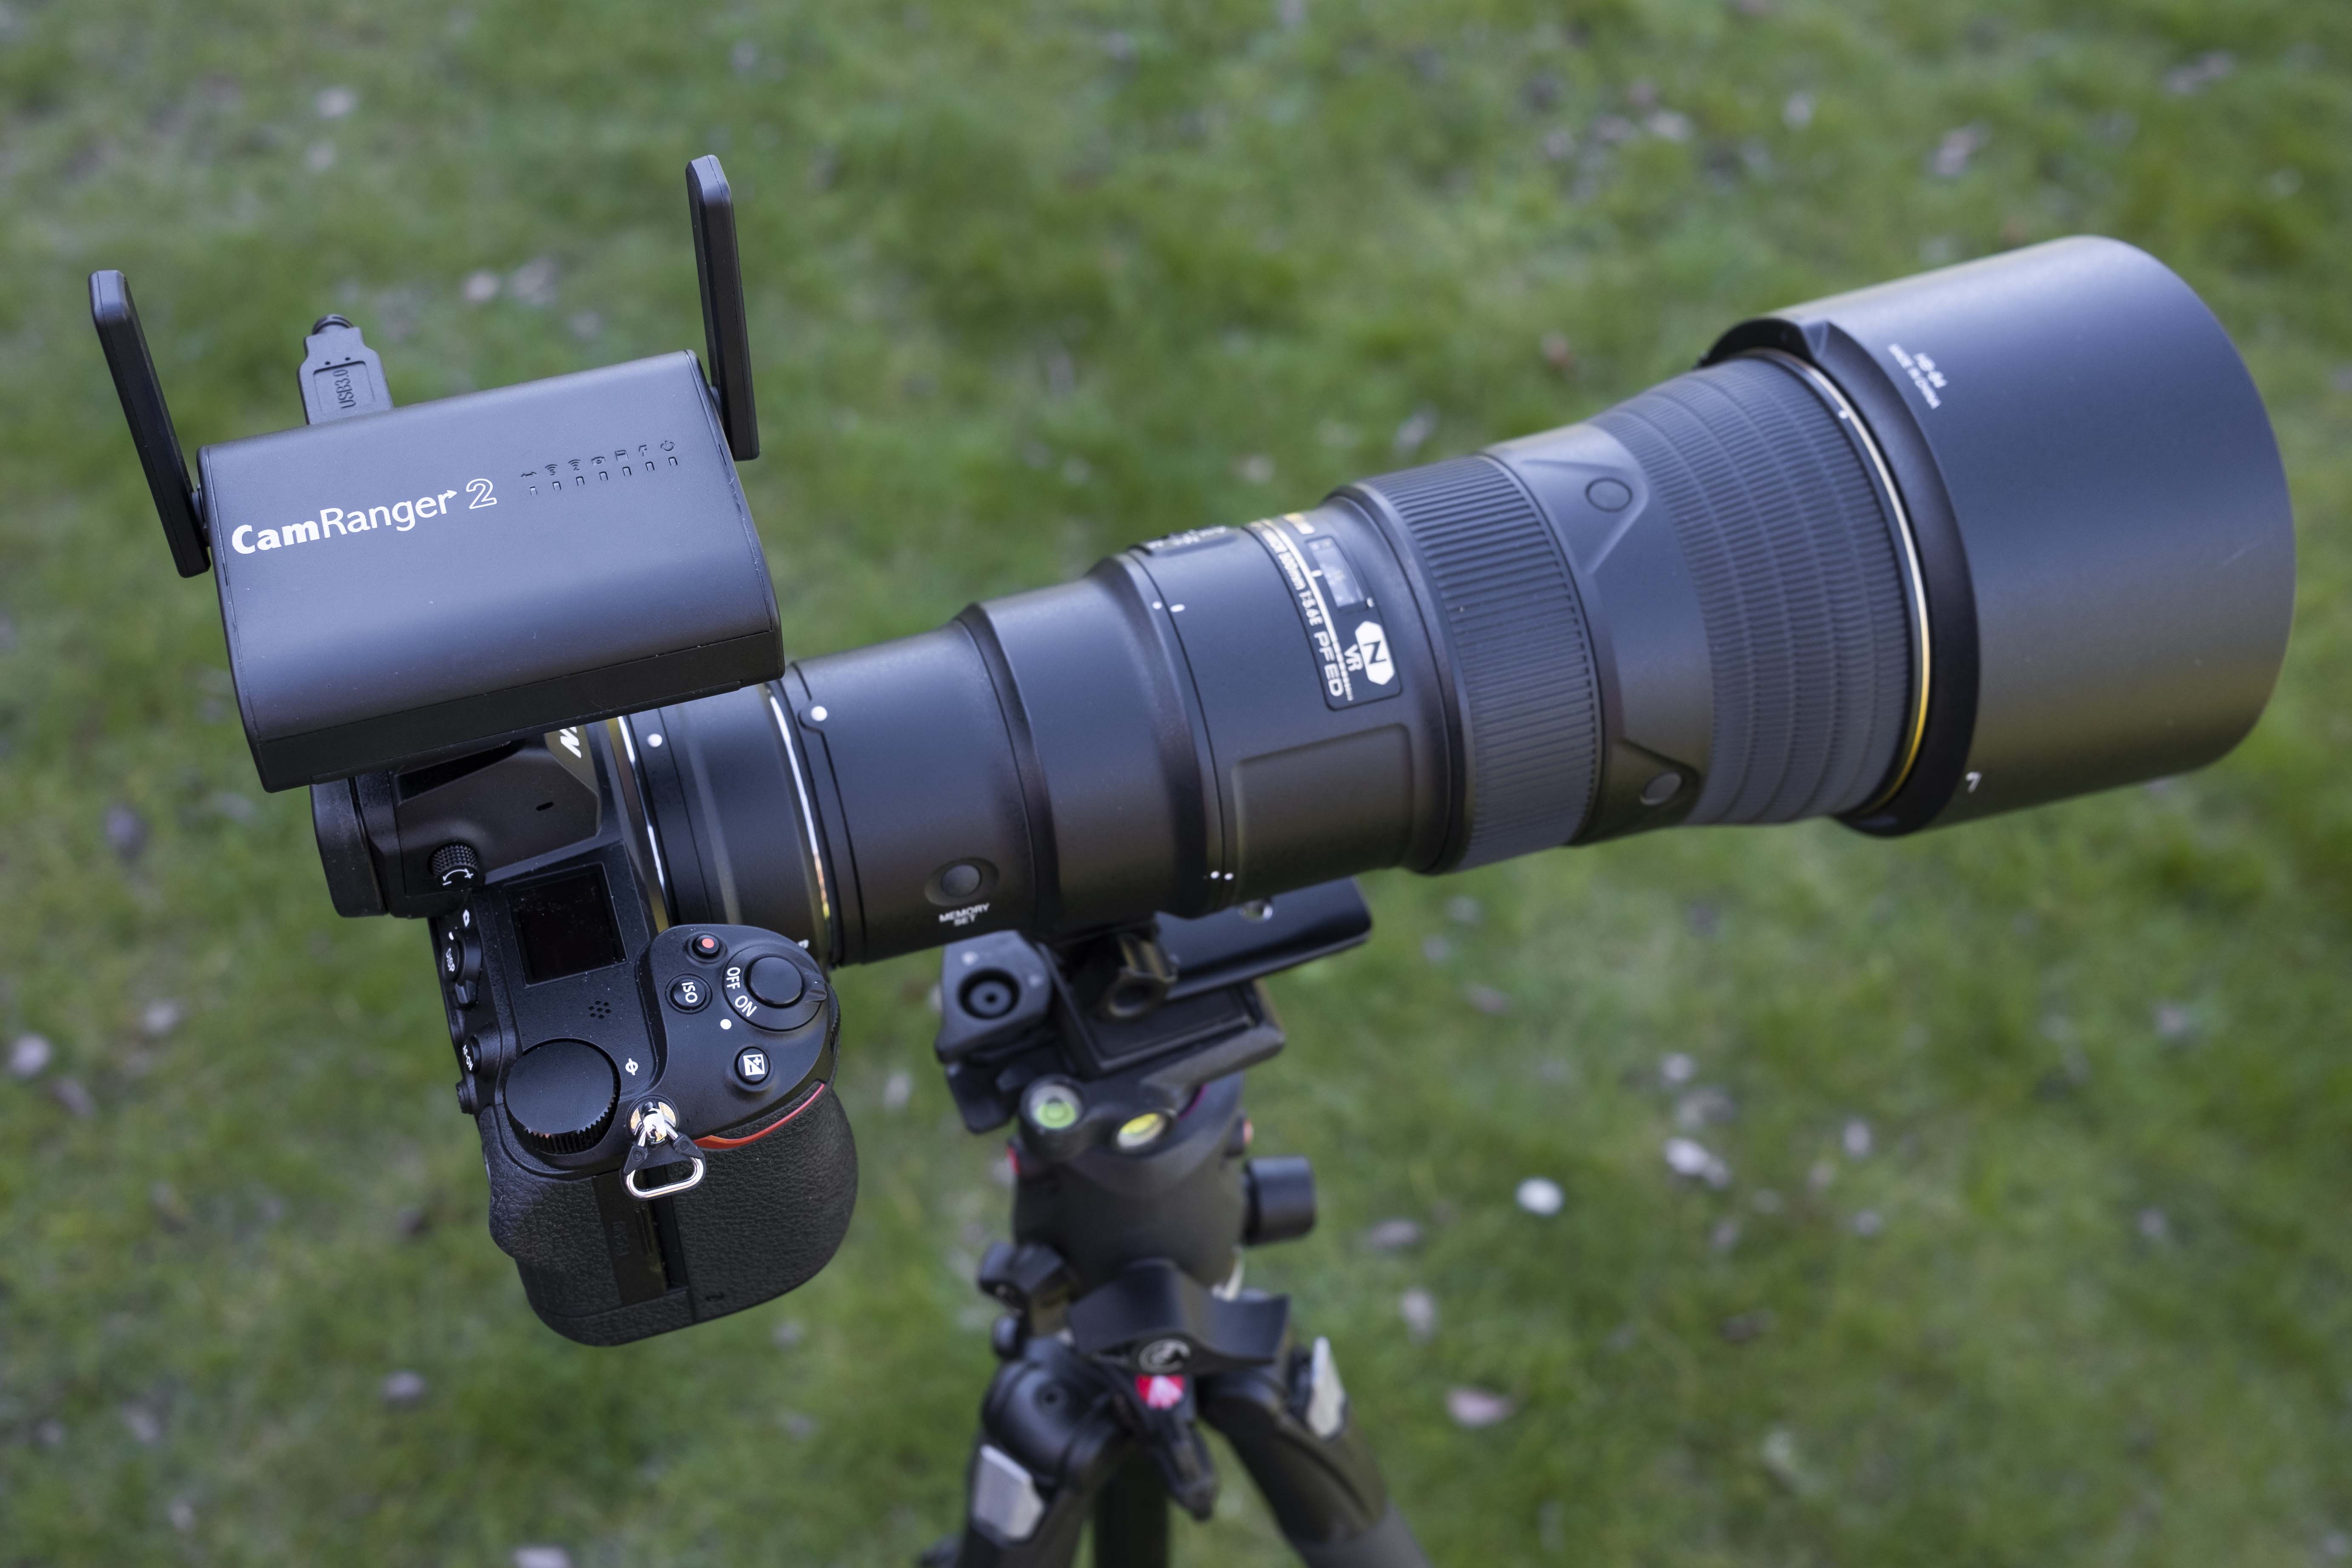
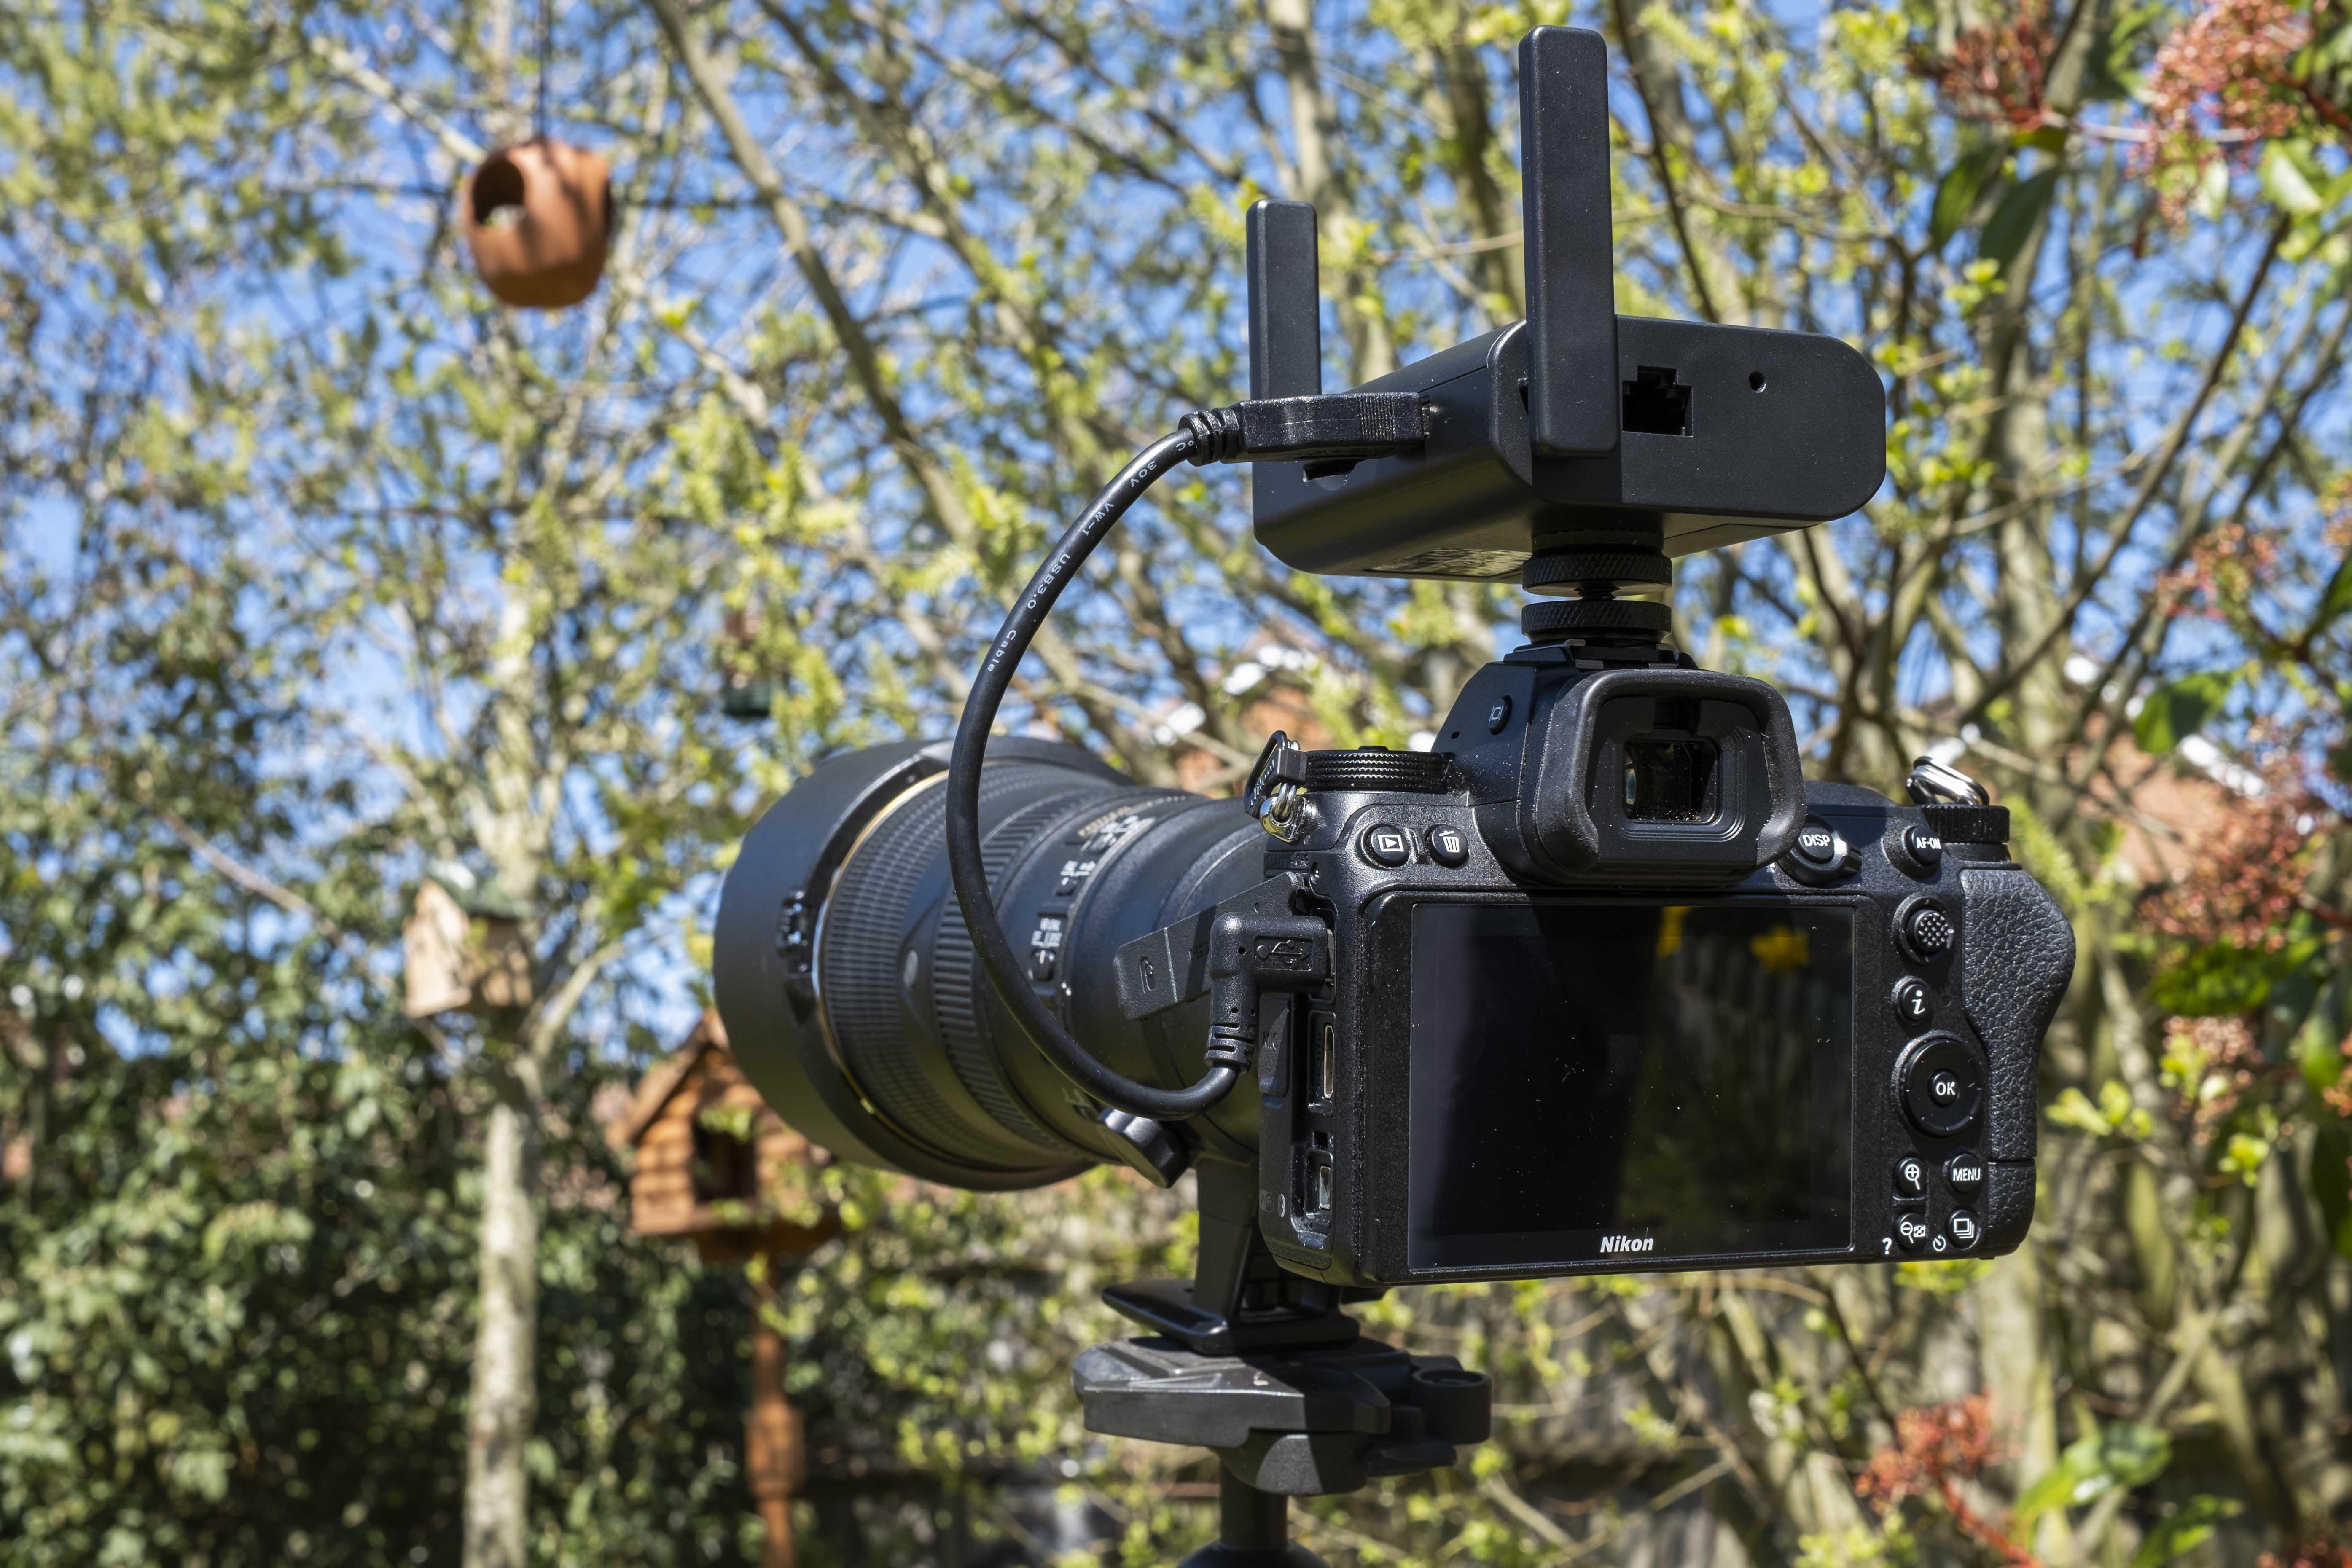
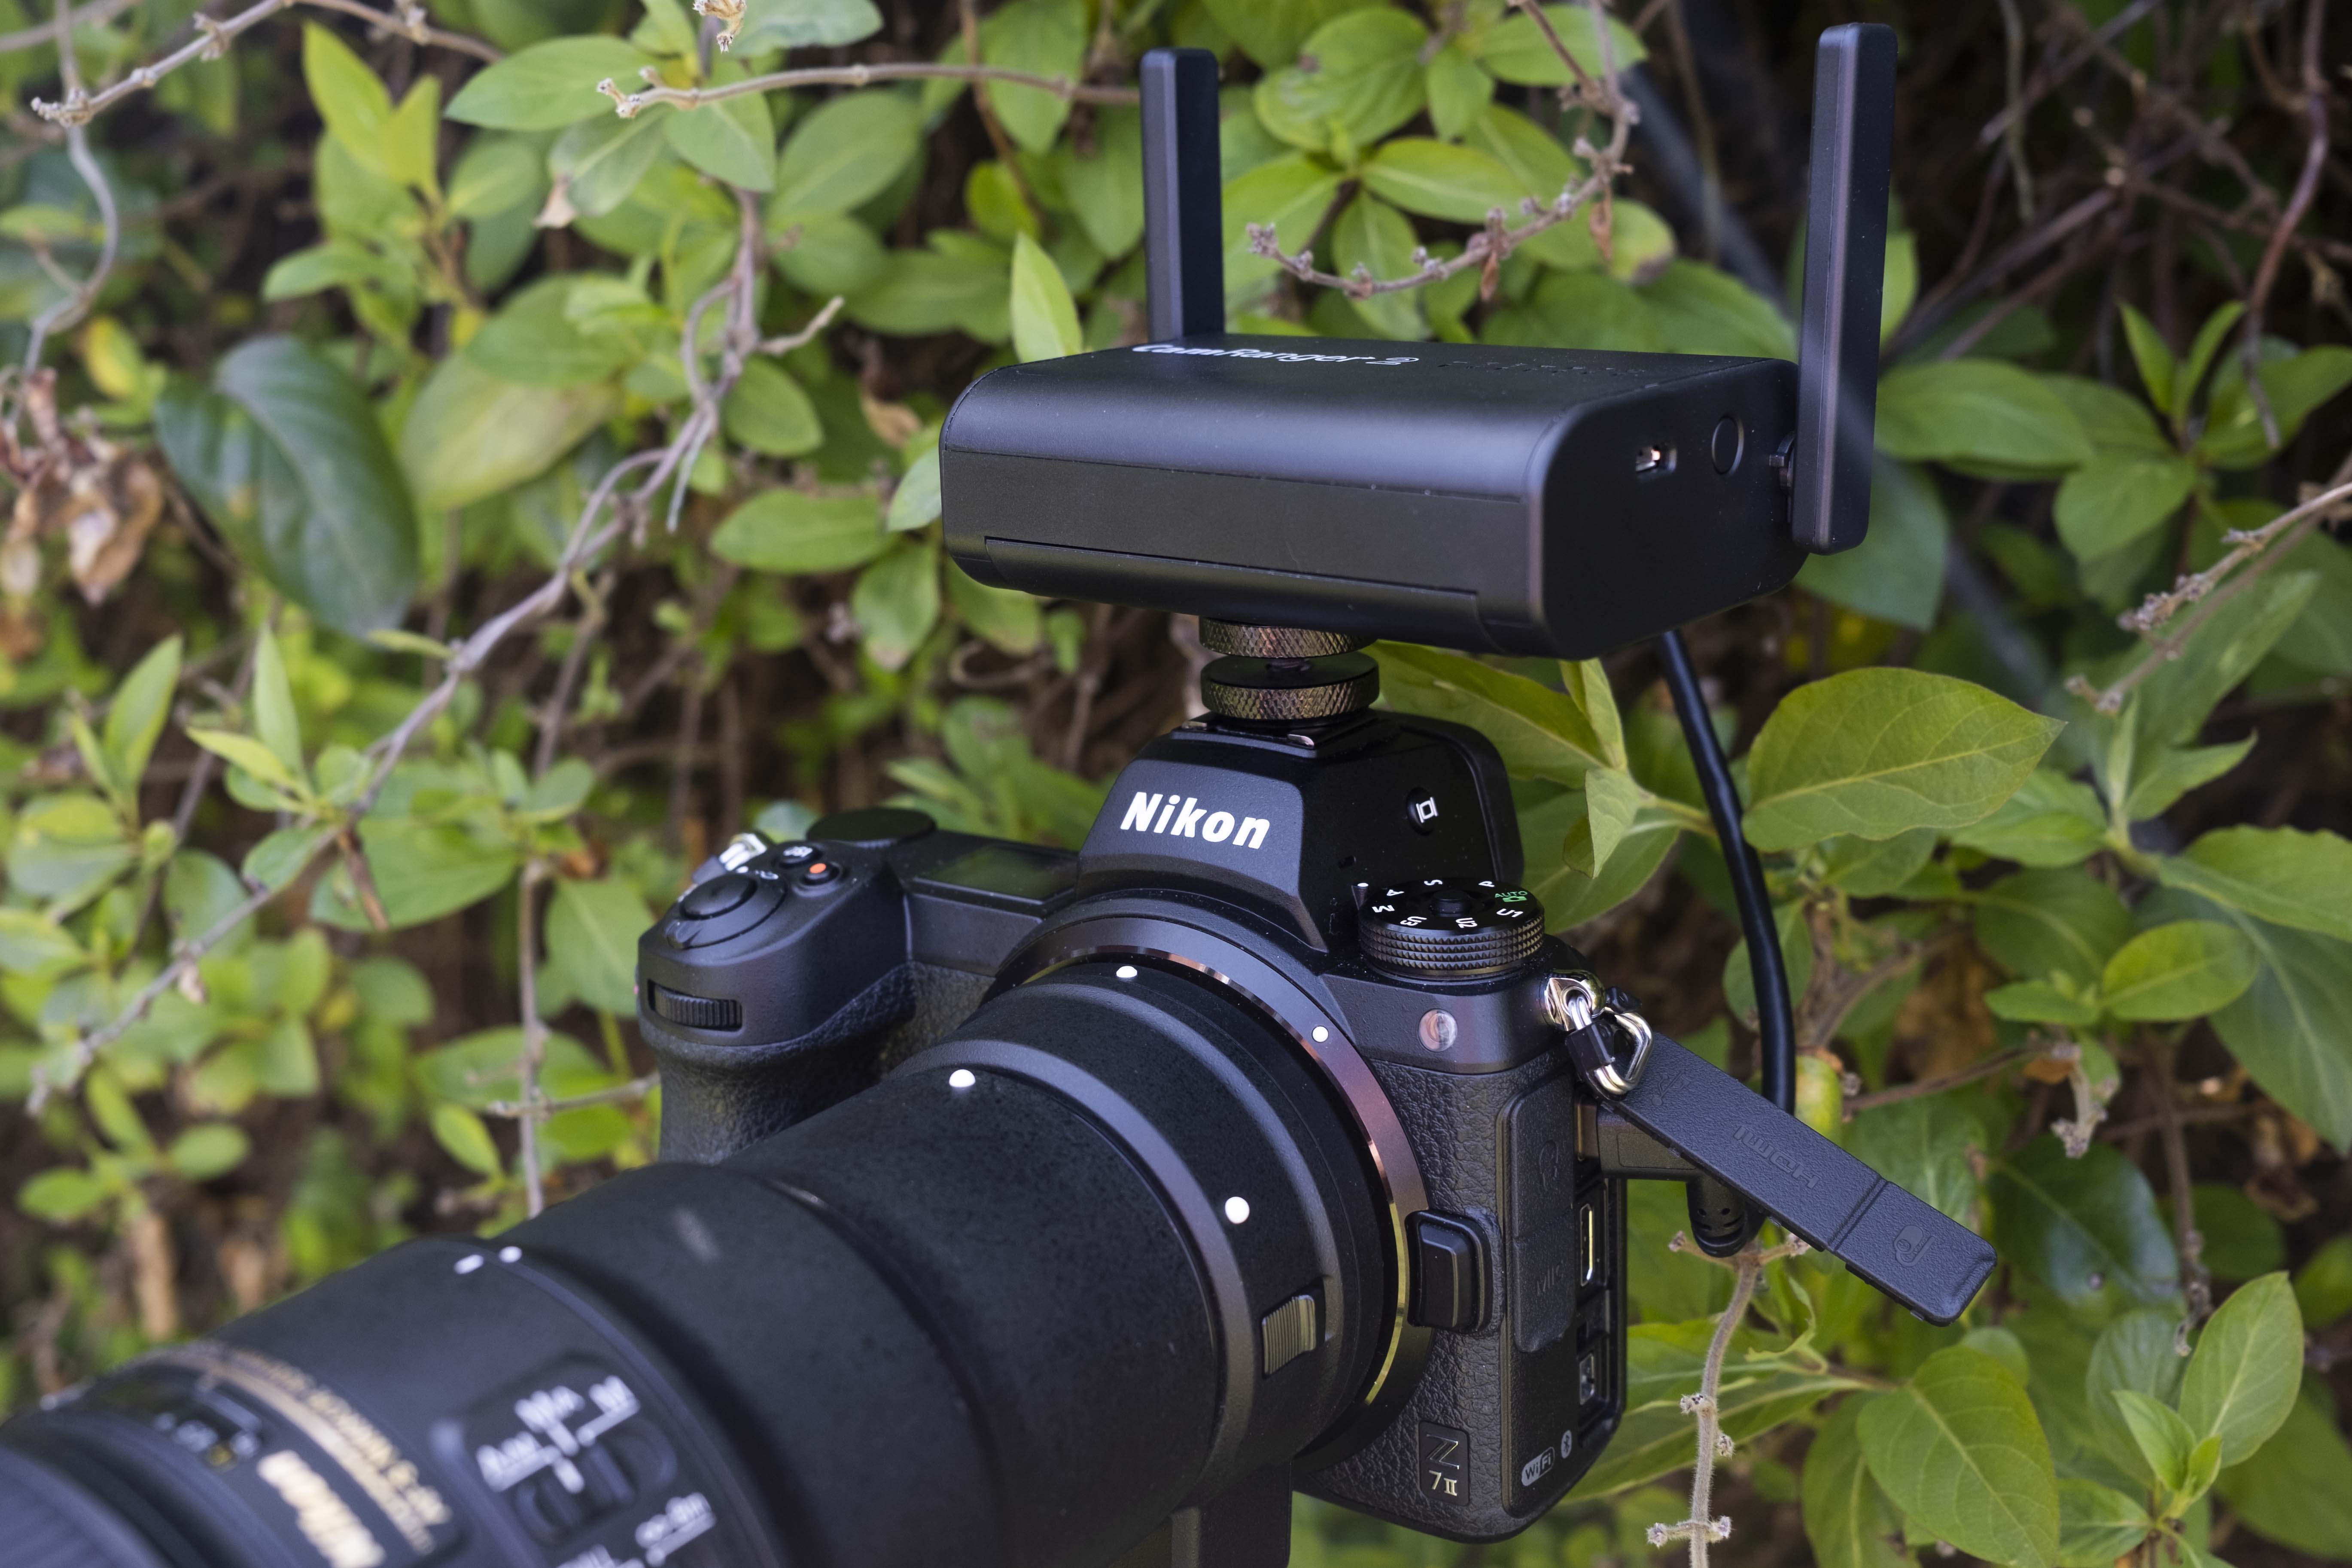
The CamRanger 2 was tested with the Nikon Z 7 II and Nikkor AF-S 500mm f5.6E PF ED VR with FTZ adapter
To get a feel of how the device operates in the type of environment it’s likely to see use, I setup my camera close to a bird bath before taking up position at the opposite end of the garden where there was no risk of alarming my subject. During my wait for birds to arrive I adjusted the exposure settings, refined the position of the AF point and selected burst shooting all from the app. All of these adjustments occurred instantly without delay or lag. One of the only settings that requires you to confirm the adjustment before you see the change in the preview is exposure compensation.
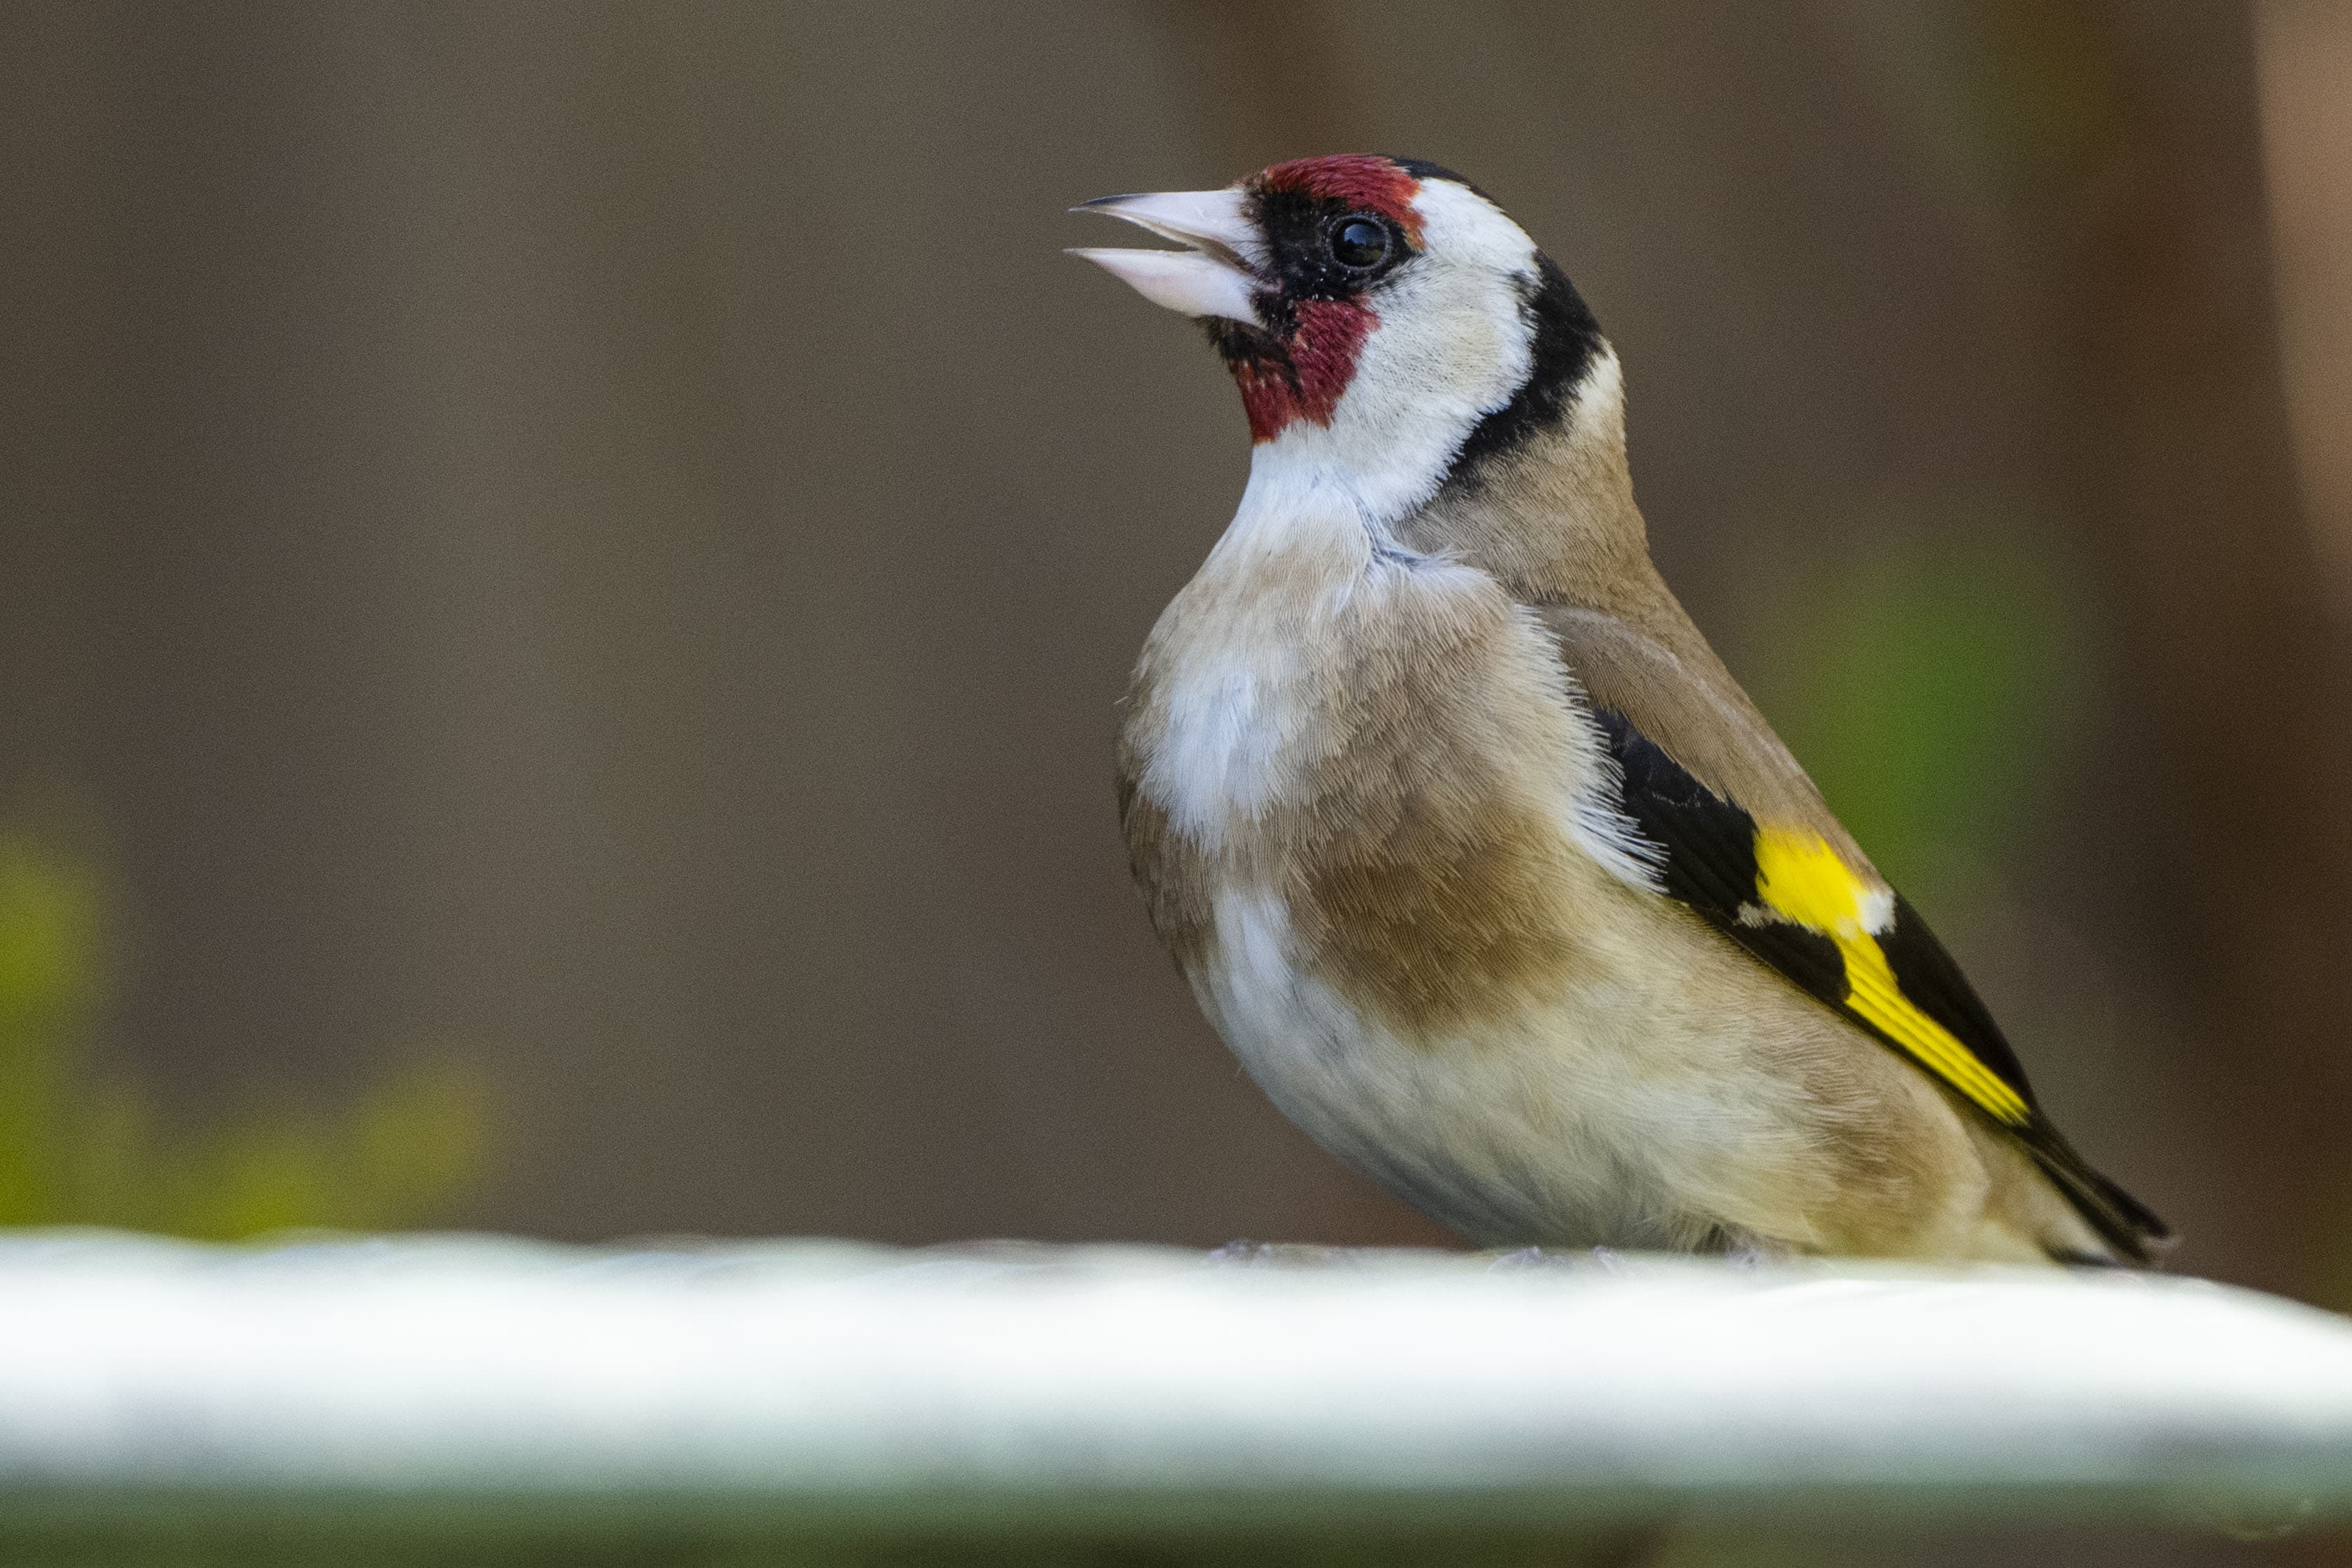
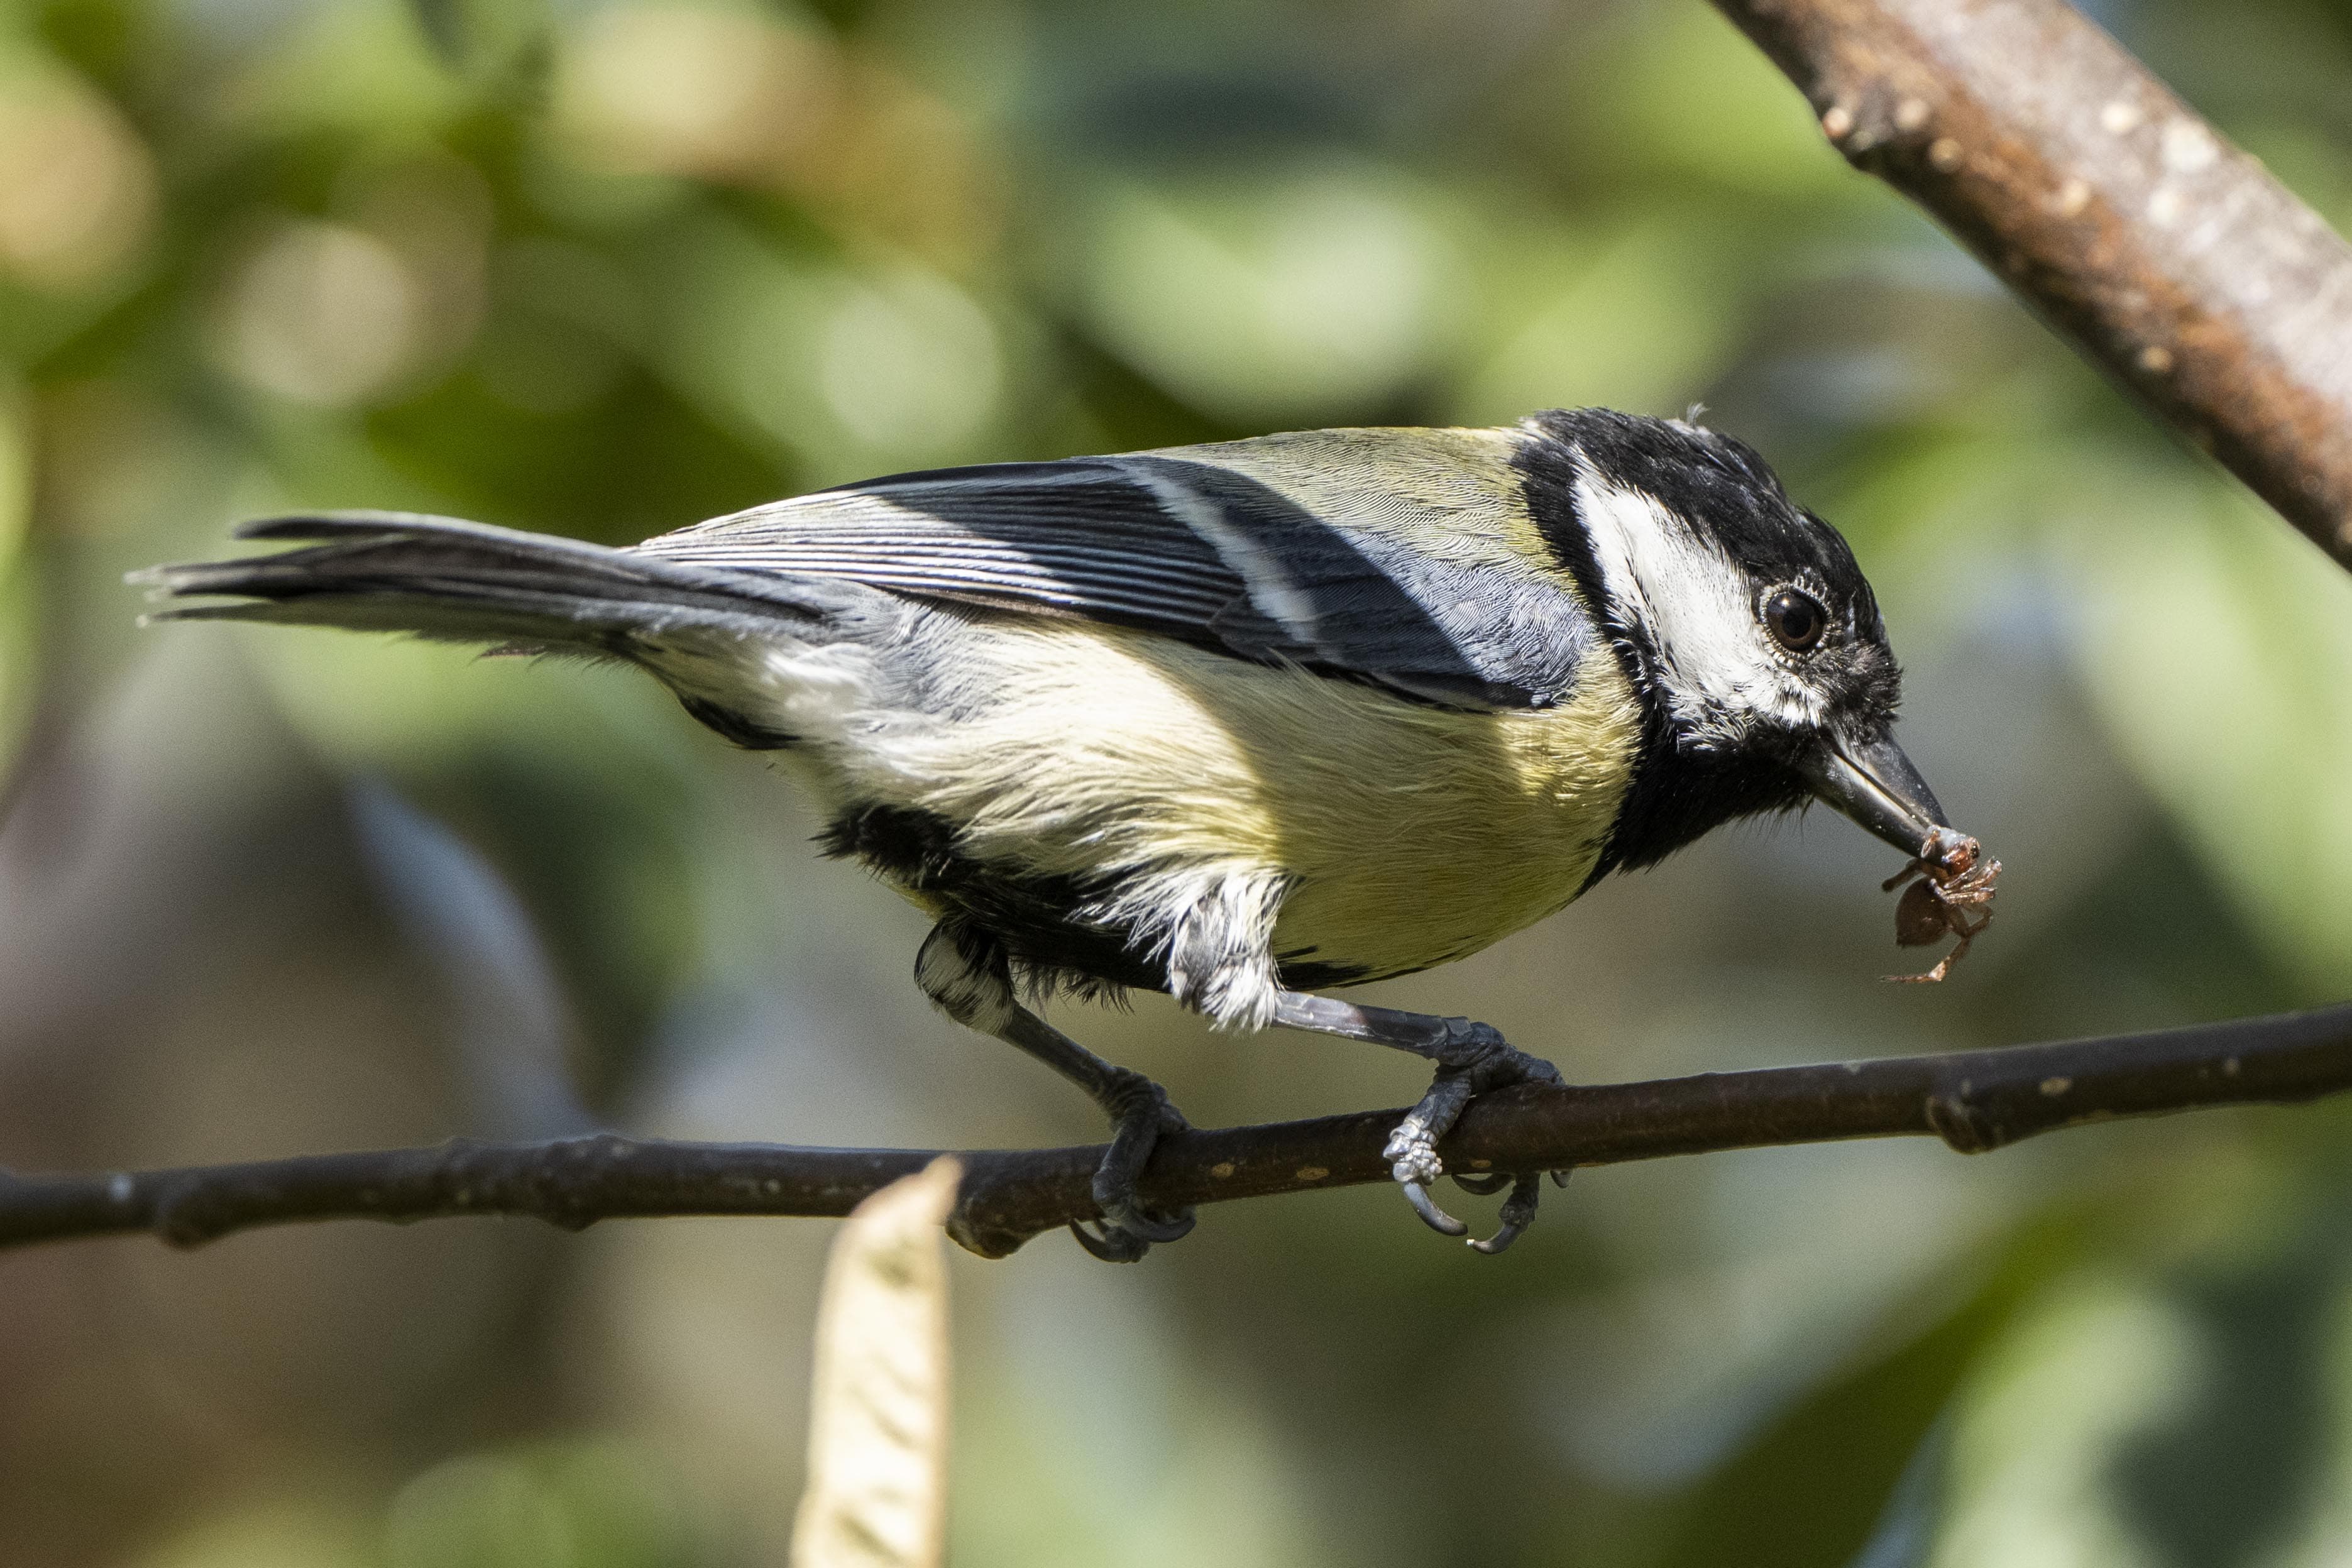
This goldfinch was photographed drinking from a bird bath using the CamRanger 2. Nikon Z 7 II and Nikkor AF-S 500mm f5.6E PF ED VR with FTZ adapter, 1/500sec at f/5.6, ISO 800
When the birds arrived at the bird bath I used the red capture shutter button in the app to trigger the camera’s shutter remotely. The live view feed was sufficiently fast enough that I could sit back and observe activity from the app and and I didn’t experience any infuriating lag between tapping the shutter button on my iPad and the camera capturing a burst of shots from 15m/50feet away.
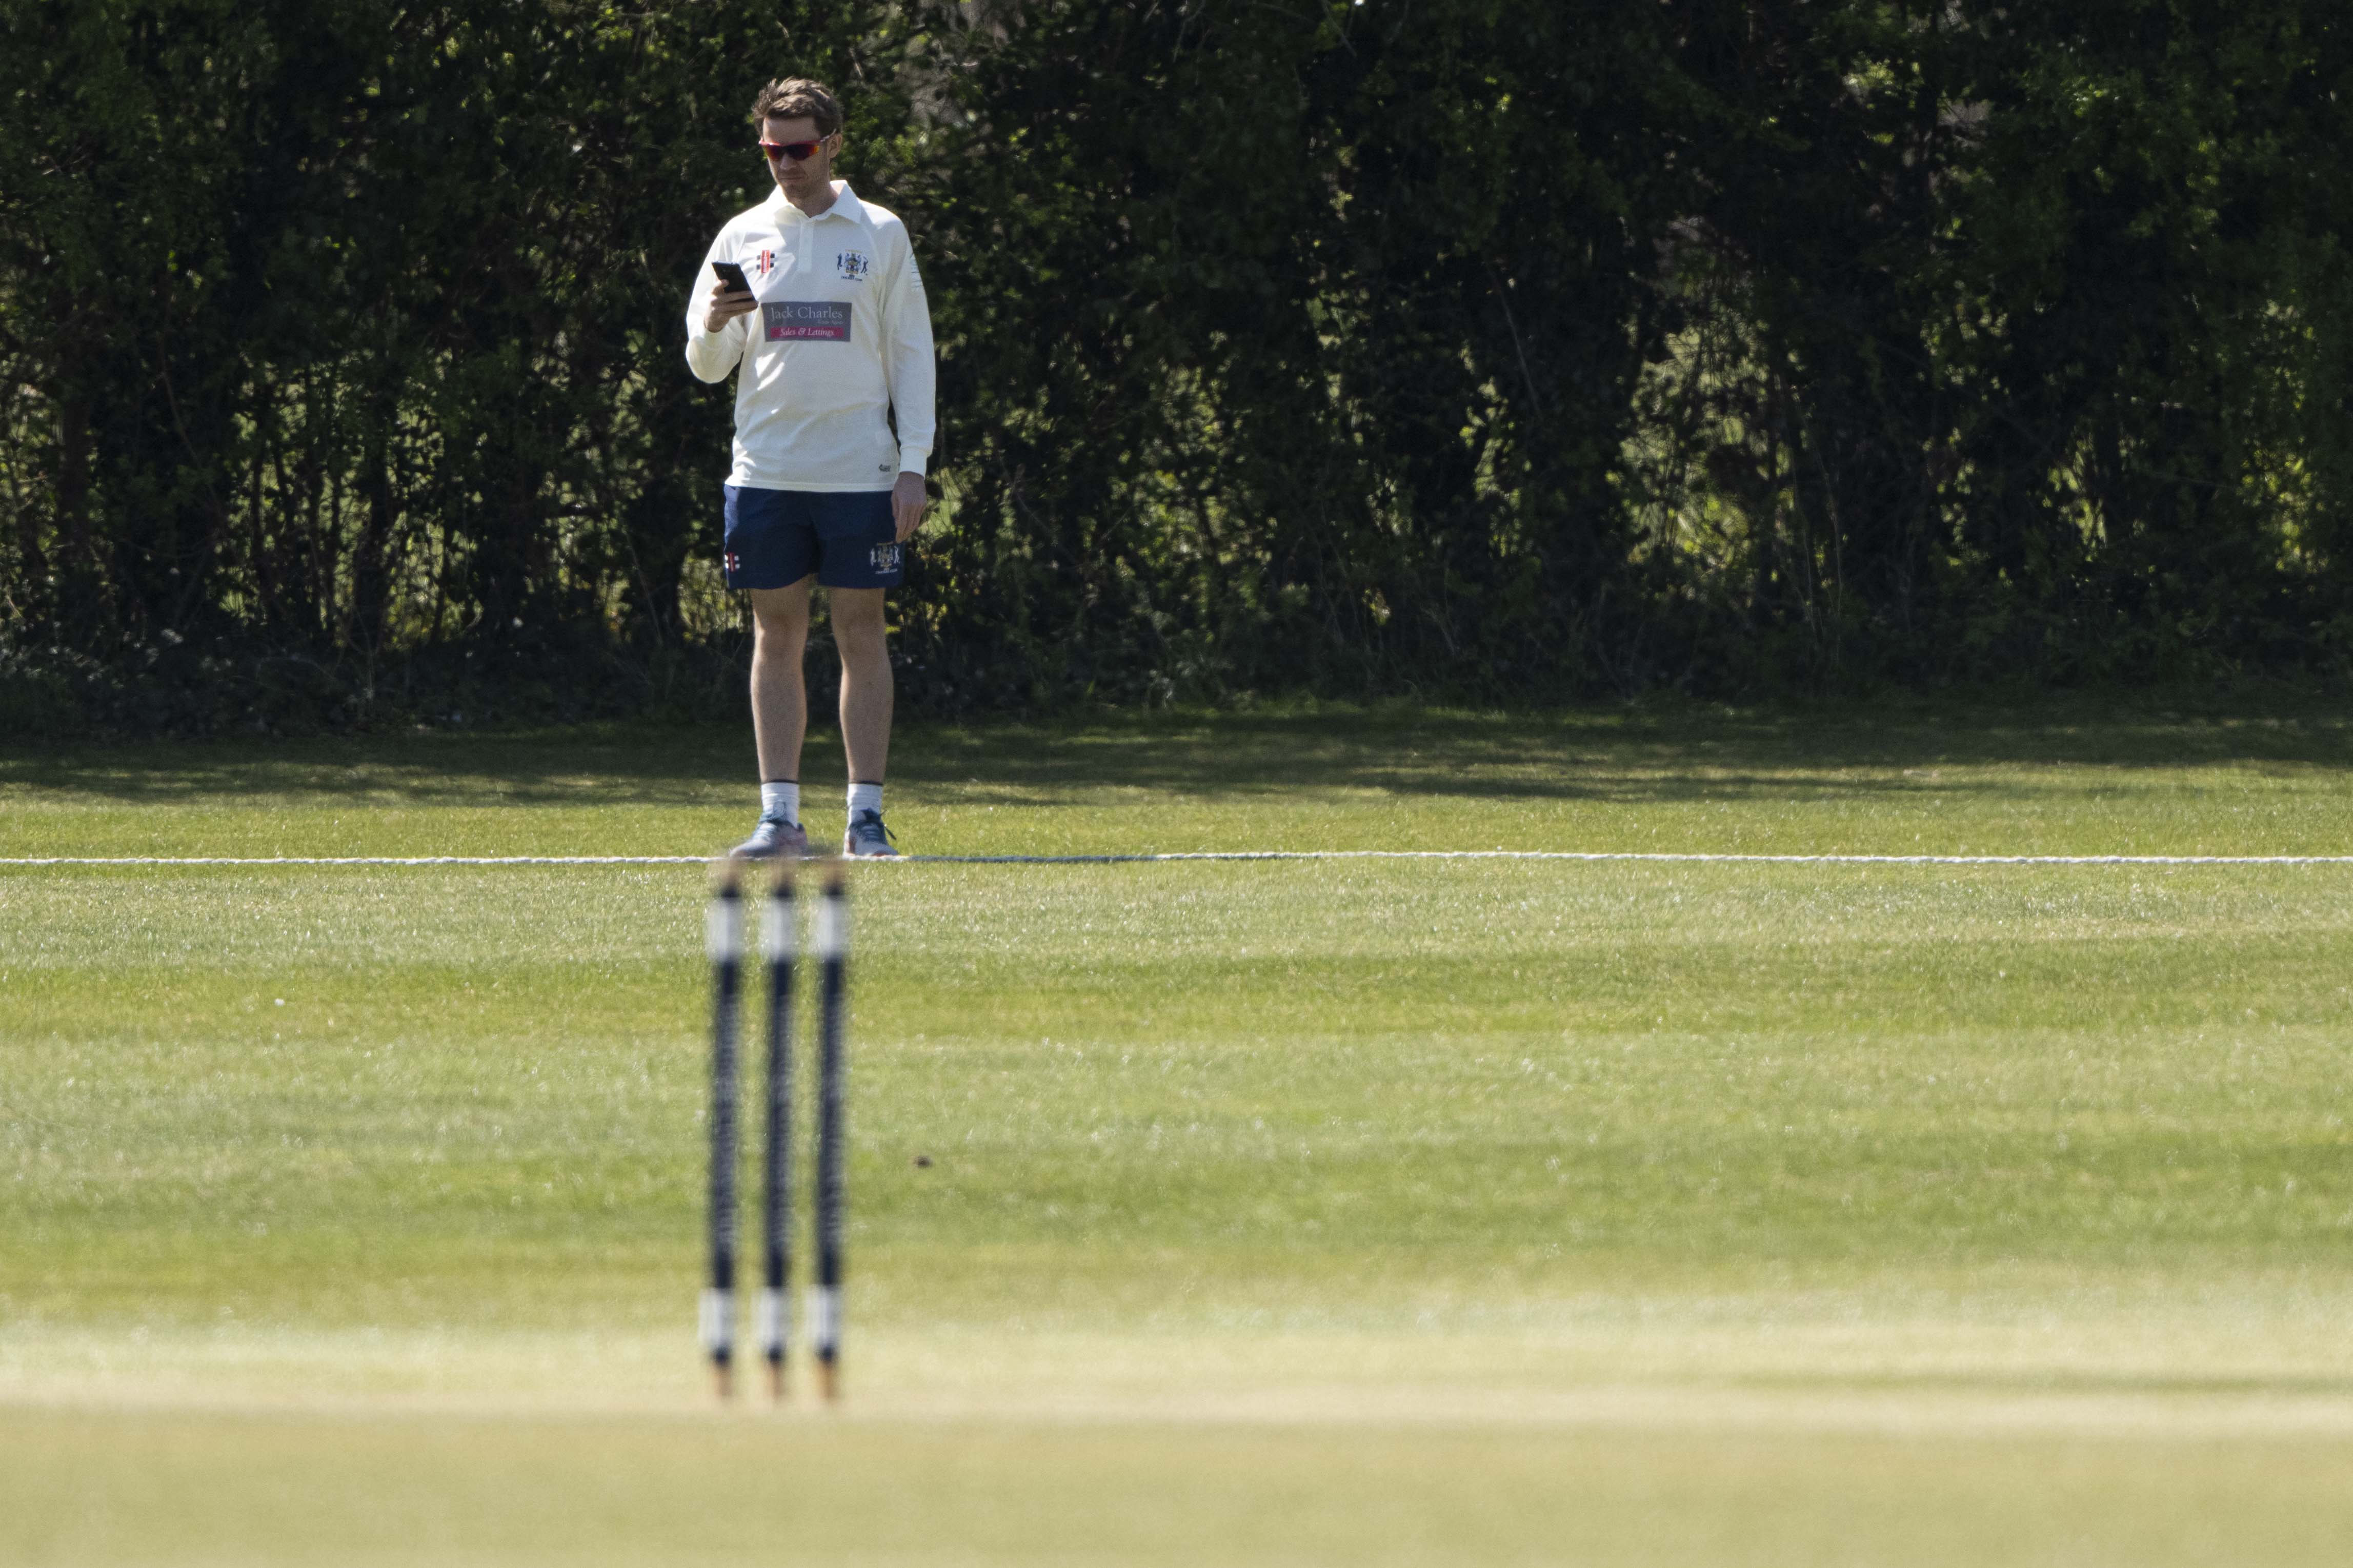
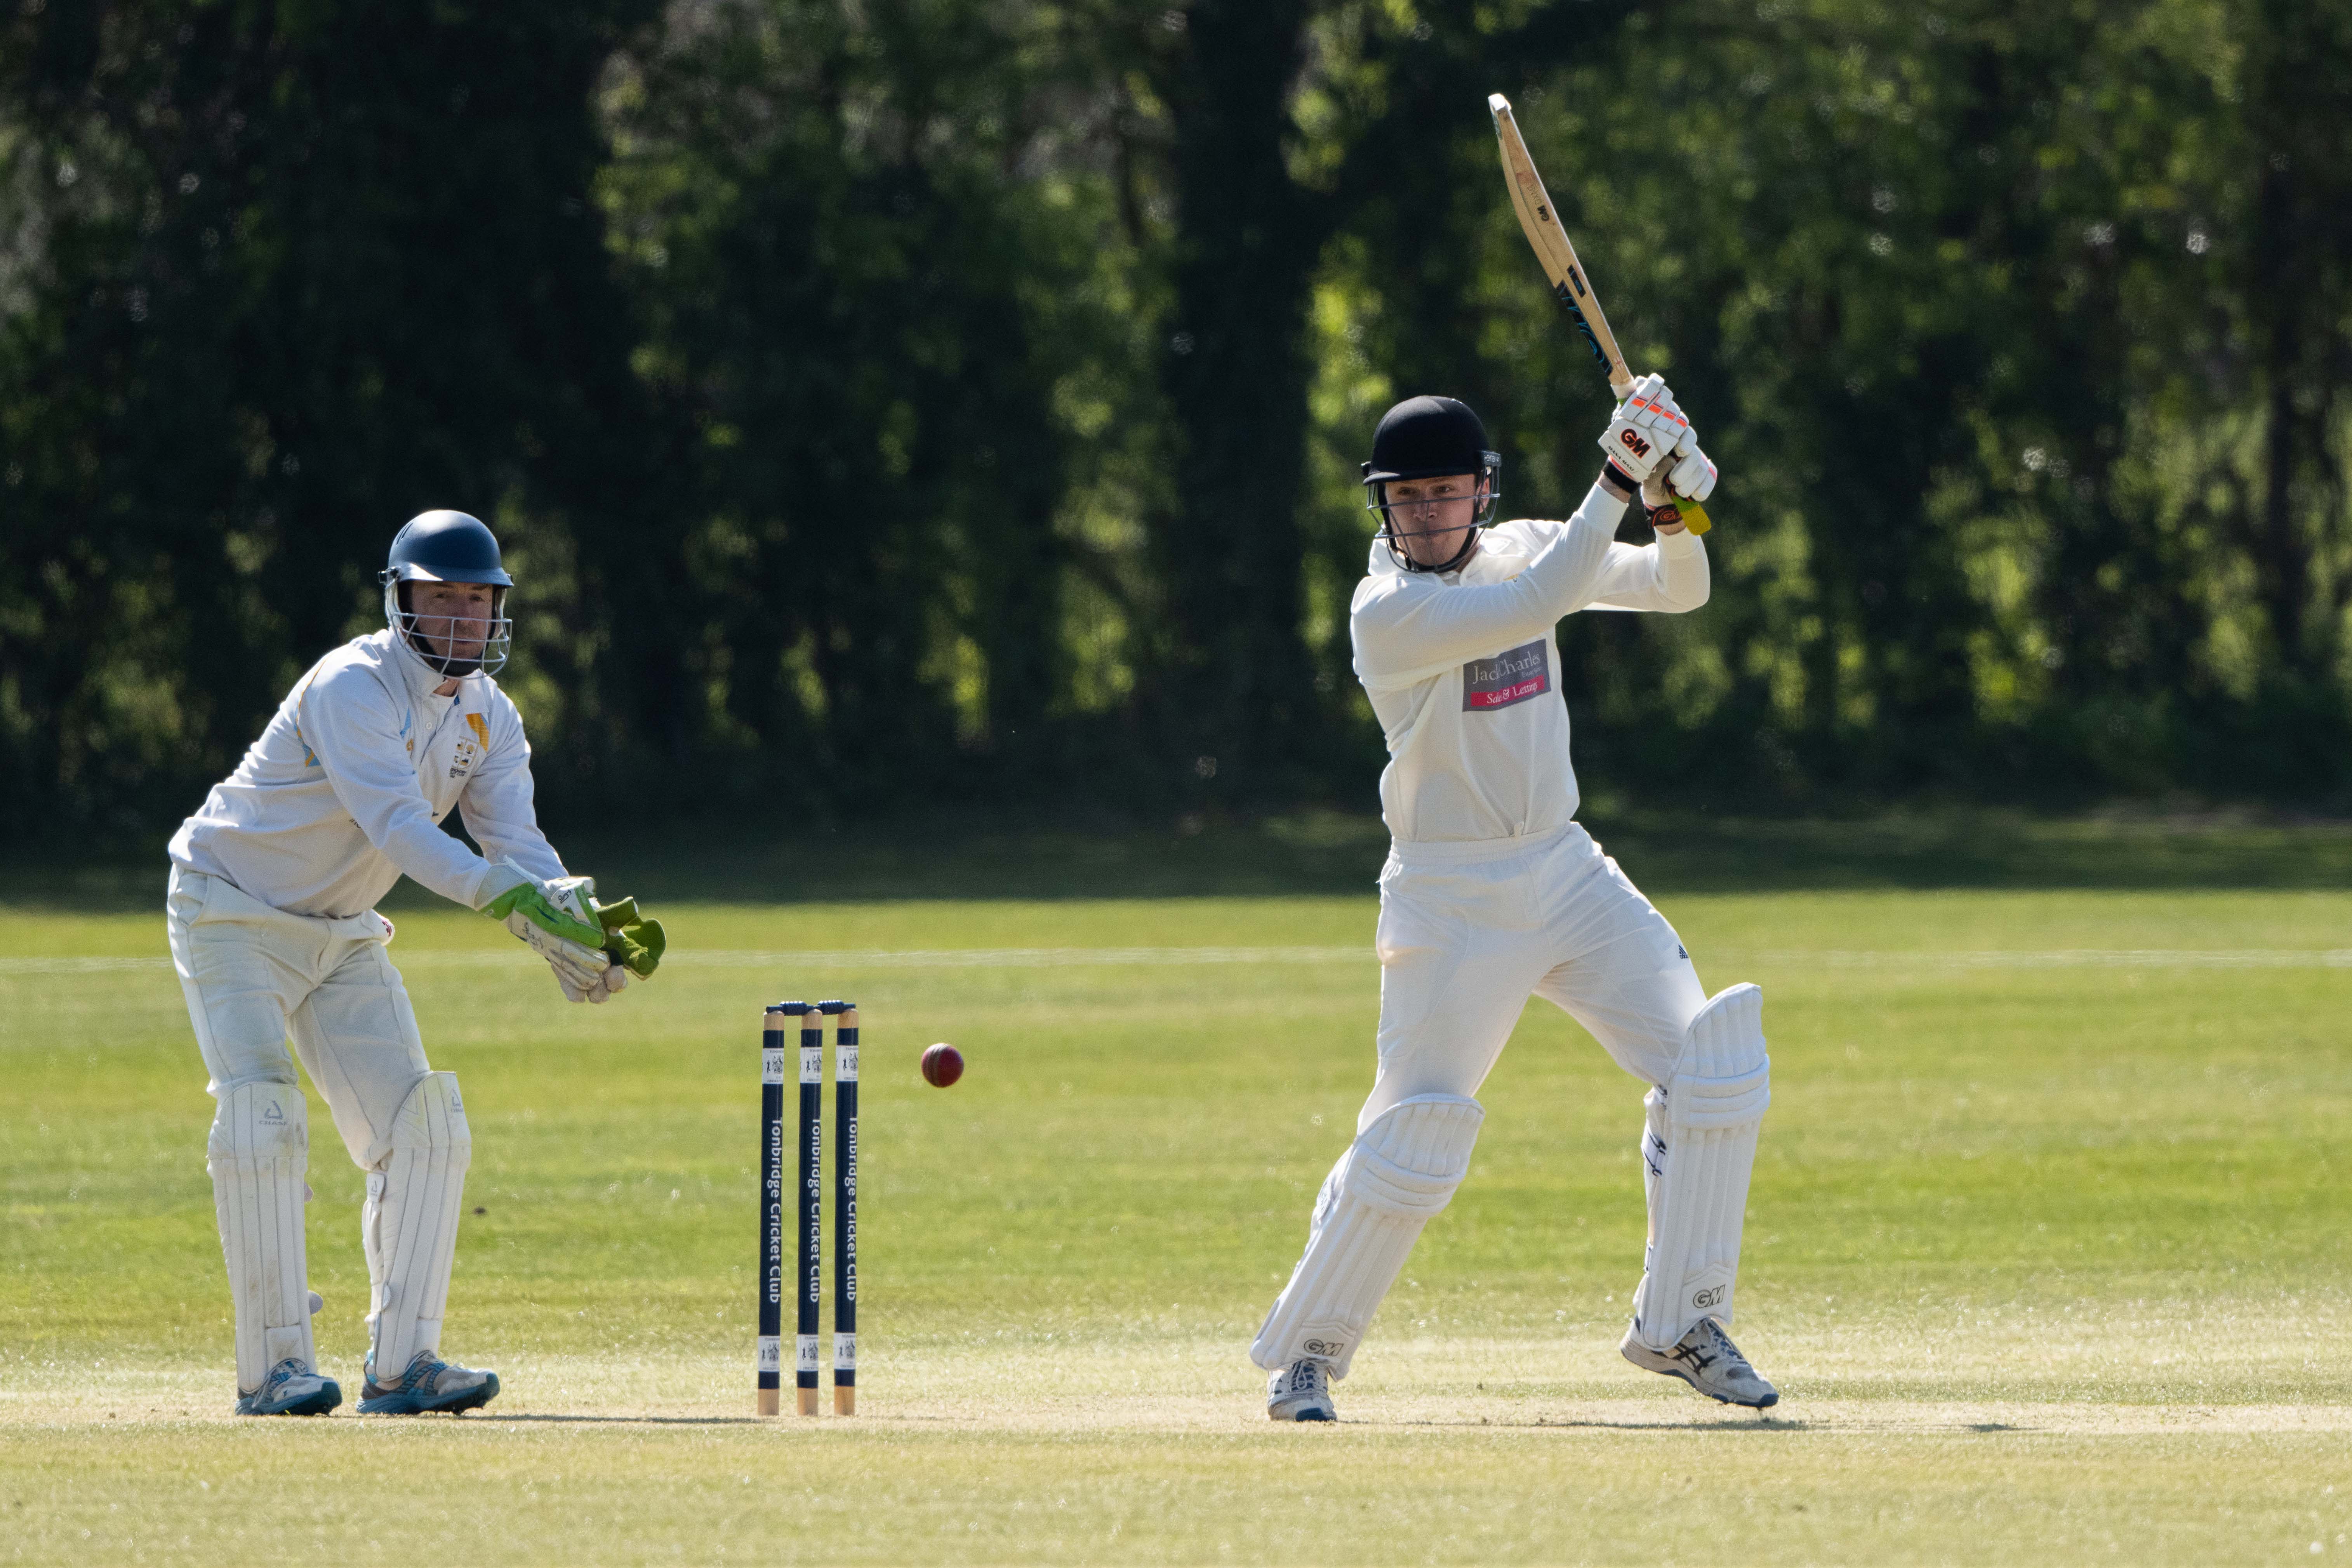
Testing the CamRanger 2’s range at a cricket ground. I was checking if I could fire the shutter from the other side of the ground using the CamRanger 2 app on my smartphone, which I had no difficulty doing
The following day I visited my local cricket club and experienced no issues using the CamRanger2 and its 2.4GHz network to fire the Nikon Z7 II from the opposite side of the ground – a distance of approximately 130m/426feet. For fast and erratic moving subjects, I found I had better success firing the shutter whilst watching the action rather than constantly looking at the live view feed.
An action shot captured using the CamRanger 2 from long distance. Nikon Z 7 II and Nikkor AF-S 500mm f5.6E PF ED VR with FTZ adapter, 1/3200sec at f/8, ISO 1000
Extensive testing over long periods revealed the CamRanger2’s battery depleted faster than my camera and iPad’s batteries. The battery icon turns red at 25% and despite the spec sheet saying the battery should last for around five hours, I was finding it was lasting closer to four with continuous use. Spare batteries cost £25 and an optional charger kit (£42) is available for anyone who’d like to charge two batteries simultaneously.
CamRanger 2: Verdict
There are times when it can be useful being able to setup our cameras at distance and control them remotely to capture images, or video, we might otherwise struggle to take. With an advanced wireless camera remote like the CamRanger 2 we’re given the opportunity to setup our cameras extremely close to the action, or whatever we might be attempting to photograph before stepping back, monitoring the scene from an app, and having the control that’s needed to get the shot at the perfect moment.
I used the CamRanger 2 to photograph a pair of great tits, which continuously used the same branch to land before entering a nest box in the garden
The level of control far exceeds what most camera manufacturers provide from their own Wi-Fi apps and the 5GHz network is extremely stable unless you happen to be shooting from extreme distances where the 2.4GHz network is better to use. The connection remained stable throughout my testing and it is good that it can be conveniently mounted to the camera’s hot shoe and used at the same time as it’s being charged via a power bank, which is crucial for any lengthy photo sessions.
A closeup of a great tit in the garden captured using the CamRanger 2 Nikon Z 7 II and Nikkor AF-S 500mm f5.6E PF ED VR with FTZ adapter, 1/2000sec at f/8, ISO 1600
It’s not all about remote camera control either. The CamRanger 2 app provides excellent JPEG and Raw wireless tethering capability when you’re shooting from the camera, allowing you to review, share or transfer images on the spot from mobile devices, or a computer.
The CamRanger 2 put in a fine performance throughout our testing
Combine its impressive performance with its good reliability, the fact it’s not daunting to use and it does everything it claims it can do and I wouldn’t hesitate to recommend the CamRanger 2 to other photographers after an advanced wireless camera control device. It builds upon the original CamRanger in enough ways to justify an upgrade and is a camera accessory deserving of our Gold Award.