Your guide: Kingsley Singleton
Kingsley is a photographer, tutor, and writer with decades of experience in shooting technique and image editing. Specialising in landscape, nature and documentary subjects, he also photographs dogs professionally for private clients and charities. See more @kingsley.photo
If you’re a photographer who uses wideangle lenses, you’ll know all about the optical distortions that can become a problem when shooting with them. It’s well known that these distortions happen both due to the lens’s design, and from how you’re using it. After all, not all lenses are created equal, and not all photographers are either. In terms of the optical distortions that come from wideangle lens design, the main offender can often be barrel distortion, and whether you’re shooting architure, interiors, street or even nature shots with prominent straight lines, like trees or the horizon, it can make pictures look very unrealistic with those lines curving outwards from the centre, and making scenes look twisted and bulbous.
Allied to that is ‘volume anamorphosis’, a distortion that causes objects at the edge of the frame of a wideangle lens to become stretched compared to those in the centre. You’ll have seen this when framing up a street or nature scene with detail in the foreground, wherein those parts of the frame stretch out and look unnatural. And it’s especially troubling when people are framed at the edges of a picture taken on a wideangle lens, as they’ll widen in a way that no one is going to like. Another offender – this time caused by the photographer’s positioning of the lens – is perspective distortion, also called converging or diverging verticals, or keystoning. This can happen at all focal lengths, but it’s more prominent when shooting wideangle.
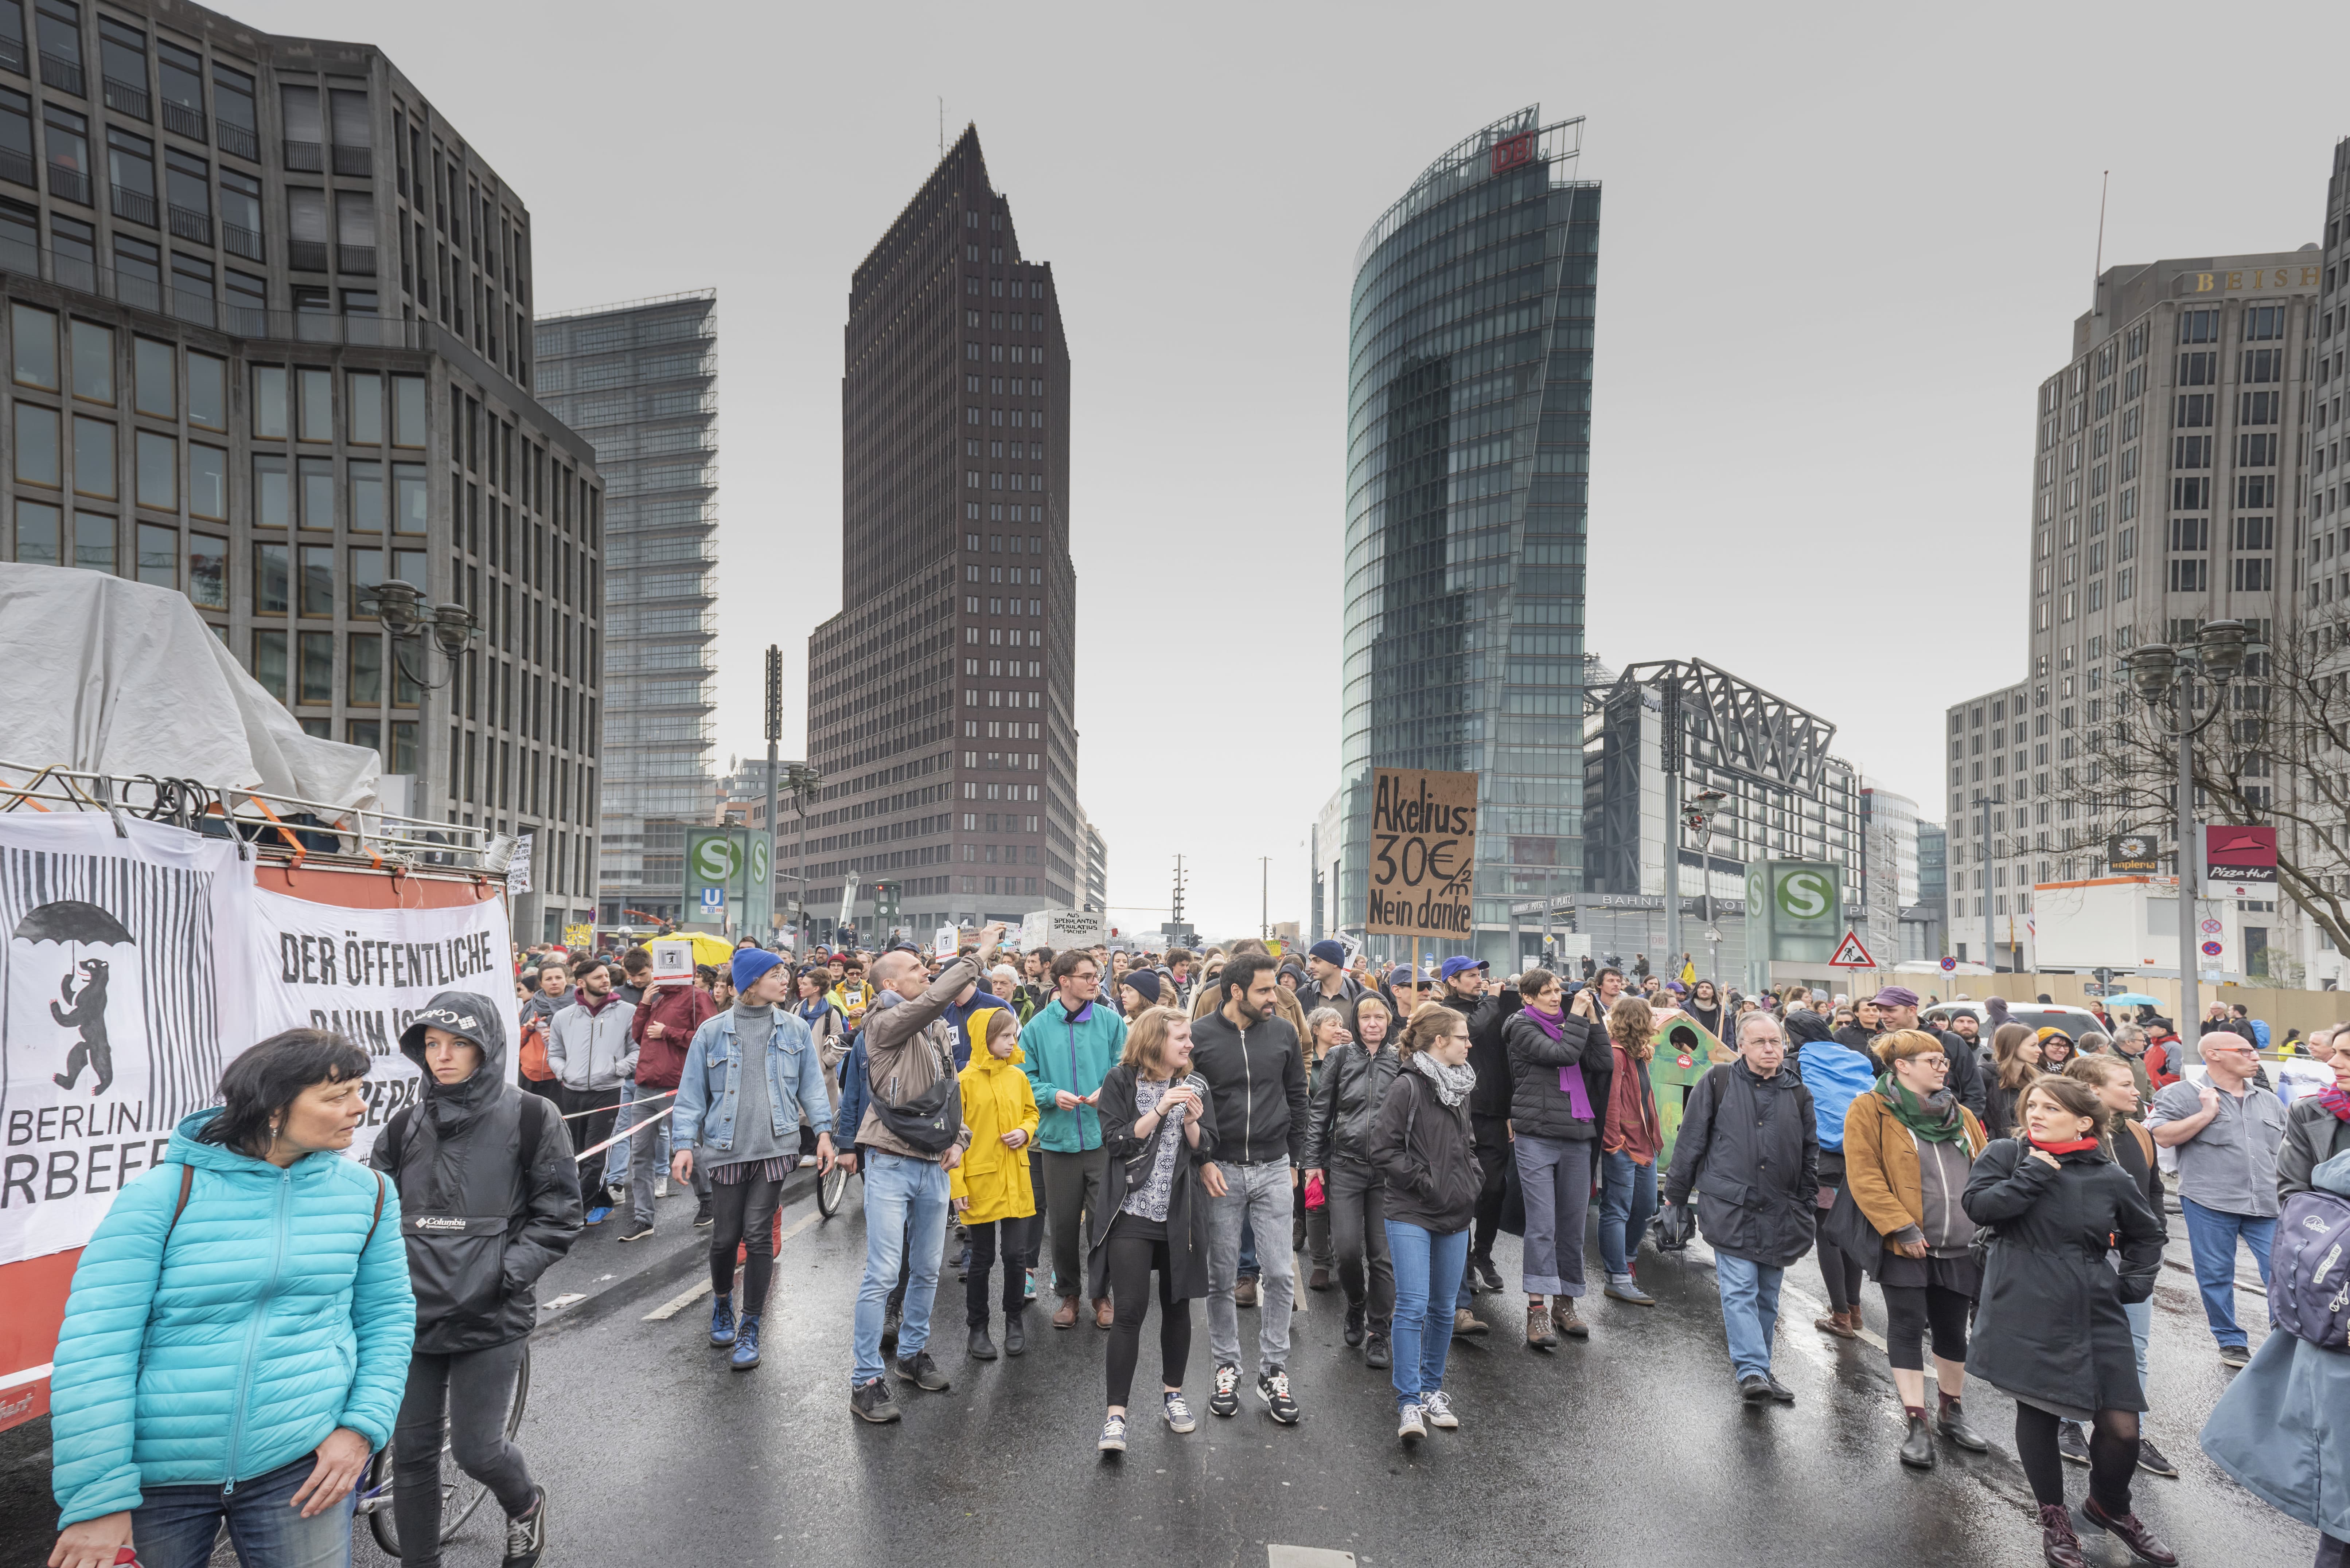
Before…
The obvious example is when framing up on buildings or street scenes. Keep the lens horizontal and the vertical lines will look straight. But if your lens is tilted up or down even slightly – as it often will be to capture an entire piece of architecture into the shot – then the vertical lines of the building will begin to converge or diverge. This same issue occurs when trying to shoot a flat subject like the side of a building, a window or even a poster. If your camera lens isn’t aimed perfectly flat-on to the subject, then the lines in the object you’re shooting won’t be straight either. This is the reason that photographers shooting things like flatlays or architectural features spend so much of their time looking at spirit-levels! How to fix distortions Whatever the distortion you’re encountering, the human brain simply doesn’t see the world in that way, so something has to be done if you want your images looking as natural as possible.
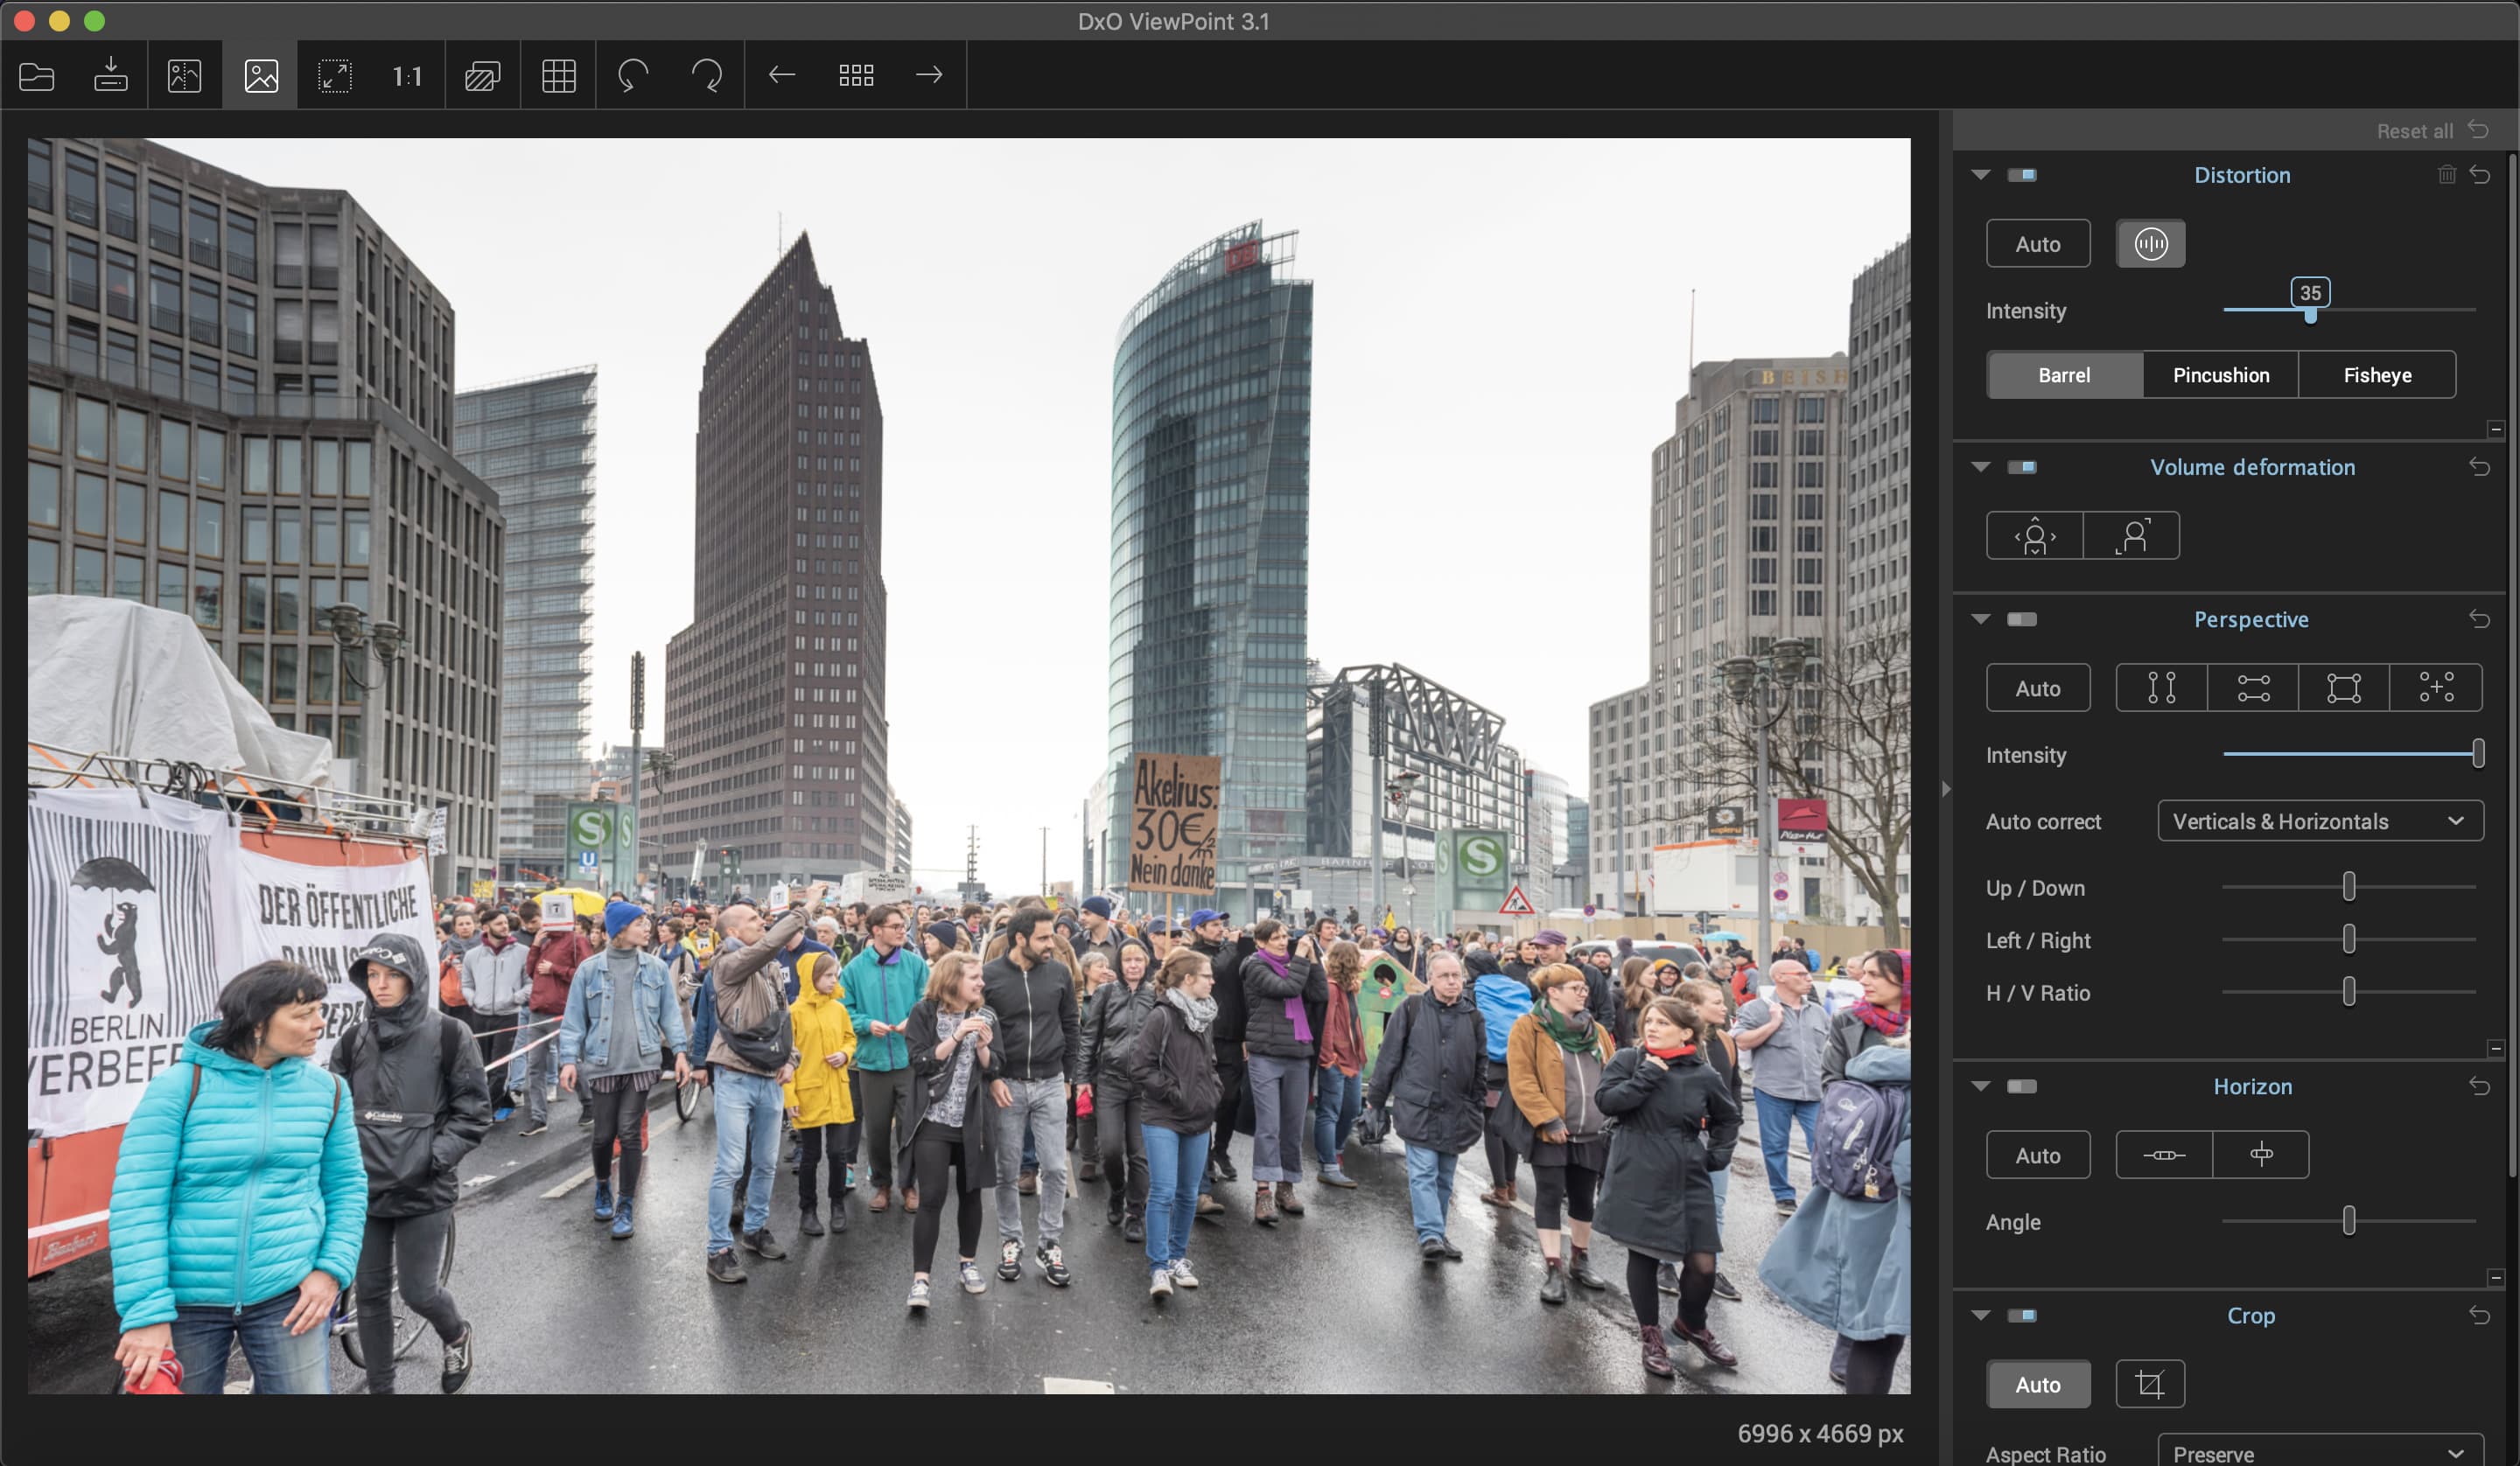
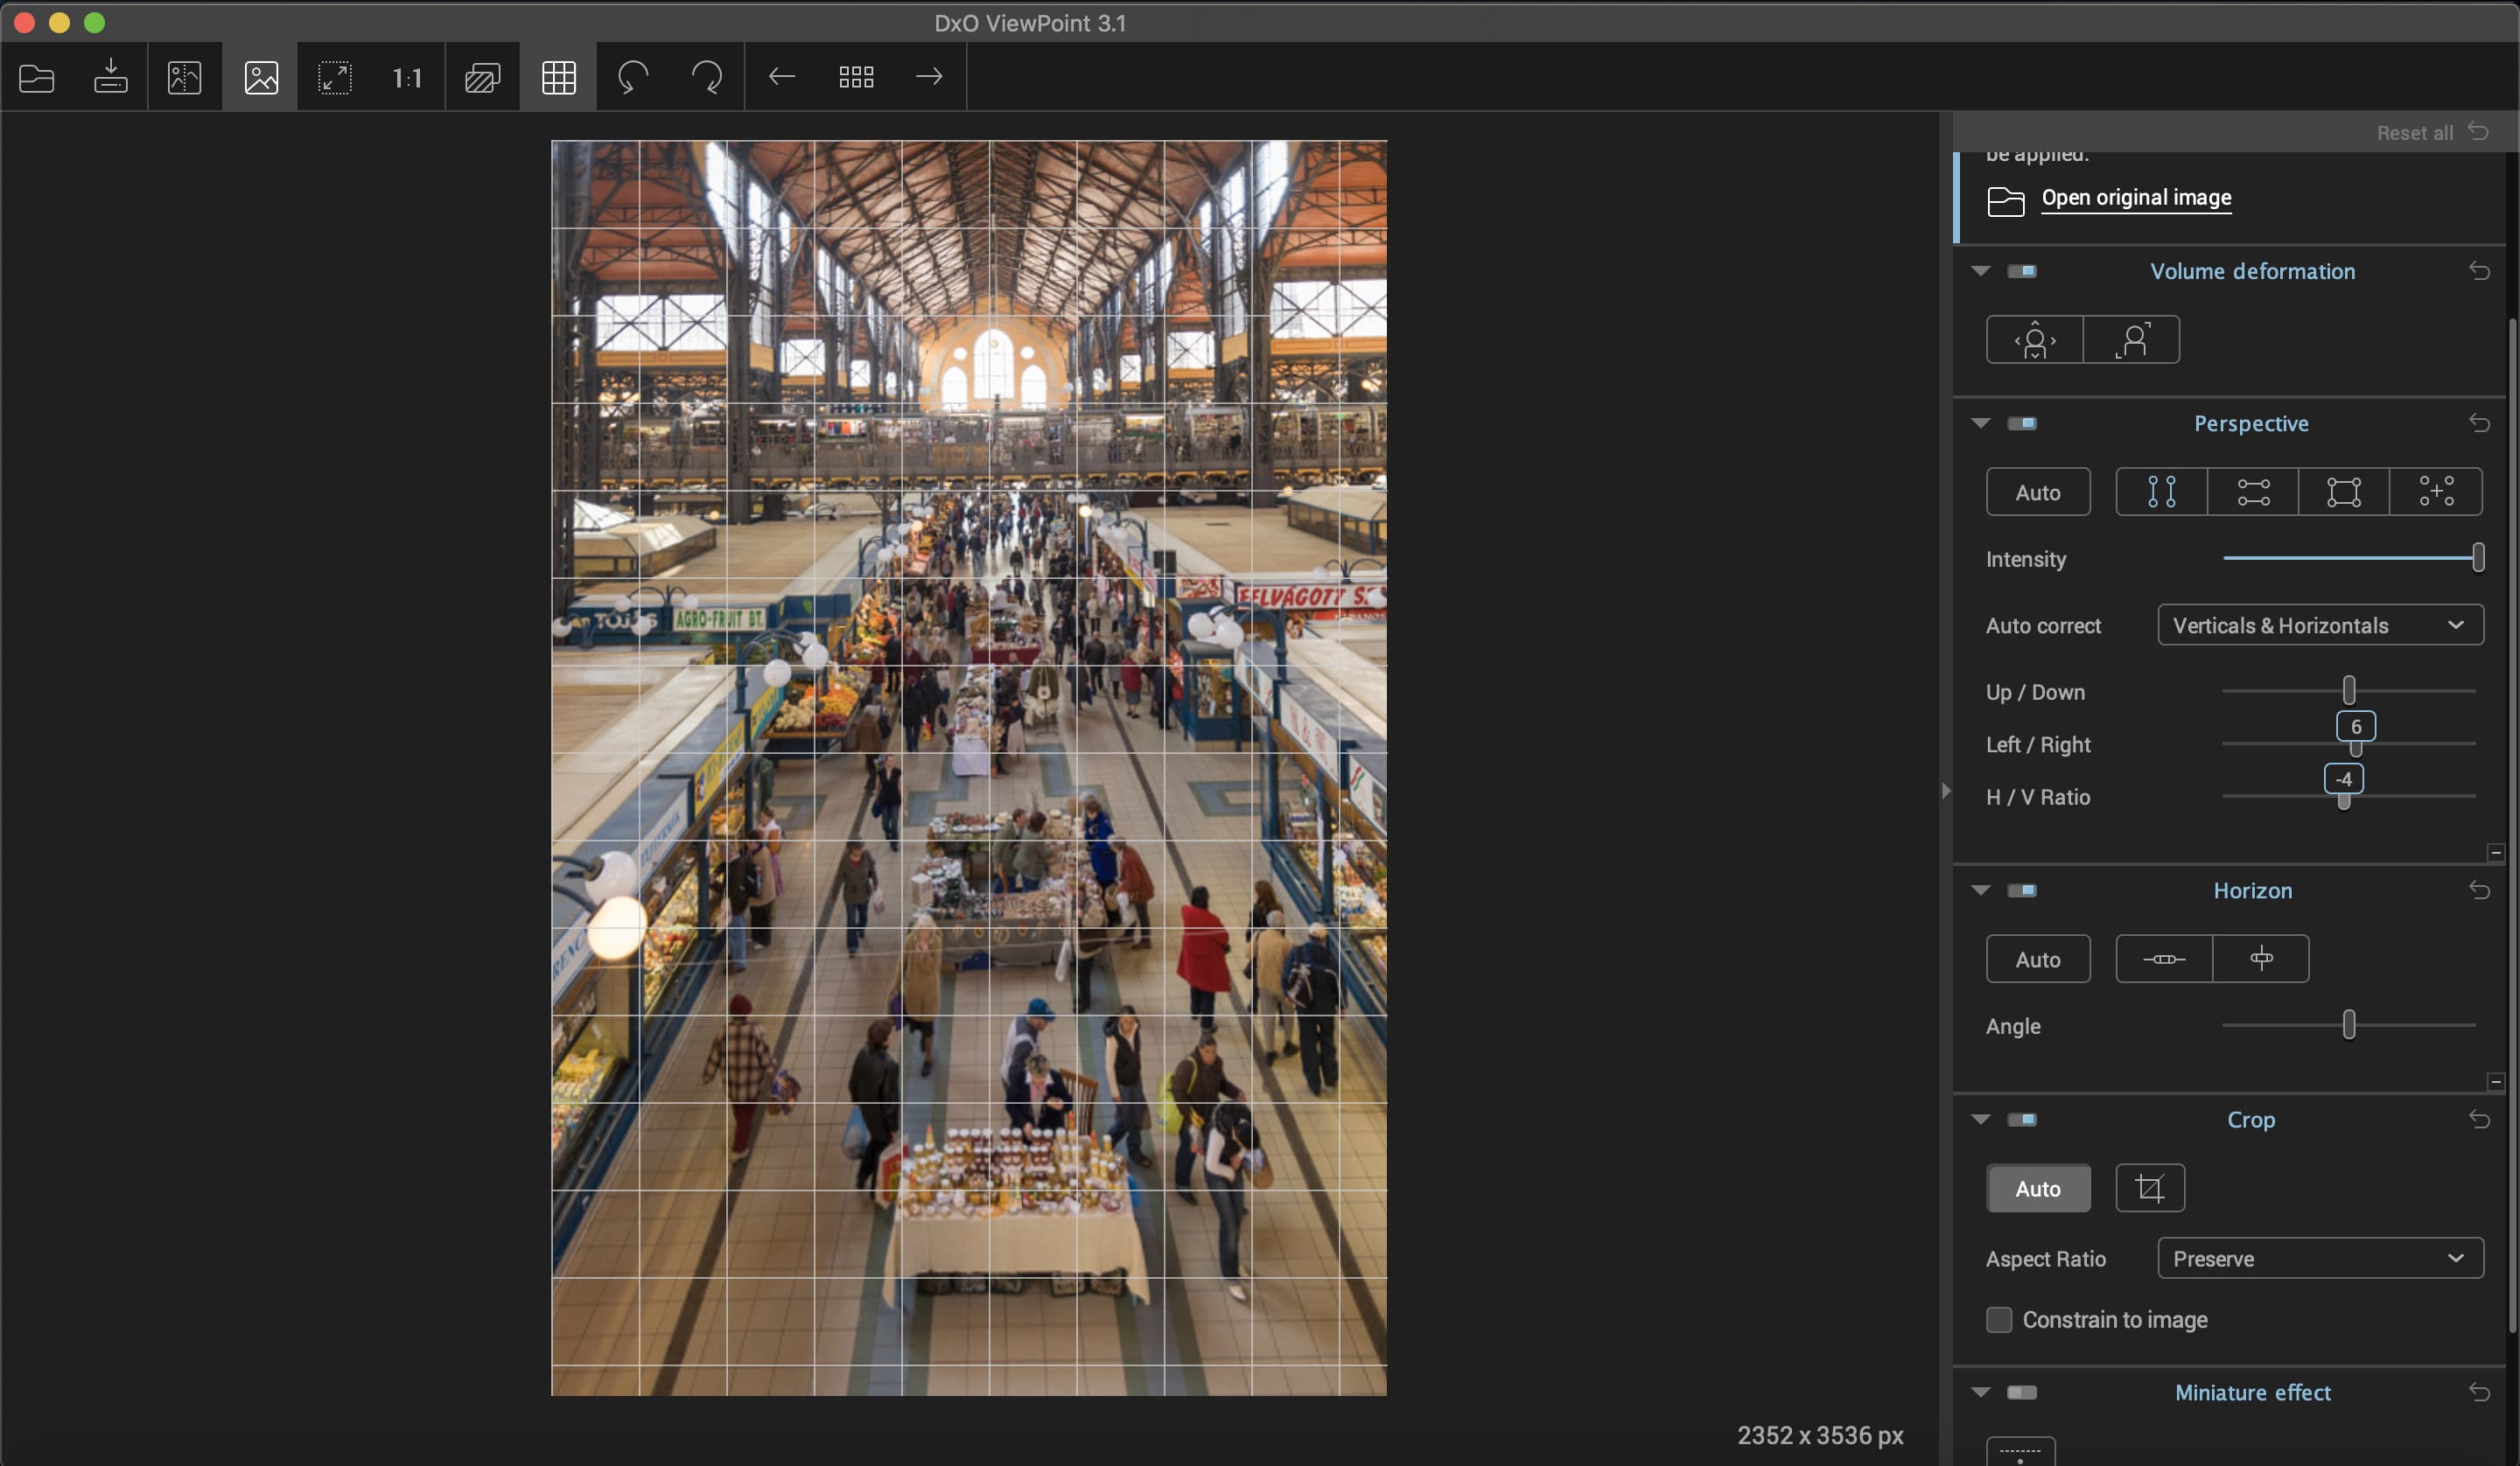
As you know, most image-editing software has tools to fix these kinds of distortions, but DxO Viewpoint and DxO Nik Collection Perspective Efex are dedicated to the process and give lots of variables, plus some other features, making the process very easy, intuitive and ultimately successful. So let’s see how some of these tools in Viewpoint and Perspective Efex work. Both packages have identical tools and features, which cover automatic and manual optical corrections to control barrel, pincushion and fisheye distortions, and also volumetric controls to balance the size of subjects shot with a wideangle. There are also perspective controls that let you straighten up the lines in a frame, including the horizon, and cropping tools, too. Viewpoint and Perspective Efex don’t offer controls for correcting fringing or vignetting.
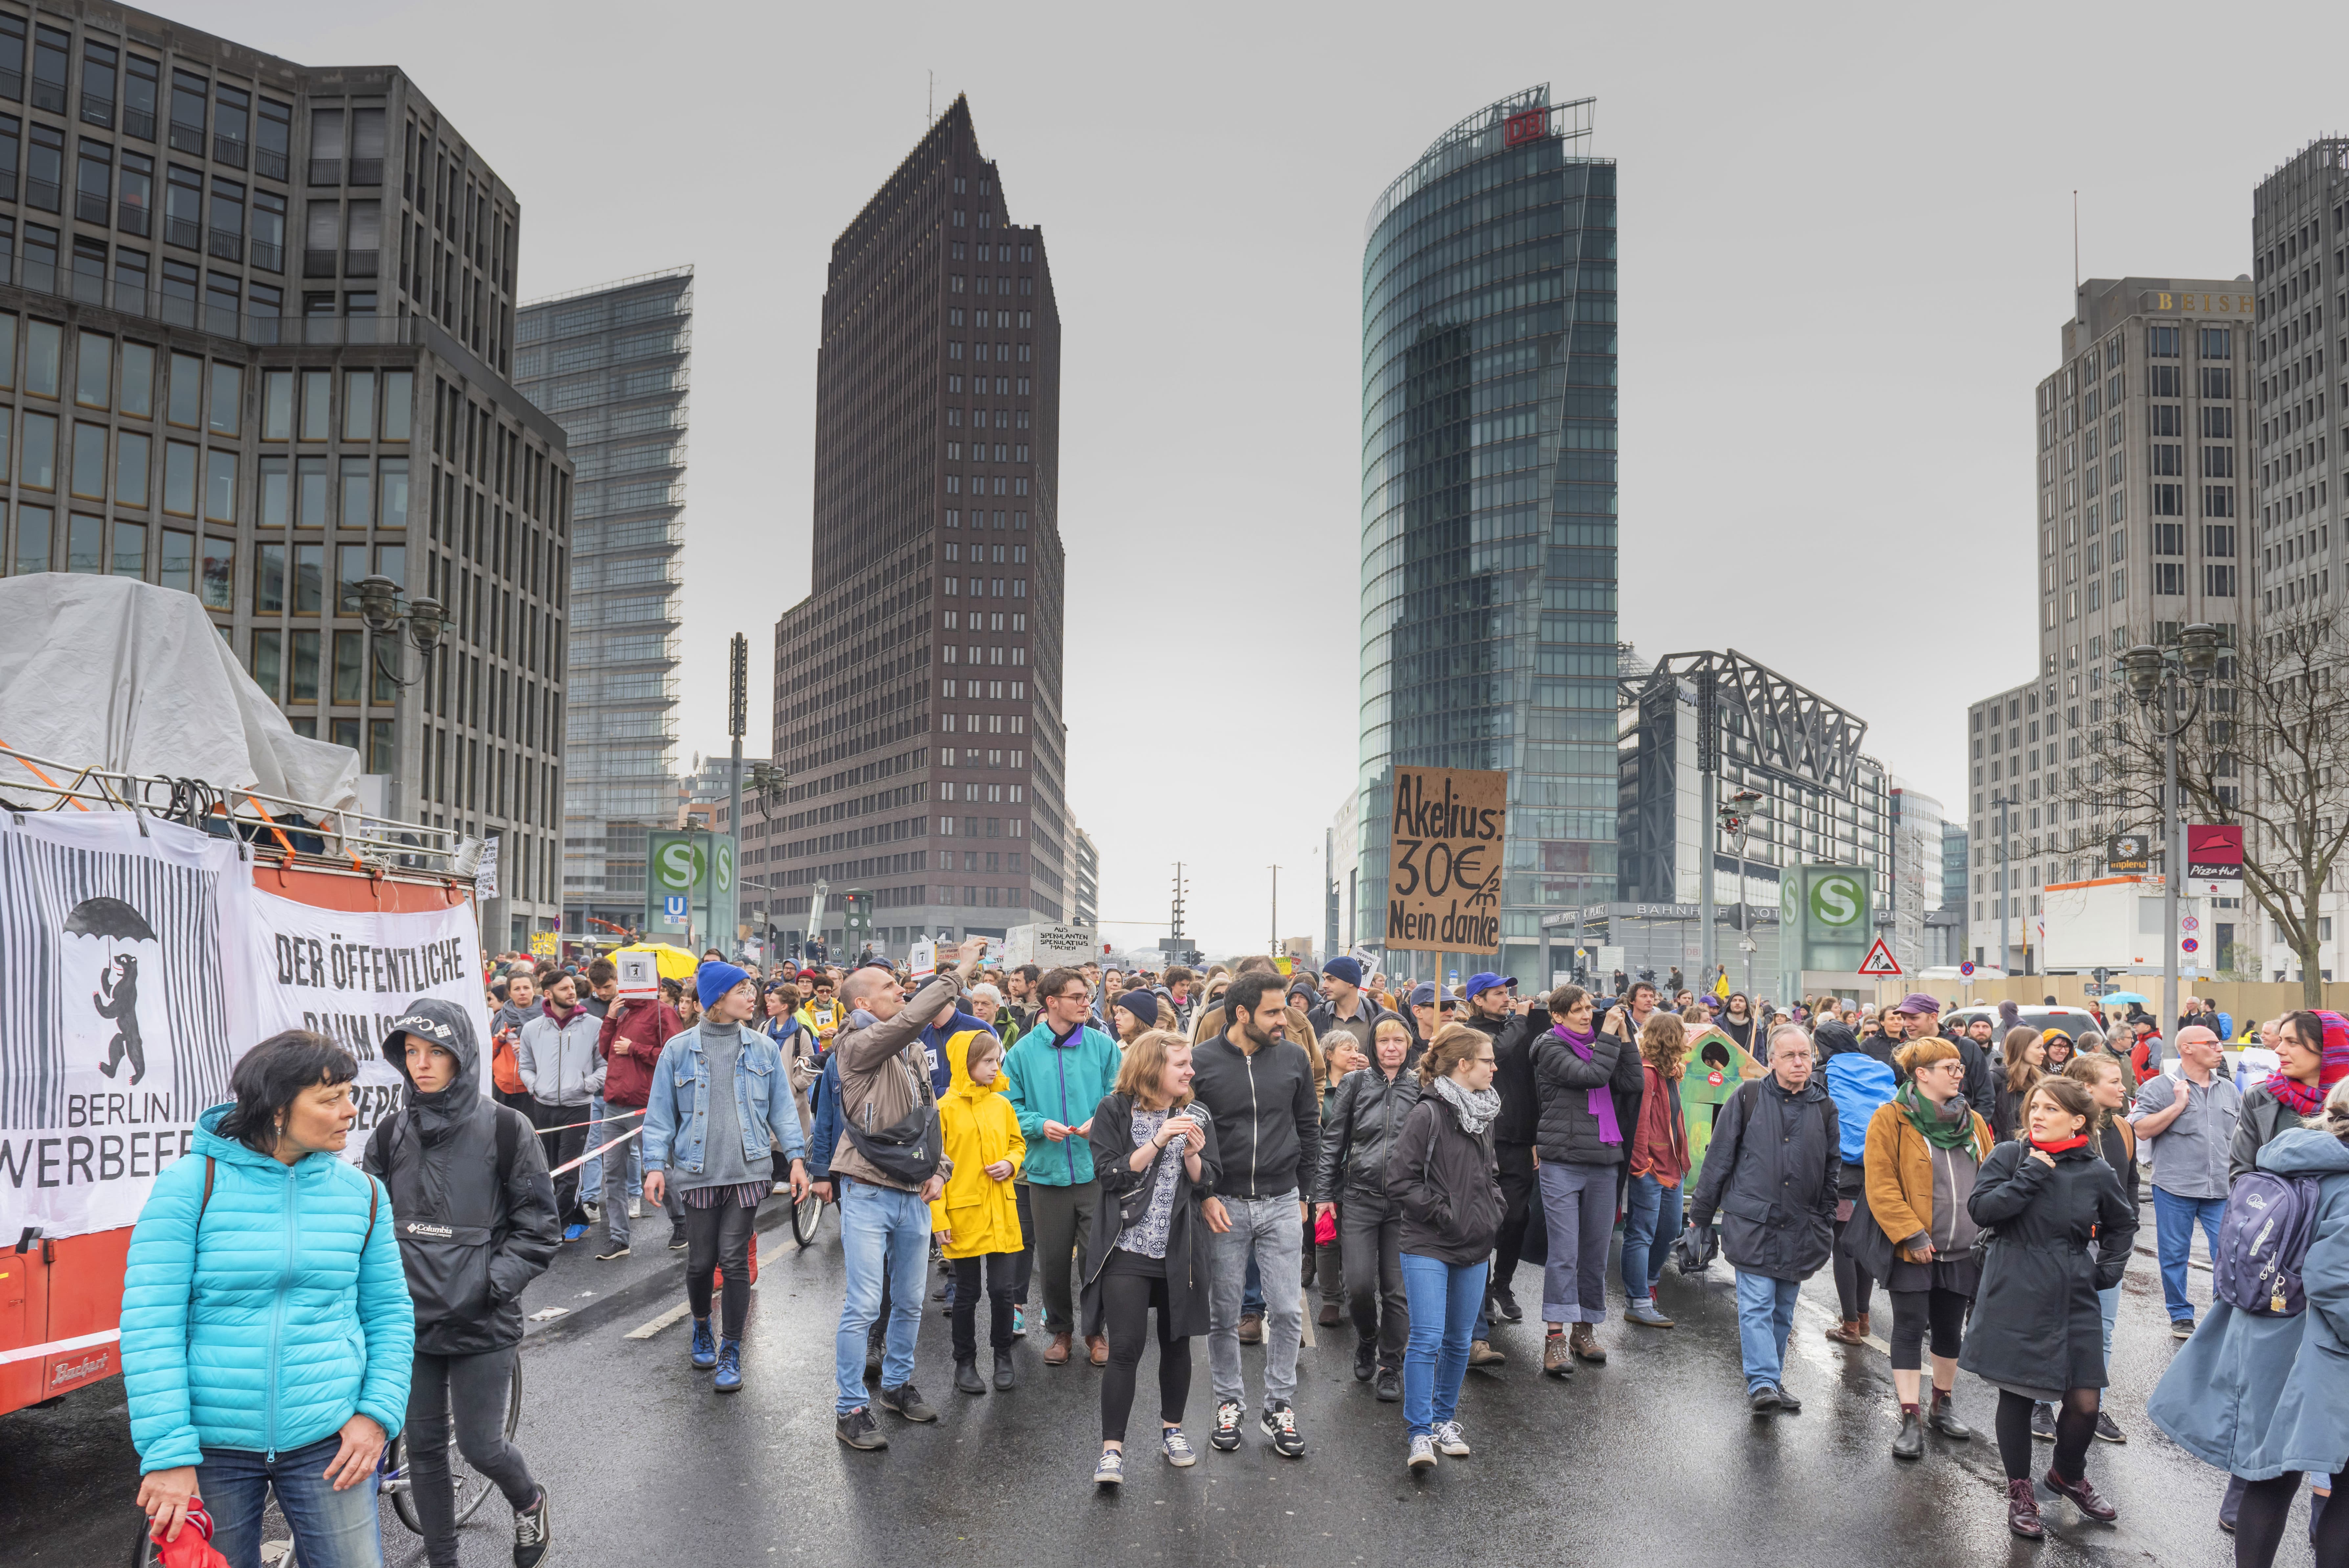
After… The people along the edges of the frame no longer look stretched out wide
Of course, these tools aren’t magic, and they can only work with what they’re given. And whether you’re correcting barrel distortion, or keystoning, they will have to distort the image back to true, and in the process lose pixels. Therefore, if you have a frame-filling subject that needs correction, you may end up losing bits of it. The only real difference in how these two packages work is how they integrate in your workflow. Both can be used as standalone packages, and plug-ins in Photoshop and Lightroom, but if you have DxO PhotoLab and want to integrate these features with it, you’ll need to go down the DxO Viewpoint route.
Lens distortion step by step: control barrel and volume distortions
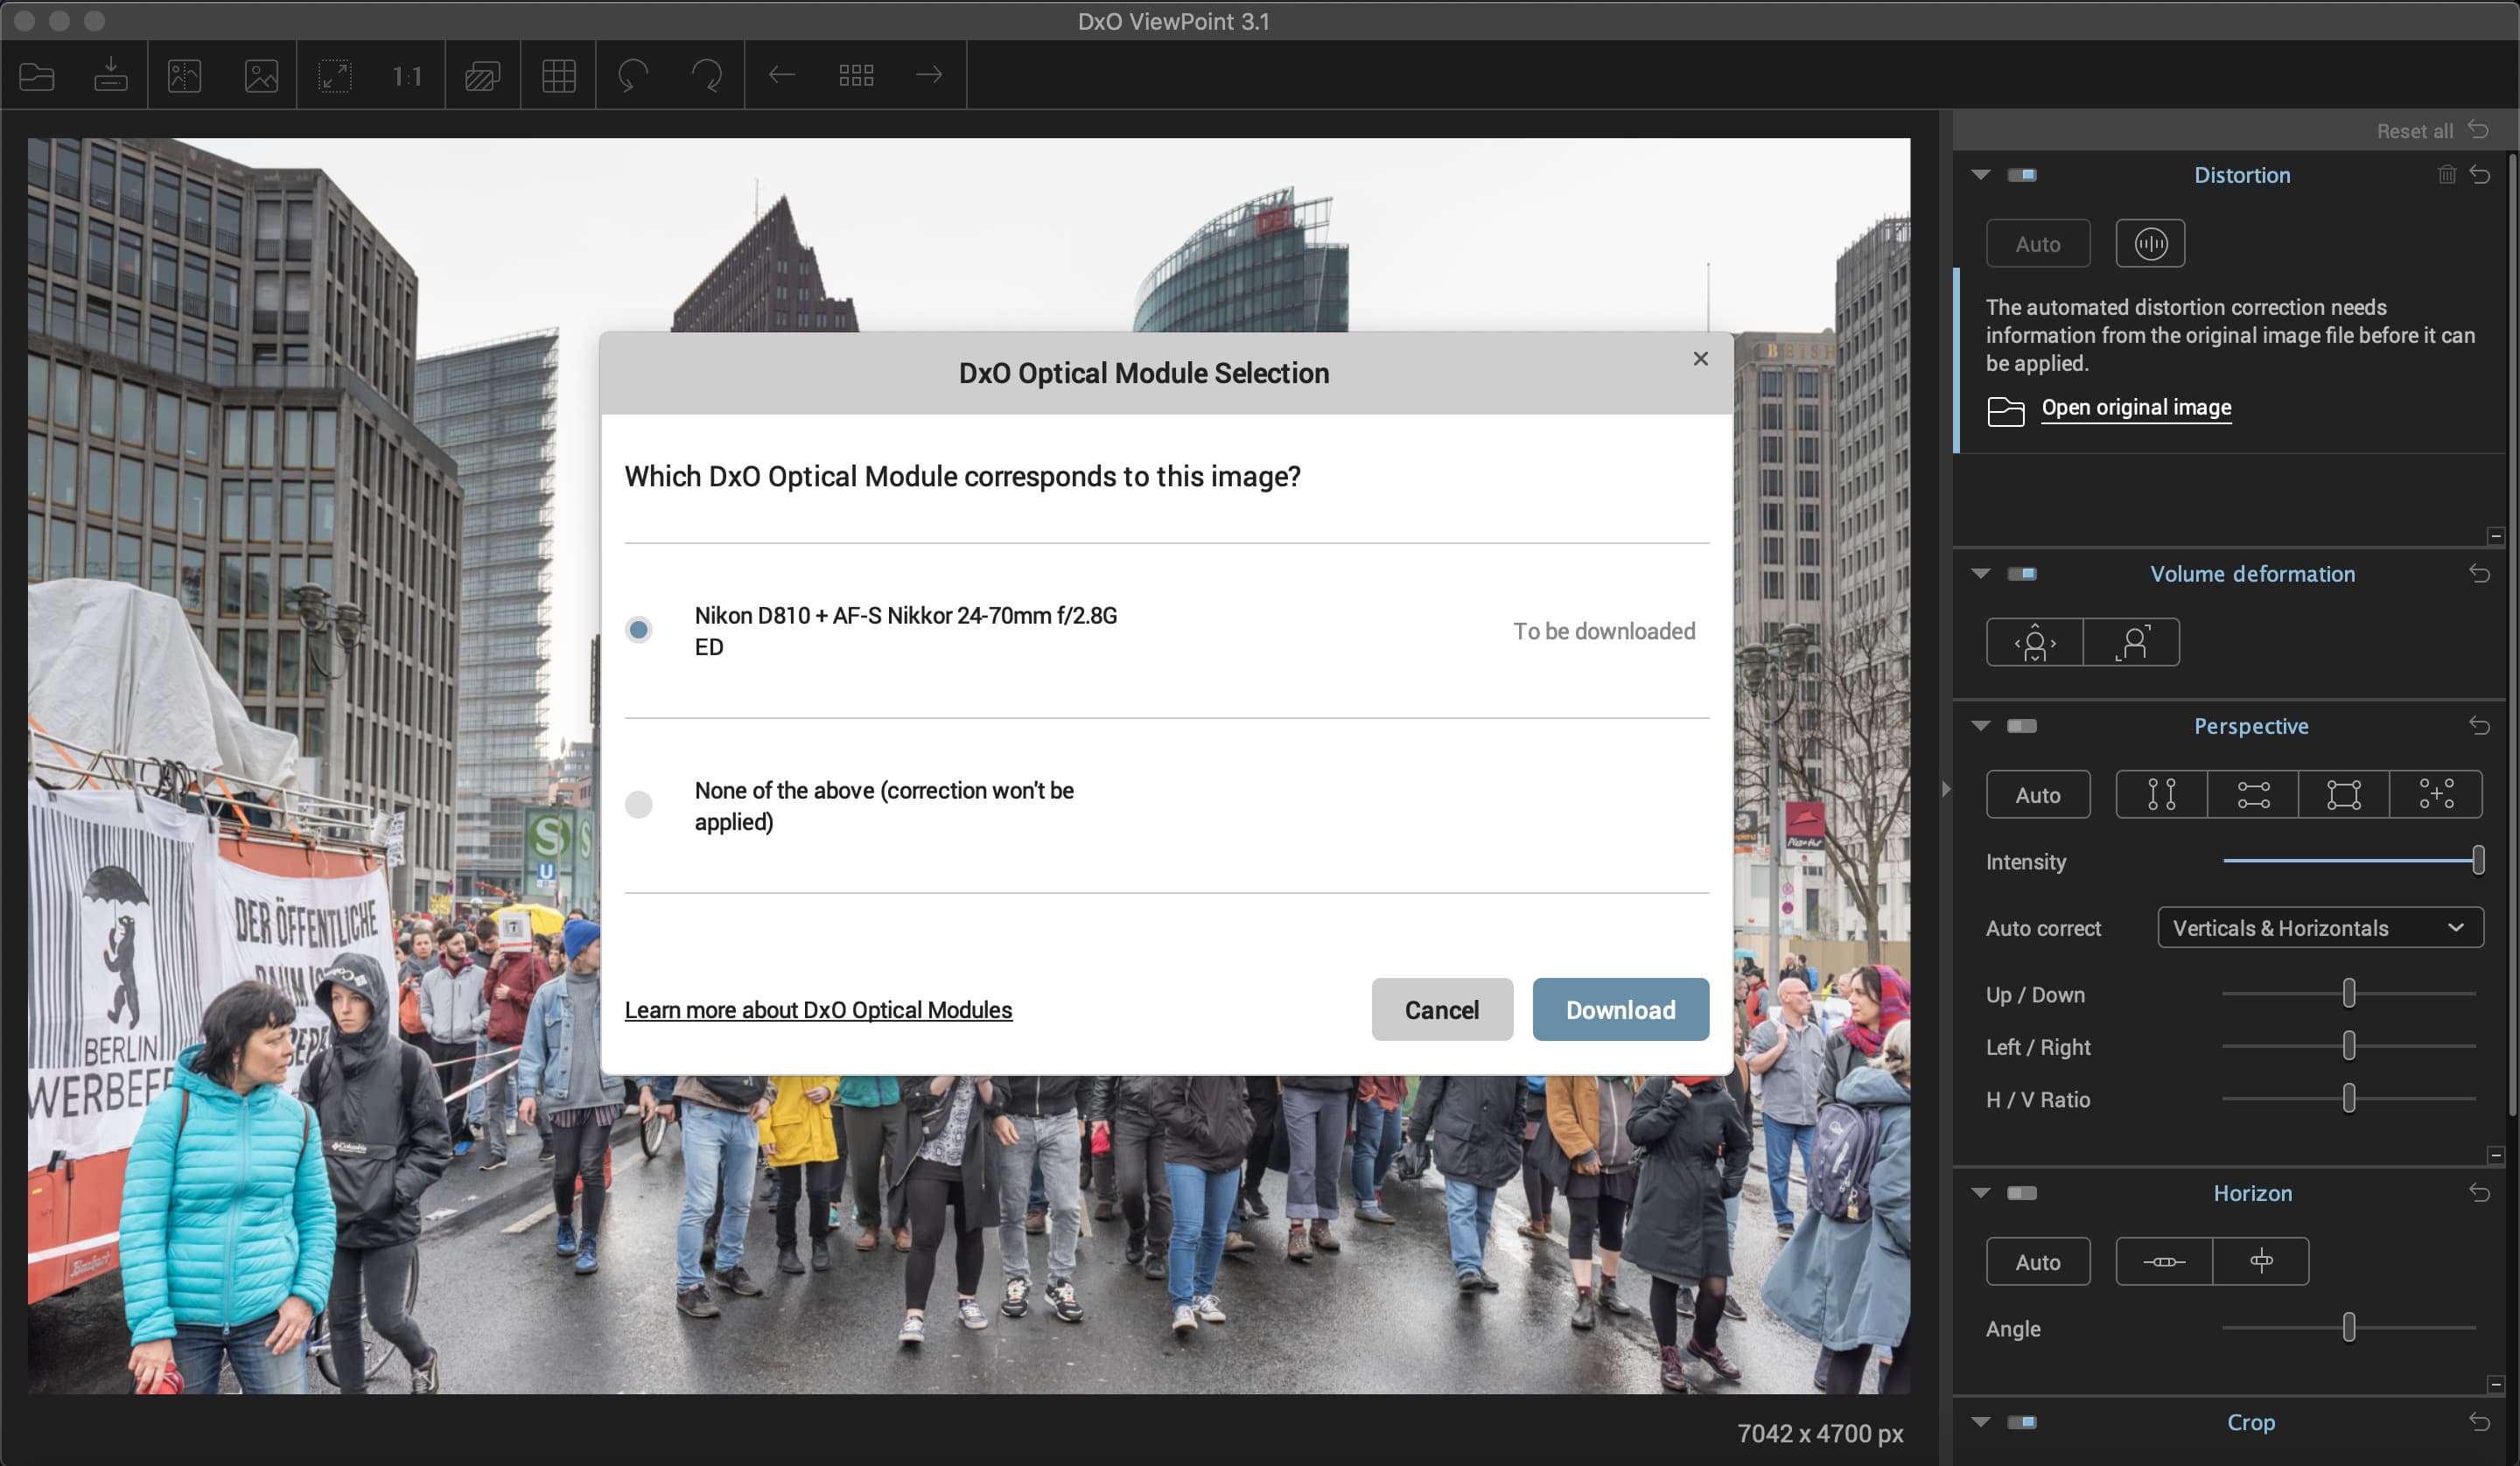
1 Use the lens’s profile
Control the known distortions of your lens by using its profile data from DxO’s archive. At the top right, under Distortions, click Auto, and if you don’t already have the lens data loaded, you’ll be prompted to locate the original file. From that, the software will find the profile online and you can download it.
2 Or correct manually
If you can’t access the lens data, you can still work manually. Click on the Manual button and select Barrel from the options if you’re editing a wideangle picture. There’s also Pincushion and Fisheye for other optics. Move the Intensity slider until the distortion is corrected. It’s easiest to see in straight lines.
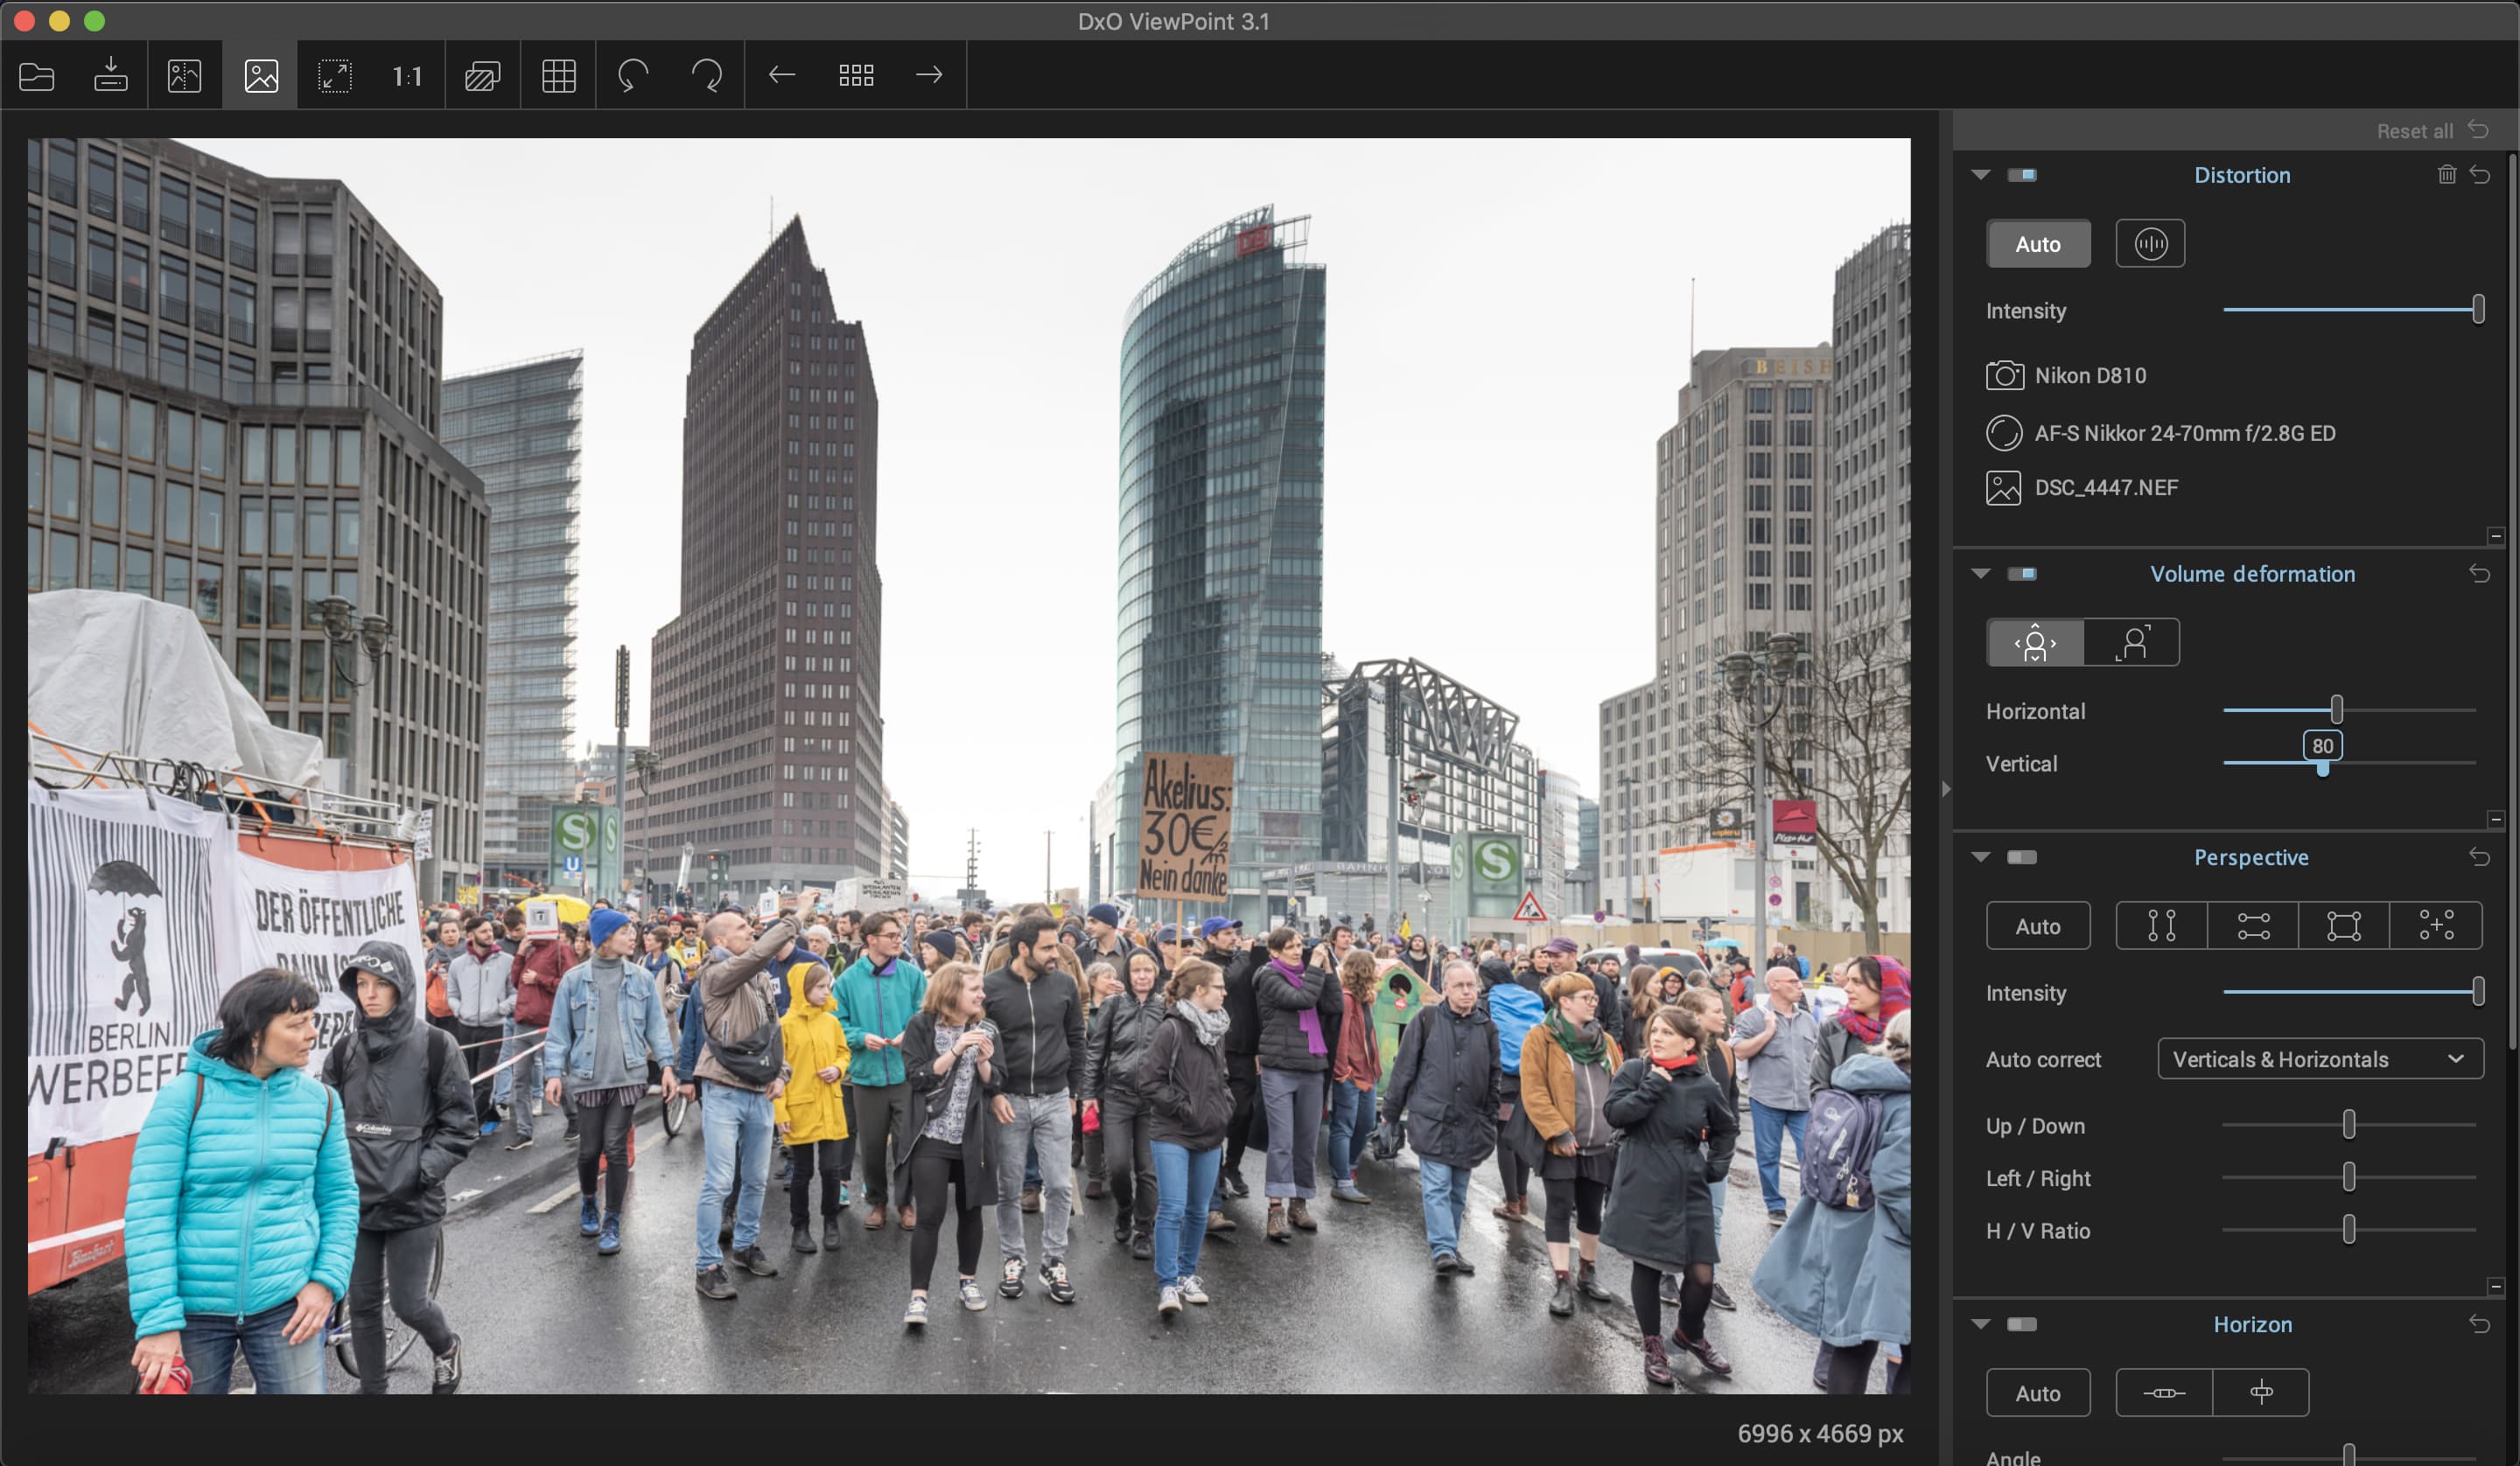
3 Correct the frame edges
Now move down to Volume deformation. The Horizontal/Vertical and Diagonal options give different effects. The latter uses cylindrical correction and is the weaker of the two, but can still be very effective. Increase the Horizontal slider, until people at the edges of the frame look thinner and more natural.

4 Correct the Vertical shift
As the frame is stretched to thin objects or people at the edges you will notice that you lose detail at the top and bottom of the frame. To fix this, move down to the Vertical slider and shift it to the right. As you do, lost details will be brought back into the top and bottom, but without affecting the middle.
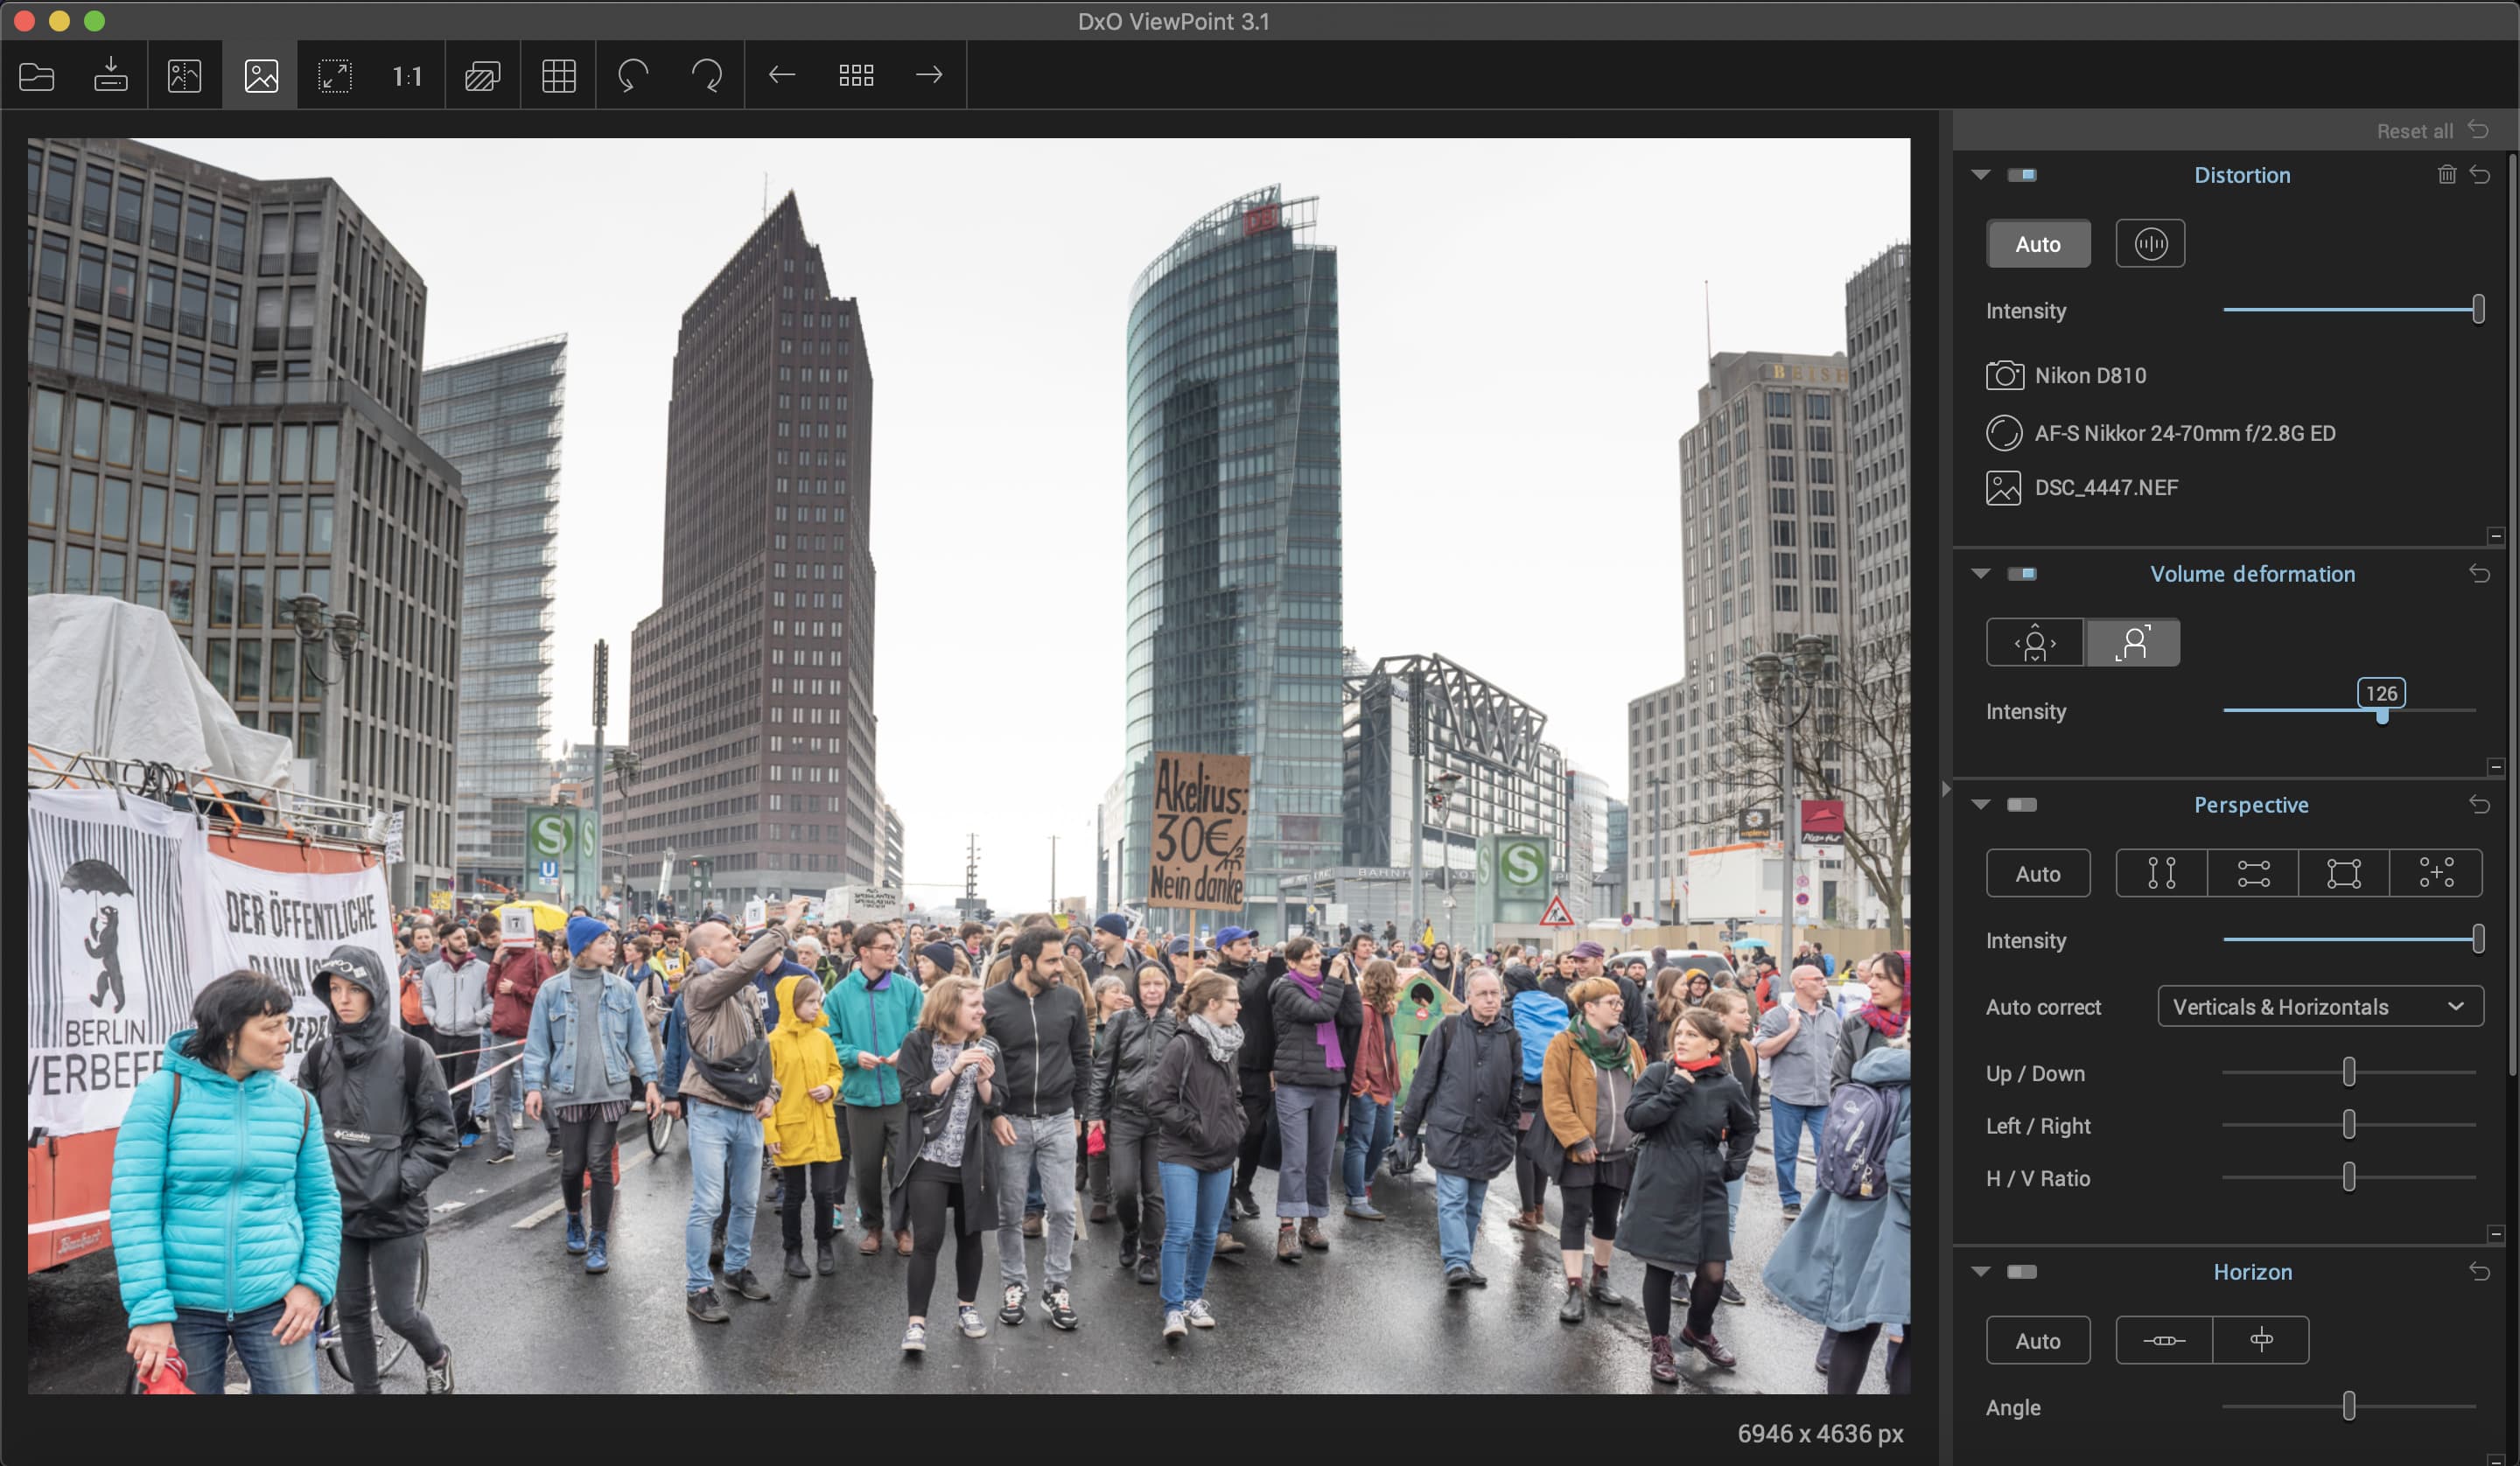
5 Diagonal correction
The Diagonal setting uses spherical correction. It works independently from the Horizontal/Vertical option – you can’t combine them. Click on it to apply a base amount and use the Intensity slider to modify it until the objects at the frame edges have a better balance with the centre.
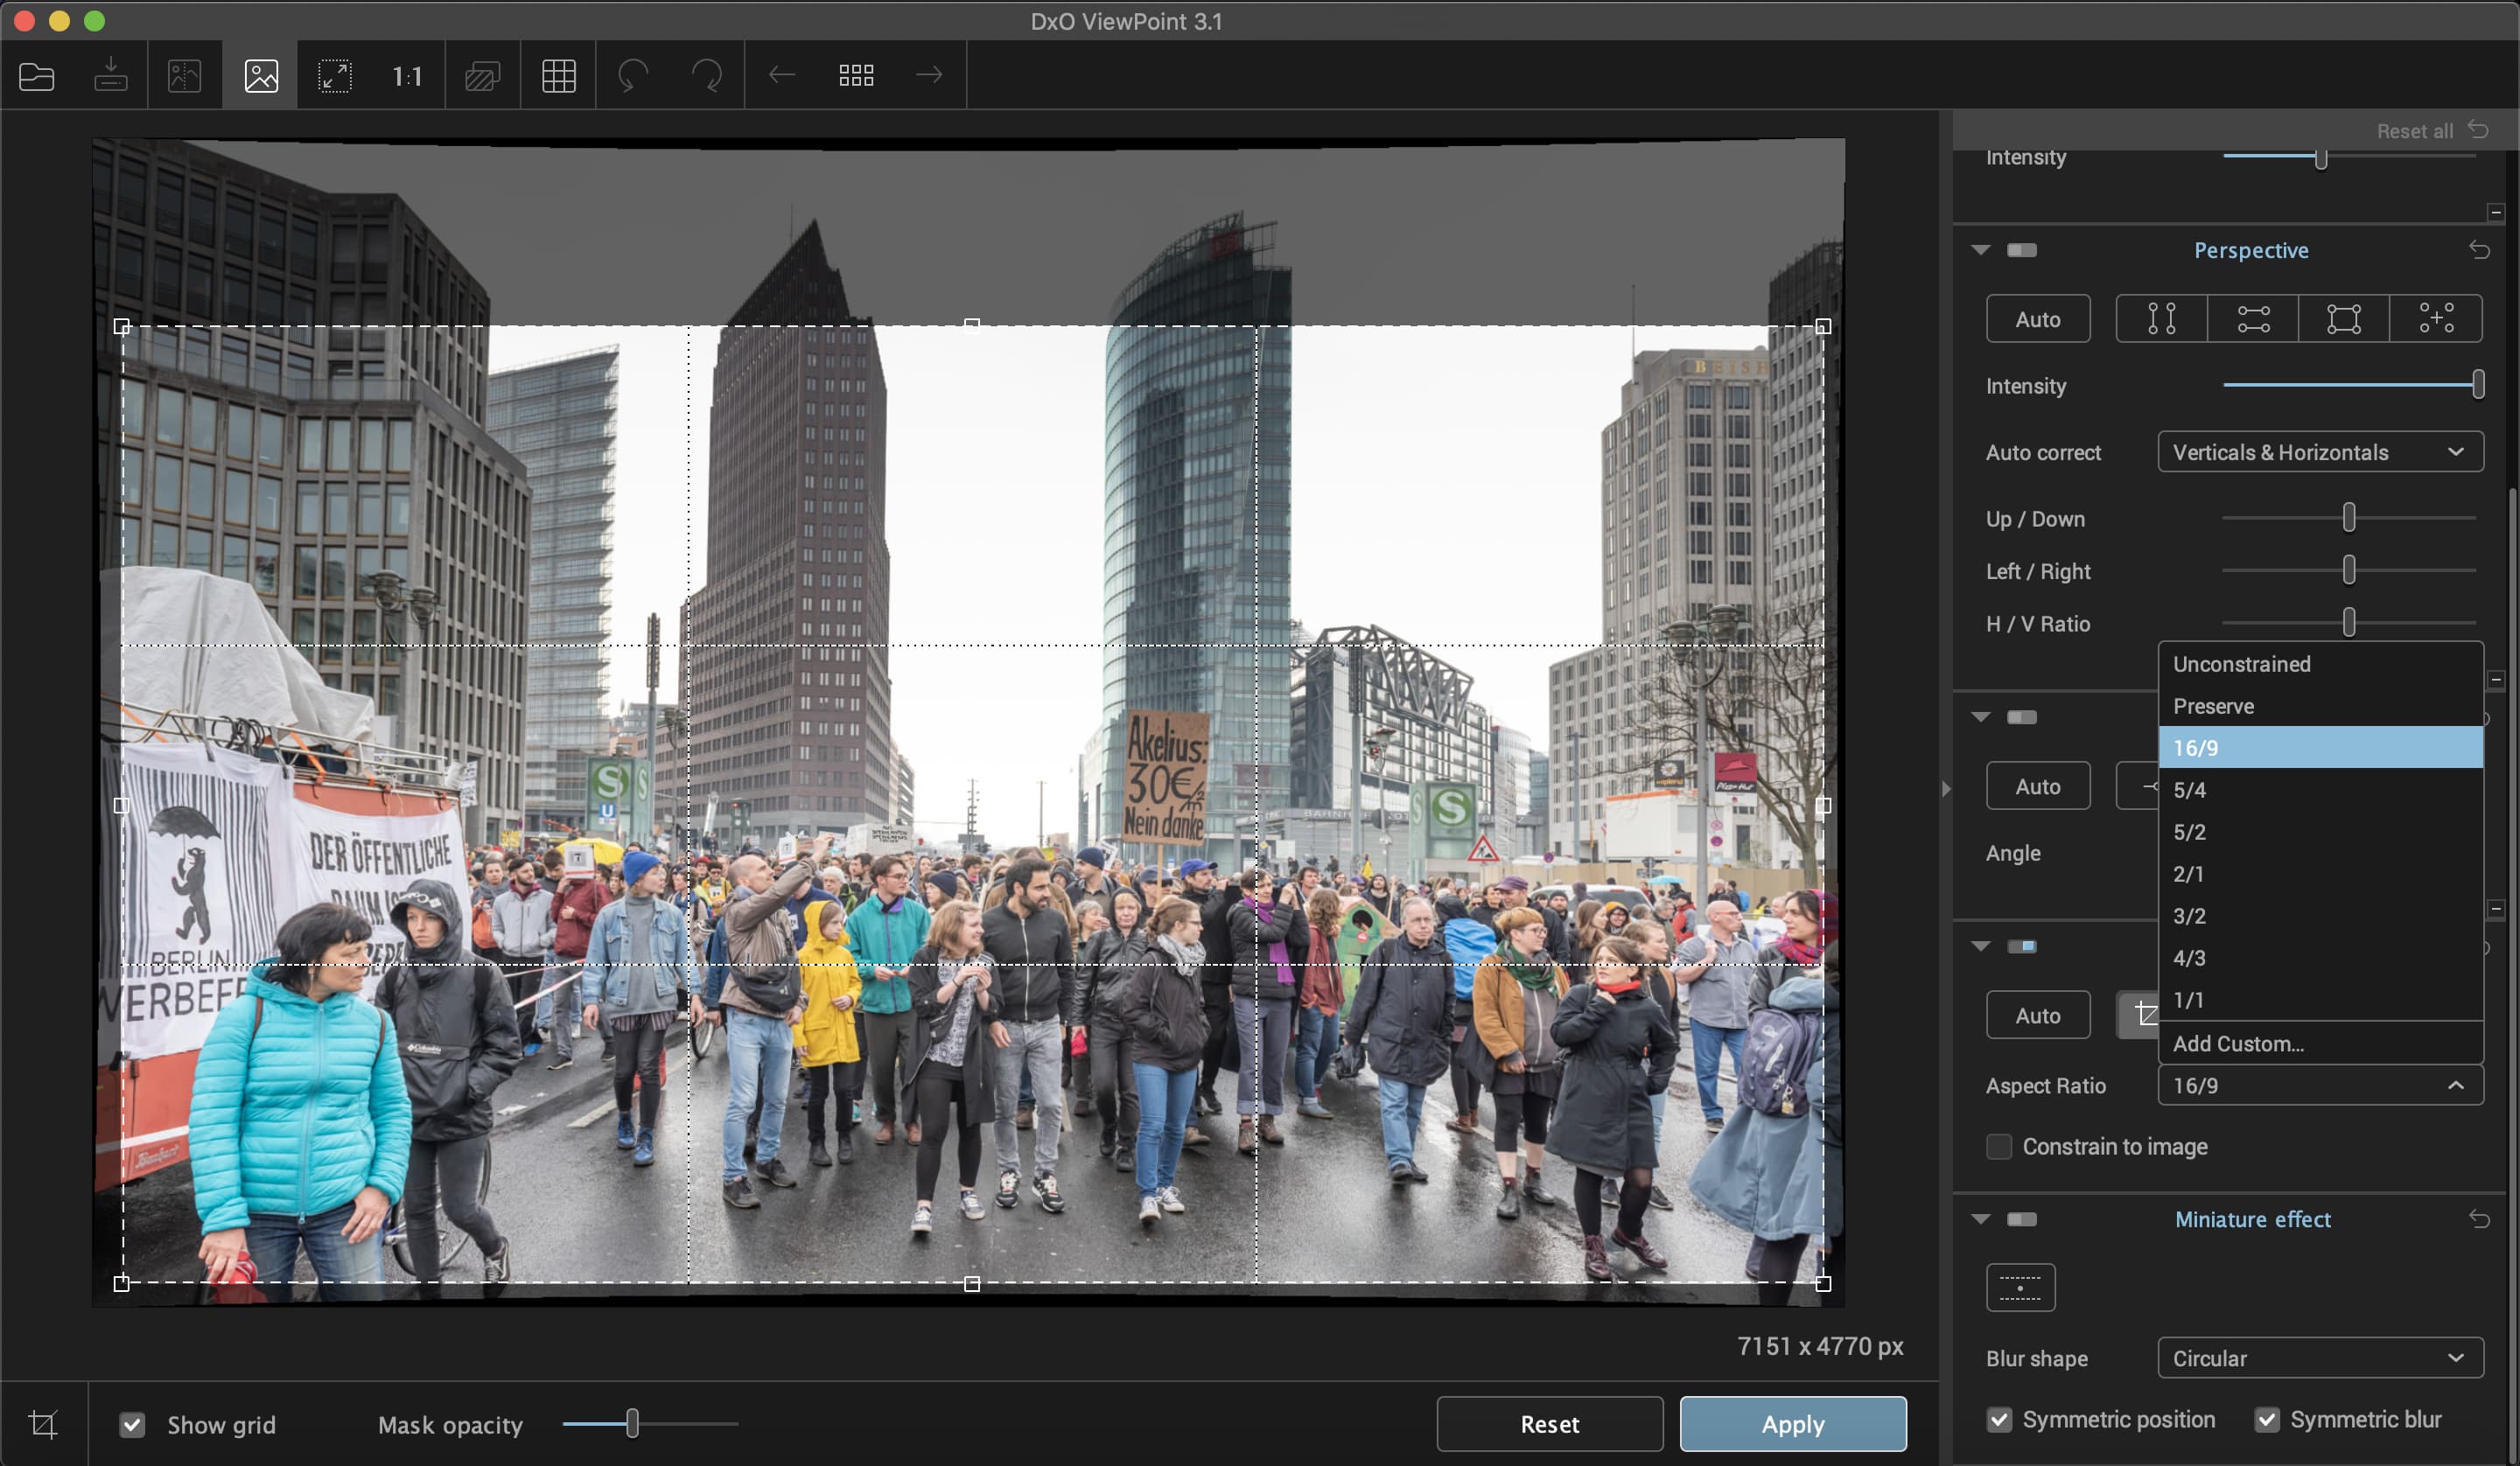
6 Crop and save
After fixing the distortions, move down to the Crop options. Here you can reformat the aspect ratio of the image to suit your tastes, or simply crop out some areas of the picture you no longer want. Then go to File > Save As and the software will default to saving it as a new copy so you don’t lose the original.
Straighten up flatlays and artwork shots
It’s not the most instantly photographic of applications, but ViewPoint 3 and Perspective Efex’s Rectangular and 8 Point tools are great for enabling you to quickly and easily square up pictures of paintings, posters, table tops… anything that you want to be nice and square. Both are found within the Perspective tools and are essentially more powerful versions of the Force Vertical Parallel and Force Horizontal Parallel tools.

The distortion is obvious here
They come into use when you have an object in the frame that has two skewed perspectives or more. All you need to do is click on the tool and then
drag out the points around the image as usual, aligning them with lines in the frame that you want to be straight. After setting the tools, intensity can be set down from the default 100% if desired and you click Apply to finish.
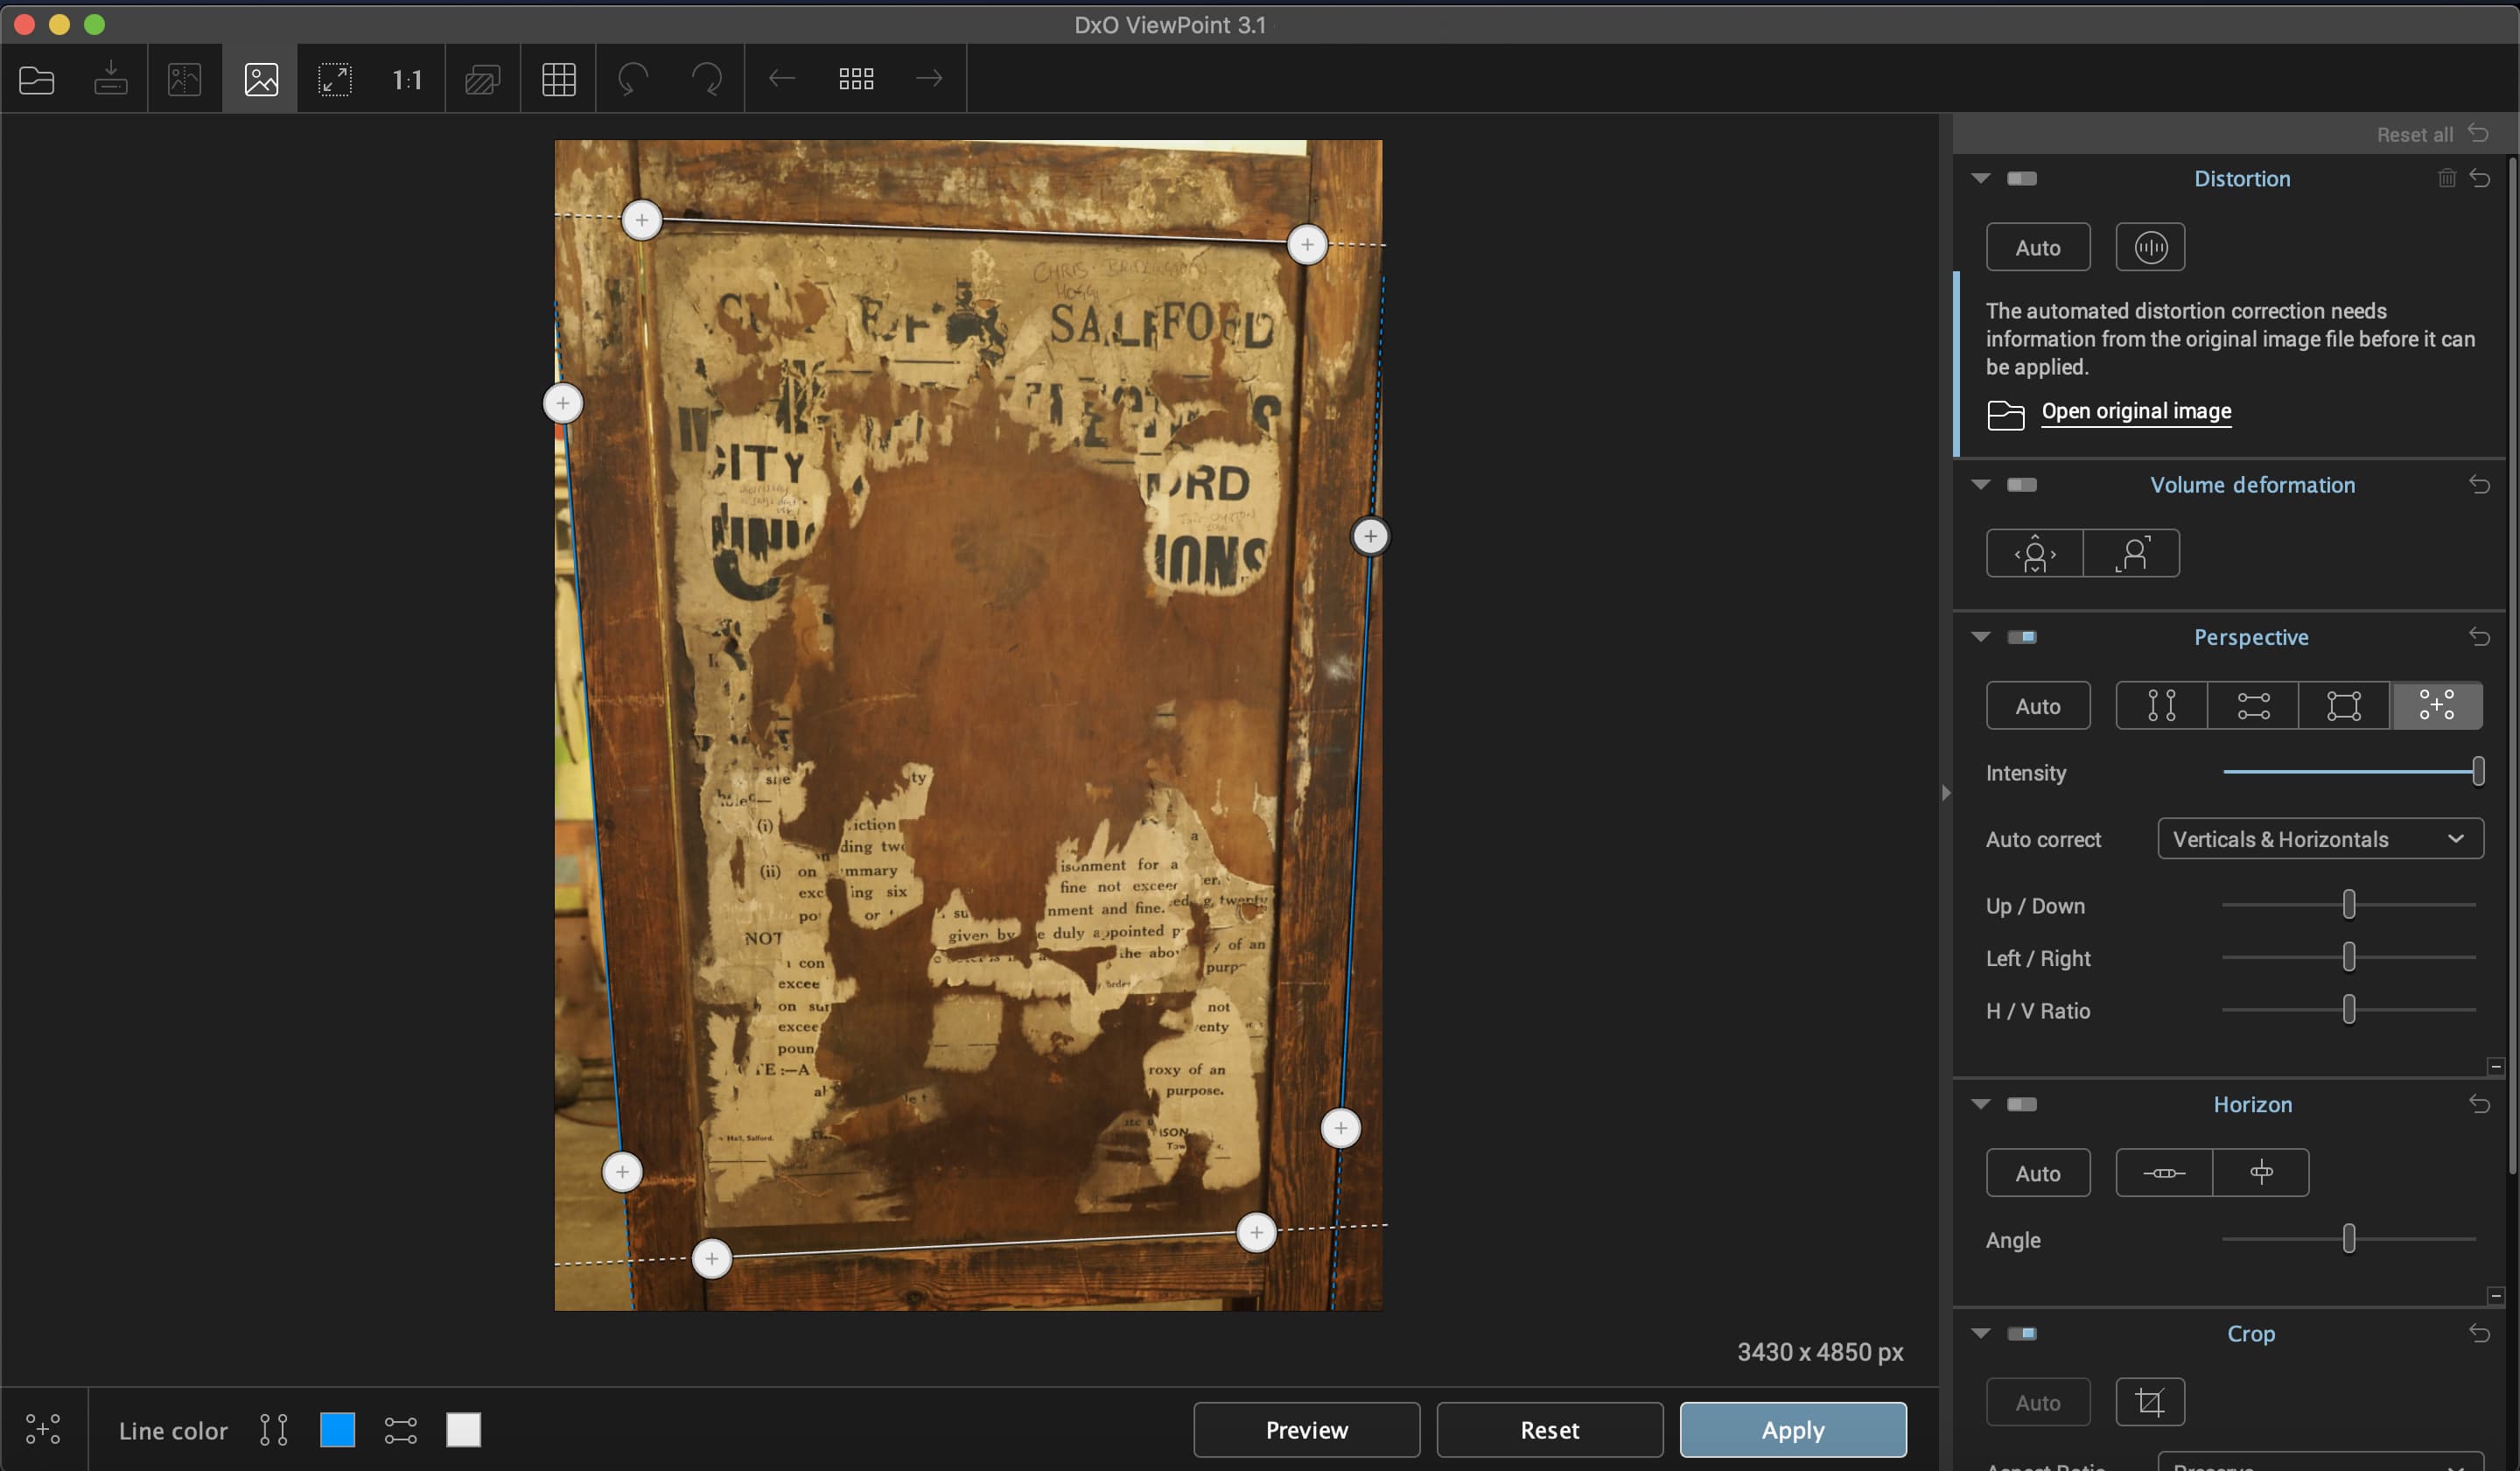
Correct skewed perspective using the Rectangular or 8 Point tools
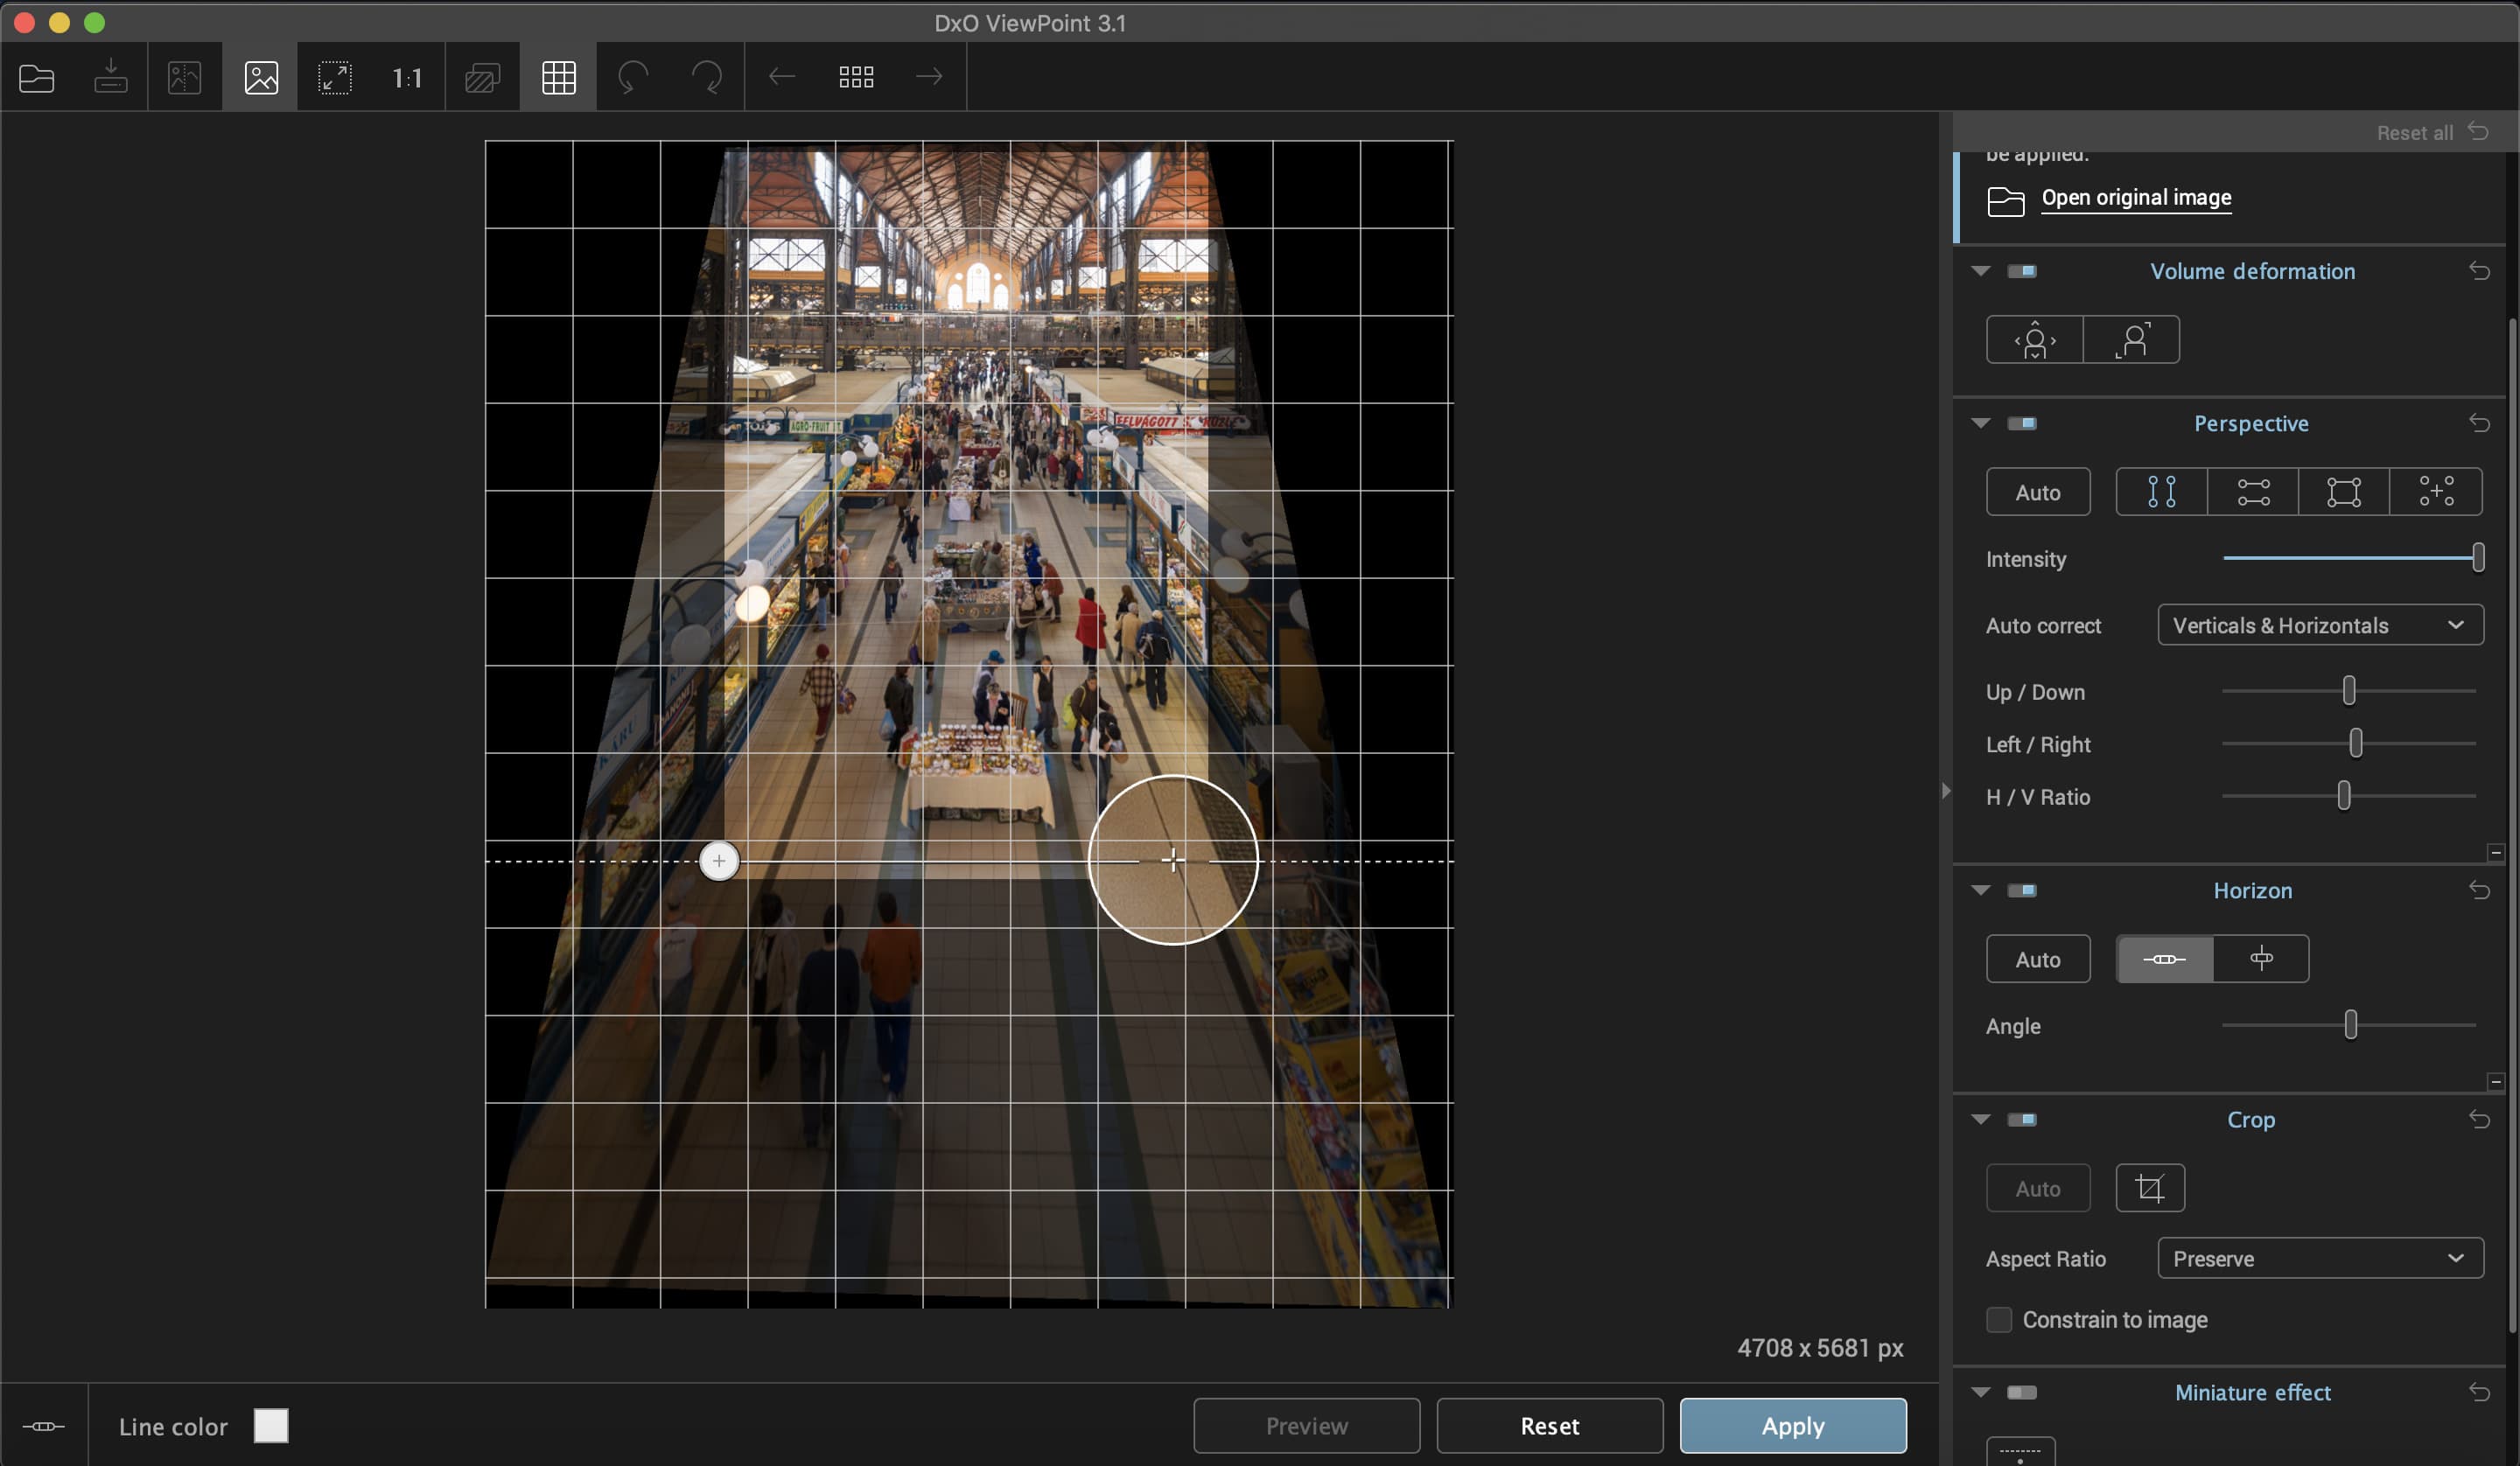
Lens distortion step by step:: how to fix skewed perspective
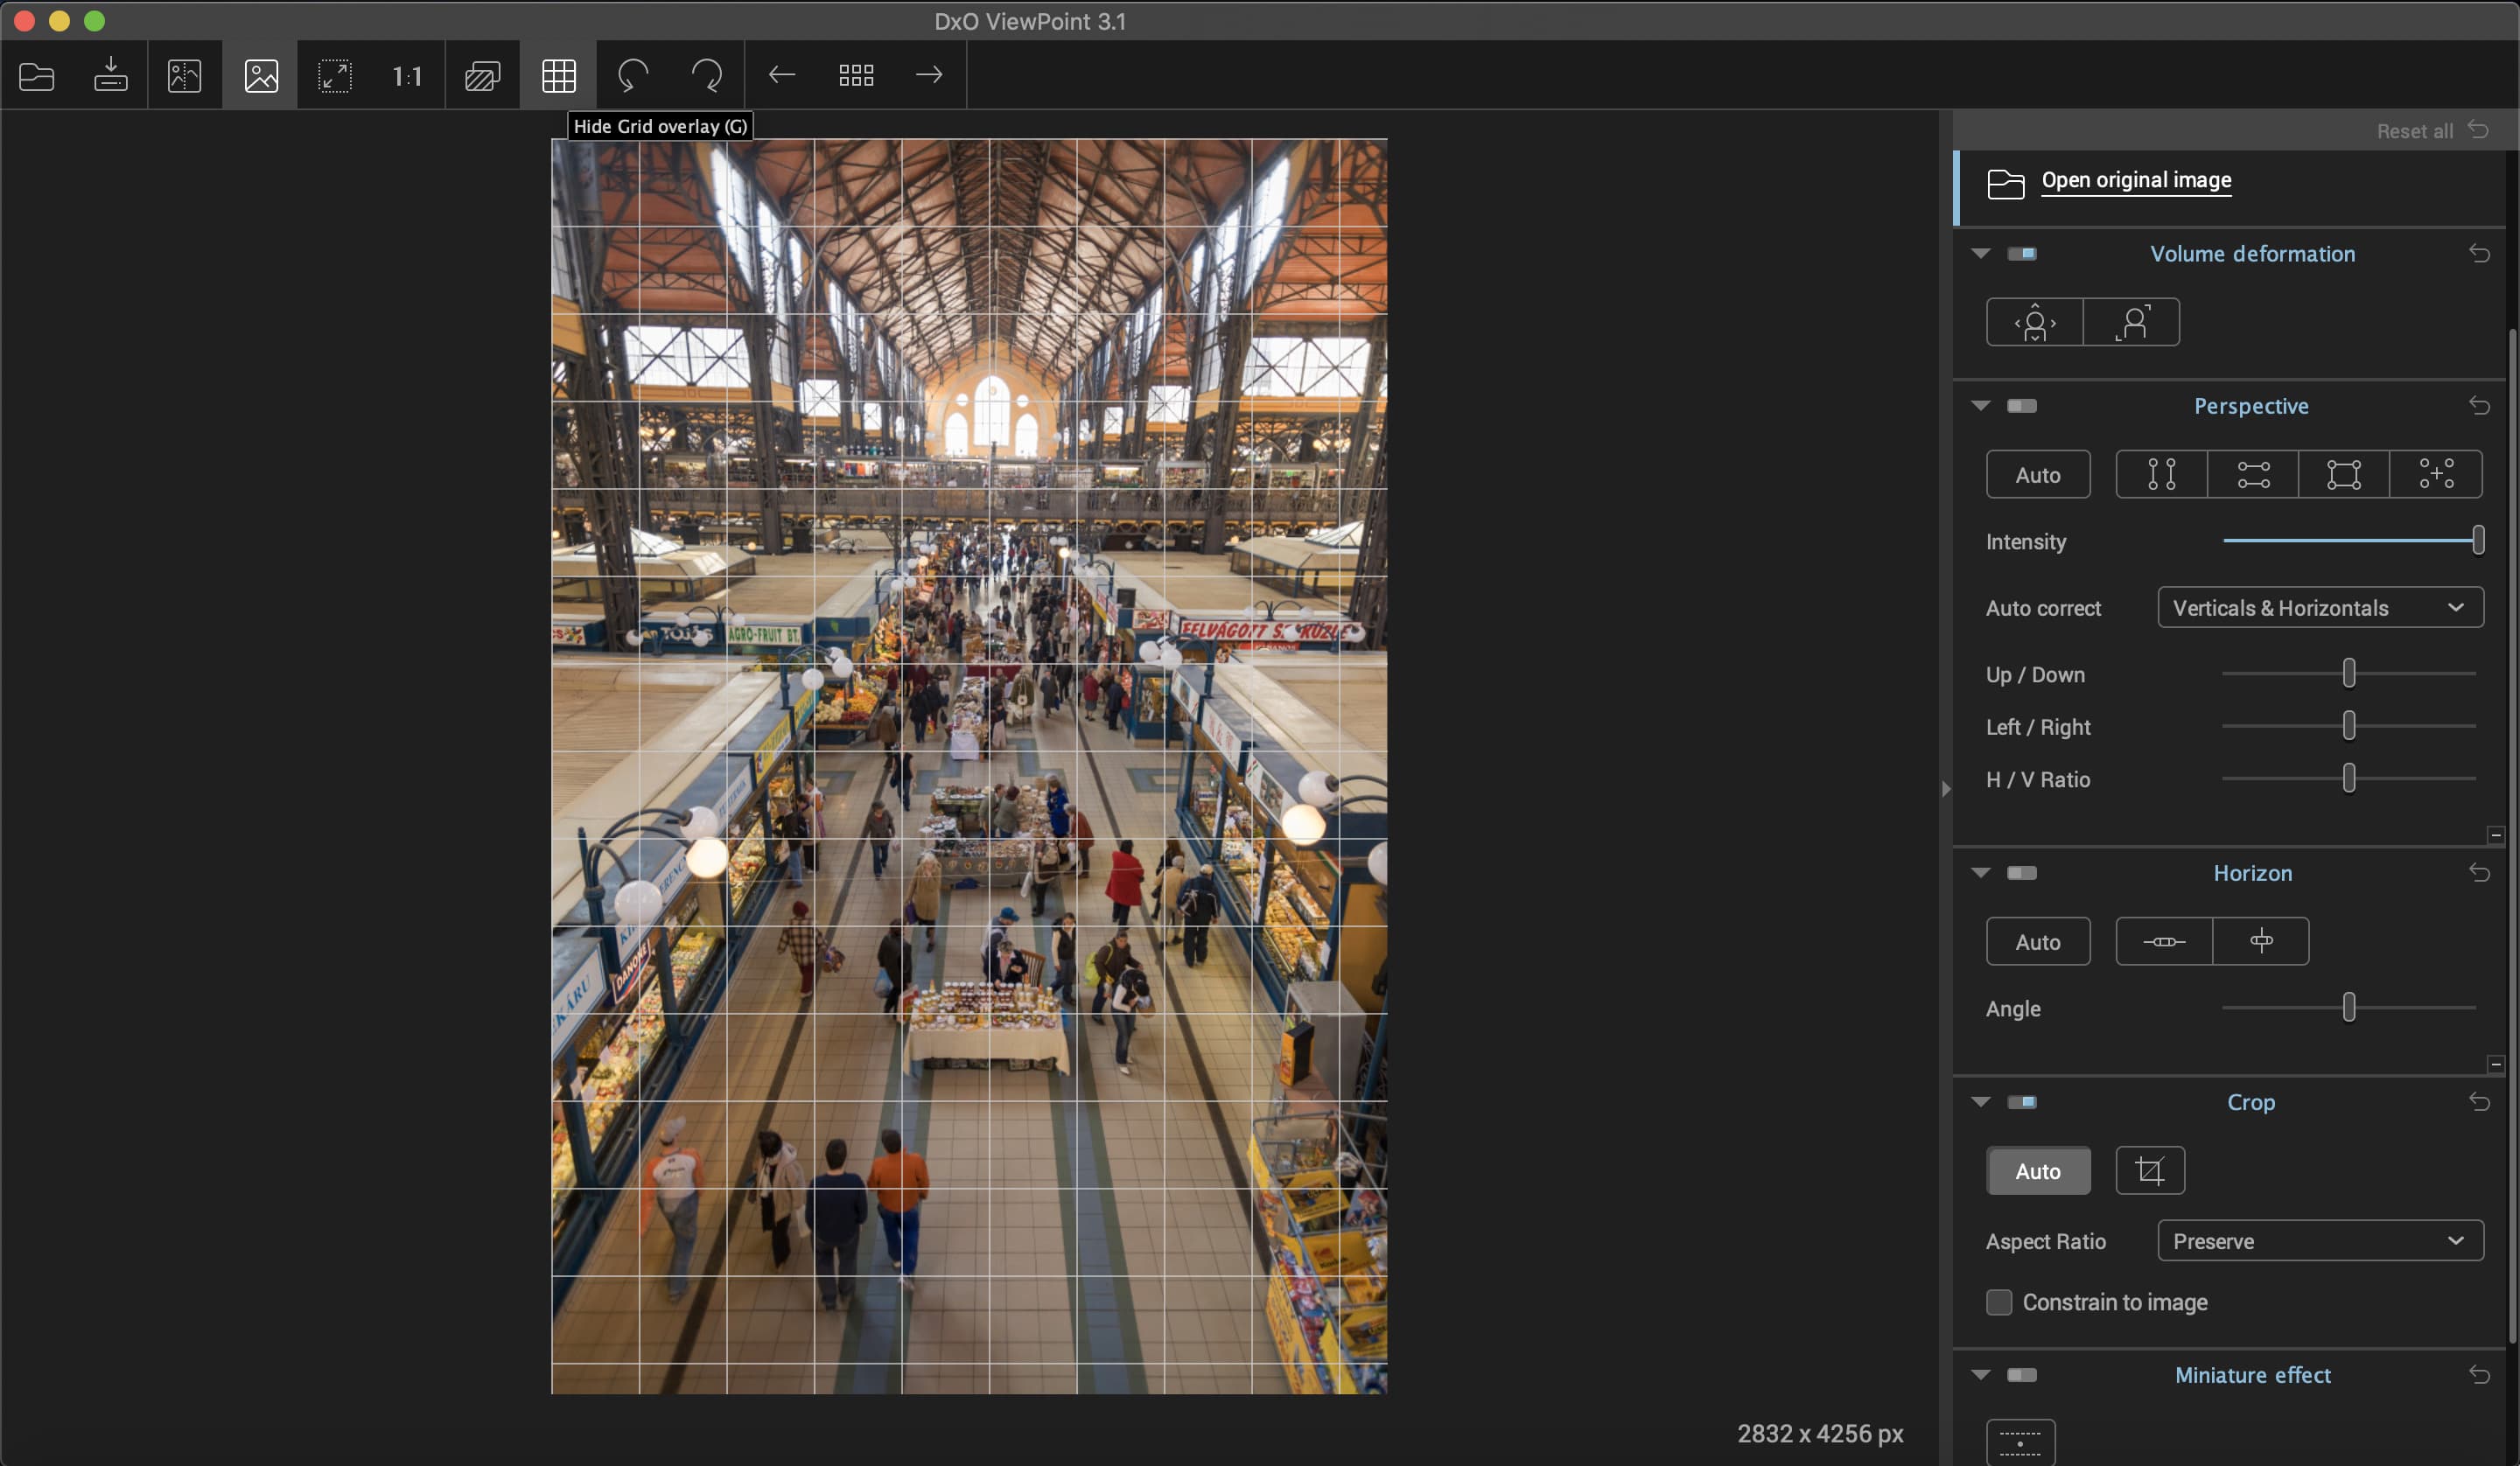
1 Add the Grid overlay
Launch Viewpoint or Perspective Efex, and load in your image. At the top of the interface you’ll see options for navigating and viewing the image. The grid (G) is helpful in showing the extent of skewed perspective. There are also options to show a side-by-side view and a button to toggle any changes on and off.
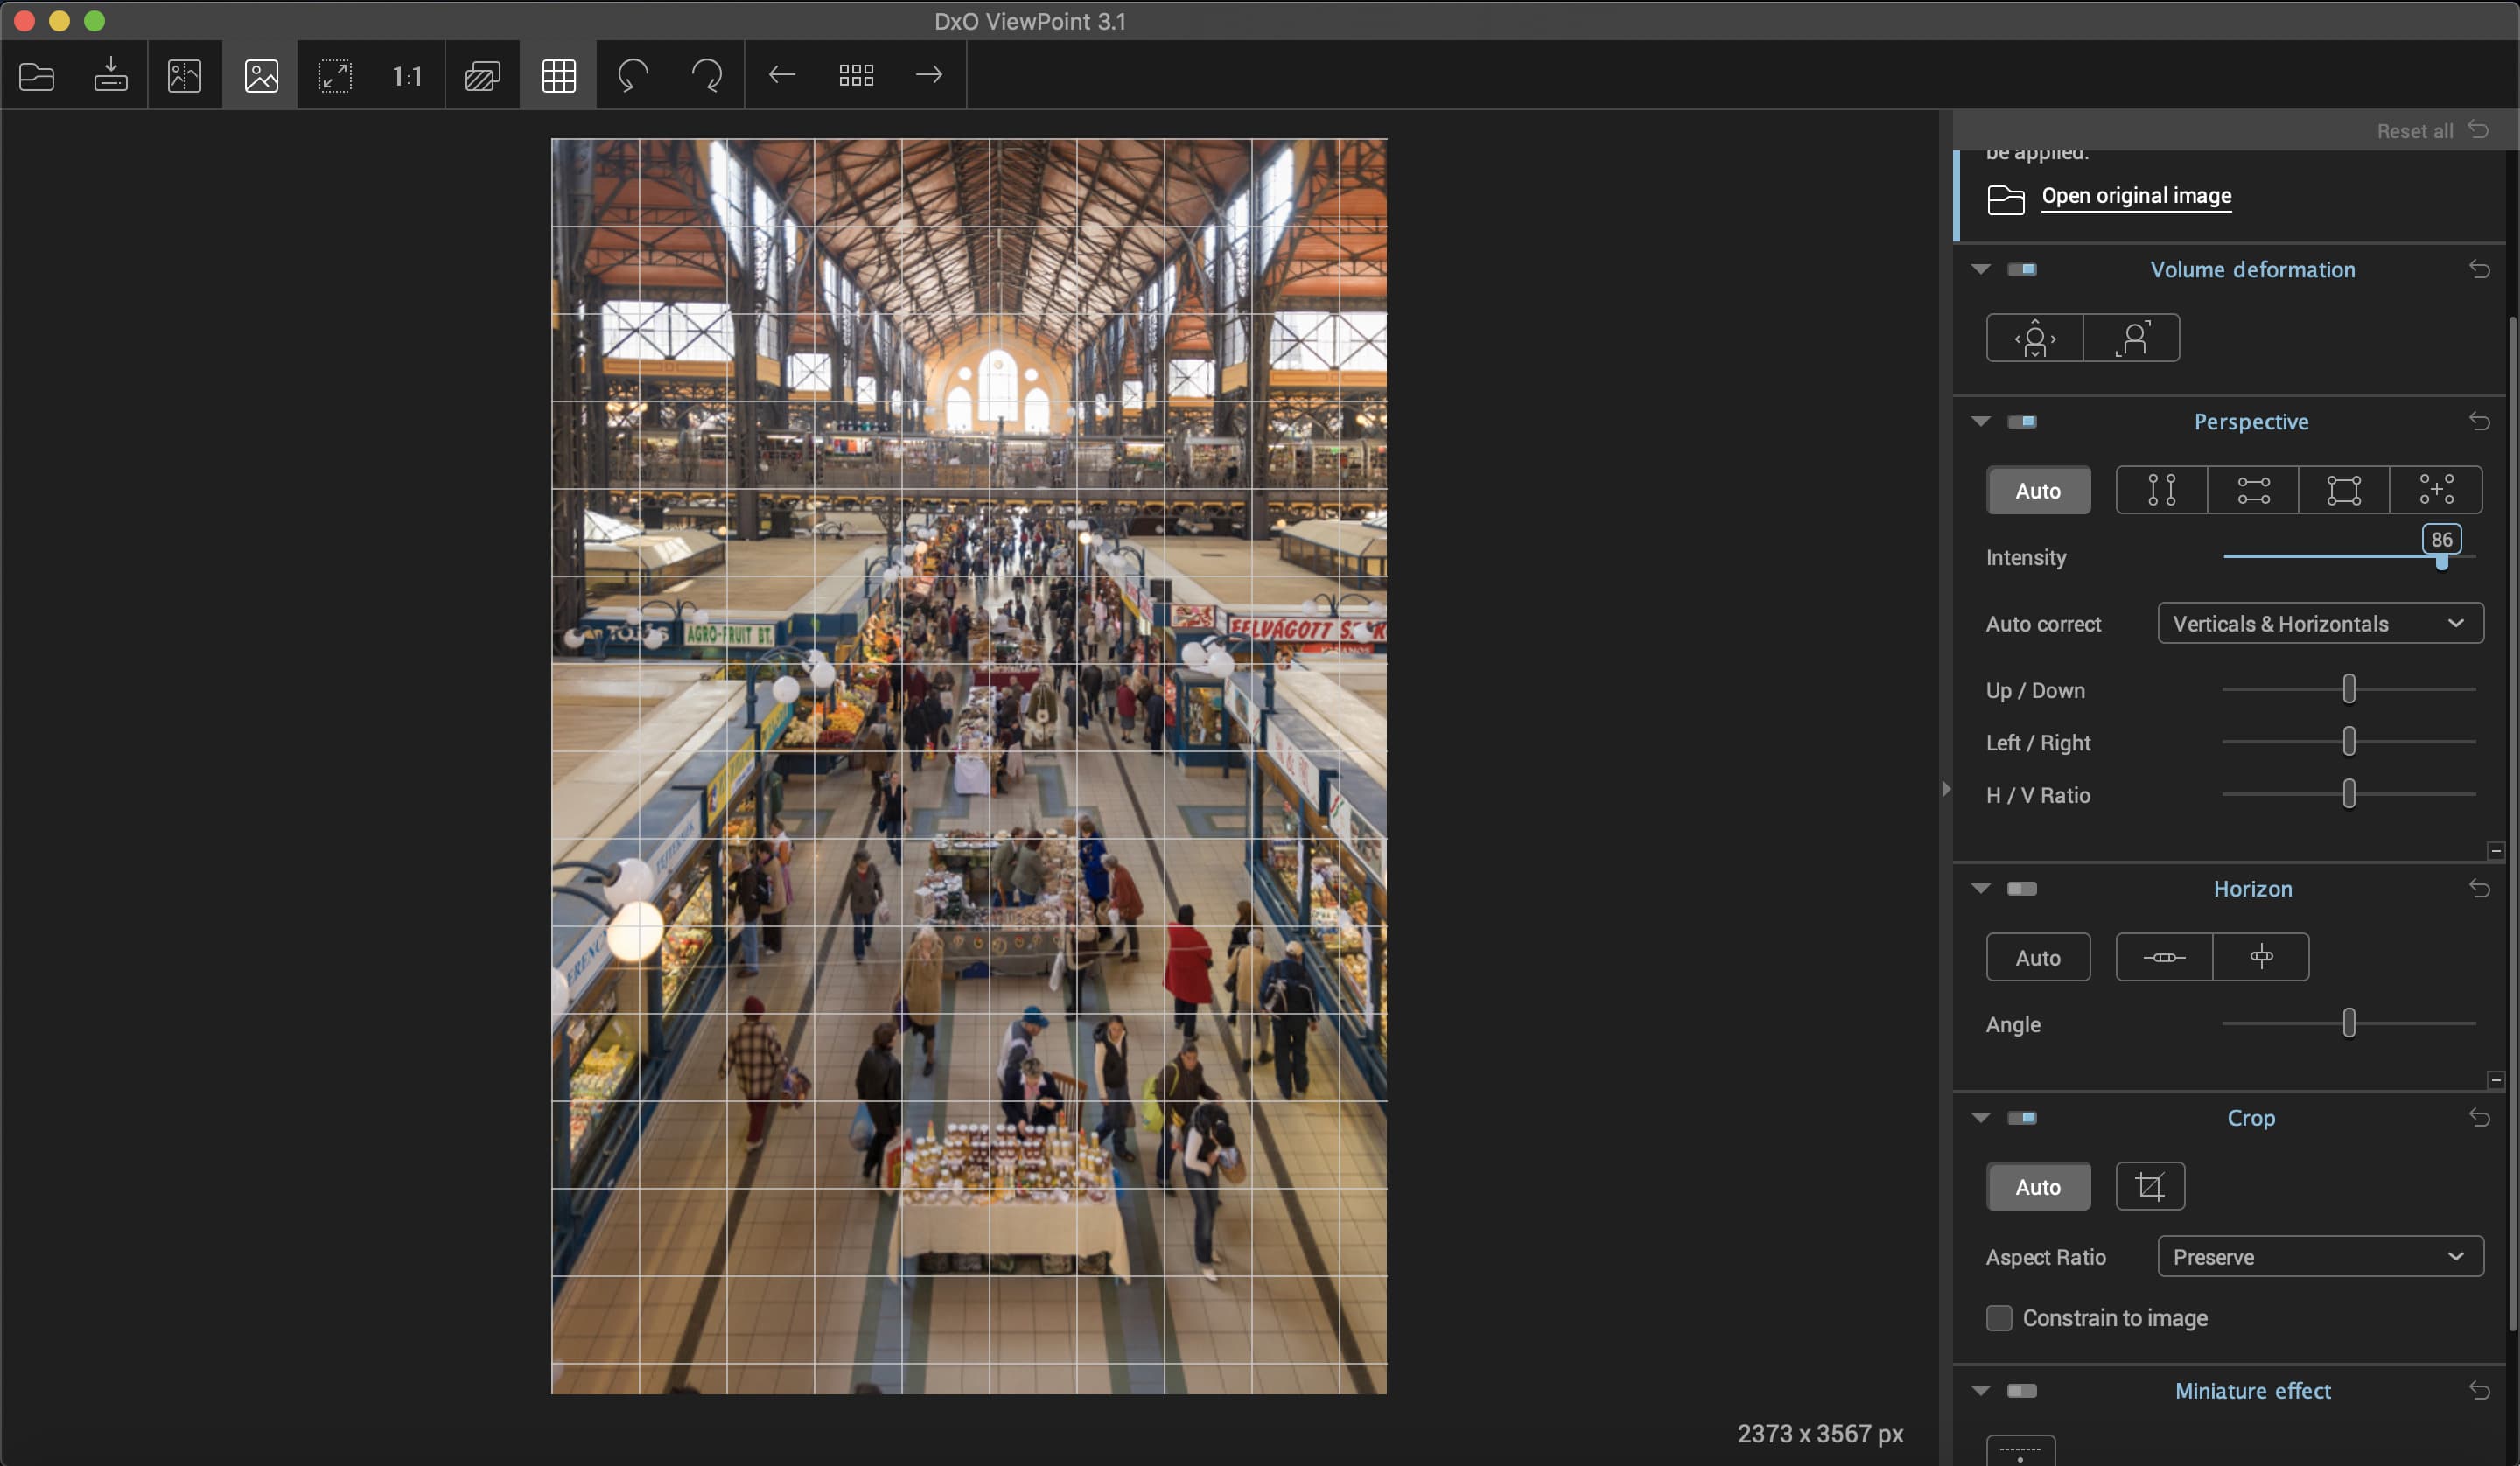
2 Perspective controls
On the right side are the controls to fix distortions. Find the one marked Perspective and first click the Auto option. This may do the job just fine, looking for vertical lines in the image and adjusting it accordingly. But if you want to fine-tune it, you can use the Intensity slider, using the Grid as a guide.
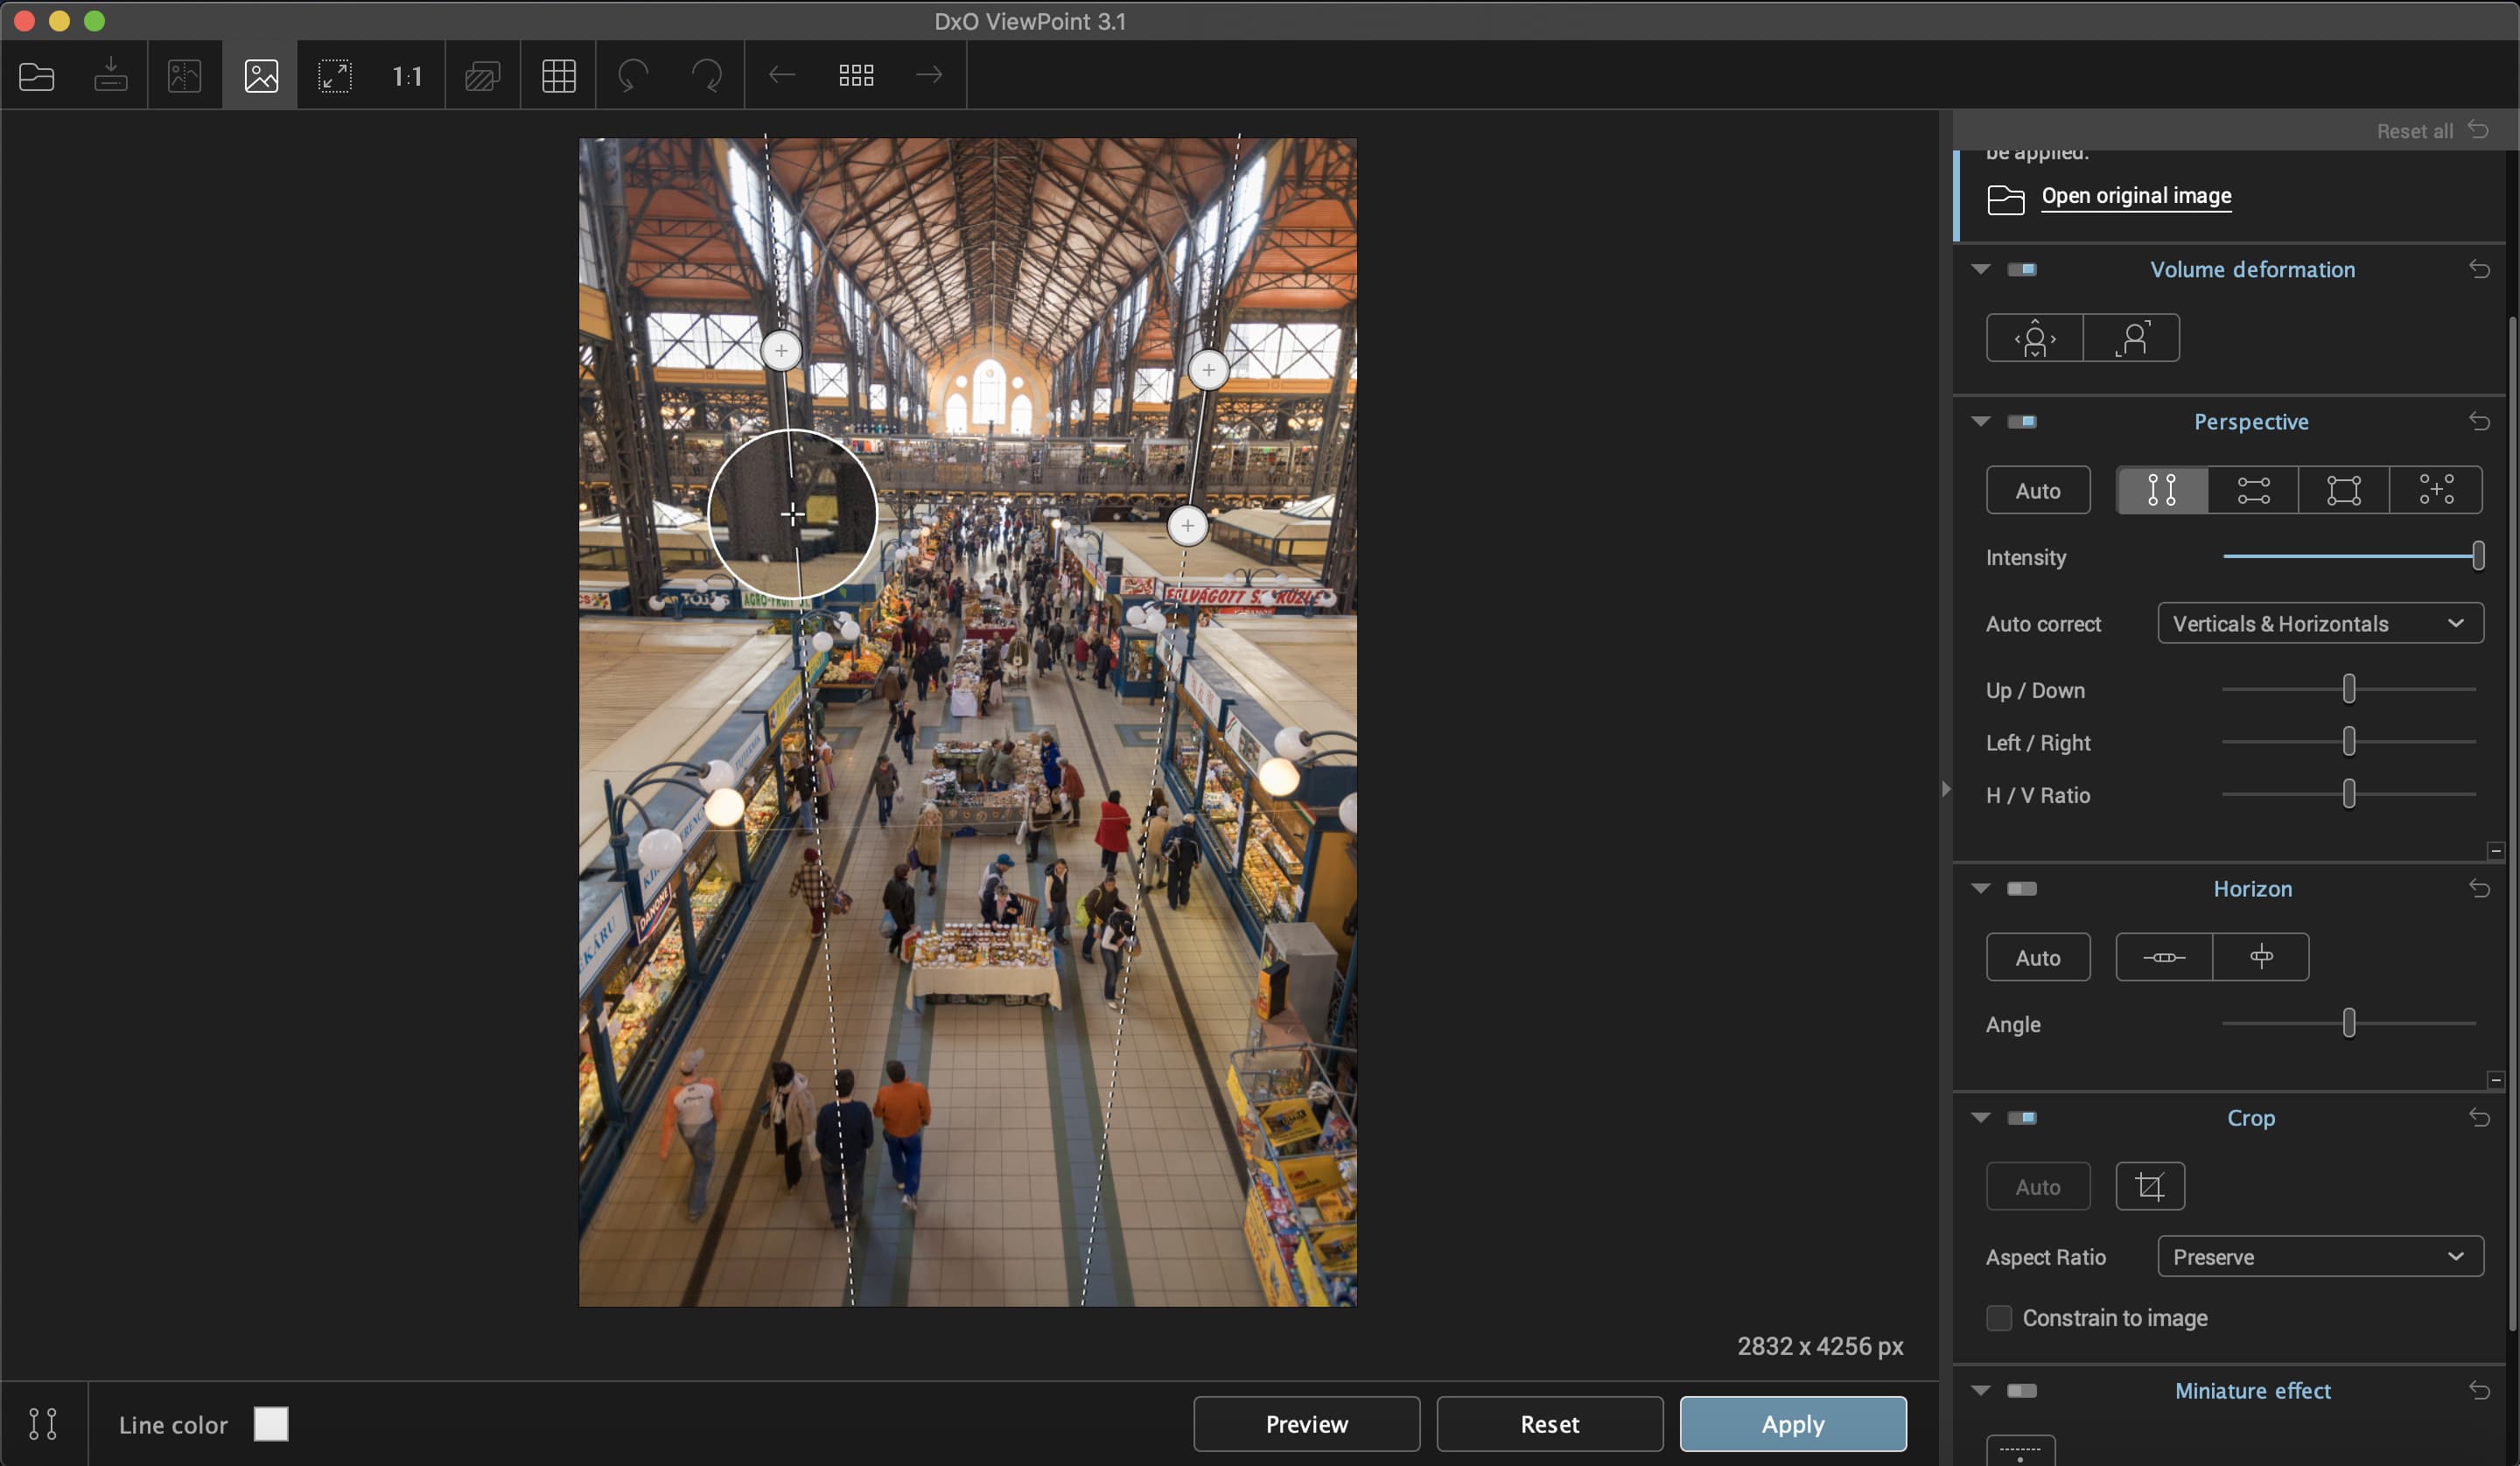
3 Set perspective manually
Alternatively, you can set the Perspective effect yourself. Click on the icon with two lines (Force Vertical Parallel), and then click and drag the plus signs at either end of each line so that they follow objects you know to be verticals in the image. Click Apply at the foot of the interface to apply changes.
4 Adjust any other problems
Further down under the Perspective heading, you’ll find the Up/Down, Left/Right and H/V Ratio. Use these to fine-tune the lines in the image, and correct for any stretching that’s taken place during correction. Here we straightened up the Left/Right balance of the image and shrank it slightly vertically.
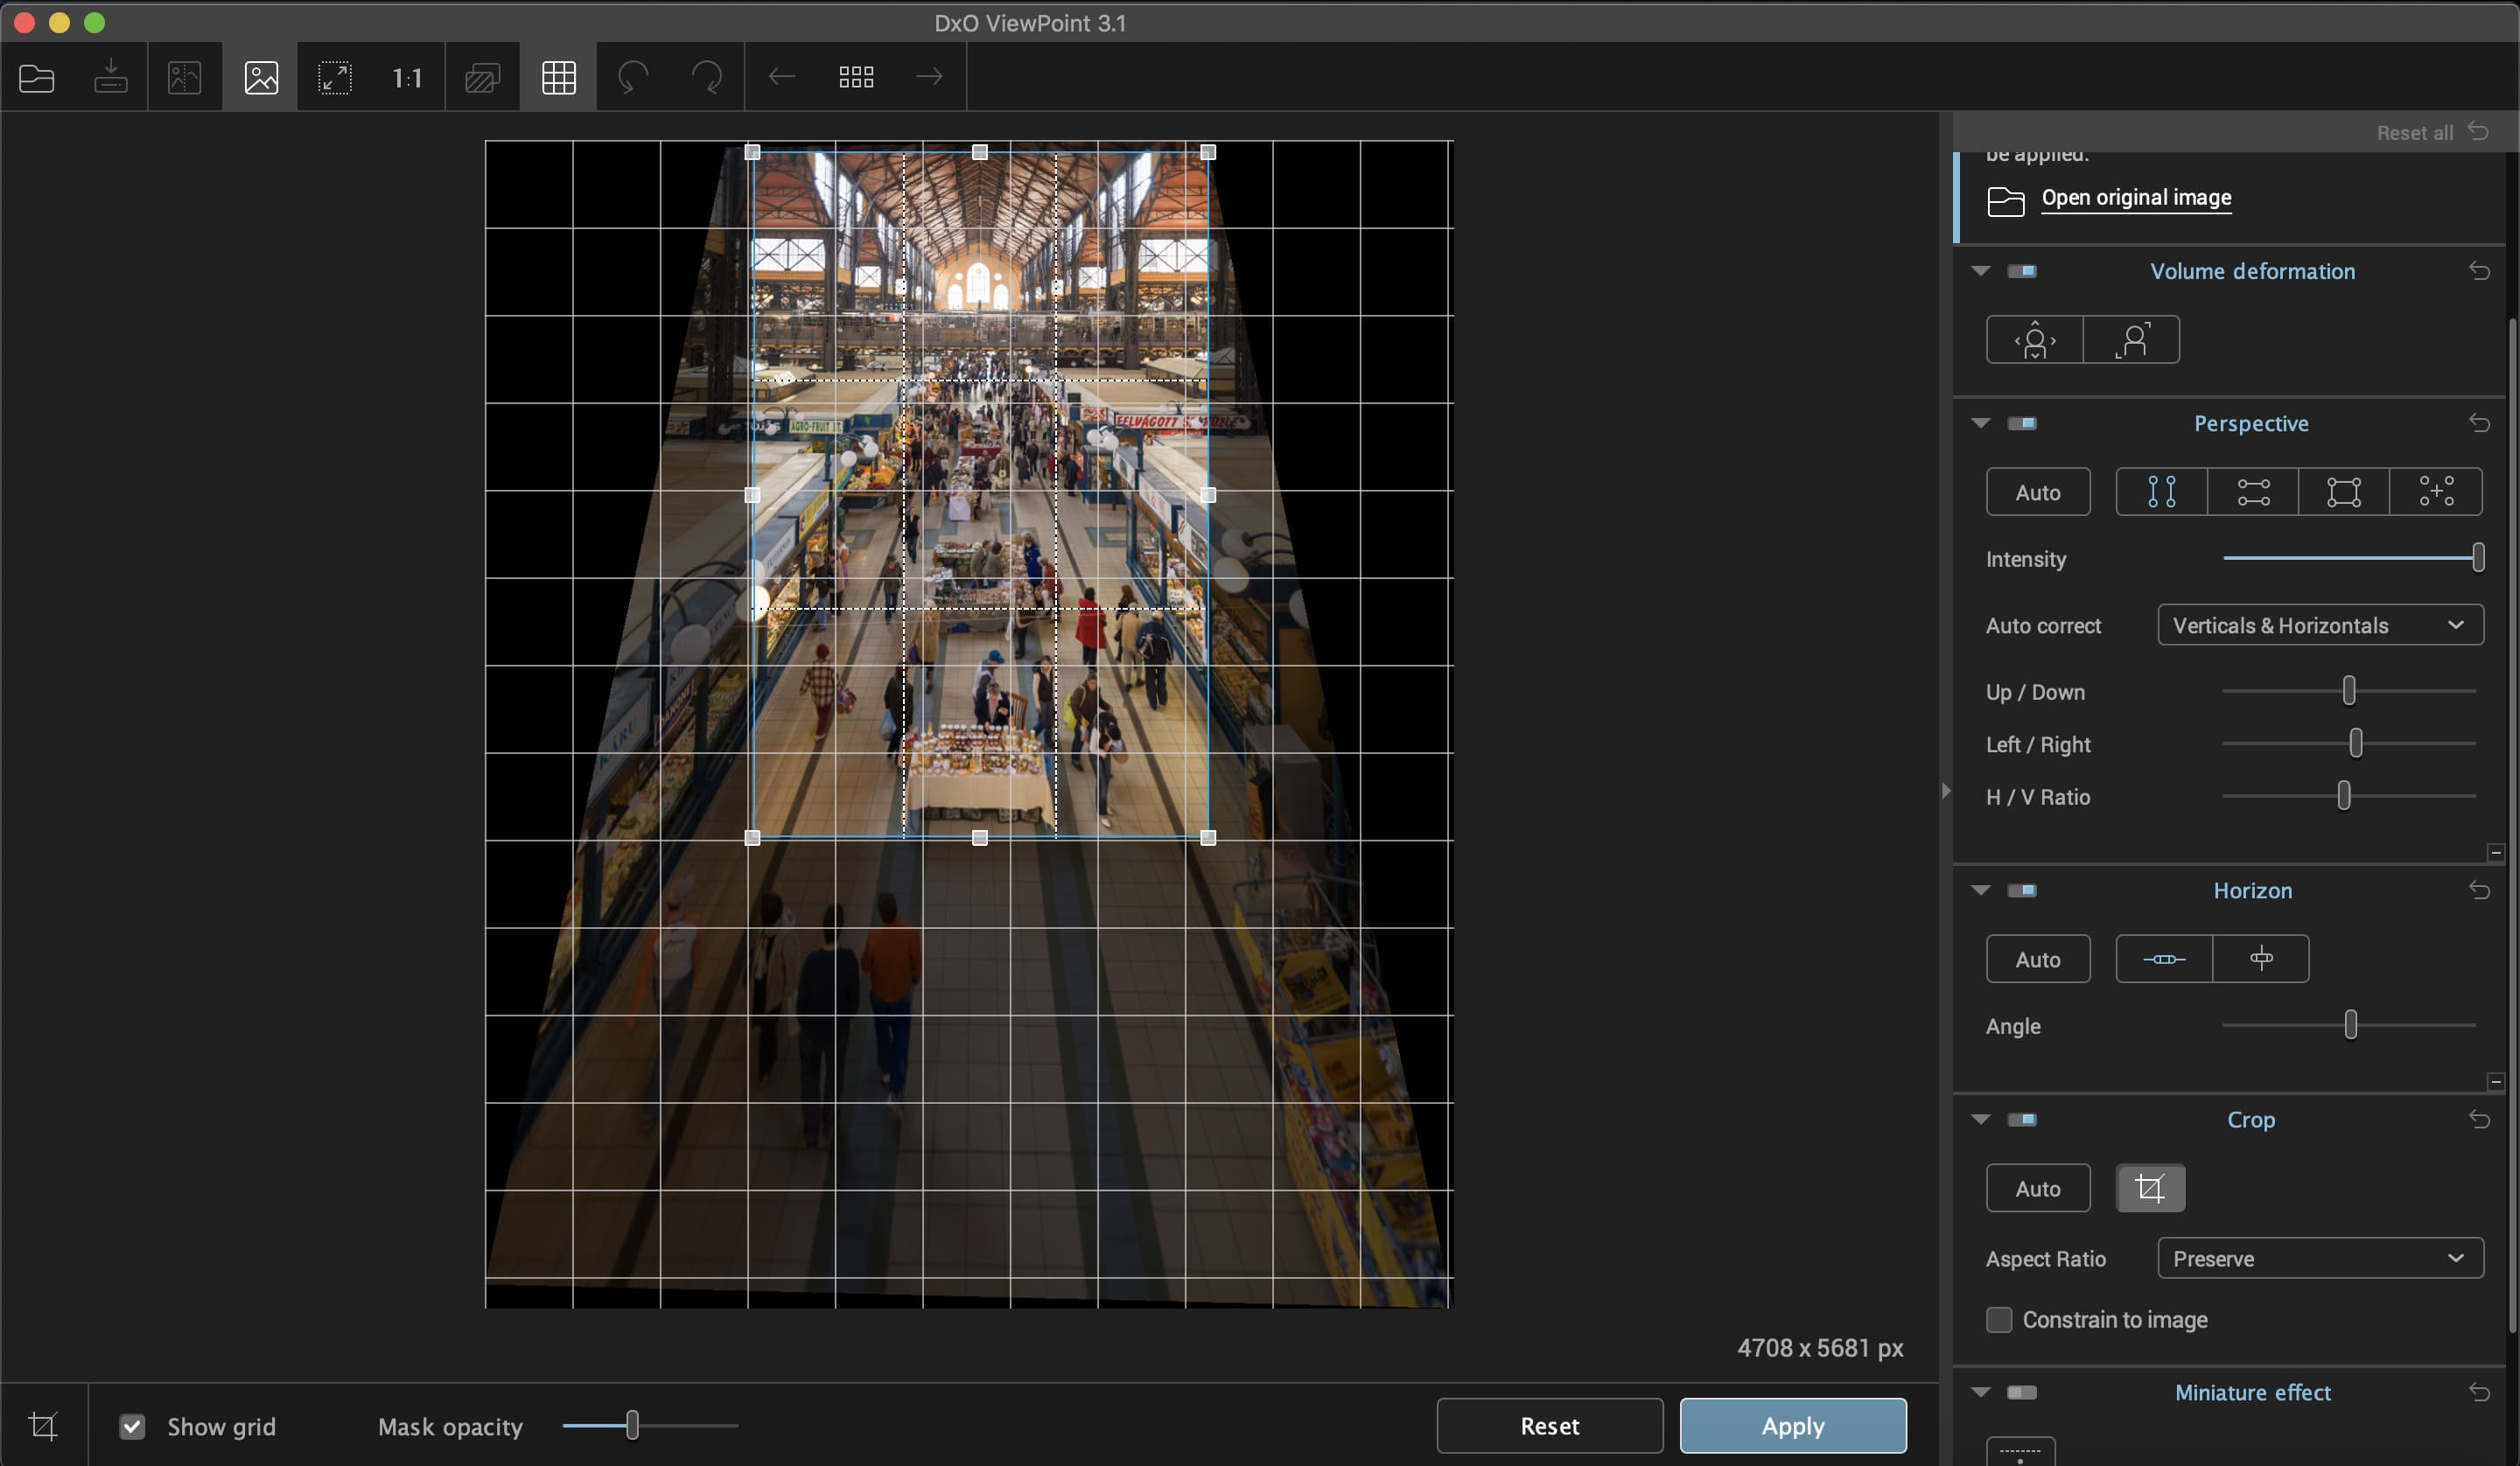
5 Check horizontal is true
Just because the verticals are now fixed doesn’t mean the picture is finished. On the right hand side of the interface, look for the Horizon heading. Click on the Horizontal Level button and this time drag the plus signs to mark two ends of a line in the image that you know to be horizontal, then click Apply.
6 Assess the Crop
Further down the right side is the Crop heading. Cropping is automatically applied after perspective correction, but if it’s not as you want it, click on the Crop icon next to Auto and then click and drag on the corner handles to resize it. Click Apply when you’re done. Go to File > Save As… to finish.
One thing to bear in mind when fixing skewed perspective is you might lose parts of your scene – the tools will allow you to crop it how you wish.

Further reading
Get the most from Nik Collection 3
Guide to converging verticals