Stuck with software? Need a few shortcuts to make life easier? Rob Lawton reveals a variety of little-known features and programs to help you make the most of your images
For many photographers, the image captured by the camera is only the beginning, and it’s the processing you carry out later that makes the masterpiece. This was as true for darkroom workers in the days of film as it is now for digital image editing. So here is a selection of image-editing tips to help you make your images better, including very helpful software, undiscovered features in the software you use, and unexpected editing techniques and shortcuts.
1. Adobe DNG Converter
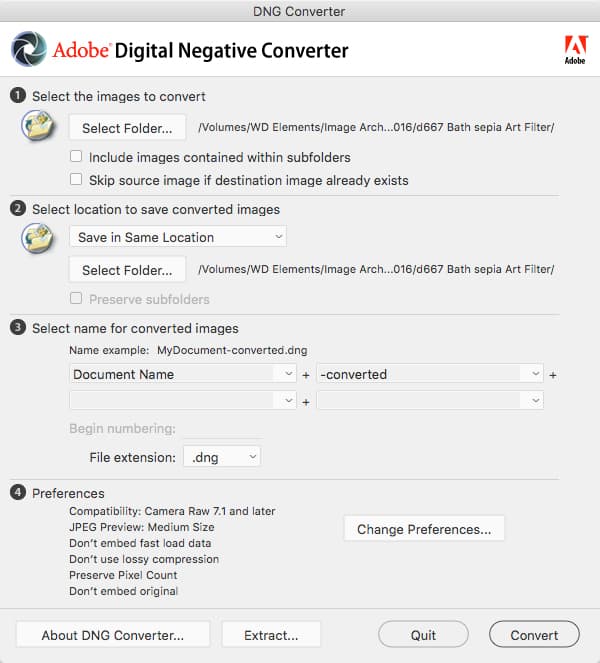
If you have a new camera and your older versions of Photoshop or Elements won’t open its raw files, what do you do? It might seem as if Adobe is forcing you to upgrade your software just to get the latest camera compatibility, but there is another method you can try. You can download the free Adobe DNG Converter from the Adobe website (www.adobe.com), which converts proprietary camera raw formats into ‘universal’ DNG files that your older software will be able to open. Each time Adobe updates Adobe Camera Raw, it releases a new version of the DNG Converter with the same camera compatibility and the same version number.
2. Share and store with Google Photos

Google Photos (photos.google.com) isn’t going to replace serious image-cataloguing tools such as Lightroom any time soon, and its novice-oriented approach can grate, but it’s a surprisingly useful tool for informal online sharing and storage. It uses ‘machine learning’ to find photos by type and location. It also has an assistant to volunteer creative ideas and you can view your photos on a timeline or organise them into albums. You can upload an unlimited number of photos, but if you attempt to upload an image that’s larger than 16MP it will be automatically compressed.
3. Lightroom mobile’s camera controls
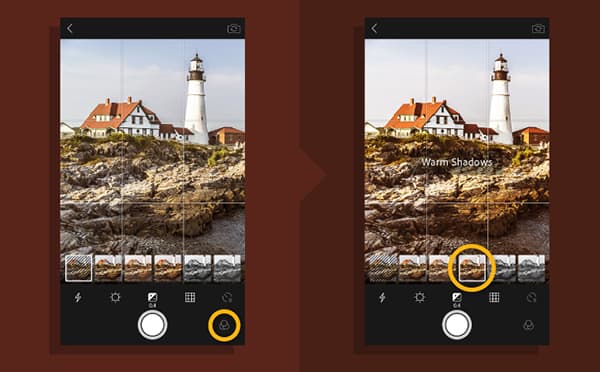
If you use Adobe Lightroom and take pictures with your smartphone, you should take a look at the mobile Lightroom app, which now includes a rather powerful camera module. The app is free to download and install, and as well as browsing through the Lightroom Collections you’ve synchronised from the desktop version, it adds ‘flash’ control, white balance presets, exposure compensation, composition grids and on Android smartphones, the ability to shoot raw files. You can also select ‘shoot-through’ Lightroom presets for image effects to modify or replace later.
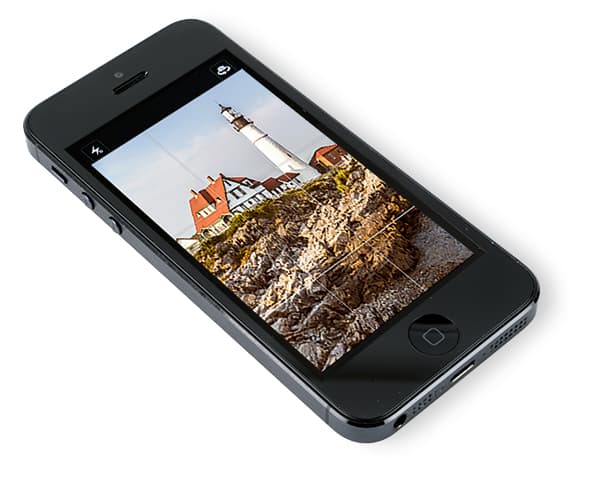
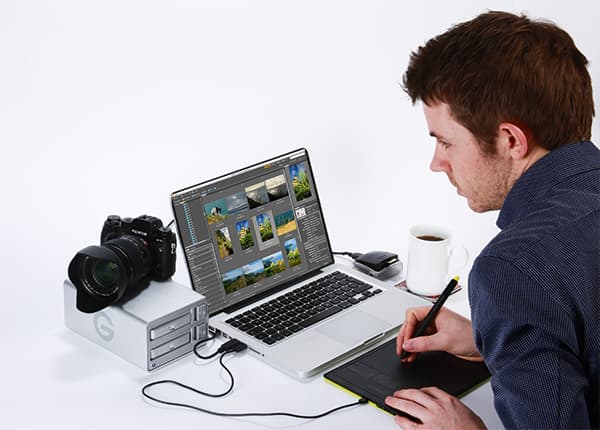
If you’re already a Lightroom user you’ll want to explore Lightroom mobile, which is free to download
4. ON1 Effects 10 Free
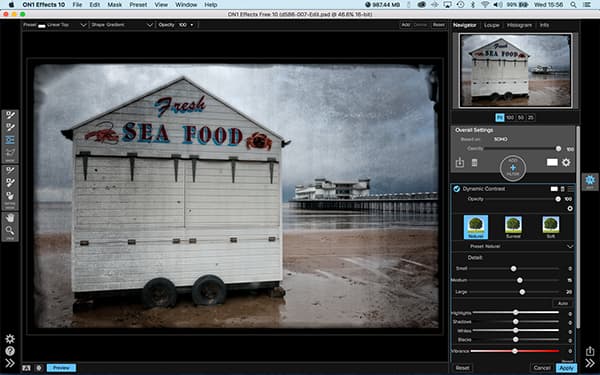
ON1 software (on1.com) publishes ON1 Photo, the new name for the ON1 Perfect Photo Suite. It’s a powerful all-in-one photo browsing, layering, editing and effects suite that can work both as a stand-alone program and as a plug-in. At its heart is ON1 Effects, a tool for applying, stacking and masking different image effects filters – and there’s a free version. ON1 Effects 10 Free offers a subset of the full program’s tools, but these can still deliver controlled, impressive results. It is not time limited, and it comes in Mac and PC-compatible versions.
5. Free Lightroom and Adobe Camera Raw presets
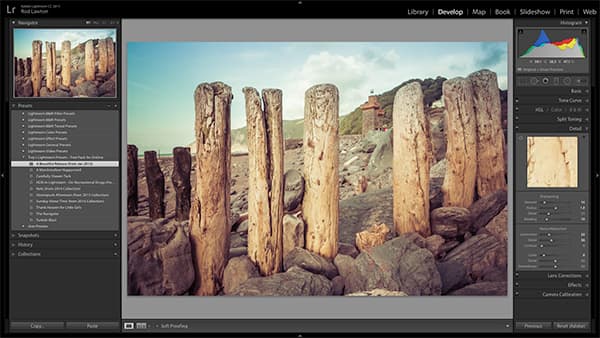
ON1 doesn’t just market its own software – it also distributes free presets for Lightroom and Adobe Camera Raw, including a selection of Lightroom presets from HDR imaging guru Trey Ratcliff. These aren’t just one-click wonders, because as with any Lightroom and ACR presets you can check the adjustment settings to ‘reverse engineer’ the effect, see how it was done and learn from it.
6. Google Nik Collection
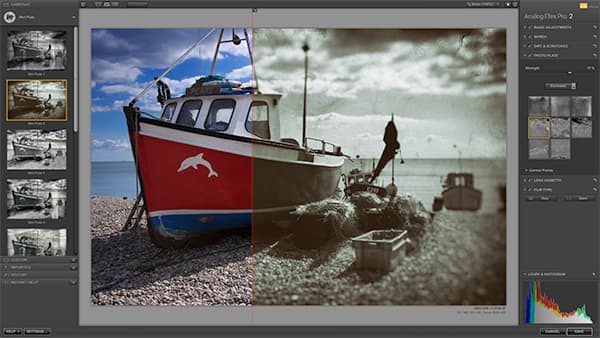
What was once arguably the imaging world’s premium plug-in collection is now completely free, and you can get it from www.google.com/nikcollection. It includes Google’s brilliant Analog Efex Pro for retro effects, the superb Silver Efex Pro for black & white, Color Efex Pro for myriad different image effects, HDR Efex Pro and more. The fact that it’s now free is amazing, but get it while you can because many are worried that this could be a sign that it will be discontinued soon.
7. All raw converters are not made equal
Raw files are often described as ‘digital negatives’, but it might be more accurate to think of them as undeveloped films – and different raw converters are like using different film developers. Adobe Camera Raw is the default raw converter that most photographers use, perhaps without thinking about, but it’s not necessarily the best. DxO Optics Pro offers excellent optical lens corrections with low noise, for example, while Phase One Capture One delivers low noise with exceptional definition – and both are available as fully enabled trials for those who want to try them out.
8. Your camera maker’s software
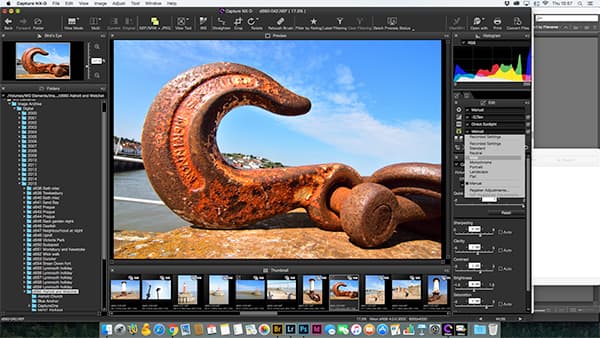
We tend to head straight for Lightroom and other third-party image editors to enhance our photos, ignoring the free software offered with our camera. True, this is often basic and dated by comparison, but it has one important advantage – it will open and convert your camera’s raw files and replicate the maker’s exact picture styles and white balance settings in a way that third-party programs won’t. Below is a picture of Nikon’s free-to-download Capture NX-D software.
9. Macphun Filters for Photos
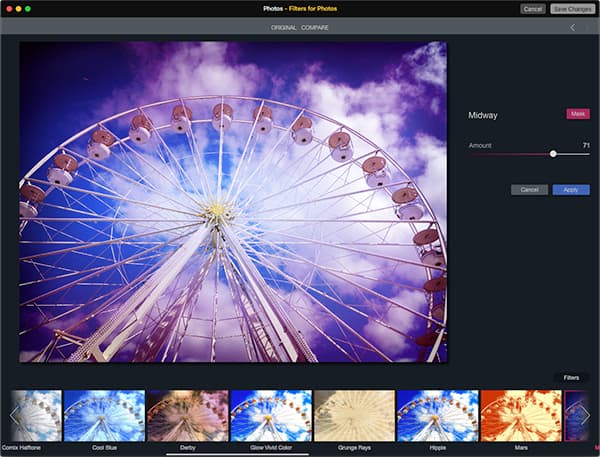
Many Mac owners will still be smarting at Apple’s decision to drop Aperture, its pro-level image-management and editing app. The consumer-orientated Apple Photos is hardly a replacement. But if you’ve upgraded to the El Capitan operating system, Apple Photos now supports third-party Extensions such as Macphun’s free Filters for Photos app (macphun.com). You get 15 effects free and another 15 when you sign up for emails; it also works independently as a stand-alone app. Apple Photos’ native editing tools are good, but the new Extensions capability really opens things up.
Undiscovered features
10. Using Adobe Camera Raw for JPEGs
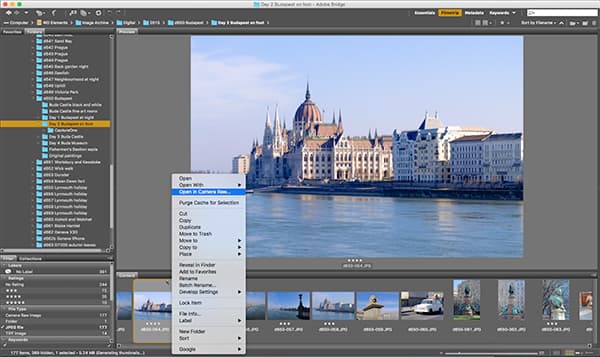
Adobe Camera Raw is a powerful image editor (the full Photoshop version, not the cut-down version in Photoshop Elements). But it’s not just for converting raw files, since you can use its powerful tools on regular JPEG and TIFF images, too, direct from Adobe Bridge. Just right-click on a photo and choose ‘Open in Camera Raw’ from the menu. Your adjustments are saved non-destructively (look for the icon in the top right corner of the adjusted photo’s thumbnail in Bridge) and can be readjusted or removed at any time.
11. ACR’s automatic perspective correction
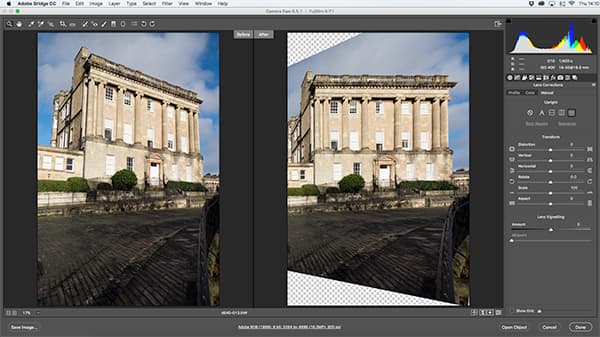
You’ve probably noticed that Adobe Camera Raw and Lightroom now offer automatic lens corrections, but have you spotted the Upright and other perspective correction buttons? In Adobe Camera Raw, these are hidden in the Lens Corrections panel in the easily overlooked ‘Manual’ tab. The Level button can straighten skewed horizons, the Upright button can automatically correct converging verticals, while the Auto and Full buttons can correct perspective distortion in both planes at once. These tools can be uncannily quick and effective, but not all images respond equally well to analysis, so some trial and error may be needed.
12. Targeted Adjustment Tool
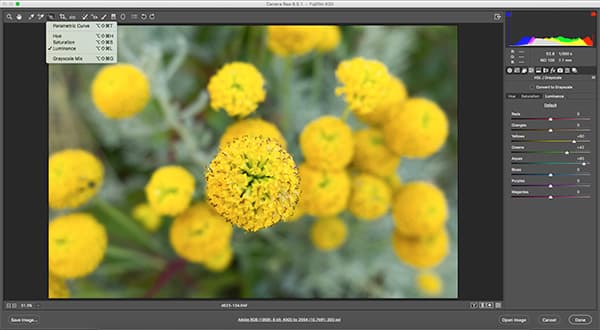
You don’t need to understand curves when working in the Curves panel in Adobe Camera Raw or Lightroom. Just select the Targeted Adjustment Tool and click and drag upwards on any area in the picture to lighten the tone or downwards to darken it. If you’re in the HSL adjustment panel, you can adjust the Hue, Saturation and Lightness.
13. Use Camera Calibration in ACR
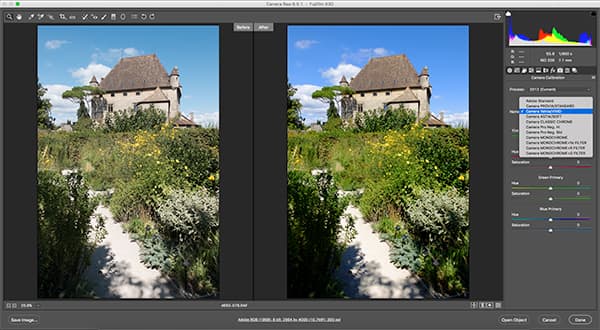
Adobe Camera Raw’s generic raw conversions can look a little weak and insipid, and fall some way short of the tone and colour of your camera’s JPEGs. But there is a way to replicate the camera’s native colour reproduction, and you’ll find it buried in the Camera Calibration tab. Here, you’ll find a dropdown ‘Camera Profile’ menu and, for most modern cameras, Adobe Camera Raw will list the maker’s own built-in picture styles. You can see the difference between the Velvia setting and the wishy-washy Adobe Standard profile.
14. Auto-Stacking Lightroom
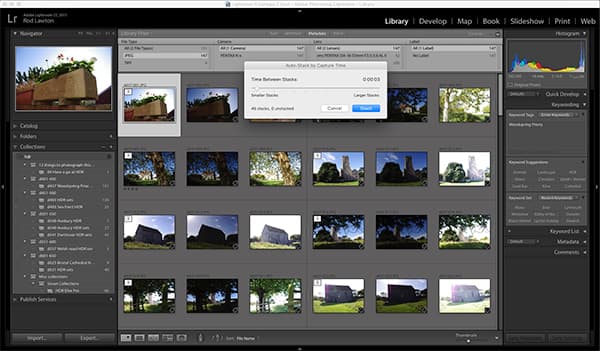
In Lightroom, it’s useful to be able to group or ‘stack’ related images together, such as JPEG+raw pairs, HDR sets, panorama sets or burst sequences. Doing this manually, though, for a folder full of images can take ages. Instead, use the Photo>Stacking>Auto Stack by Capture Time command. Lightroom will use EXIF data to group images shot close together, and you can fine-tune the outcome by adjusting the ‘Time between Stacks’ slider.
15. Filtering and metadata in Adobe Bridge
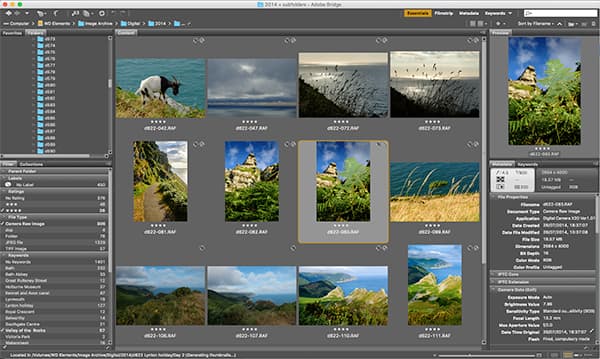
Just because Lightroom is now included with Photoshop in the Adobe Photography Plan subscription, this doesn’t mean you should abandon Bridge just yet. Many find a simple file browser like this easier to grasp and work with than Lightroom’s complex database tools, and Bridge has tricks of its own. You can use it to add keywords, ratings, labels and other metadata, both to single and multiple images, and you can then use its powerful Filter panel to isolate specific images. In this image, for example, it’s filtering out raw files with a rating of four stars and above, and the keyword ‘Valley of the Rocks’.
16. Save and re-use develop presets in Adobe Camera Raw and Bridge
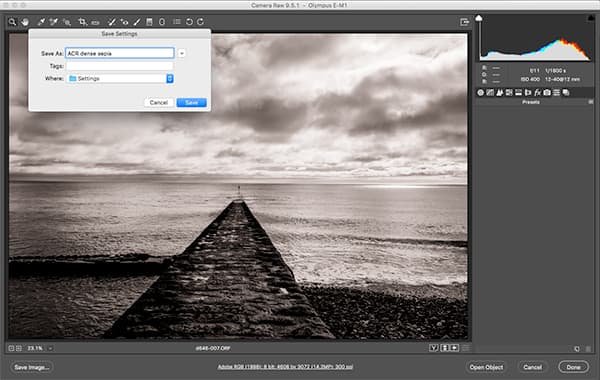
Did you know you can save your custom-develop settings in Adobe Camera Raw and apply them straight from Adobe Bridge? First, make all adjustments to an image in Adobe Camera Raw, then swap to the Presets tab, open the drop-down menu in the top-right corner and choose ‘Save Settings’. You’ll be prompted to check boxes for each setting you want to apply and to choose a preset name. From now on, this will appear in the Presets panel, and in the context menu if you right-click an image in Adobe Bridge.
17. Adobe Camera Raw snapshots
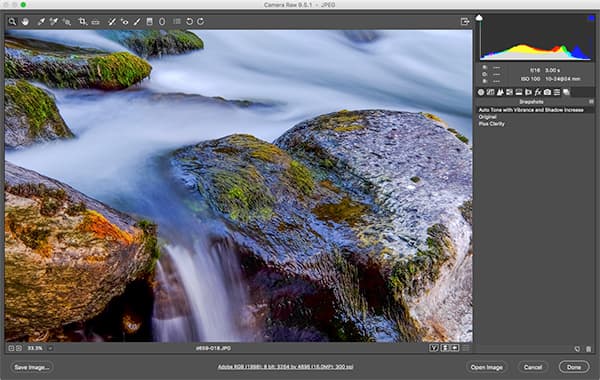
Carrying out some complex editing work in Adobe Camera Raw? Not sure if you might need to retrace your steps? Then save Snapshots of key editing states as you go along. In this way, you can always return to an earlier state. It’s just like using Snapshots in Photoshop, but with a key difference: your Snapshots persist even after you’ve closed the image and opened it again.
18. Parametric curves adjustments
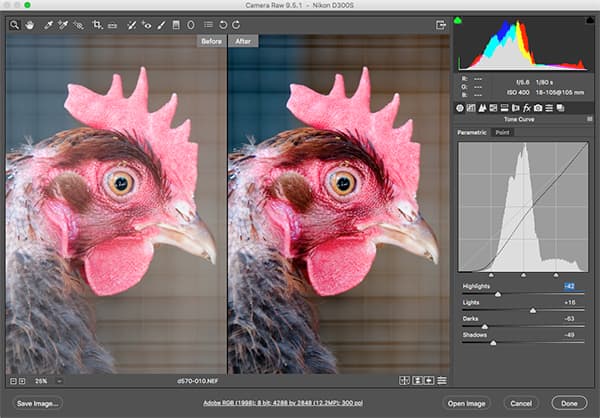
Most of us are familiar with the regular ‘point’ curve adjustments you get in Photoshop and other image editors, but it’s always easy to go wrong with these, since small adjustments can have a big effect. Adobe Camera Raw and Lightroom also offer ‘Parametric’ adjustments, with sliders for Highlights, Lights, Darks and Shadows. Don’t dismiss this as a simplistic ‘beginner’ mode. In fact, these sliders allow subtler, controlled curves adjustments, and are easier to grasp.
Neat photo editing tips
19. Instant analogue richness with clipped blacks
The market is awash with apps and plug-ins to recreate that classic ‘analogue’ look, but here’s a simple way to achieve it without any special tools (although histogram purists will hate this). All you need to do is open the Levels dialog in any image editor and drag the black point slider to ‘clip’ the shadows. The rationale? Digital cameras attempt to hold on to extreme shadow detail, and this compromises the midtone contrast and saturation we’re used to from film.
20. Authentic-looking grain
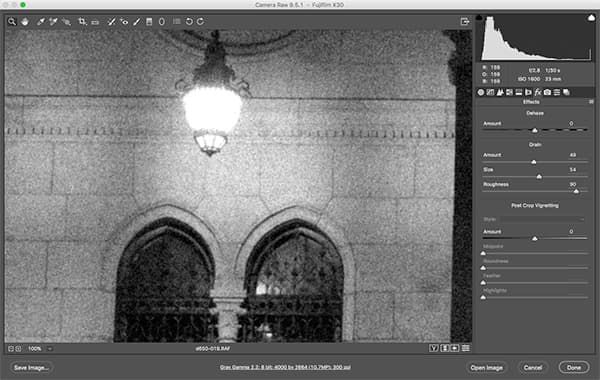
If you like the look of film grain and you’re using Adobe Camera Raw or Lightroom, look no further. The grain controls in the Effects tab are a little tricky to grasp, but very effective. Too many grain effects simply look like exaggerated digital noise or fail to erode edge details in a realistic manner, but Adobe’s Grain effect looks like the real thing.
21. Add frames or keylines by resizing the canvas
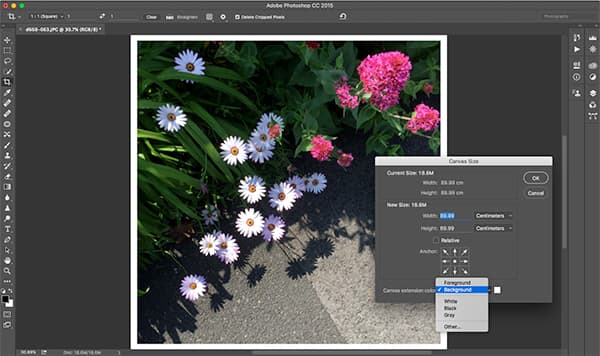
If you only need a simple single-colour frame or keyline for a photo, you don’t need special tools. Set the background colour in Photoshop or Elements to the frame colour you want, then increase the canvas size by adding the same number of pixels to the width and height values. If you’re working in print dimensions, use them instead. Don’t use percentage values because unless your image is square, this will extend the canvas disproportionately.
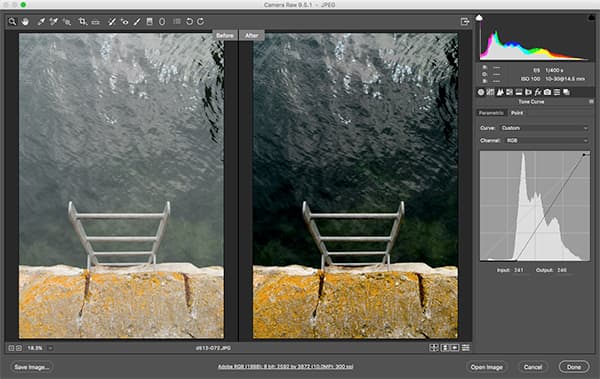
22. Instant ‘solarisation’ with curves
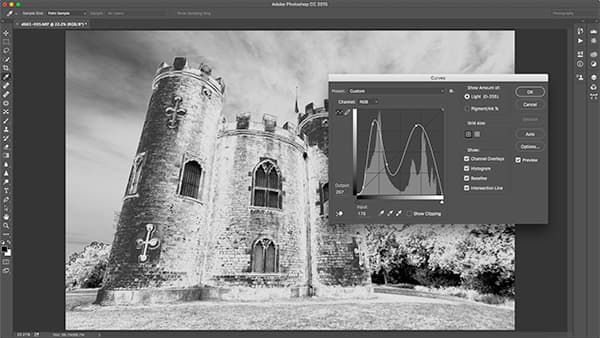
Solarisation is a striking effect that once meant briefly re-exposing a print to light at a specific point in its development to make the lighter tones ‘negative’. But you can do this digitally with a simple curves tweak – just drag the end point of the curve from its usual position down to the bottom right corner, then drag the middle of the curve up towards the top to increase the tonal range and get full ‘whites’. To make it interesting, you can even put in a ‘double peak’. This works in any program that has curves adjustments.
23. Create an HDR luminosity mask in seconds
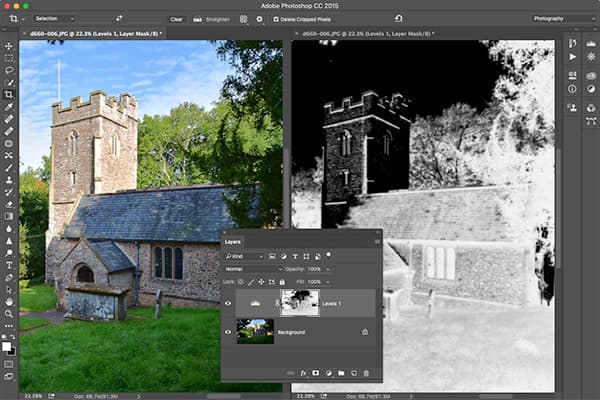
If you need to even up shadows and highlights in a photo you can do this with a ‘luminosity mask’. Creating one in Photoshop or Elements is easy. ‘Select All’ and copy the image. Create a new adjustment layer, option-click it to edit directly and paste in the image. You can invert the mask to adjust shadows rather than highlights, blur it to blend in the adjustments more naturally and adjust its levels to make its effect stronger. My adjusted image is on the left, the luminosity mask is on the right and you can see it in the Layers panel, centre.
24. Non-destructive dodging and burning
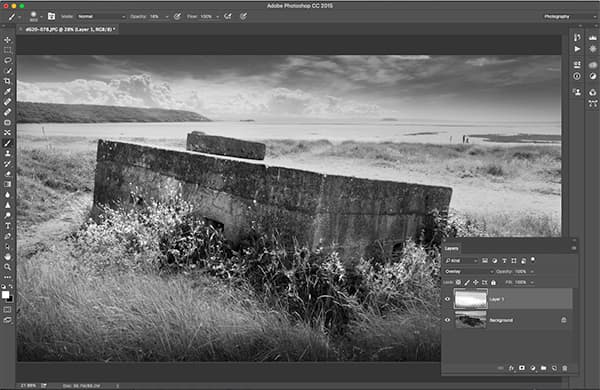
Many images benefit from a little selective lightening and darkening, or ‘dodging and burning’, but the Dodge and Burn tools in Elements and Photoshop are quite complex and they’re also ‘destructive’ – they act directly on the image pixels. Instead, create a new blank layer over the image, and set its blend mode to ‘Overlay’. Now paint using white to lighten areas of the image underneath or black to darken them. If you set the brush Opacity to around 20%, you can build up the effect slowly and subtly.
25. Instant clarity with a giant Unsharp Mask radius
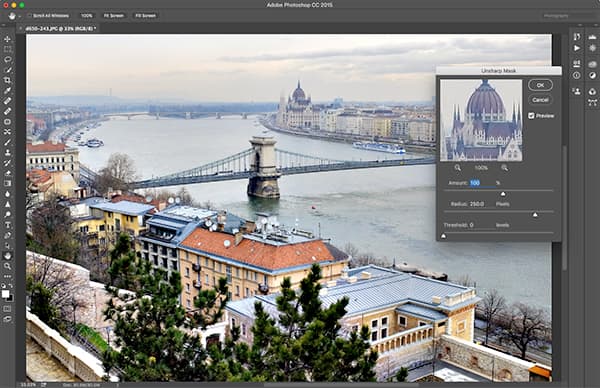
Photos can look flat even when they’ve got a full contrast range. You can’t adjust the Levels without clipping the shadows or highlights and a regular ‘S-shape’ curve adjustment is crude. Try using the Unsharp Mask filter. Set a huge radius value (250 pixels) and start with a strength setting of 25 and work up.
26. Simple colour replacement with Hue/Saturation
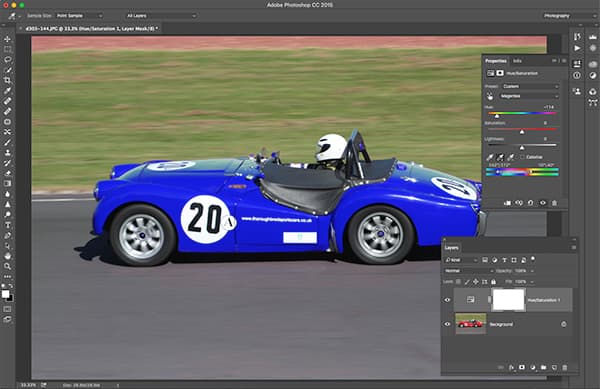
Need to change the colour or hue of an object? Don’t worry about tricky selections. Instead, use the Hue/Saturation panel’s different channels to target the colour you want to change precisely. Start by selecting the broad colour range from the drop-down menu, then use the Eyedropper to click on the object to select the colour precisely. You can now adjust the HSL of that colour alone. This sports car was changed from red to blue in moments, with no selections needed.
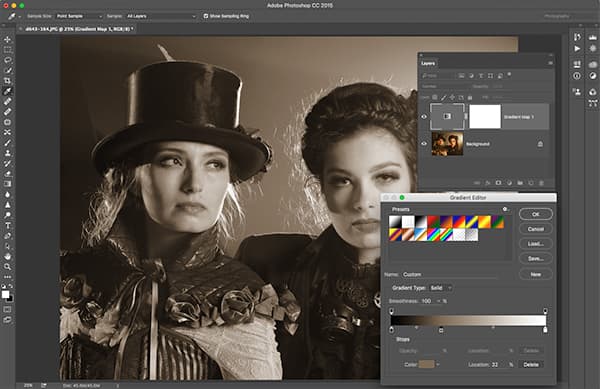
27. Punchy mono with a gradient map
There are many ways to convert colour photos to black & white – desaturation, conversion to greyscale, or channel-mixing – but this little-known method gives a slightly richer result than regular tools and can be quickly adapted for sepia and other toning effects. All you need to do is create a new Gradient Map adjustment layer in Photoshop or Elements, and select the simple black-white gradient swatch. If you want to add a toner effect, edit the gradient to add a midtone sepia colour halfway along.