With so many advanced features in modern digital cameras, it is easy to become over-reliant as photographers on technology. From auto white balance to autofocus, many of us simply let the camera do the hard work while we concentrate on composition.
However, as good as all this might be, the camera isn’t infallible. There is always something that a photographer can do to get more from an image, and given that there may only ever be one opportunity to capture it, it’s worth spending a little extra time to make sure that the photograph is as good as it can be. For JPEG shooters, it is critical to get the image right in-camera, but even those using raw should seek to give themselves the best possible raw file from which to work.
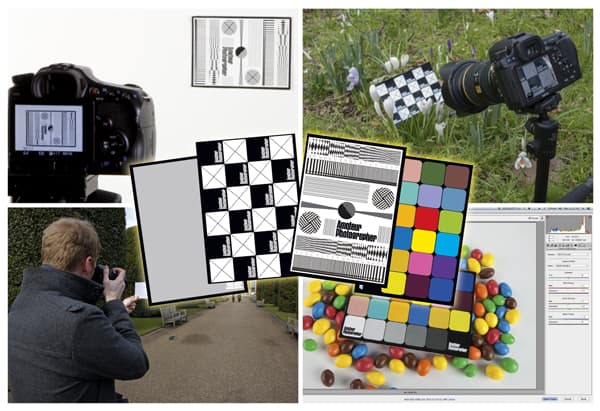
The AP target cards free with this issue will help to ensure that white balance, colour, focusing and sharpness in captured images are as accurate as possible. Each card is simple and straightforward to use – all it takes is a little time.
The four cards include a white balance target, which will help set custom white balance to achieve accurate colour rendition, regardless of how a scene is lit. This can be used in combination with the colour chart for the accurate editing of an image’s colours. The simple AF chart will enable greater accuracy when focusing, even in low light, while the mini test target will allow for very fine, precision focusing and will help to reveal a great deal about the camera and lens in use.
Focus target

As good as modern autofocus systems are, all but the most expensive professional cameras may struggle in extreme low-light conditions. Our free AF target card will help to overcome this problem, assisting the camera to focus in dull light and aiding the user when focusing manually.
Whether a camera uses phase- or contrast-detection AF, each system relies on being able to see a subject clearly before bringing it into focus. In low light a camera may find it difficult to focus accurately, so the photographer is often forced to use only the more sensitive centre AF point, focusing on a high-contrast edge and then recomposing, as a way to get around this difficulty.
Our free AF target card operates on this same principle. The simple chequerboard provides a high-contrast target that will help a camera’s AF system to find focus, while the fine cross lines will aid precise manual focusing.
To use the AF target, place it at the point in the scene on which you wish to focus. Some Blu-Tack, masking tape or a drawing pin are useful here to fix the target in the correct position.
The chequerboard should provide enough contrast to let the camera focus the lens.

Image: Objects with smooth surfaces, like these white crocuses, can be
difficult to focus on. The cross lines of the AF chart make it easy to
focus with live view
The image below was taken a few minutes before sunrise. The low light level meant that the log in the icy lake was completely in shadow, leaving no detail for the AF system to focus on. By using some Blu-Tack to stick the AF target to the log the AF was easily able to focus.

Image: In this dark scene it is difficult to focus on the log as it
is solid black. The AF chart provides enough high-contrast detail for
the lens to be focused correctly
Using the focus target
If the scene is extremely dark, such as when photographing outside on a moonless night, a little extra light may be required.
Most cameras have an AF assist light to help them achieve focus in low light – make sure that this feature is turned on in the camera’s custom menu. If this light is not available, or is simply not bright enough, then a small torch makes for an excellent alternative, and of course, when shooting at night, carrying a small torch is advisable anyway.
Just point the torch at the AF target and focus the lens. Once focused is achieved, use the AF lock button or fix the focus position of the lens by switching to manual focus.
Top tips for using the focus target
1. Use the chequerboard pattern to help focus in low light
2. Keep some Blu-Tack or a drawing pin handy to help fix the target in place
3. A torch is useful for lighting the target in extremely low light
4. The AF target can also help with setting the white balance when editing a raw file
Colour chart
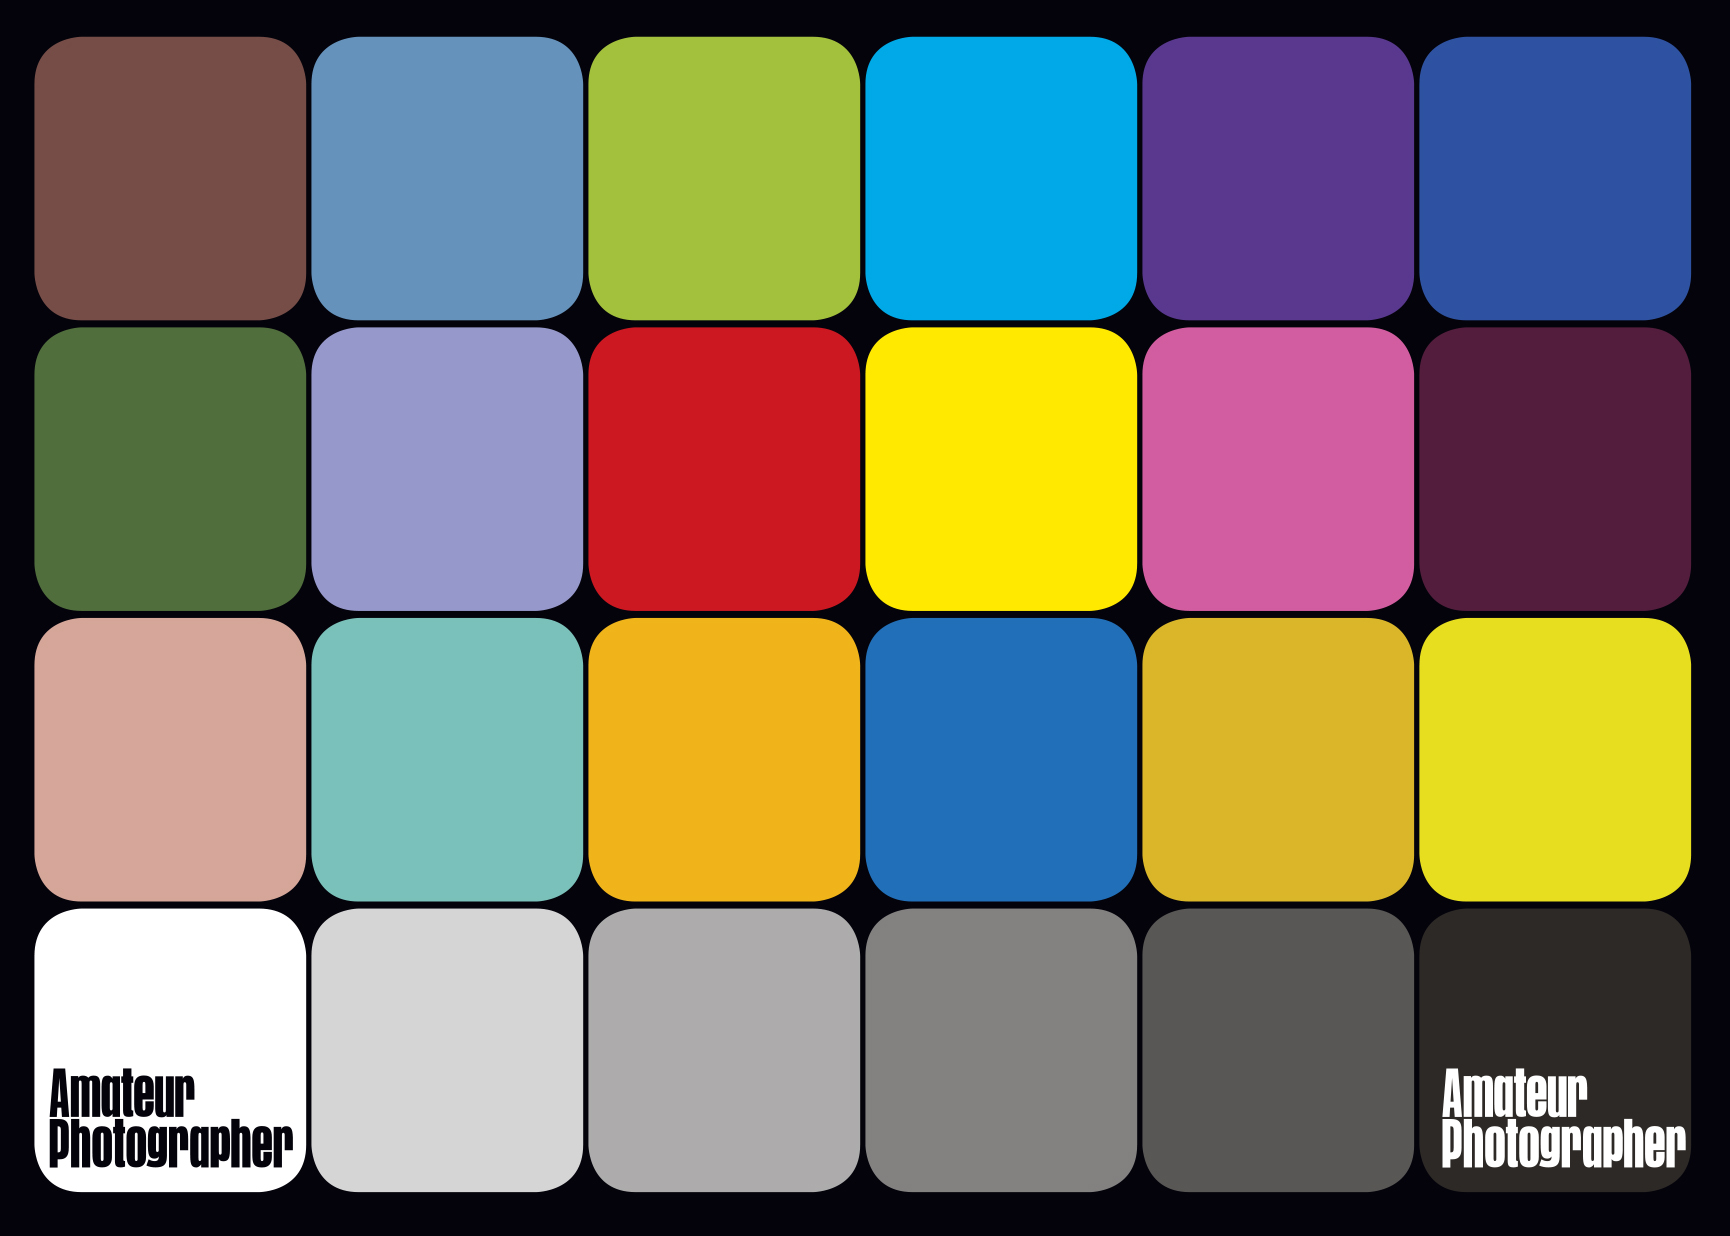
All cameras and raw-conversion software handle colours differently, so how can you ensure that the colours of an image match those of the scene? Our free colour chart is the answer.
How a camera represents colour in its images is determined by the manufacturer. While the aim is to create realistic colours that are representative of the scene photographed, the images also have to be as pleasing as possible. Even raw images will be adjusted differently depending on the software.
Cameras can have difficulty with certain colours. For instance, vivid reds and yellows tend to show little detail, bleeding into one block.
Using the colour chart
Place the coloour chart in the scene and photograph it. The result is a reference shot for post-capture editing. With the reference image taken, remove the card from the scene and shoot away as normal. Later, during editing on a computer, compare the colours in the reference image against those of the actual colour chart (it is necessary to have a correctly calibrated monitor to do this).

Image: Placing the colour chart in a scene allows a comparison to be made
between the on-screen image and the actual colour chart, which helps
when editing. However, it is important to have a correctly calibrated
computer monitor
In Adobe Camera Raw or Lightroom, it is possible to adjust the basic colours in a raw file when converting it. Under the Camera Calibration panel are controls to adjust the hue and saturation of each of the red, green and blue colour channels, as well as a separate green/magenta slider for the shadows.
Once the white balance for the image has been set, use each of the sliders in the Camera Calibration panel to adjust their corresponding colours, to match the colours in the reference image to those of the actual chart. To start with, focus on getting the red, green and blue patches to match each other. Once this is done, the standard colour adjustment tools can be used to fine-tune the rest.
It is also worth noting the greyscale panels on one side of the chart. By observing how these neutral tones shift, they will give an indication as to how the tone curve of the image has been adjusted. Attempting to match the reference image to the chart is a good starting point.
 Image: Here is the original raw file and the version edited using the colour chart as a reference (see the image above). The edited version has slightly more saturated blue and orange hues
Exploring colour modes
Another use for the colour chart is to see exactly what each of the different colour modes or picture styles on a camera do.
By photographing the card in each of the different styles, it is easy to see which mode affects which colours – the landscape mode will often increase the saturation of blues and greens, for example. It is also interesting when using a black and white setting to see just how the different colours in a scene will be rendered.

Most cameras allow their default colour styles to be adjusted, or even a custom style to be created. Use the colour chart to adjust the saturation and contrast of these image styles to your own taste. Taking time to save some custom settings in-camera can save more time later when editing the images, which is of course vital for those who only shoot JPEG images.
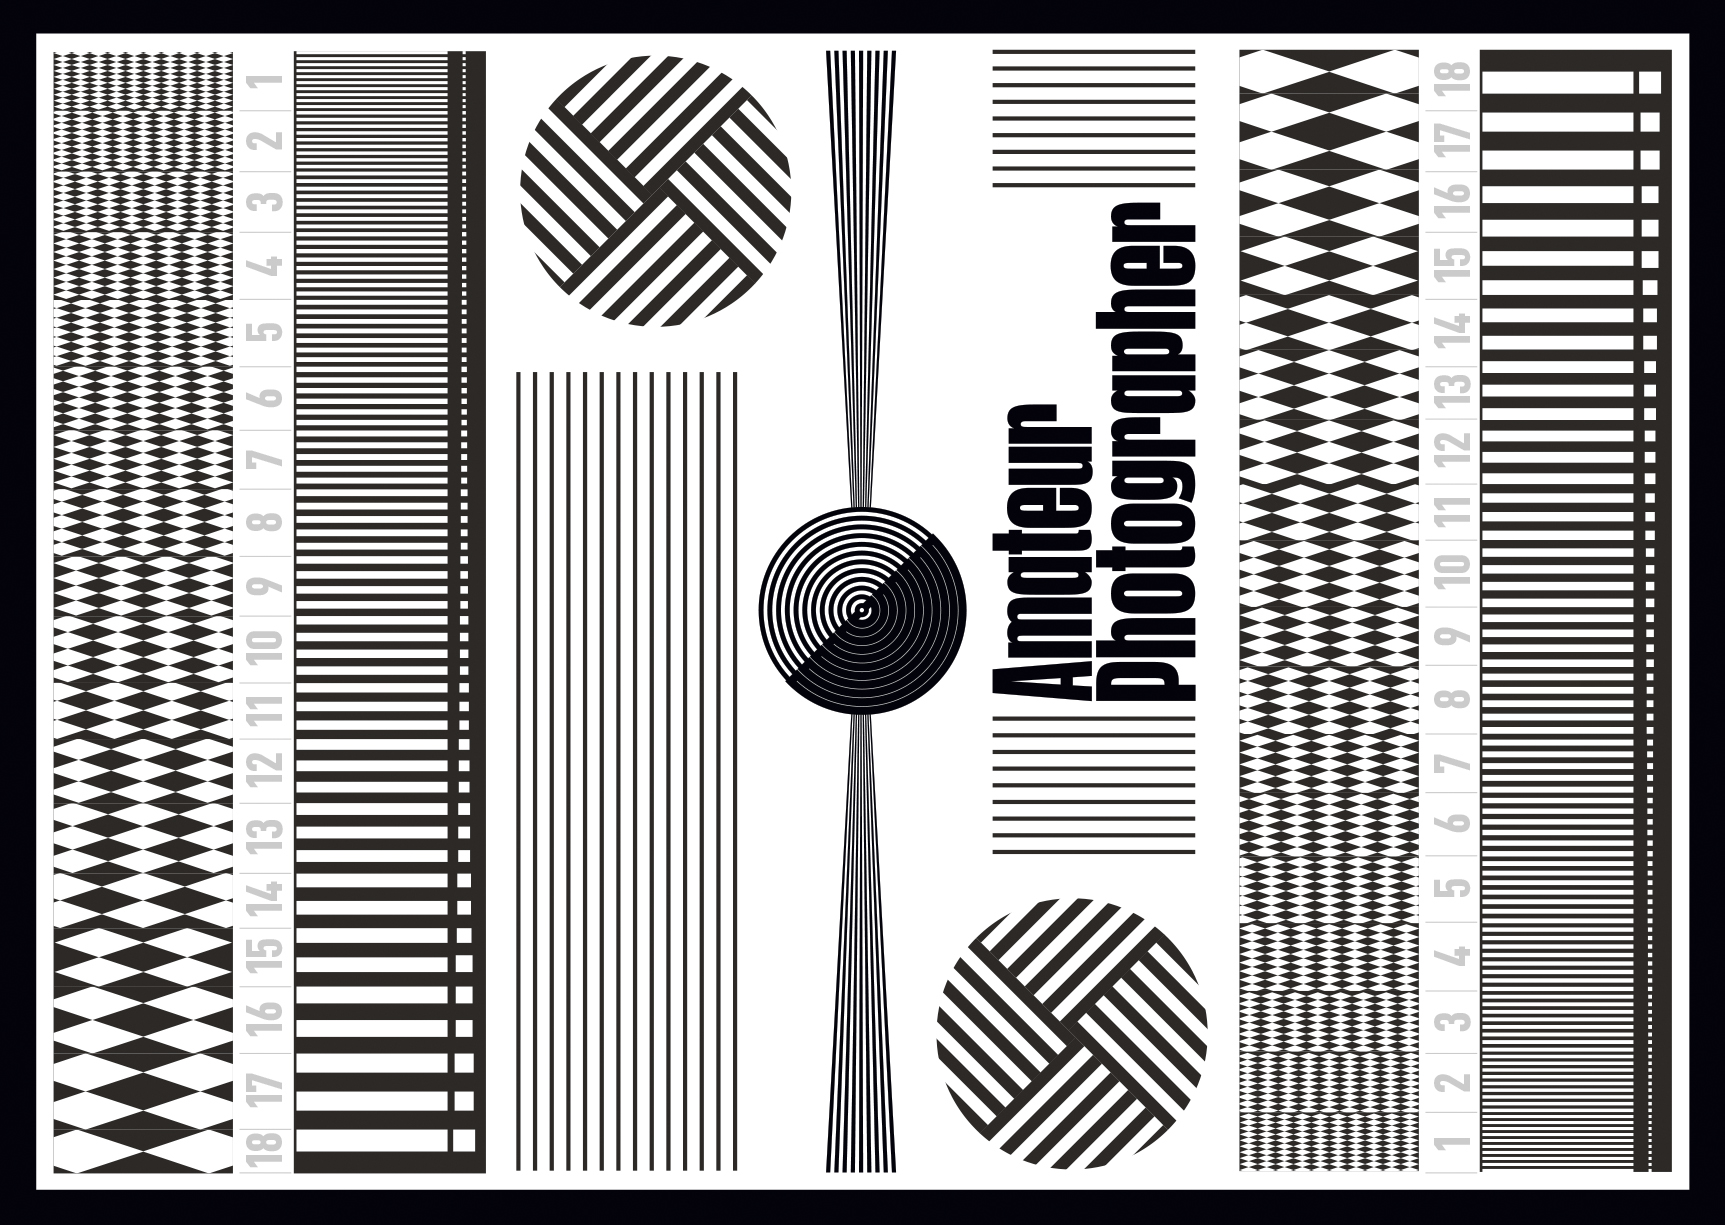
Resolution and sharpness card
One of the most important things that any photographer can do is learn about the lenses and cameras that they use. Just a few simple tests will make a big difference to the detail and sharpness that can be captured in images.
As photographers know, lenses are quite individual, with different models being sharper or softer at different focal lengths or apertures. Knowing the sweet spot of their lenses – the point at which a lens can resolve maximum detail – is something that every photographer should aspire to.
Of course, it won’t always be possible to use a lens at a particular focal length or aperture setting, but knowing how it performs at its best will allow a photographer to make a reasonable compromise when it comes to image quality.
For example, zoom lenses are often softer at their maximum focal lengths, so rather than zooming in, where possible try taking a few steps forward. Or if depth of field isn’t too much of a concern, stop the lens down from f/4 to f/8. Just performing these few adjustments can make a difference to sharpness, but it all starts with knowing how a particular camera and lens combination performs.
Finding the sharpest aperture
The resolution and sharpness chart can be used in a number of ways, but its most basic function is to test sharpness at the centre of a lens. To do this, stick or pin the target to a wall and make sure that it is lying as flat to the surface as possible.
Using a tripod, position the camera and lens so that the chart sits right in the centre of the frame. The distance from the chart will vary depending on the focal length of the lens being tested. Make sure that the position is far enough away so that any small differences in sharpness will be visible. Set the ISO setting to a low sensitivity to maximise detail, and use a self-timer or remote release to minimise camera shake. Now photograph the chart using every possible aperture setting of the lens.

Image: Photograph the resolution chart when it is completely flat against a wall
Once finished, open all of the images and compare the detail resolution of each. Most compact system cameras or DSLRs should be able to resolve all of the thicker lines, but the finer lines may cause more of a problem. An assessment of the images should reveal which apertures are the sharpest, and at which settings diffraction begins, which will help you learn more about your lens.
Performing the same test with the chart in one of the corners of the frame will also allow corner sharpness to be compared with centre sharpness at each aperture setting.

Image: By photographing the chart at different apertures it is easy to tell at what setting the lens is at its sharpest
Top tips for using the resolution and sharpness chart
1. Learn which aperture setting and focal lengths offer the highest resolution
2. Use the chart to check for front and back focusing and adjust if necessary
3. Use the card for help with precise manual focusing when using live view
AF fine-tune

Many lenses suffer from a slight front or back focus error when used with AF systems. This can often be seen when comparing a manually focused image to one that has been taken using the camera’s AF system. These slight focusing issues can usually be solved via the camera’s built-in AF fine-tune feature. Most enthusiast and professional DSLRs allow the AF to be fine-tuned, with the results remembered for individual lenses.
To test for front or back focus problems, simply photograph the chart as described above, and then adjust the AF fine-tune by moving it a step forwards and backwards, taking an image of each. By assessing these images, it is possible to tell whether this fine-tuning of the AF system has made a difference. If so, make another adjustment step: if, for example, a +1 adjustment is an improvement on the default setting, then move it to +2 and see if there is a further improvement in sharpness. Keep doing until the optimum setting is found.