In this photo-editing masterclass, Martin Evening shows you how to add contrast, clarity and Graduated Filter adjustments in Camera Raw.
Martin Evening has a background in advertising and landscape photography. He is also well known for his knowledge of Photoshop and Lightroom, plus books on digital imaging. See www.martinevening.com.
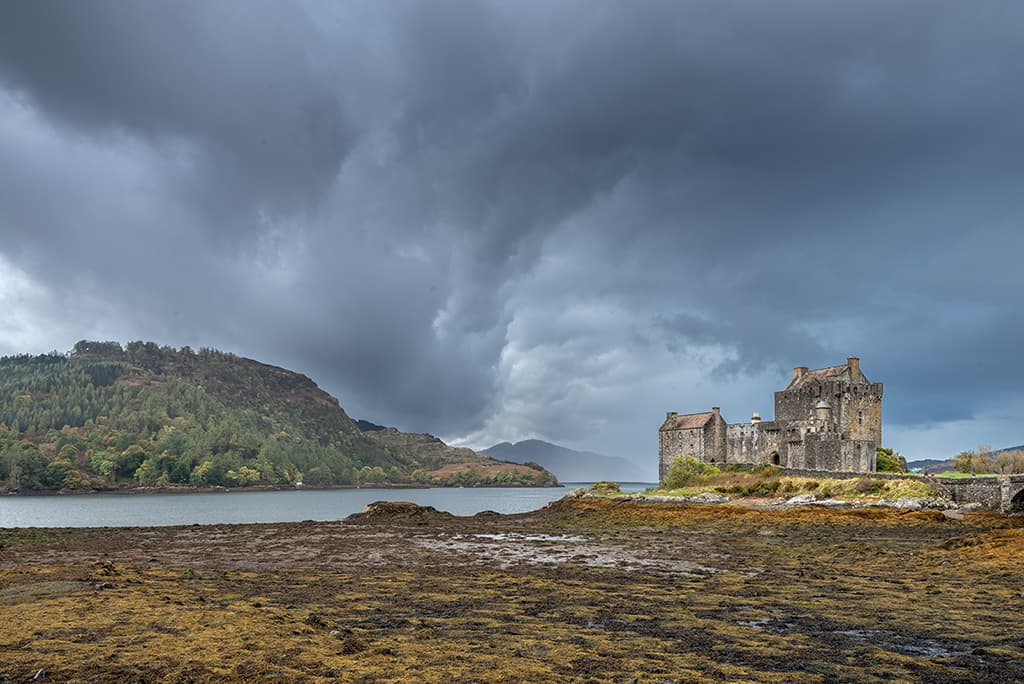
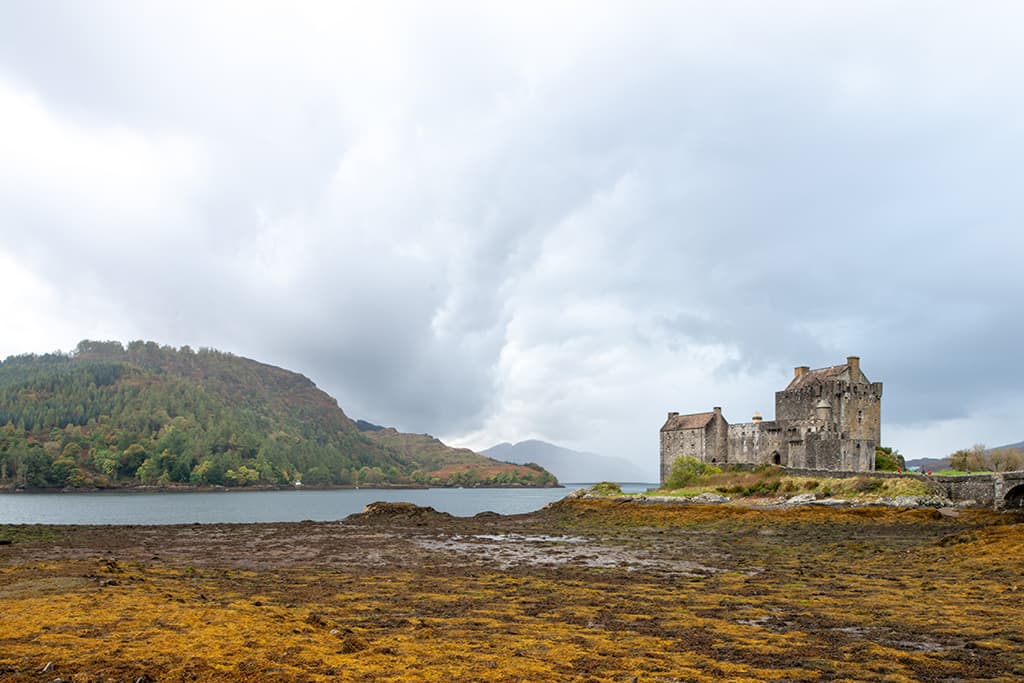
Eilean Donan Castle by David Kirkland
David is an architect and founding principal of Kirkland Fraser Moor, an award-winning practice noted for its innovative design. He is also a teacher and social innovator, but photography remains his long-held passion. www.davidkirkland.art.
Eilean Donan Castle is an unmissable destination for lovers of the Scottish landscape. The castle dates back many centuries, although the building you see today is mostly the result of more recent 20th-century renovations. David writes: ‘Running a busy architectural practice does not afford me the time I would like to spend exploring my photography.
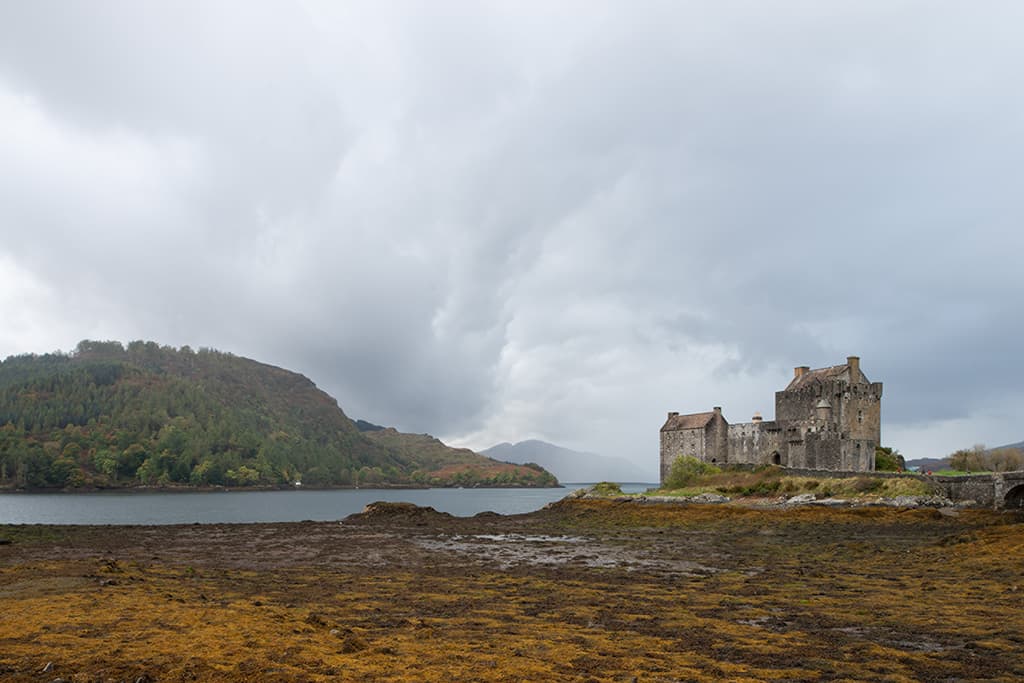
Eilean Donan, before
The year’s highlights tend to be a week’s break to head off into the boondocks – the more desolate and wilder the better. I gravitate towards the Scottish Highlands and find the Isle of Skye particularly appealing. The journey west passes Eilean Donan Castle near Dornie which is very photogenic, particularly when the grey clouds part.’
I liked the way David chose to process this photograph. Therefore, in the steps below I have attempted to match that as closely as possible.
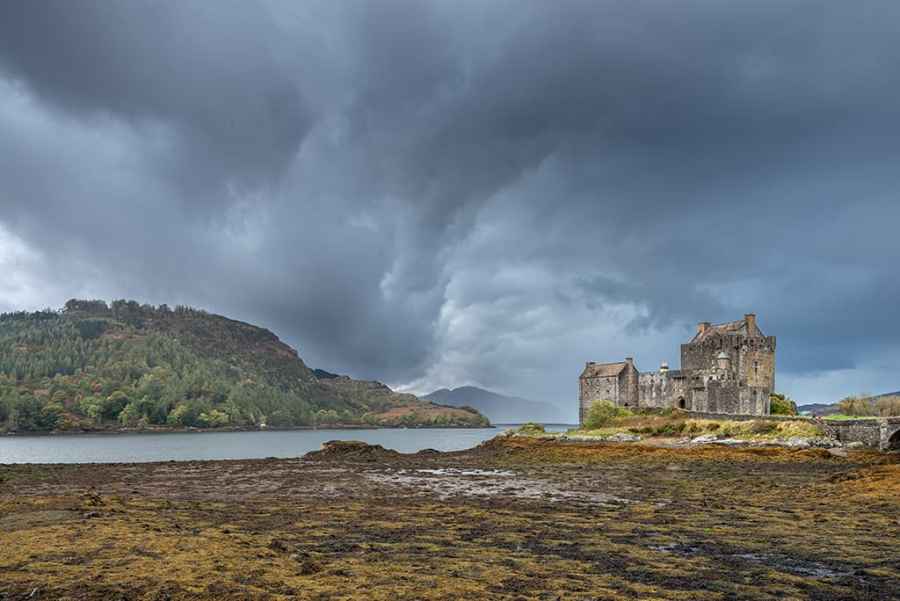
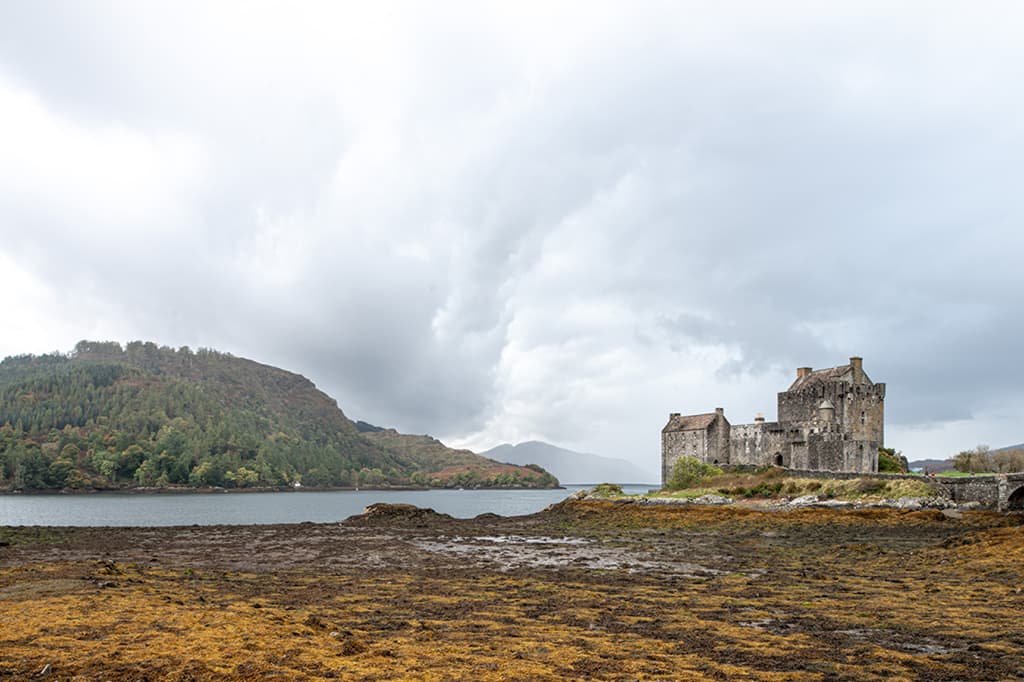
I mainly wanted to recreate the feeling of a shaft of sunlight hitting the castle, contrasted against the dark moody sky in the background.
Eilean Donan, after
Graduated Filter adjustments
The Graduated Filter adjustments can be used to add linear gradient localised adjustments, which you can edit by dragging the boundary handles. You can also use the Brush Edit mode to add to or erase a Graduated Filter adjustment.
These days I now prefer to use the Range Mask options at the bottom to refine the extent of a filter adjustment. For example, when editing this photo I applied a darkening adjustment to the sky, which I edited by selecting the Color Range Mask option. Using the eyedropper tool to sample the sky colours helped target the adjustment to the sky only.
How Martin used Camera Raw to add contrast and clarity
1. Add Contrast
Opening the photo in Camera Raw, I went to the Basic panel to apply tone adjustments: I needed to adjust the Whites and Blacks sliders to optimise the tone contrast. I also dragged the Shadows slider to the right to lift detail in the darker areas.
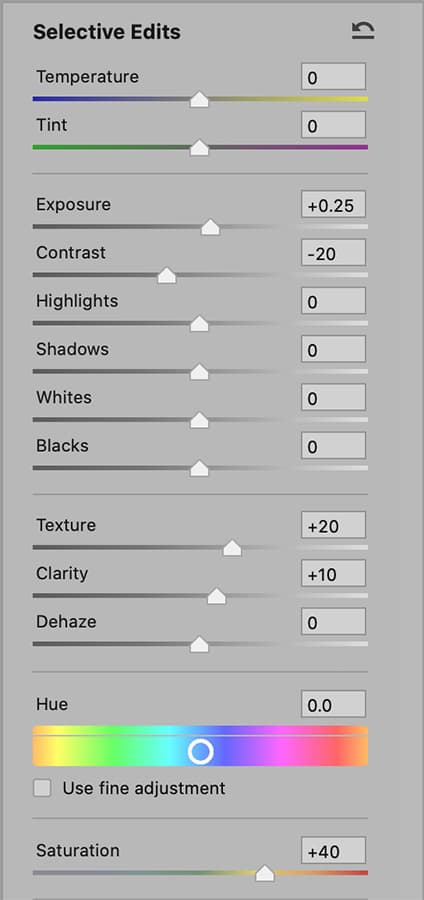
2. Add Clarity and Texture
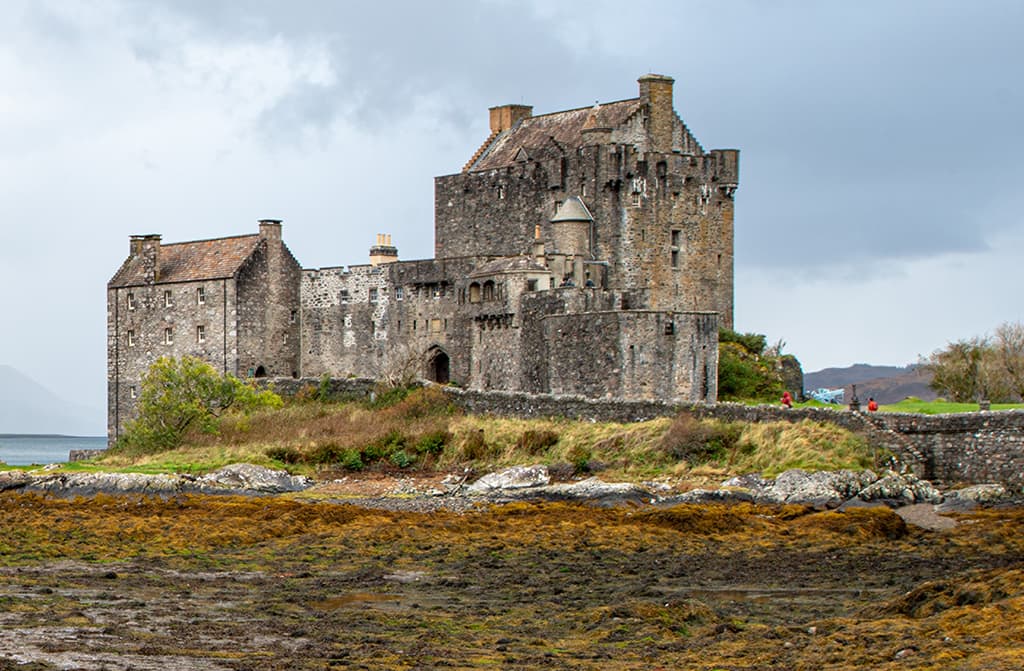
The main focus of attention in this photograph is the castle. In this step I zoomed in close to a 100% view and added more Texture. This helped emphasise the detail in the stonework. I then added a small amount of Clarity to add midtone contrast.
3. Reduce the Vibrance
There is a saying ‘If you don’t like Scottish weather, wait 30 minutes, and it is likely to change’. Much of the time Scotland can be dull and overcast, which can be a nice light to work with. Embracing the flat grey atmosphere in this scene, I chose to reduce the Vibrance.
4. Optically correct the image
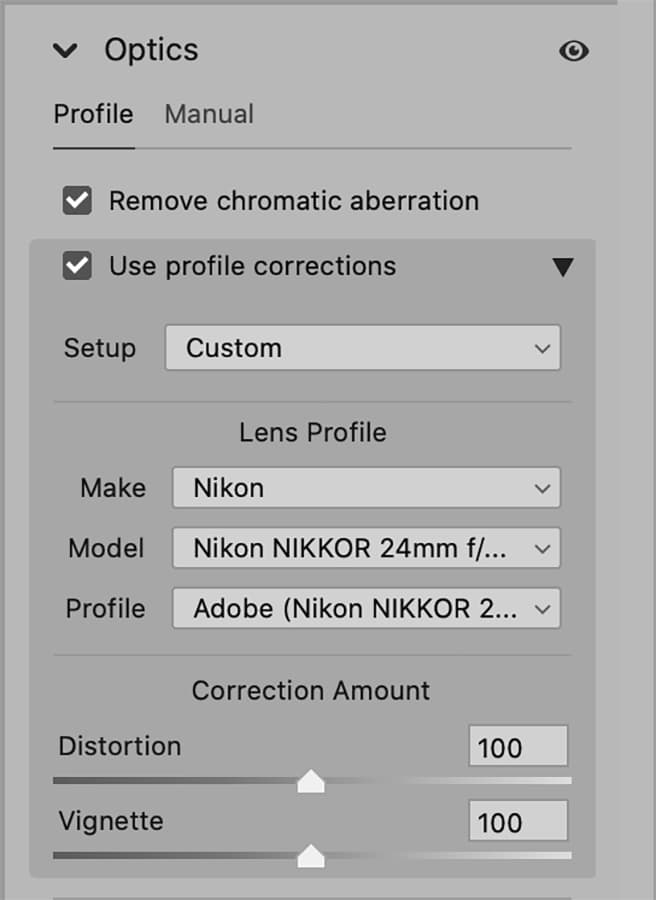
To make the image as optically correct as possible, I next went to the Optics panel, where I clicked to enable Remove chromatic aberration and enabled ‘Use profile corrections’. This should auto-select the correct lens profile based on the embedded EXIF data in the image.
5. Add Graduated Filters
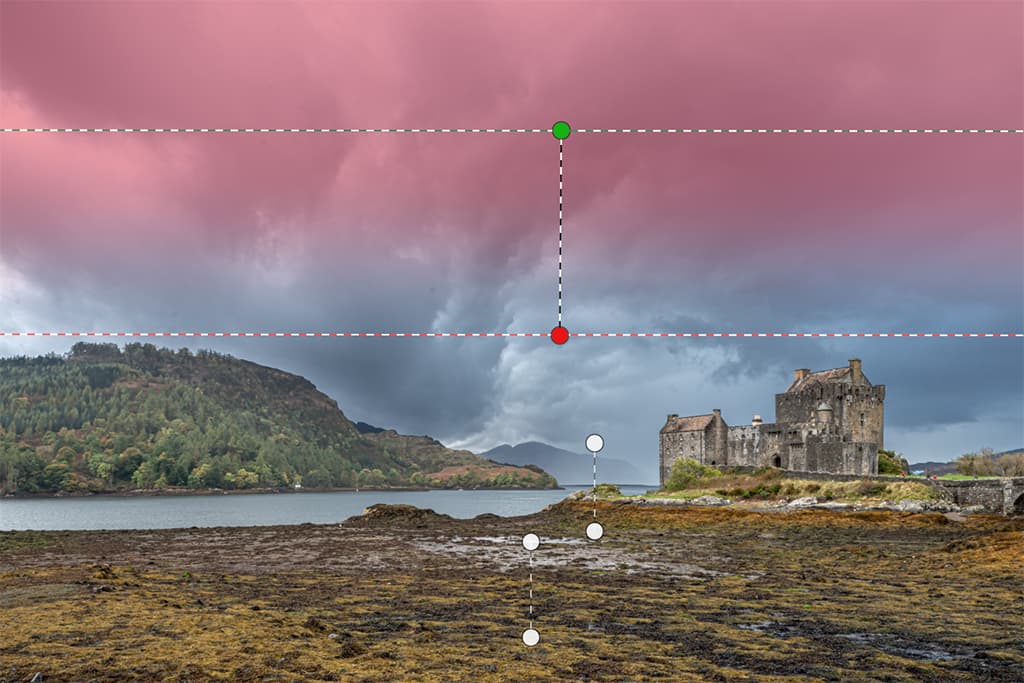
It was now time to apply localised adjustments to add light and shade to the photograph. To start with, I added a couple of Graduated Filter adjustments to darken the sky. I then added a graduated filter to the lower section to darken the foreground as well.
6. Add a Radial Filter
Finally, I selected the Radial filter tool and added a Radial gradient adjustment on top of the castle. The idea here was to lighten it slightly, add a little more local texture and boost the colour saturation. Just enough to make it pop out a little more.
Submit your images
Submit your images to see your photo here and for a chance to win Martin’s new book. Email submissions to ap.ed@kelsey.co.uk with “Evening Class” in the subject line.
Further reading