Skylum’s Luminar 4 enables you to replace a dull sky in seconds, transforming disappointing images into head-turners.
If you’ve been browsing through your landscape images and discovered lots of shots of an interesting scene under a boring sky, you’re not alone. It’s a common problem for enthusiasts who don’t have the luxury of being able to wait for the perfect weather conditions. Even photographs taken on a ‘good day’ when the sky is clear blue can lack impact.
The good news is that digital technology enables us to strip out a featureless sky and replace it with something a bit more interesting. The bad news is that it’s a skilled job, which when done manually, can take hours of painstaking work. Fortunately, the unique technology in Skylum’s Luminar 4, which makes use of artificial intelligence (AI), means anyone can do the job in seconds.
Getting Started with Luminar 4
Luminar 4 works as a standalone image editing package and as a plug-in for software such as Adobe Photoshop, Adobe Photoshop Elements and Adobe Lightroom Classic. That makes it incredibly flexible and you can use Luminar 4 to do all of your editing, or if you prefer, you can use an Adobe package for some aspects and use Luminar to do the heavy lifting with tricky tasks such as replacing a lacklustre sky.
Luminar uses your computer’s folder structure, which makes it easy to locate and select an image when you’re using it as a standalone package. Once you’ve selected an image in the Library view, it’s simply a case of clicking on the ‘Edit’ tab to get access to the editing tools.
How to use Luminar 4’s AI Sky Replacement
Luminar 4 makes it incredibly easy to replace a dull, boring sky, in fact you need little or no experience of image editing. You’re able to pick from a selection of great skies from a dropdown list or upload your own. The software takes care of everything, including detecting the horizon, blending in the new sky, cutting around objects such as trees and buildings that reach into the sky and balancing the overall exposure and colour.
Here’s how its done
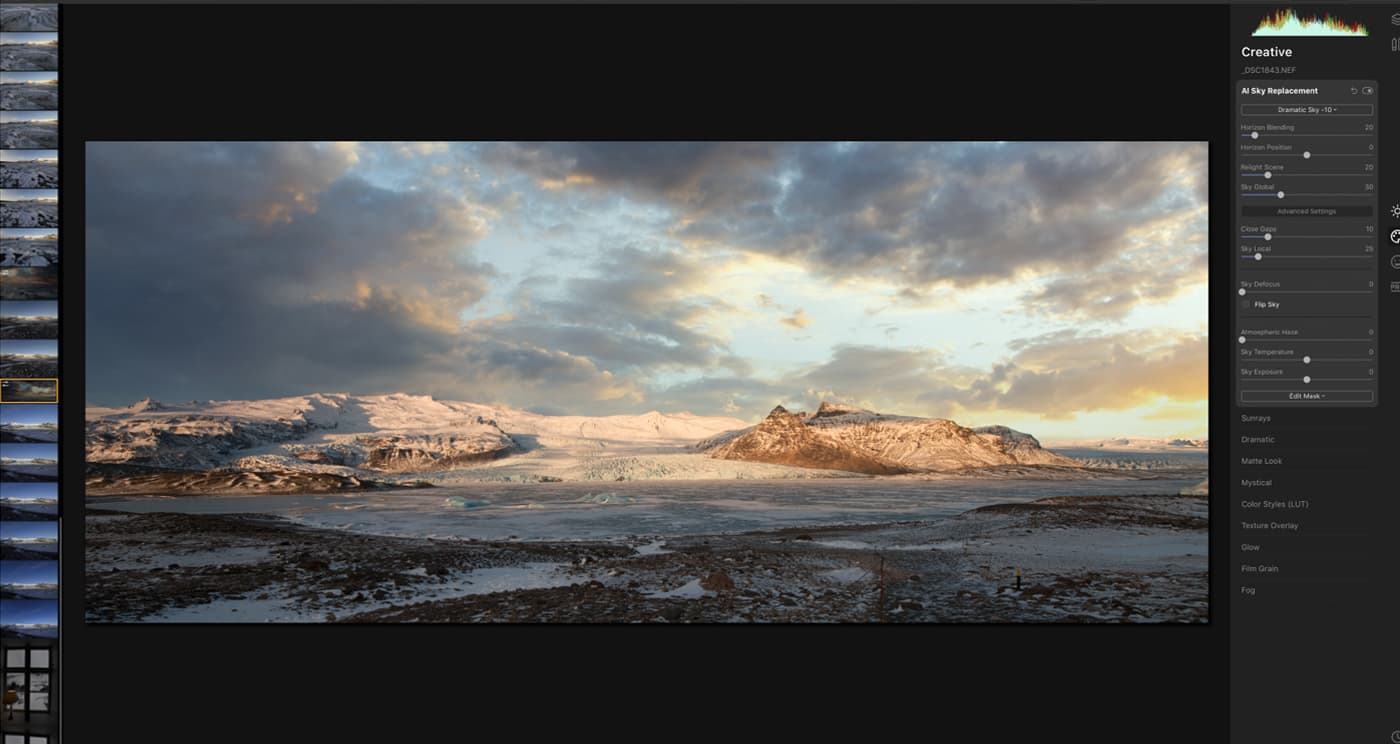
1. Open the image in the Edit view and click on the ‘Creative’ tab in the panel on the right.
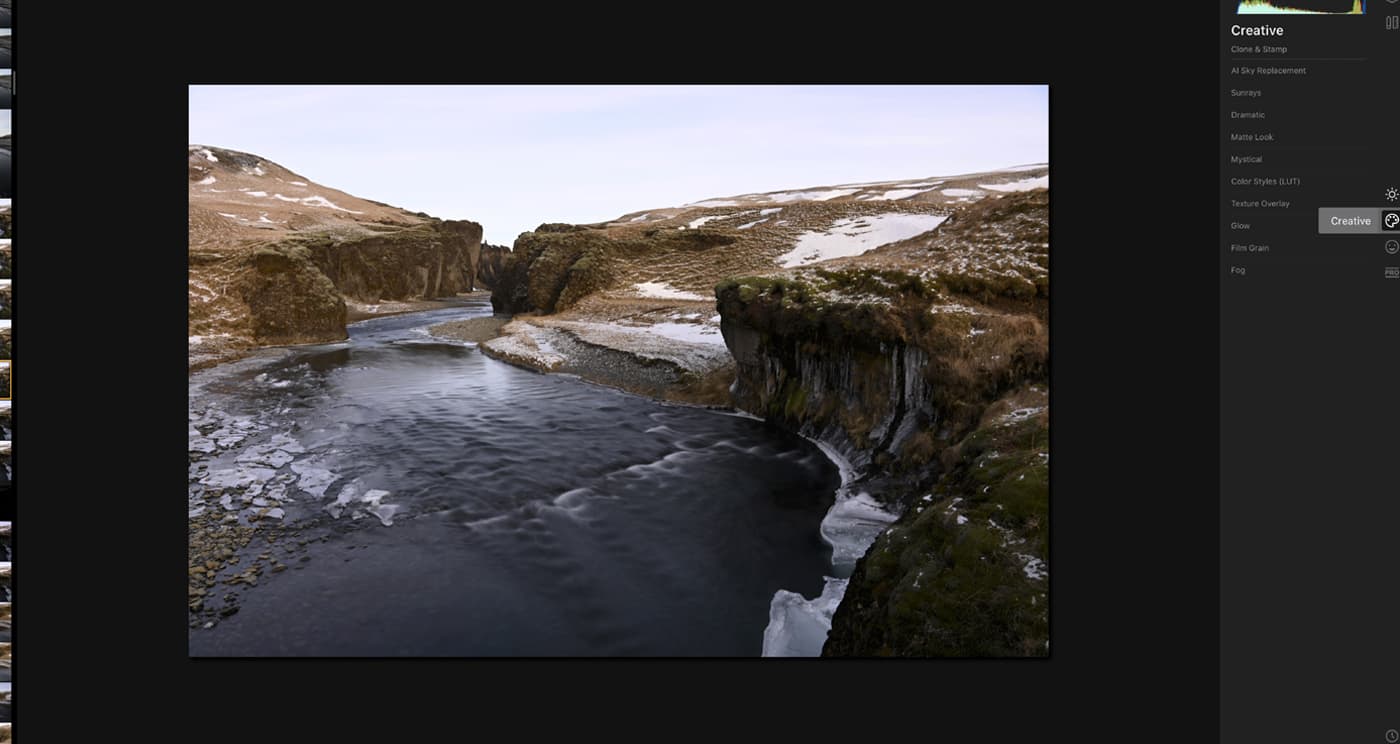
2. Next, click on ’AI Sky Replacement’ tool in the Creative panel.
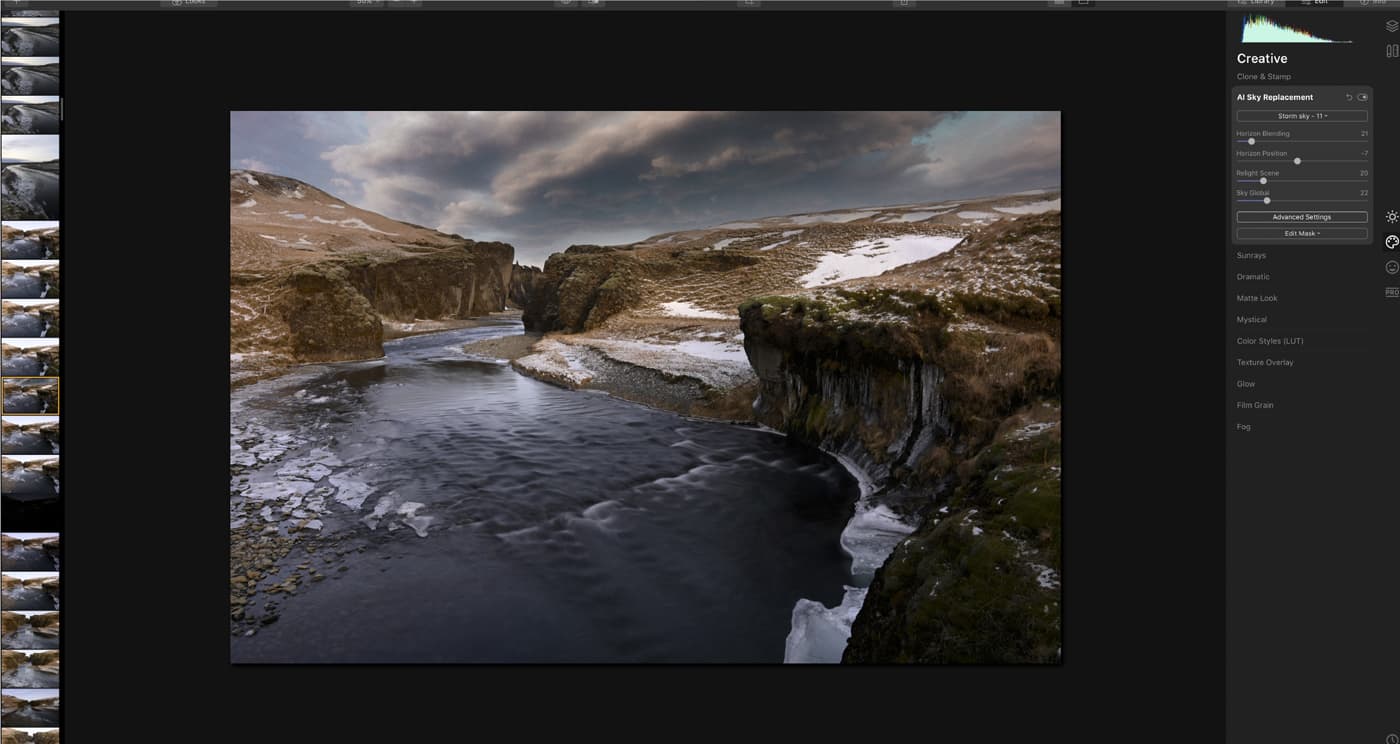
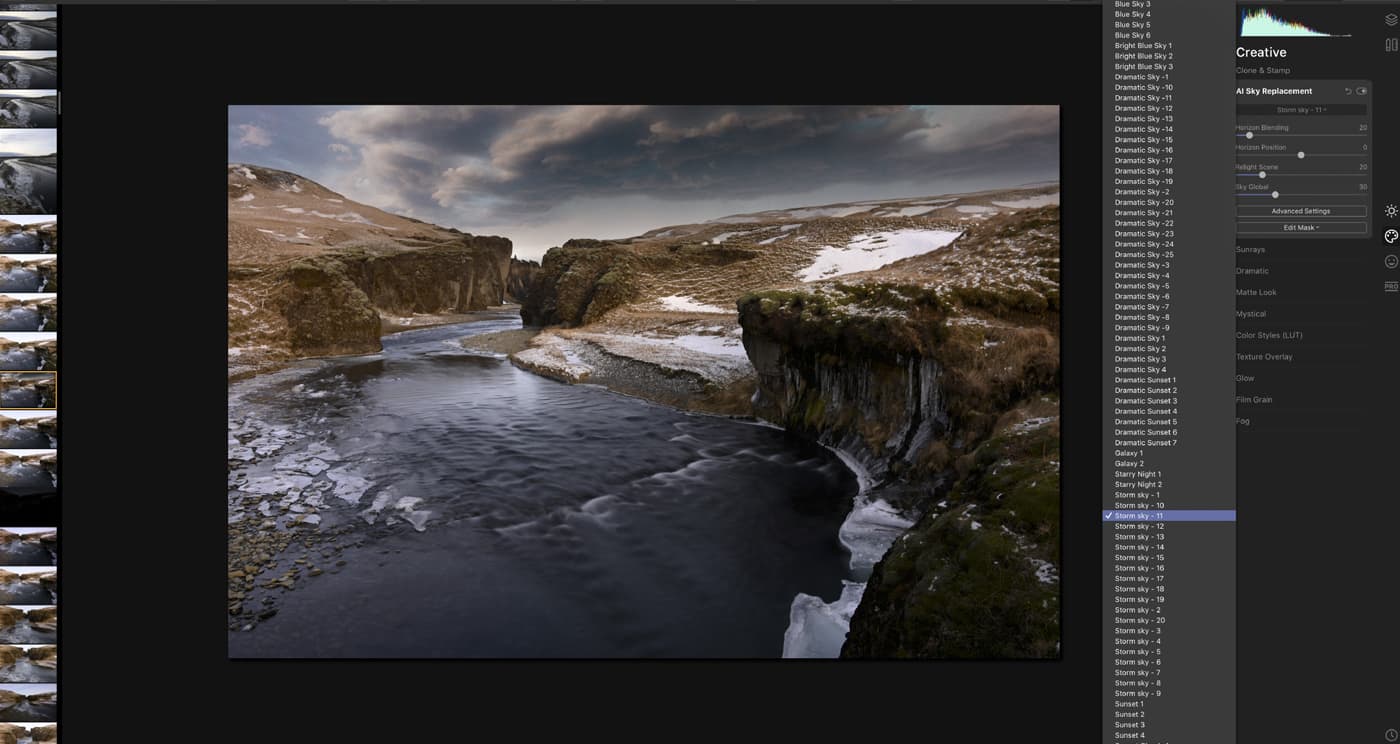
3. Now click on the Sky Selection dropdown option and try the available skies unit you find one that you like. If you want, use ‘Load Custom Sky Image’ to use your own Jpeg image of a sky.
4. Luminar 4 uses AI to blend the new sky into your image but there are tools available if you want to adjust the result to get exactly what you want. Click on the ‘Advanced Settings’ button to see the full range. Read on to discover what the controls do.
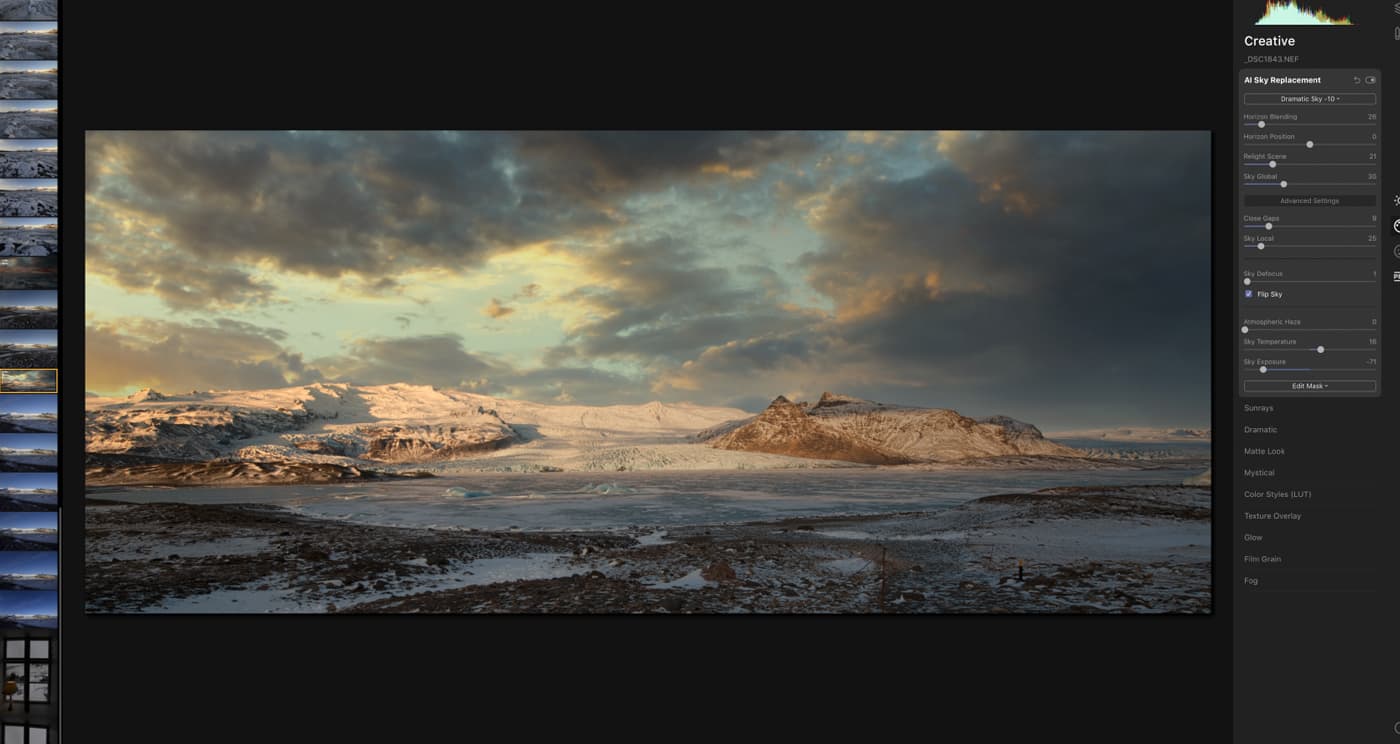
 Horizon Blending
This controls the bending of the original image and the replacement sky along the horizon. Moving the slider to the right reveals more of the original sky whereas moving it to the left gives a harder transition. It’s helpful for creating a seamless transition into the landscape and recreating the lightening that’s often visible in the sky near the horizon.
Horizon Position
Luminar automatically detects the horizon in the original image and aligns the new sky appropriately, but this tool lets you shift the sky up and down if necessary. Slide to the right to move the horizon up or left to move it down. It can be useful for moving the clouds or shafts of light to where you want them relative to the horizon, enabling you to produce the perfect image from a shot taken in less than perfect conditions.
Relight Scene
Luminar automatically adjusts the image so that the exposure and white balance of the sky and landscape match, however, this slider lets you tweak the degree of the matching to create the atmosphere that you want. It’s especially helpful when you want to make a major change to the feel of the original image and inject more drama.
Sky Global
This slider controls the visibility of the new sky. Using a high value setting makes the new sky more intense whereas as low one reduces its impact. Use this tool create the ideal blend between the old and new sky so you can combine what you saw at the time with your creative vision.
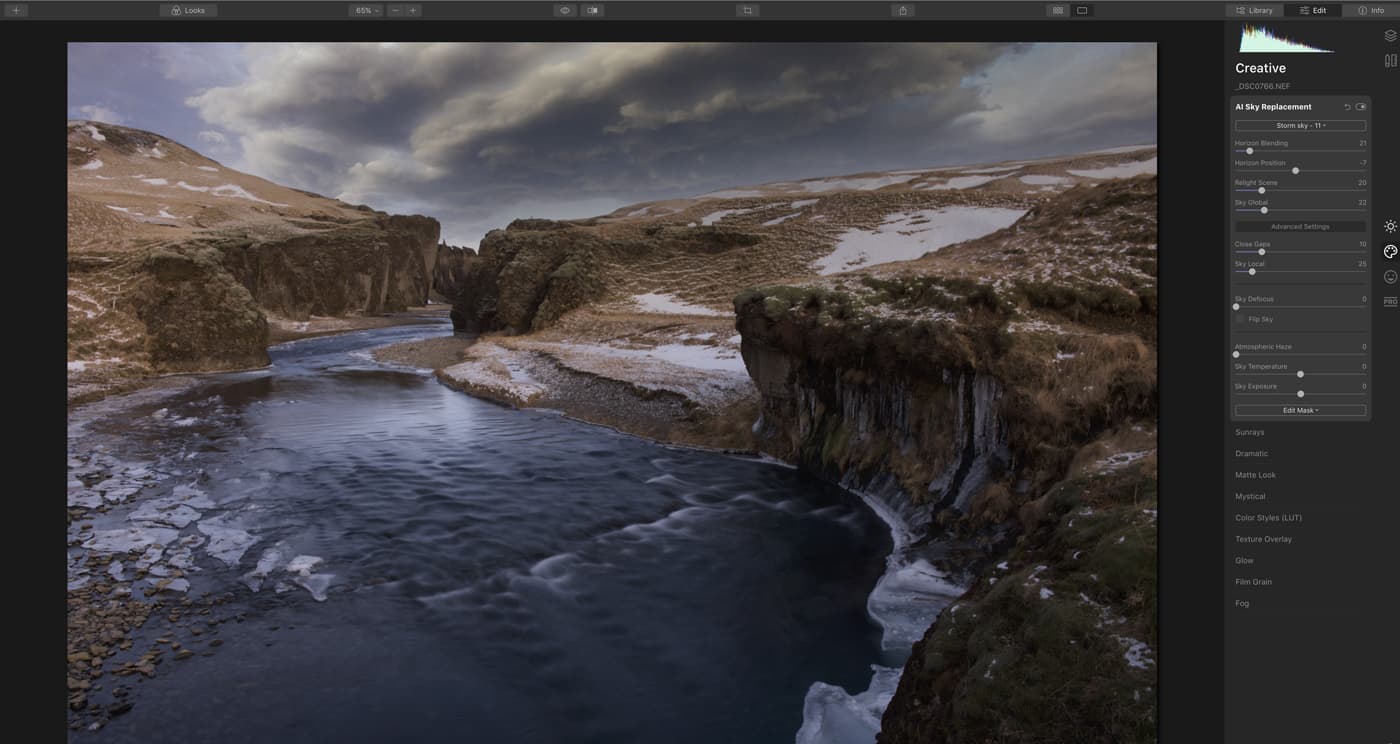
Advanced Settings
Close Gaps
This tool works in a similar way to ‘Horizon Position’ and is useful for closing any small gaps between the new sky and elements such as trees or tall buildings that extend into it. A small adjustment to the left, lowers the new sky to close any gaps. It’s especially useful when you’ve made a dramatic change such as switching from a bright grey or white sky, to something much more interesting, as any gaps would draw attention to the change.
Sky Local
This tool gives control over the visibility of any clouds in the original sky. Moving the slider to the left makes the original sky clouds more visible whereas moving it to the right makes them less visible. Use this tool to improve a reasonable sky to give your image impact.
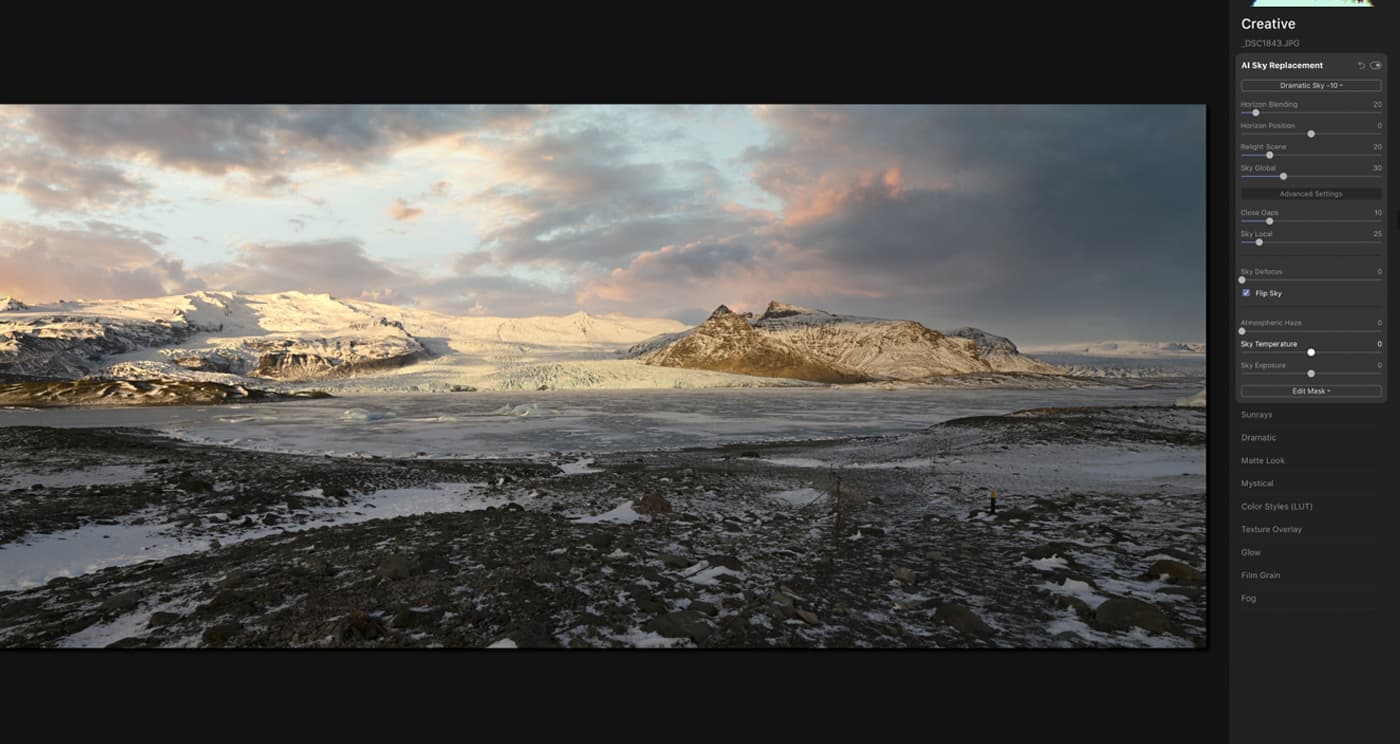
Sky Defocus
If you have shot with a wide aperture and focused on a subject in the foreground, distant objects will be out of focus in your original image. A sharp sky over a blurred background would look odd. Slide the control point to the right to make the sky look softer so the end result is more natural-looking.
Atmospheric Haze
This tool lets you add some haze to the sky to help it blend in when the original image captures air pollution and murky conditions. It’s useful for big cityscapes and shots of distant mountains.
Flip Sky
Sky in original orientation
One of the tell-tale signs that a sky has been replaced is that direction of the light hitting the land doesn’t match the position of the sun in the sky.
Flipped Sky
This tool flips the orientation of the replacement sky to deal with that.
Sky Temperature
Sky Temperature before
Use this tool if you want to cool or warm the colour of the new sky.
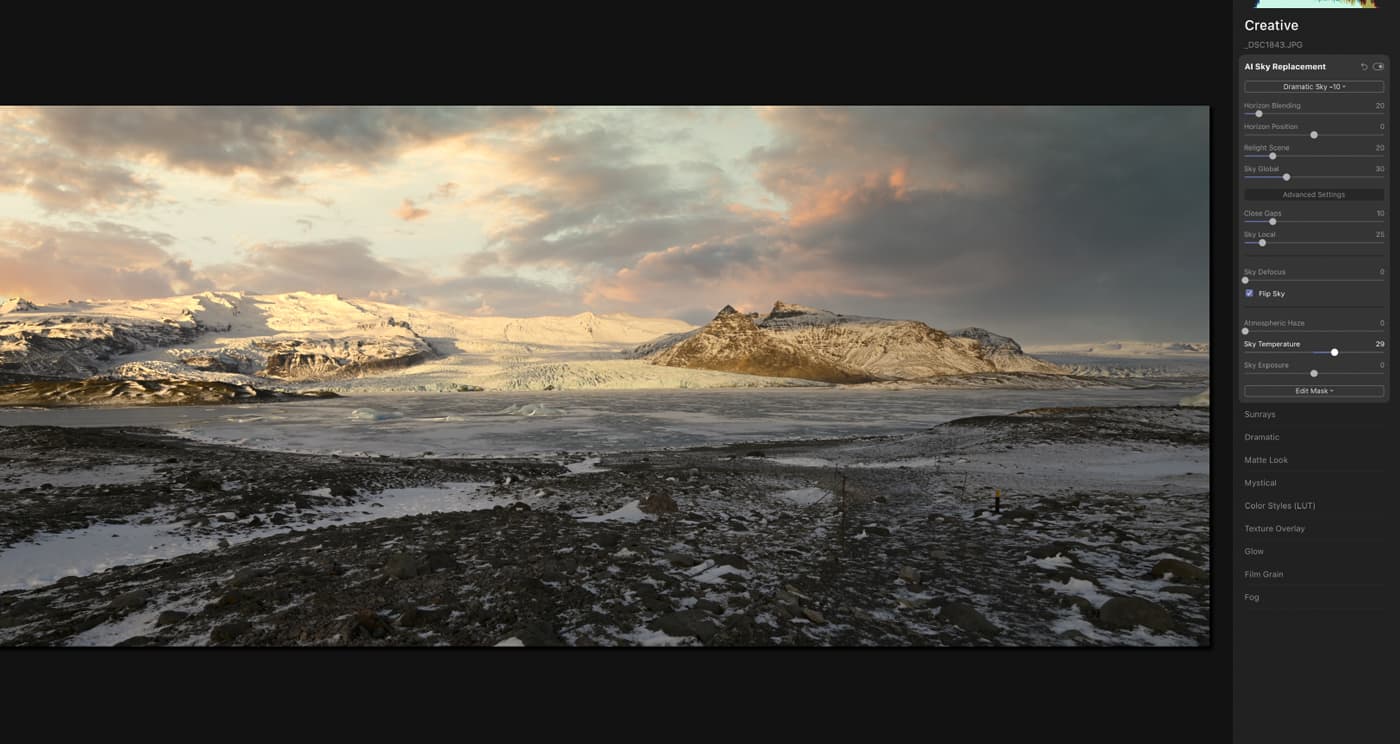
Sky Temperature after
It’s useful for making the sky match the foreground or creating a different atmosphere.
Sky Exposure

Sky Exposure before
This slider allows you to brighten or darken the new sky. In some cases that may be to make the sky better suit the landscape beneath, but in others it’s a creative decision.
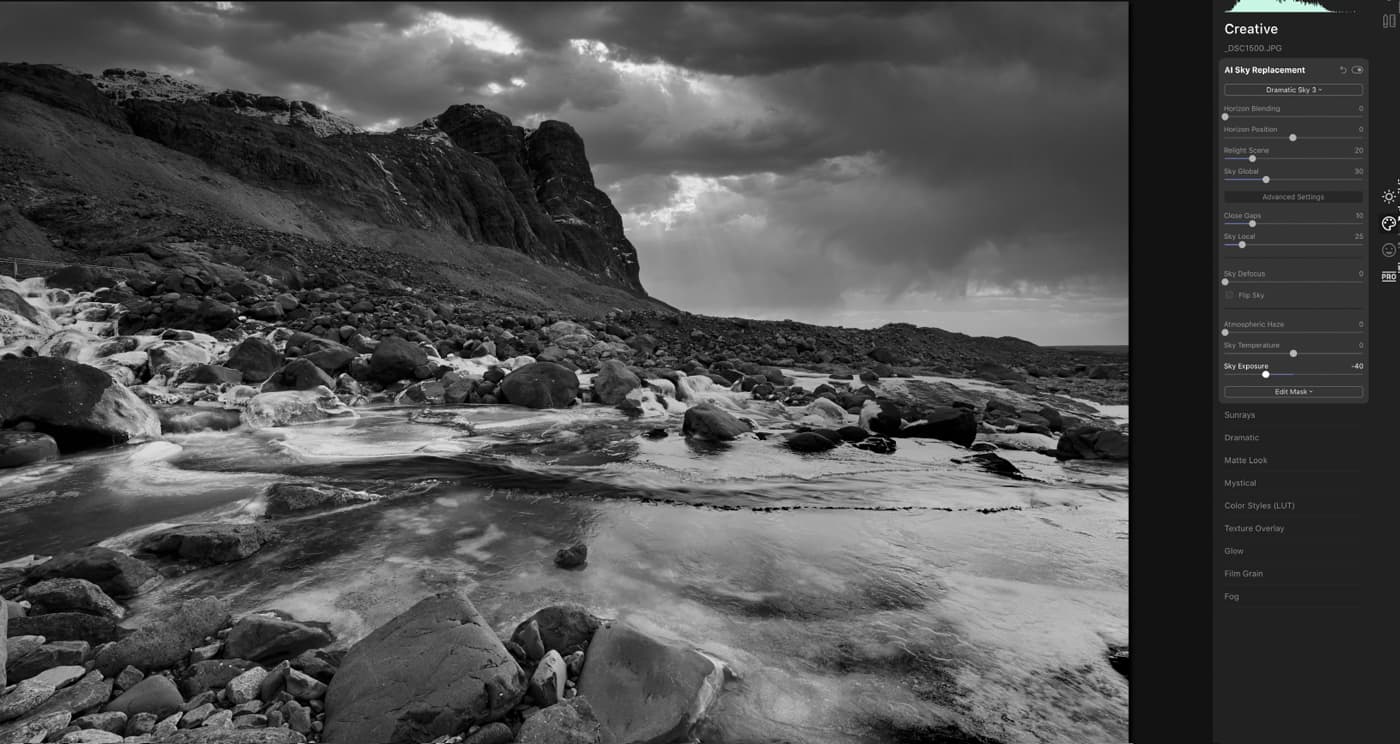
Sky exposure after
It’s especially useful for creating a dark-brooding sky in a monochrome image.
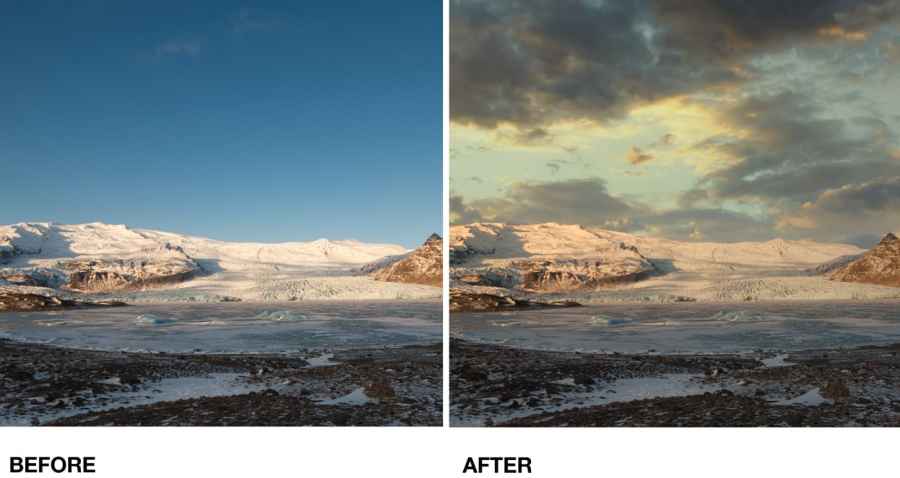
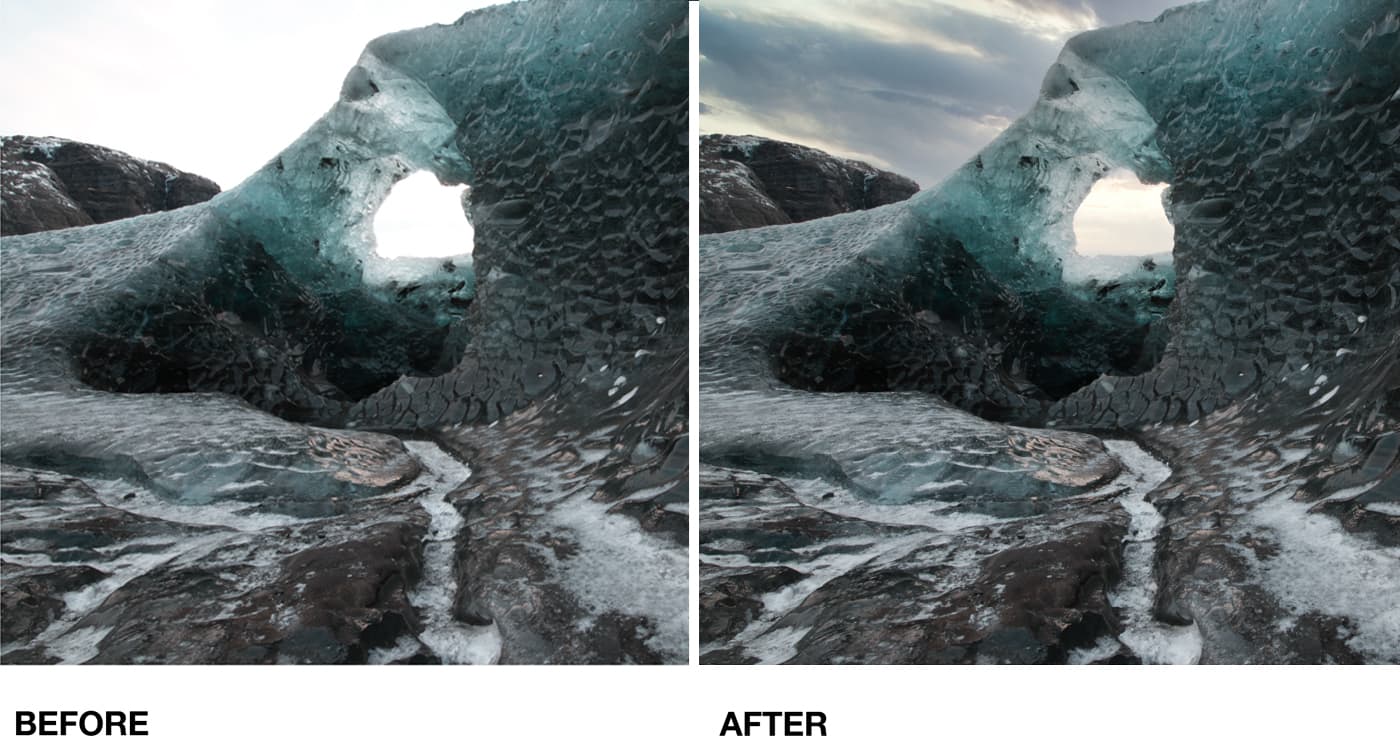
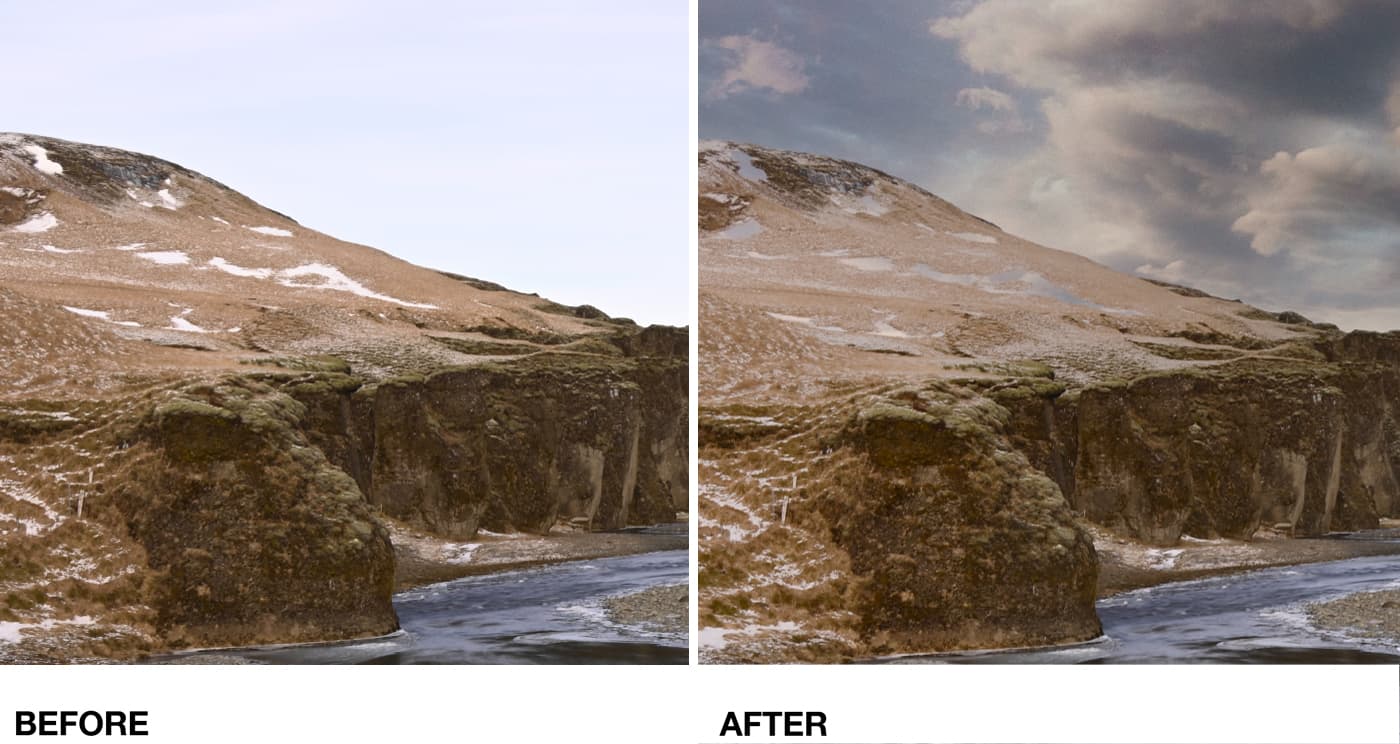
Why Use Luminar 4’s AI Sky Replacement?
As you can see, Luminar 4 AI Sky Replacement can transform an image in seconds. Instead of a dull grey sky you can have fluffy clouds against a blue sky, threatening storm clouds, a warming sunrise or a galaxy of stars – and more. You can even start your own collection of sky images to add to your landscape shots.Luminar 4’s AI Sky Replacement tool means that if you can’t shoot in the perfect weather conditions you can still create beautiful images and any trip with your camera is worthwhile. And if like now, you’re unable to get out with your camera, you can still create great images.
Follow the link to find out more about Luminar 4’s AI Sky Replacement.
It’s a great time to buy Luminar 4 because Skylum has announced that during April, $5 from any purchase made on skylum.com will be donated to the World Health Organization COVID-19 Response Fund, the Coronavirus Relief Fund by GlobalGiving, Heart to Heart International, and local charities around the world to help fight COVID-19 and assist victims of the coronavirus pandemic.