
1. Get it right from the start
Pick an organisation method that works for you and then stick to it. I like to save images to folders named YYYY-MM-DD and add keywords while importing. Then once in the Library Module, I rate my images and use a combination of Collections, Collection Sets and Smart Collections to organise and categorise the shots I want to take further.
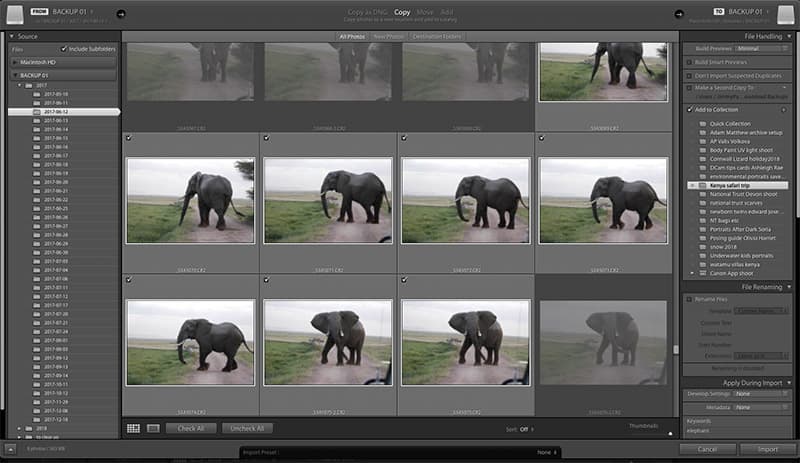
2. Master the import
Do as much as you can during import and you’ll save lots of time later on. You can apply presets on import, add keywords and create collections. If you like to import directly from a memory card, you can automatically create dated subfolders to organise your photos. And if you like to import to a specific folder, you can save time by right-clicking it in the folder panel and choosing ‘Import to this folder’.
3. Render previews
If you find that Lightroom constantly displays ‘loading’ when you move from one image to the next, try rendering 1:1 previews before you begin editing a set or folder. Select the images in the Library Module then go to Library > Previews > Build 1:1 Previews. It may take a while to complete, so choose a moment when you can leave your system to it.
4. Use your cloud storage
By default Adobe Photography Plan subscribers get 100GB of cloud storage to use with the cloud-based Lightroom CC app. While this isn’t enough to store an entire image library, it’s a great place to upload your favourite shots (perhaps all your 5-star photos), either to edit them on-the-go, or to use as a portfolio when out and about.
5. Don’t Move!
Moving an image file around your drive is the cardinal sin for Lightroom users because Lightroom will lose track of where it is – unless it’s done via the Library Module’s Folder panel. So if you ever need to move something from one location to another – say, to store it on an external drive – then do it here so that Lightroom can keep dibs on it.
6. Rate and Advance
Use ratings to highlight your favourite photos. Add a star rating (hit 1-5) or use flags (hit P/X). Once you have a method then stick to it for consistency across your library. Here’s a simple tip that helps speed up the process. Enable Auto-Advance (Photo > Auto-Advance) and upon adding a rating Lightroom will move to the next photo for you.
7. CC or Classic?
Either version of Lightroom offers a different workflow – Classic is based on a traditional file/folder/collection structure, while CC utilises cloud-based storage. Here we focus on LR Classic techniques because there’s greater depth in Classic. But if you want a simpler cloud-centric workflow and are prepared to pay for the 1TB cloud storage package, CC may be the better option for you.
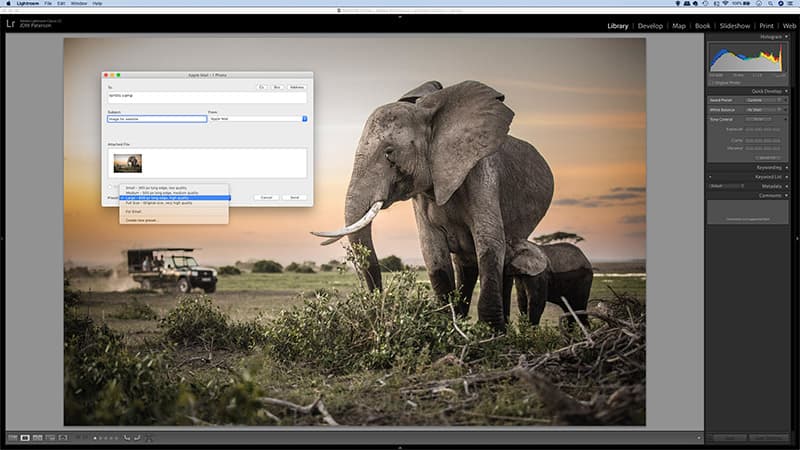
8. Email directly from Lightroom
If you need to email photos to a friend or client then there’s no need to export the images. Lightroom offers a convenient command under File > Email Photo. You’ll need to link Lightroom to your mail app, then you can add a recipient from your address book, include text, and even resize to an email-friendly attachment like 800px long.
9. Enable Solo mode
This is such a simple yet useful feature that stops you having to scroll right down through a long list of panels to find the one you’re after. Right-click over any panel title and enable ‘Solo Mode’ then each time you click a panel all others will automatically collapse, giving you a cleaner interface and no more need for endless scrolling.
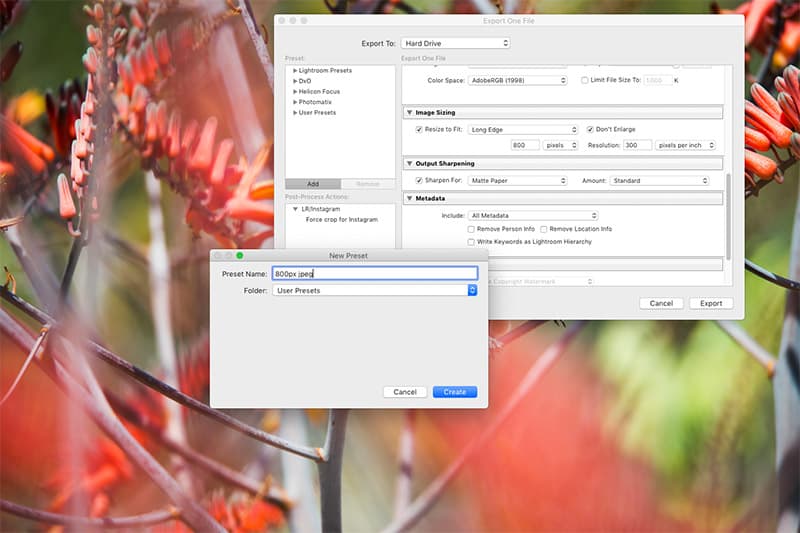
10. Use Export Presets
The Export dialog contains lots of useful settings, but they can be a drag to go through. Instead, if your workflow requires regular re-formatting – say to make an 800px JPEG version for web – then save yourself time by setting up Export Presets. Simply choose your settings and hit ‘Add’ to the left of the box.
11. New HDR Panoramas
Like to make HDR Panoramas? In the latest update to Lightroom Classic you can now do this in one step, rather than having to create HDR merges for each segment of your pano before stitching them together. Select your entire set of exposure-bracketed images then go to Photo > Photo Merge > HDR Panorama.
12. Spray Can edits
When in the Library grid view you can use the Spray Can tool to swiftly apply edits to images in the grid by dragging or ‘spraying’ over them. You can spray on presets, metadata, keywords, star ratings, image rotation and more. Simply click on the tool, use the dropdowns to set parameters and start spraying.
13. Create sidecars
The Catalog is where Lightroom stores all your edits. But if you decide to open the file in another editor, like Camera Raw or Bridge, the edits won’t show. If you need them to, head to Lightroom > Catalog Settings and check ‘Automatically write changes to XMP’. This creates ‘sidecar’ data files and helps safeguard your edits if your catalog is corrupted.
14. Speed up everyday tasks
Presets aren’t just for applying specific looks or treatments; they can be used for practical purposes too. If you favour a certain level of sharpening, for example, or need to switch between different process versions, then save yourself a few clicks by making presets for these everyday tasks.
15. Remove rejected files
In any shoot there is likely to be a few duff images that you’re never going to want or need. While it’s good practice never to delete anything, there’s no need for these images to clutter up your Lightroom Library. After sorting your images hit the delete key and choose Remove – but don’t ‘Delete from Disk’!
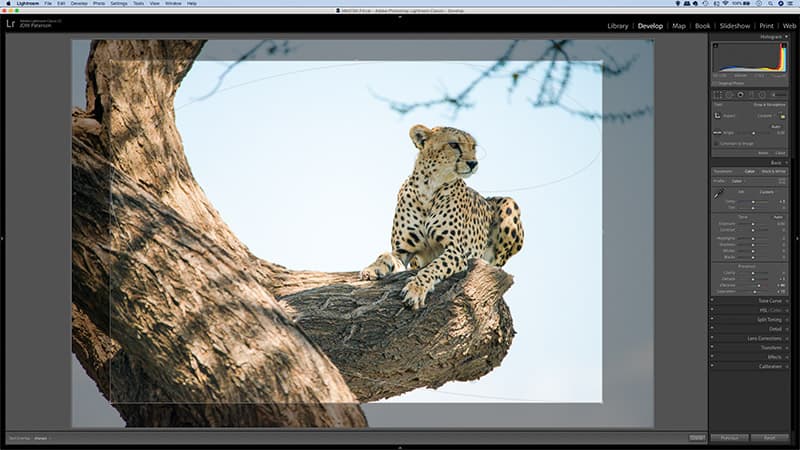
16. Handy crop guides
When cropping images the Crop tool displays a helpful overlay, but if you like, you can press O to cycle through a variety of others (Shift+O changes the orientation). Each overlay adheres to a different compositional rule like the golden ratio or golden spiral. What’s more, you can customise which overlays are included under Tools > Crop Guide Overlay > Choose Overlays to Cycle.
17. Turn Presets into Profiles
Why not turn your much-loved Presets into Profiles? Open an image into Camera Raw (you can’t make them in Lightroom), then head to the Preset Panel and apply the preset. Next Alt-click the ‘New Preset’ icon at the bottom to open the ‘New Profile Browser’. Save and close, and the profile will appear in Lightroom’s Profile Browser the next time you open it.
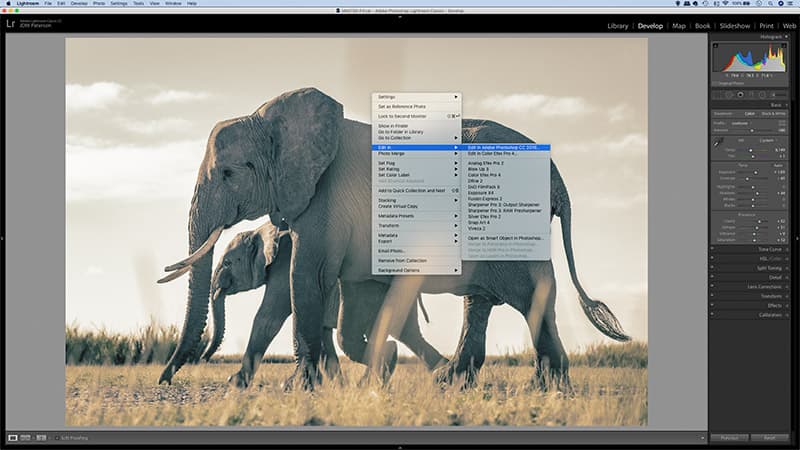
18. Round-trip with Photoshop
You can treat Photoshop almost like a plug-in for Lightroom in that you’re able to round-trip your images between the two. Here’s an indispensable shortcut: Cmd/Ctrl+E. It summons the ‘edit in Photoshop’ dialog. Once you’re finished in Photoshop, simply save the image and go back to Lightroom.
19. Get to grips with Profiles
Found at the top of the Basic Panel, Profiles are like newer, better forms of Presets. They let you instantly apply different looks to your photos, but unlike Presets they can be used independently of any other edits you make either before or after. What’s more, the handy strength slider lets you control the intensity of the effect.
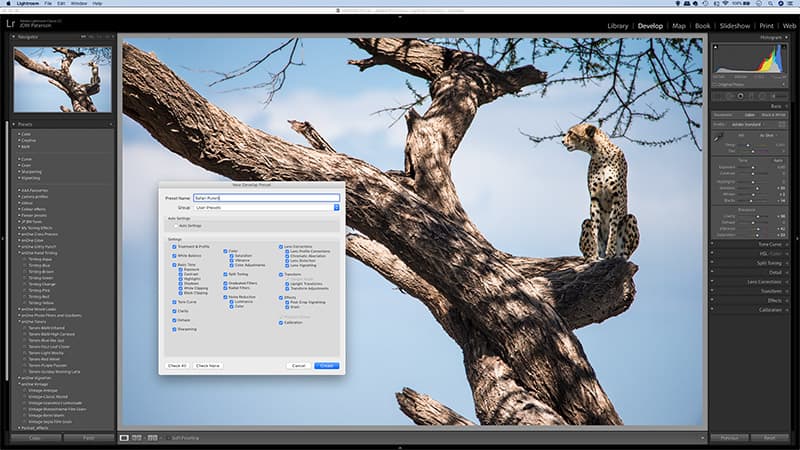
20. Make Presets for everything
If you apply the same edits over and over again, why not make a Preset? Hit the plus in the preset panel to save your current edits for speedy use on other images. Get to grips with presets and you need never do anything more than once.