https://link.brightcove.com/services/player/?bctid=4691146597001
If you’ve spent any time browsing videos on Vimeo or YouTube, chances are that you have skipped, or completely stopped, a video that has poor audio. It’s odd, but a video that may not be visually perfect is often easier to watch than one with terrible audio. Poor sound can have us quickly looking for the stop button, no matter how good the footage looks. So how do you ensure that the quality of your audio and digital film match?
External microphones
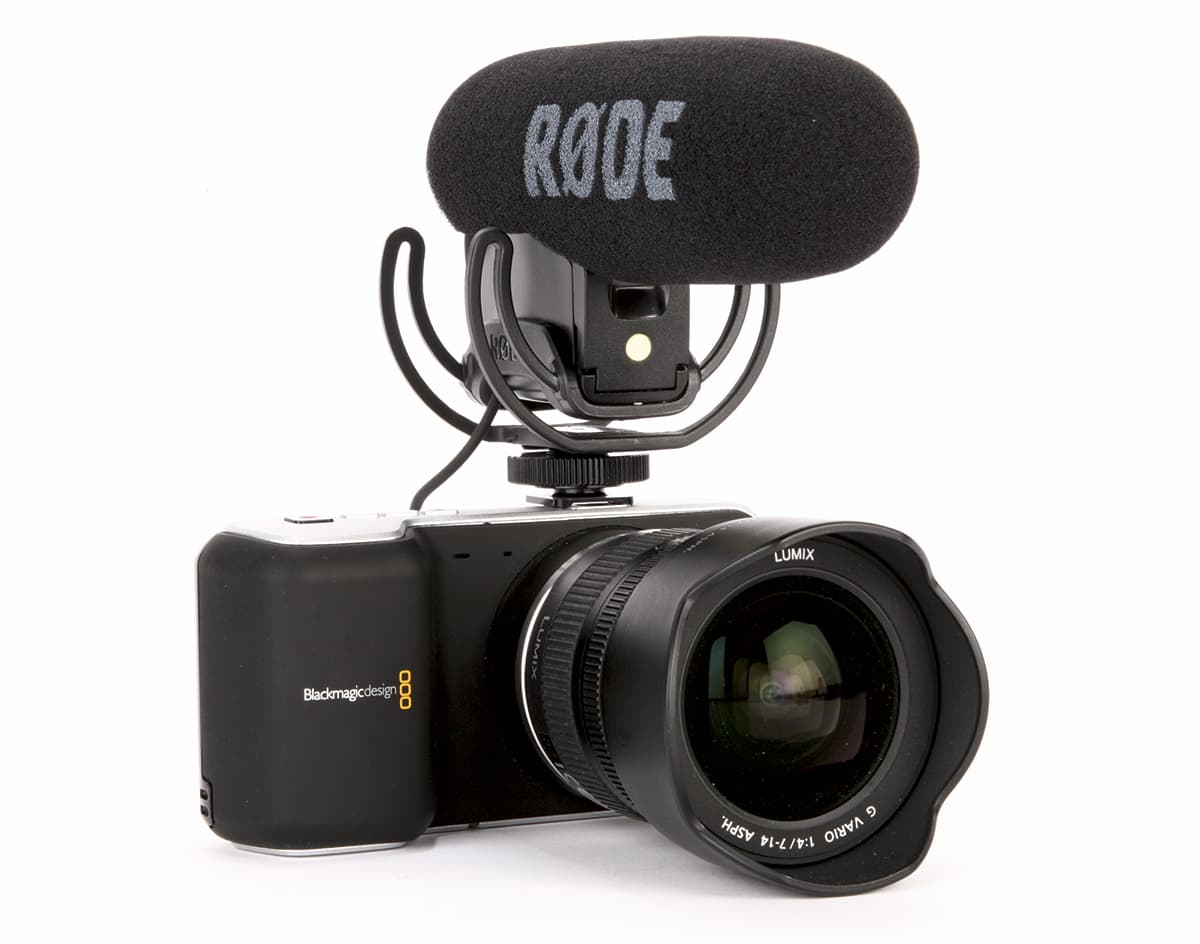
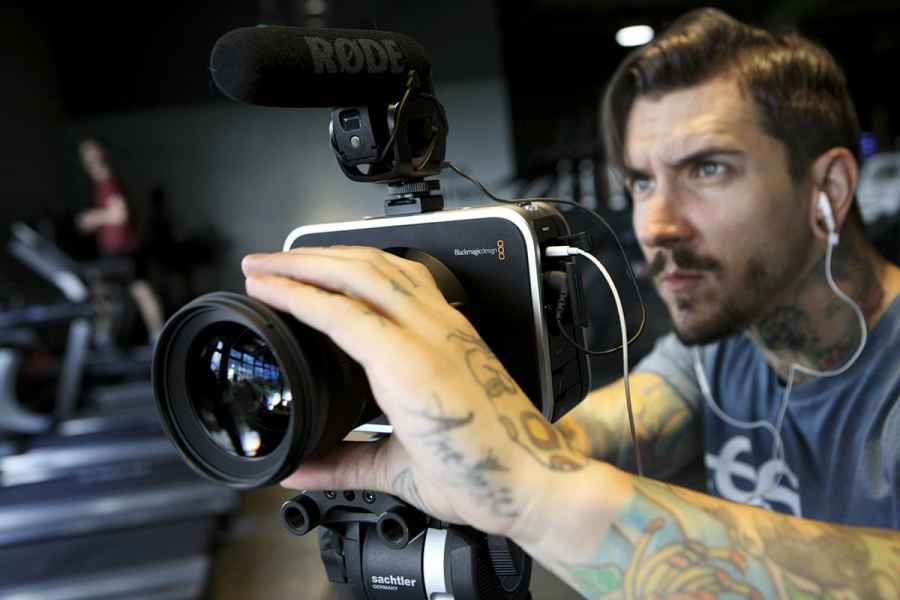
Although the tiny microphone that’s built in to many cameras may work as a reference, it isn’t really up to much. Instead, look for a camera such as Blackmagic’s Pocket Cinema Camera that has an audio socket to plug in an external microphone.
There are many different types of external microphones available, but a good starting point is to get a decent mounted shotgun mic. Since these are directional, they’ll pick up the majority of sound from the direction they are pointing in – which is great if you’re recording someone talking as their voice will be far louder than any background noise.
If you’re recording an interview an even better option is a lavalier mic, which is also known as a lav, or lapel mic. These clip on to the subject and further isolate his or her voice above any distracting background noise.
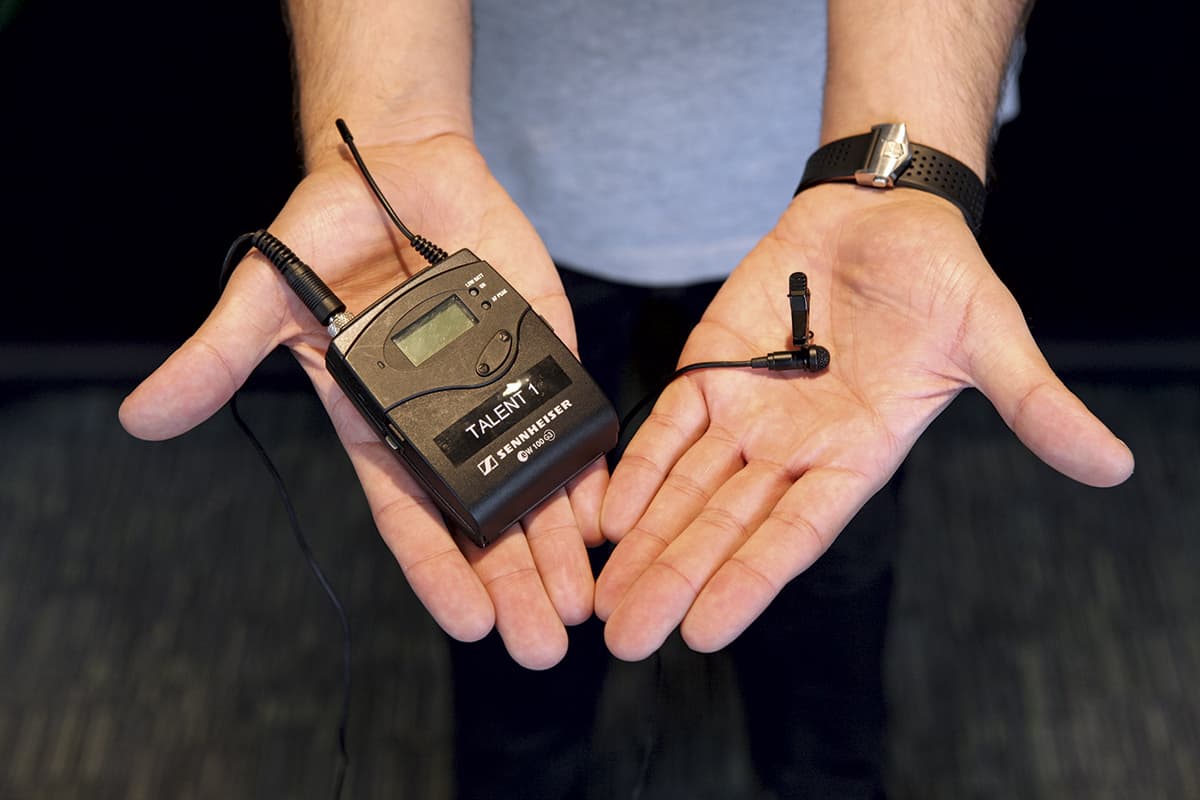
For isolating the human voice, a lavalier microphone is one of the best options available
Other sounds
Of course, sound isn’t just about the human voice, and when you’re recording it’s a good idea to include other sounds that may help you create your digital film. For example, if you’re shooting beside a river, you may want to record the noise of the water up close, so you can add it as needed. There are separate audio recorders that can help do this, but you can always use your camera – just remember to mark the video as ‘audio only’. One way to do this is to put the lens cap on for a quick visual reference that your clip is audio only.
Backing tracks and music
Picking music to go with your video is an art in itself. Use the wrong music and you might not end up with the product you wanted. Conversely, the most obvious music may not be the best choice to accompany your narrative, and thinking differently can pay off.
Just like when learning to shoot video, the best advice when picking music is to learn from what other filmmakers have done. If you’re making a wildlife film, watch wildlife documentaries and listen for how sound is used to add drama, build tension and create emotion. There are certain sounds and instruments that can do this.
How to find audio tracks
Although you can use commercially available music, sites such as YouTube will be able to detect these tracks when you upload your video. This may result in advertising appearing before your footage, or may even prevent the video from being shown at all. Additionally, if you want to enter any competitions or use your film commercially, you’ll need clearance to use the music – which can be expensive and a minefield to navigate for the enthusiast. However, there are sites and services that can help.
Musicbed has many tracks that can be downloaded and used royalty free, and there are also reasonably priced tracks available through sites such as iStock, or the slightly more expensive Audio Network site.
Editing
It’s important to decide quite early on if you’ll be using any music in your film. This is because the video will need to be cut to the beat of the music. If you edit the footage, and then add the music, the two won’t match and the end result will feel jarring. Tap your foot along to the beat of the music, and place your cut on the beat at the end of the bar. For example, on the ‘1’ of, 1, 2, 3, 4.
Daniel Peters
Daniel is a cinematographer and director who shoots music videos and corporate videos, as well as weddings
Most people tend to assume the first thing you need for audio is a shotgun mic, but I went the opposite route and got a set of lavelier mics. These for me are more intimate, and get you up close and personal with the subject.
Now, I can’t stress enough the importance of monitoring that audio. You can’t just fix a lav mic on someone and assume you’ll get great results. You need to listen for whether the microphone is too close, or if it is ruffling against a shirt, for example. And you don’t need an expensive pair of headphones to do this, as earphones will do.
Another tip is to consider recording audio externally on something like a Zoom H1. One of the advantages of doing this is that you can hide it discreetly. For example, at a wedding you can hide a recorder behind a bouquet of flowers, close to the bride and groom. You’ll get better sound, and you won’t see the recorder in shot.
However, a lot of people get scared about syncing it up with their camera footage later on. When you are syncing an external audio track to your video track, look at the audio waveforms. Look for any spikes in sound, and match those with the camera’s internal footage. Better still, clap before you start recording.
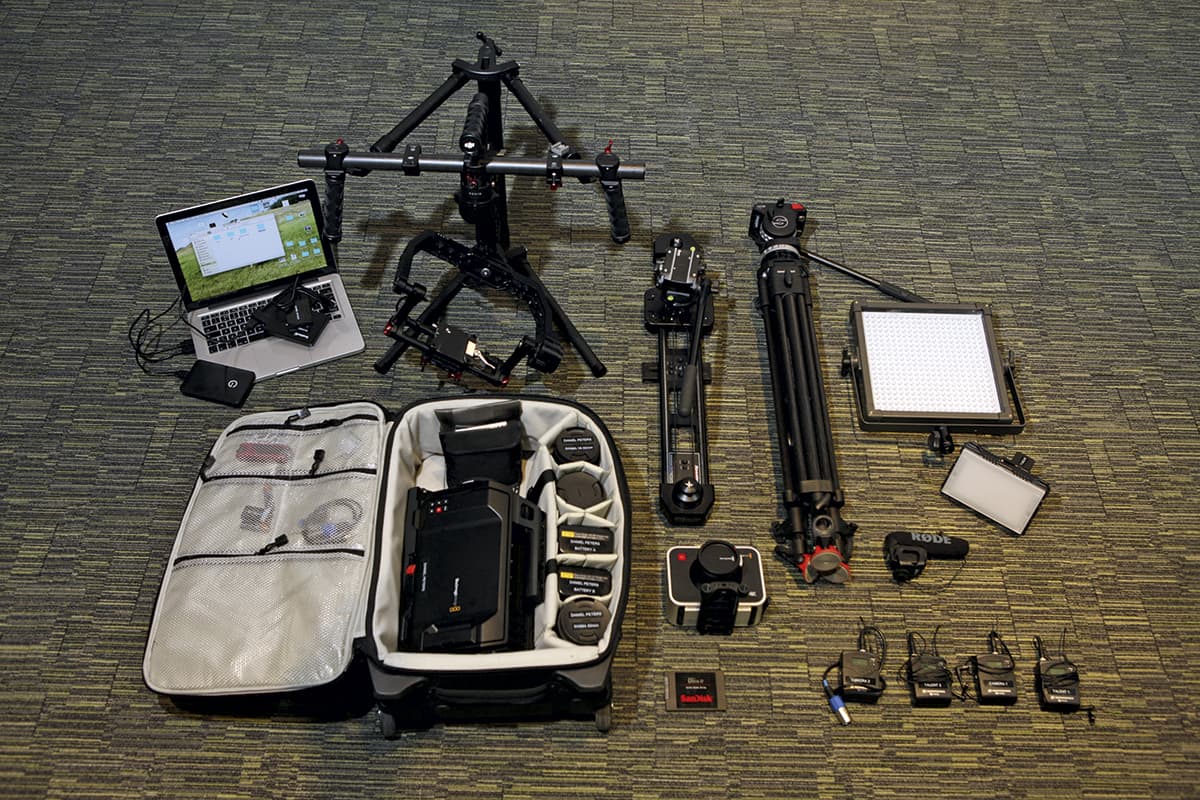
Daniel’s shooting kit, including wireless radio mics, a slider, tripod, LED panels, a three-axis gimbal stabiliser and lenses
Brought to you in association with London Camera Exchange www.lcegroup.co.uk