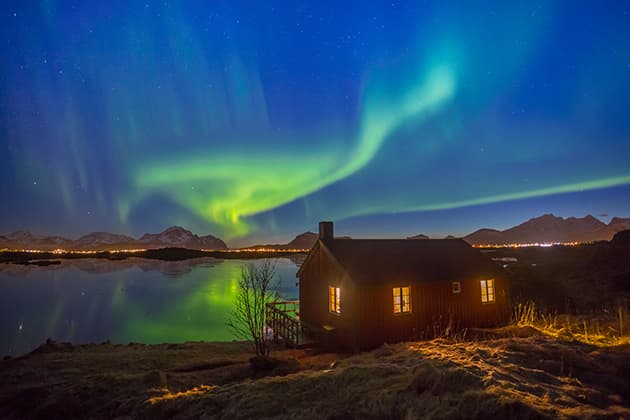

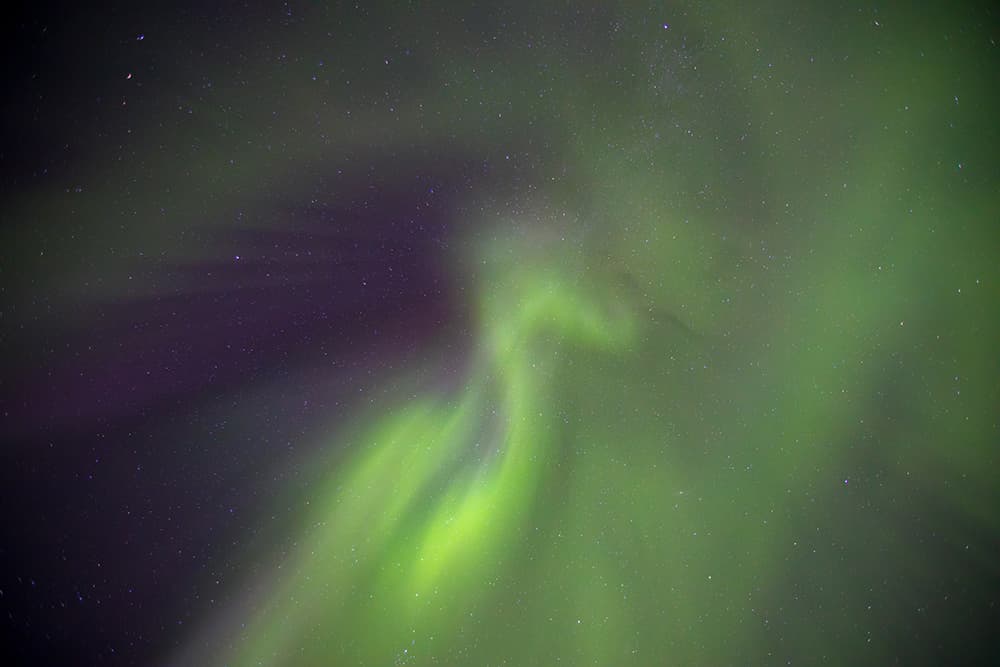
The impressive light display in Lofoten, Norway. Canon EOS 6D, 17-40mm, 10sec at f/4, ISO 1600. Credit: Matty Graham
Photographers who have enjoyed a long hot summer, complete with endless hours of sunny days and golden sunsets, may be letting out an extended sigh at the prospect of it now being dark by dinner time. However, while it may pose challenges to photographers, the night sky presents wonderful opportunities to capture celestial phenomenon and get creative with mother nature.
Accessibility to fast-aperture lenses at more reasonable prices and advancements in sensor technology means your camera can capture everything from auroras to star trails with greater quality than ever before. What’s more, raw files containing more tonal information will also enable you to enhance your after-dark images so you no longer have to fight a constant battle with digital grain.
To show you just how accessible astrophotography can be, we’re taking on three celestial projects to explain the technique needed to produce a stunning photo, along with the equipment to make the shoot easier, and some processing tips to add that final polish.
How to shoot auroras
With an aurora shoot you are at the mercy of a number of factors. So let’s start by explaining what causes the aurora borealis, also known as the Northern Lights.
The amazing lights start their journey at the sun, and are produced when solar storms send gusts of charged particles towards the earth’s atmosphere. When the particles react with the earth’s magnetic field, light is created (typically green, but also red, blue and violet) and these displays can last from a few seconds to over an hour.
Even if there is strong solar activity, other factors play a role when it comes to getting the best possible results. A clear night sky is required, and it’s important to find shooting locations with low levels of light pollution. In addition, a high latitude is advantageous. While you can shoot the aurora in the UK as far south as Lincolnshire, travelling to Northern-Lights hotspots like Iceland or Norway’s Arctic Circle area will reward you with more impressive displays. Nonetheless, there’s still more you can do to better plan your aurora adventure.
Smartphone apps
A smartphone can be a useful accessory when hunting down the lights, with the aurora season running roughly between September and April. Weather apps will forecast cloud cover while dedicated aurora apps will do their best to predict the strength and timings of any displays using solar storm data. While there’s a wealth of apps available, I use AuroraWatch UK for UK-centric information and My Aurora Forecast while shooting further north in Norway and the Faroe Islands. One common mistake photographers make is to pick a location and hope the aurora drifts into view. If you have transport available, I find that searching out the light in different locations can be a better approach.
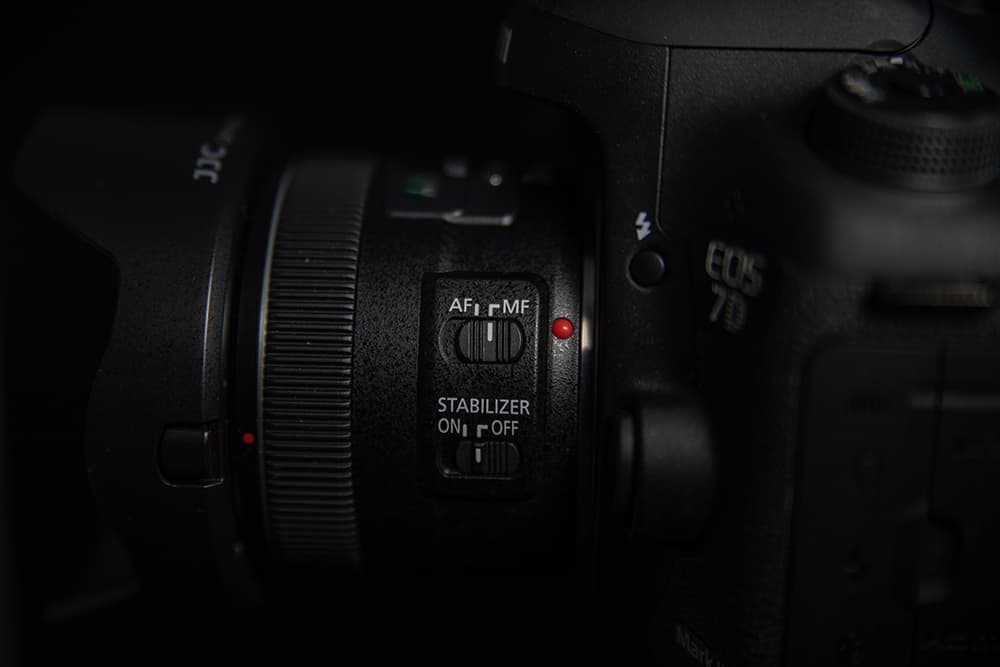
1. Manual focus
With the camera on a sturdy tripod, the best approach is to switch your lens to manual focus (MF) and use live view to zoom in and focus precisely. Remember to switch off any image stabilisation as this can be counter-productive with the camera on a tripod.
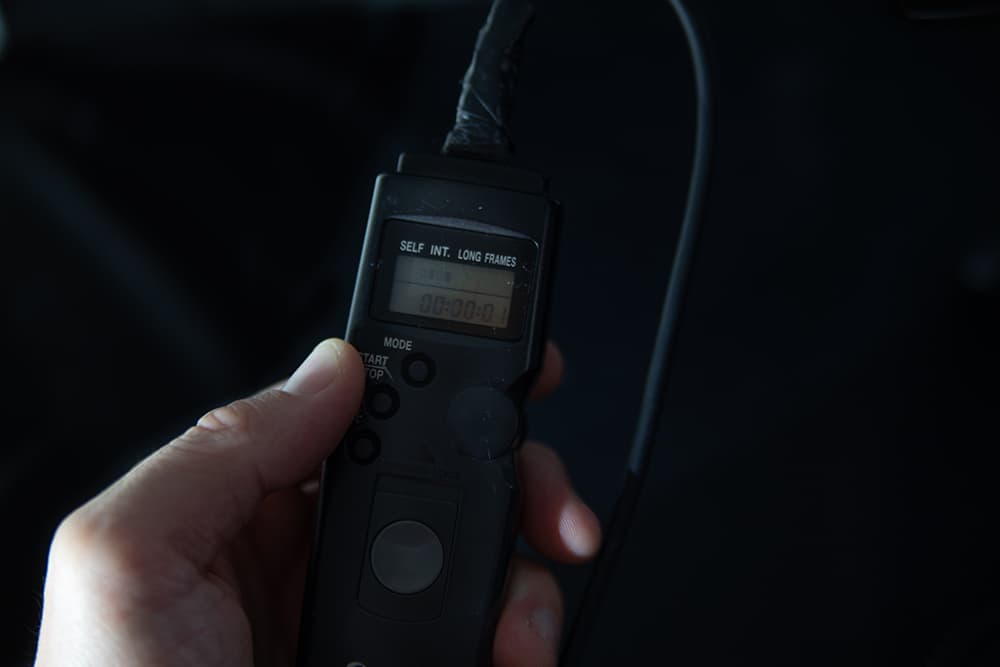
2. Use a remote release
Connect a remote release or a radio trigger to avoid touching the camera during the exposure. Select the raw file format to give you more tolerance when editing the image. Your exposure will depend on the ambient light and how strong the aurora is.
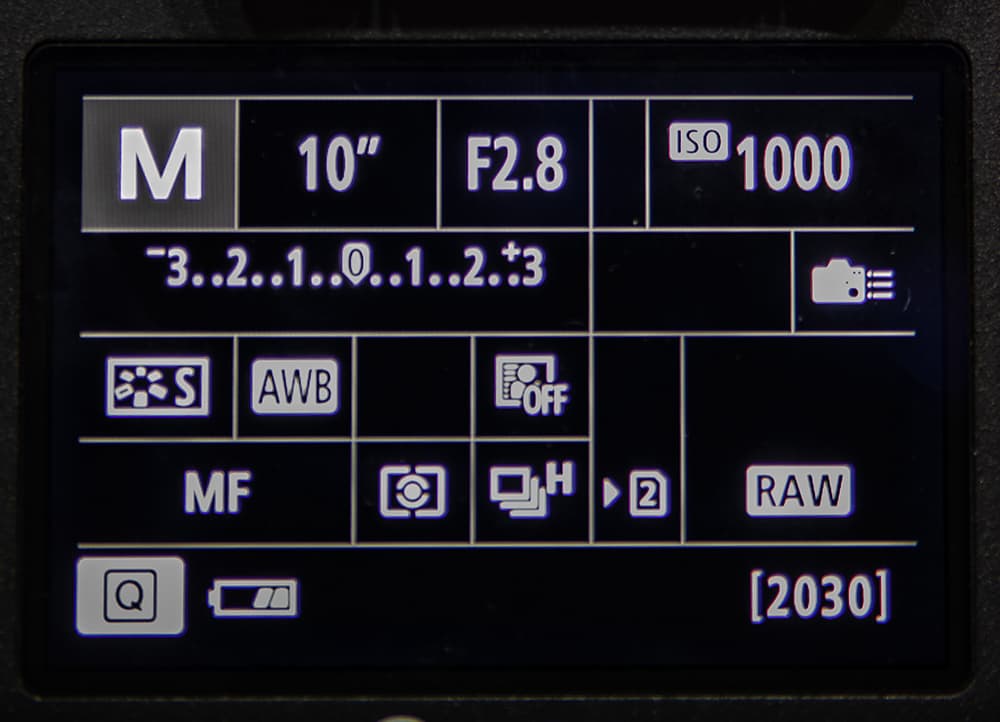
3. Dial in your settings
A good starting point is to select an ISO of around 1000, an aperture between f/2.8 and f/4, and a shutter speed below 15 seconds to avoid any movement of the stars in the frame. Take a test shot and adjust the exposure settings if your image is too light or dark.
Credit: Matty Graham
4. Don’t forget about framing
It’s a good idea to experiment with focal lengths – using a 70-200mm and zooming in can deliver great detail shots. Going wide can capture the full scale of the aurora, but just remember to be considerate with your foreground.
An all-star challenge
A starry sky can be transformed into a swirly trail using nothing more than a sturdy tripod and some clever photo-editing
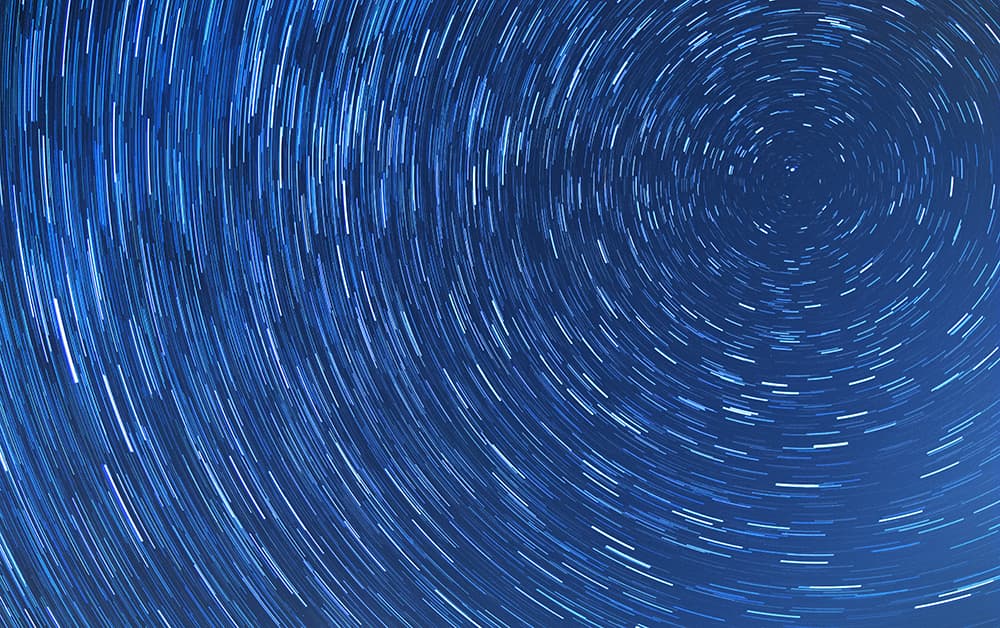
Star-trail photography is becoming increasingly popular; it requires combining a sequence of shots taken over an hour. Credit: Matty Graham
Star-trail photography has become increasingly popular in recent years owing to a number of factors. First up is the accessibility to reasonably priced, fast-aperture lenses and cameras that can perform at increased ISO levels. Second, photography is often trend-led, and image-sharing sites have seen no end of inspiring star trails plastered over social media and image-sharing websites such as Flickr and 500px. in short, star-trail photography is cool.
One of the misconceptions about this form of astrophotography is that, like shooting auroras, you have to debunk to a dark-sky area miles away from civilisation to stand any chance of capturing a successful frame. Well, the truth is that you can actually shoot a star trail from the comfort of your back garden
– all you need is a clear sky, a tripod and a slice of technique. Many photographers choose to include foreground but another approach is to make the trail the sole subject in the frame, and even zoom in closer to the sky to create abstract swirls within the image.
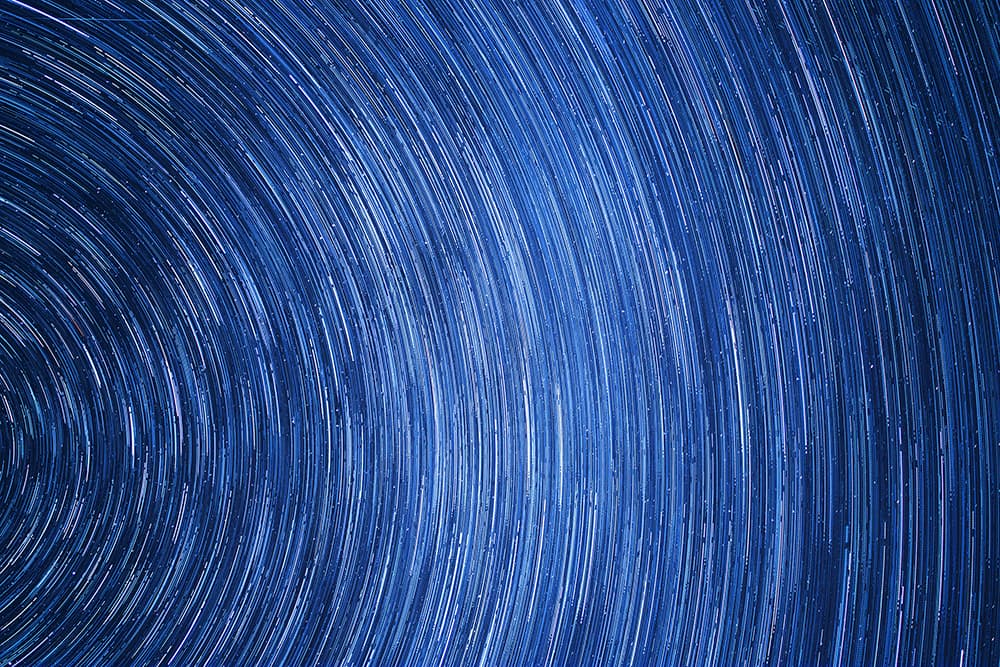
Zoom in close to the sky to capture abstract swirls. Credit: Matty Graham
The practicalities
Wherever you shoot star-trail images, some practicalities should be observed. Make sure you have a head torch to hand so you can see what you’re doing with the camera. Place your tripod on an area of grass and you’ll be amazed at how the dew will climb from the grass up your tripod legs, especially on warmer evenings. remember as well that you’re going to be locked down to one location for a while as you capture multiple exposures, so it could pay to take along a ask of tea to keep warm.
There are actually two ways to shoot a star trail. The first involves shooting one continuous exposure with the shutter locked open. this isn’t great though as noise can be more of a problem and if you accidentally knock the tripod an hour into the exposure, your picture will be ruined. Instead, shooting multiple files, editing one using lightroom before syncing the adjustments to the rest of the files, and then merging them together using StarStaX software is a more commonly used method.
Credit: Matty Graham
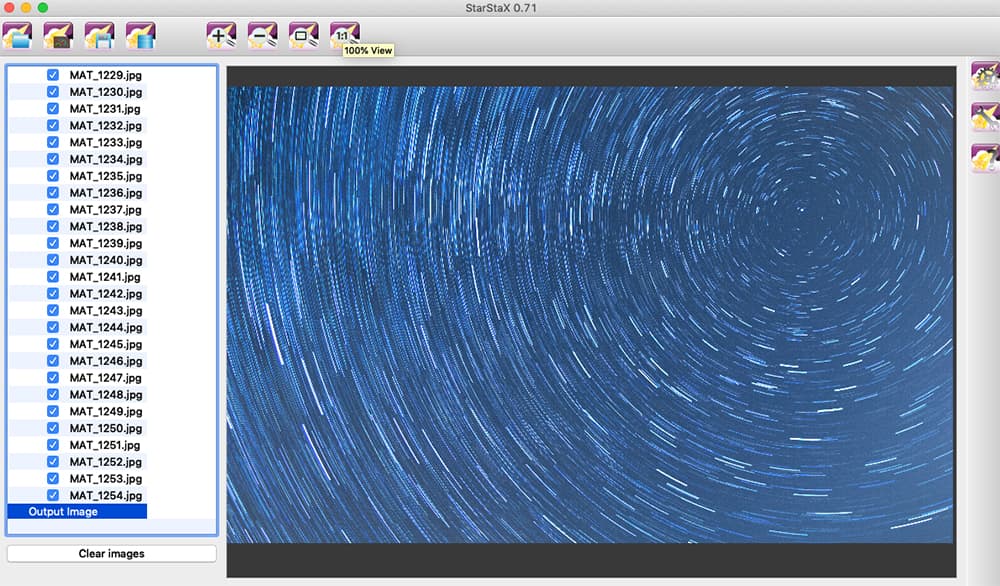
What is StarStaX?
Type ‘starstax’ into Google and it will take you to Markus Enzweiler’s website (markus-enzweiler.de). He developed the software and makes it freely available to Mac and Windows users. All you have to do is drop your star-trails sequence files onto the interface and click ‘Start Processing’ and the software merges the files together. To complete the process, you simply save the final image and you’re done.
StarStaX is certainly the quickest and easiest software option, but there is an alternative. You can use Photoshop to merge the files together, either manually or by creating a bespoke action. The technique consists of copying and pasting each file onto one starting image, changing each Layer’s Blending Mode to Lighten. If your image has foreground interest, keep the bottom Layer’s Blending Mode as Normal.
Get set up for star trails
1. Compose the scene
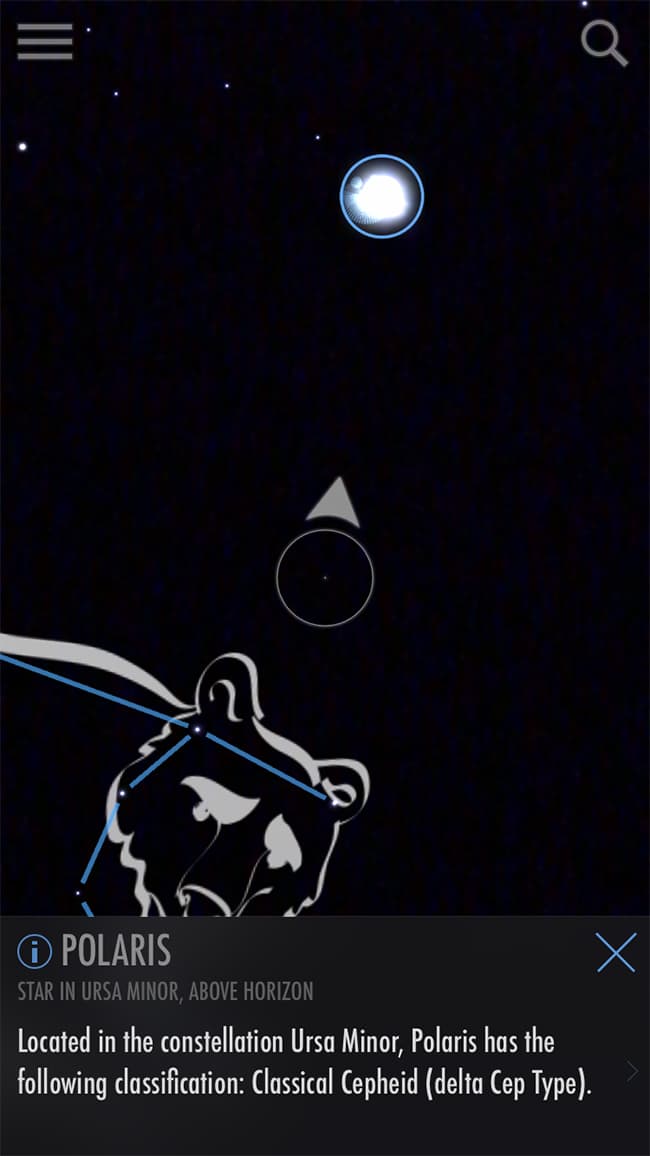
With the camera on the tripod, set focus to manual (MF) and use the live view and magnify function to ensure the stars are in focus. If you want to include the centre of the star trial, you’ll need to include the North Star in your frame, which can be quickly found using an AR app like SkyLite.
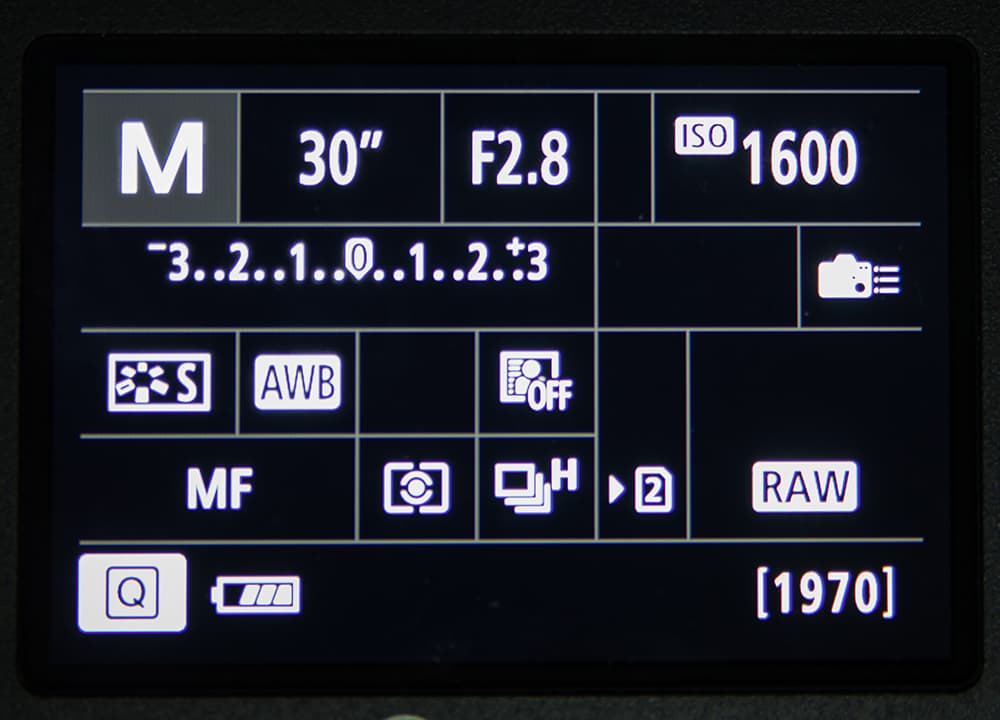
2. Camera settings
Next, select manual mode and dial in an exposure of 30sec at f/2.8 (or whatever your lens’s maximum aperture is). The aim is to keep the ISO as low as possible, so take a test shot at ISO 1600 and dip the ISO as low as possible while ensuring the stars are clearly visible in the frame.
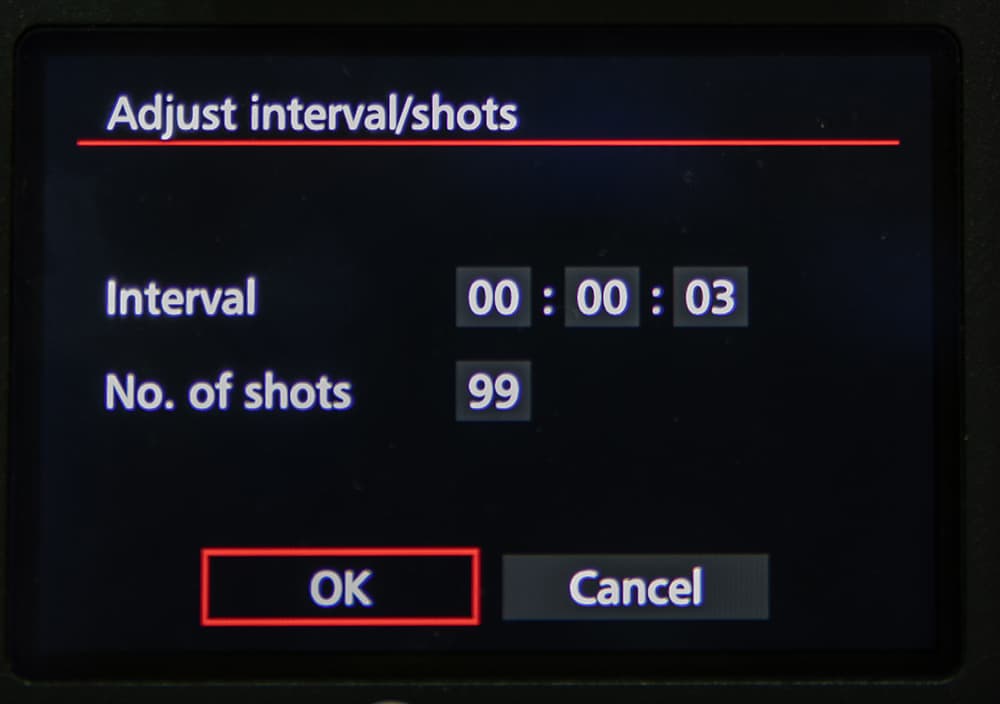
3. Adjust intervals
Use the camera’s interval mode to make it shoot one image after another, or add a compatible remote release that will do the same job. Make sure the battery is fully charged and format the memory card. Shoot for at least 45 minutes, but longer sequences of 1-2 hours can yield better results.
Shoot for the moon
Whether as a stand-alone subject or used in a wider landscape, the pull of the moon is strong for photographers
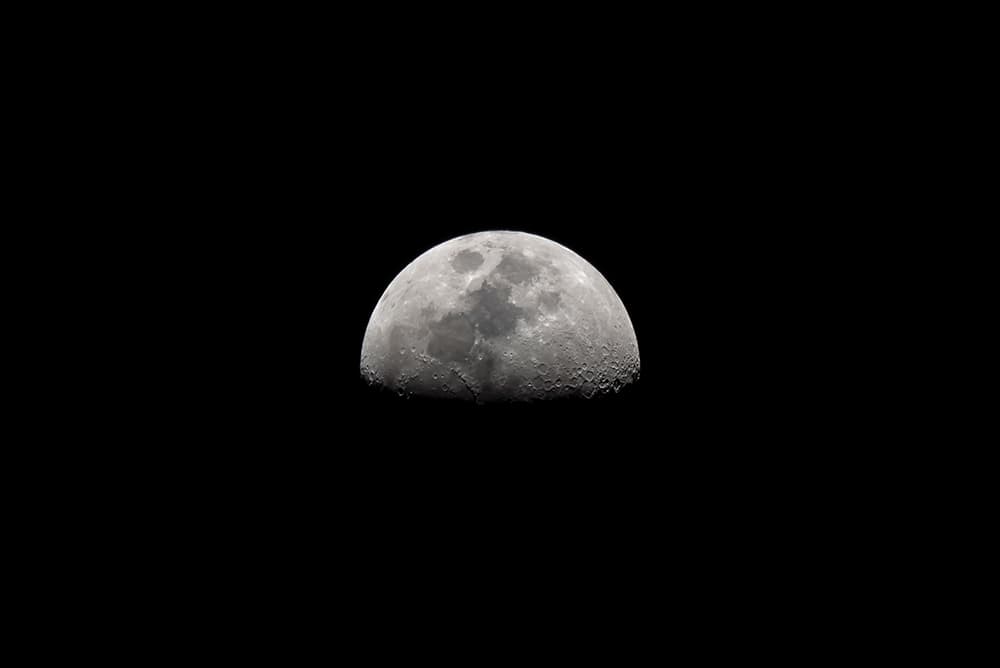
Capture a close-up of the moon to reveal the tones and textures of the moon’s surface. Nikon D800, 80-400mm, 1/250sec at f/8, ISO 200. Credit: Matty Graham
Mankind’s fascination with the moon is undeniable and this celestial wonder presents plenty of opportunities for photographers. From close ups and wider landscapes to more special occurrences like eclipses, the moon can be a useful source of illumination for a night-time scene or a spectacularly detailed subject waiting to be captured.
Like the Northern Lights and star trails though, nothing with astrophotography is ever that straightforward, and in this case, photographers are at the mercy of not only weather and light pollution, but also the moon’s cycle. Again, research time can be slashed by using an app like PhotoPills, which will enable you to plan ahead and not only know exactly when is moonrise in a certain location, but pinpoint the exact phase and percentage of the moon that will be visible as well.
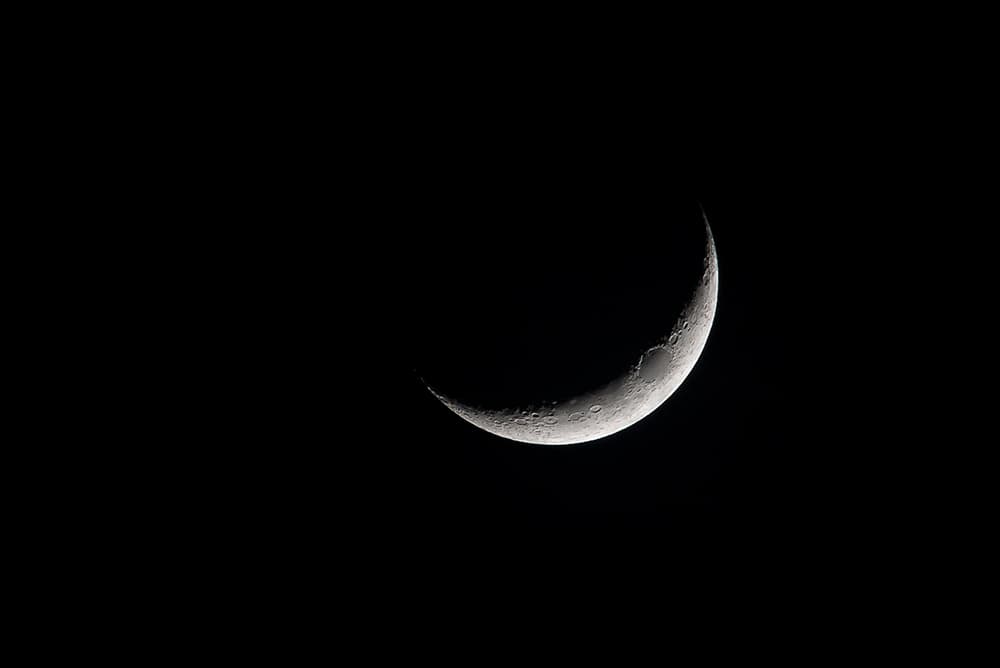
A crescent moon makes a great shot. Nikon D800, 80-400mm, 1/200sec at f/5.6, ISO 800. Credit: Matty Graham
Pitfalls
Two common pitfalls that photographers make when capturing images that include the moon are the focal length needed for a decent close-up and just how bright the light from the moon can be. Let’s start with focal length; it’s generally accepted that the minimum focal length needed to capture an image that will show real detail on the moon is between 300-400mm. This is where crop-sensor cameras have an advantage, giving a higher effective focal length (1.5x Nikon, 1.6x Canon), but there is another option too. Pairing your lens with an affordable teleconverter will give you even further reach – in fact, a 70-200mm used at its long end on a APS-C Canon camera that’s paired with a 1.4x teleconverter affords the photographer a maximum focal length of 448mm.
Remember, DSLRs or mirrorless cameras aren’t the only option when it comes to capturing pictures of the moon. Superzoom cameras like Nikon’s Coolpix P1000 features a 125x optical zoom, giving a focal length of 24-3000mm!
Photographers can struggle to balance ambient light in the scene with the bright light of the moon. Shooting during twilight as darkness is still falling can be a good solution as there will be less difference in light levels between the moon and the rest of your scene. What’s more, the moon will be lower in the sky, allowing you to frame up more imaginative compositions, such as the moon placed in the arch of a bell tower. All that bright light from the moon can be used to your advantage, however, as it can provide illumination for a wider landscape scene that would have otherwise been dark or needed an ultra-long exposure.
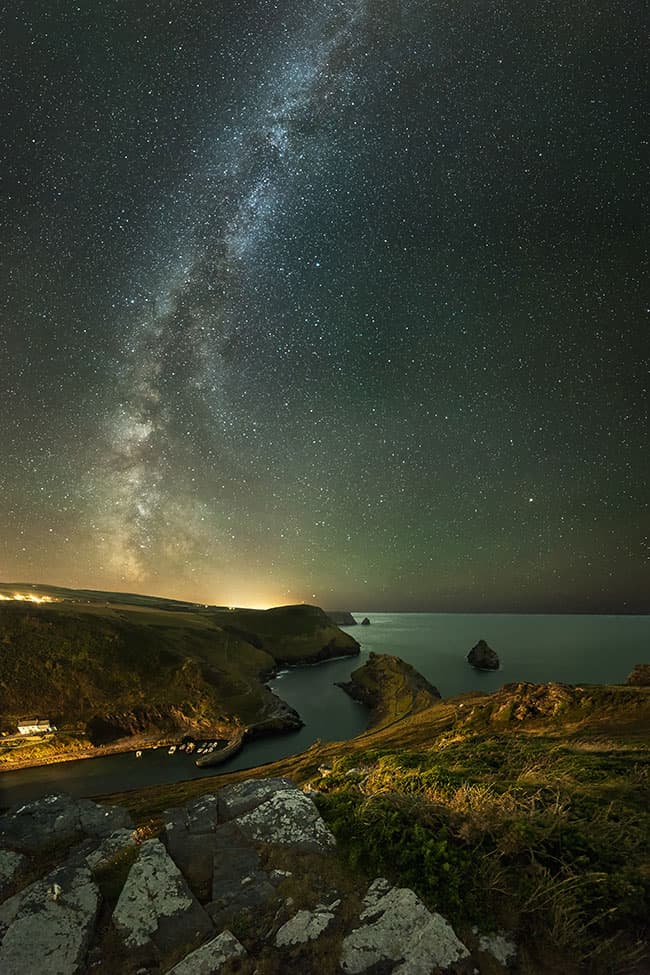
When shooting the Milky Way, keep the shutter speed below 30 seconds to prevent stars from turning into trails. Nikon D750, 14mm, 10sec at f/2.8, ISO 10000. Credit: Getty Images/Mike Wilson
How to shoot the Milky Way
The Milky Way is one of the most magical subjects in the night sky and, although photographing it may seem daunting, some solid photographic technique could unlock this stunning scene and result in spectacular captures.
Finding the Milky Way can be quite straightforward. Head to an area of low-light pollution and use an app such as PhotoPills to view the Milky Way via augmented reality, as this will drastically cut down your set-up time and will help you to frame a successful composition.
Select a wide, fast-aperture lens, such as a 16-35mm f/2.8, and place the camera on a tripod to keep it steady. Switch to manual mode and dial in a starting exposure of 30 seconds at f/2.8, ISO 1600 before adjusting the ISO to account for light levels. The aim should be to control the exposure by keeping the shutter speed at or below 30 seconds to prevent any stars from turning into trails.
Some photographers use the ‘500’ rule, where 500 is divided by the lens’ focal length. Using this method will give you the maximum shutter speed you can use before stars turn to trails.
If you are planning to shoot a lot of astrophotography, the Pentax K-1 is a good camera choice as, not only does the camera offer 36 megapixels of resolution, but it also boasts an astro-tracer feature that follows the movement of the stars so you can achieve sharper imagery.
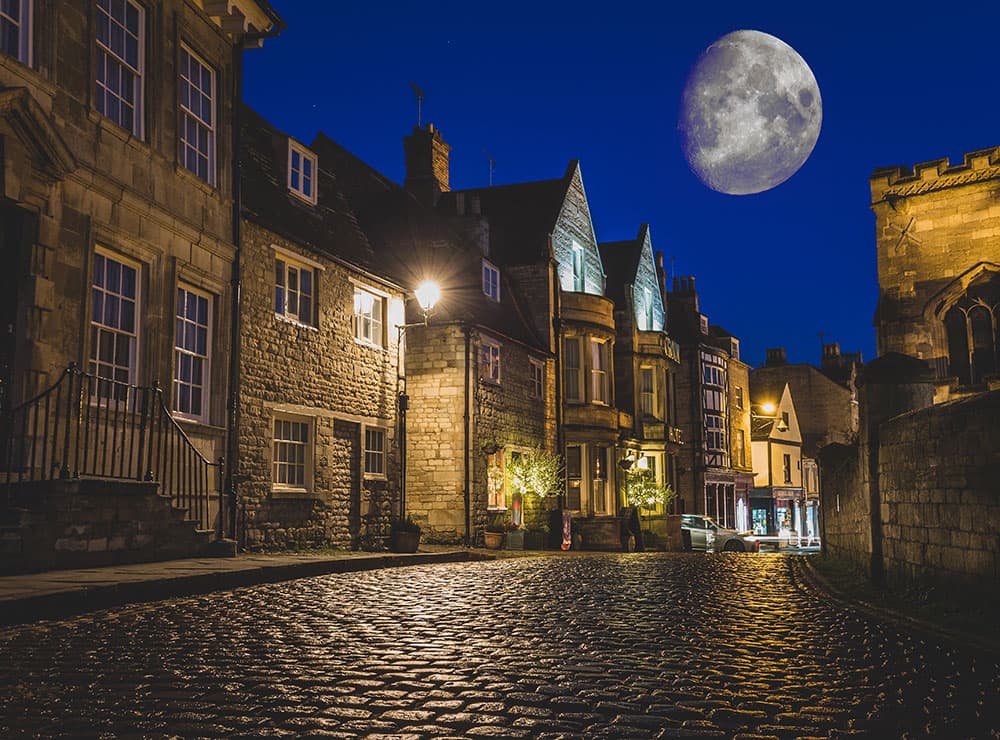
Take some creative licence
Photography purists look away now! For more creative images, you could always try merging your close-up images of the moon with a night-time landscape. this will enable you to play with perspective and create hyperreal supermoons that enhance their importance in the frame. In Photoshop, simply copy the moon image and paste it onto your landscape before changing the moon’s Blending Mode from Normal to Lighten. Experiment with the scale of the moon in your scene using the Free transform option.
Credit: Matty Graham
Kit list
- Head torch Shooting after dark means you need to take safety seriously. An essential item of kit is a head torch. If possible, pack one with a red light as this won’t affect your night vision as much as a white LED light would.
- Remote release To avoid knocking the camera, use a remote-release cable or a radio trigger. The camera’s self-timer mode will also allow time for any vibrations to dampen before triggering the shutter.
- Tripod With long-exposure times, you will need a tripod to capture a sharp image. Temperatures will be cold, so either use a tripod with foam surround on the leg sections or add some DIY foam yourself to save your hands from freezing.