While Elements may not be as feature-rich as Photoshop CC, it still contains plenty of very powerful tools – many of which are identical to those found in its more expensive big brother. Here we’ll take a look at 10 of our favourites. All but one of these tools reside in the Elements toolbar. Upon choosing a tool, a context-sensitive panel will appear down at the bottom of the screen displaying the tool options. It’s always worth exploring all of the settings here, as you can often find some surprising controls that enrich the tool.
Adobe Photoshop Elements top 10 tools
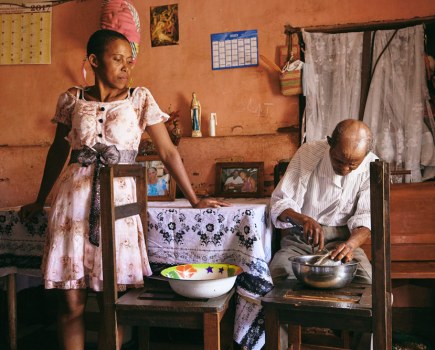
Credit: James Paterson
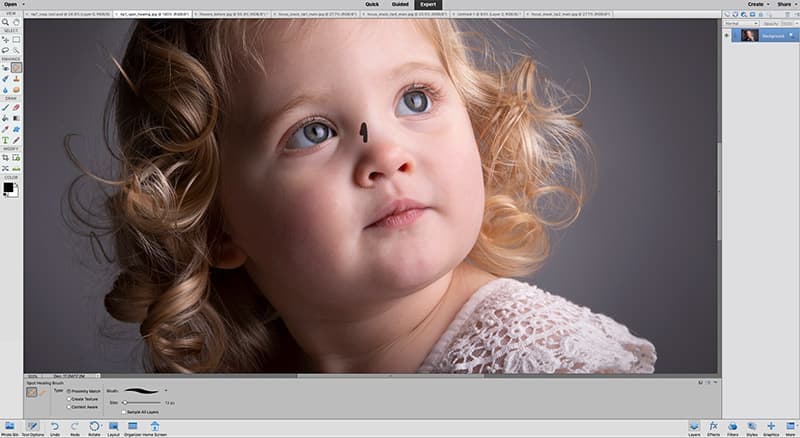
1. Spot Healing Brush
This is the ideal tool for removing small problem areas from your photos, like blemishes and stray hairs in a portrait or sensor marks in a landscape. It’s fully automated, so you simply have to paint over the problem and let the tool do the rest. It’s most effective in areas where the mark is against an otherwise clean backdrop, like skin or a clear sky. It can slip up when the problem is on a more detailed backdrop – at this point, switch to the Clone tool or Healing Brush. Both of these let you target a sample area by Alt-clicking. If you want to use any of these tools non-destructively, make a new empty layer first then set the tool to ‘Sample All Layers’.

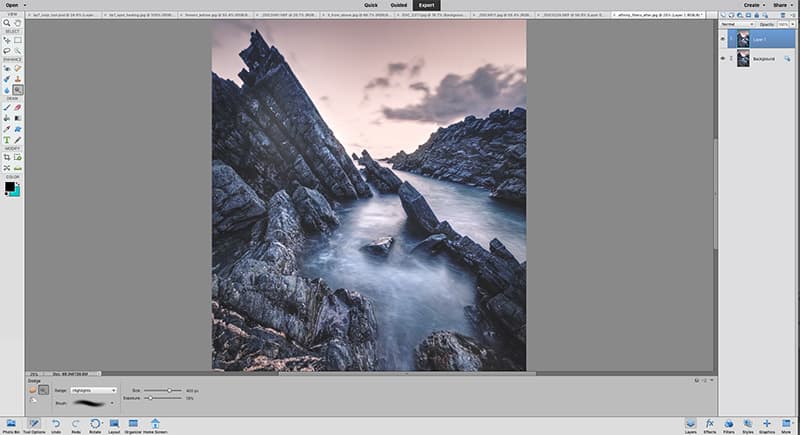
Use the Sharpen tool to apply selective sharpening to areas of your image that need it. Credit: James Paterson
2. Sharpen tool
Often an image will have areas of sharpness and blur. When it comes to sharpening, the problem with using filters is that they work universally, and why would we want to sharpen the blurred areas of a photo? One solution is to use the Sharpen tool. This lets you paint selective sharpening over your image. It’s most effective when used at 10-20% strength. Ensure ‘Protect Detail’ is turned on though, otherwise the results will be terrible. Like the Spot Healing Brush, the tool can also be set to ‘Sample All Layers’ so you can create a new empty layer and sharpen non-destructively on
this rather than directly onto your image.
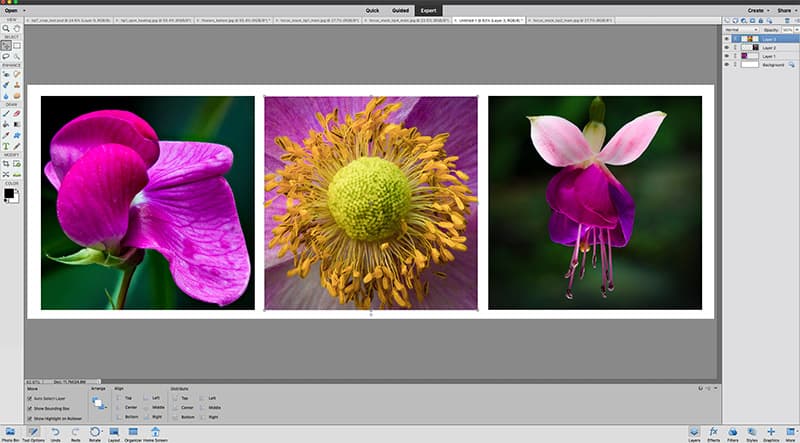
The Move tool offers many uses, for example, it comes in handy for creating triptychs like this. Credit: James Paterson
3. Move tool
This may seem like a simple tool but it comes in handy for all kinds of tasks, not least for arranging a triptych like this. The tool options include two settings: ‘Auto-Select Layer’ which lets you target layers by clicking on parts of the image; and ‘Show Bounding Box’ which gives you a box around the layer edges that can be clicked on to quickly transform the layer. Right-click with the Move tool to see a list of all layers under the cursor, and Alt-drag elements within the image to make quick copies. You can also use the tool to drag layers from one document to another.
Use the Dodge and Burn tools to selectively lighten or darken areas of an image. Credit: James Paterson
4. Dodge and Burn tools
Technically these are separate tools, but in effect they’re two sides of the same coin (you can even hold Alt while using either to temporarily switch to the other). Like the darkroom techniques on which they’re named, the Dodge tool lets you lighten areas, while the Burn tool darkens things down. As such, they’re invaluable for landscapes as you can lift areas, darken skies and draw attention to the parts that matter most. When using either tool it’s crucial to note the Range setting in the tool options at the bottom. This lets you target either shadows, midtones or highlights. In general, the Dodge tool works best when targeting either Highlights or Midtones, while the Burn tool is better when set to Midtones or Shadows. It’s usually best to keep Exposure fairly low, between 0-20%, then build up your strokes gradually.
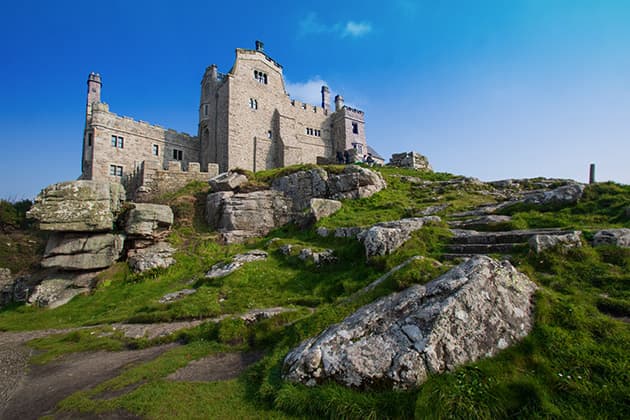
Credit: James Paterson
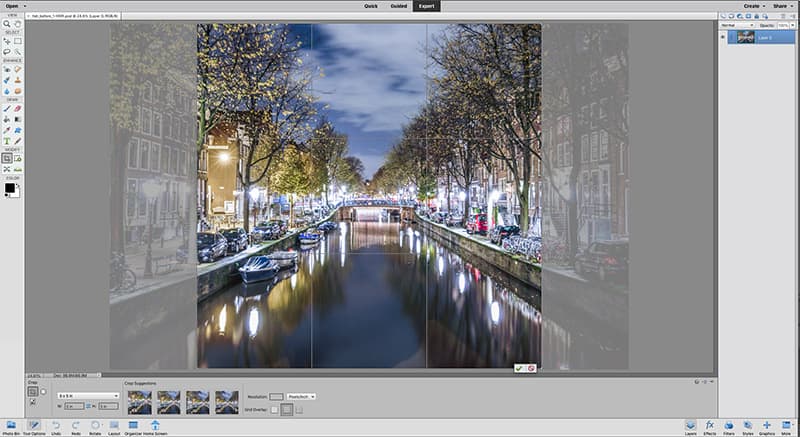
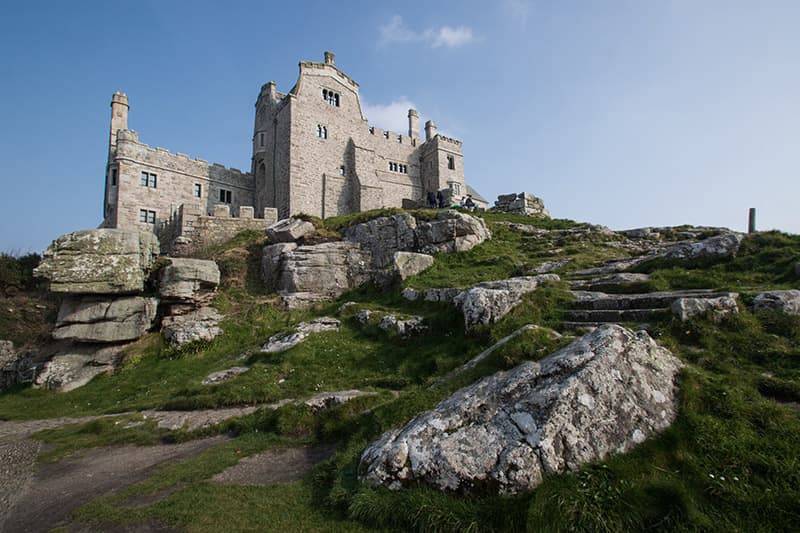
5. Crop tool
This is one of the most useful tools in Elements. Not only can you use it to crop into the image, but you can also change the ratio using the dropdown in the tool options, which gives you common aspect ratios like 4×6, 7×5 or 16×9. What’s more, you can also set a resolution for the image, which can be handy when preparing the image to print at a specific size (if you’re cropping to a specific size for screen then set the Resolution to 72 pixels/inch; for prints, set it to 300 pixels/inch). The helpful ‘crop suggestions’ can also offer useful starting points for your cropping – hover over each for a variety of different crops.
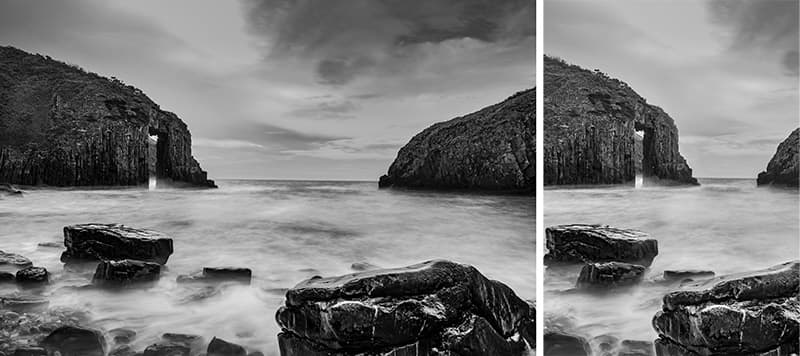
Before (left) and after (right). Credit: James Paterson
6. Recompose tool
Sometimes it can be hard to get the crop or aspect ratio you want without having to lose important details. This clever tool can help. It lets you reshape your frame while preserving the important elements. It works by intelligently analysing the image and compressing the parts that don’t matter while leaving the important areas untouched. Here, for example, the aim is to squeeze the rocks and cliffs closer together for a more balanced composition. Using the Recompose tool, we simply drag the side of the box inwards. For further control, the tool options contain brushes that let you
paint over areas to either mark them for protection or removal.
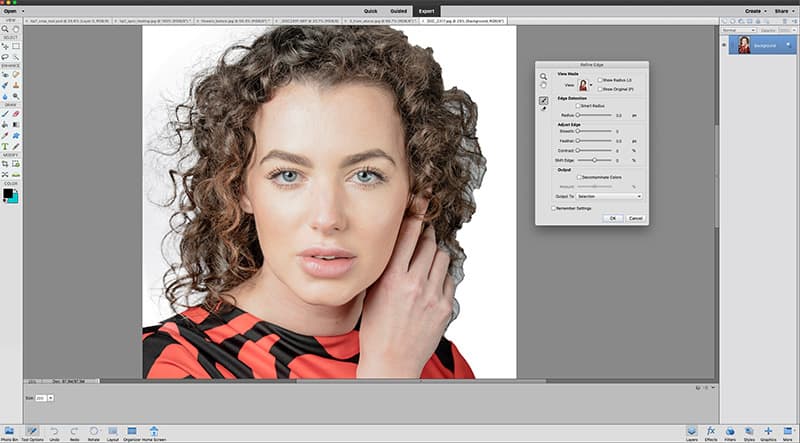
The Refine Edge tool tidies up selections – ideal for tricky areas like hair. Credit: James Paterson
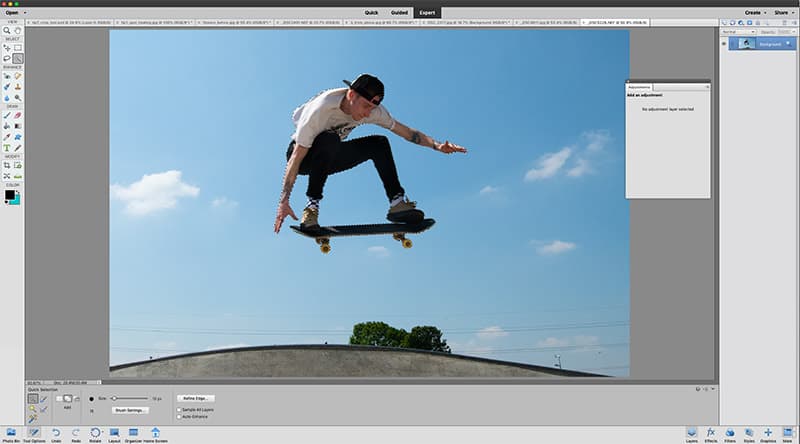
7. Refine Edge brush
This is the only tool on the list not found in the standard Elements toolbar. But it deserves special mention because it’s so effective. This tool is found within the Refine Edge dialog box. After making a selection using any selection tool (such as the Quick Selection brush – see tip 10), you can enter Refine Edge (Select>Refine Edge) to make it more precise. This is where the Refine Edge Brush tool comes in. Grab it from the side of the dialog box and paint over tricky areas along the selection edge like hair or fur. It increases the area of refinement in these areas, which forces the command to pick out all the background details between the hairs. Note the difference in the screengrab here between the left side of the hair which has been painted over with the tool, and the right side which hasn’t. Once the subject is precisely selected we can do all kinds of things, like change the background colour here.
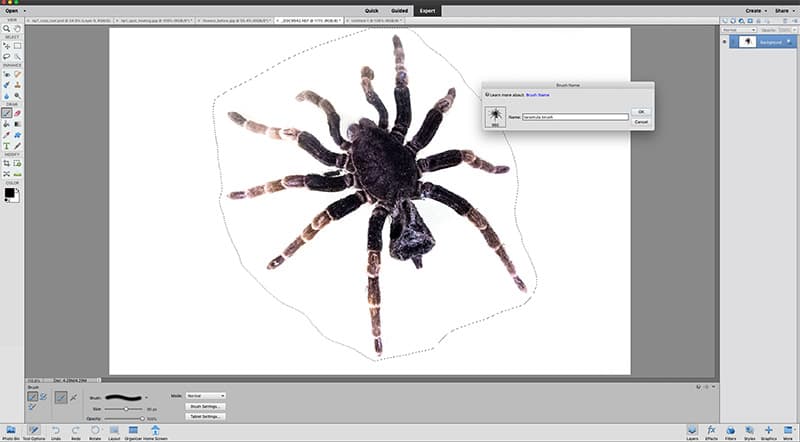
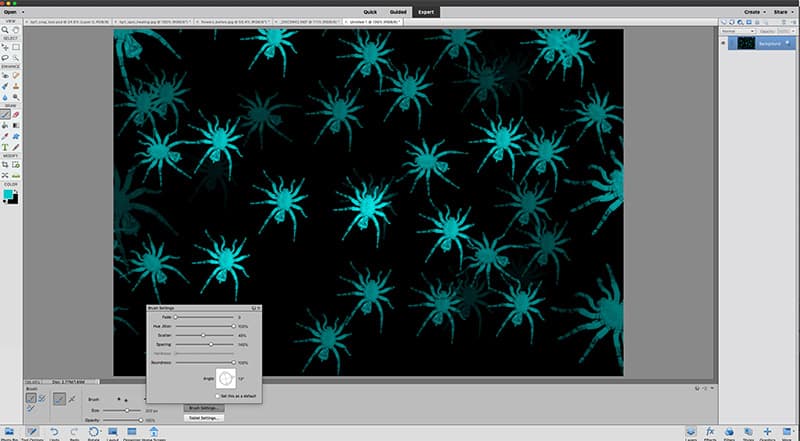
You can easily make your own brush tips for creative results. Credit: James Paterson
8. Brush tool
The Brush tool simply lets you paint either the foreground or background colour over the image. Initially the Brush tool might seem fairly simple, but there’s plenty of hidden depth in the tool settings. First, there are tons of brush tips to choose from, and you can even create your own brush tips like the ‘tarantula brush’ here. Simply make a selection of a shape (it works best if they’re on white like this) then go to Edit>Define Brush Preset. You can also create all manner of effects by changing either the blend mode of the brush or by delving into the Brush settings for fun settings like scatter. To make the most of the tool, memorise a few shortcuts: press ] or [ to resize the brush tip, hit X to flip foreground and background colours, hold Shift and click between two points to make a straight line, and Alt-click to sample a colour from the image.

Before (top) and after (below). Credit: James Paterson
9. Smart Brush
This is a clever tool that, like Recompose, is exclusive to Photoshop Elements rather than a port-over from Photoshop CC. It lets you load up a preset adjustment – like ‘Make Dull Skies Blue’ or ‘Intensify Foliage’ (both used here), then snaps on to edges in the image as you paint over areas, allowing you to quickly enhance different areas. As you paint, a new layer appears in the Layers Panel that houses the adjustment, so you can go into the layer to tweak the settings afterwards or alter the area that’s covered by editing the layer mask. It’s a great example of the way Elements offers simplified editing, but the added depth is there for those who want to explore further.
Quick Selection is one of the best selection tools as it snaps to the edges for you. Credit: James Paterson
10. Quick Selection tool
This is my go-to tool for most selections. It works like a brush by seeking out and snapping on to edges in the image as you paint, so it’s very effective at isolating complex areas like people. Of course, it can occasionally go wrong and pick up unwanted details. At this point, hold Alt and paint to subtract areas from the initial selection. As you add or subtract, the tool actually gets smarter because it learns more about the kind of colours and tones that you want to either include or exclude from the selection. Often after making a selection with the tool, it’s worth going into the Refine Edge command to further improve it.
James Paterson is as skilled a photo editor as he is a photographer. His work has appeared in countless magazines and books, and in 2014, he was appointed editor of Practical Photoshop. For James, Photoshop is more than just a work tool.
Now you’ve learnt the Photoshop Elements top 10 tools, you might want to have a look at more ways you can use Adobe Photoshop Elements. Or, if you’re looking for a Photoshop alternative, check out our guide to the best photo-editing software with no subscription required.