
Credit: James Abbott
Modern cameras are amazing. Fast autofocus, intelligent metering systems, excellent ISO response and high resolutions are just a few of the things that make photography easier and better than ever before. But even with all this, and much more amazing technology, cameras remain crude compared to the capabilities of the human eye, and there are times when taking full control of exposure and focusing are essential.
There’s a certain amount of stigma and reverence attached to shooting in manual: it seems difficult, but won’t it make me look more professional? The reality is that shooting and focusing in manual is actually really easy, and it’s simply another option alongside the semi-automatic shooting modes and autofocus. There are times when it’s the only option, and then there are times when it’s the worst option. The key to success is identifying these situations and switching to the best route possible.
Exposure
When and why would you pick manual over other shooting modes?
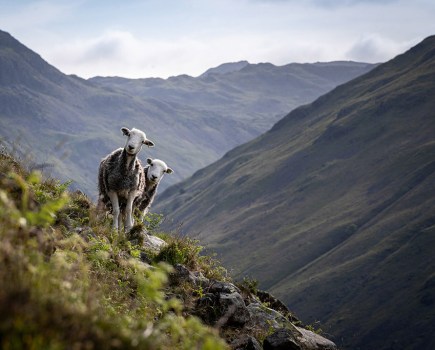
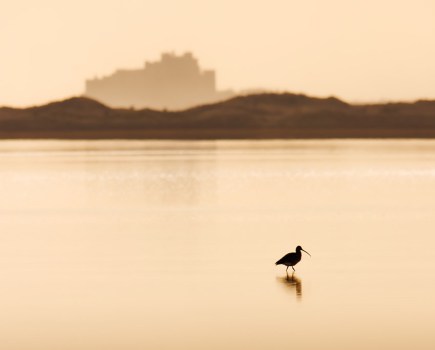
Once upon a time manual shooting was the only option, but as cameras became more intelligent they began to take more of the legwork out of shooting. Despite this impressive automation, there are times when manual exposure allows you to lock camera settings for more reliable results. When shooting in the studio or with off-camera flash it’s best to shoot in manual mode to avoid under and overexposure. When shooting with a Big Stopper you’ll often need to shoot in Bulb mode which requires manual timing of exposure. In difficult lighting scenarios, such as when shooting contre-jour or live music, manual mode is a winner.
Credit: James Abbott
How do you use the viewfinder and LCD exposure meters?
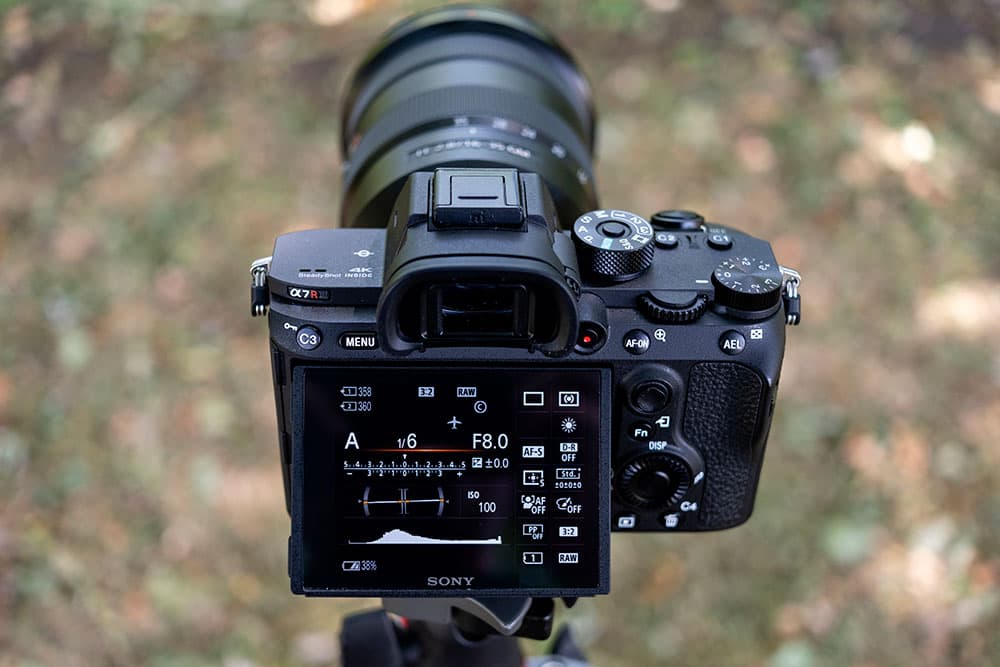
When shooting in manual you have to use the exposure meter to assess exposure. The exposure meter is a scale that’s usually found at the bottom of the viewfinder and the LCD screen on the back of the camera. At a basic level, when a correct exposure has been obtained an arrow will show above the central part of the scale which may be signified by zero. Any underexposure will show the arrow to the left of the central area, where the scale will say -1, -2 or -3. For overexposure the arrow will show on the right with +1, +2, +3. There are 1/3 stop increments between these values, and it’s worth noting that a ‘correct’ exposure at zero in the centre isn’t necessarily correct. You may need to overexpose or underexpose the shot as required.
Is shooting in manual mode ‘more professional’ than the other modes?
There’s a common misconception that all professionals shoot in manual mode. The reality is that most professional photographers will shoot in manual, shutter- and aperture-priority modes depending on the situation. Being able to successfully shoot using these three main shooting modes will provide confidence and competence in all situations.
Credit: James Abbott
How can the camera’s histogram help with exposure?
The histogram is a great way to assess whether you’ve blown highlights or lost shadows, and with DSLRs will show on the LCD, while mirrorless cameras can display a live histogram in the viewfinder and on the LCD. The histogram is simply a graph where the shadows are represented on the left, mid-tones in the central area and highlights on the right. The key is to make sure that the graph doesn’t touch the left or right edges of the histogram, as this means shadows and highlights, respectively, have been lost.
What’s the difference between manual and semi-automatic modes?
In manual mode, you control all aspects of exposure including ISO, aperture and shutter speed. In this mode, you would typically change the shutter speed to obtain a correct exposure using the in-camera exposure meter as a guide. In aperture-priority, you set ISO and aperture while the camera will select the most appropriate shutter speed based on light metering; the shutter speed would essentially be the same one you’d choose manually. For shutter-priority, you set ISO and shutter speed while the camera takes care of the aperture. In these two modes you may have to use exposure compensation to override the exposure set by the camera.
Focusing
There’s a time and a place for everything, and when it comes to focusing, knowing when to switch between auto and manual focus is just as important as knowing when to shoot at a wide aperture of f/1.4 or narrow aperture of f/11. Focusing is something we often take for granted because in most situations, pin-sharpness is a shutter button press away – but it’s not 100% perfect and there are times when it can’t perform.
The main reasons for needing to switch to manual focus are simply when the autofocus fails in some way, such as failing to lock onto a subject due to the surrounding conditions, low-light levels, or when using AF produces unreliable or inconsistent results. So it’s best to lock focus while a number of shots are taken.
Credit: James Abbott
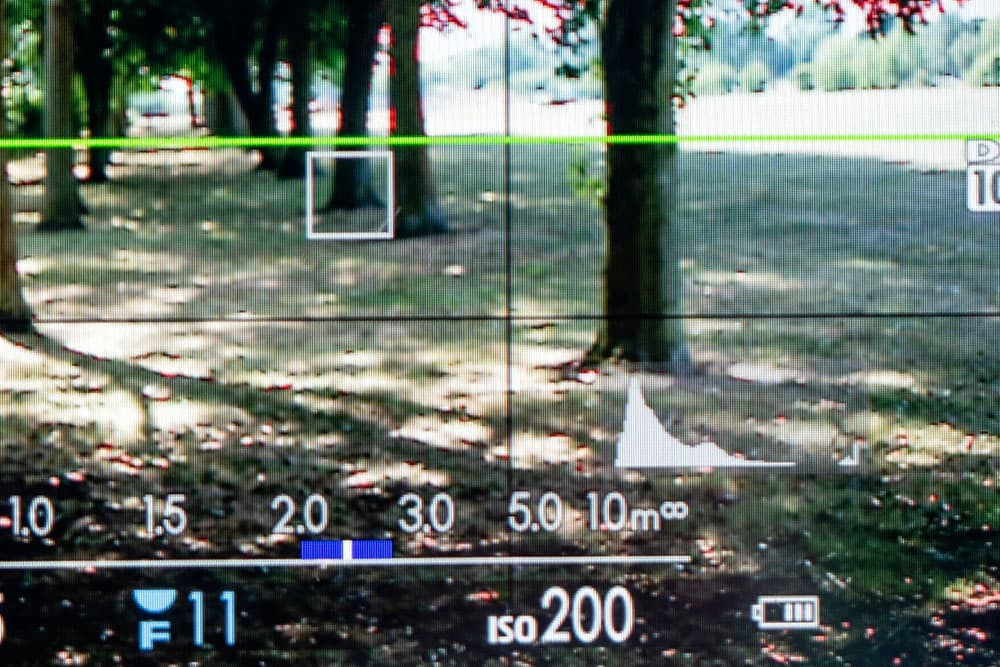
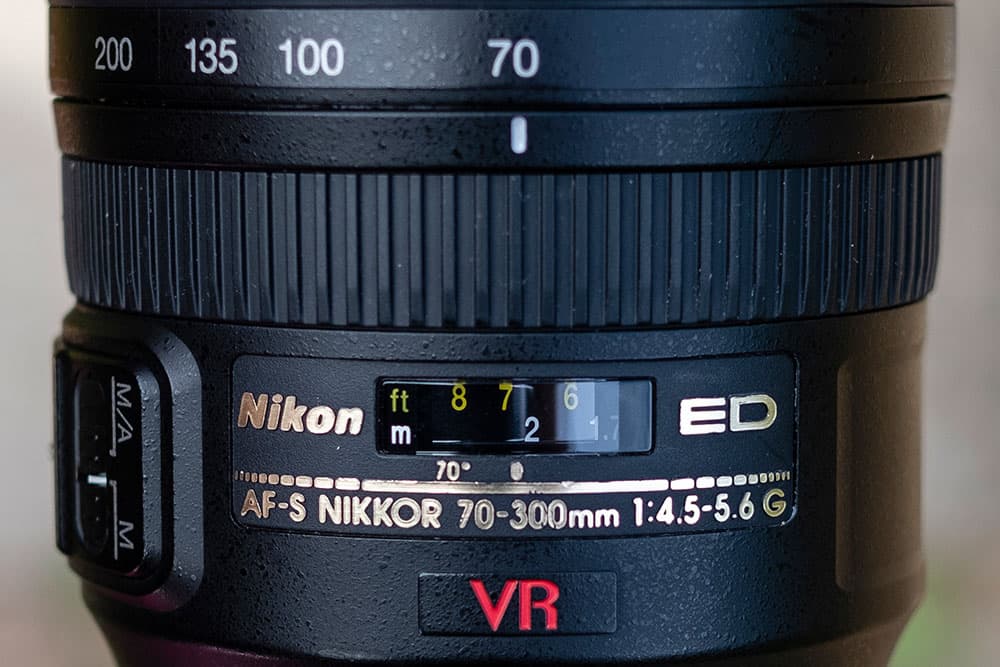
What’s zone focusing and why would you use it?
Zone focusing is a great technique for street photography because it allows you to work quickly and even shoot from the hip without worrying about focusing. It’s basically where you decide on the depth of focus you wish to have, such as between 2 metres and 5 metres. By setting the focus manually at say 2.5 metres with the aperture at f/8, everything in that range should be in focus. One thing to keep an eye on is the shutter speed, and raise the ISO if shutter speed is too slow. Alternatively, use Auto ISO.
What’s prefocusing and is it still relevant today?
Prefocusing is a technique that was originally used when shooting fast-moving subjects with a manual focus (only) lens back in the days of film. For this, you simply focus at the point where you know the subject will pass and then compose the image. When the subject passes over the prefocused point you simply take the shot, and most of the time the subject will be in sharp focus. Modern autofocus can be extremely fast, and there are very few action photography situations where they fail, but when they do prefocusing can be an invaluable technique to have up your sleeve.
What are the different manual focusing techniques?
To focus manually you generally rotate the focus ring on the lens until the image in the viewfinder or on the LCD appears sharp, but there’s another technique unique to macro photography that can be applied when shooting both handheld or when using a focusing plate. To explain this technique, we’ll use the focusing plate as an example.
You simply manually focus the macro lens so that it’s at its minimum focusing distance and able to capture subjects at a 1:1 ratio. Now attach the camera to the focusing plate and the plate to a tripod. Once the camera is positioned close to the subject you can turn a dial on the plate that will move the camera backwards or forwards until the image appears sharp and in focus.
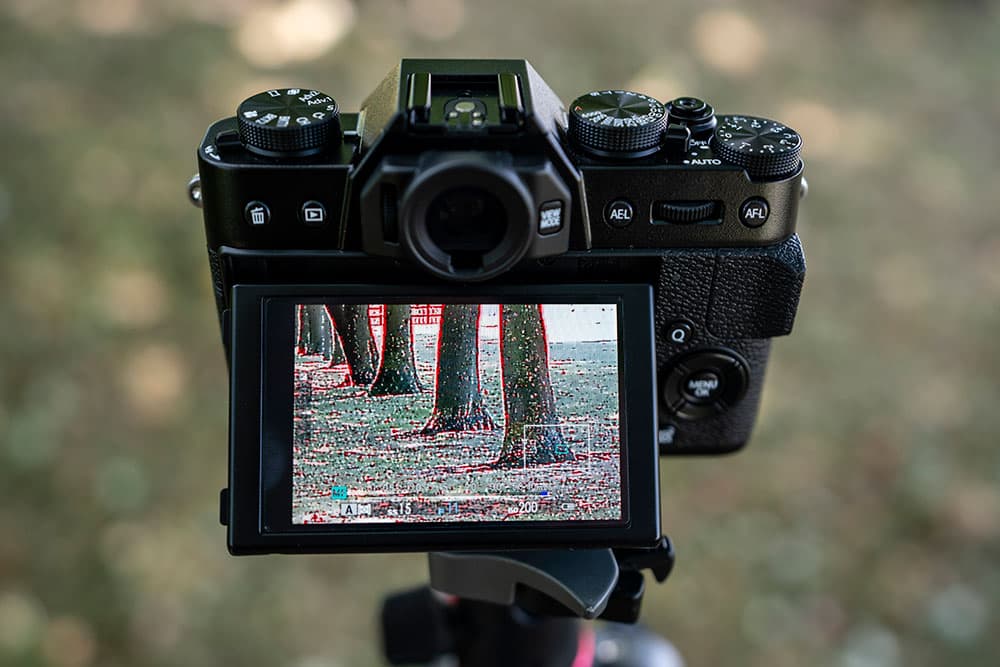
Make focusing more reliable with focus peaking. Credit: James Abbott
Is there a way to increase the reliability of manual focusing?
When manually focusing almost any subject, one of the best things you can do for precision is to zoom into the image on the camera LCD screen using the zoom buttons on the back of the camera. If you’re shooting with a mirrorless camera you can also do this in the viewfinder, which can be useful in bright conditions. Another useful setting is to turn on focus peaking. This is where the parts of a scene that are in focus will be highlighted red or white, and this can be used in conjunction with zooming into the image if you wish.
When and why should you use manual focus?
We’ve already briefly covered why you’d switch to manual focus, which is simply to take control in situations where the camera is struggling. But sometimes, AF and manual focus can be used in conjunction, where you may use AF to focus on a subject but then switch to manual focus once AF has locked on to keep it fixed at the desired point. This technique can be particularly useful when shooting HDR – to maintain consistent focus from one exposure to the next – or when shooting with a Big Stopper where you focus before the filter is attached and lock it in position using manual focus to avoid AF hunting. Some cameras can autofocus through extreme NDs, but many can’t.
Flash
If you want to master flash photography and take advantage of its full potential, you need to get to grips with setting flash power output manually. After using TTL flash, doing everything yourself may seem daunting, but manual flash is about consistency and control in dark studios, difficult interiors and outdoors. It allows you to use the exact settings you desire and/or to achieve special effects without the risk of the camera exposing a scene in a way it thinks is correct, rather than what you wish to achieve.
Why would you use manual adjustments on a flashgun?
With both the camera and the flashgun in manual mode, you will have full control. Remember that aperture controls flash exposure while shutter speed takes care of ambient light, and you can’t go wrong. You can even combine semi-automatic shooting modes with manual flash, or manual mode with TTL flash – the options are almost infinite.
Credit: James Abbott
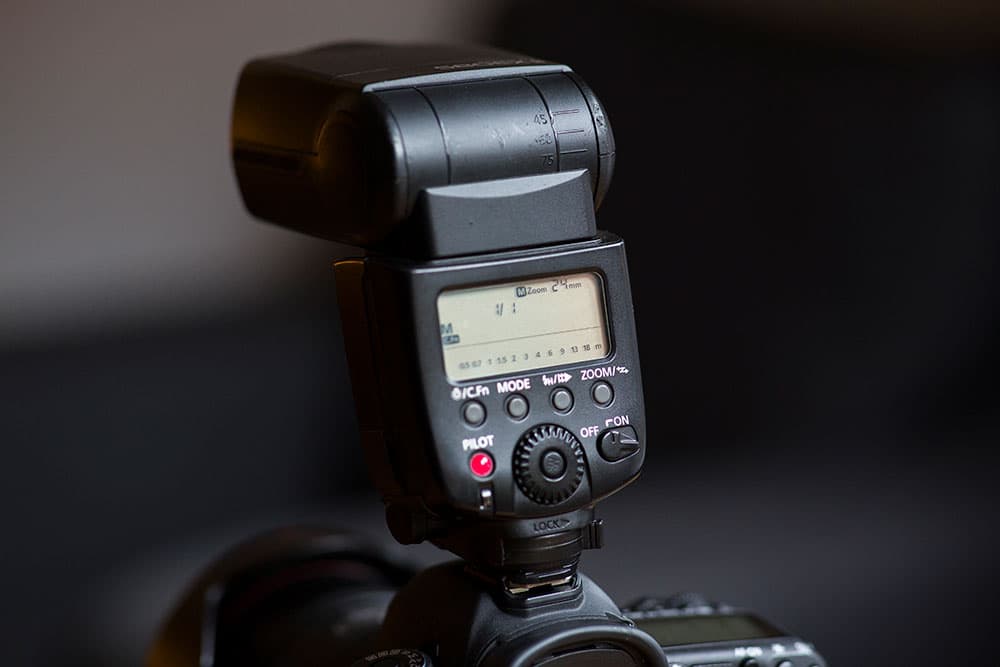
How do you manually control your flashgun?
With manual flash, you generally set the camera up first with the desired settings in manual mode. This might be ISO 100 at f/8 with a shutter speed of 1/200sec. Set the flashgun to manual power output and start with the power at 1/4. You can then increase or decrease the output as required to obtain a correct exposure. You’re also able to stop down to f/11 or open the aperture up to f/5.6, too.
Another setting you may have on your flashgun is a manual zoom control. This is simply the zoom function the camera uses when different lenses are attached to help focus the light on the subject. When using modifiers such as softboxes, setting the zoom to 24mm spreads the light well, while if you’re using a bare flashgun as a hair or rim light you may find setting zoom to 105mm is more beneficial.
Combine manual camera settings with TTL flash. Credit: James Abbott
Can you mix manual camera settings and TTL flash?
A great way to push both ambient exposure and flash output is to shoot with the camera in manual mode and the flashgun in TTL mode. This can be highly effective when shooting weddings, for instance, where there could be a high ceiling and a lot of contrast in the scene. Setting the camera to ISO 400 at f/5.6 and 1/60sec and flash set to TTL and positioned to bounce off the ceiling, really can save the day when the mix of flash and ambient light is difficult to balance.