
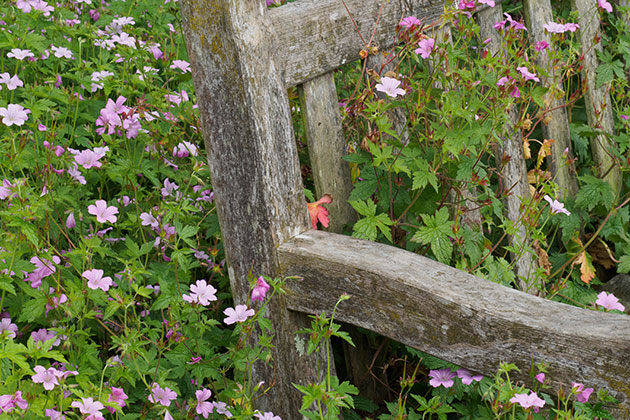
With distant shots, it’s best to focus towards the front of the scene. Olympus E-M1 II, 12-100mm f/4, 1/400sec at f/5.6, ISO 200
1. Focus one-third of the distance into the scene
This piece of advice pops up all the time, but it’s an over-simplification. It assumes the depth of field (DoF) extends twice as far behind the focus point as it does in front, but this is only true in a narrow set of circumstances: for instance with a 50mm lens on a full-frame camera at f/8, with a subject three metres away. Change the lens, aperture, focus distance or even sensor size and the front-to-back DoF ratio also changes, often substantially. With close-ups, depth of field is almost equal in front of and behind the focus point, whereas with distant landscapes, it extends almost entirely behind.
2. Everything within DoF should look sharp at 100%
DoF calculations assume a specific ‘circle of confusion’ to define what should look acceptably sharp in print. Conventionally they’re not very stringent at all; for example with a typical 24MP sensor, the circle of confusion would be 5 pixels in diameter. If you want a finely detailed large print, you’ll probably need to use a smaller aperture than that indicated by a lens’s DoF scale.

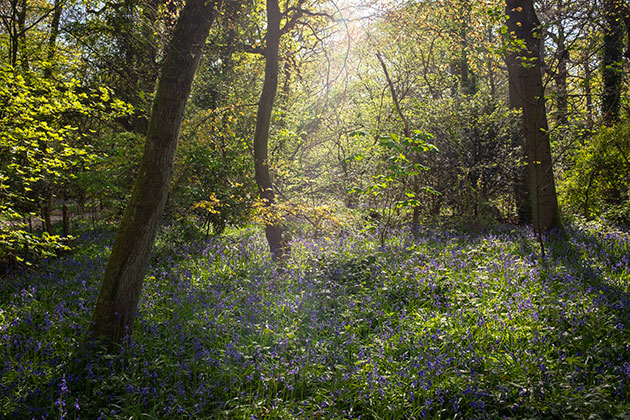
If you want shallow depth of field, full frame is the best format to use. Nikon D800E, Zeiss Milvus 1.4/85, 1/640sec at f/2, ISO 100
3. Medium format gives the shallowest depth of field
The laws of optics mean that for any given angle of view and aperture setting, larger formats give shallower depth of field. So you might come across photographers waxing lyrical about the lovely blurred backgrounds that only medium format can provide. But the flaw with this argument is that much faster lenses are available for full-frame cameras, with only a handful of medium-format optics sporting apertures larger than f/2.8. So if ultra-thin DoF is your thing, then using full frame with f/1.4 or faster primes is the best approach.
4. Set your camera to Adobe RGB
Most cameras have the option to choose between sRGB and Adobe RGB colour spaces, and the latter can describe a wider range of colours. What sensible photographer wouldn’t want to do that? In practice, though it’s not that simple, because cameras usually output the same colours regardless of the colour space selected. But there’s a risk Adobe RGB files might display or print incorrectly, so sticking with sRGB JPEGs is safer. If you’re only shooting raw, this setting is irrelevant anyway.

Use larger apertures with smaller formats to avoid diffraction blur. Fujifilm X100T, 23mm f/2, 1/80sec at f/5.6, ISO 1250
5. Your lenses’ sweet spot is f/8
One holdover from the days of shooting 35mm film is the idea that you’ll get the sharpest images at f/8. But this isn’t true with smaller formats, owing to diffraction blurring becoming significant at larger apertures. As a result, you can often expect the sharpest overall results at f/5.6 on APS-C and f/4 on Micro Four Thirds. With a 1-inch sensor compact, in principle you should get the sharpest pictures around f/2.8, but their small and often ambitious zooms normally need stopping down further to sharpen up the corners. If you’re worried, check each lens’s sharpness across its aperture range with the camera on a tripod.
6. Focus and recompose
Back when we were shooting film cameras with just a single, central focus area, it was natural to focus on a subject then recompose to place it off-centre. It’s tempting to do the same now, as it’s quick and easy, but the problem is that it introduces focus errors when shooting at large apertures. Now that practically all cameras have multiple focus points, make a habit of using the one closest to your subject to get the sharpest results.
A hood will protect your lens’s front element
7. Always use a UV filter
There’s a long-running school of thought that it’s best to use UV filters all the time to protect your lenses. But with the latest coatings shrugging off water and grease and being highly resistant to scratches, lenses are now more robust than before. I prefer to go without a protective filter unless there’s a serious risk from water or sand, using a lens hood to protect against knocks.
8. In-lens IS is better than in-body IS
With the various camera companies using either in-lens optical stabilisation or in-body mechanical systems, there have long been arguments about which is better. The fact is that they simply have different strengths: optical IS is much more effective with telephoto lenses, but in-body systems can correct for more forms of shake and work with lens types that are difficult to stabilise. With these advantages being complementary to each other, the most effective systems now combine both in-lens and in-body IS, as we’ve seen over the past few years from the likes of Sony, Panasonic and Olympus.
9. DoF scales work regardless of sensor size
This is a mistake many photographers will fall into without even thinking. If you use a lens with distance and depth-of-field (DoF) scales on a crop-sensor camera, it seems obvious to employ them to set the focus distance and aperture. But DoF scales are calculated for the lens’s native format – usually full frame – and with any given lens, you get shallower depth of field with smaller sensors. This means that to get the required front-to-back sharpness, you need to close the aperture by a further stop on APS-C or two stops sensor size on Micro Four Thirds.
10. Turn off IS when using a tripod
Early lens-based stabilisation systems didn’t like being used on tripods; indeed with some older design IS lenses, you can actually see the image ‘swim’ across the viewfinder. So users were advised to turn IS off to avoid introducing unwanted blur. However, newer systems are much improved and there’s often no need to turn them off.
The latest dual IS systems allow long shutter speeds to be used handheld. Sony Alpha 7 II, 24-70mm f/4, 1sec at f/10, ISO 50
11. Use a tripod at shutter speeds below 1/15sec
Conventionally this is pretty good advice, as even with ultra-wide lenses, rotation around the lens axis and low-frequency, large-amplitude shake movements can cause blur when shooting handheld. But with the latest image-stabilisation (IS) systems that use 5-axis in-body stabilisation, the rules have changed, and you can get sharp results handheld at really slow shutter speeds – sometimes longer than 1 second.
12. Only shoot raw
One of the first things enthusiast photographers are told is that raw files give the best image quality, and should be used all the time. The implication is that you’re not doing proper photography unless you sit at home after the event post-processing and fine-tuning your masterpieces. But cameras now make better JPEG files than ever before, which are perfectly usable in many situations. For family snaps or casual shooting, JPEGs are fine (although it still makes sense to shoot raw files alongside, just in case). With most cameras, turning off raw greatly extends buffer depth when shooting bursts, increasing your chances of getting the perfect shot.
Sony’s 42.4MP full-frame sensor records a vast dynamic range. Sony RX1R II, 35mm f/2, 0.4sec at f/2, IS0 100
13. More pixels bring lower dynamic range
With smaller pixels being individually noisier, it appears to stand to reason that higher-resolution sensors will show lower dynamic range. But for much the same reason as with noise (see myth 19), this isn’t necessarily true. What really matters is that the sensor maker keeps the electronic read noise very low, which is the case with the latest round of high-quality 40-50MP full-frame sensors. As a result, they show extraordinary dynamic range.
14. A shutter speed of 1/focal length will avoid shake
This is a rule of thumb that worked pretty well with 35mm film, but it doesn’t translate so well to digital. Crucially, you need to take sensor size into account and use equivalent, rather than actual, focal lengths. So with a 50mm lens you might choose 1/50sec on full frame, 1/80sec on APS-C and 1/100sec on Micro Four Thirds. What’s more, if you want to be confident of getting pixel-sharp results in every shot, you’ll probably want to use shutter speeds a stop or more faster. On the other hand if you have a stabilised camera or lens, you’ll be able to use slower speeds, but at the risk of blur from subject movement.
15. Always set the highest-quality JPEG
One of the earliest things we learned with digital was to always select the highest-quality JPEG setting. Otherwise, there was a risk of getting compression artefacts across blocks of pixels, especially on subjects with diagonal lines. But since then, camera makers have adopted visually lossless processing that gives no obvious artefacts. However, some have gone even further and included ultra-low compression options that, while technically more faithful to the original scene, aren’t visibly better. Usually they’re turned off by default and there’s no need to enable them, as they take up more card space and slow down the camera.
Avoid using small apertures on Micro Four Thirds cameras. Olympus E-M5 II, 50mm f/1.8, 1/50sec at f/11, ISO 200
16. Micro Four Thirds cameras give deeper depth of field
Smaller formats give deeper DoF for a given angle of view and aperture setting; hence you might infer that Micro Four Thirds cameras can provide deeper front-to-back-sharpness than APS-C or full-frame models. But the problem is that diffraction blurring also impacts smaller sensors more. In fact DoF and diffraction scale in precisely the same way with sensor size, so you can get exactly the same DoF on larger sensors by stopping the aperture down further.
17. Full frame is the Holy Grail
With all the recent buzz around full-frame mirrorless, it’s easy to fall into the trap of thinking that you can’t do serious work with a smaller format. This is, of course, nonsense. Full-frame systems bring certain advantages with regard to image quality, such as lower noise, increased dynamic range, and shallower depth of field, but this comes at the expense of increased size, weight and price. On the other hand smaller sensors require smaller lenses, which adds up to a lighter and more portable system. Pick whichever compromise works best for you.
A 16MP sensor records easily enough detail to make an A3 print. Fujifilm X100T, 23mm f/2, 1/105sec at f/8, IS0 200
18. A high-resolution sensor is needed for landscapes
There’s no doubt that serious landscape photographers tend to prefer high-resolution full-frame cameras in the 40-50MP range. But that’s often because they like to make huge prints, a metre wide or more. If you have no intention of making anything that large, then even 16MP is enough for a detailed A3+ print, while 24MP is better still, giving extra scope for cropping.
19. More pixels give noisier pictures
Possibly the oldest myth of digital is the idea that sensors with more pixels result in noisier images. This had more than a grain of truth with early, inefficient image sensors, but it doesn’t stand up to scrutiny any more. For any given sensor size, a higher-resolution sensor will show higher pixel-level noise, simply because the pixels are smaller and gather less light. But when you look at the image as a whole, this noise averages away again, meaning that a higher-resolution image won’t look any worse at any specific display or print size. But crucially, it will usually retain more detail.
Excessive highlight recovery from raw has resulted in the blue sky turning grey. Sony Alpha 7R III, 24mm f/1.4, 1/400sec at f/1.4, IS0 100
20. Highlights can be recovered in raw
Raw files have much greater dynamic range than JPEGs, making it possible to recover extra shadow detail. But there’s far less scope to recover highlights accurately. Raw files do contain some extra information, as the individual colour channels all clip to white at different points, which means raw converters can reconstruct some additional tonality. But the moment the first channel has clipped, any colour is at best an estimate. As a result, pulling the brightness or highlight sliders back too far will result in false colours or posterisation. So it’s best to avoid highlight clipping.
21. Multi-shot modes are like having a high-resolution sensor
Quite a few cameras these days have multi-shot composite modes that claim to offer resolutions beyond the sensor’s native pixel count. This allows cameras like the 16MP Olympus OM-D E-M5 Mark II or 20MP Panasonic Lumix G9 to promise resolutions similar to much more expensive full-frame models. While such modes do work, the problem is that they usually require the camera to be tripod-mounted, and give image artefacts with anything in the frame that moves. Despite the continual improvements that have been made to their image- processing algorithms, they’re not yet a practical substitute for high-resolution sensors.
22. Shooting wide open means soft edges
Something you’ll see repeated time and again is that you should avoid shooting with your lens wide open, as the edges and corners of the frame will be too soft. But with modern lens design, this isn’t necessarily true; for instance Sigma’s f/1.4 Art primes are much sharper wide open than older (and smaller) lenses. That’s ignoring the debate about whether a touch of softness towards the edges even matters much, in aesthetic terms; when you’re shooting with fast lenses, the chances are that those areas of the frame will be out of focus anyway.

Don’t be afraid to use high ISOs in low light. Canon E0S 800D, 100mm f/2, 1/160sec at f/2, IS0 4000
23. High ISOs mean unusably noisy images
You’ll always get increased noise at high ISOs, but it’s crucial to understand that the type of lighting has a huge impact too. You’ll get much better results with natural light compared to low colour-temperature artificial illumination. So don’t be afraid to use high ISOs indoors in daylight.
24. Kit lenses just aren’t worth using
The basic kit zooms supplied with DSLRs and mirrorless cameras are designed to get the user started for the minimum extra cost. As a result, they’re never going to be as well-corrected and sharp as more expensive lenses or allow as much creativity as those with longer ranges or faster apertures. But don’t think this means you can’t get good results with them because, ultimately, that’s all about the photographer’s vision.
The latest EVFs are stunning
25. EVFs are not as good as optical viewfinders
Electronic viewfinders (EVFs) used to be awful, with tiny, low-resolution panels and obvious lag. But they’ve developed massively over the past few years and the latest are simply stunning. They’re large, bright and detailed, and bring their own considerable advantages over optical viewfinders. They can accurately preview exposure, colour and depth of field, while enabling precise manual focus and displaying far more shooting information.
26. 100% crops are best for judging image quality
When digital cameras first appeared they didn’t have enough pixels, meaning we often viewed and printed the images at rather marginal output resolutions. This meant that zooming-in on screen to examine the image at 100% made sense for judging image quality. But for most purposes, we now have more pixels than we need. At this point 100% viewing becomes misleading, as general-purpose computer screens are rather low in resolution. For instance a 24in Full HD display has around 94 pixels per inch, which is way short of the 300ppi resolution we’d usually consider ideal for printing. As a result, any flaws are amplified unreasonably, and taken well out of the context of the image as a whole.

Vignetting can add atmosphere. Sony Alpha 7 II, 50mm f/1.7, 1/250sec at f/1.7, IS0 100
27. Vignetting is an optical flaw
Some photographers treat any sign of vignetting as an undesirable flaw. But all lenses suffer from it to some extent, with the amount being a trade-off against size and weight. Really it’s just a lens characteristic that can be pictorially desirable – indeed with fast primes, vignetting complements shallow DoF in making the subject stand out. I’m far more likely to add a touch of corner darkening back into my images, than I am to remove it.
28. Lenses that employ software distortion correction are poor quality
By necessity, lenses designed for film had to use optical-distortion correction to give usable images. But digital is a different medium, especially with compact and mirrorless cameras that use fully electronic viewing and image reproduction. So it’s now standard practice for lens designers to tolerate much higher levels of curvilinear distortion and correct it in software. This isn’t shoddy lens design; in fact
it often gives sharper results in the corners of the image, while allowing longer zoom ranges with higher quality.
29. Always turn off the camera when changing the lenses
It might be good practice to turn off your camera when swapping to a different lens, but it’s far from essential. I’ve changed lenses with cameras of all brands powered-up, with no ill effects. The biggest argument in favour of the practice is that many cameras run a dust-removal cycle on start-up.

Superzooms let you get long shots without changing lenses. Olympus E-M5, 14-150mm, 1/400sec at f/8, ISO 200
30. Superzoom lenses are optically poor
Purist photographers sometimes deride broad-range ‘superzoom’ lenses that cover everything from wideangle to telephoto as being a jack of all trades – implying they are too optically compromised to be useful. Such lenses are certainly weaker at the long end than standalone telezooms, while often showing considerable distortion. However, they let you get a much wider range of shots in situations where you don’t want to be changing lenses. So it depends on whether you’d rather get an imperfect shot or nothing at all.