Credit: James Abbott
The quickest and easiest way to improve your landscape photography is to invest in a filter system that will allow you to take full control over the exposure of the sky, exposure duration and the way light itself is recorded. Here we’re talking about ND grads, ND filters and polarising filters. If you’re serious about landscape photography, filters really will help you to take the shots you’ve always dreamed of. All you need to know is when and how to use them correctly.
ND grads
Neutral density graduated filters, most commonly called ND grads, are the filters you need – say goodbye to washed out, featureless skies and hello to detail and exposure balance between the sky and ground. ND grads are most commonly available as drop-in filters that slot into a filter holder on the front of the lens. This has the advantage of allowing you to not only adjust the horizontal position of the filter to match that of the sky and ground for a seamless blend, but you can also rotate them to deal with side light and even brighter foreground in some situations.
ND grads are generally available in light-reducing densities of 1, 2, 3 and 4 stops, with some manufacturers quoting these as 0.3, 0.6, 0.9 and 1.2, respectively.
So how do they work? Quite simply, these filters have a light-reducing coating at the top of the filter that graduates to no e ect in the centre of the filter. The graduation can be hard, medium or soft, each designed for use with different landscapes. For a correct exposure of the sky, you simply meter for the sky and then the ground, and the difference in stops between them will suggest the density you need.
Hard ND grads
Hard ND grads are designed for use in situations where the horizon is virtually flat. These filters have an extremely short graduation from full to no effect, which makes the blend from brighter sky to darker ground seamless with straight horizons. Hard grads can sometimes also be used as ND filters when positioned low enough in the holder to cover the lens fully.
Medium ND grads
Medium ND grads are best used for landscapes where there are a number of elements such as trees, rocks or hills protruding into the sky area of the frame. Medium grads sit between their hard and soft counterparts with a medium graduation, from full to no effect, that occurs over roughly 2cm. This type of ND grad is most commonly used.
Soft ND grads
Soft ND grads are best used in mountainous regions where there are many ground elements in the sky area of the frame. These grads often need to be stronger than hard or medium grads because their graduation can be as much, if not more than, 5cm from full to no effect. They’re also great for combining with medium grads.
Reverse ND grads
Reverse ND grads are used to shoot sunrise and sunset when the area above the horizon is the brightest part of the scene. In the centre (moving down) they have a hard graduation to no effect like a hard grad. But moving up the filter they have a soft graduation from full to a reduced effect to deal with the sky at the top of the frame being darker than the horizon.
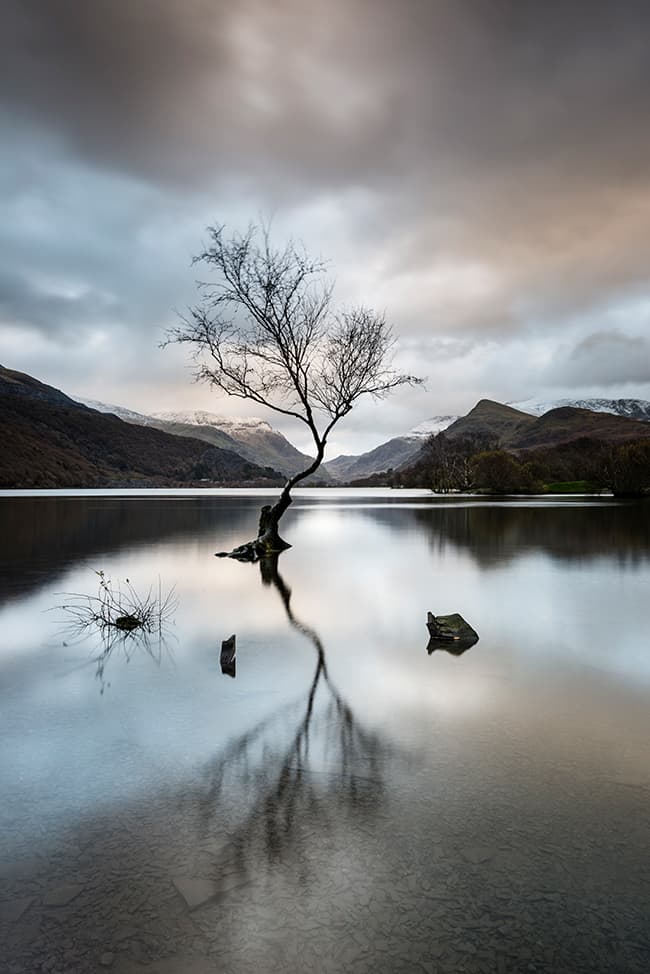
When used well ND grads will improve the details and exposure balance of your landscape shots. Credit: James Abbott
In-camera vs post-production
There are two schools of thought in photography: one that endeavours to get everything right in-camera, and another that aims to capture all the required elements that will then be compiled into a single image during post-processing. Both approaches have their pros and cons, and sometimes you need to combine the two. But in most situations using filters to get things right in-camera will save you time, allow you to see a more complete image on the LCD, and most importantly, in some cases, will allow you to create effects that are impossible to replicate using editing software.
Drop-in vs screw-in filters
There are two main types of filters available and the option you pick usually depends on your budget. Screw-in filters, as the name suggests, screw on to the front of lenses and are small, lightweight and generally less expensive than the drop-in type. Their disadvantages, however, are that you have to buy them in the right thread size for each of your lenses, so you can end up with two or more of the same filter type.
Drop-in filters drop into a holder that attaches to the front of lenses via an adapter ring, and to use them on different lenses you simply need the appropriate size adapter ring for each lens. The main advantage here is that you only need one set of filters for all lenses, and filters such as ND grads, while available in screw-in versions, are much more effective when they’re the drop-in type.
The most common filter companies include Lee Filters, Cokin, Hoya, NiSi Filters, Formatt-Hitech, Kase Filters, B+W and many more. Drop-in/sheet filters also come in different sizes with 70mm specifically for smaller mirrorless cameras, 100mm for most cameras and lenses, and 150mm filters for use with ultra-wideangle lenses such as the 14-24mm f/2.8 and wideangle tilt-and-shift lenses.
Creative exposures
Extend exposure times for creative blur effects that take the viewer beyond the limitations of human perception
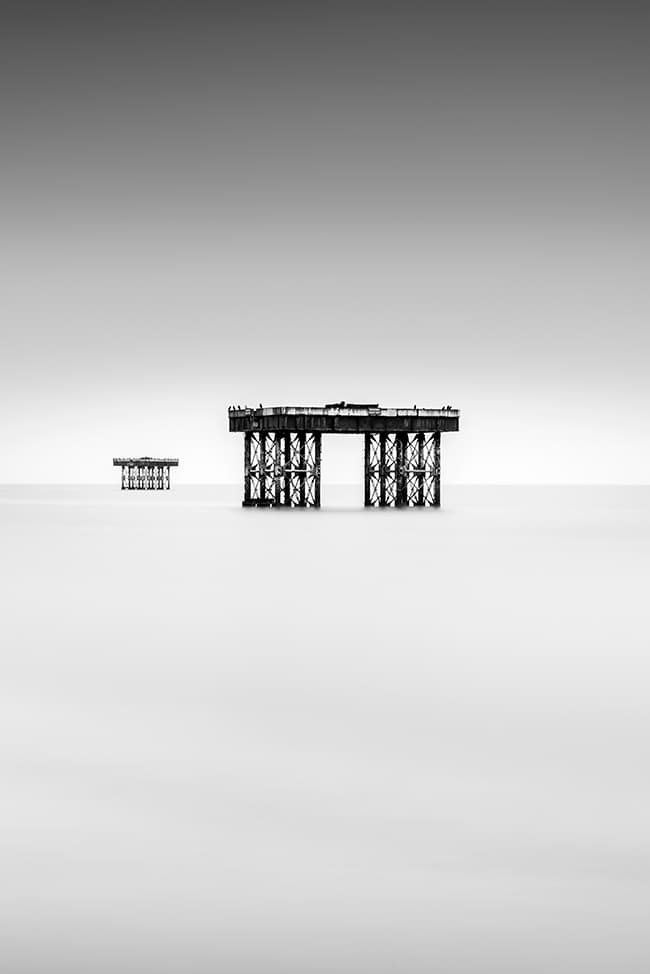
ND filters are a great way to blur movement for creative effect. Credit: James Abbott
Neutral density filters, or NDs, are filters that reduce the amount of light entering the lens allowing you to shoot with slower shutter speeds or wider apertures than you could without. This is ideal if you would like to blur movement, such as clouds or water, in the scene or to shoot with a wider aperture for a shallow depth-of-field.
As the name suggests NDs are neutral, so in the majority of cases they won’t add a colour cast to images. Quality plays a role, so cheaper non-branded NDs may produce colour casts. Standard NDs are available in light-reducing densities of 1, 2, 3 and 4 stops. Extreme NDs are available in 6, 10 and 15 stops, but these will typically alter colour in images which will need to be corrected in post-processing.
Shooting with ND filters that are up to 4 stops in density requires no change in technique – simply attach them to the lens and shoot as normal. With a DSLR the viewfinder will look darker than usual, so you may find that using the LCD screen makes composing easier. With mirrorless cameras, however, you’ll be able to see the image in the electronic viewfinder as clearly as normal.
Things begin to change when you’re shooting with a 6-, 10- or 15-stop ND filter. Since these filters appear opaque to the human eye because of how much light they block, when you attach them to your lens you can’t see an image through the viewfinder or on the LCD with some cameras. With others you can, and in most cases you can shoot normally, but if your camera can’t ‘see’ through these extreme NDs, my guide here will help. Even if you do have a camera that can see through these filters, the guide shows you how to obtain a perfect exposure every time.
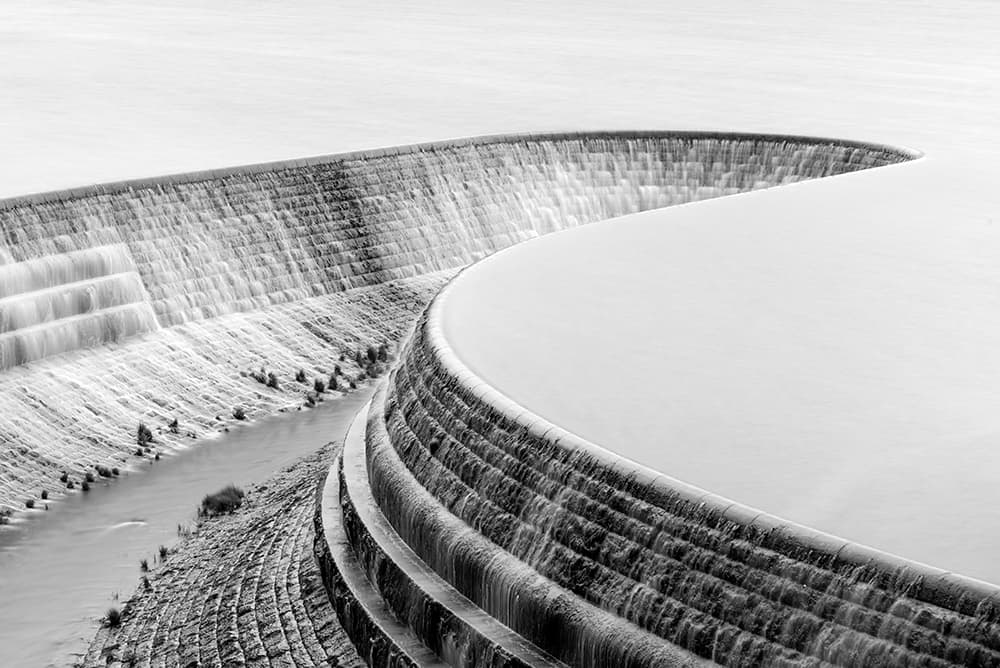
The Big Stopper is an ND filter that reduces the amount of light entering the lens by approximately 10 stops. Credit: James Abbott
How to shoot with a big stopper
1. Camera setting and test shot
Focus your shot using AF or manual, and then make sure focusing is set to manual to lock it in position. Next, set aperture priority with your desired ISO and aperture and take a test shot. Apply any exposure compensation as required for a correct exposure and take further test shots. Once you’re happy with the exposure make a mental note of the shutter speed set by the camera.

2. Use an exposure calculator
The easiest way to calculate and time exposures longer than 30 seconds is to use the Lee Stopper App, which is available on both Android and iOS. Once the app is open simply select 6 stops, 10 stops or 15 stops depending on the filter you’re using, and then rotate the wheel on the left to the shutter speed you made a mental note of in step one.
3. Shoot in Bulb mode
Set the camera to manual mode, and if your shutter speed is below 30 seconds set this in manual mode with the ISO and aperture used in step one. If longer than 30 seconds, turn the shutter-speed scroll wheel until set to Bulb on the LCD or top plate. Use the timer in the Lee Stopper App and release the shutter remote button, locking it in place by sliding it. Disengage the button when the timer ends.
Variable ND filters
Variable NDs are very convenient when it comes to controlling the amount of light entering the lens. They are always the screw-in type and can range in density from as much as 1 to 8 stops, essentially offering the flexibility of eight individual filters. So how do they work?
Once attached to your lens a variable ND is rotated until the desired density is reached using a scale on the side of the filter. They’re made of two sheets of polarising glass that darken as they are rotated. These filters are great if you’re on a budget or want to keep kit to a minimum, but this also comes at a small cost. Many variable NDs suffer from a large X that appears in the frame when close to, or at, their highest strength, but this is easy to avoid.
One filter to rule them all
The humble polarising filter is the most versatile and one whose effects can’t be replicated in Photoshop
Polarising filters reduce surface reflections and glare, as well as deepen blue skies. Credit: James Abbott
If there was only one filter on the planet you could ever own, it would have to be a polarising filter because of all the things it can be used for – it’s a filter that can be used for four different effects. Is that even possible? You’ve probably already guessed that it is, and it’s this versatility that makes polarisers essential for all types of photographers. For landscapes, however, you should never leave home without one, especially when shooting water.
Polarising filters are mainly used to reduce surface reflections and glare on water and glass, alongside their ability to deepen blue skies. But they also reduce glare and increase saturation. Moreover, their ability to reduce exposure by up to 1.5 stops means they can be used as a low-strength ND filter. Most of these effects can’t be reproduced in post-processing. They’re most effective when the sun is at a 90° angle to the camera.
Using polarising filters couldn’t be simpler, whether using them with a drop-in filter system or as a standalone screw-in type. Attach the filter to the lens or holder – some holders have a front attachment for the polariser while others have a recess within the holder itself with dials to turn the filter. Once attached, rotate it until the desired e ect can be seen in the viewfinder. Take care when deepening blue skies because over polarisation will leave the sky too blue.
Polarising filters are often used with ND grads and ND filters to combine effects for the best results possible. One thing worth mentioning is that if you’re using screw-in filters and would like to use an ND filter alongside a polariser, make sure the polariser is screwed onto the ND. If you attach the filters the other way around the polariser will rotate while the ND is being attached, which will lose the desired e ect. Also, if your lens rotates while focusing it’s best to manually focus and then turn the polariser for the desired effect after.
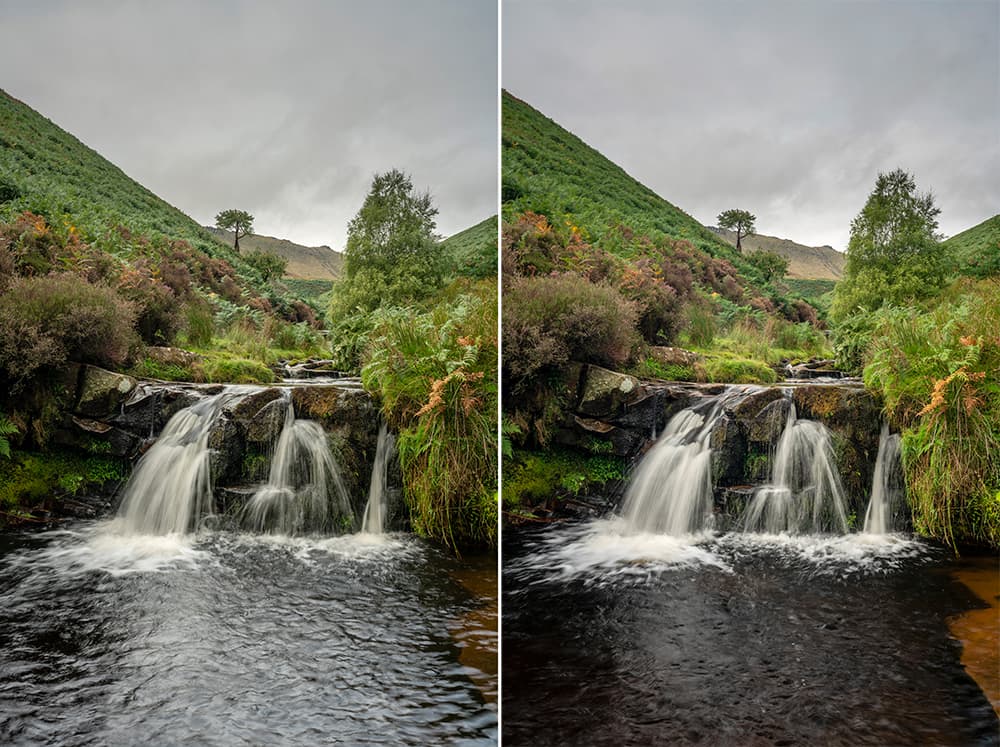
Glare: without polariser (left), with polariser (right). Credit: James Abbott
Improving skies
Even modern cameras struggle to capture scenes the way the eye sees them, and what appears to be a blue sky can be captured white by the camera. Rotating the polarising filter until the sky is blue is all you need to do but take care not to over polarise the sky. Over-polarisation of skies will look unnatural and can also result in areas of the sky being darker than others.
Removing glare and reflections
Glare and reflections on water sometimes make a shot, but in situations where you don’t want them, a polarising filter will be able to reduce or completely remove the glare in many cases. Compose your shot and then simply rotate the polariser until the glare or reflection become invisible. This also works with glass and other surfaces such as car bodywork.
Wideangle vignetting
A problem with some drop-in filter systems, particularly those that require polarisers to be attached to the front of the holder, is that vignetting can occur when shooting with a lens wider than 20mm. This can be frustrating if you’ve just forked out on a 16-35mm lens, but you can take steps to avoid it. If you have a filter system with front attaching polariser, with some you can remove the third filter slot so you only have two slots available. This is ample for most but may be problematic if you often find yourself using three drop-in filters alongside a polariser. If this is the case, look for a holder where the polariser attaches behind the sheet filters.
Stacking filters
Sometimes you’ll need to use several filters at once, and with screw-in filters you really only want to use a maximum of two because vignetting will become an issue at wider focal lengths. Also, the more of any type of filter you stack means there’s a greater risk of dust and fingerprints. Drop-in filters are better for filter stacking, but you must make sure the filters are clean. Lenspen and filter companies offer a variety of easy-to- use filter cleaning products designed for both larger and smaller screw-in filters.
Check out this buying guide for the best camera filters for photographers you can buy to create different effects in your photography.