Welcome to our no-nonsense series on to how to overcome common pitfalls and capture your best-ever video footage…
In the fourth part of our video series Amateur Photographer, in association with London Camera Exchange, continues our in-depth ‘How-to Guide to Shooting Video’.
In this series we will arm you with all the information and knowledge you’ll ever need to become a competent and confident video shooter. Along with explaining camera settings, recommending equipment and demystifying all the videography jargon, we’ll walk you through all the steps to get you recording your first movie…
In part 1 of this series we looked at How to set up your camera to shoot video. In part 2 we revealed our Essential gear guide and in part 3 we examined 9 Common Video Problems and How to Fix Them.
How audio can make or break a video
For the latest instalment in our straightforward guide to video recording for photographers, we explain how audio can make or break a video and how to get it right.
When newcomers to video think about what makes great footage, they probably think of lighting, depth-of-field or maybe even the colour grading of the movie. But one hugely important element that’s often neglected is audio.
Viewers will often tolerate a little shake or blur in the footage, as it’s often there and gone in the blink of an eye. What’s more, all but the most demanding of viewers are typically less bothered how the colour renders on the screen. But putting up with poor audio throughout a video is like sitting there listening to someone scratching their nails down a chalkboard – it’s simply intolerable and, worse still, it can easily be avoided.
Avoiding audio mistakes
Diverting just a little of your total gear budget is all that’s needed to ensure you level up the audio quality in your video footage and adding in solid, simple technique will also help ensure you never make audio mistakes again.
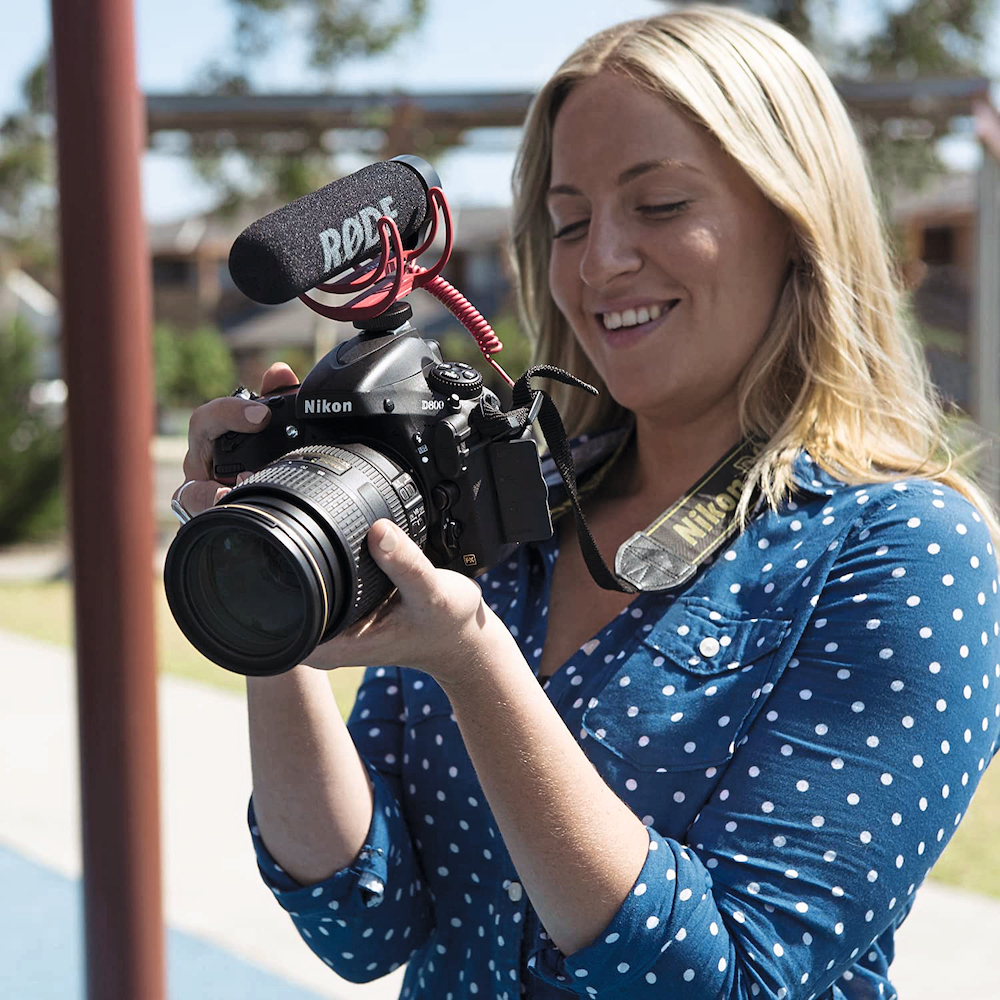
When it comes to audio, videographers actually have a big choice in how they approach capturing sound, but one thing is sure; relying on the built-in mic inside your camera is a big mistake as it simply doesn’t have the power or parts needed to capture impressive audio and is also hugely susceptible to picking up wind noise on a blustery day.
This feature will arm you with all the important information to help you pick your preferred approach to audio, as well as suggesting some of the best value-for-money kit currently on the market…
Our guide to the key audio essentials
1: Headphones: any
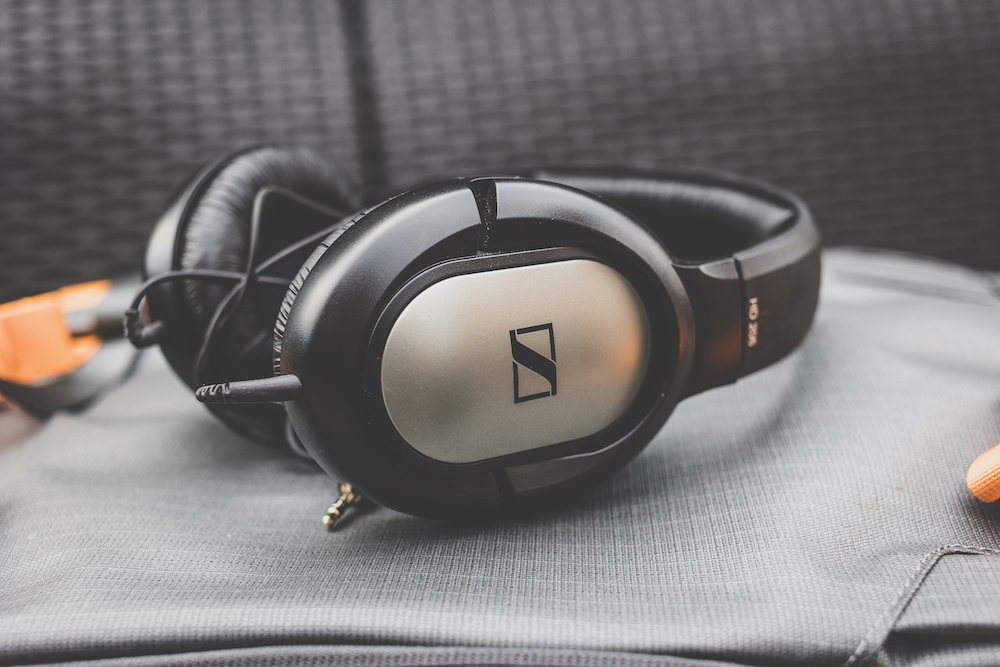
Sennheiser is a great brand but any comfortable to wear headphones will suffice
A simple pair of headphones may sound like an ordinary item of kit that won’t do anything special but, actually, a decent set of headphones is critical when it comes to making sure your footage features decent audio. Put it this way; you can spend big bucks on a microphone setup, but if you can’t adequately monitor the sound that’s being created, then the whole process is for nothing.
Headphones are particularly useful for when you are using a radio/lav mic as sometimes the mic element can rub on clothing, causing unwanted noise, or when shooting in the wind as this can also compromise the quality of your audio, although this risk can be reduced by using a windshield.
Another common pitfall that headphones can help spot is crackles generated by little breaks in the cable that connects the mic to the transmitter. While headphones don’t have to be expensive, you’ll be wearing them for extended periods of time so it’s worth finding a pair that you can wear comfortably. It’s often best to look for a pair that will fold down and take up less space in a kitbag.
2: Radio mic: Rode Wireless Go II, £249
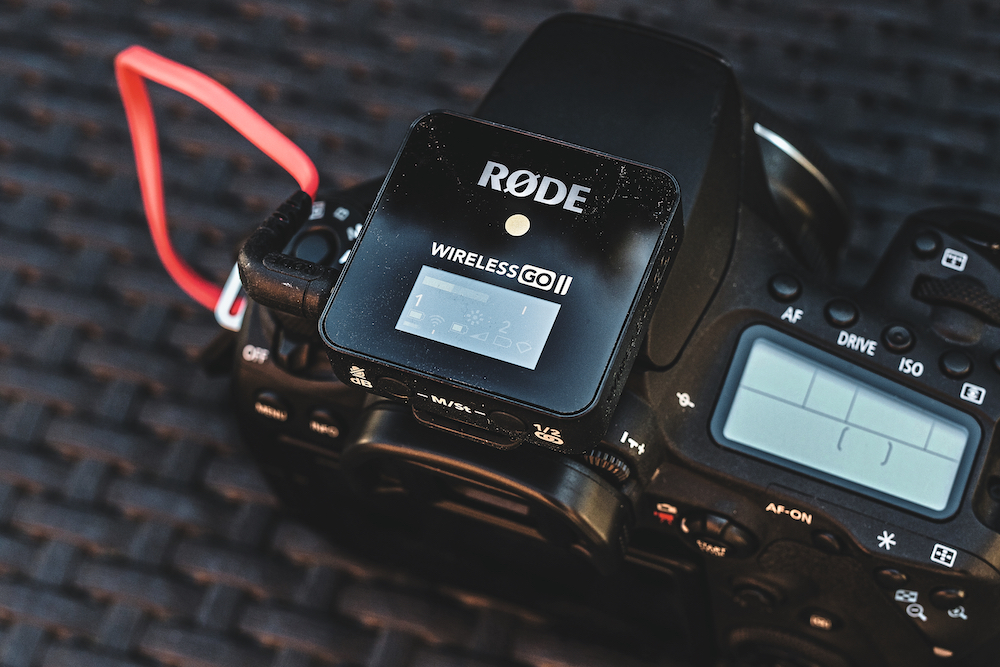
A wireless mic is a great add-on for anyone who is serious about shooting video
A wireless mic system gives the videographer the ability to capture professional-level audio without the need for the microphone to be tethered to the camera. These systems typically work by having a lav mic plugged into a transmitter, which then sends the signal to a receiver that plugs into your microphone port.
The big advantage to this system is that your subject who is wearing the mic can move around freely in the frame and not have to worry about any cable connected to the camera. The Rode Wireless Go II is absolutely tiny, tipping the scales at only 30g and features a rechargeable battery that lasts for up to seven hours. What’s more, the transmission range is huge, enabling the transmitter to operate up to 200 metres from the receiver.
All you have to do is turn both the transmitter and receiver on and the two will pair, connecting up and making the process even easier. Better still, this system actually features two transmitters so is perfect for those aspiring filmmakers who want to shoot interview set-ups with two subjects.
If you don’t need the additional mic then the Rode Wireless Go II Single is more affordable at £199. In truth, there is a huge number of options in this category, with one of the newest being DJI’s Wireless Mic set (£289), which includes a case that doubles as a charger.
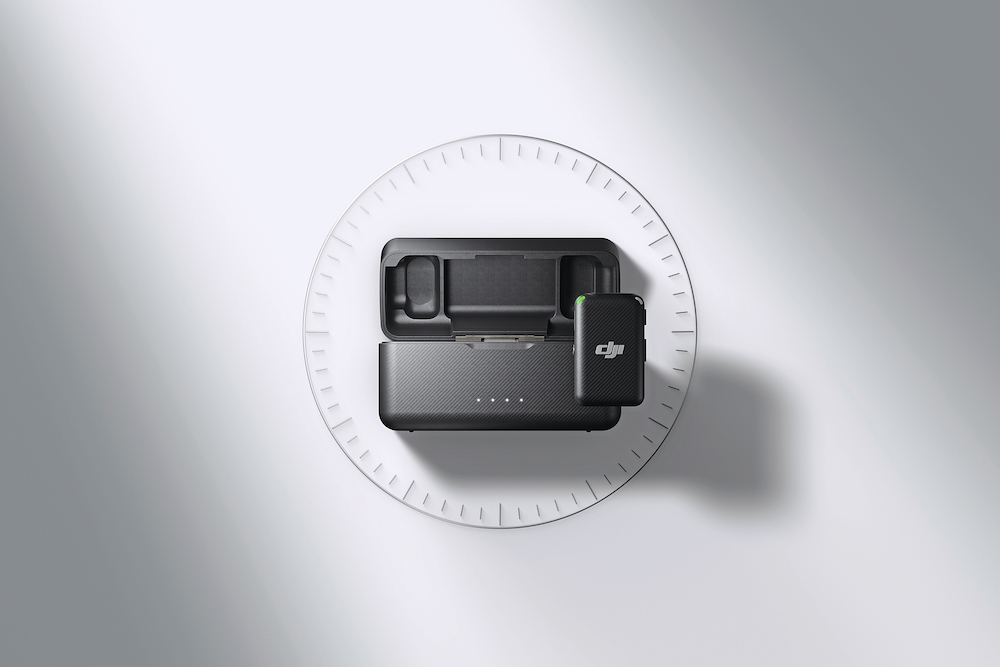
DJI’s handy Wireless Mic set with its case, which doubles as a charger
3: Hotshoe mic: Rode VideoMic Go II, £95
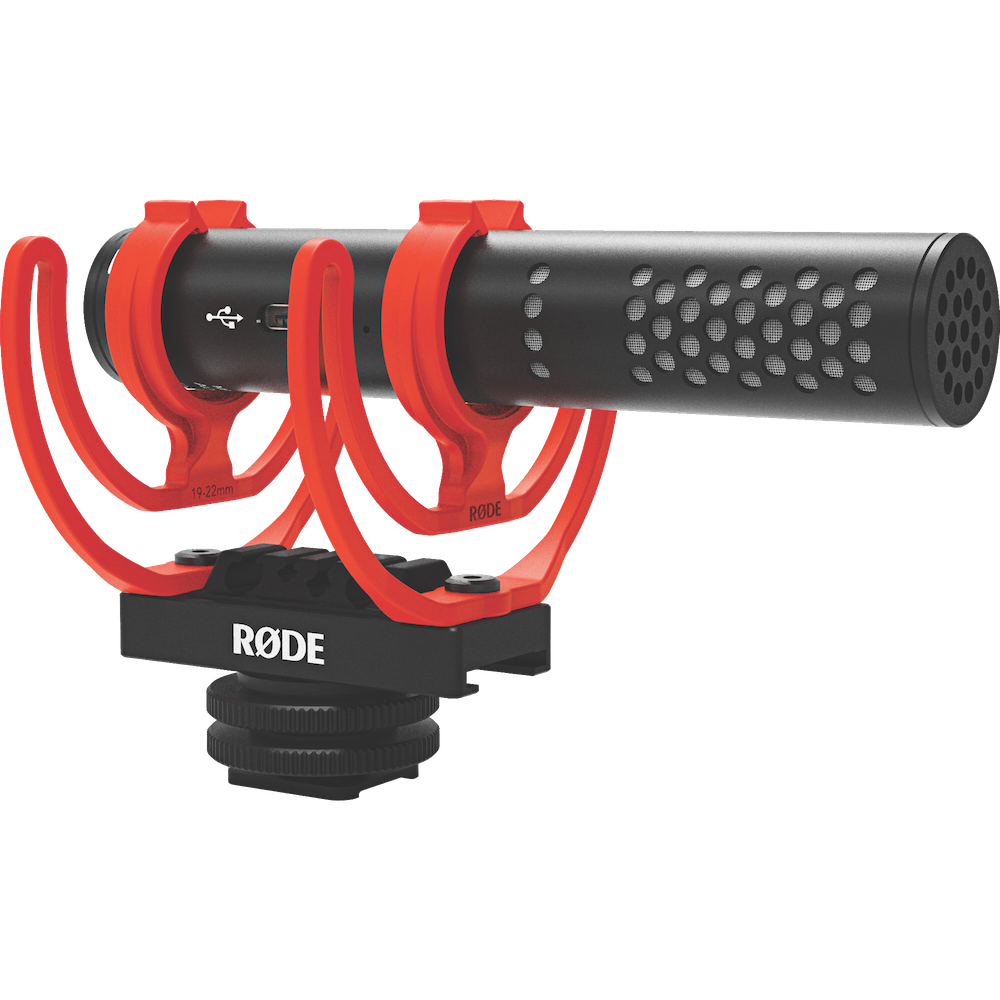
The Rode VideoMic Go II hotshoe mic weighs just 89g
There are times when a wireless radio mic system will actually be the wrong tool for the job and it’s in these situations when you can instead reach for a hotshoe mic. As the name suggests, these mics sit on the hotshoe of a camera where you would slide in a flashgun, but you can also buy camera cages that will provide multiple mounting points.
The design of a hotshoe mic allows the videographer to capture directional audio in front of the camera and these devices are great for general video capture – especially when you don’t have time to swap mics between subjects. Hotshoe mics also do a great job of capturing ambient sound in a scene, so if you wanted to pick up the sound of waves crashing on the shore or cars driving past on the road, the hotshoe mic would be the best tool for the job.
Rode’s VideoMic GO II tips the scales at just 89g, so won’t add extra weight to your camera set-up and doesn’t need any additional power source. It also comes with a windshield to reduce the risk of compromised audio in windy conditions and features a shock mount to guard against and bumps that could further affect the quality of the audio.
If your budget is more modest then the Rode VideoMic Go will set you back just £59. If your pockets are a little deeper, the Rode VideoMic NTG costs £219 and will bring a more pro-level of audio.
A hotshoe mic is easily mounted and can save time on shoots
4: Field recorder: Zoom F2 field recorder, £125
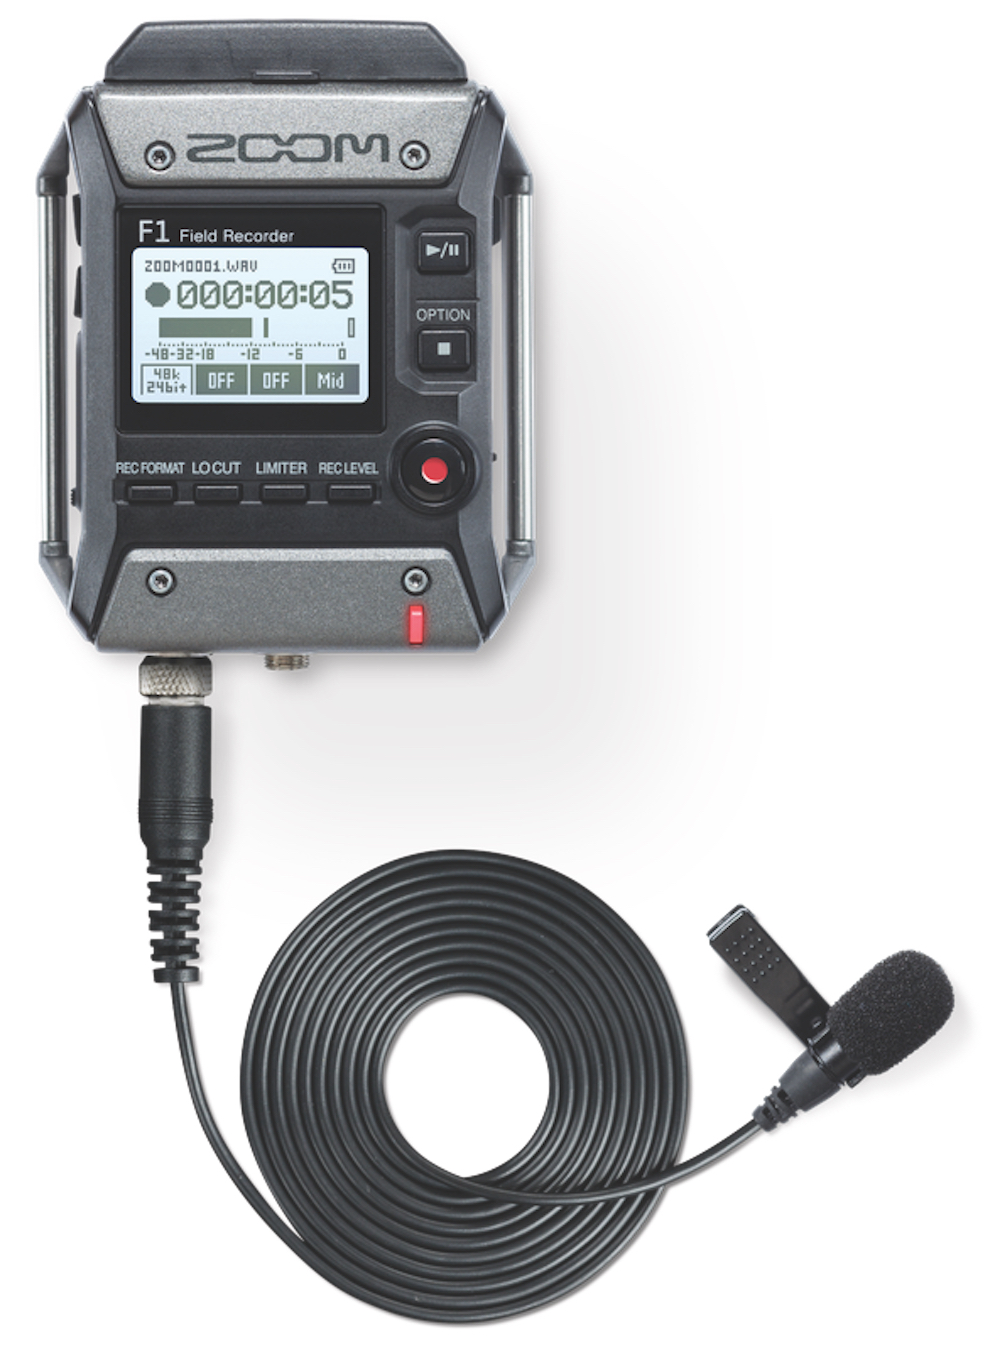
If your wireless signal is compromised a field recorder, like the Zoom F2, is a good solution
A field recorder provides the videographer with a way to record sound independently, away from any audio captured by the camera. The field recorder could be used as a safety net, to record audio in case the hotshoe mic or radio mic fails.
Alternatively, a field recorder is a wise choice to ensure quality in situations that may provide challenges for a wireless system; for example, if the subject is a great distance away from the camera or say you’re filming the subject in a car that could block any wireless signal.
The F2 from Zoom is powered by two AAA batteries and weighs just 32g. Once the record button is pressed, you can flick a Hold switch to make sure you don’t actually stop your recording mid-take and the F2 also features a belt clip so it can be word comfortably. You can plug a standard lav mic into the F2 and record audio directly onto a Micro SD card (up to 512GB in size).
Just remember, when using a field recorder, you will need to synchronise the audio to your video footage when it comes to editing it all. Try a loud sync clap (literally clapping your hands together), which will show up on the audio wavelength view. This gives a visual indication of when the clap was, so you can match the audio and video.
5: Smartphone mic: Sennheiser Memory Mic, £150
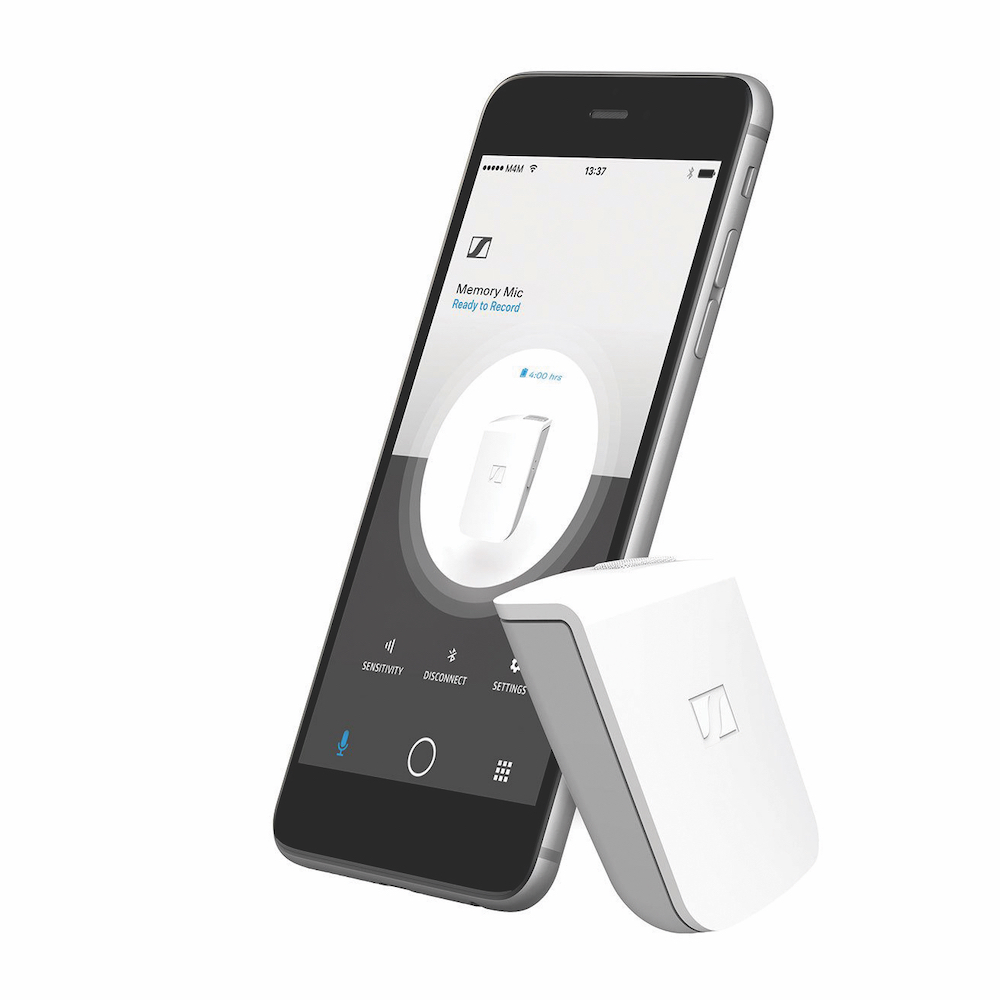
Your phone can also be a useful audio-recording accessory
Using your phone to capture video? No problem, you can still take control of the audio in your footage by investing in an accessory like the Sennheiser Memory Mic, which is a wearable microphone device that connects directly to your smartphone.
Once the recording is complete, you can mix the sound with the audio recorded by the device to any ambient sound captured by the phone, thus giving you a degree of control over the levels from both options. The omnidirectional, pre-polarised condenser microphone is controlled and operated via a free app and tips the scales at just 30g with the mic taking two hours to recharge to 100% and then providing up to four hours of recording time.
Related articles:
How to set up your camera to shoot video
The essential gear guide for video
9 Common Video Problems and How to Fix Them