Whether you want to enhance contrast, convert to black & white, fix exposure problems or perform any number of other image adjustments, you need an image editor that offers the right tools. While Adobe Photoshop Elements is seen as lightweight in comparison to Photoshop CC, it includes many features that match those found in its big brother, and these tools are presented in a beginner-friendly way that makes them both accessible and intuitive, by using Photoshop Elements Raw processing you can improve your shots.
We’ll look at the powerful range of tonal tools available in the Elements Camera Raw plug-in, and over the page we’ll explore some of the most interesting tonal tools in the Elements Editor. In keeping with the Elements beginner-friendly focus, many of the tools are semi-automated. These take some of the control out of your hands, but they can still be nuanced and effective. In fact, the tonal tools are laid out in a clever, uncluttered structure that – from a workflow point of view – many will find more helpful than the more advanced Photoshop CC.
How to edit with Photoshop Elements Raw:
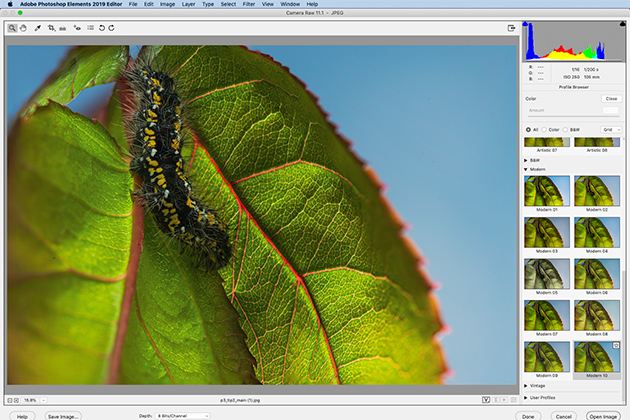
Elements comes with a Raw editor so you can tweak the tone and contrast easily. Credit: James Paterson
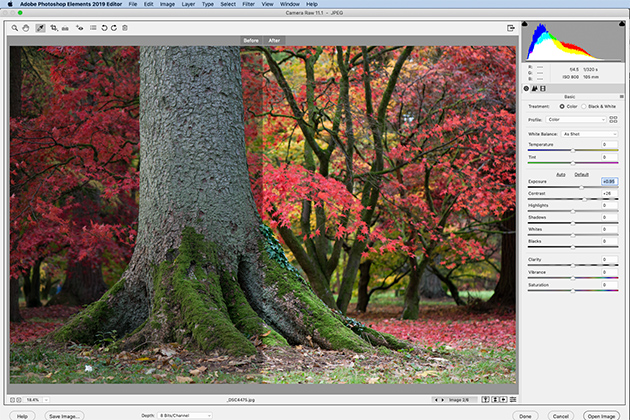
Raw editing in Elements
The Camera Raw editor in Elements will pop up automatically when you open a raw photo. The Basic Panel to the right is the ideal place to begin making tonal changes to your image. Work your way down from the top, from white balance, correcting exposure and adding contrast. As with all raw edits, any changes made here are completely non-destructive and editable. This is one of the biggest benefits. We are altering a set of parameters that affect how the Camera Raw viewer displays the image. Changes are only applied once we open the image into Elements, or save the image. This gives you the freedom to try out different treatments and effects. It also means that tonal, contrast and colour changes can be applied to several images at once – simply open a set of raws, click the Select All button and make your edits.
Begin with a Profile
The Profile Browser within the Elements Camera Raw plug-in offers a range of helpful starting points for your image (you can also open JPEGs as well as raw). If it’s a raw file you can use the Adobe Raw profiles. These are geared to suit different subjects. For instance, the Adobe Portrait Profile makes tonal and colour tweaks to enhance skin tones, while the Adobe Landscape Profile is designed to affect textures in landscapes as well as boosting blues in skies and greens in foliage. With raws you’ll also see a set of ‘Camera Matching’ profiles. These will match any picture-style settings that your camera offers. Below Camera Matching is a set of b&w profiles and tonal effects. Split into categories such as Artistic, Modern and Vintage, these can be applied to raws or JPEGs, and there’s a strength slider that lets you control the tonal change.
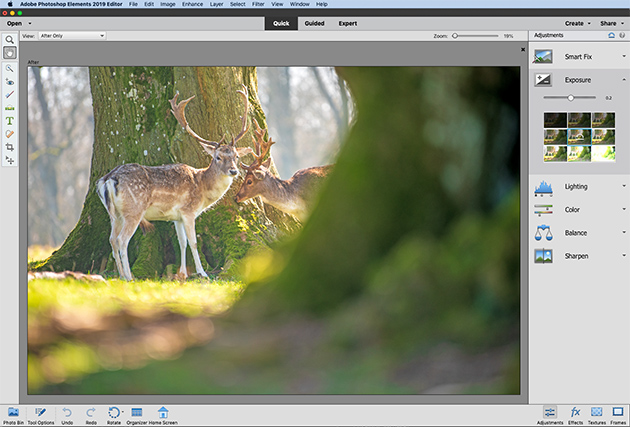
The Quick workspace in Elements is fast and easy to use. Credit: James Paterson
Quick adjustments
The Quick workspace in Elements is usually thought of as a place for beginners to learn before progressing onto the Expert mode. However, when it comes to adjusting tones, contrast and colour, Quick mode allows you to do so in a way that is more intuitive than anywhere else. Click ‘Adjustments’ at bottom right and you’ll see a series of simple submenus – Auto Smartfix, Exposure, Lighting, Color, Balance, Sharpen – that offer controls for adjusting each, either using the slider or a series of nine incremental boxes. Hover over any box and you’ll see a preview of the change over your image. It’s usually best to click on the box that works best for you, then if necessary go on to fine-tune the adjustment using the slider. The command offers an effective, intuitive way to enhance tones for both beginners and experts. This is a great place to start with your image.
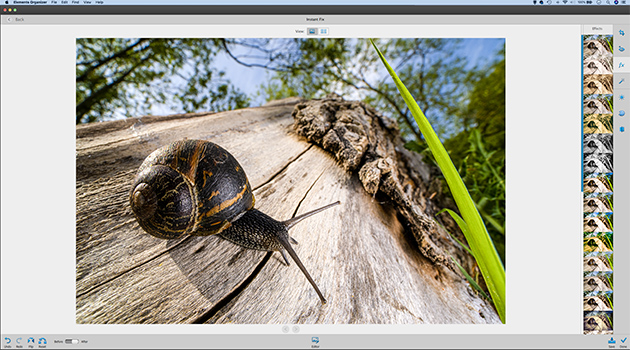
Credit: James Paterson
Instant fix in the Organiser
Found within the Elements Organiser along the bottom of the interface, the Instant Fix command gives you quick access to simple tonal controls (including the helpful Smartfix) and other useful editing tools such as cropping so you can make fast adjustments. As such, you may not even need to open your image into the Elements Editor at all if you only need to perform simple tonal tweaks. What’s more, the Instant Fix tools can be applied to multiple images at once, so you can select a set of photos in the Organiser and then make batch edits to the lot. This is very helpful if you need to make colour tweaks, fix overexposure or convert them all to monochrome.
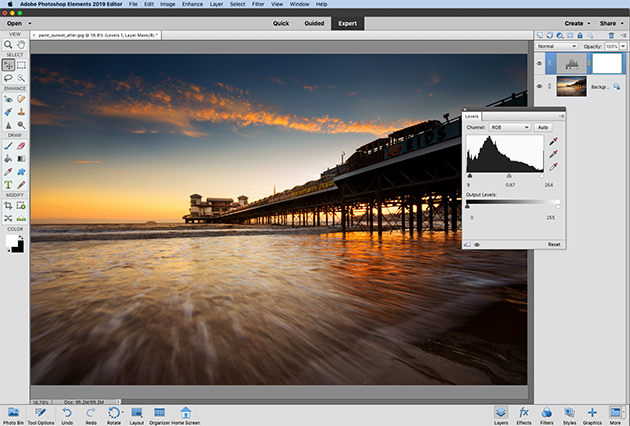
Credit: James Paterson
The power of Adjustment Layers
Adjustment Layers are tonal and colour tools that are represented by a separate layer, affecting all below them in the stack. Combine several to create a finely tuned tonal effect, and use features such as masks, blend modes and opacity. Included in the list of adjustments is Levels. Levels gives you three sliders below the histogram that affects different parts of the tonal range. You can set the black & white points, and alter the brightness of the midtones. To the side of the settings, three eyedroppers allow you to pick points in the image for white and black, while the midpoint eyedropper allows you to remap colours (click on a neutral point to correct colour casts). Because these edits are made in a separate layer, you have the option to change the settings or use layer controls such as masks and blend modes to change how the layer works with the rest of the image.
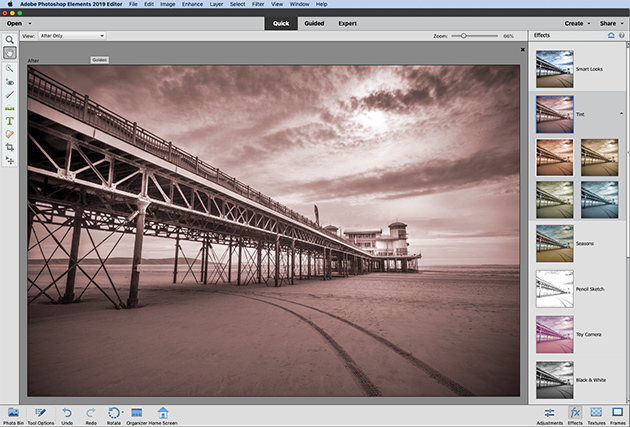
One-click Quick mode enables you to alter colour and tone fast. Credit: James Paterson
Effects and Smart Looks
The Elements Quick Mode offers swift access to a range of one-click looks via the ‘Effects’ button at the bottom right. This opens up an array of image treatments to experiment with, such as colour tinting, vintage looks and cross processing. You’ll also find ‘Smart Looks’ here. These are looks that Elements automatically generates by analysing the image content. All these effects are applied to a duplicate layer, so after choosing one you can head to the Expert Mode and adjust the intensity of the effect using layer opacity, or make it work selectively in different parts of the image with a layer mask.
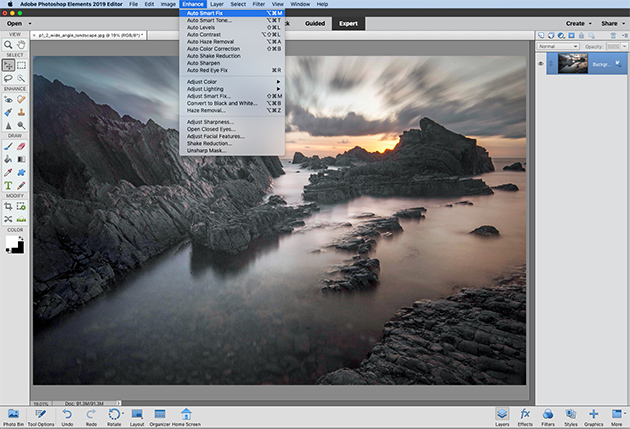
Auto Smartfix is designed to fix photos automatically. Credit: James Paterson
Try Auto Smartfix
This automatic command is designed to fix over- or underexposure, as well as pull details out of shadows and highlights, and correct colour casts all at once. It can be very effective at rescuing images that are too bright or too dark. However, with high-contrast images the tendency to pull detail out of the shadows and highlights can give photos an overcooked look. As such, whenever you apply an auto adjustment like Smartfix, it’s worth doing so on a duplicate layer. Not only does this mean the change remains non- destructive, it also gives you the option to dial down the fix if the results are too heavy-handed, simply by lowering the layer opacity. This method can be especially useful for colour fixes, because often the auto-fix will over-correct for colour casts. By lowering the layer opacity, you can find the sweet spot where the correction works best.
Six essential raw tonal tools:

Credit: James Paterson
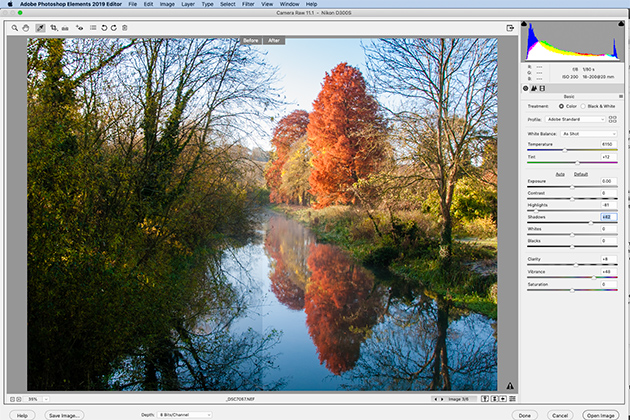
1. White Balance tool
Found in the Elements Camera Raw toolbar, this lets you correct colour casts. Simply grab the tool and click over a part of the image you know should be completely neutral such as a grey road, a white wall or (best of all) one of your own grey cards. The Temp and Tint sliders can also be used to fine-tune the white balance.
Credit: James Paterson
2. Exposure
With raws, we’re able to lighten or darken tones with greater headroom than JPEGs. As the name suggests, this slider lets you do this by simulating more or less exposure, much like the exposure compensation dial on your camera. As such, the values in the box represent stops of light.
Credit: James Paterson
3. Highlights and Shadows
Raw files hold a surprising amount of detail at the tonal extremes, and these sliders allow you to tease it out by lifting the shadows or dropping the highlights. Be careful not to push them too far, as they can overcook an image. Of course, you can also decrease shadows and increase highlights to boost contrast.
Credit: James Paterson
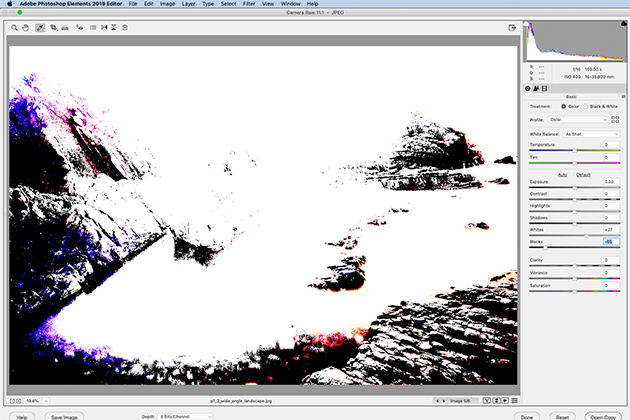
4. Whites and blacks
These let you set the point at which pixels will be either completely black or completely white. As a rule of thumb, we usually don’t want too many clipped pixels (areas of full black or white lacking in detail). We can Alt-drag these sliders to check for clipping, and drag them to a point just before it occurs.
Credit: James Paterson
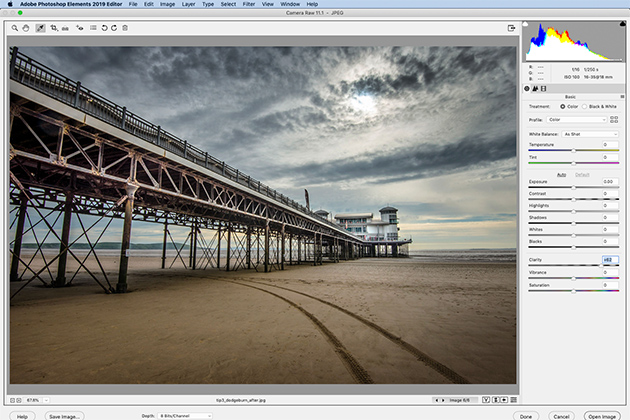
5. Clarity
This fun slider works by increasing midtone contrast. It has the effect of ‘crunching up’ an image, enhancing detail and texture. As such, it can be useful for boosting landscapes and skies, or for giving portraits a grungy look – but if pushed too far it can leave an image looking over-processed.
Credit: James Paterson
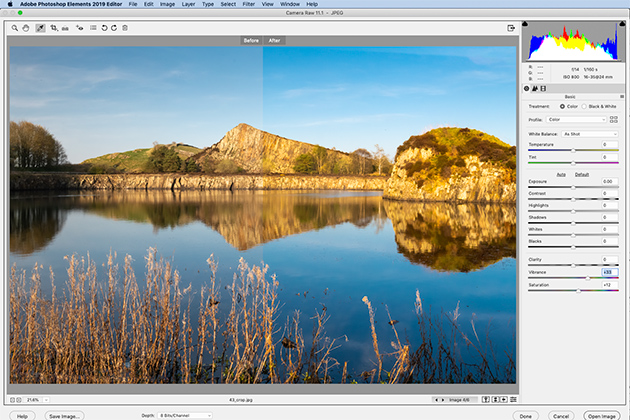
6. Vibrance and Saturation
These two sliders let you increase or decrease colour intensity. The Saturation slider affects all colours equally. By contrast, the Vibrance slider is designed to affect the weaker colours more than the strong ones, so it’s better to use this if you want to boost the image without pushing the already dominant colours too far.
If you want to use Adobe Photoshop Elements in other ways, have a look at our beginners guide to Photoshop Elements.