
Making selections is an essential Photoshop skill. Credit: Martin Evening
Making selections is an essential Photoshop skill. Selections can be used to select a specific area you wish to copy or edit, or to create a more permanent mask. How accurate that selection needs to be depends on what you want to do with it. But creating selections doesn’t have to be difficult. Although some subjects may require the use of pen paths to accurately define a mask outline, there are plenty of times where the quick and easy methods are all you need to create a basic or initial selection in Photoshop. For example, while the Magic Wand may be considered something of a blunt instrument, for some images the Magic Wand can still be the quickest way to obtain an instant selection.
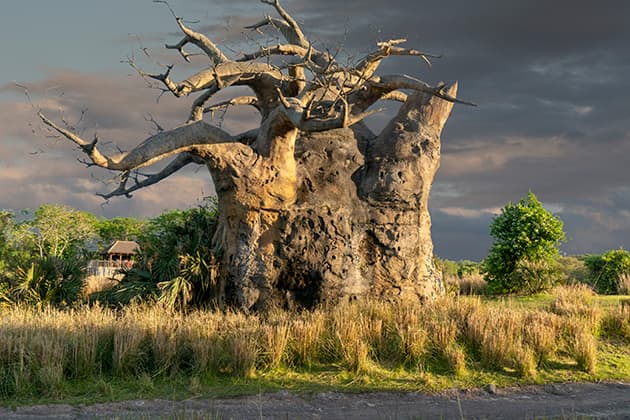
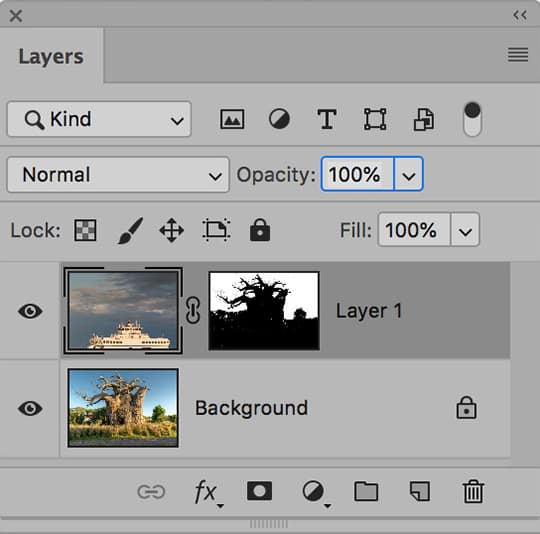
It is also important to bear in mind here that the Select and Mask feature in Photoshop can be used to refine any selection. Make a simple click with the Magic Wand to create an initial selection, and then click on the Select and Mask button in the Magic Wand tool Options bar to open the Select and Mask dialog where you can fine-tune the original selection. In these two steps you can end up with a fairly sophisticated mask. For example, the main image shows how a Magic Wand selection, modified using Select and Mask, could be used as the basis for a layer mask applied to a separate sky image layer.
Selections can be used to select a specific area you wish to work on. Credit: Martin Evening
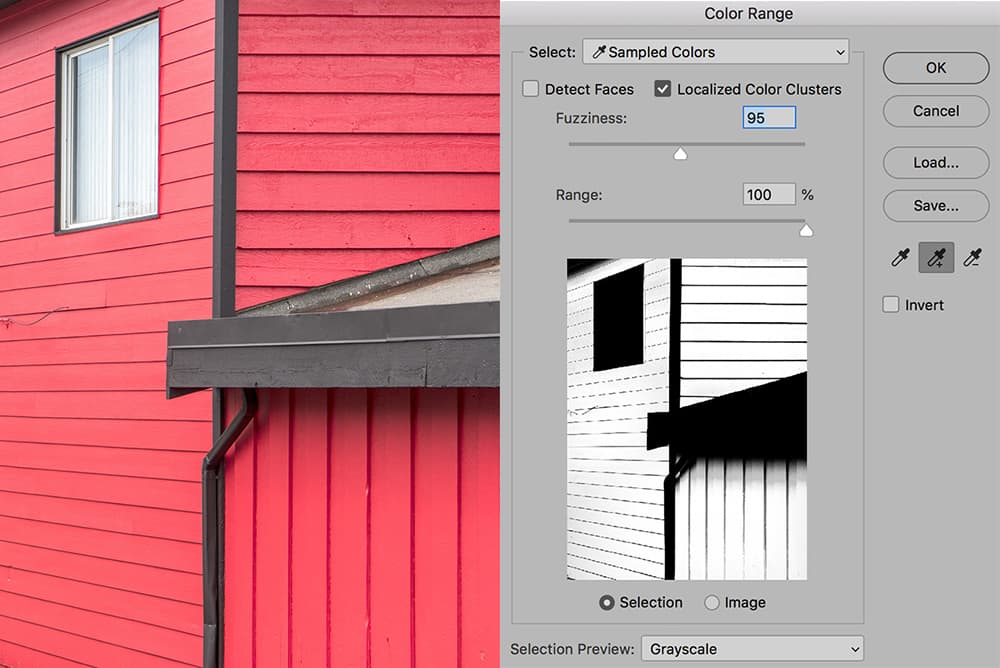
Magic Wand alternatives include the Color Range command, which can be used to create more advanced colour selections. Here, there is a Fuzziness slider that is similar to the Magic Wand’s Tolerance slider. If the Localized Color Clusters box is checked, Color Range can more accurately merge the colour sample data from multiple sample points. Also, when this is enabled, the Range slider can be used to determine which pixels are selected based on their distance from the sample points. You’ll find that the above description will make more sense if you try opening Color Range, then choose different sample points in the image and play with the two sliders to see how these affect the colour selection mask. The Quick Selection tool is like an advanced Magic Wand tool. As you keep clicking and dragging you can add to or subtract from a selection. The Quick Selection tool also stores all the sample points in memory. Therefore, the more you click and drag, the more accurate the Quick Selection will be as you train it, showing Photoshop what to recognise as part of a selection and what not. With this in mind it can sometimes help to clear the Quick Selection tool memory by hitting the Q key twice before you carry on refining the selection, but starting with a cleared memory.
Recent additions to Photoshop include Focus Area selections, which I describe below, plus the new Select Subject feature. Powered by advanced machine learning technology, Select Subject has been trained to identify various types of objects in an image and automatically create a selection. In practice I find it does a pretty good job of creating instant selections that correctly identify the main subject in a photo. However, it will nearly always be necessary to refine the selection to some extent, but Select Subject is still a great time saver.
Finally, let’s not forget the powerful selection tools in Camera Raw and Lightroom such as the Adjustment Brush Auto Mask mode and the new Range Masking features for refining the extent of localised adjustments.

Use the Auto Mask option to constrain the brush strokes. Credit: Martin Evening
Auto Mask in Camera Raw
If you select the Adjustment Brush in Camera Raw to apply a localised adjustment, there is an Auto Mask option at the bottom of the Adjustment Brush panel. When checked, this constrains the brush strokes to areas of colour that are similar to where you first clicked. As you paint you can re-click to clear the original sample colour to make a new sample. You can also refine the selection by holding down the Option key (Mac), or Alt key (PC) to erase in Auto Mask mode. In this way you can build up a masked selection in Camera Raw. Having done that you can fine-tune the Adjustment Brush settings to apply the desired adjustment. Watch out for speckled edges though. These can appear along edges of soft colour transitions and can be particularly noticeable when applying strong tone and colour adjustments.
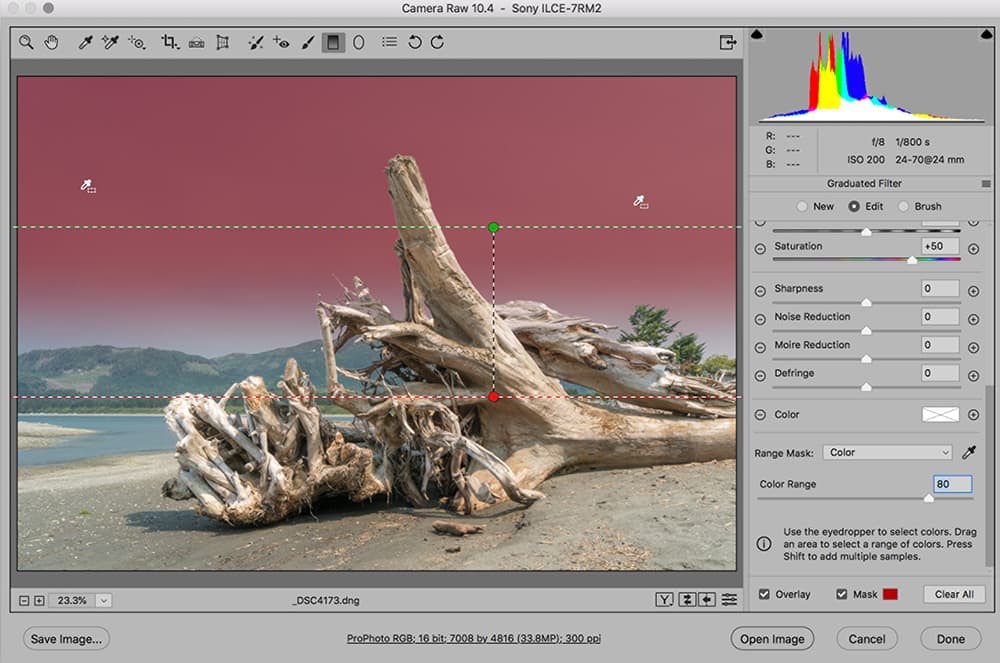
The Range Mask options are at the bottom of the localised adjustment panel in Camera Raw. Credit: Martin Evening
Range masking in Camera Raw
New to Camera Raw is the ability to edit the extent of a localised adjustment by applying a Range Mask. The Range Mask options are at the bottom of the localised adjustment panel. If you select the Color mode you can then select the Eyedropper tool and use this to sample the colours you wish to see the adjustment applied to. You can do this by clicking or marquee-dragging. Plus, you can add up to five sample points by holding down the Shift key as you add a new colour sample. The Color Range Slider can then be used to soften or harden the refined mask border. Alternatively, you can choose the Luminance option. In this mode you can drag the shadow and highlight sliders to determine the luminance range the adjustment will be applied to. Similarly, the Smoothness slider can be used to soften or harden the refined mask border. At this point you can continue to edit the position or extent of a localised adjustment while the Range Mask will remain locked. Both can be edited independently.
Different Photoshop selection methods
Credit: Martin Evening
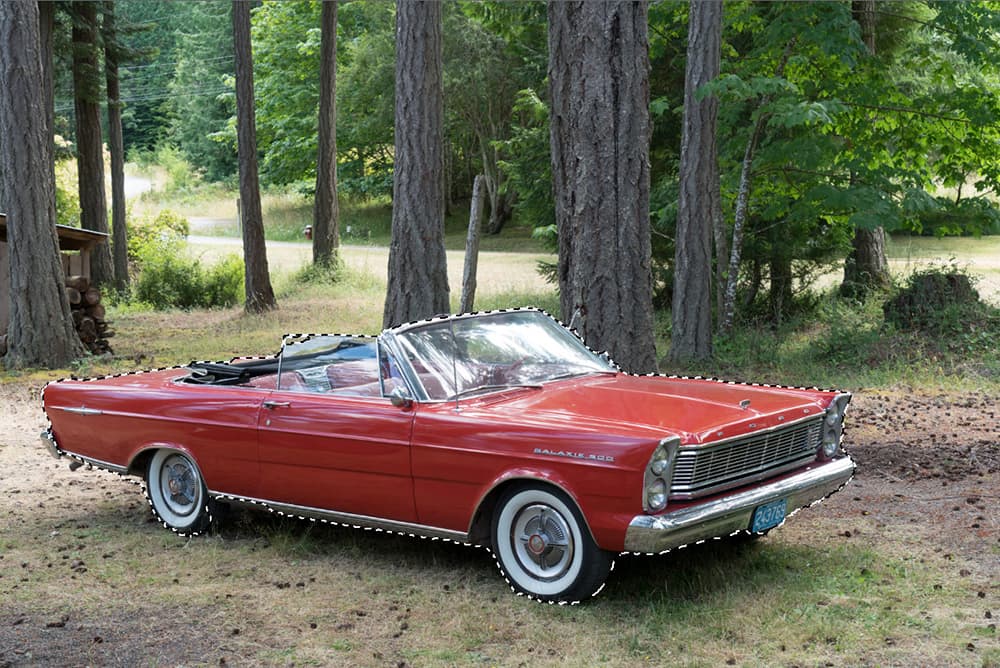
Select subject
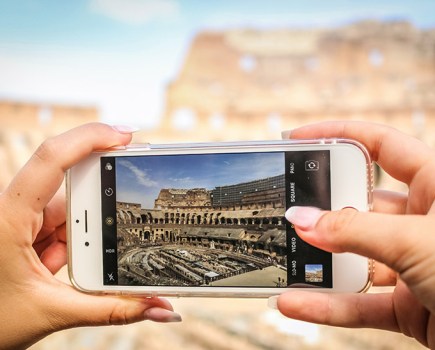
To quickly select an object, try going to the Select menu and choose ‘Subject’. This command cleverly works out what the main subject in a photo is and creates a selection around it. It won’t work for every image, but often does surprisingly well. Here, it selected nearly the entire car in one step.
Credit: Martin Evening
Magic Wand tool
Clicking with the Magic Wand tool creates a simple selection based around the sampled colour where you clicked. If not all the desired pixels are selected, you can use Select> Similar to select more pixels of a similar sample colour based on the same tolerance setting as the original Magic Wand selection.
Credit: Martin Evening
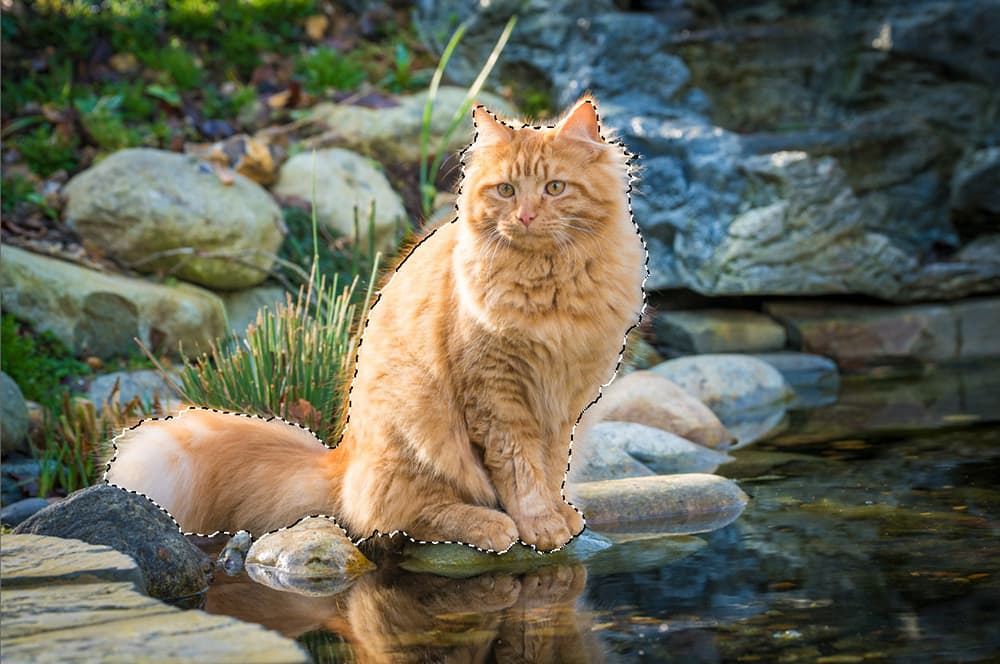
Quick Selection tool
The Quick Selection tool offers a superior Magic Wand style selection method. Click, or click and drag once, to create an initial colour-based selection and keep clicking and dragging to add to the selection. Hold down the Alt key as you do so, to subtract from a quick selection.
Credit: Martin Evening
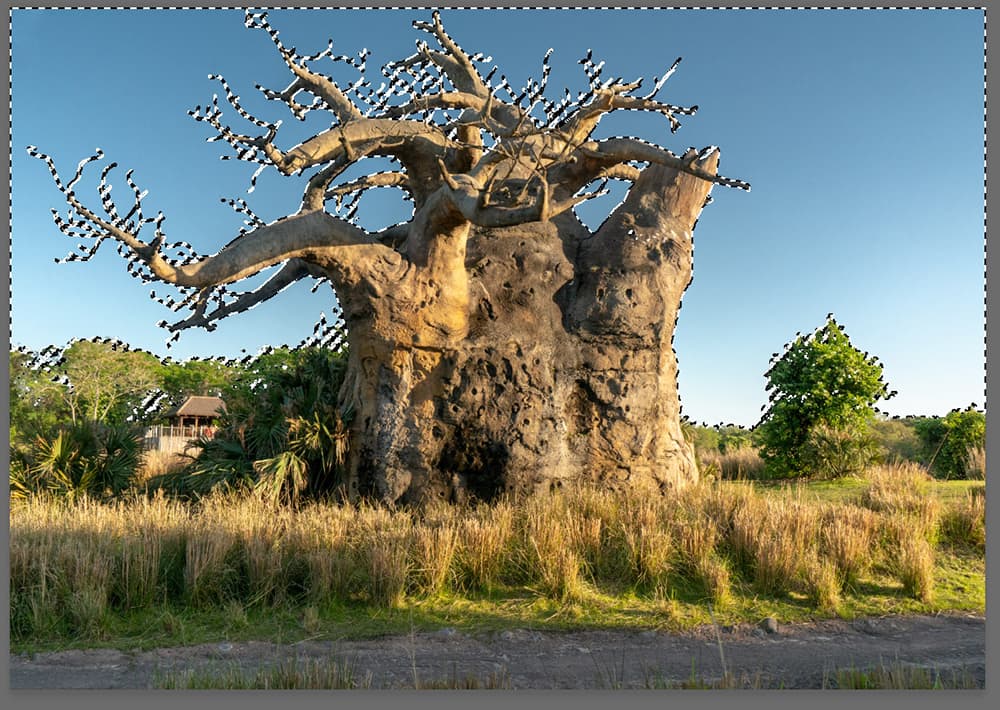
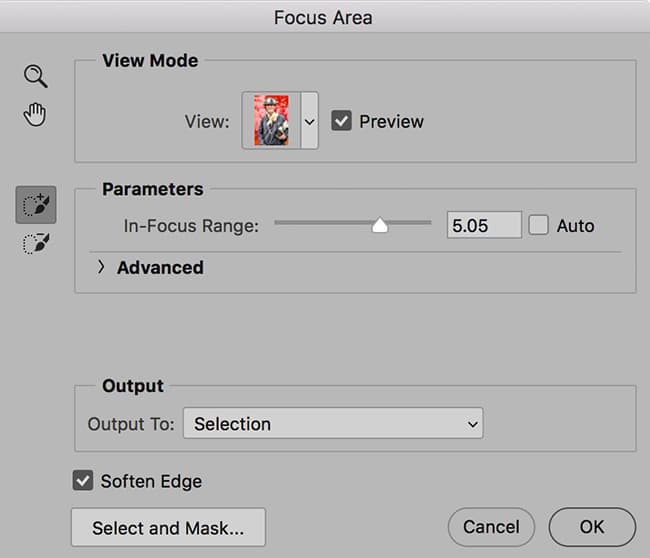
Focus Area selection
To select a subject from an out-of-focus background, use Select>Focus Area. This brings up an option where you can adjust the In-Focus Range to determine the focus sharpness threshold. To modify the selection, use the Focus Area Add and Focus Area Subtract tools.
Credit: Martin Evening
Colour range masking
Instead of using the Magic Wand or Quick Selection tools you can use Select>Color Range. This can create a selection based on a colour sampled using the Eyedropper tool. You can carefully modify the extent of the selection using the Add to Sample and Subtract from Sample tools.
Credit: Martin Evening
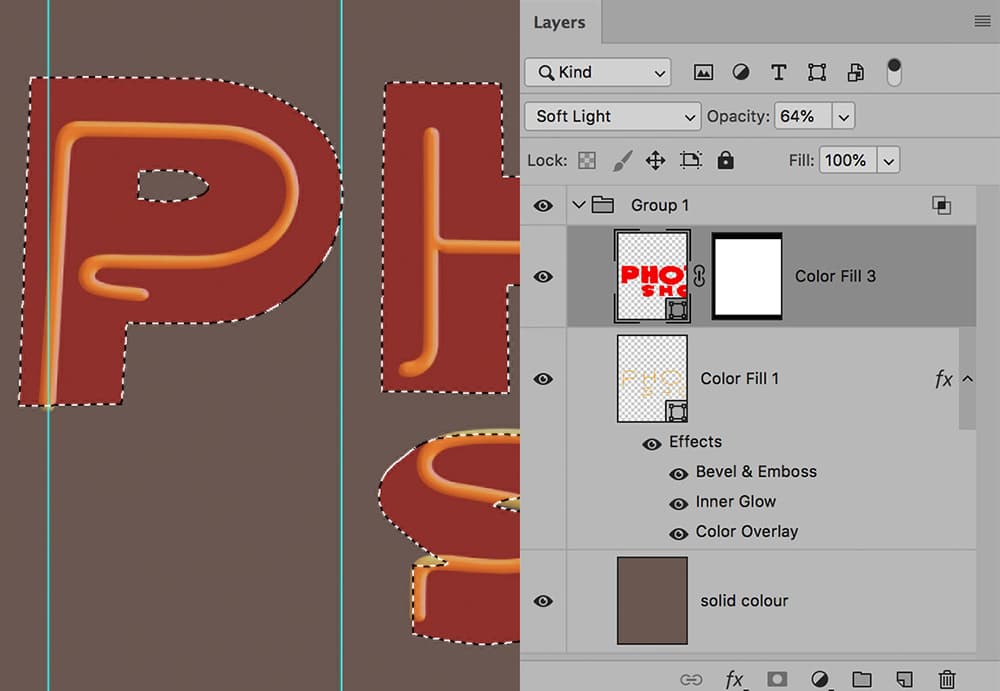
Command/Control-click
Remember that you can use the Command key (Mac) or Control key (PC) at any time to click on a layer or layer mask in the Layers panel, a channel in the Channels panel, or a path in the Paths panel, in order to directly load as a selection.