Canon Fv mode arrives on the EOS R
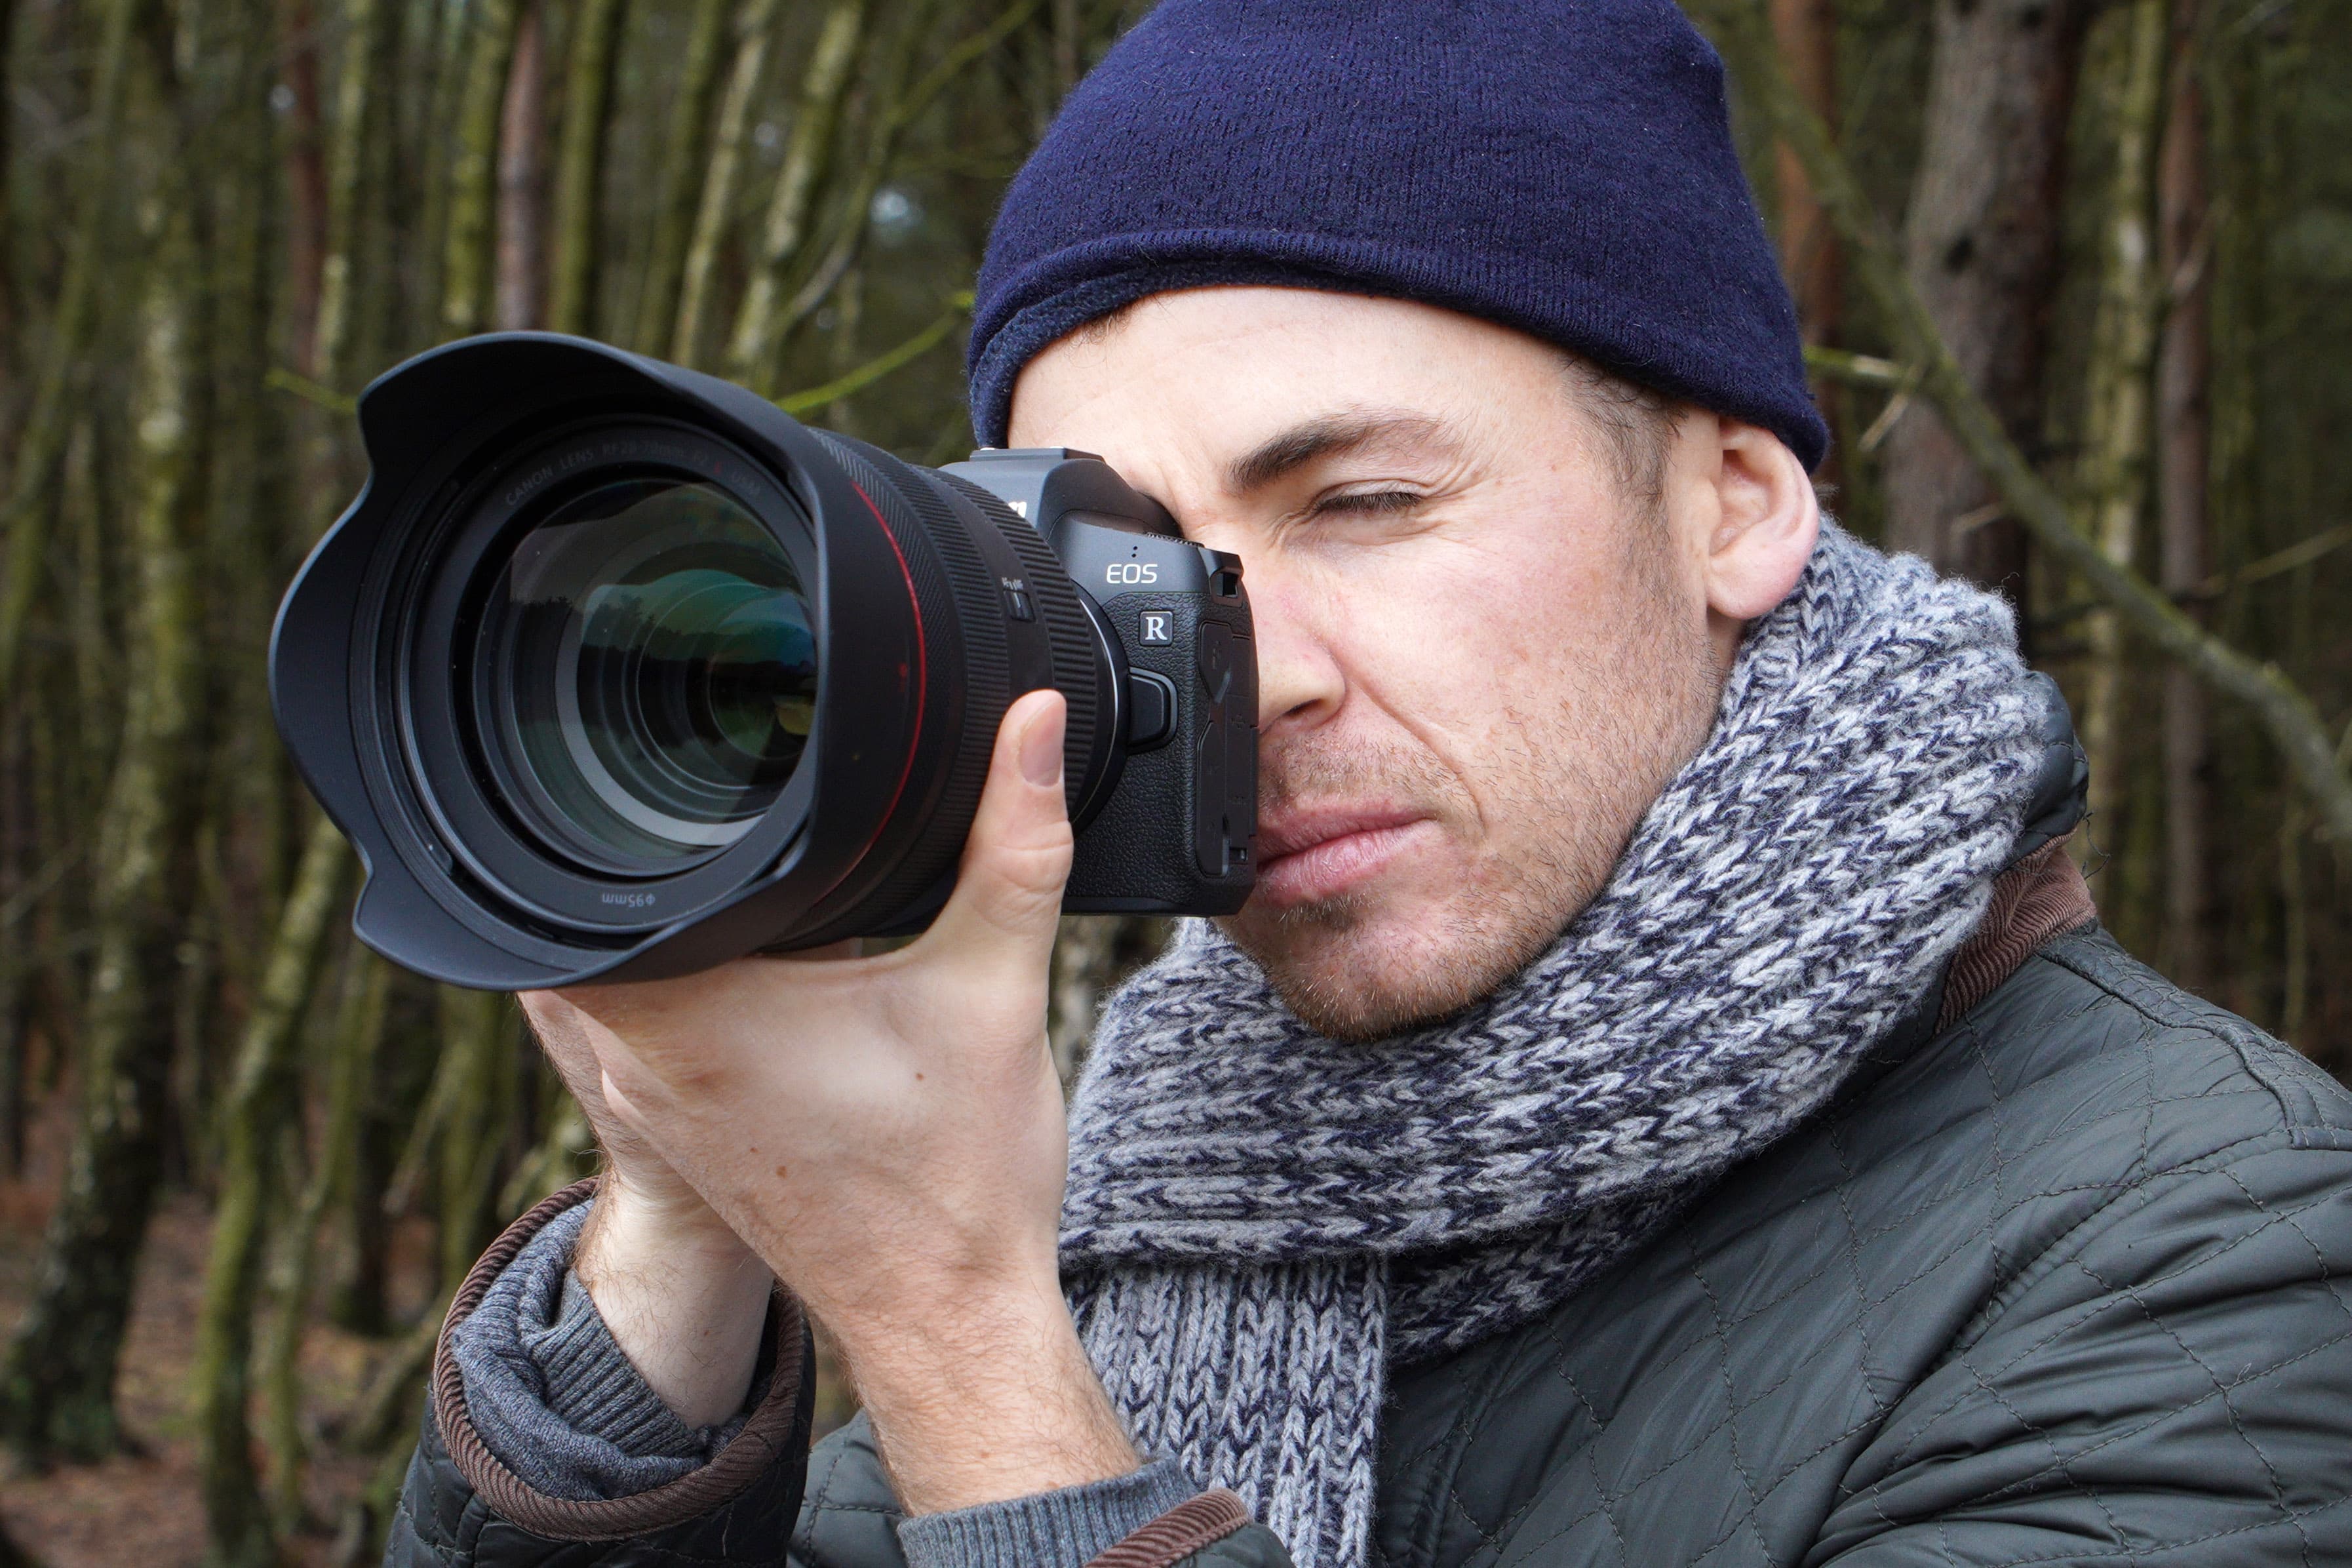
When Canon announced the EOS R last year, there was so much to cover, it was a squeeze to get all the information into in our six-page review. The headline talking point was its new large-diameter, short back-focus mount that has been designed to enable faster focusing and extra flexibility in lens design. Besides this, it presents quite a few other innovative ideas that have never been witnessed on a Canon EOS camera before. Examples include the M-Fn bar that allows various settings to be changed using slide or touch movements with your thumb, the customisable control ring at the front of RF mount lenses that brings aperture, shutter speed, ISO or exposure compensation control directly to your left hand supporting the lens, and the convenience of in-camera battery charging via its new USB Type-C port and LP-E6N Li-ion battery.
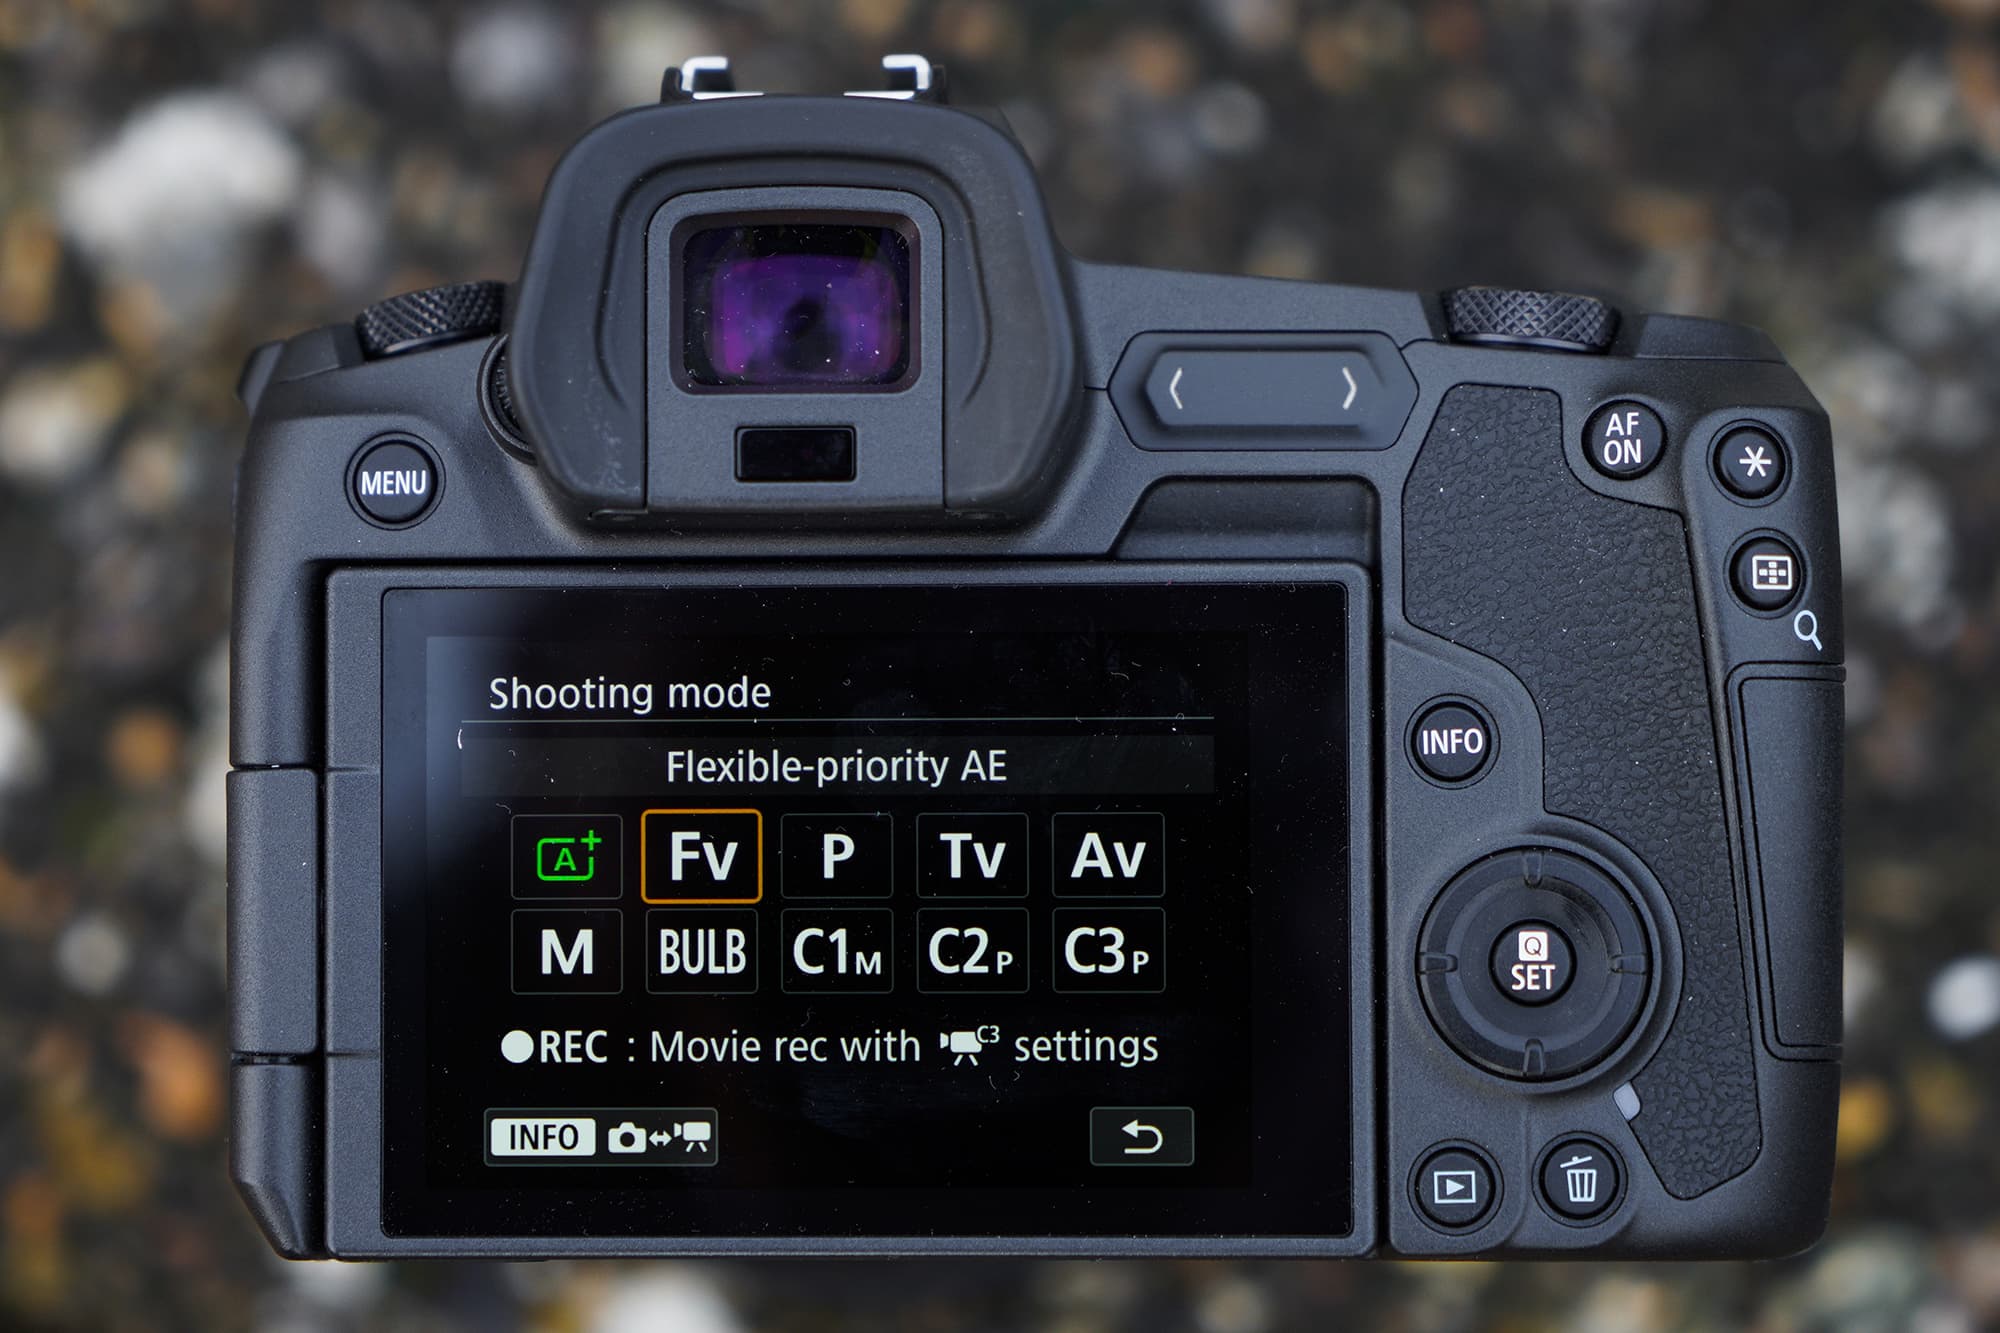
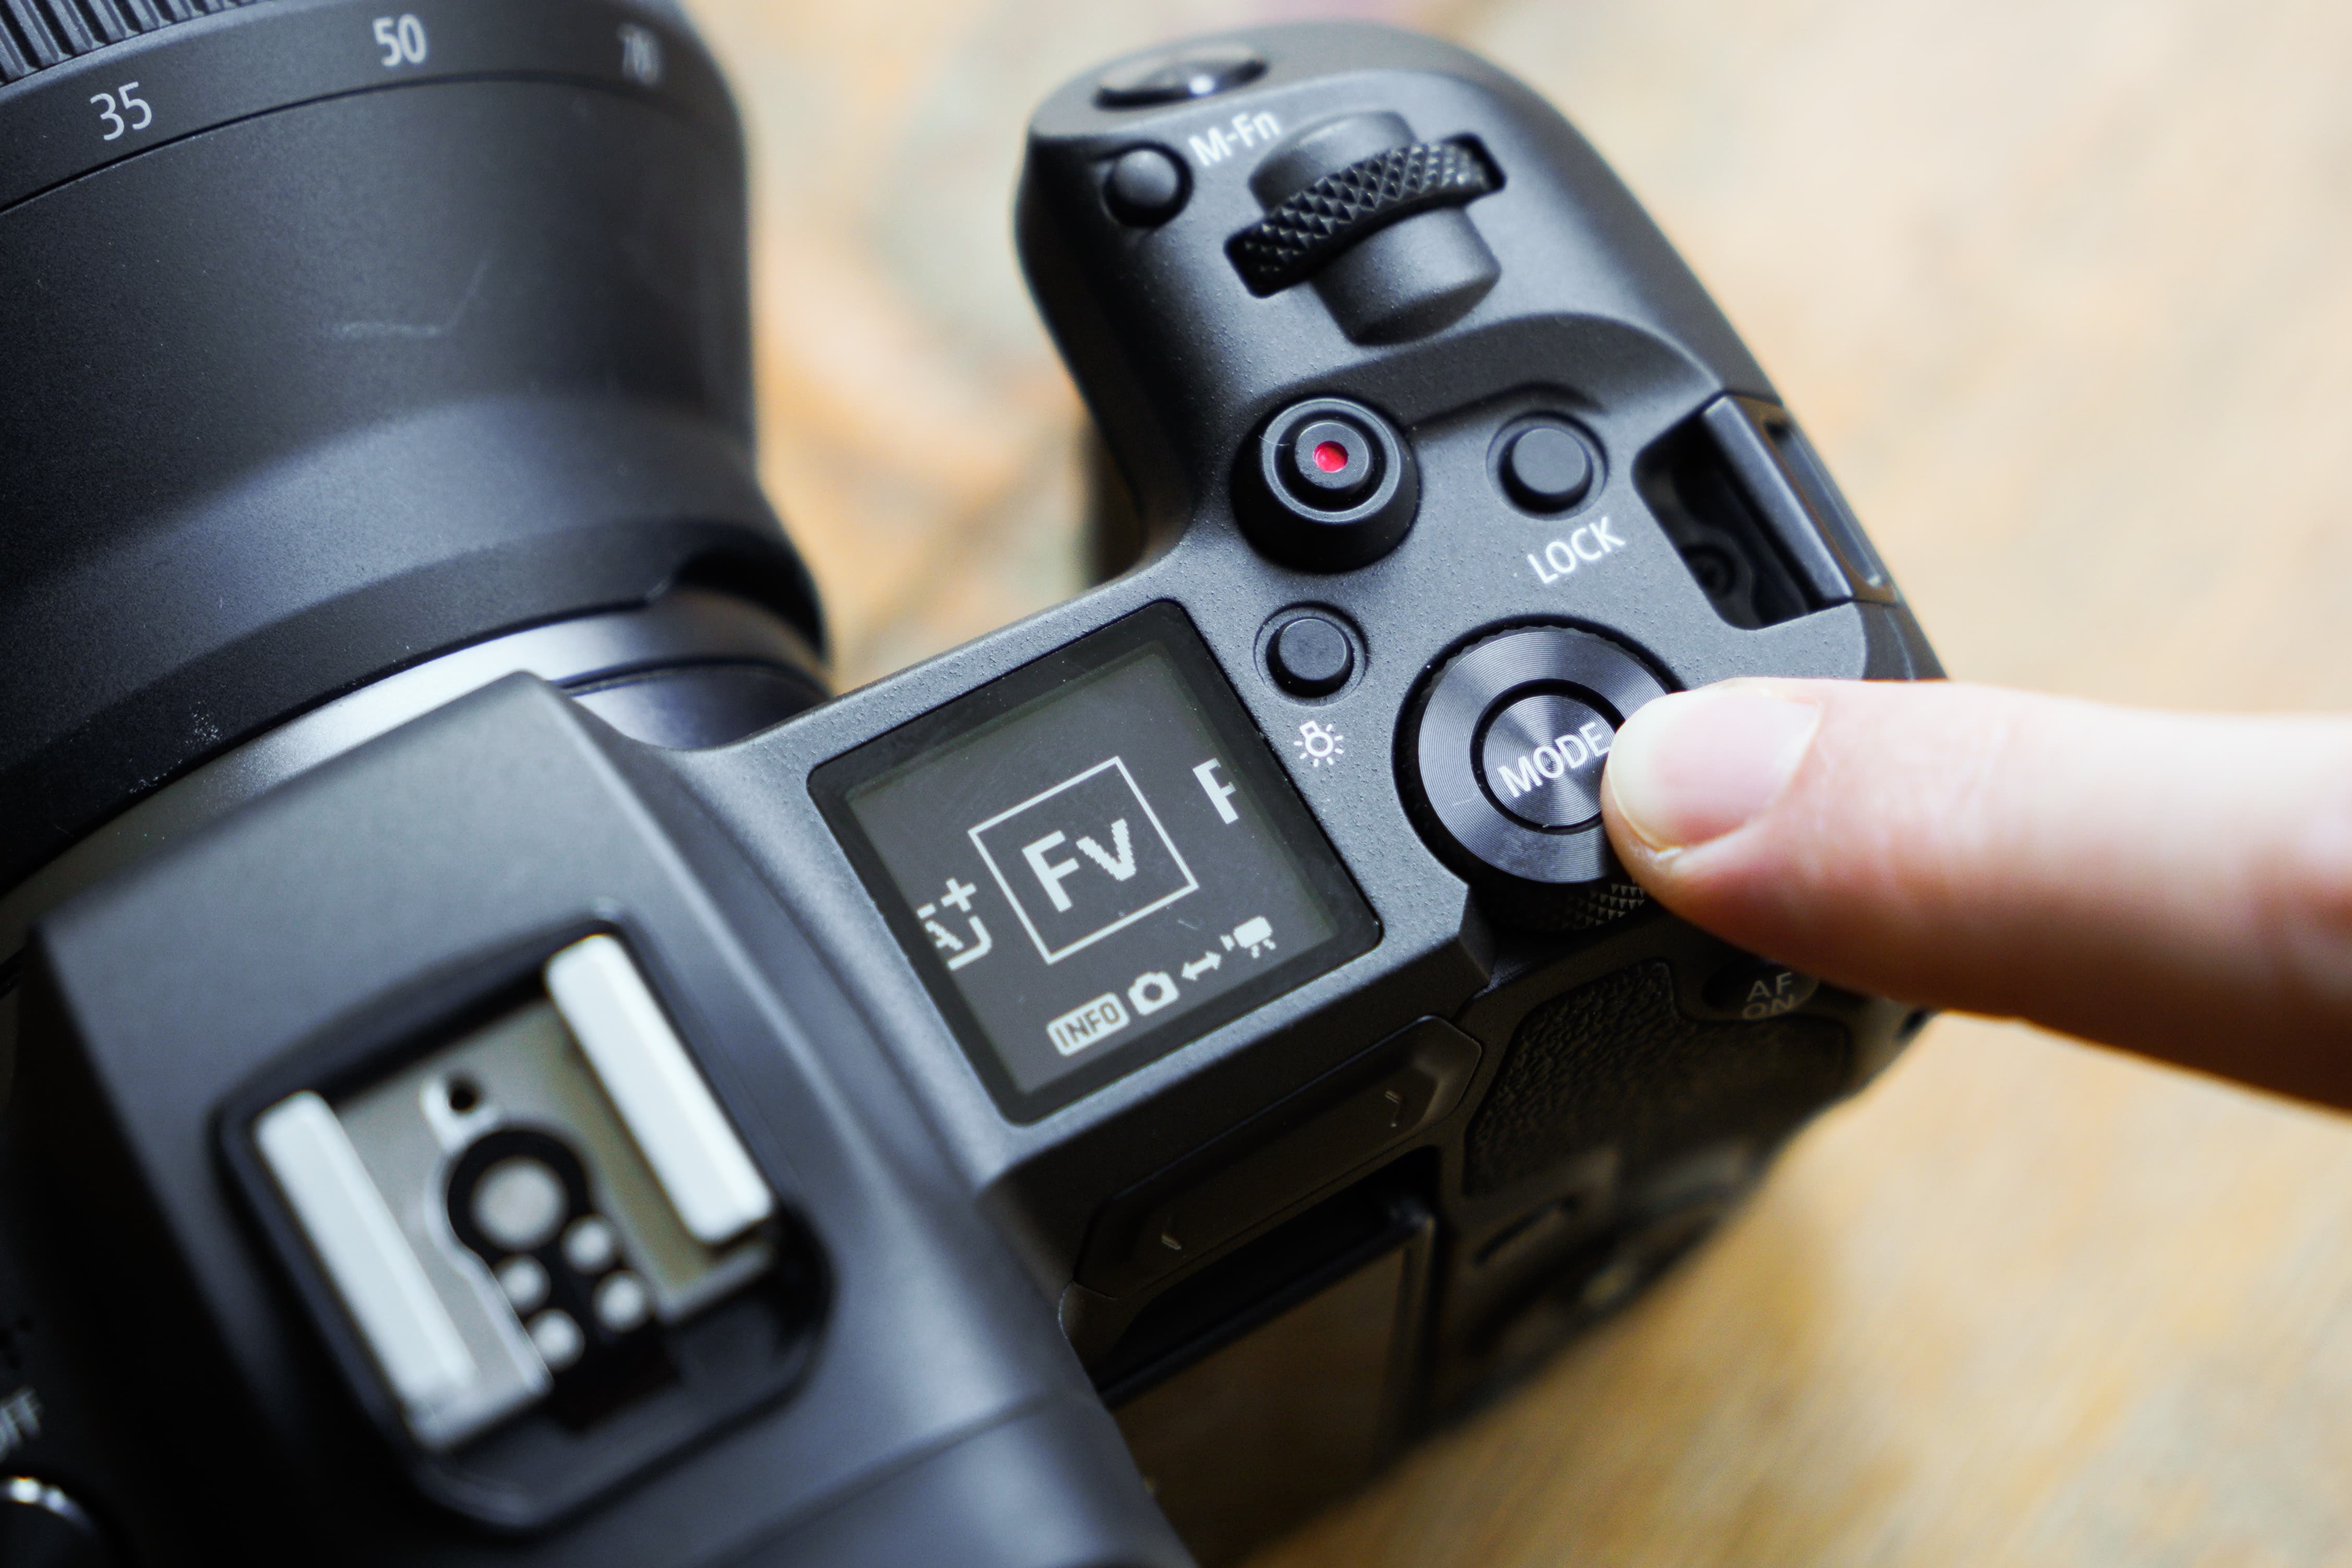
Flexible-priority AE mode, or Fv mode for short, has been added to the shooting mode options on the Canon EOS R. This is what you’re presented with on the touchscreen when you tap the mode button on the top plate.
One of the overlooked new features on the EOS R is the addition of a new exposure mode, or Fv mode as it’s better known. After receiving some feedback from Canon users about their uncertainty of this new Flexible-priority AE mode, and how it differs to the standard exposure modes, we thought we’d take a closer look, and reveal why, and in what instances it could prove useful.
So what is Fv mode?
To get a better understanding of Flexible-priority AE or Fv mode, it’s best to look at it as being similar to Program AE mode, which is available on most Canon cameras. Just to recap, Program AE, or P mode as it’s often referred to, is a fully automatic exposure mode that’s popular with those who’d like the camera to select the shutter speed and aperture value for them. It can be an effective setting to use in situations when you’re not worried about what affect a particular aperture or shutter speed has on the image or when you just want to point and shoot and get a well exposed shot that requires as little user input as possible.
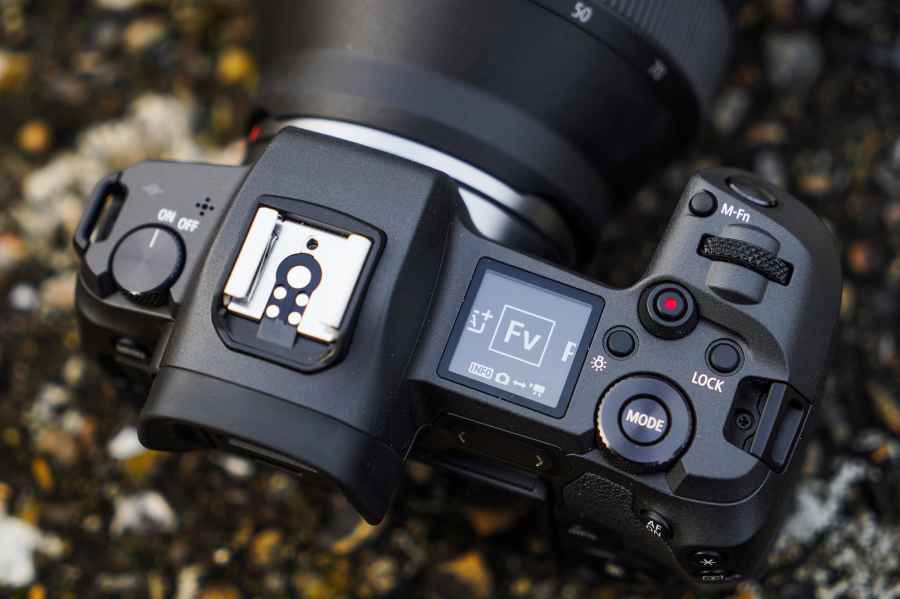
The EOS R is the first Canon camera to feature Fv mode. Will it be adopted by other cameras in the EOS R lineup in the future?
The downfall of P mode and reasons why so many photographers refuse to use it is the time it takes to switch to another mode when you’d like to take exposure control. The time spent pulling your eye away from the viewfinder to change the mode dial to shutter priority (Tv), Aperture Priority (Av) or Manual (M) before dialling in the appropriate settings could result in a spur of the moment opportunity being poorly captured, or worse missed altogether.
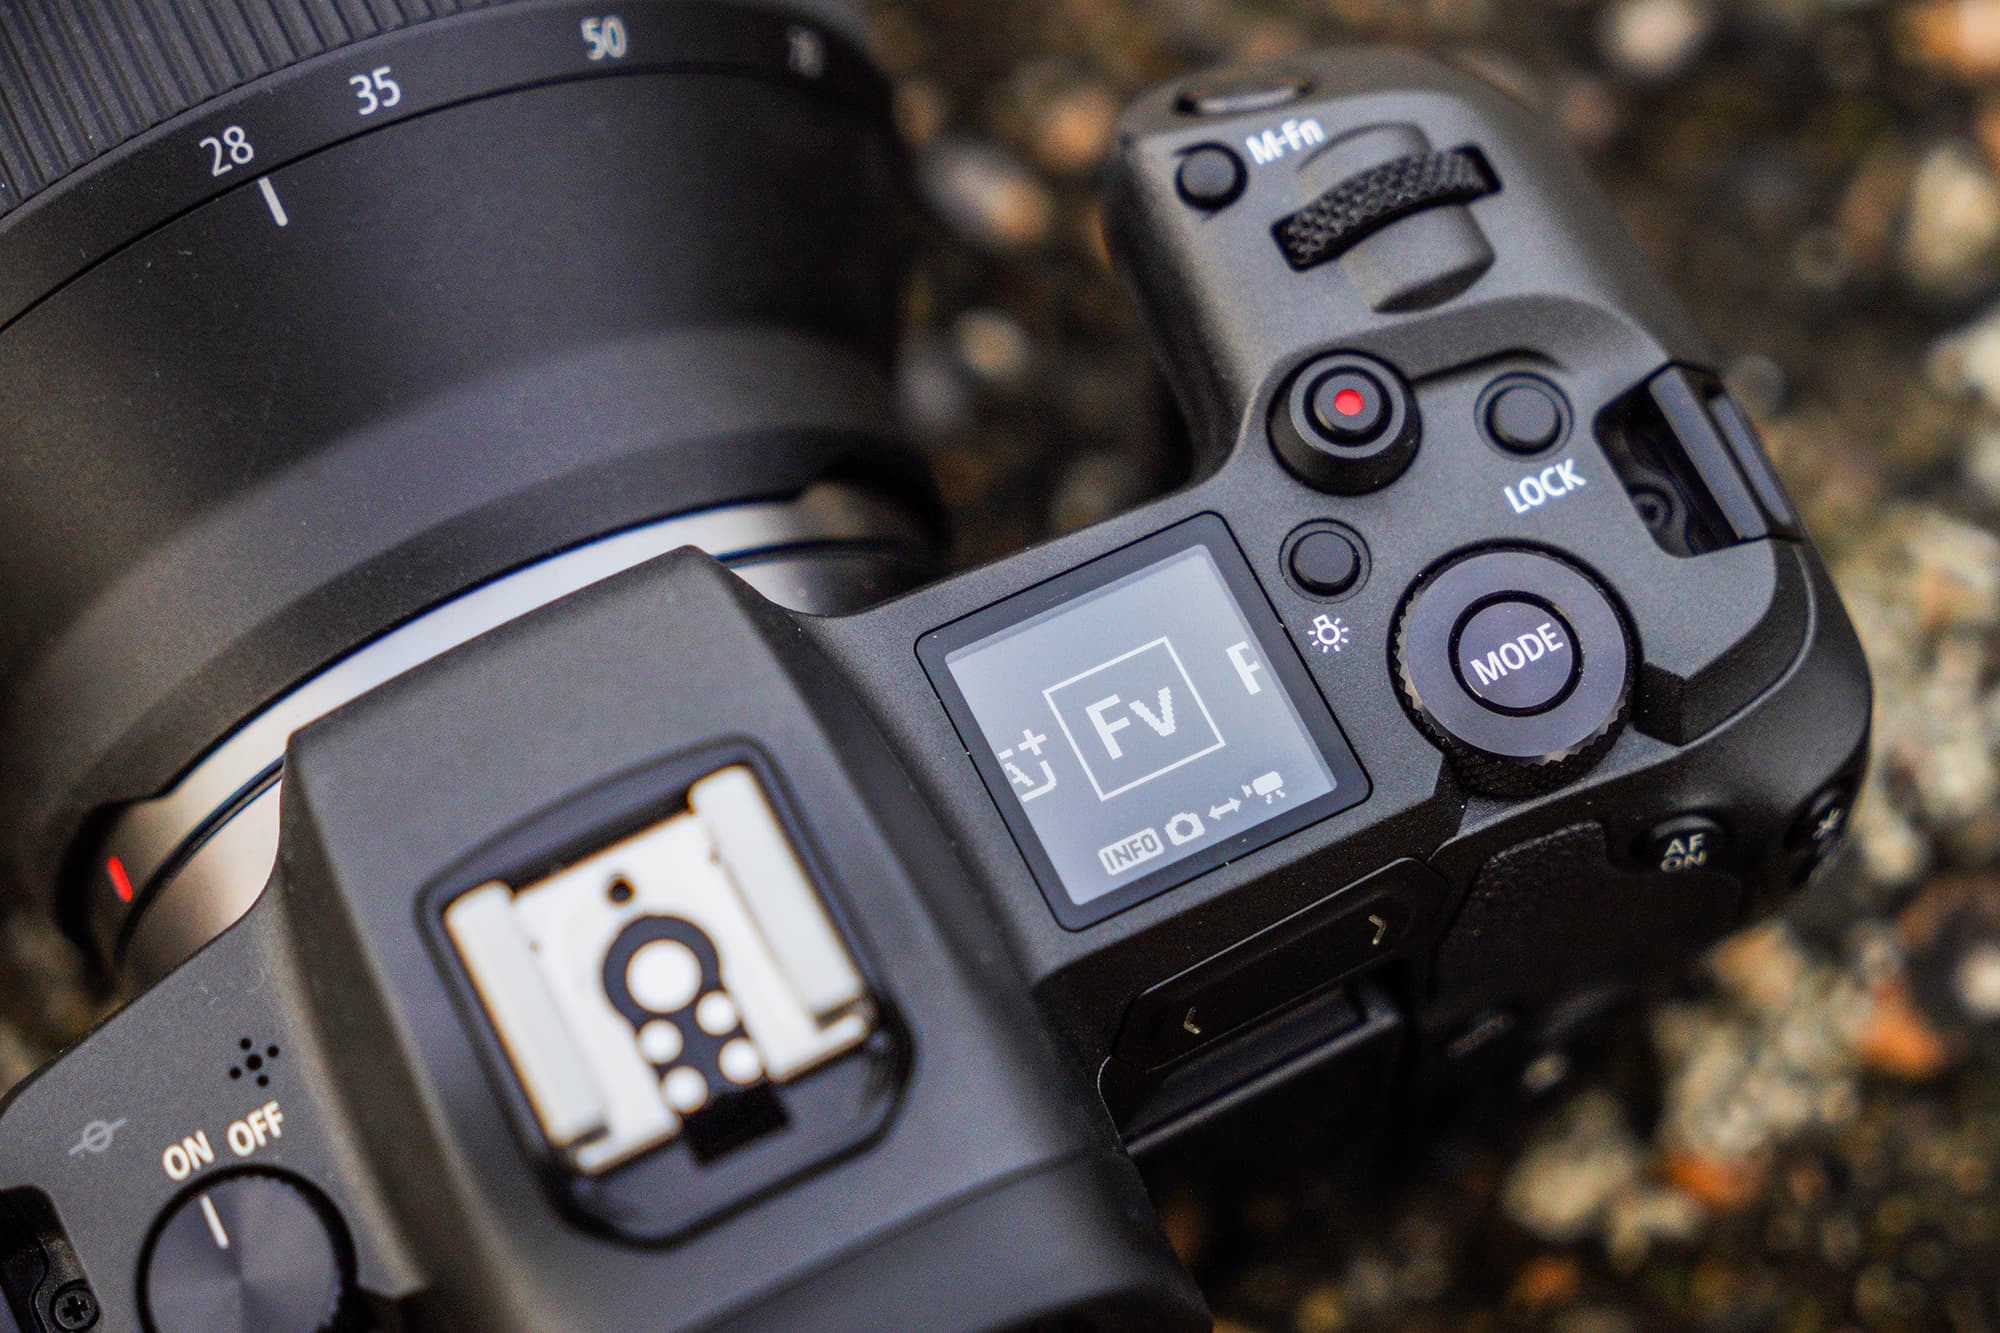
Fv mode is found between Scene Intelligent Auto and Program AE shooting modes. You can use either dial on the top plate of the EOS R to toggle through the various shooting modes on offer.
Imagine the following scenario. You’re on safari and you are taking a few shots of a stationary cheetah. In this situation P mode is perfectly fine to use, until that is the cheetah suddenly starts chasing its prey. Depending on the type of tracking or panning shot you’re looking to capture, a slower or faster shutter speed than what the camera automatically sets in P mode is likely to be desired. By the time you’ve switched across to Shutter priority mode and set the shutter speed you want the opportunity of capturing a once in a lifetime moment has passed. This is where the new Flexible-priority AE mode comes in, which is essentially Program AE mode with the benefit of being able to jump from full auto to semi-auto or even full manual very quickly and without having to move the mode dial, or press the mode button in the case of the Canon EOS R.
How does Fv mode work?
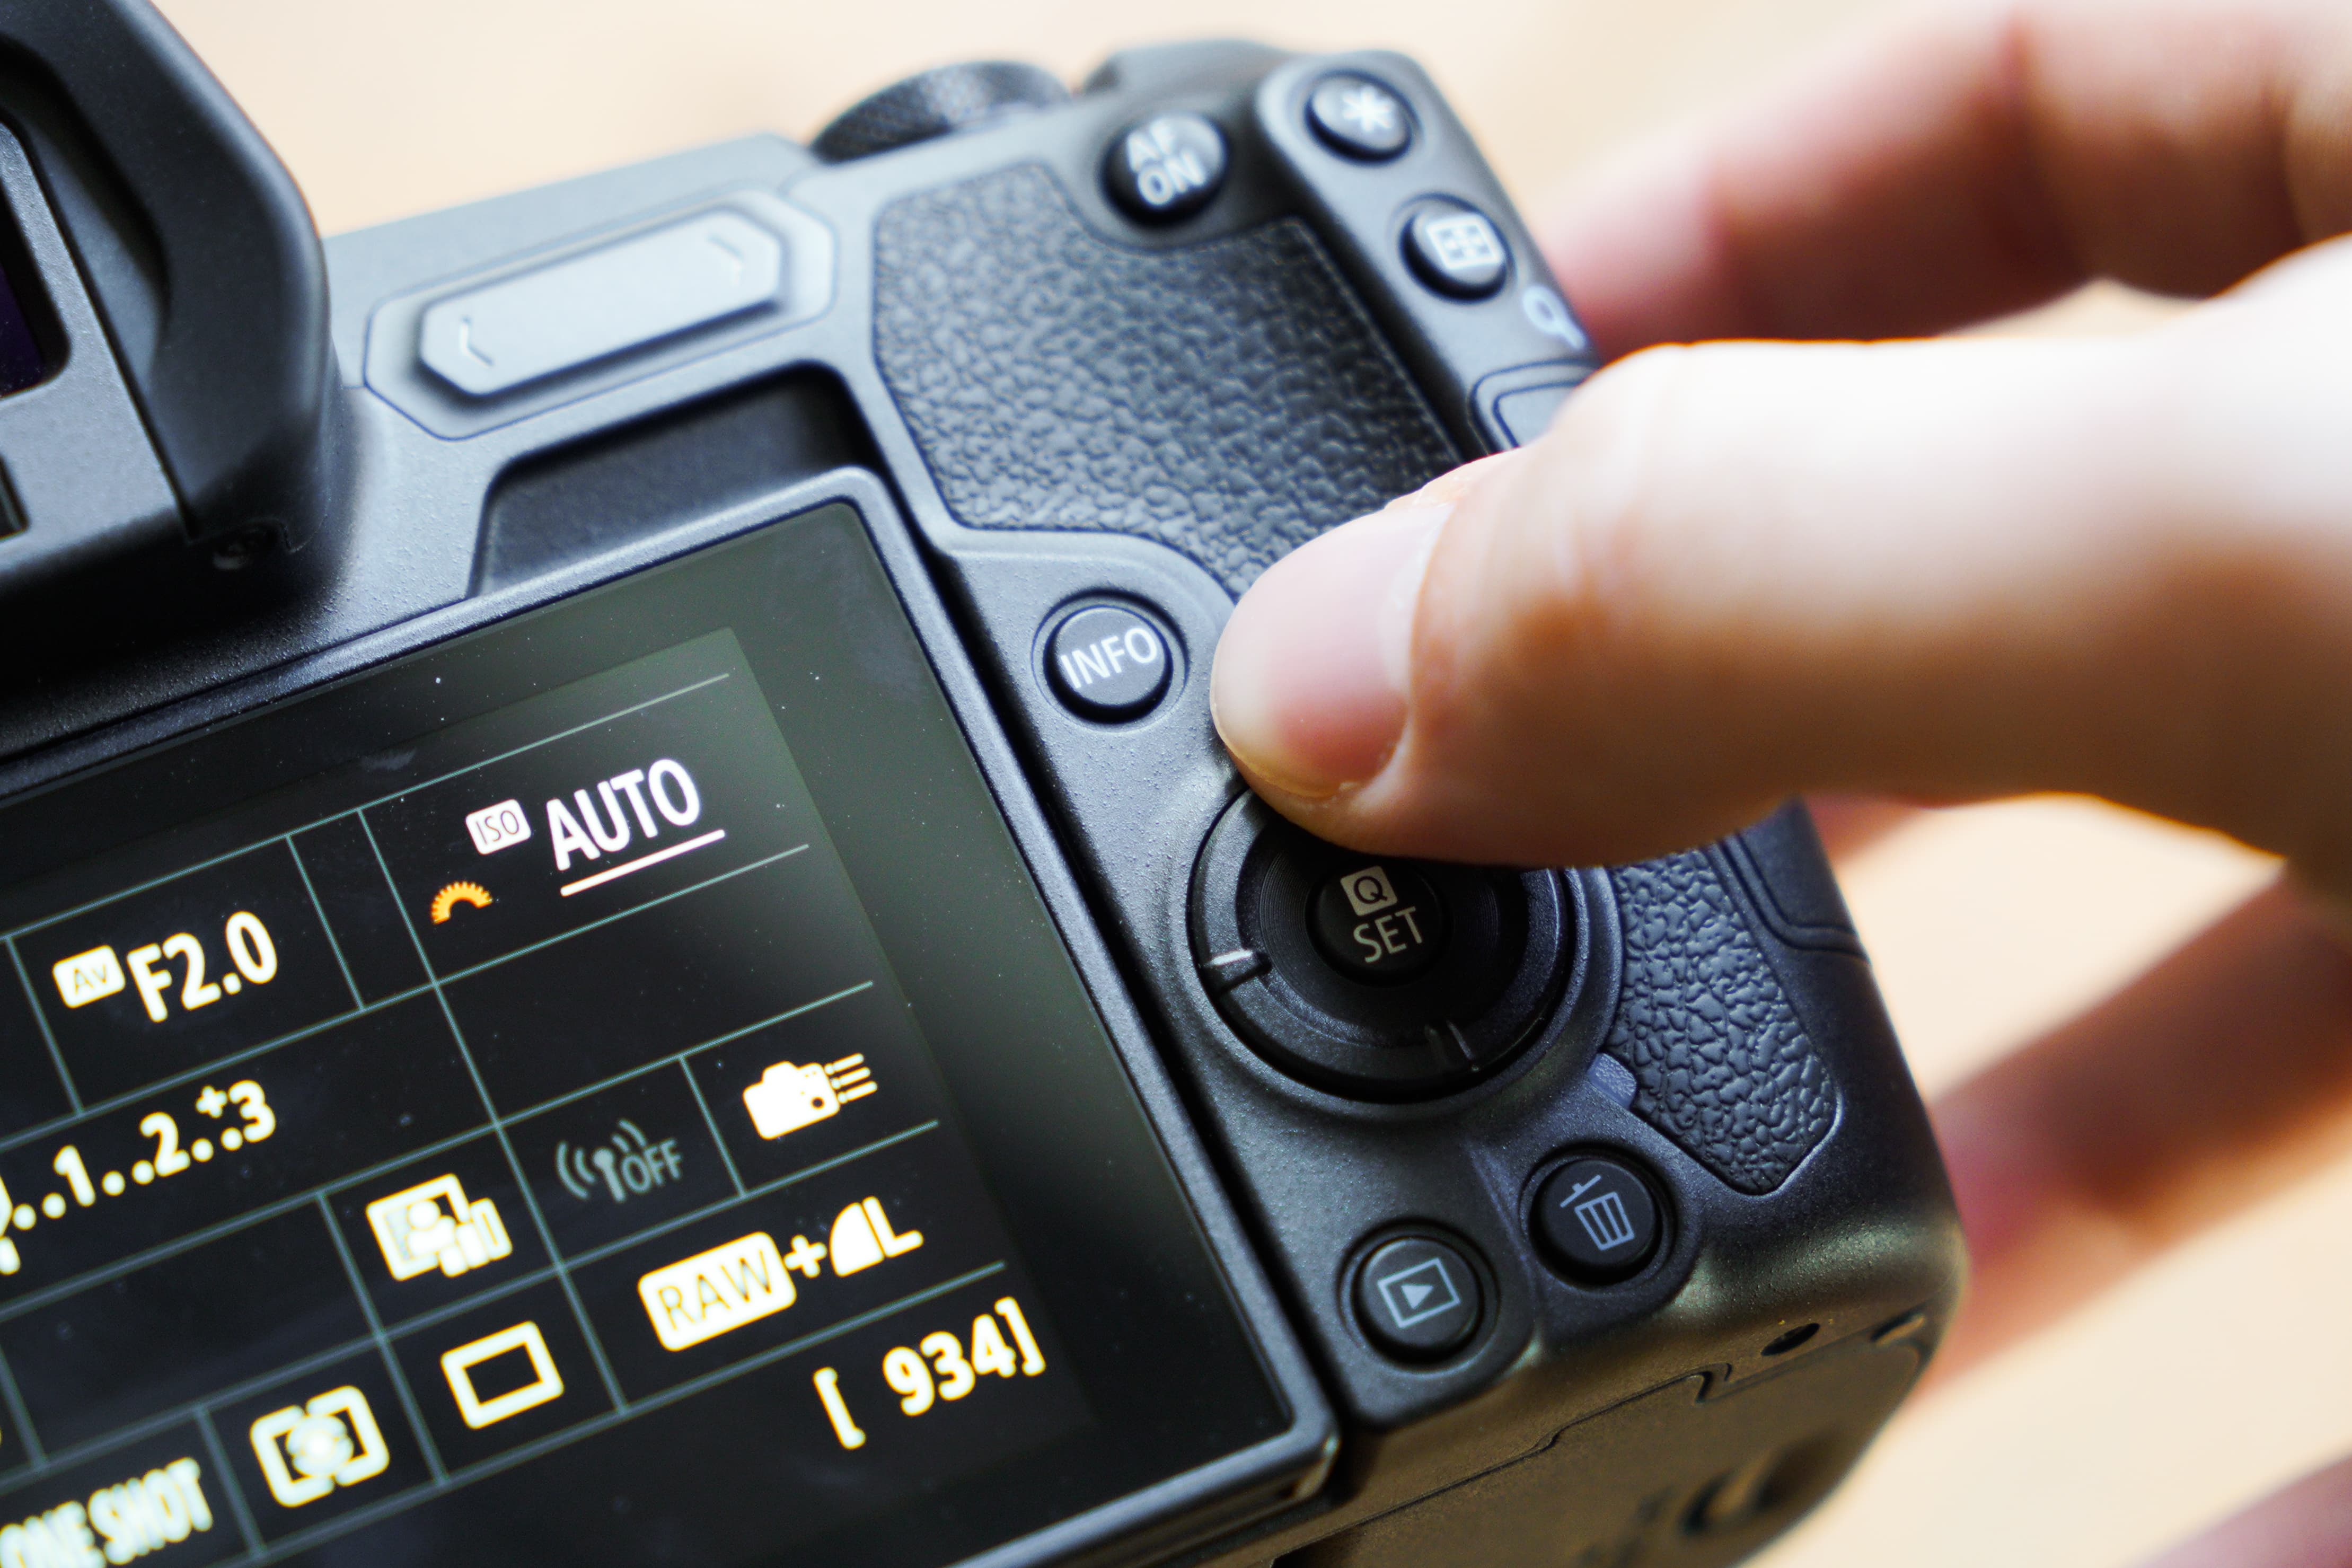
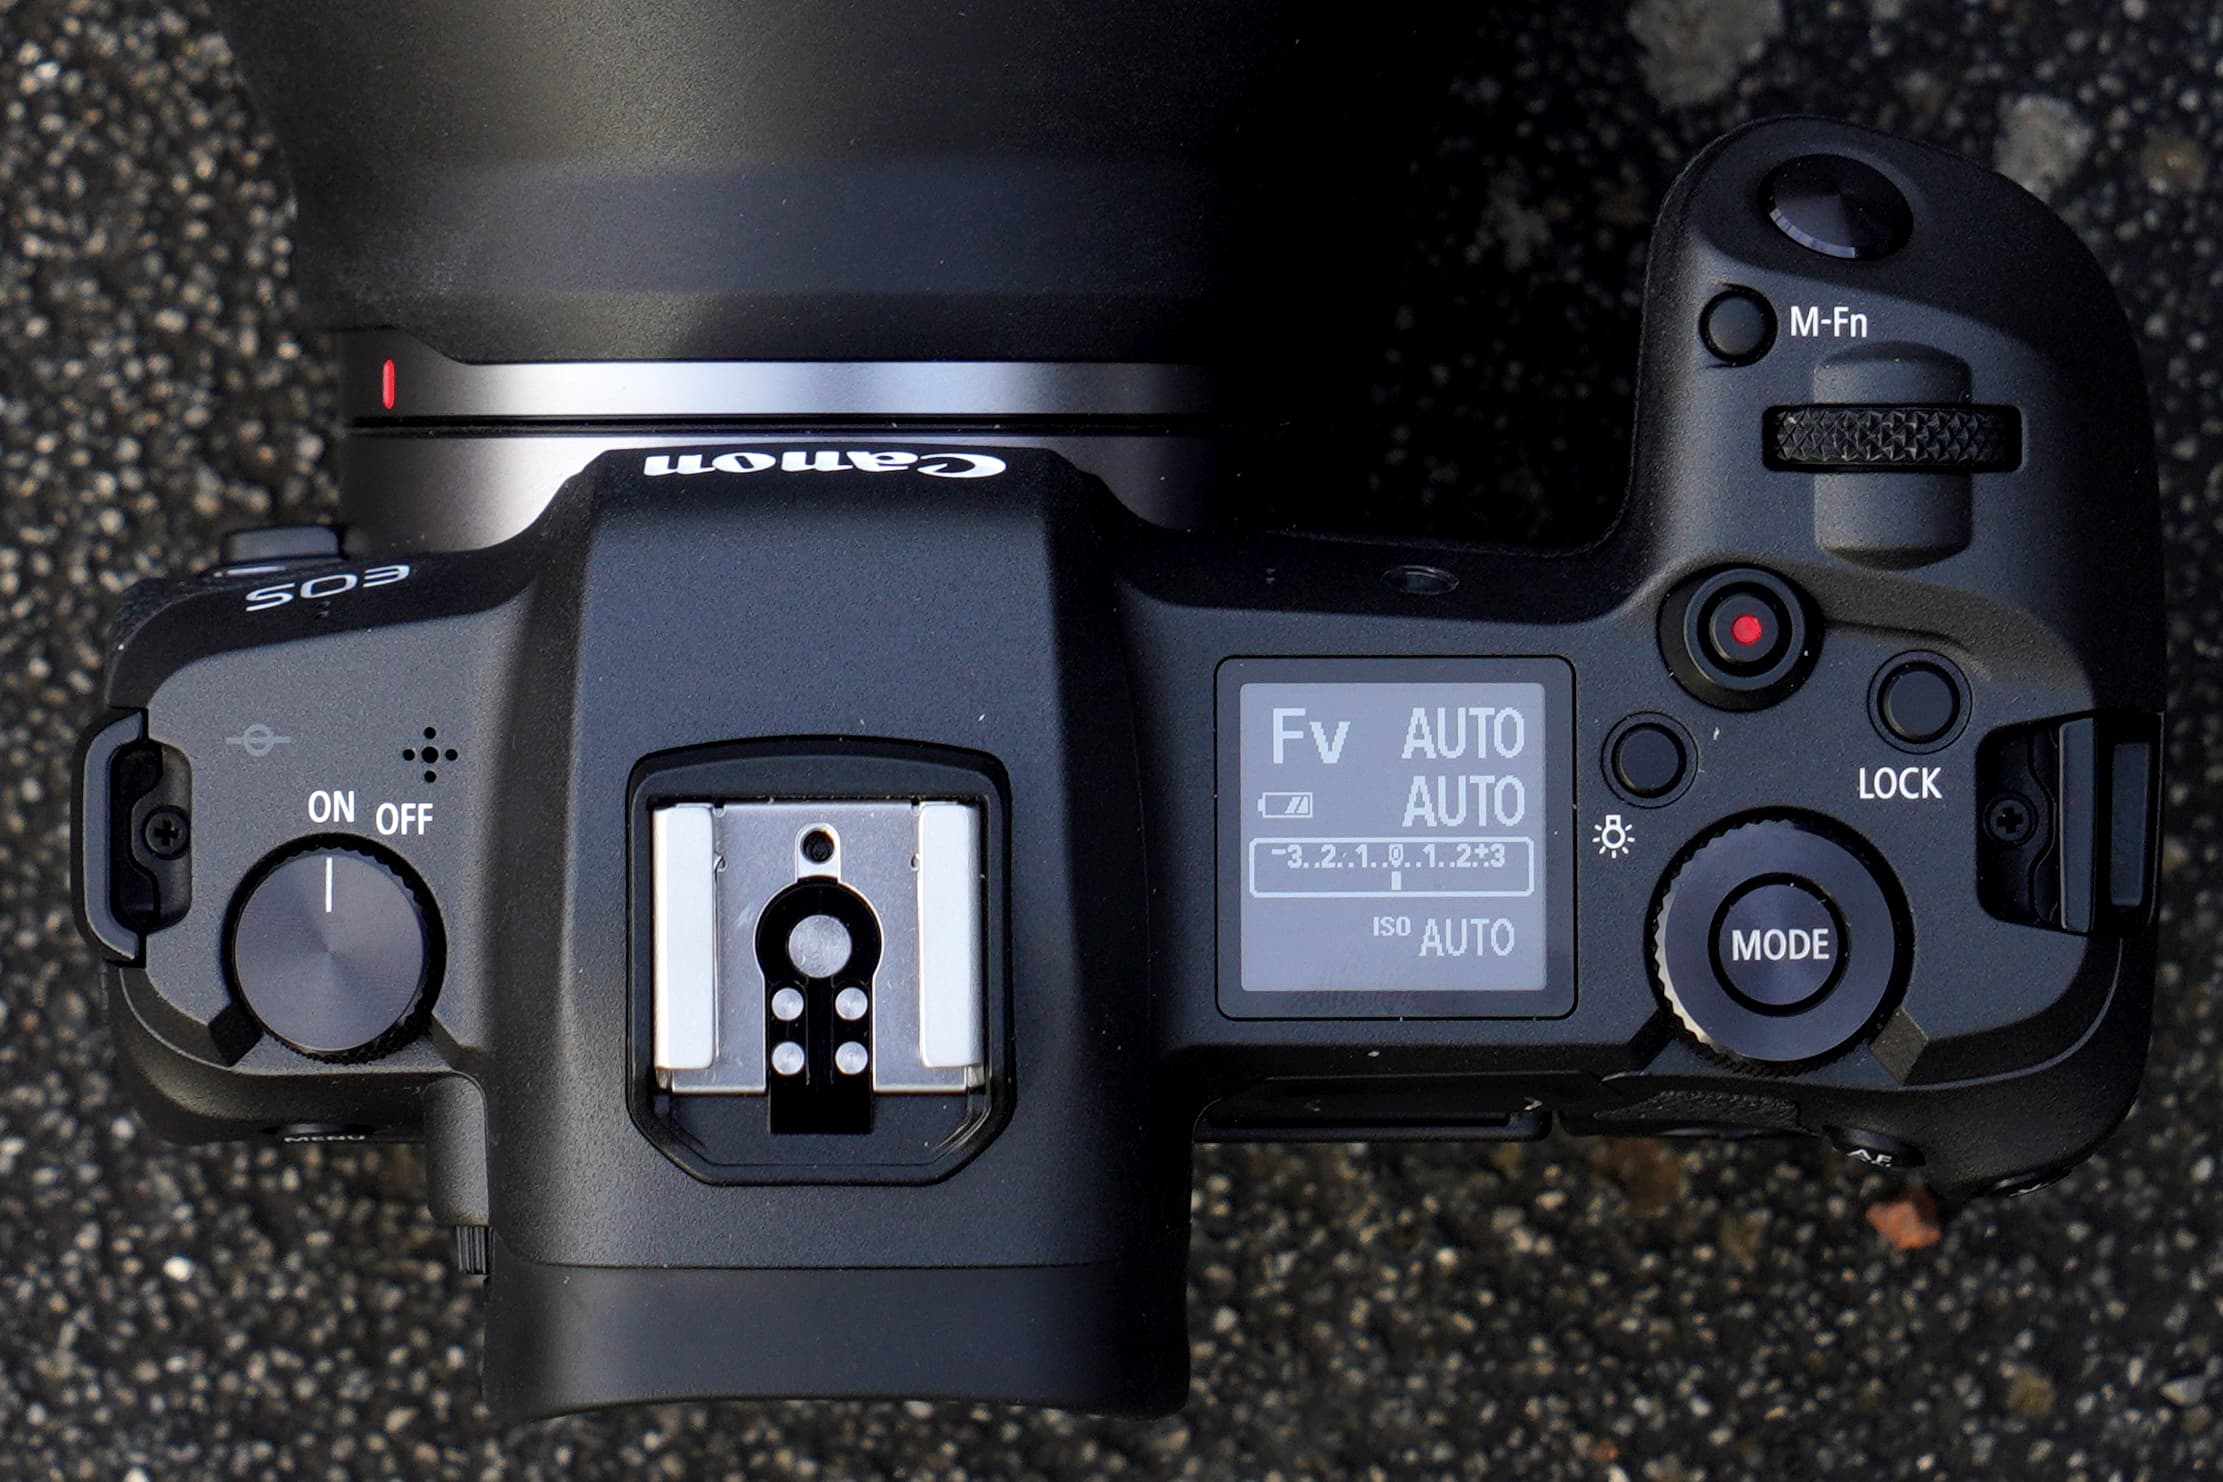
Select Fv mode on the EOS R and it starts off similar to Program AE mode. The camera recognizes the lens and focal length you’re using, and automatically selects the shutter speed, aperture and ISO settings. These are displayed in the viewfinder, on the screen as well as the top-plate LCD panel. Take a closer look at these settings on the screen or EVF and you’ll notice they’re underlined, which is important, as this is the visual clue that the camera is controlling each exposure variable automatically.
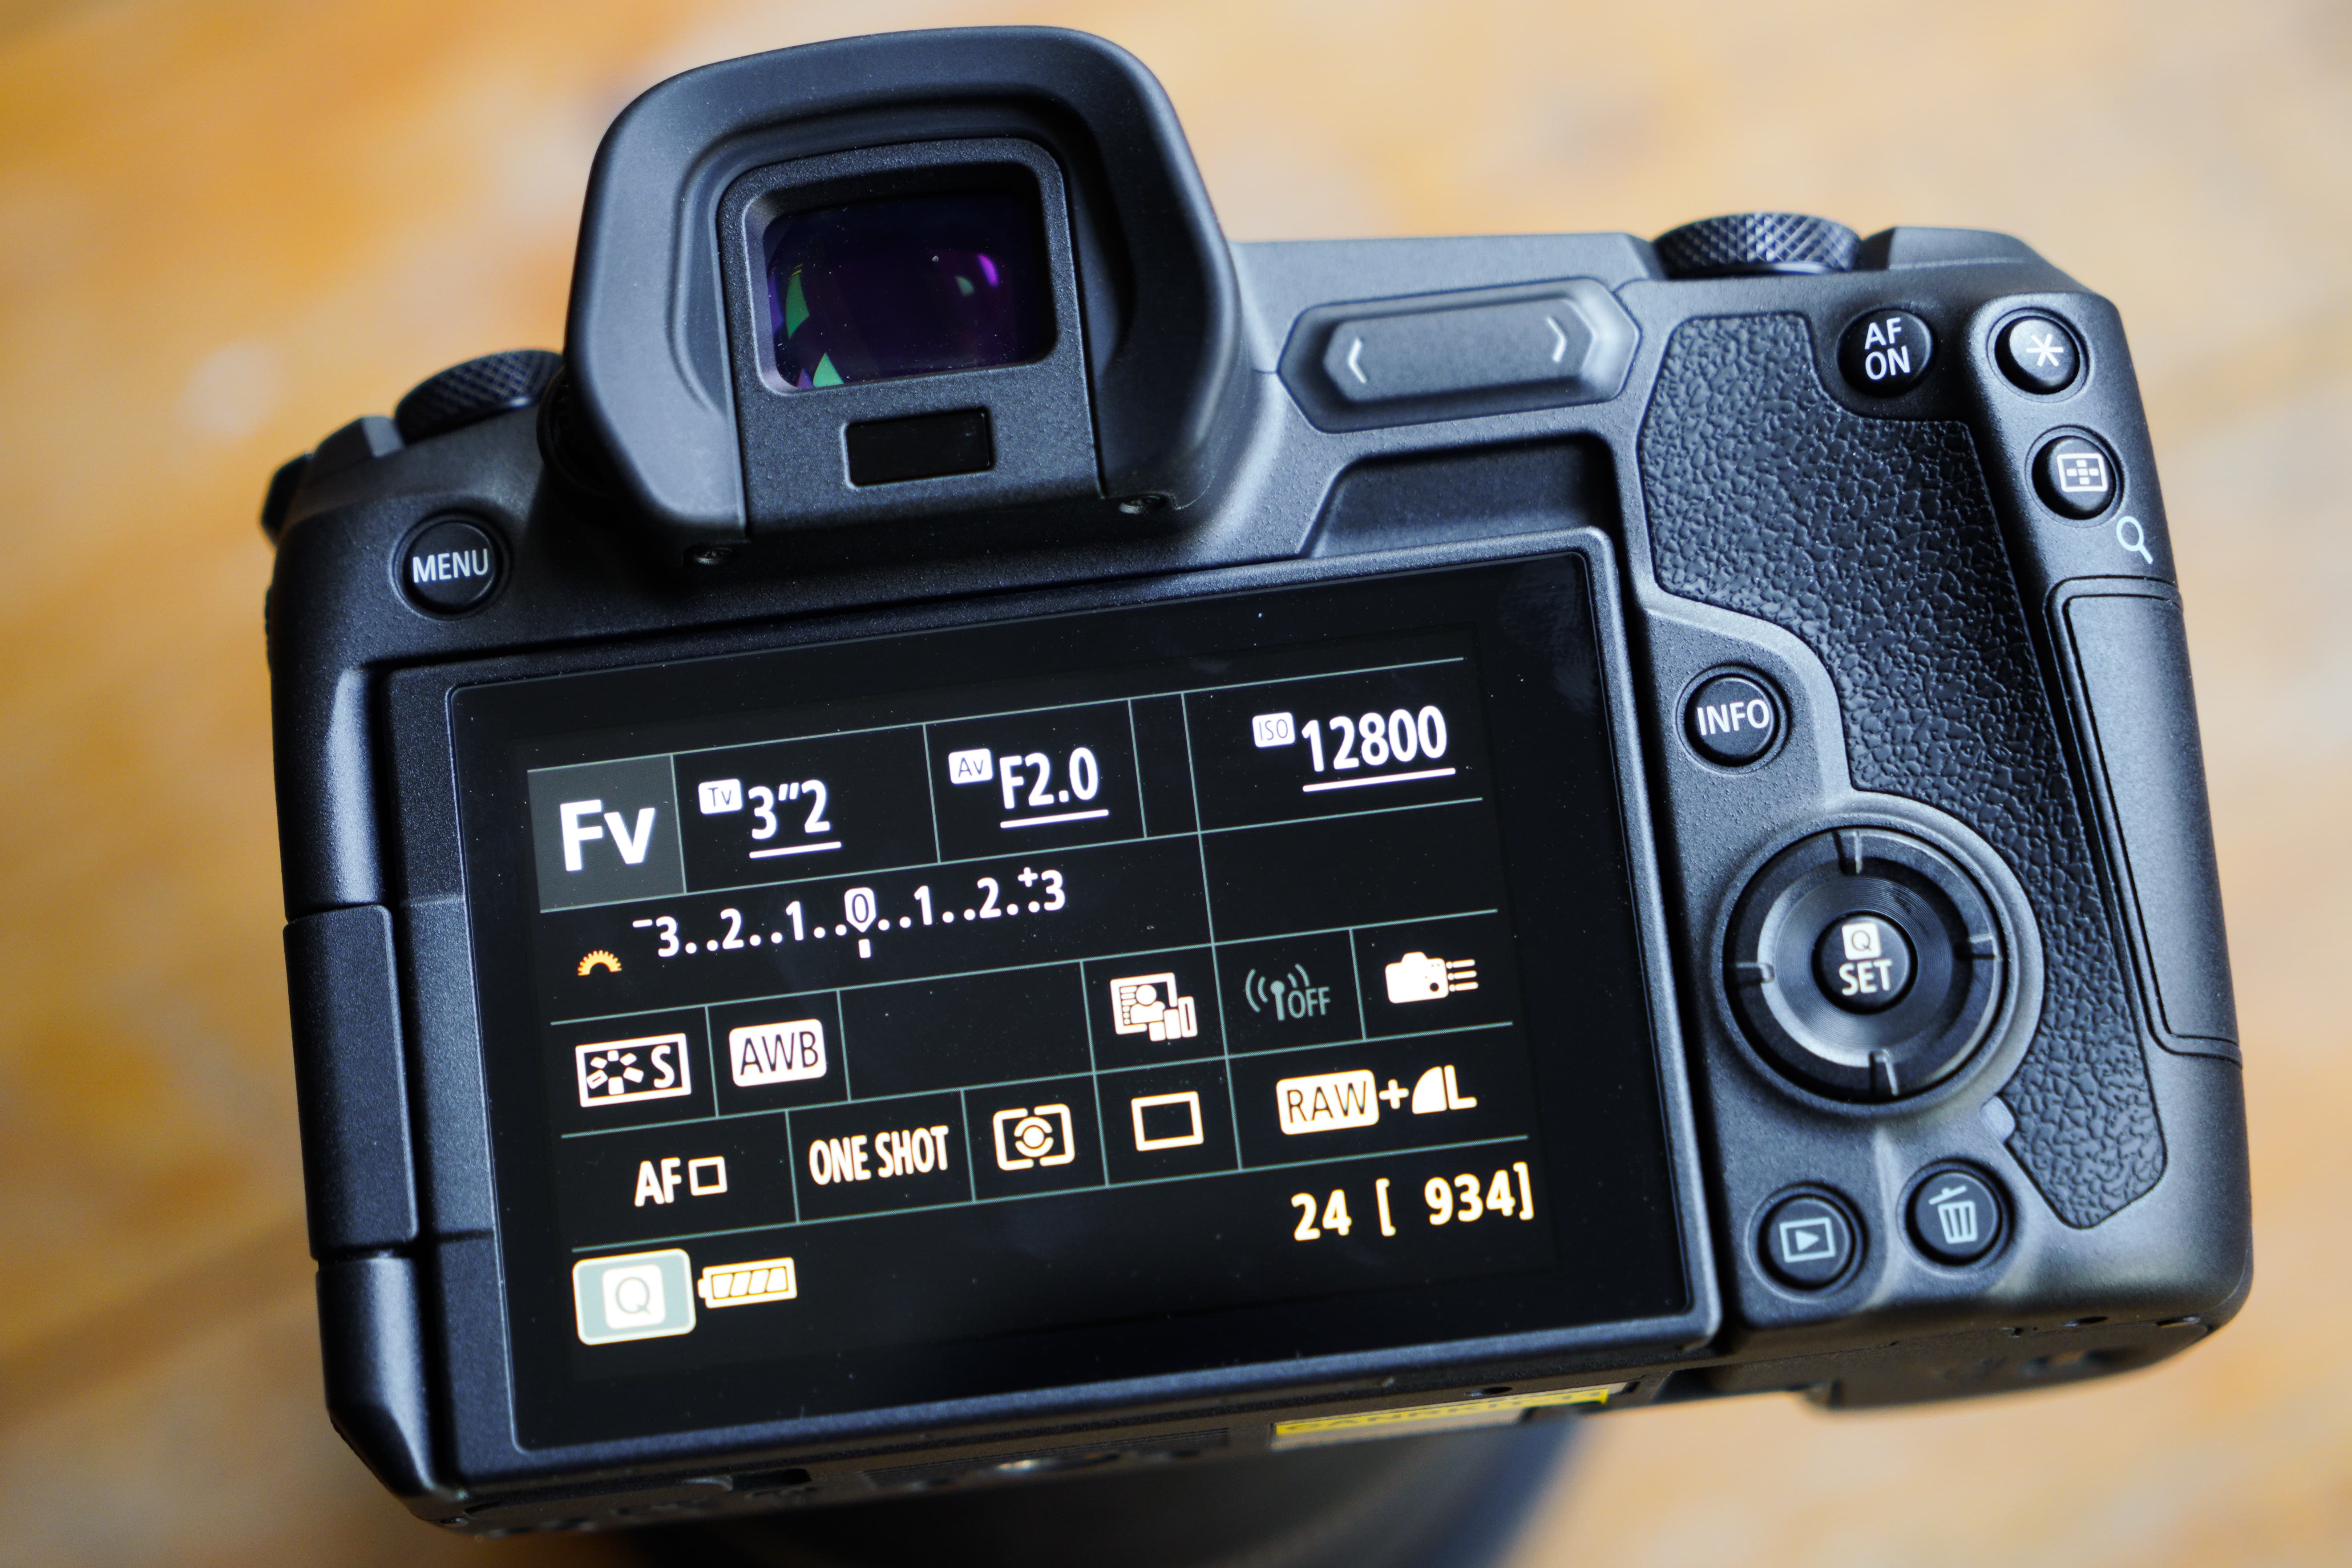
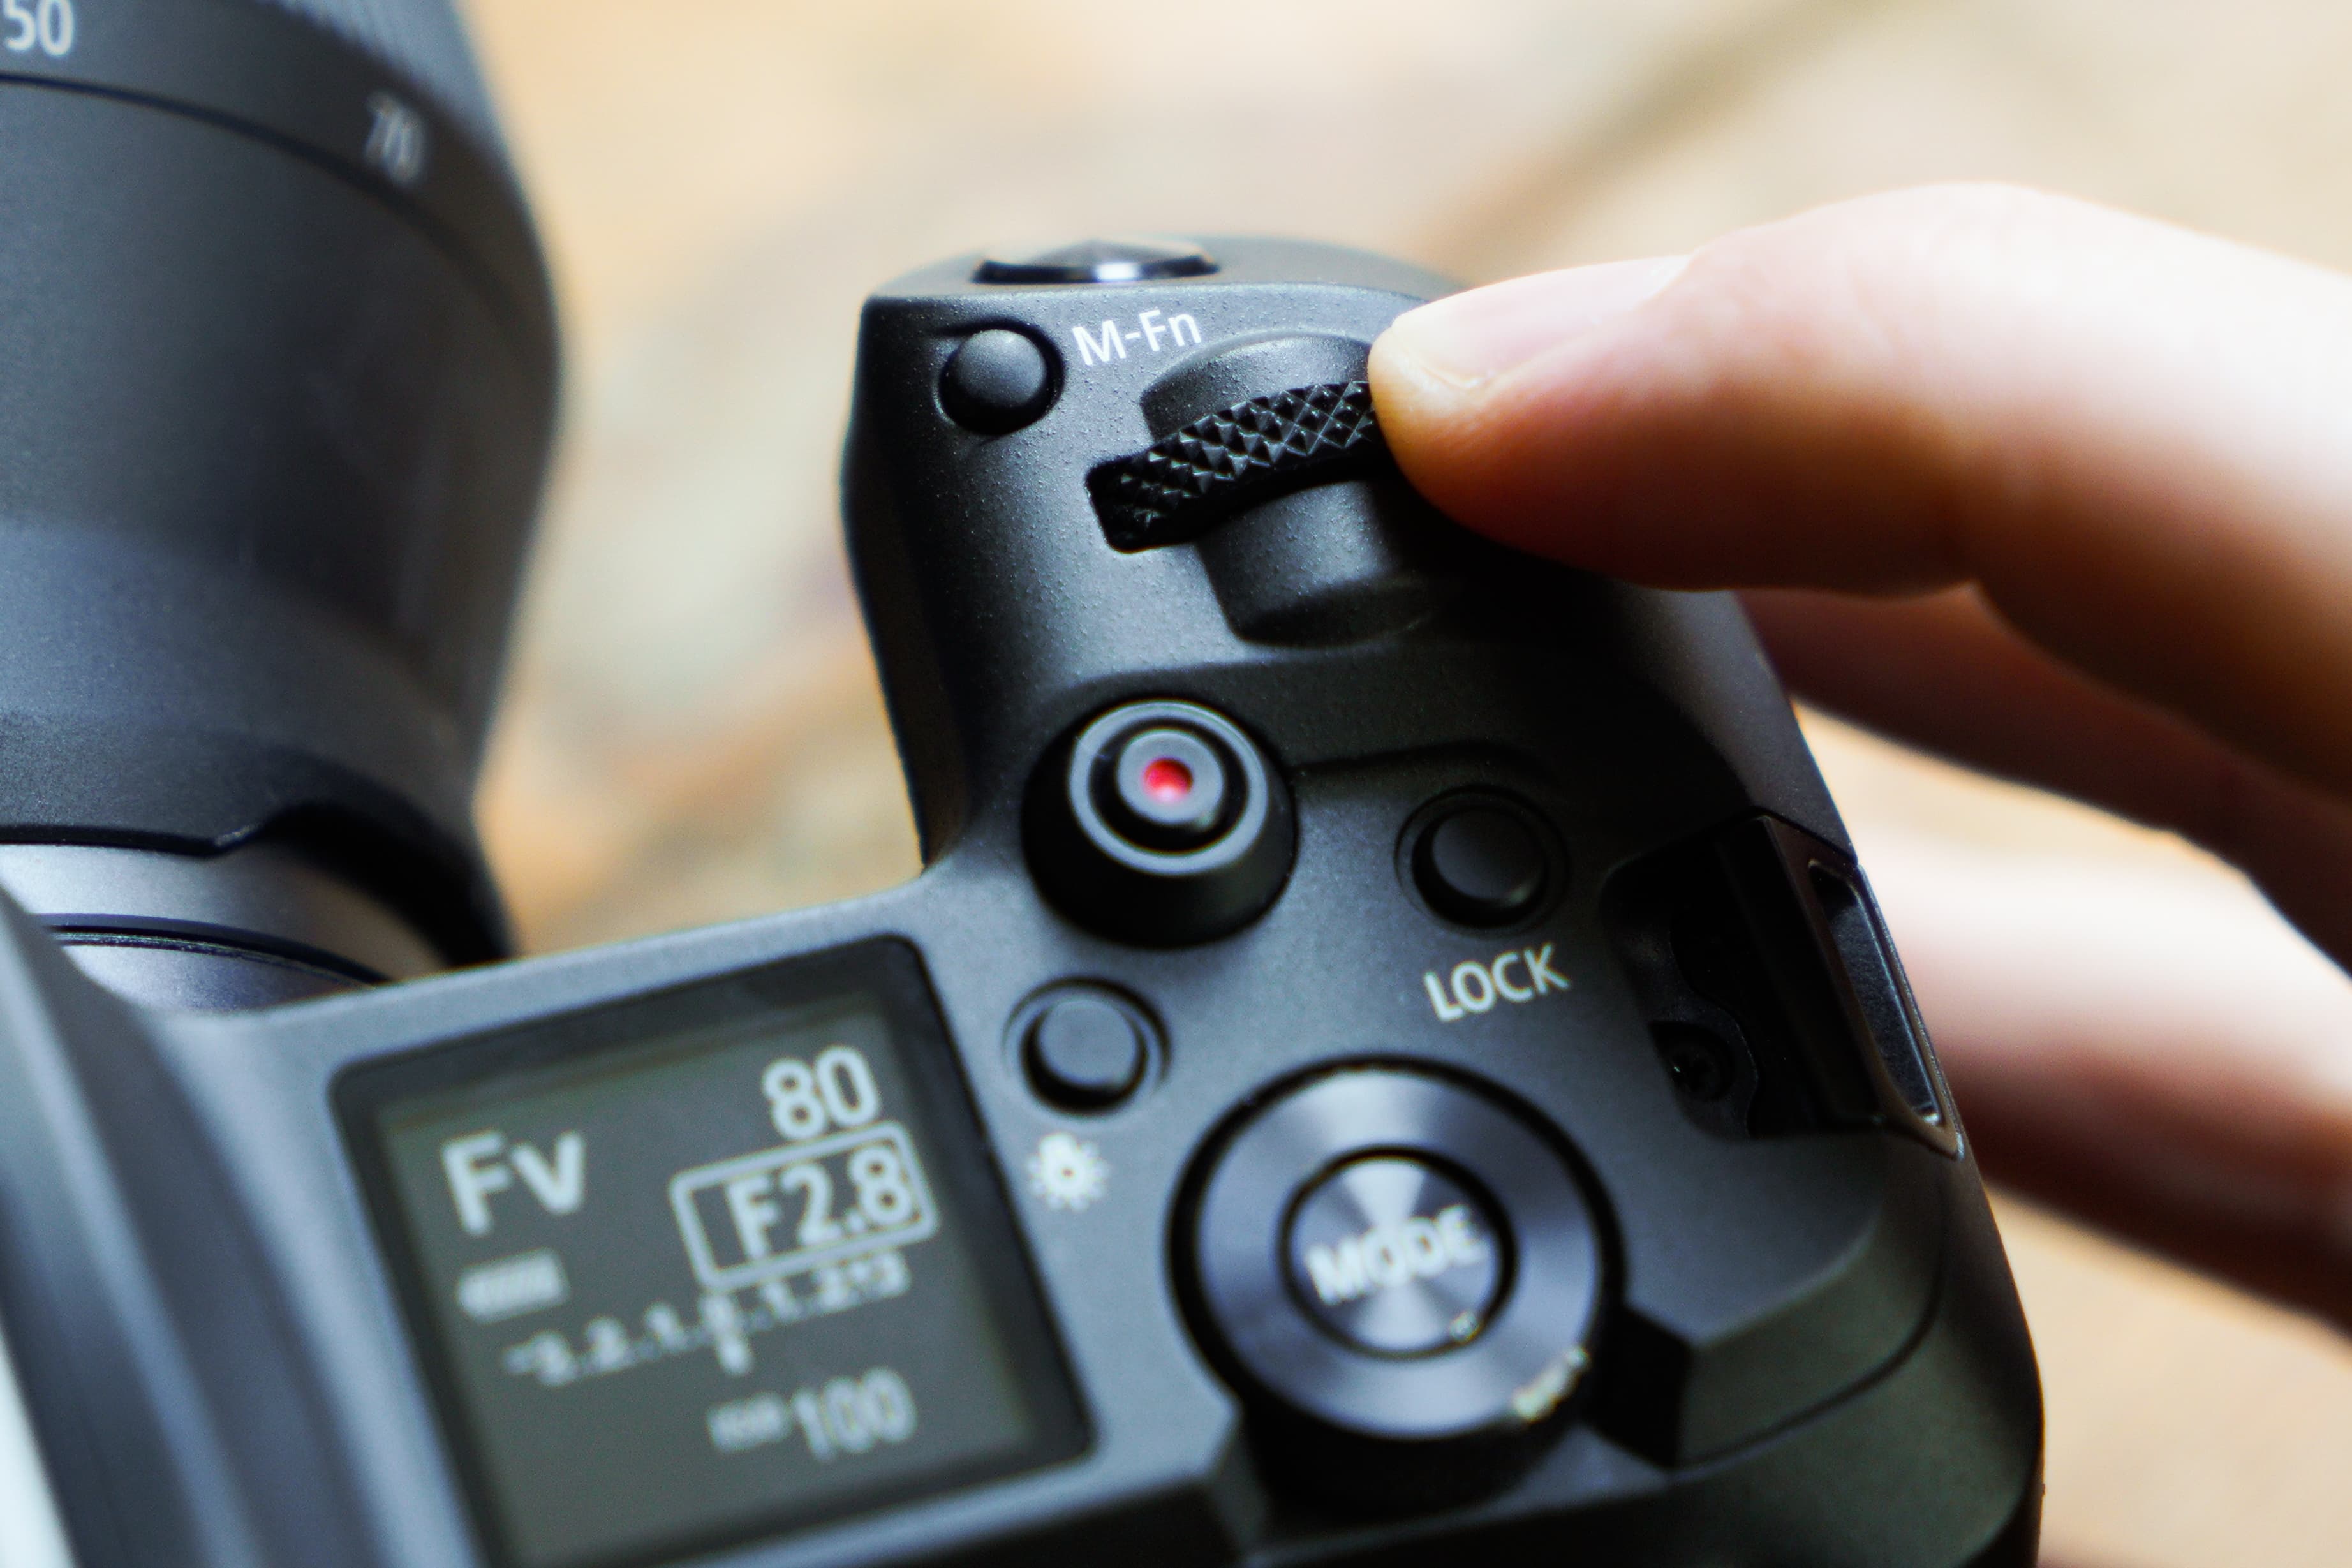
Here we see the EOS R in Fv mode with all exposure variable being automatically controlled by the camera. The thumb dial is used to shift between shutter speed, aperture, exposure compensation and ISO.
The beauty of Fv mode, unlike P mode, is that the rear thumb dial can be used to toggle between shutter speed, aperture, exposure compensation and ISO, with the top dial (the one just behind the shutter and M-Fn button) allowing you to adjust whichever exposure variable you’d like. In other words you can quickly switch the camera from fully automatic Program AE to shutter or aperture priority by taking one or the other off auto control. Alternatively, you may wish to turn both shutter speed and aperture off auto control to take manual control. By taking ISO off Auto too you’re given full manual exposure control that’s no different to using the Manual (M) exposure mode.
Notice how the shutter speed, aperture and ISO values are all underlined. This reveals that the camera is controlling each exposure variable automatically. A small orange dial icon appears next to the currently active exposure variable. In this example you can see it next to the aperture.
The good thing about all this is that you have the option to switch between the different exposure modes from one mode, whereas previously we’d have to stop what we’re doing and physically turn the mode dial to a different shooting mode – not easy to do when you’re working under pressure and the viewfinder is raised to your eye.
Returning to Auto
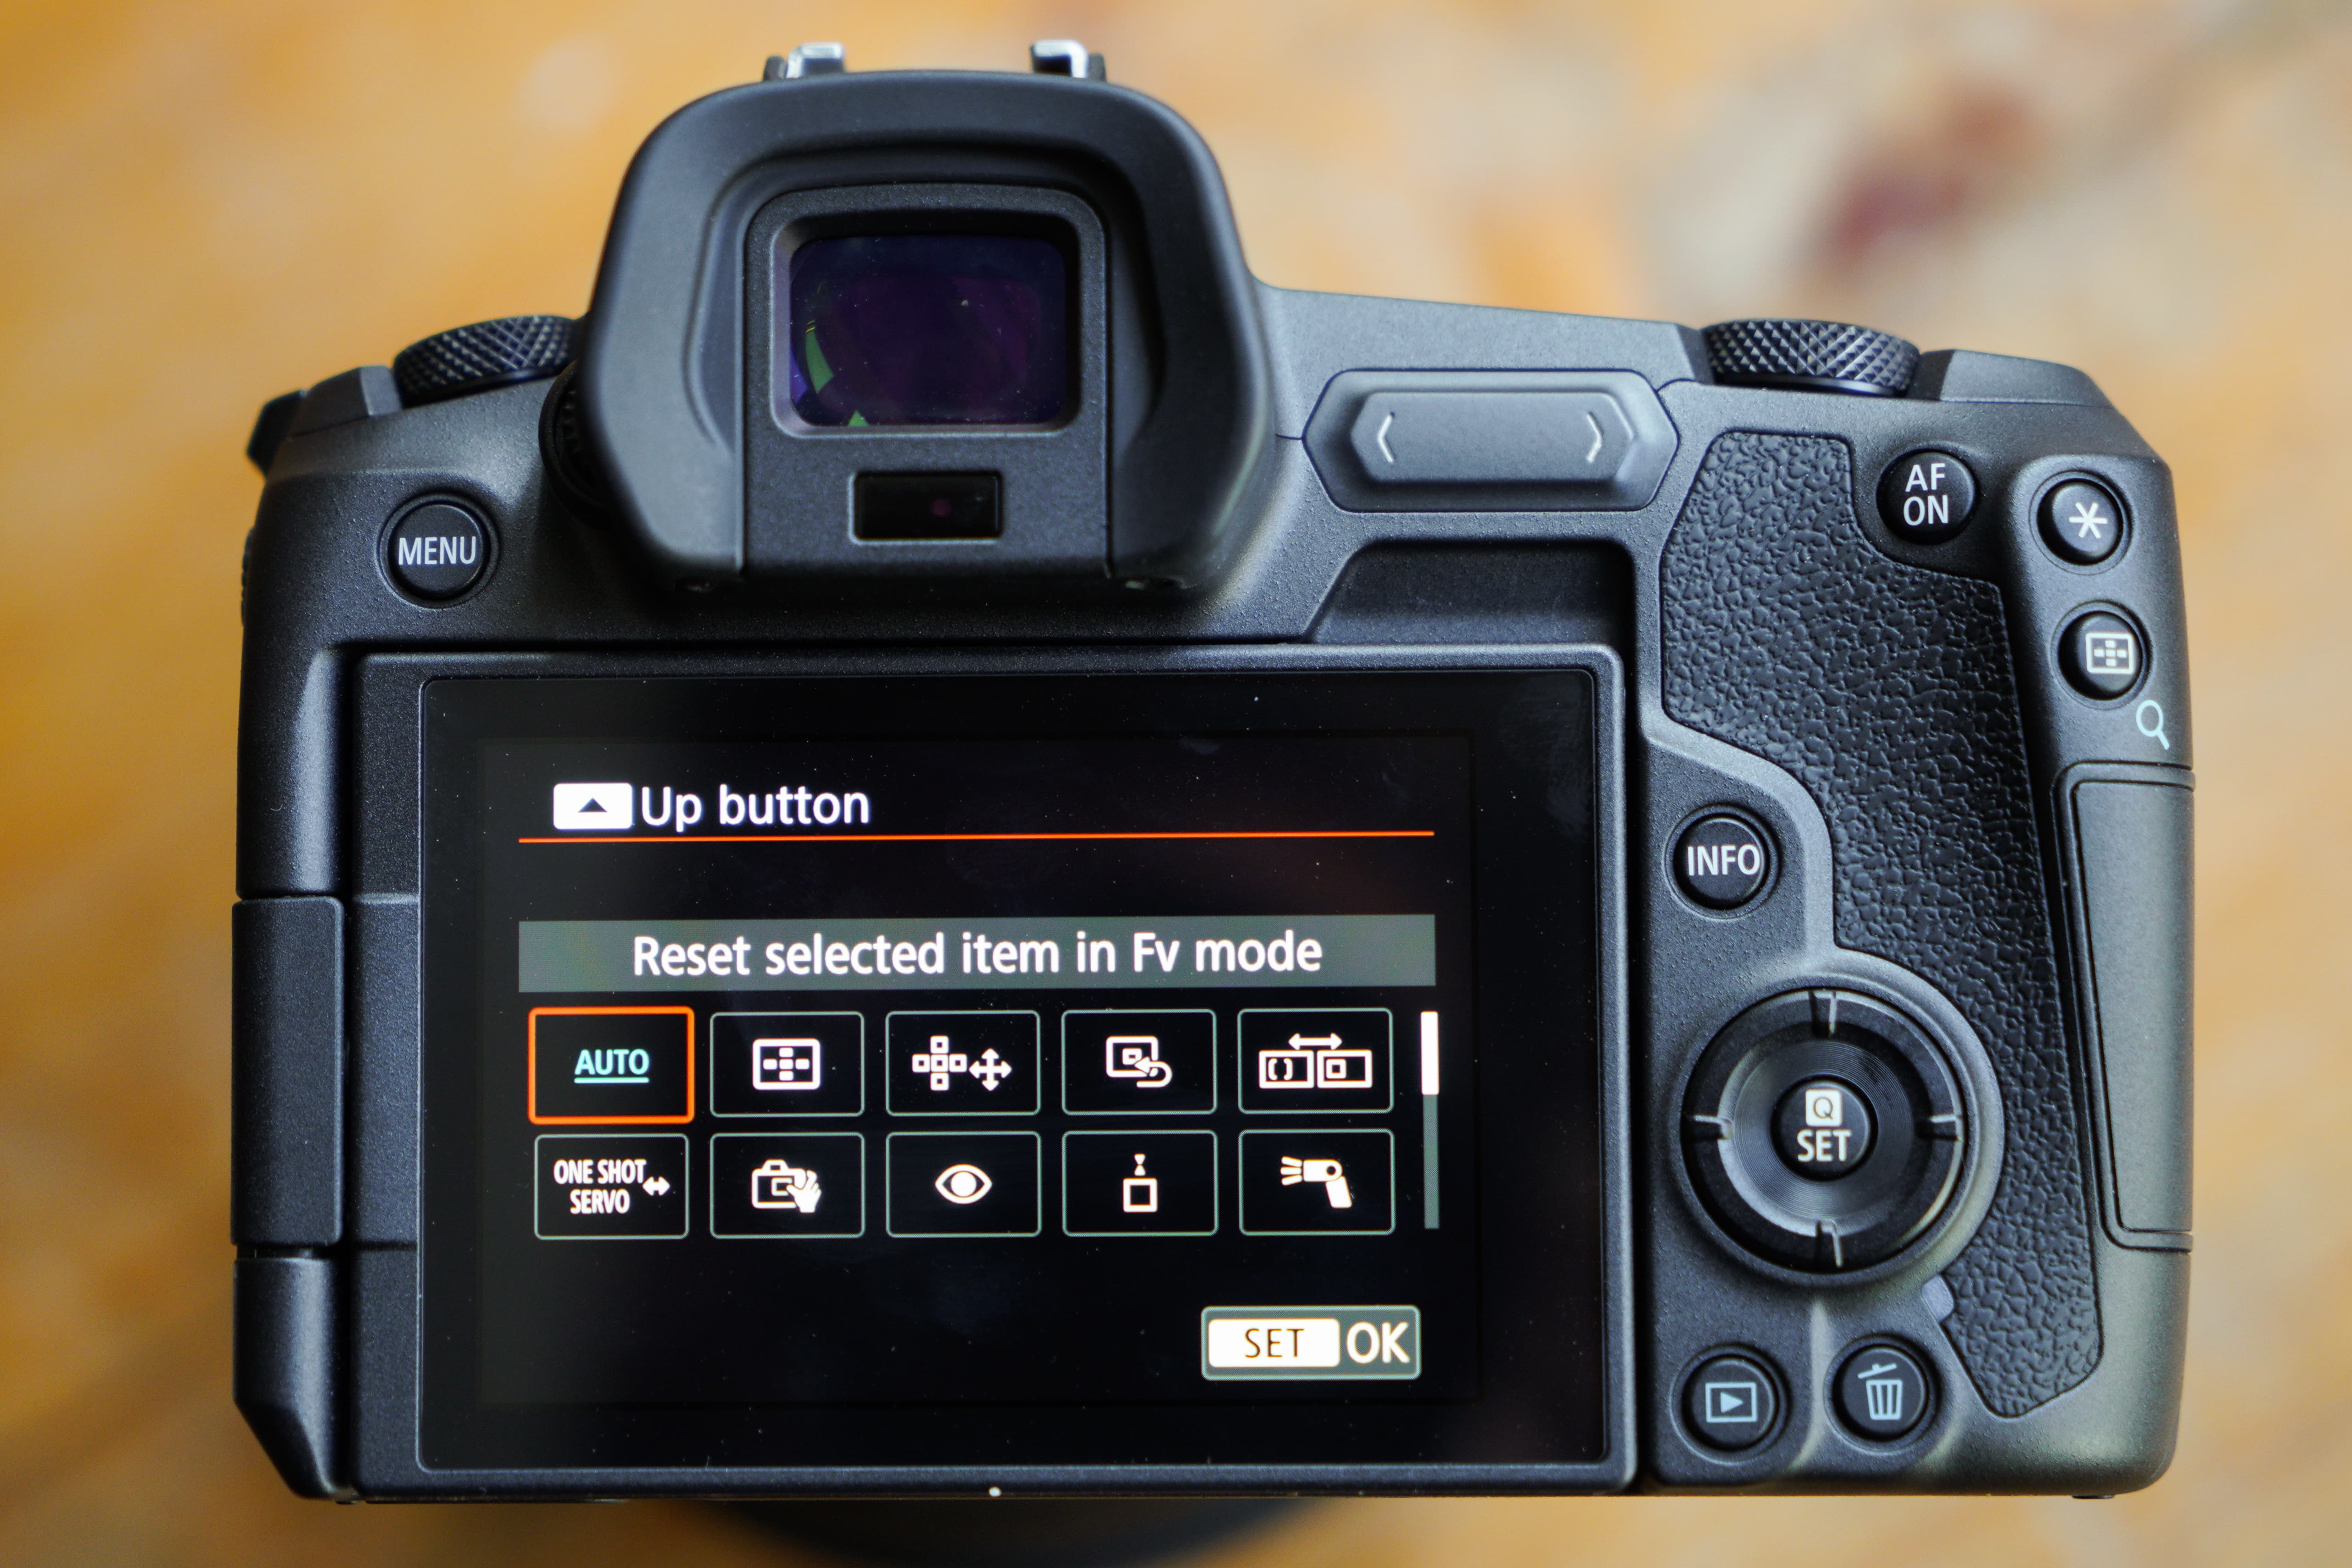
It’s all very well having the option to quickly change a primary exposure setting, but what do we do when we want to return shutter speed, aperture or ISO back to auto control in Fv mode? For example, lets say we’re taking some outdoor portraits and we’re working in Fv mode with aperture taken off Auto, which is just like operating the camera in aperture priority mode. With the camera set to its factory-default settings, quickly returning aperture back to fully automatic is simply a case of pressing the top four-way directional pad button. As you do this you’ll notice that aperture is now underlined, confirming the camera is now in charge of setting the aperture value. This shortcut can be used to return shutter speed and ISO back to full auto operation too.
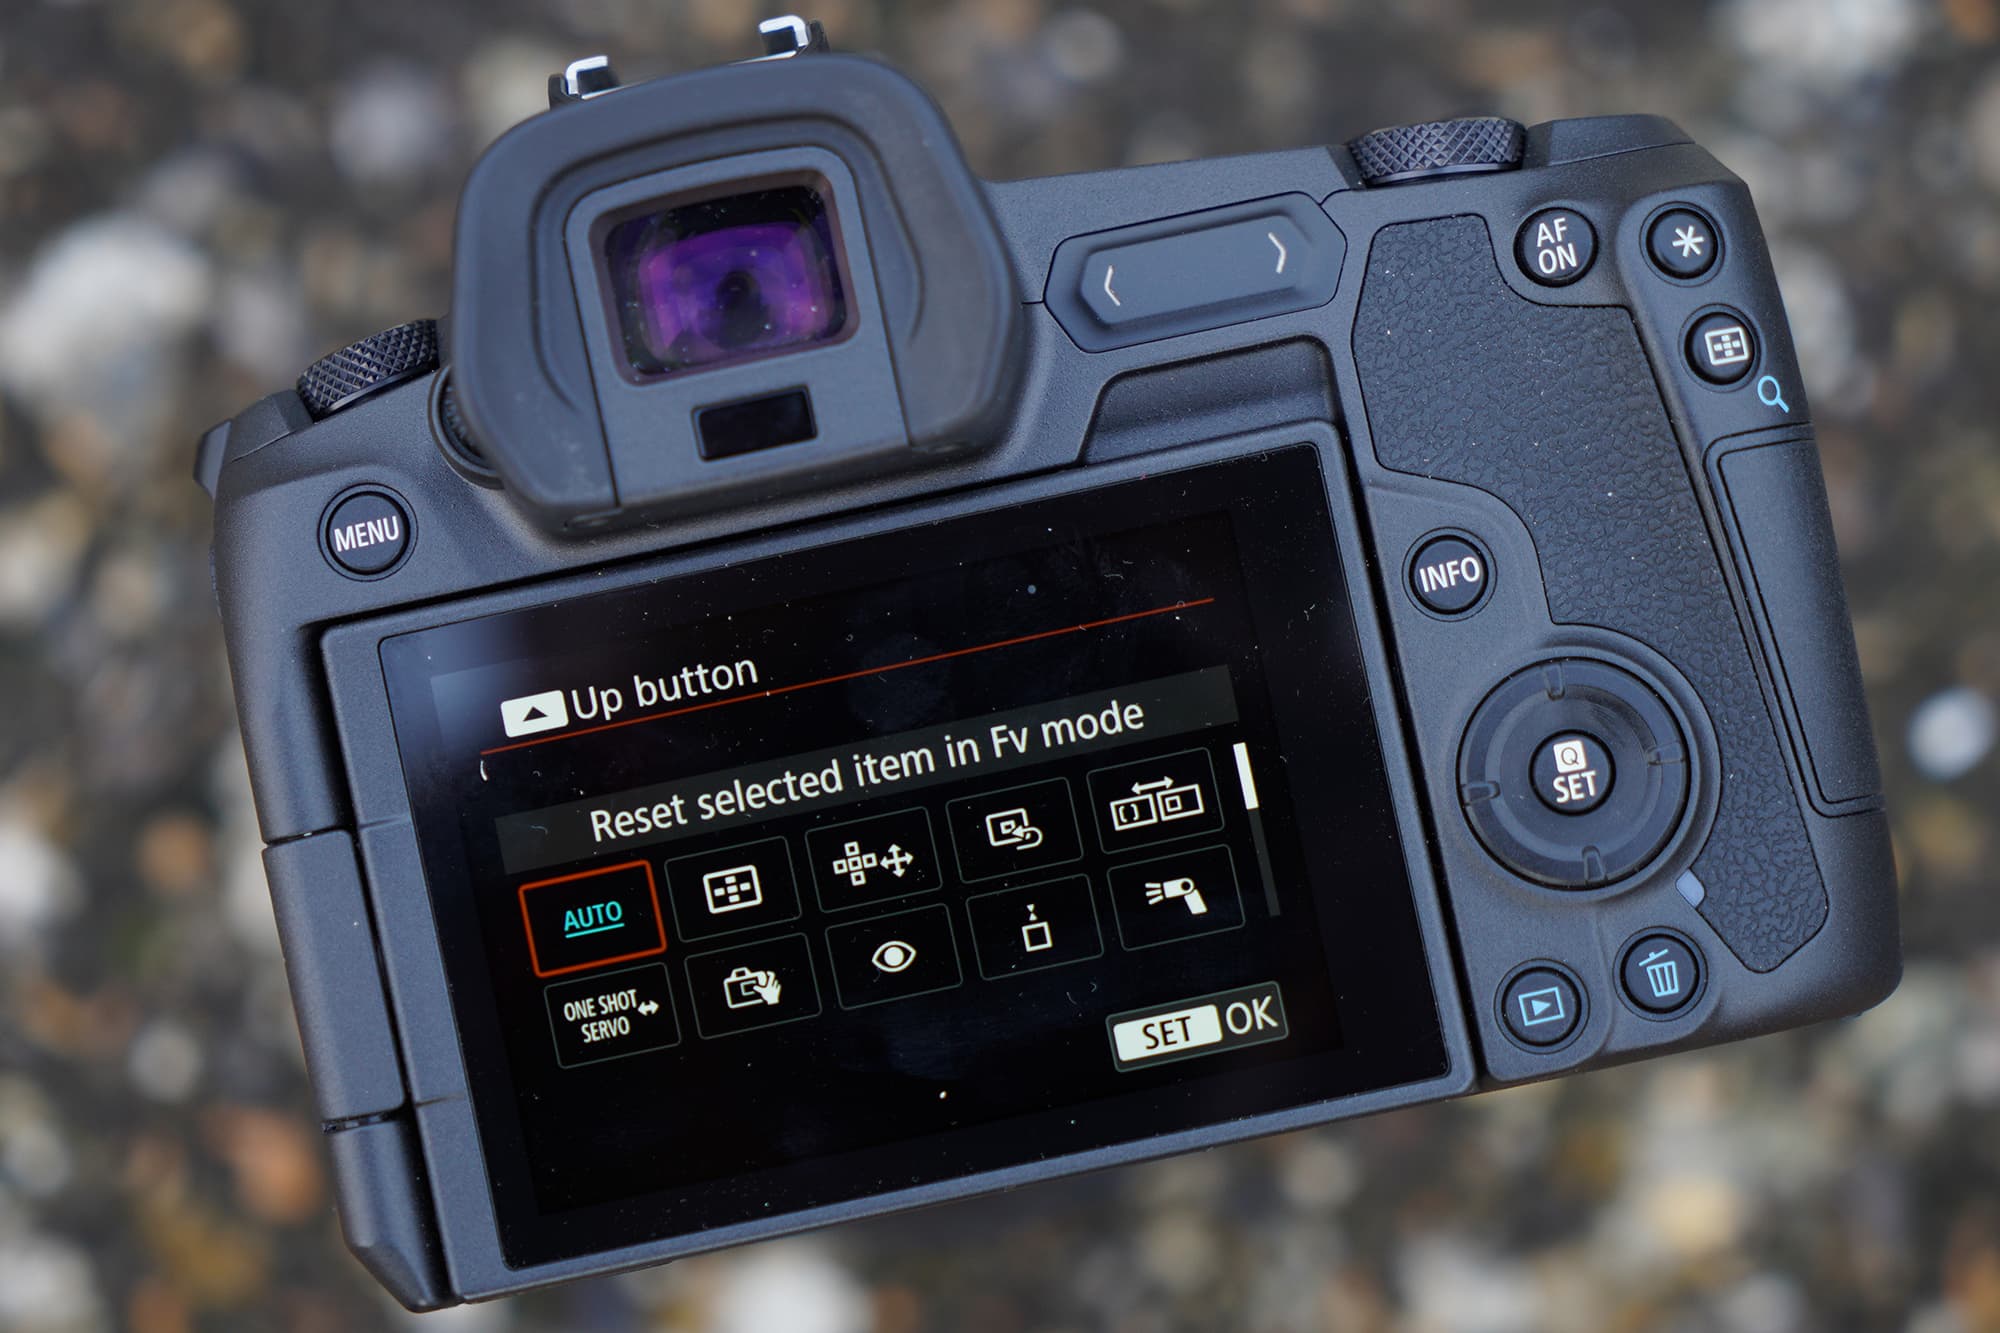
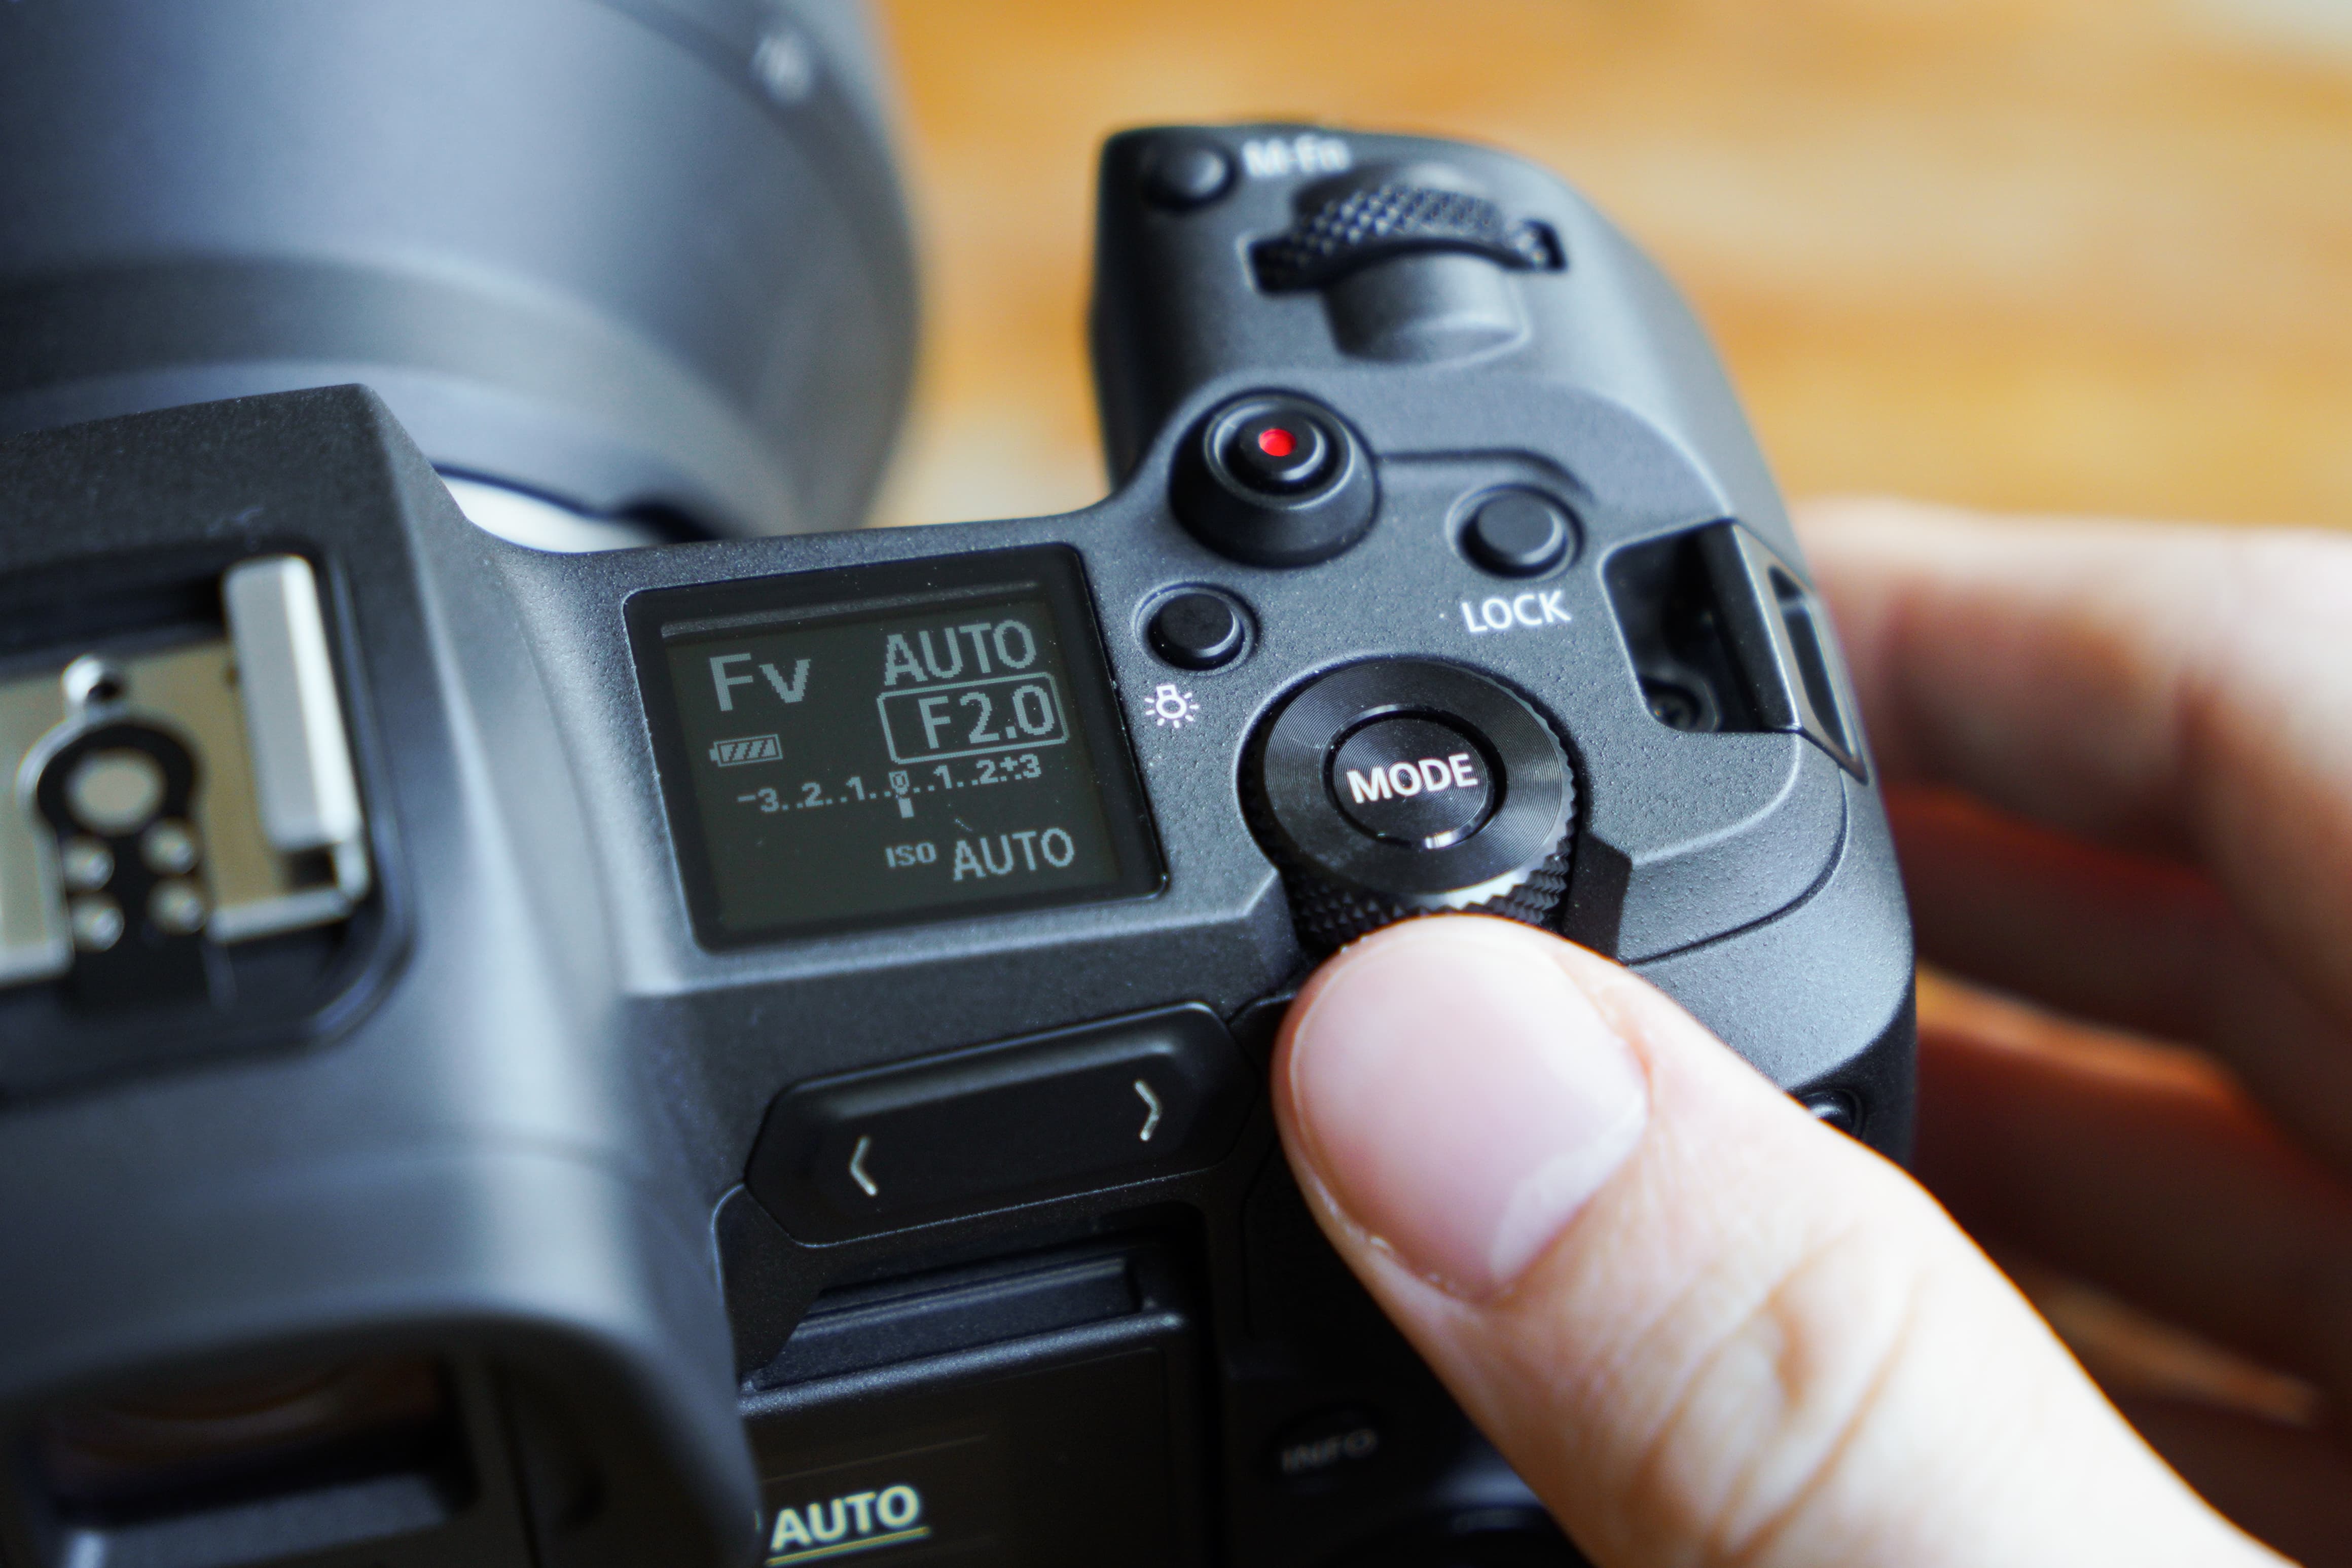
It’s worth double checking what you have the four-way directional buttons assigned to. Here the Up button has been assigned to resetting the selected item in Fv mode back to auto.
If you suddenly decide that you want to revert multiple settings you’ve taken off auto back to full auto operation, this is also possible. Simply touch the right four-way controller button and you’ll notice how aperture, shutter speed and ISO all return to full auto. Another perk of the Canon EOS R, which we mentioned in our review of the camera, is the excellent level of customization it offers. If you decide that you’d like to assign the four-way controller buttons to different functions this isn’t a problem either, as the return to Auto or All Auto functions as part of Fv mode can be reassigned to other buttons on the body, including the M-Fn button, the LCD illumination button or the SET button.
Summary
Like anything new, it takes time to get familiar with working in Fv mode. The first time you use it you may feel it’s more hassle than it’s worth and revert to shooting in your normal way. Experiment and persevere with it however, and you’ll likely find it’s the only exposure mode you ever need.
Canon touts Flexible-priority AE as a new exposure mode, but it could be argued that it’s not a new exposure mode as such and simply presents a different way of being able to control all the existing exposure modes. Whichever way you look at it, Fv mode is an interesting addition to the EOS R and doesn’t take away anything from the usual exposure modes we’re used to seeing on EOS cameras. You can take it or leave it.
It’s worth spending a few hours familiarising yourself with the Fv mode on the Canon EOS R.
Whether it’s for you or not all comes down to personal preference and if you’re open to the idea of switching from the exposure mode you use most frequently, whether it be P, Tv, Av or M to Fv mode, which provides quick and easy access to all of them from one place. I can foresee Canon rolling Fv mode out across all of its new models that arrive in the EOS R system in the future.
Experimenting with Canon Fv mode
The best way to learn how Fv mode works is by using it. Follow the steps below and you’ll quickly know your way around it and have a better understanding of how it works.
Selecting Fv mode
There are a couple of ways of selecting Fv mode on the EOS R. Press the mode button and scroll through the various exposure mode options using the rear dial and you’ll find Fv mode positioned between Scene Intelligent Auto and Program AE modes. Alternatively, tap the mode button and select Fv mode using the touchscreen.
Underlined means auto control
In its default state, Fv mode is a full auto exposure mode and operates similarly to Program AE (P) mode. Glance at the shutter speed, aperture and ISO settings and you’ll notice they’re all underlined, which tells you that all exposure variables are being automatically controlled by the camera.
Learn how to change the active exposure variable
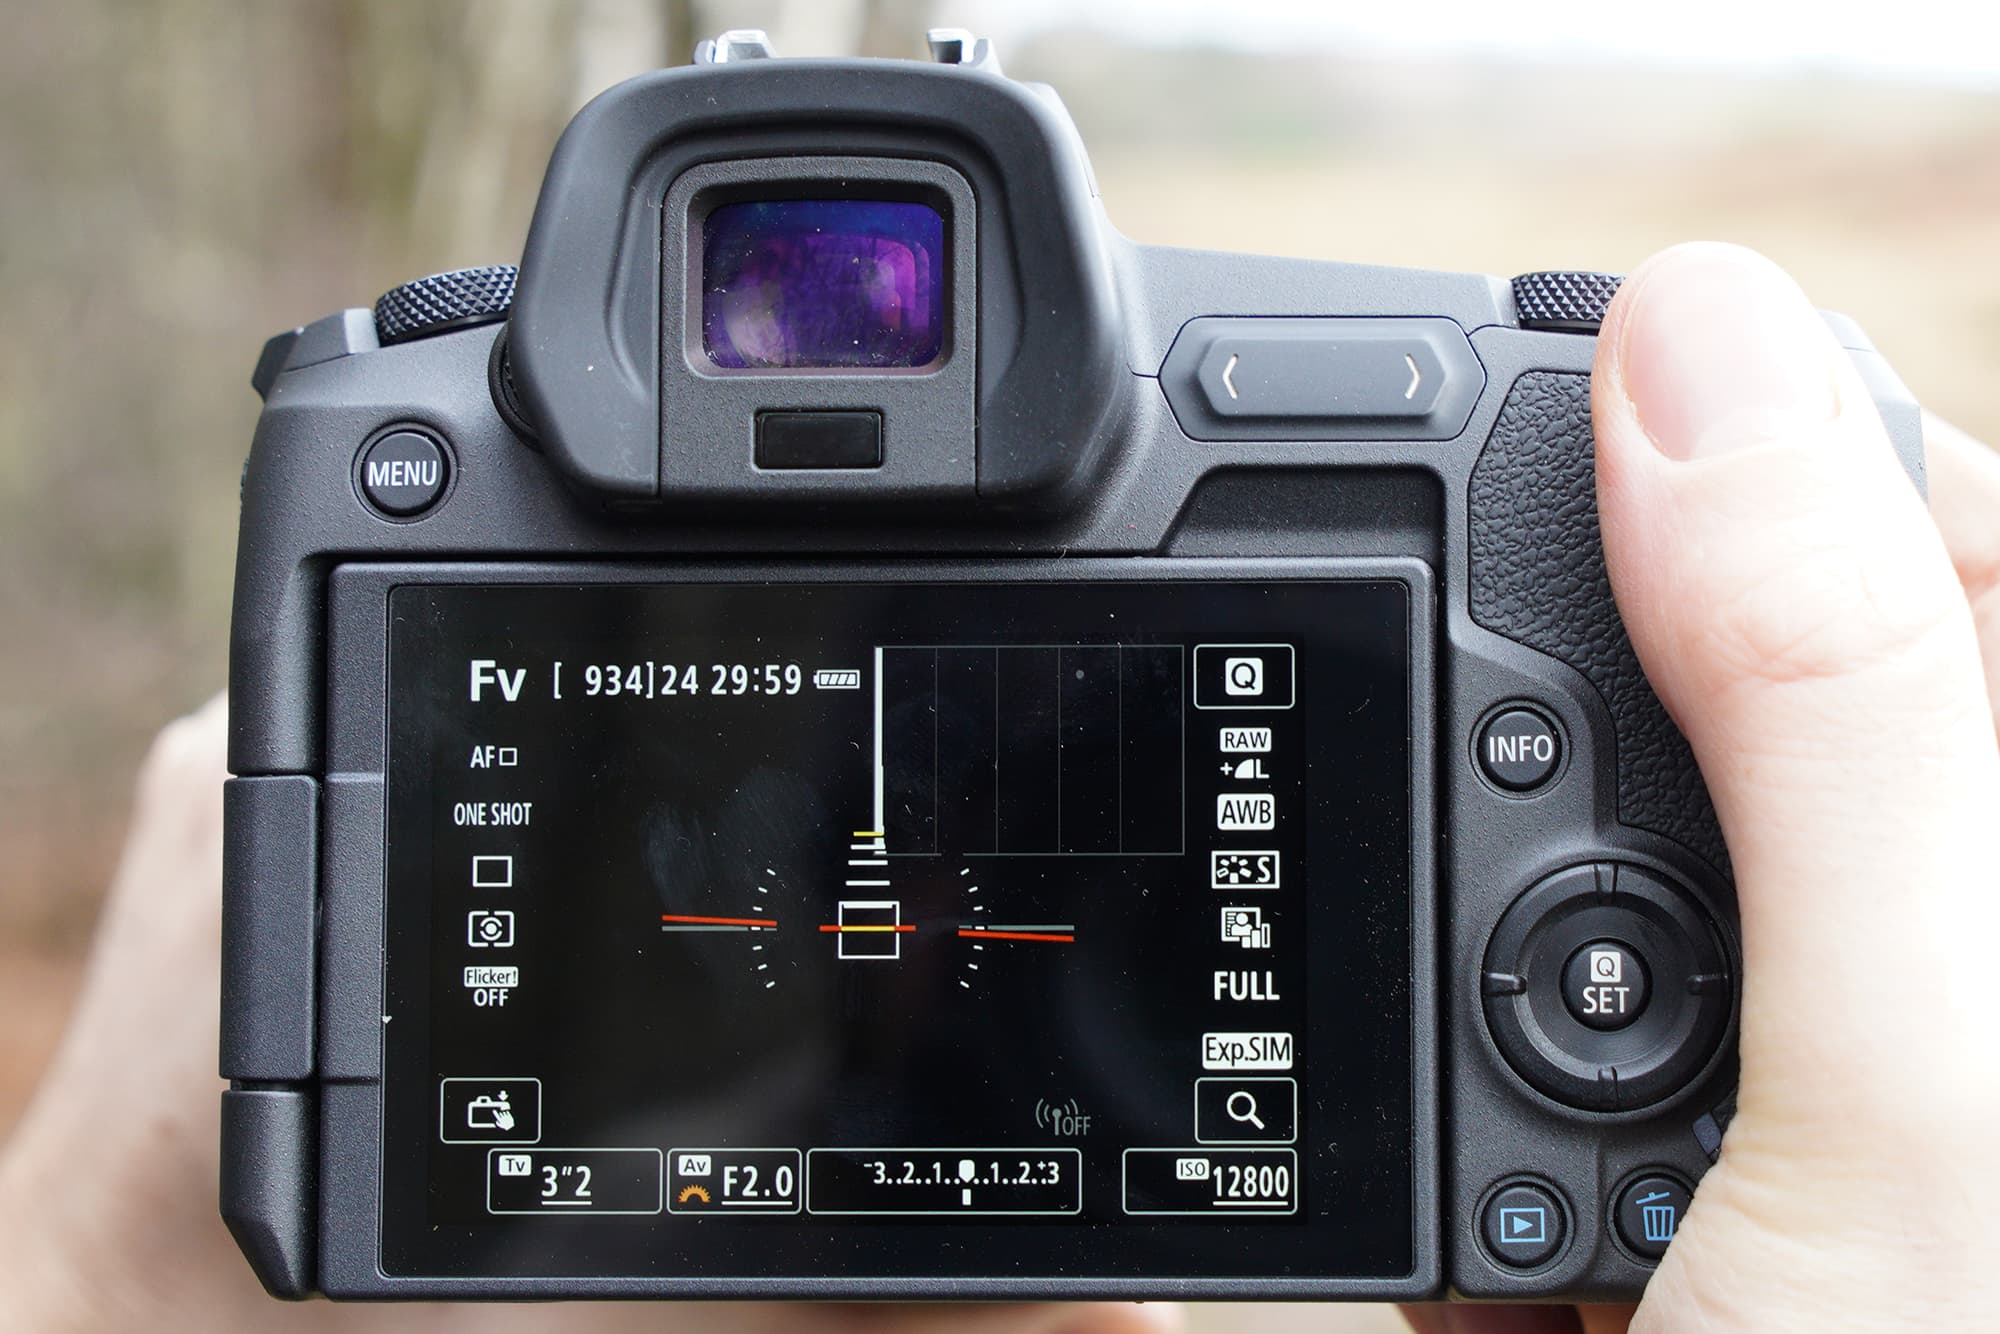
The rear dial is used to toggle between shutter speed, aperture, exposure compensation and ISO. A small orange dial icon appears next to the currently active exposure variable on the screen and EVF. Up on the top plate LCD the active exposure variable is circled, which is useful for glancing down at now and again.
Dial in your preferred settings
With your desired exposure variable or multiple exposure variables active you can then use the knurled top plate dial that’s positioned just behind the shutter and M-Fn buttons to dial in the settings you’d like. The alternative method is to tap the exposure variable icons at the bottom of the touchscreen and drag your finger across the slider scale.
Changing the return to auto settings
Head into the C.Fn4: Operation area of the EOS R’s main menu and select Customize buttons. Scroll down and check the Up button is set to Auto, which resets the selected item in Fv mode back to Auto. It’s also worth checking the Right button is set to All Auto, which resets all exposure variables back to auto with one button press.
Test the return to auto shortcuts
Try experimenting with the shortcuts you’ve just setup. Make ISO active, increase the sensitivity manually and then hit the Up button on the directional pad. You’ll notice ISO is immediately reset to Auto. Now try dialing in a new aperture value and a high ISO setting. Hit the Right button and you’ll notice all exposure settings are reset to Auto.