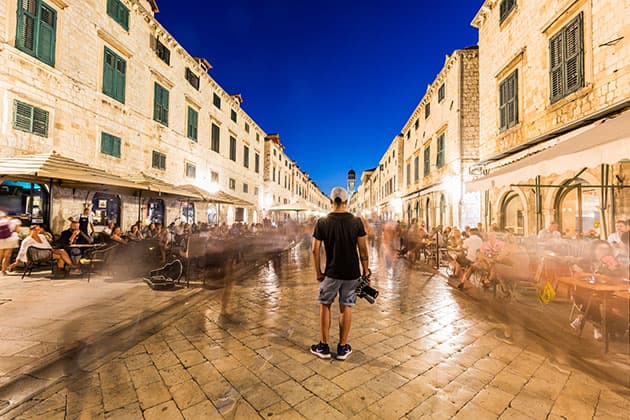
Documentary & street
The benefits of black & white, the importance of creative composition, and the art of editing are all explored
Credit: Claire Gillo
Don’t worry about noise
When you’re shooting quickly and on the go you won’t have time to set up lights, so when it’s dark simply push the ISO up on your camera and embrace the noise! By converting your image to black & white at the editing stage you can stylise your picture with the grain. This image was taken at ISO 2000. The textured noise coming in through the background actually adds another element rather than existing as an unwanted flaw. AP
Picking the right frame
Editing in itself is a true art form. At the end of the day there are no right or wrong answers, only a difference of opinion. Often we have an emotional connection to our images that can be a good thing but can also blinker our ability to see. A good way to gauge which images are working well is to get a range of opinions. Sharing on social media sites is useful for feedback, but also sharing with people you trust, and whose opinion you value, is vital. AP
Credit: Claire Gillo
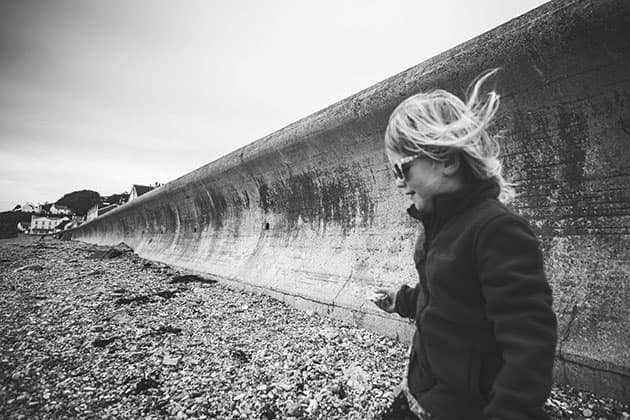
Go black & white
When it comes to telling a story with an image, colour can often (not in every circumstance) be a hindrance and distraction. By switching to the monochrome medium the elements in the frame are easier to see and shape, and lines leading the eye through become key. This image is about a village by the beach and a connecting road that is dominated by the sea and erosion. The sea defence plays a key part in keeping the village safe. AP
Spare batteries
Carry plenty of memory cards and spare batteries. If your camera has a double card slot use it as extra backup. To save battery power avoid ‘chimping’ – reviewing every picture immediately after shooting it. AP

Credit: Claire Gillo
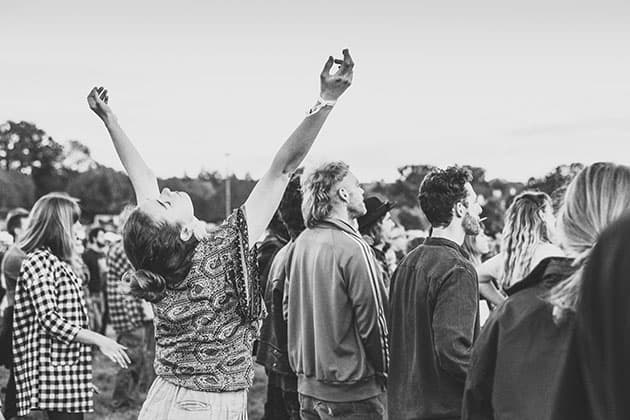
It’s all about the moment
Although we think the moment just happens (and to some degree it does) we can also predict what might happen when we start to people watch. This photograph was taken at Sea Change Festival last May in Devon, and was taken by the photographer about a minute after spotting the girl in the crowd and watching her movements. AP
Look for colour
Whilst black & white images are great in a documentary style as they can tell a story, on the flip side of the coin colour can work well too. Look for subjects in bright clothing against dark or contrasting colours. In this case a young girl in a neon pink coat looks through a blue glass panel. The two colours work well together. AP

Credit: Claire Gillo
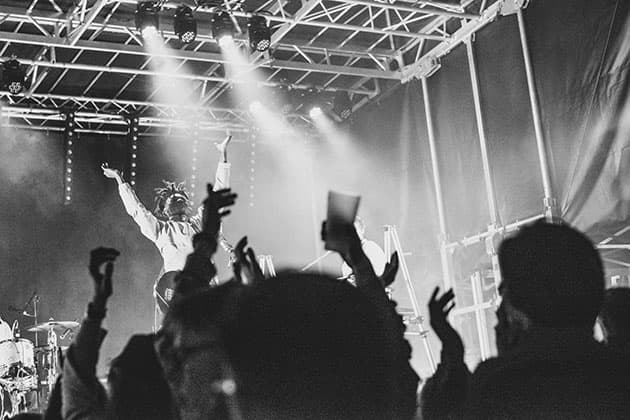
Use text
Text can be a great aid to your documentary shot to help tell a story or add a quirky message. In this image musician Gruff Rhys throws aside a sign that says ‘Don’t follow signs’. The inclusion of the audience in front of the camera was also intentional to create that feeling and connection of the performance. AP
Track
When shooting moving subjects set your focus setting to the tracking feature to ensure they stay pin-sharp. Predicting where they might move into the frame and composing before they do will guarantee a winner! AP
Credit: Claire Gillo
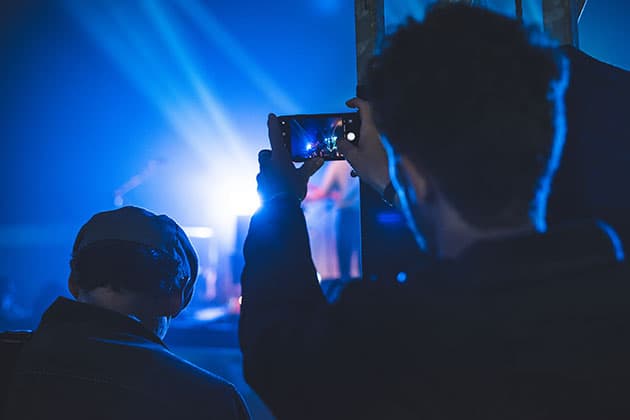
Take a creative composition
Look for interesting angles and alternative ways to compose your shot to get something different from the norm. In this image the person shooting the performance on stage through the mobile phone became the point of interest and adds another element to the photograph. AP
A smile goes a long way
Don’t forget if you get caught shooting an image on the sly then simply smile and apologise. A smile can go a long way, and remember people don’t want to feel threatened by you or what you’re doing. If they do get annoyed delete the image and move on. You can always try to rescue it later using recovery software. AP
Credit: Claire Gillo
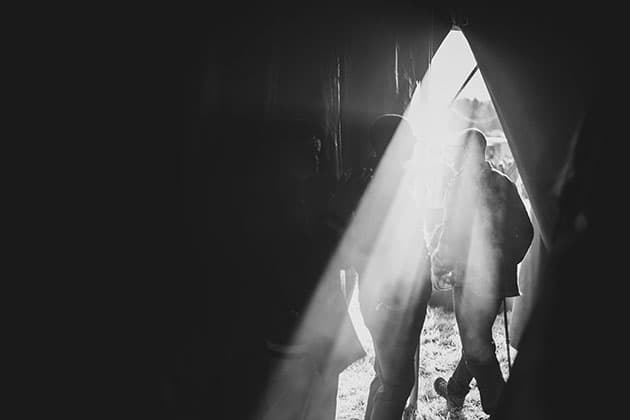
Find atmosphere and light
If you find some decent light wait until a person/people walk into it to get the perfect frame. Many street and documentary photographers find the light before they identify the subject, and then wait for the moment to happen. AP
Change your perspective
If you take all your images at eye level they’ll look basic, as we’re all used to this perspective. To stand out, go and stand on something to gain a higher perspective or lie on the ground. You’ll get used to the weird looks. Another option is to take a wideangle lens (I like to use a 24mm) and shoot without looking through the viewfinder. Just use zone focusing and hold your camera high and low. Maarten Mellemans, www.maartenmellemans.be
Speed it up
Often when we shoot the documentary genre we take a lot of images in the space of a relatively short period of time. It can take an age to edit them all if you’re doing them one by one, so a program such as Lightroom or Adobe Bridge to sort and rate will help speed up the process. It’s better to edit all your images in one go, or over a short space of time so they feel more uniform and work as a set if that’s your intention. AP
Shoot at midday
Midday is thought of as a photographer’s no-go zone. The magic hours at sunrise and sunset are the best times to shoot outdoors, so what’s the point of going out when the sun is high and the light seems uninspiring? Midday is certainly a challenging time to shoot, but look for the right pockets of light or angle the subject so that the light from directly above falls on them in a pleasing way; it doesn’t have to be siesta time for our cameras. James Paterson, www.patersonphotos.com
Don’t put your camera down
Anything can happen at any moment, so make sure you’re ready. This means not checking every photo on the camera display immediately after capturing the shot because you’ll miss some great images while looking at your screen. You’ll see the results later when you get them on your computer, and you can then spend time editing them. Maarten Mellemans, www.maartenmellemans.be
Mobile phone
Smartphones are capable of taking great street shots – they are light, portable and, crucially, discreet. Some models have similar levels of control to a standalone camera. AP
Sensitive subjects
Take care where children are involved, and you also need to be sensitive to cultural and religious differences (when taking photographs of Muslim women, for example). For a fuller guide to your rights under the law, see this excellent page on the Urban 75 website: bit.ly/2KCZOp9. AP
Get some business cards
If you’re shooting on the street and one of your subjects takes offence, they often calm down when you freely identify yourself as a serious photographer or offer to share your pictures with them. Never feel you need to be shifty or somehow feel guilty about following the endlessly rewarding pursuit of street photography. AP
Comfortable bag
When it comes to bags you need something comfortable, waterproof, and discreet. Something like the Billingham Hadley Small Pro is an ideal choice as the padded inserts can be removed to convert it into a ‘casual’ bag. AP
Public right of way
If you’re on a public right of way – such as a public pavement, footpath or highway – you’re free to take pictures for personal and commercial use, as long as you’re not causing an obstruction to others or falling foul of anti-terrorism laws or the Official Secrets Act. AP
Pictures of people
Photographers can use their pictures of people taken in public places as they wish, including for commercial gain. While this is reassuring, common sense does need to be applied. A lot of pedestrians in the UK won’t react favourably if you go right up to them without any kind of introduction and shove a long lens in their face. You have been warned! AP
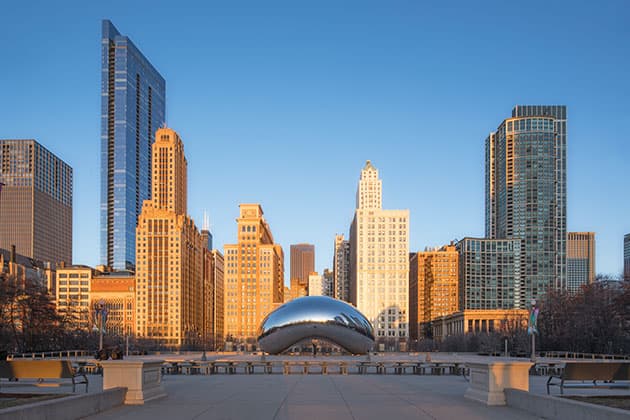
Architecture
Explore buildings and man-made landscapes from different angles and perspectives, with our final set of expert top tips
Credit: James Abbott
Try HDR
Interior photography is one area that always looks good when given the HDR treatment, as these locations often feature high-contrast light – bright windows set against the darker interior corners will always be a difficult exposure to contend with. It can also be a challenge owing to mixed lighting. Areas lit by different light sources can make post-processing difficult, so converting an image to black & white can help because mono naturally removes colour inconsistencies. James Abbott, www.jamesaphoto.co.uk
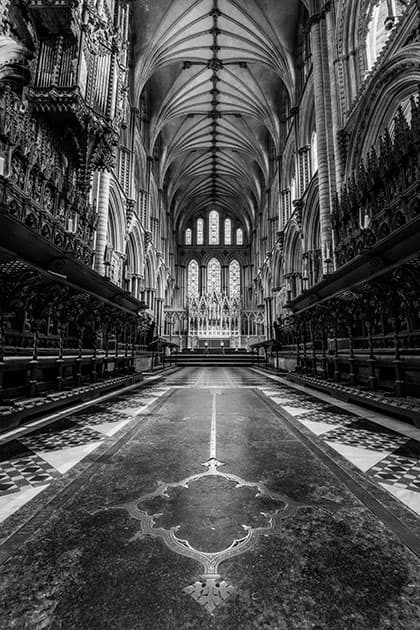
Expose for stained glass
To record the light transmitted through stained glass at the correct exposure it is necessary to ignore the surrounding frame or tracery and base the exposure on the light coming through. The required exposure will be less than that indicated by the metering system. Reducing the exposure sufficiently will allow detail to be retained in the highlight areas of the glass. The shadow will lose some detail, but this is often easier to recover in post-production. Steve Cole
Credit: Dave Fieldhouse
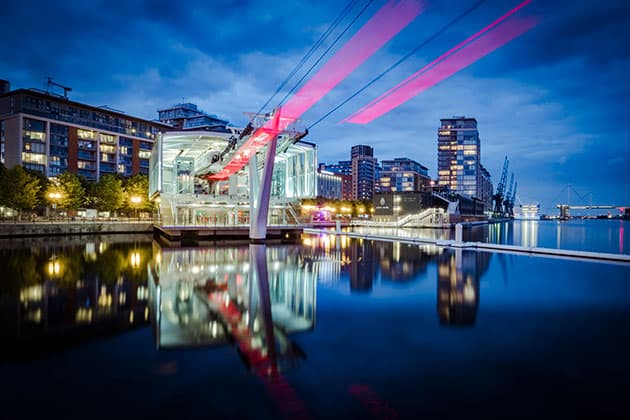
Switch on
During the blue hour the city lights come to life, adding a new dimension to the scene (reverse the above for the pre-sunrise blue hour). Any clouds in the sky add texture and provide options for varying shutter speeds. Increase the ISO and deal with the noise later to freeze an image, or increase the shutter and get creative. Dave Fieldhouse, www.davefieldhousephotography.com
Do your research
Research the history of a building before you photograph it. Check records in the local library, see how other photographers have approached it by looking at stock pictures, find out about the people who have lived in the building. Try to get under the skin of what is, essentially, bricks and mortar. AP
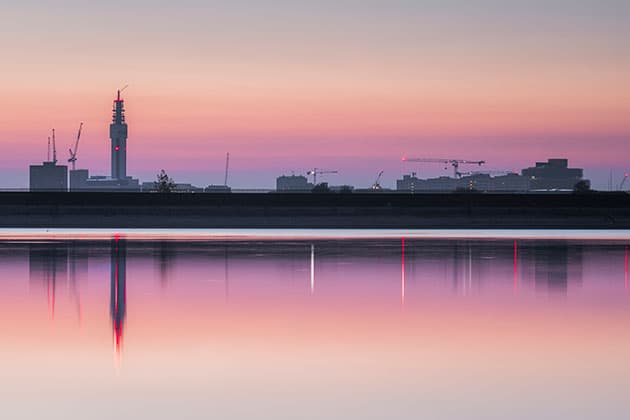
Credit: Verity Milligan
Take time to reflect
Many urban spaces have waterways such as canals or reservoirs based in or near the city. This can provide ample opportunity to capture unique cityscapes, especially during dawn when the water is often still and reflective. If there is a lack of inner-city waterways, puddles can be just as useful. Verity Milligan, www.veritymilliganphotography.com
Lift off
A range of lenses is important. Many industrial shots are out of bounds owing to security reasons; so detailed maps and a long lens are essential. I often use a drone where it’s legal to do so. Being able to get 15 or 20 feet above the ground can make all the difference. Simon Butterworth, www.simonbutterworthphotography.com
Credit: David Clapp
Hire a lens
Specialist optics do not come cheap, and few people can justify splashing out on a tilt-and-shift lens. However, there are a number of places where you can hire a tilt-and-shift lens for as little as £25-30 a day. David Clapp, www.davidclapp.co.uk
Be flexible
Historic buildings are labyrinths of layered history. Many buildings have low ceilings and fascinating details tucked away in corners. I carry a battery-driven LED light and flexible mini tripod to help me get into places others can’t. Andy Marshall, www.andymarshall.co/index
Credit: Matt Parry
Include people
Including people in city scenes is sometimes unavoidable, yet it can give the scene both scale and context. Blending architecture with street photography can create stunning shots that are more dynamic or interesting than a people-free picture. Matt Parry, www.mattparryphoto.com
Tell a story
Tell the story of the building. As well as your safe wide shots, capture details or interesting elements either up close on a wide lens, or far away and zoom in to flatten them out. Janie Airey, www.janie-airey.com
Stay level
Switch on the electronic level or attach a spirit/bubble level to the accessory shoe of your camera to keep the lines of buildings nice and straight. It’s also worth familiarising yourself with the post-production techniques for correcting lens distortion. AP
Know your rights
When you’re photographing private property you might be approached by a security guard or other official questioning your motives. Make sure you’re aware of your rights, and keep abreast of any changes to the law. AP
Think like an architect
Study the way the space is being used, notice where the shadows fall, and observe the balance between positive and negative space. AP
Shoot doorways and details
Look at the entrance to a building: is it ornate or plain? Is there a step that has been worn down by hundreds of feet? Is there a doorknob shiny from years of use? Once you’ve explored the doorway, turn your attention to any windows. AP
Record repairs
If you hear about a famous building (such as the clock tower housing Big Ben) undergoing repairs, take the opportunity to record the workmen and women going about their business. It’s all part of the building’s history. AP
Explore every angle
Explore a building from every angle: lay down on the ground and look up, stained glass climb on a wall to get a higher vantage point, go inside and ask if you can climb the bell tower etc. When you think you’ve exhausted every photo opportunity, take a break, and then start all over again. AP
Record growth and demise
If a landmark building is planned for your town or city make a point of recording its progress. On the flipside, if a building is about to be demolished see if you can find out when and then document its demise. AP
Use lead-in lines
Use stairways, escalators, walls and fences as lead-in lines, but make sure the viewer has something interesting to look at once they get there. AP