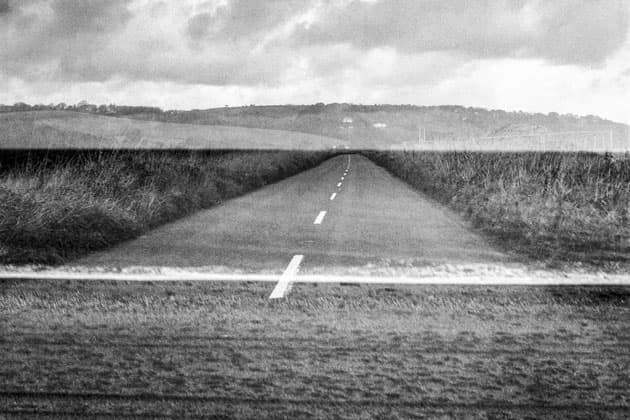
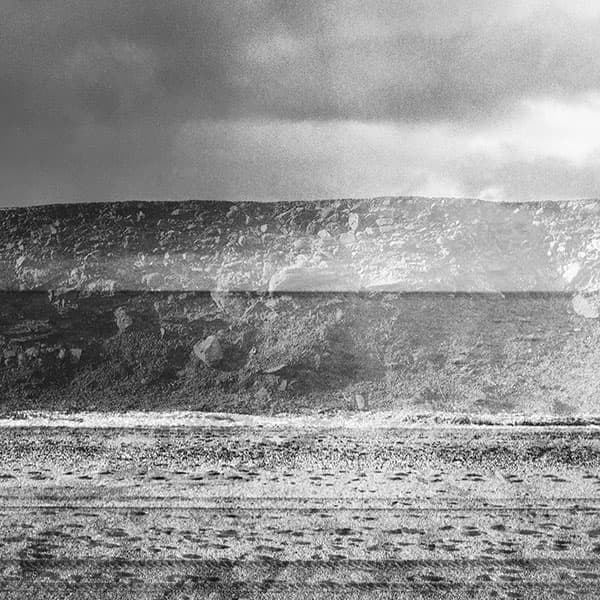
With black & white there is no colour to distract from the shapes and structures. This image shows the new road along Slapton Sands, Devon, teamed against an exposure looking out to sea. Credit: Claire Gillo
There’s no getting around the fact that shooting film is a far more laboured, expensive and uncertain way to produce a photographic image. When it comes to taking a double exposure on film it’s even trickier, as not only do you need to consider visually how the two frames are going to work together, you also need to apply the correct exposure settings to each without under or overexposing the end result. However if you do all this right then there is something far more rewarding and enticing about one that has been captured on film.
To take a double exposure on film, the first thing you will need is a camera that can do the job. For our shoot we used our old 1970s medium-format Hasselblad 500C/M with an 80mm lens. To this day, this camera remains a beautiful and simple machine to use. Once you have a camera you need to work out how to trick it from its default settings to take two exposures on the same piece of film. On a Hasselblad the film is loaded into a film magazine that can be attached and removed from the back of the main camera body. This is why it’s easy to hack around. To take the double exposure first shoot the scene as normal, then insert the dark slide back over the magazine film back, take the magazine off the camera, wind the camera on, put the magazine back on, remove the dark slide and shoot another exposure. It may sound a bit complicated, but once you’ve done it a couple of times it’s simple to master.
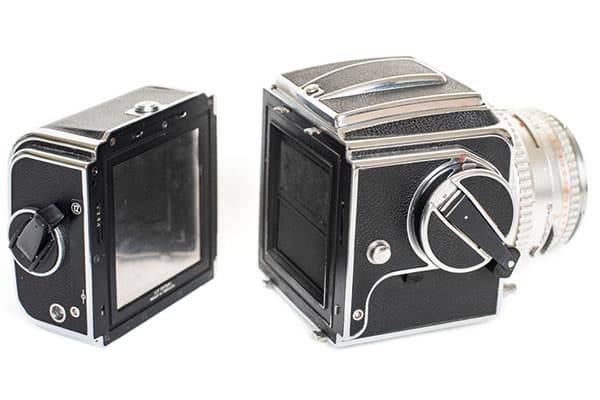
The Hasselblad comes apart (film magazine on the back) making it easy to trick the camera. Credit: Claire Gillo
If you have a 35mm camera, which for many is more accessible, then the process is a bit different. The idea is you take your first exposure, hold the rewind knob lever so your film can’t move, press the rewind button on the bottom of the camera, and push the advance lever to wind the film on without actually winding it on. Then you can take another shot again. There’s a great instructional, short YouTube video on how to do this if you need a visual guide.
Once you have your camera sorted then the next step is your film. Decide if you want to shoot black & white or colour, and what speed you need your film to be. We were shooting on 120 medium-format film as our camera produces square 6×6 inch frames. The ASA or ISO on ours was 400 which meant we didn’t need to use a tripod as we were shooting during the day. Like with digital the higher the ISO the grainier the image; however grain compared to digital noise is far nicer and less of a technical flaw, so you can use it to create a more stylised look if desired.
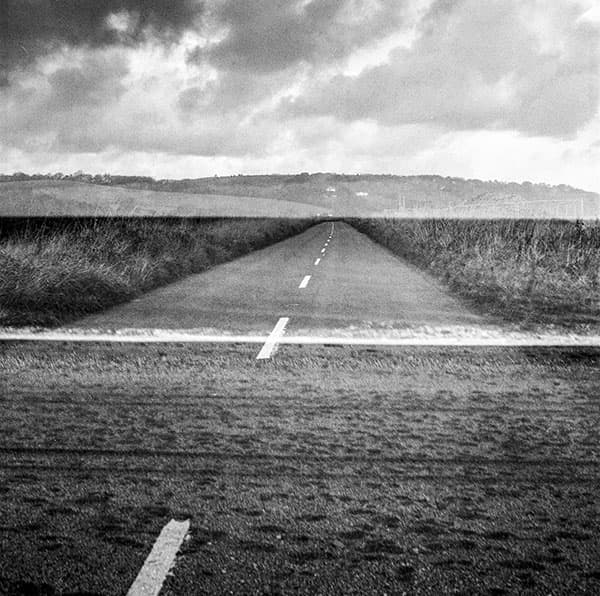
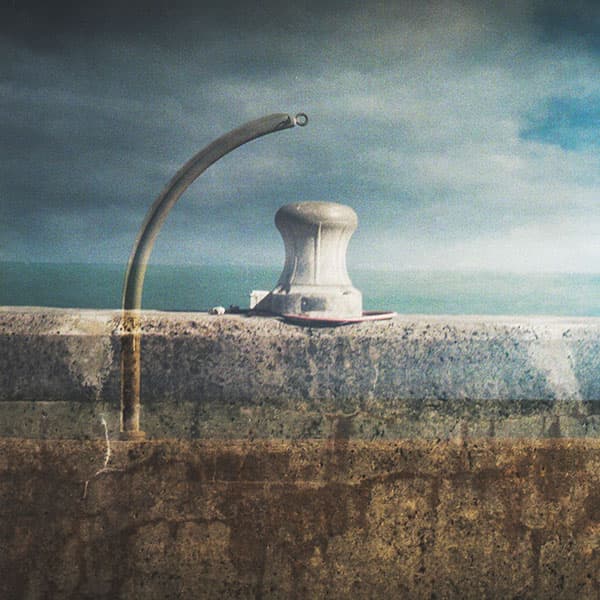
This image shows the passing of time as the tide goes in and out. Sometimes a simple approach is all it takes. Credit: Claire Gillo
For this double-exposure film shoot we shot on both black & white and colour film. Despite doing the same technique for both rolls of film our colour shots came out far better, going to show that each film and brand all require a slightly different approach. For our colour film we underexposed each frame by -1 stop to avoid overexposing the end result. Film can be forgiving so don’t be afraid to let a little more light in as you normally would. With our black & white film we underexposed by -1 stop, but the results were unusable. On our next shoot a few weeks later with the same black & white film we set each scene to correctly expose, which came out much better. You may also want one image to be more present in the frame (therefore you’ll need a brighter exposure value) and the overlaying subject more faint (underexpose). It really is a case of experimenting and writing down what you have done so you can learn what does and doesn’t work. Part of the process with double exposures on film is making mistakes, experimenting and hopefully getting closer to perfection next time.
When it comes to finding good subject matter then there are many approaches you can take. Shapes, strong lines and patterns all make interesting visual effects, and if you’re after a dreamlike avant-garde type result then people (silhouettes), buildings, flowers, water all make fantastic subjects to merge together. You’ll need to think about how you can make the exposure work logistically. For example if you need to travel 20 miles between each frame then it’s going to take a long time to shoot a roll of film. It helps if your subject/s and settings are in the same place (but this isn’t essential if you have the patience).
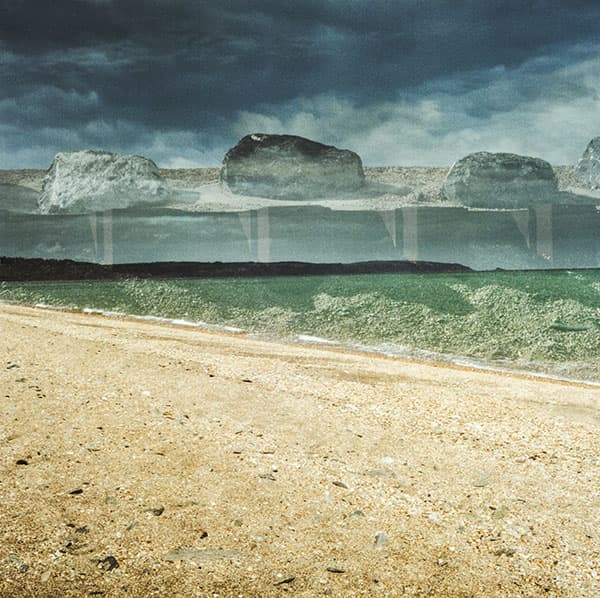
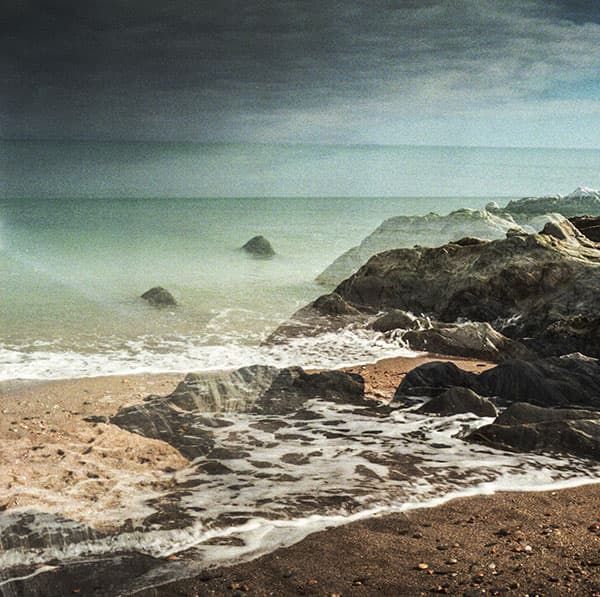
This view looks over the sea at Slapton Sands towards Dartmouth teamed against an image of the jagged sea defences. The shapes, textures and lines in both images blend well together. Credit: Claire Gillo
The images taken on our photo shoot are part of an ongoing project that looks at the relationship between the sea and the erosion and shaping of the land. Therefore not only was it important for the two images to work together from a visual standpoint, but we also wanted the images to highlight the relationship between nature and man and the ongoing battle of the changing land. If you want to see more, you can follow the project on instagram.
Developing and scanning
If you have the facilities to develop and print your own images then you will have more control over the end result. However for many of us this is not an option. We sent our films to be developed at Digital Lab. As they have a postal charge it makes more sense to send off a few films at one time. They did a great job and quickly turned our films around in a few days. As we have a scanner at home we only ordered the negatives. If you don’t have a scanner at home then scanning negatives is another service most film developers offer.
To digitise our negatives we used the Epson V600 Photo. This is a great mid-range affordable scanner that comes with negative holders and an easy-to-use software programme.
After we scanned our images we quickly cleaned up the dust and scratch marks using the Spot Healing brush in Photoshop and boosted the contrast a little.
Claire’s top tips
Credit: Claire Gillo
Monochrome or colour?
Some argue that black & white film works better for the double-exposure technique as the shapes and tones are easier to blend together without the distraction of colour; however we found that really it’s just a case of experimenting and seeing what works! It’s all down to personal preference.

Credit: Claire Gillo
Light and dark areas
When exposing your frames remember that white or bright areas will destroy the information on a negative. Anything that is dark will maintain it for the next frame. So if you take a silhouette of a figure, underexpose the figure/face first and then this area will be filled with what you shoot in your next image.
Credit: Claire Gillo
Remember where you place objects
Your first image will be your primary subject. Remember where you place key objects in the scene so when you frame up your next image (your second subject) they work together in the frame. Shoot a few frames of the same subject to get it right and have some variations.
Credit: Claire Gillo
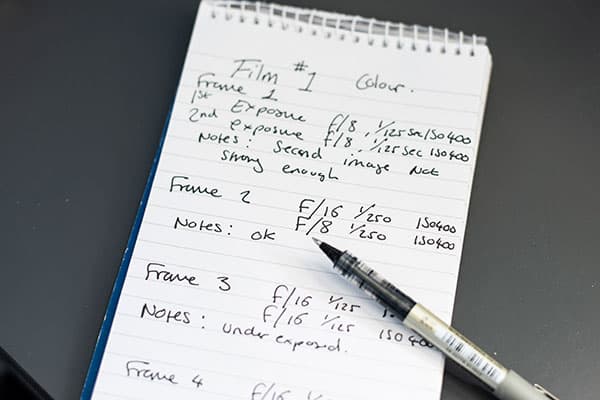
Write it down
Film can be quite forgiving, but it can be a useful exercise to write down all your camera settings for each exposure and then you can see where you went wrong and how to make improvements next time. Our black & white film was underexposed and unusable, and we had to try again.
Credit: Claire Gillo
Hasselblad history
For any keen Hasselblad enthusiasts out there, have a look at this visual feature on its website of the history of its 500 model. The iconic 6x6in square format is lovely to work with, making a refreshing change from the 2:3 landscape ratio.
Kit list
- Camera You’ll need to find a camera that can do the job whether it is a large-format, medium-format, or 35mm camera. Our 500C/M is easily tricked into taking two exposures in one!
- Film Consider the film speed (ASA or ISO) and whether you want to shoot in colour or black & white. The latter is more straightforward; however when it comes to colour film the results in tone and colour vary across the brands.
- Light meter There are a few options when it comes to metering. You can either use an external light meter, your film or digital camera (our film camera did not have one), or a smartphone app. We tried the app called Light Meter – EV for Photography on the app store for free.