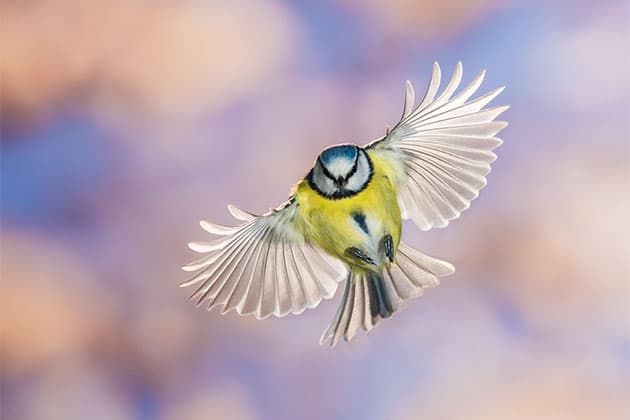
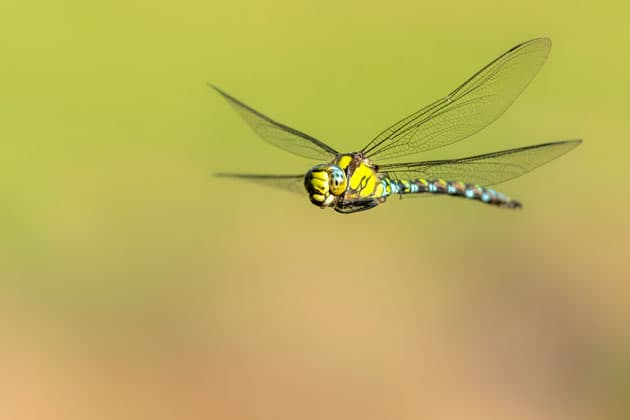
Sharper bird photography – Guy Edwardes
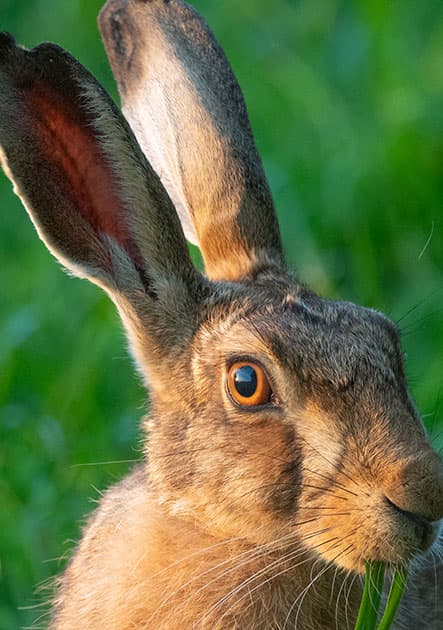
When it comes to capturing great images of birds, Guy Edwardes is one of the best in the business. As well as being in steady demand as a workshop leader, his images are marketed by several leading agencies including Getty Images. He also manages a library of over 250,000 images and has been widely published (including several AP covers). He tends to stick with tried and tested gear and techniques, rather than jumping on the latest bandwagon – he’s definitely sticking with his Canon DSLRs, for example. ‘Soft shots are a killer with bird photography, and I have learned through trial and error how to keep images sharp. I’m happy to share my hard-won tips banishing soft shots, both in terms of camera technique and gear.
Credit: Guy Edwardes
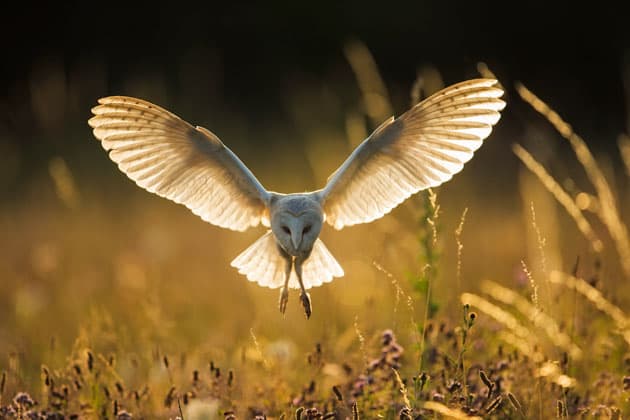
EVFs nein danke
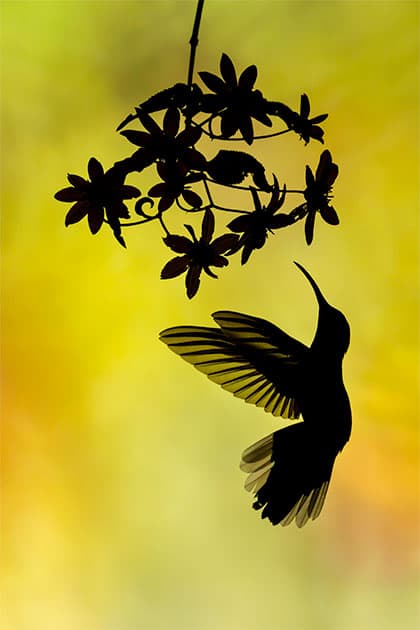
For bird photography, I am not convinced by the EVFs (electronic viewfinders) on mirrorless cameras. When I was in Costa Rica recently shooting hummingbirds, the workshop attendees with mirrorless cameras were getting some really weird stepping effects in their EVFs, which was very off-putting. The refresh rate of the viewfinder screen just wasn’t fast enough. I prefer to use live view on the back of the camera, as the high-res screen looks like the scene are you looking at.
Credit: Guy Edwardes
Back-button focus lock
I always use Canon’s AI Servo (continuous AF) for moving subjects. I don’t use back-button focusing as I end up having to press two buttons with action shots; I simply don’t get on with it. If I want to hold the focus, I will use back-button focus lock. So if a bird suddenly moves or perches I can hold focus, recompose and take the shot. This can make effective composition easier too.
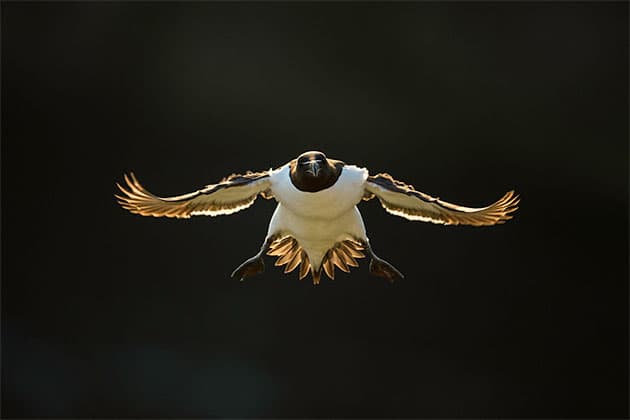
Push the ISO as necessary
I will use higher ISOs for wildlife when necessary in order to cope with low light and keep up the shutter speed. On my Canon EOS 5D Mark IV and 1-DX I will push the ISO to 6400 and sometimes to 12,800 and still get good results. It is better to have a noisy, sharp shot than a soft, low-noise one.
Credit: Guy Edwardes
The eyes don’t always have it
While it’s good to try to focus on a bird’s eye, this is not always possible, particularly if the subject is quite a distance away. So focusing on the birds’ chest or neck can be easier for the camera and lens, particularly if bright colours or lighter tones contrast with the background.
Be careful with stabilisation
For low-light shots or portraits, or whenever I am shooting with big telephoto lenses, I will use a tripod. However, I shoot handheld for fast-moving subjects and with smaller lenses. In these cases, it’s important that I set a shutter speed that is as high as possible. I also turn off image stabilisation when shooting over 1/1000sec. The stabilisation takes power away that could be used for tracking or other important AF features.
Credit: Guy Edwardes
Make the most of central AF points
Remember that not all AF points are created equal and it’s still the case that the central points tend to be the most sensitive for action and tracking shots, which is basically what a lot of bird photography involves. Again, using the focus and recompose technique via the back-button focus lock means I can make greater use of the central points.
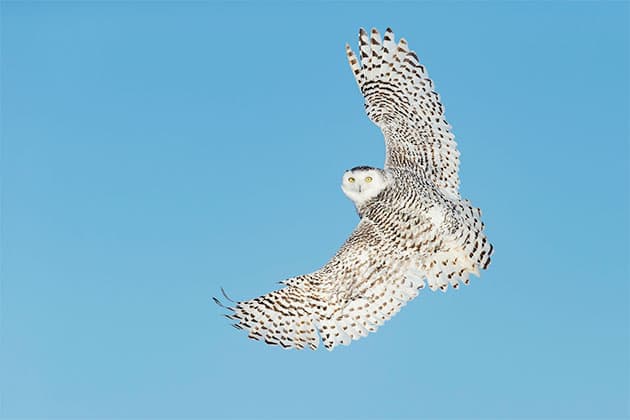
Credit: Guy Edwardes
Wait until the bird is right in the frame
When focusing on subjects in flight, I try to prefocus on the point the point that the bird is the right size in frame, carefully following it until it’s in the correct position (even if it’s coming from a long way off). When the bird is the right size in frame, I will then quickly focus so the AF snaps onto the bird without it accidentally focusing on the background. For static subjects, I like to use AF in live view, as it means I can magnify right in on the subject.
Kit list
- Canon EOS-1D X Mark III Guy is a committed Canon user, and while he swears by his EOS 5D Mark IV and 1D X, he is looking forward to using the new EOS-1D X Mark III. ‘Moving AF points is more like using a mouse control, which will make focusing even faster.’
- LensAlign ‘With long lenses it’s important to calibrate your lens,’ says Guy. ‘You can pay to get this done, but I use LensAlign. All the adjustments are done in camera and you can be sure you won’t get front or back focusing by mistake.’
- Decent tripod and spikes ‘It’s all very well having a sturdy tripod, but if you set it up on spongy ground, you lose all the benefits and you’ll be compromising the sharpness of your images. I use a set of 12cm long aluminium spikes that screw into the feet of my Really Right Stuff TVC-34 tripod.’
Guy Edwardes has been a professional landscape, nature and travel photographer for over 20 years. Based in Dorset, he has a range of clients, and runs a number of courses and workshops.
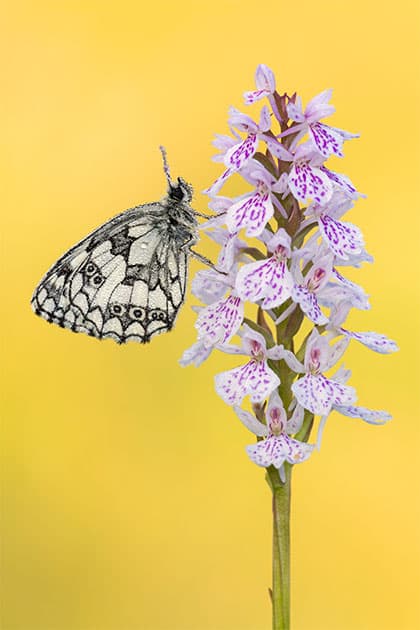
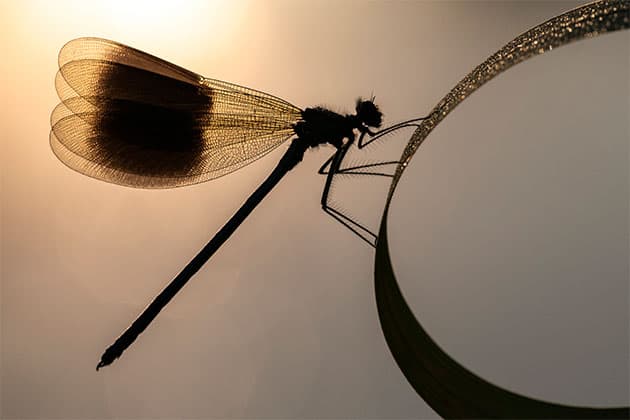
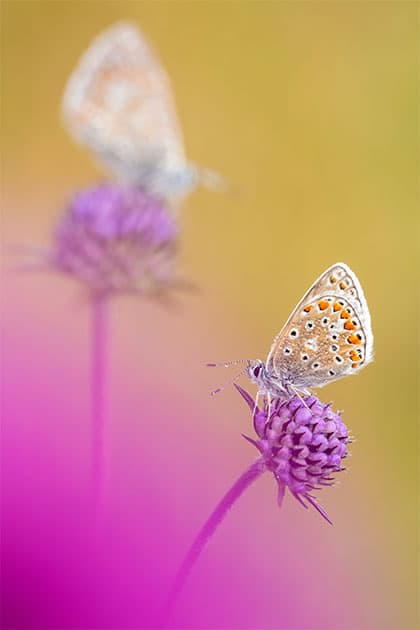
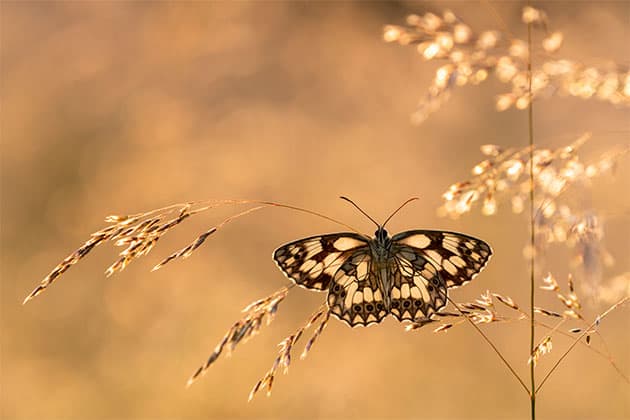
Sharper insect photography – Ross Hoddinott
Ross has been capturing great macro shots of insects, particularly butterflies and dragonflies, since he started taking pictures aged only ten. Within a few months he had won the first BBC Countryfile photography competition with a dragonfly close-up, kickstarting a career that is still going strong today. ‘I don’t think there’s any subject more accessible than close-up wildlife photography,’ he says. ‘You don’t have to go out hiking into a big landscape, you don’t have to bait subjects or sit in a hide for weeks on end waiting for them to show. With macro you can find subjects in your garden, in the park, anywhere, and this accessibility is one of the things that makes macro so popular.’
Credit: Ross Hoddinott
Customise the zoom button
Macro insect photography is pretty unforgiving, so your images must be pin-sharp. You need to be able to check this as you shoot, so you can make adjustments to your focusing as necessary. The normal image preview is unlikely to reveal whether the image is critically sharp. So I set up the zoom function on my Nikon DSLR to enable me to check images on the screen at 100% or even higher magnification, at the press of a single button. Check your camera manual to find out how to do this, or online forums if you get really stuck.
Credit: Ross Hoddinott
Depth of field decoded
With macro, depth of field is very shallow, but rather than seeing this as a problem, go for wide apertures so you can manipulate it. A lens has one plane of focus, so it’s vital to get your camera parallel to the subject, so as much of the subject falls within that plane to keep the critical areas sharp. Most DSLRs have depth of field preview, which is really handy for checking subject focus. I tend to shoot in aperture priority for control over depth of field.
Pick your day
It sounds like common sense, but for insect macro work, pick a day when the wind speed is no more than 12mph – anything much more and you’ll have your work cut out as the subject will be blown around. Pick a day when it’s still and you’ll find life a lot easier. Or at the very least shoot from a sheltered spot and make sure your tripod is as stable as possible.
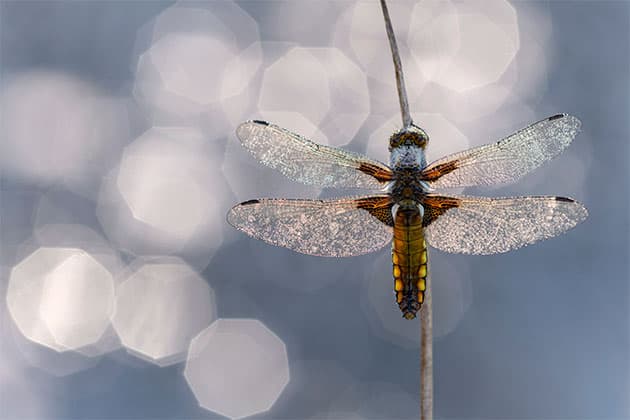
Credit: Ross Hoddinott
Manual for macro
For 90% of the time when taking macro shots of dragonflies and butterflies I will use manual. Pretty much everything I do with a tripod, I will manually focus. If I am stalking a dragonfly or butterfly or a larger subject, I am more likely to use AF. But a lot of my insect work is taken early in the morning or late in the evening when the creatures are roosting. So I set up to my tripod and focus via live view, manually adjusting my focus for extra precision by zooming in.
Credit: Ross Hoddinott
Use focus peaking
I find focus peaking very helpful and I definitely recommend using it if your camera supports it – most mirrorless cameras offer focus peaking, along with my Nikon D850 SLR. It helps me to see the extent of the depth of field. With macro work, the depth of field is very shallow, it tends to fall roughly 50/50 either side of the point of focus. Sometimes I am not necessarily even focusing on an insect’s eye, perhaps it’s the fluff or fur on the insect’s body and front of their eye. Using focus peaking with a good lens enables this kind of selective precision focusing.
Credit: Ross Hoddinott
Back button focusing
When I am stalking an insect or larger wildlife, I will use AF with back button focusing (BBF). I will select a single focus point and move it over the abdomen or eye of the creature I am shooting, depending on the viewpoint and my creative intent. I can set up the joystick on my Nikon D850 so I can activate a small group of AF points to help me get exactly the right area in focus. BBF is not for everyone, but it enables me to focus on a point, quickly recompose if needed, and take the image.
Credit: Ross Hoddinott
ISO expertise
A few years ago I would have said keep your ISO as low as possible to minimise noise, but it isn’t so much of an issue now. With a lot of my subjects, even though they may be stationary on grasses or flowers, even the smallest wind movement causes a huge amount of problems for close-ups. In order to freeze out that motion, especially early in the day or late in the evening when there isn’t a huge amount of light, compensating through higher ISO, with the benefit of higher shutter speeds, is a great option. As long as the image is well exposed you can happily shoot macro at ISO 1600 and higher. It’s also useful when shooting handheld to offset your own movement.
Kit list
- Nikon D850 ‘I’m a big fan of this DSLR for macro work, as it offers such a fine degree of control. I can set up the AF joystick so a small group of AF points are selected, and it offers focus peaking when shooting with manual focus.’
- Quality tripod Ross uses a Gitzo Systematic series carbon tripod with a Manfrotto 405 geared head. Geared heads enable you to make very precise micro adjustments to composition, which suits the fiddly nature of close-up work.
- Small LED Small LED devices, like Manfrotto’s Lumimuse range, are great lighting aids for macro wildlife work. They can be camera-mounted or handheld. With a continuous light source, you can preview the effect before triggering the shutter.
Ross Hoddinott is one of the UK’s leading outdoor photographers. He is multi-award winning, and the author of eight books. Ross is recognised as a close-up specialist, and enjoys photographing insects and wild plants.
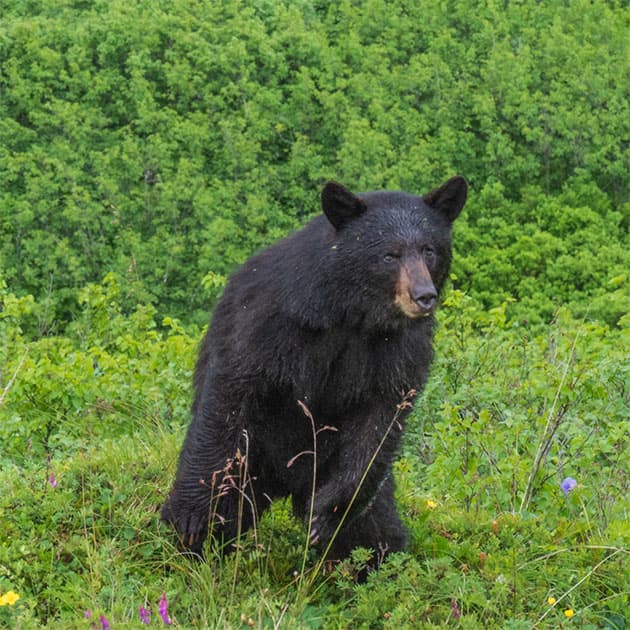
Sharper animal photography – Andrew Fusek Peters
While capturing larger animals can sound somewhat easier than trying to capture distant birds or tiny, easily startled insects, there are also a lot of focusing challenges involved. Key principles include using continuous AF for moving subjects, or focusing carefully on the eyes and head with static subjects (if you can get close enough). Andrew reckons the sophisticated image stabilisation built into the Olympus camera bodies he uses gives him a big advantage when trying to capture fast-moving wildlife. ‘The IS you get with Olympus is better than anything else I have tried,’ he explains. ‘I can regularly shoot at 1/30sec handheld and get sharp shots. Slower shutter speeds let in more light and mean I don’t have to use higher ISOs. With the Olympus systems, I find the focus locks on really quickly.’
Credit: Andrew Fusek Peters
Always be ready
With larger animals, you have to be able to react fast. I was lying down shooting flowers when this bear wandered into my shot. I had to change settings as it reared up, and he was incredibly close. You can’t waste time thinking what aperture do I need, what AF point, etc, you have to know your camera inside out and be able to react quickly.

Credit: Andrew Fusek Peters
Use silent shutter speeds
I was out taking pictures of hares and had no idea this rabbit would make an aggressive display. I was in a hide and just kept on shooting, using the silent shutter mode to avoid disturbing the animals. So again, if your camera supports this feature, turn it on.
Credit: Andrew Fusek Peters
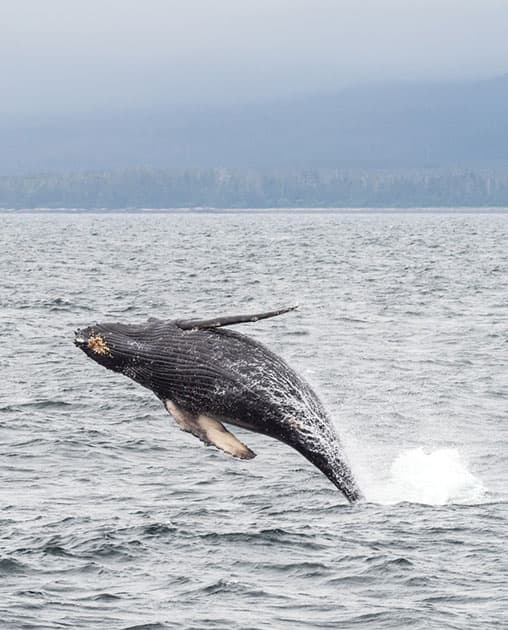
Use more than one focus point
Focusing on sea otters and leaping whales while in a boat going up and down in the sea is another a huge focus challenge. For this kind of image I will select a group of nine or 25 AF points rather than just trying to do it with one. Image stabilisation also comes in really useful in this kind of
situation, so if your camera or lens supports it, make sure it’s turned on.
Credit: Andrew Fusek Peters
Focus on the eyes
Where possible with animals, focus on the eyes, as you would with any portrait. This may involve selecting a single AF point or a group, depending on how far you are away and whether the subject is still. If you can’t make the eye, at the very least focus on the head. Don’t miss the shot as you are obsessing about focusing on the eyes.
Kit list
- Olympus OM-D E-M1X Andrew swears by the advanced in-body stabilisation in Olympus cameras, along with features such as ProCapture – it allows images to be buffered and captured before the shutter is fully pressed.
- Olympus 40-150mm f/2.8 ‘This compact and lightweight option will still give a decent telephoto zoom and the optical quality is very good indeed,’ says Andrew. ‘I also like the Olympus 300mm f/4 and the 12-100mm f/4.’
- Olympus MC-14 1.4x Teleconverter This is compatible with the Digital ED 40-150mm f/2.8 PRO and Digital ED 300mm f/4 PRO lenses for extended reach at only one stop light loss.
Andrew Fusek Peters is a regular contributor to AP and a highly regarded wildlife and landscape photographer whose work regularly appears in national newspapers. He has been shortlisted twice for British Wildlife Photographer of the Year.