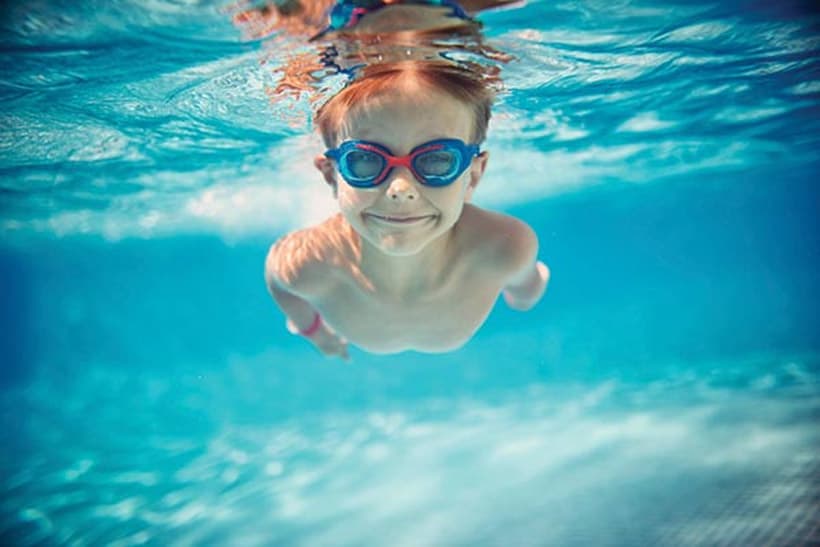
At some point we’ve all thumbed through a copy of National Geographic magazine or tuned into a marine biology documentary on the Discovery Channel and stared in wonder at life beneath the sea. From eye-popping coral formations to rusting shipwrecks, and from schooling fish in the open ocean to your kids splashing about in the hotel pool, the ability to use your camera underwater provides you with an unlimited supply of interesting things to photograph.
“Digital has made underwater photography considerably cheaper and more accessible than it once was.”
In common with many other specialist genres of photography the transition from film to digital has made underwater photography considerably cheaper and more accessible than it once was. Sure, you can still spend huge amounts of money on professional-grade underwater rigs, but there are also plenty of relatively inexpensive waterproof compacts on the market that are perfectly adequate for snorkelling in the shallows with. If you still need to pick a camera, check out our guide to the best waterproof cameras and housings.
Likewise, while some of the best underwater housing units can cost as much as the DSLRs they are designed to keep dry, there are more cost-effective ways to take pictures underwater. Put simply, while your budget will largely dictate the quality of the equipment you can afford, it won’t exclude you from shooting underwater altogether.
Of course, underwater photography comes with its own set of technical challenges and even with the best equipment money can buy, you’ll still need to know a thing or two to get good results. For example, understanding how water affects ambient light and colour temperature are two critical things that stand between you and a decent image. Likewise, shooting underwater also provides a different type of physical challenge to shooting on dry land.
Suffice to say that if you’re going to take a camera into open water then at the very least you’ll need to be a strong and confident swimmer. And if you want to go deeper than you can while holding your breath then you’ll need to learn to dive.
In this guide, we’ll look at all these issues in more detail and aim to provide you with a basic understanding of how to deal with them. We’ll also point you towards some of the better specialist underwater photography brands, as well as some of the best waterproof compacts. Obviously, we can’t hope to cover absolutely everything in the space we have, however, there are plenty of excellent online resources where you can learn more.
Underwater photography – Swimming, snorkelling and diving
While taking pictures underwater presents its own set of unique technical issues, by far the biggest hurdle for most photographers is the physical challenge of shooting while suspended in water. Obviously, you’ll need to be a good swimmer in order to manoeuvre yourself about and take underwater photographs safely.
In addition, you need to familiarise yourself with local conditions beforehand, taking things like tides, currents and swell conditions into account.
If you’re swimming or snorkelling somewhere unfamiliar then try to seek out local advice, too, to ensure you’re not inadvertently putting yourself in any danger.
And if you’re lucky enough to be snorkelling somewhere with strong sun, do apply plenty of high-factor sunscreen, or better still invest in a UV-blocking rash vest or snorkel suit – there’s nothing worse than getting horribly sunburnt on your first day in the water!
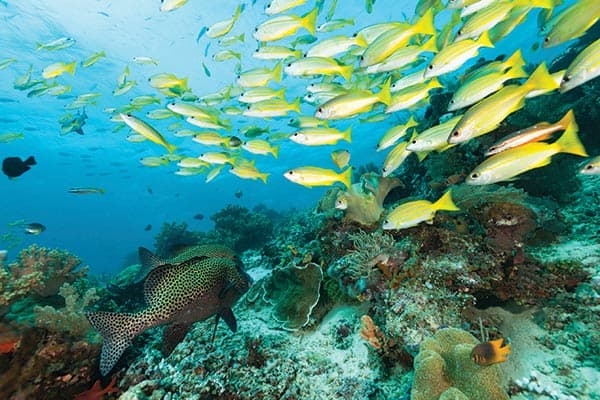
If the conditions are right, then snorkelling and shallow freediving is a great way to view life underwater, especially in calm, clear water. There are numerous beach resorts around the world that have coral reefs or rock shelves located just offshore, and snorkelling is by far the easiest way to see them, though you should always be mindful of any local conservation issues. Arm yourself with a decent pair of diving fins, a snorkel vest and a half-decent waterproof compact and you’ll be able to capture everything you can see underwater too.
If you’re looking to shoot at deeper depths than you can manage with a mask and snorkel then you’ll need to be able to use scuba equipment, which entails attending a course and gaining a certificate. There are a number of recognised diving bodies who award the required certification, and the best known of these is the Professional Association of Diving Instructors (PADI). The Open Water Diver Course is PADI’s most basic diving qualification and completing it will allow you to rent scuba equipment from affiliated PADI dive centres. Holding a PADI certificate will also enable you to access specialist diving holidays where everything is put into place for you.
The Open Water Diver Course can be completed in four to seven days. There are numerous PADI diving centres in the UK where you can do the course, with international PADI centres also found near recognised diving sites worldwide. You’ll need to pass some medical checks before you can enrol and you can expect it to cost about £400 should you choose to do it in the UK. In theory all PADI-affiliated dive centres have to conform to the same rigorous safety practices, but if you plan to tak the course abroad then you might want to research your options beforehand and check out feedback from previous participants.
Underwater photography – Underwater lighting
One of the biggest technical issues that you’ll need to overcome is creating enough light to illuminate your subjects properly. This is basically because water blocks out sunlight. As you might expect, the amount of sunlight decreases the deeper you go. If you’re snorkelling in bright sunlight in shallow, clear water then this isn’t likely to be much of an issue. You might still have to raise your ISO settings to compensate for the loss of light, but your camera should be able to cope without utilising an artificial light source. Once you start diving deeper than five or six metres, however, you will probably need to employ an underwater strobe or video light. If you don’t then your images are likely to come out with a strong dull blue/grey tint and contain very little colour. There are plenty of specialist underwater strobes available at a wide range of price points. Which type is right for you will depend primarily on whether you want to concentrate on capturing still images or video. You can, of course, use the continuous light generated by video lights to capture still images with, however strobes of a similar size will generally produce more power.
In order to attach a strobe – or better still, twin strobes – to your camera you’ll need to invest in a set of specialist cables or a wireless slave device. While most underwater housing systems designed for Mirrorless / CSCs and DSLRs can use electronic sync cables to connect the strobe directly to the camera’s hotshoe via a watertight connection to provide full TTL flash metering, this isn’t always possible with compacts. If you want to connect a camera without a hotshoe to an external strobe, then a wireless optical slave arrangement is your best option.
You can, of course, use an optical slave system with a CSC/Mirrorless or DSLR, too. Many of the better underwater strobes have optical sensors built-in, although if required you can buy a standalone sensor and connect it to the strobe. Either way, once in place the strobe will be triggered by the flash on your camera – in much the same way that Nikon’s Creative Lighting System works.
Whichever lighting system you decide on, one common problem faced by divers using strobes is that of backscatter. This is when the light from your strobe illuminates particles in the sea, which show up in your image as unsightly small white dots – a bit like dust particles on the sensor. While the amount of backscatter is ultimately dictated by sea conditions and therefore out of your control, there are some steps you can take to minimise its appearance in your underwater images. The most common way to do this is to position your strobes to the side of your camera. If you’ve invested in a decent waterproof housing for your CSC or DSLR then it should have attachment points that allow you to place the strobes on external arms that can often be repositioned on the fly to allow for more creative lighting techniques.
Underwater photography – Colour issues
In addition to blocking out sunlight, water also filters out certain colours – with red being the biggest victim, followed closely by orange and yellow. If you don’t take any steps to counter this effect, then depending on the kind of water you are in, your underwater images will display either a deep blue/grey cast (tropical blue seas) or a green cast (temperate waters). In addition, colours will be washed out and lacking in punch. There are three main ways you can fix this to get more vibrant and realistic colour from your images: using a custom White Balance setting, using a specialist underwater filter, and post-processing your images in Lightroom or suchlike. Professional underwater photographers often use a combination of them, or even all three. Ideally you should shoot in Raw as this will give you more control when post processing. While Raw capture comes as standard on CSCs and DSLRs, the Olympus TG-4 is the only off-the-shelf waterproof compact to offer Raw capture, with the rest being JPEG-only.
In terms of white balance, some waterproof compacts have a range of useful underwater presets. Failing this, the ‘cloudy’ setting is a useful alternative. Of course, if you are shooting Raw then white balance can be easily adjusted at post-processing, however if you are shooting JPEGs you’ll ideally want to get it as close as possible at the time of shooting. If your camera allows you to set a manual white balance and you are shooting in ambient light without flash, then this is a good practice to follow. Just remember to switch your camera back to its AWB setting if you want to use flash at any point – otherwise your images will look very red!
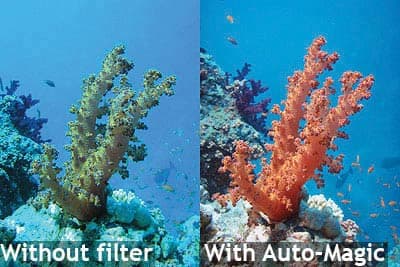
The use of specialist underwater colour correction filters is another way to boost the vibrancy of your images. Most of these are red in appearance and are designed to filter out the blues and greens that become dominant as you go deeper underwater. Because they block green and blue light (rather than add red) you will lose between one and 1.5 stops of light with one attached, which may require you to raise your camera’s sensitivity. Used at depths of below 3m they will help to restore lost colour and will make images of colourful reefs pop with the same colours your eyes can see. Just be careful not to use flash with red underwater filters as this will produce a strong red tint in your image. The effect is not so pronounced when shooting at distance, but close up and reds will dominate the image.
Underwater photography – Composition and general advice
Being able to hold your breath and freedive a metre or two will allow you to get closer to your subjects, which will often help you to get better images. One rule of shooting underwater is that subjects will look closer than they actually are. Even so, it’s generally advisable to get as close as possible to your subject as this will reduce the amount of water between you and the subject, which in turn will increase the intensity of the ambient light (or the power of your strobe). Also, getting closer reduces the red-filtering effect of water, meaning your images will be more vibrant with truer colour.
Most professional underwater photographers tend to prefer using wideangle lenses as these enable them to get closer to their subjects and still fit them all into the frame. As a rule you should try to keep the sun behind you when you shoot too, to help illuminate your subject. That said, rules are there to be broken, so don’t be afraid to experiment.
Be aware of your surroundings, and avoid causing issues for creatures in the wild
GreenFins has advice on how to be a responsible underwater photographer, and we’d recommend heading over there to find out how you can follow best environmental practice. It includes guidance on equipment, as well as do’s and don’ts when it comes to underwater photography.