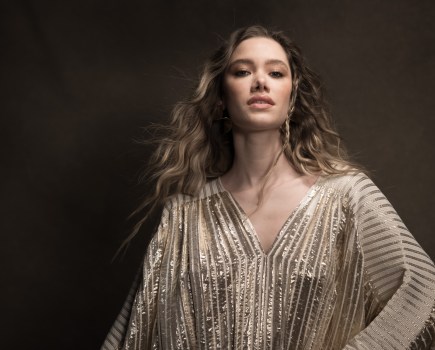

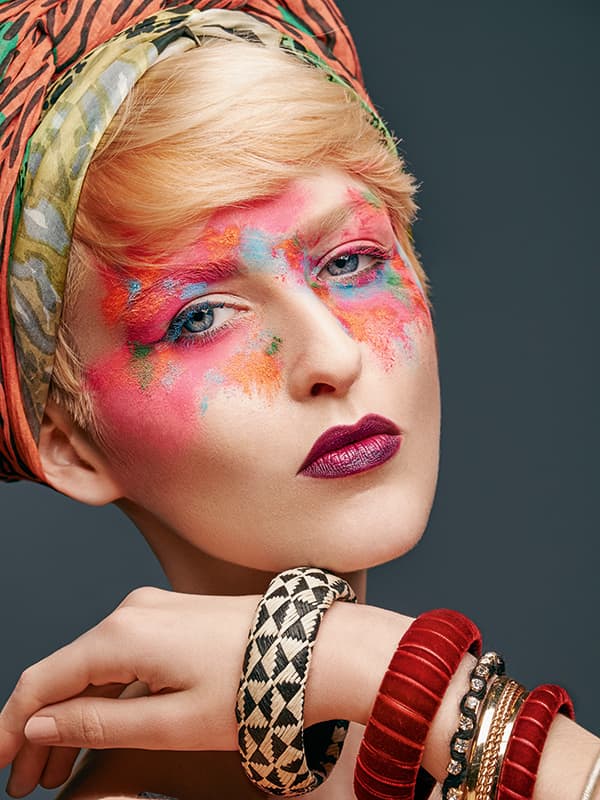
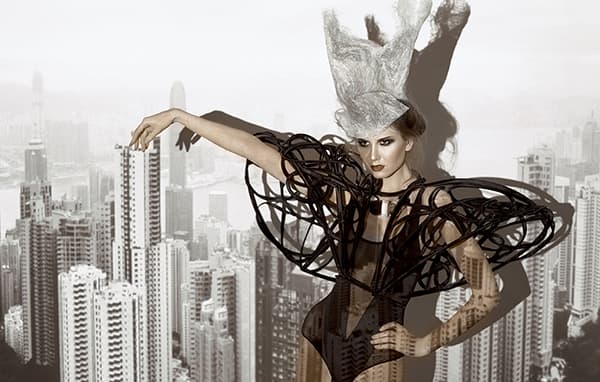
A single light source can produce striking results when used creatively
Lighting techniques have been around far longer than photography. The basics of photography may have been formulated in the early 1800s, but photographic lighting principles have long been influenced by the great artists and painters dating back to centuries before.
For example, Rembrandt-style lighting was used by the artist himself back in the 1600s. And he, no doubt, had been inspired by candlelight or similar.
Most of us know that lighting set-ups can either be very simple or complicated, particularly if you want to use multiple lighting set-ups. However, there’s a beauty and an art form to using just one light to create something beautiful and rather satisfying.
Types of light
Lighting can be divided into two main types: ‘flash’ and ‘continuous’. But in these two, we have so many lighting options and variants. With flash photography, we have the studio head (or strobe as it’s also known), a flash pack with separate head found mainly in commercial studios, and various portable flash solutions, such as a typical flashgun, which can be mounted on or off a camera.
On the flip side of this, the options of continuous lighting are greater than they have ever been. There is tungsten lighting (both tungsten and daylight-balanced), tungsten/daylight balanced hydrargyrum medium-arc iodide (HMI), light-emitting diode (LED), fluorescent, plasma, and let’s not forget our free friend-in-the-sky sunlight, to name but a few.
In addition, we have a multitude of different ‘light shapers’, ranging from the smallest snoots to the largest octoboxes and parabolic umbrellas, which allow us to add control, effect and depth to our lighting. Each one has a definitive place and purpose in our lighting set-up to help us tell our story.
I like to think of my light shapers in the same way as an artist would their paintbrushes. For example, a large light shaper, such as a softbox or an octobox, is like a big paintbrush that allows you to flood a scene, whereas a small reflector, such as a snoot or 7in reflector with a grid, is akin to a small paintbrush – it allows you to paint in the details of your scene.
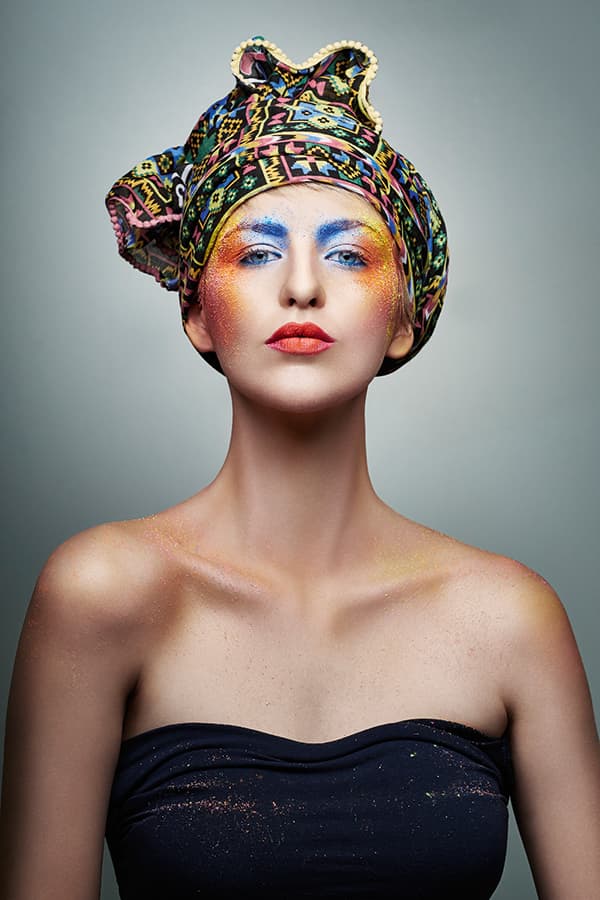
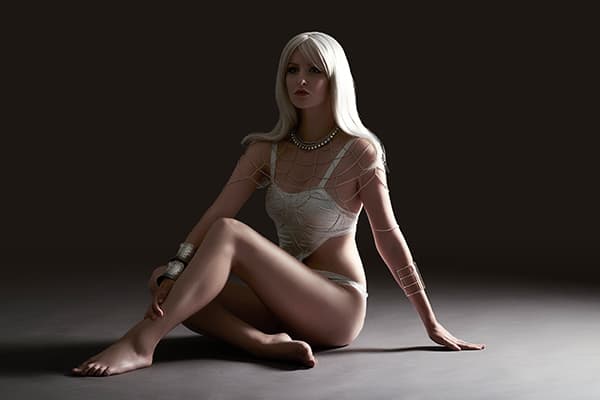
A single softbox was used here directly above the camera
Sometimes we like to use both. We then have to decide whether we want our light to be hard light or soft light, as well as deciding on which reflector/light shaper to use. We also have to remember that how we use the light can also change the mood or feeling of our shot.
Soft and hard light
Generally, soft light is provided by light shapers such as softboxes, octoboxes, umbrellas and reflected light. Softboxes provide a hard light in the centre and a soft light around the edges. Hard light is provided by light shapers such as open bare reflectors.
However, we can of course change the way in which we use a softbox so it gives us a harder light source should we wish. By simply removing the front diffuser our light becomes a little harder and has a crisper edge to it, giving our image a bit more ‘punch’.
If we go one step further than this and remove the inner diffuser, we end up with quite a hard, crisp light source that not only increases our contrast, highlights and shadow density, but if not used correctly can also be quite unflattering on your model and could overexpose your highlights if not adjusted.
However, we can still achieve a fairly soft-light effect from a softbox with no diffusion by using a simple technique known as ‘feathering’ – the process of angling your softbox at different degrees across your subject so it is not facing them directly, allowing us to soften or strengthen contours and contrast in a shot. This enables us to use this soft edge of light to sculpt and shape our model, and take advantage of the hard centre of light to bounce in some ‘fill’ light from a reflector on the opposite side of the scene.
Different light shapers give us a multitude of different lighting effects, and help us tell our story in the right manner to the right effect. Reflectors can be fun to add that little something. Different backgrounds can also help transform our entire image. And all of this without even taking our model into account.
Ultimately, though, just have some fun and experiment in ways that you normally wouldn’t with your lighting, to create something new and exciting.
Light and model position
Think about the positioning of the light and how it falls on your model
We don’t always have to light our subject from the front, as a lot of people think. Getting a lot more creative reveals how interesting light can be if we perhaps move it to light our model from behind. By placing our light at approximately a 45° angle behind the model, it still enables us to, in effect, wrap light around the front of the model. This, of course, is dependent on the model’s position, which is the key factor to making this work.
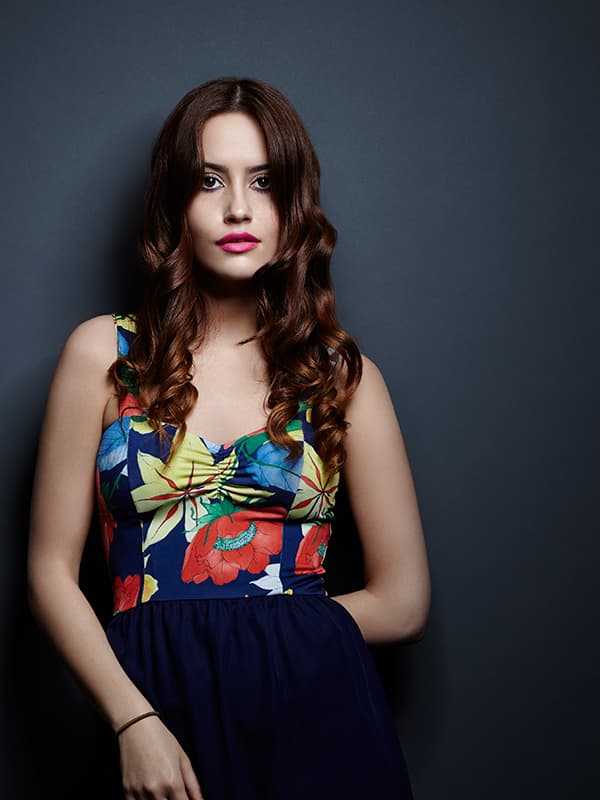
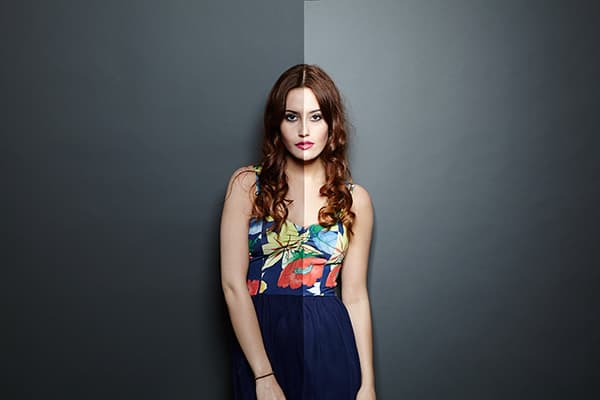
Light from the left
Light from the right
As you can see in the images above, in the shot on the left, the position of the light works to sculpt the model’s figure without losing detail on the opposite side in the shadows. But, the second image, with the light to the right of the camera just doesn’t have the same impact, even though the model’s pose is the same.
The light shaper used is a Bowens 100x40cm softstrip softbox, rotated on its axis around 30° to paint a lovely arc of light on the floor and angled down to feather the edge.
Silver and light
We also have to bear in mind that the colour of the finish in a light shaper can make a difference to our light – its output, its effect on contrast and the degree of light fall-off.
For example, the beauty dish – which uses a parabolic reflector to distribute light towards a focal point and is very popular with beauty/fashion photographers – generally comes with both a white and a silver finish, but both have a definitive difference in their output and effect.
A sliver beauty dish was used here for the deeper contrast it delivered
A light shaper with a white finish will generally give a slightly softer, more even-toned light throughout its spread, whereas one with a silver finish will give a more contrasty, crisper light and a shorter light fall-off. Colour difference can affect the exposure of your shot, too. Light shapers with a silver finish can increase the light output even though you may not have changed any settings.
White beauty dish (left), Silver beauty dish (right)
The above right image shows a split comparison between a white beauty dish and a silver beauty dish. Both lights are in exactly the same position, and the light and camera settings are unchanged. However, the white dish gives a softer light with a nice, even graduated tone from highlight to shadow.
The silver dish actually increased the exposure by around 2⁄3 stop, causing the highlights to be overexposed. It’s quite evident that it has an increased contrast and a much shorter light fall-off from highlight to shadow area. Our shadows are also much harder than the lovely soft-edged ones from the white dish.
This comparison sample has not been retouched and is the ‘before’ image, so you can see the raw file differences straight from the camera. The additional picture (right) is the final ‘after’ image – the retouched version. In this instance, I opted for the silver beauty dish, purely because I loved the deeper contrast and shorter light fall-off for this shot.
Experiment for yourself and see how changing from a white finish to a silver finish can alter the feel and effect of the light in your shots.
How to feather light

It’s possible to feather the light with a series of reflectors
The image above is one example of how I feather light, using just one light – a 100x80cm softbox, with the front and inner diffusers removed. When pointed directly at my model, it gives a very hard, unflattering light. But I ‘feather’ the light by angling the hard centre of light past and in front of my model and lighting her with the soft edge of the softbox light instead. By adding a gold/silver reflector on the opposite side of my model, I can also bounce some of the hard centre of light from the softbox back on to the model as ‘fill’ light.
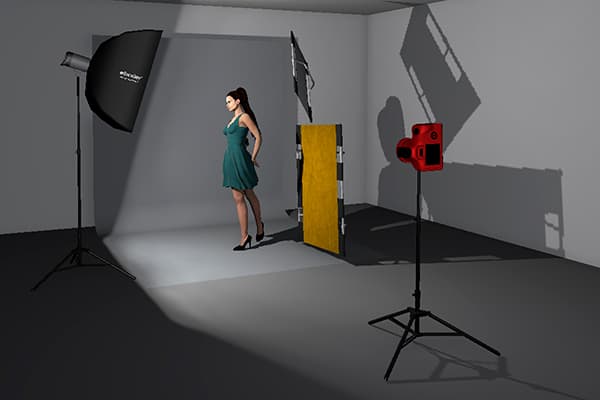
Despite only one light source, multiple reflectors are used
To add some extra depth to the shot, I also use a standard bathroom mirror beside the reflector, to bounce some of the hard light from the softbox on to my background. This provides a light pattern and gives some separation and depth.
All this, but I’ve still only used one main light source!
It goes to prove that you should not be afraid to experiment and try out different techniques. It can give some wonderful results and make you think completely differently when it comes to lighting your subjects in the future.
Alternative light sources
Creating photographic images should be fun, so don’t always think ‘traditional’ when trying to create something a little different. Sometimes you can produce the nicest work by experimenting with a random light source.
For instance, using a projector is a novel way to explore new techniques, and provides some good challenges for the photographer, too. The main issue is the power of a projector’s output, or more precisely the lack of it. Remember, it has only a tiny bulb so it’s not going to have a massive output for high aperture and fast shutter speeds. That aside, it can open up a whole world of fun.
The image above was shot with a projector light only. Find a nice selection of images based around your theme/concept, and then experiment. You never know what you might create. Just be prepared for slow shutter speeds and possibly higher ISO sensitivities to be able to capture these images.
Hard light
Hard light can be used to make the light look like strong sunlight just after noon
Hard light can be used for a multitude of purposes. It can add drama to a dark scene and reveal the contours of your model with contrasting tones, or it can be made to look like strong sunlight just after noon. It depends on which reflectors you use, and how you use them.
A prime example of this is when using a Fresnel light. Named after its inventor, the French engineer and physicist Augustin-Jean Fresnel, a Fresnel has that beautiful ‘ringed’ lens, like those found in lighthouses and on stage lights. It gives off a certain style of light that’s just beautiful to work with.

Fresnels come with a control lever to zoom the light
Fresnels come equipped with a control lever, which enables the user either to zoom the light into a more controlled ‘spot’-type light, or to zoom out to ‘flood’ the scene. Either way, it provides a good, crisp, hard light source that’s a lot of fun to shoot with.
In these particular shots, I wanted to replicate the midday sun, with hard shadows and punchy highlights.
Six top tips
1. Large and small softboxes
Remember, in light theory, a large softbox doesn’t cover a large area, and a small softbox doesn’t cover a small area: they both cover the same areas. The difference is just that a large softbox gives a slightly softer light, and a small softbox gives a slightly harder light.
2. Surface bouncing
Bounce light off a big surface, such as a wall, to add a lovely soft fill to your subject. Just be aware that a coloured wall will reflect its colour in your fill light onto your subject to give a colour hue that may not look so good. Keep in mind that you can also use the wall situated behind your shooting position and use that effect as your main light.
3. Shapes
You can subtract light by introducing shapes. Place objects in front of your light to create shapes and patterns on your subject – things like branches/big leaves from a plant are perfect for this. The distance of the plant from the light source can alter the size and density of the shadowing effect on your scene, so try moving it closer and then further away to experiment. An object of any shape can be used, so just play around to see what effects you get.
4. Reflectors
Reflectors are a fun way to add fill to a shot, but they can also add extra depth and dynamics to a particular part to enhance a detail. Instead of using the normal reflectors available, try using things such as small mirrors to bounce small concentrated shapes of light into a particular part of your scene. Anything reflective can be used, even tin foil, which can give some amazing results. Remember, light can be direct or feathered.
5. Hard or soft light
This can be used to create a particular mood or atmosphere to your shot. Be careful when using directional hard lighting on a female subject, though. If the light is angled too far to one side such that it skims across the surface of your model’s face, it can enhance texture and detail, which could end up being a little unflattering on the model. And nobody wants that!
6. Background lighting
When a single light is lighting both model and background, and they’re both very close to each other, you risk the background being overlit.
About Wayne Johns
Fashion, beauty, advertising and portrait photographer Wayne has produced images for Vogue Italia and GQ, among others. His images feature in books, magazines and all over the internet, with his team working out of studios in London and worldwide. Visit his website: www.waynejohns.com