Martin Evening gives us his latest photo editing tips
In our latest look at photo editing tips, Photoshop guru Martin Evening sorts out your post-processing problems. Here he looks at optimising sharpness.
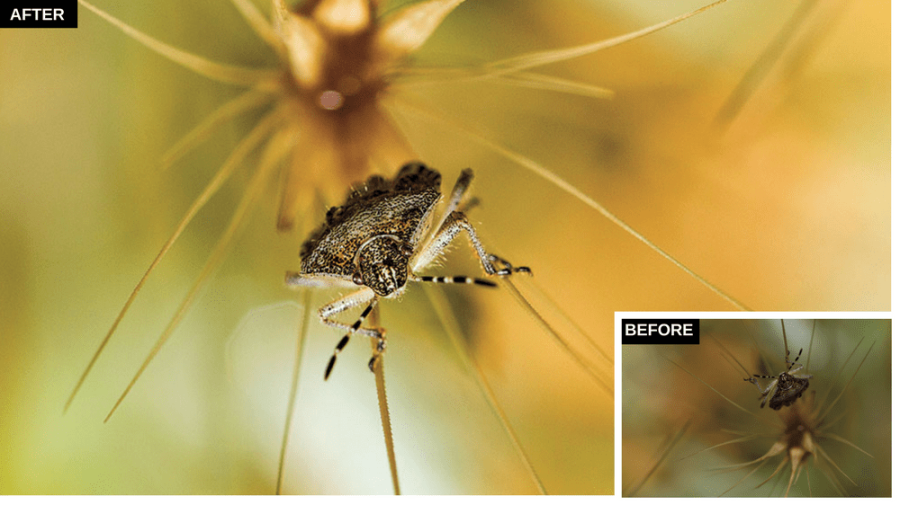
Ben Pike’s image combines creative skill with technical expertise and was shot using a Canon 7D with an EF 100mm f/2.8 lens. Captured at the widest lens aperture, the focusing is pin-sharp on the insect’s head and renders the background in beautiful soft focus.
When editing this I aimed to apply the same treatment as Ben. I rotated the photo 180° so that the insect appeared to be the right way up, and lightened the Exposure setting. Because the detail on the insect was important, I took care to apply the optimum sharpness settings here.
1. Photo editing tips: Rotate the image
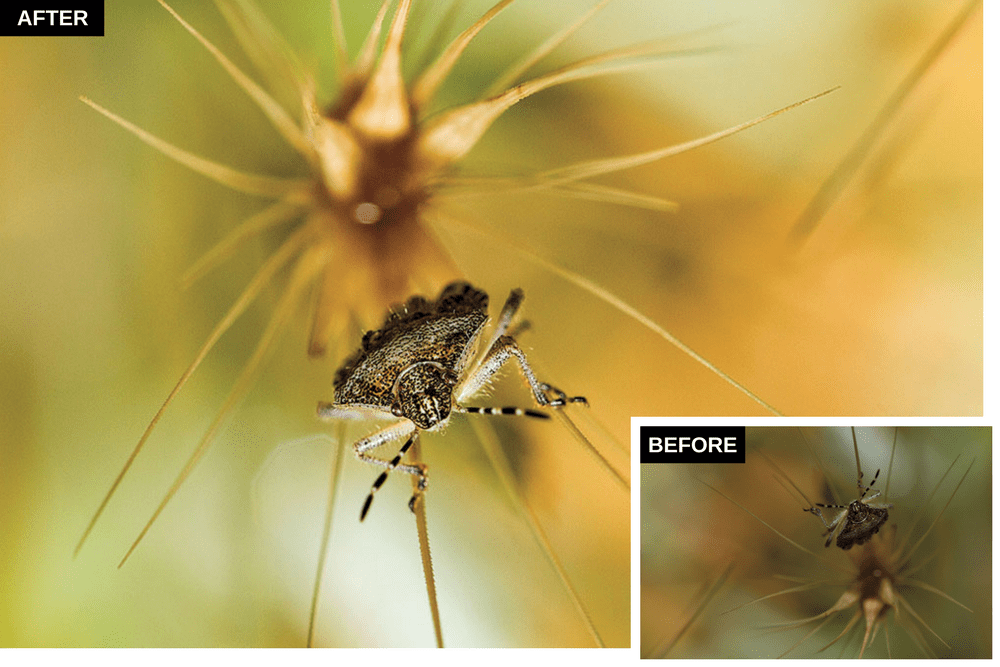
The first thing I needed to do was to rotate the image. I did this by clicking twice on one of the rotate buttons in the Tools section at the top to rotate the image 180°. I then selected the Crop tool to crop the image more tightly on the right and lightened the Exposure setting.
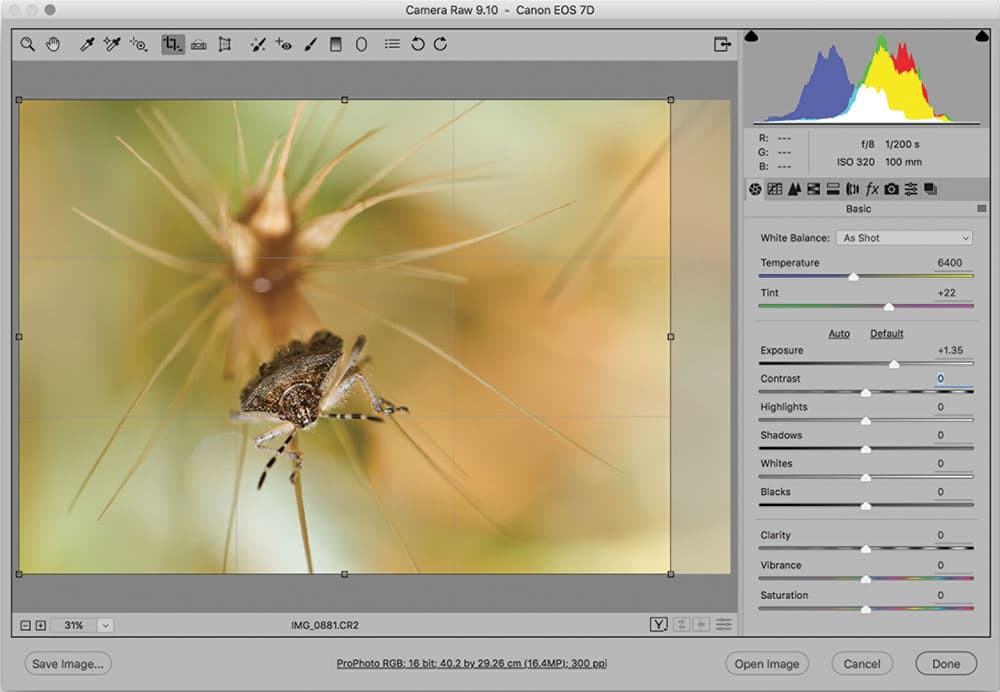
2. Photo editing tips: Basic panel adjustments
In this step I wanted to refine the Basic panel tone settings. I first added a touch more Contrast and lightened the Shadows. Next, I pressed Shift and double clicked both the Whites and Blacks sliders to auto-set the black and white clipping points for this image.
Continues below…
[collection name=”small”]
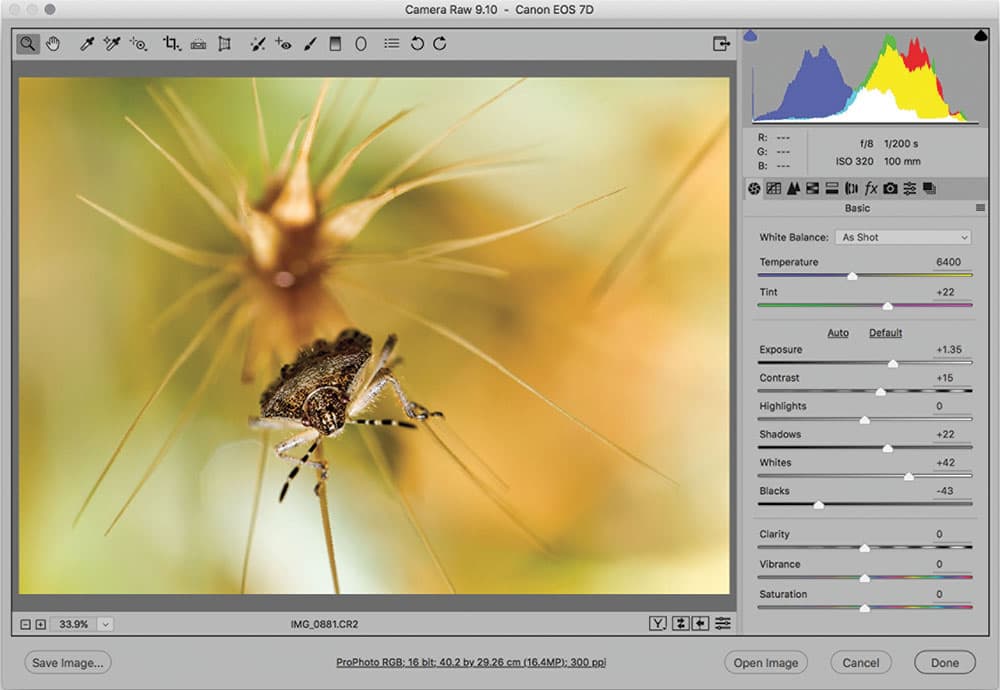
3. Photo editing tips: Detail panel sharpening
I enlarged the preview and went to the Detail panel where I adjusted the Camera Raw sharpening sliders to suit the image content. In this step I increased the Amount setting this to 45. I also lowered the Radius slightly and increased the Detail and Masking settings.
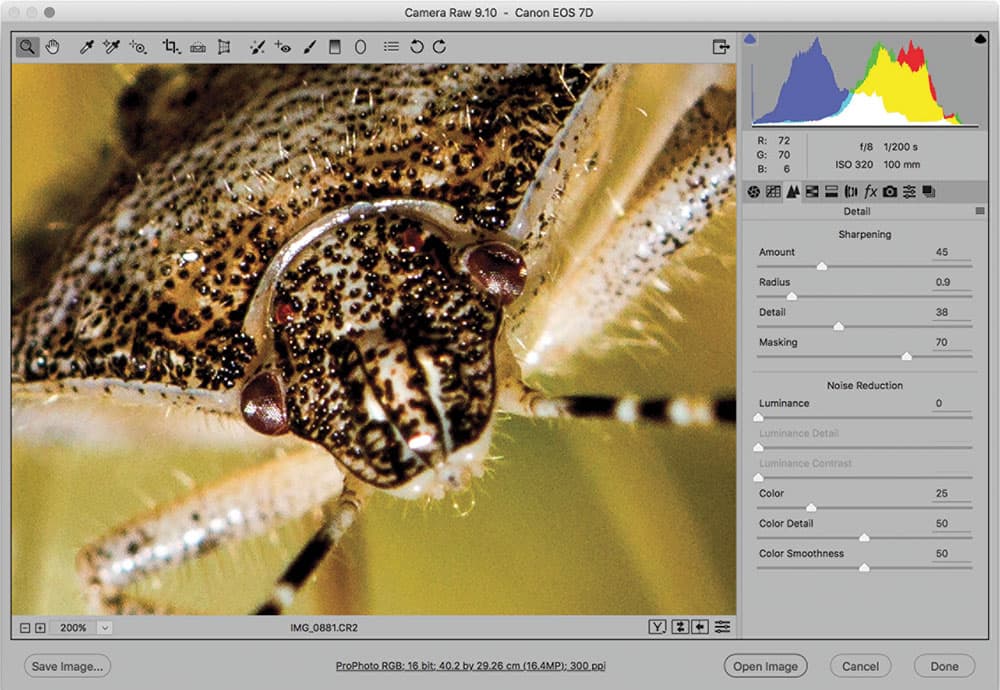
4. Photo editing tips: Camera Raw sharpening
By default Camera Raw adds a small amount of sharpening to all raw files. Although the default setting will say Amount 25, Radius 1.0 and Detail 25, the actual amount of sharpening that’s applied under the hood will vary from camera to camera. Essentially, the default sharpening settings should appear the same regardless of the inherent differences in the actual capture sharpness. The 25 Amount setting is rather conservative and can be increased to produce a sharper look.
The Radius setting should be reduced for fine-detail subjects and raised for wide edge detail photos such as portraits. The Detail slider acts as a halo suppressor at settings below 25 and as a high frequency concentrator for values above that, essentially applying more sharpening to fine textured detail areas. With low-ISO captures you can often safely increase Detail without enhancing noise. By increasing the Masking slider setting you can shield flatter tone areas such as skin tones from being sharpened. In the insect image example raising the Masking setting prevented noise from the sharpening from affecting the soft focus regions.
Martin Evening is a noted expert in both photography and digital imaging. He is well known in London for his fashion and beauty work, for which he has won several awards. Martin has worked with the Adobe Photoshop and Adobe Lightroom engineering teams over many years and is one of the founding members of a software design company. Visit www.martinevening.com.


