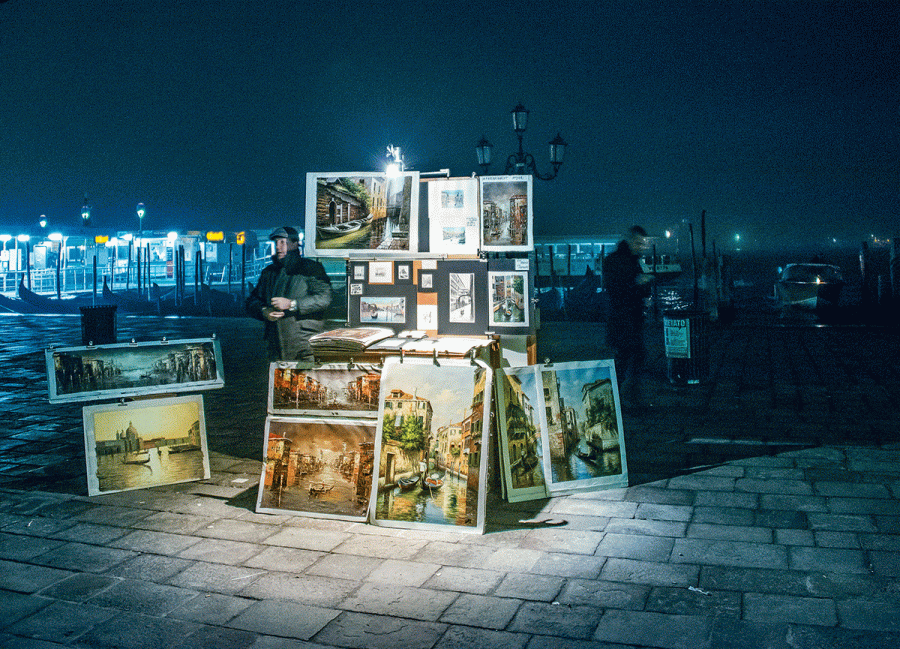
This was a challenging scene for Eric Begbie to capture because it was shot at night using just the available streetlight. I notice Eric used a Nikon D800 camera and was therefore able to set the ISO to 6,400, which allowed him to shoot handheld at a shutter speed of 1/25sec (this type of scene would have been difficult to photograph with the digital cameras that were around a few years ago).
Before
If this picture had been captured a little earlier there would have been a lovely opportunity to balance and complement that tungsten light with the blue cast of the twilight. So what I did here was to change the colour balance to simulate that type of early evening lighting through Camera Raw editing.
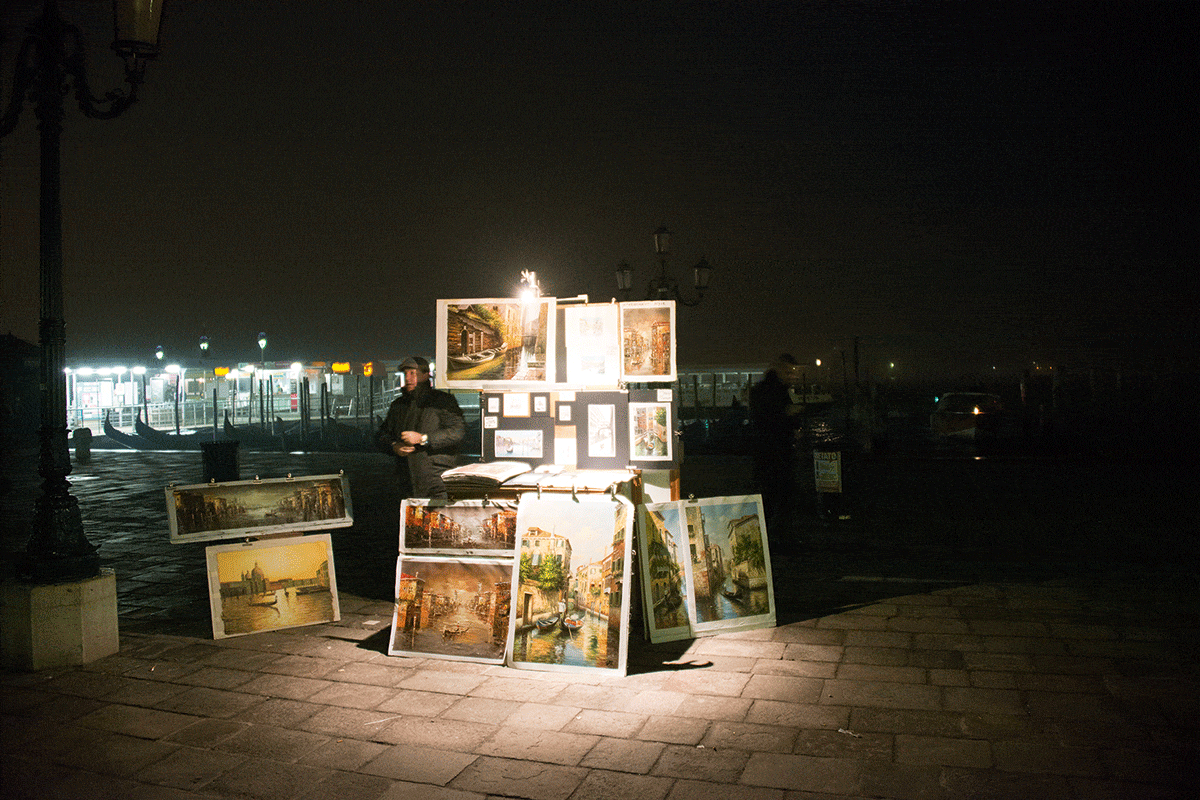
After
1. Crop the photograph
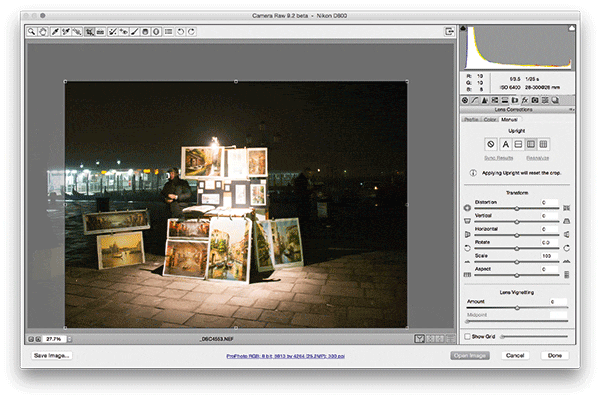
The first thing I did was to crop the photograph to remove the lamppost on the right and focus the viewer’s attention on the street seller and his various paintings. I also went to the Lens Corrections panel where I checked the Vertical Upright option to help straighten the photograph.
2. Tone the image’s colour balance
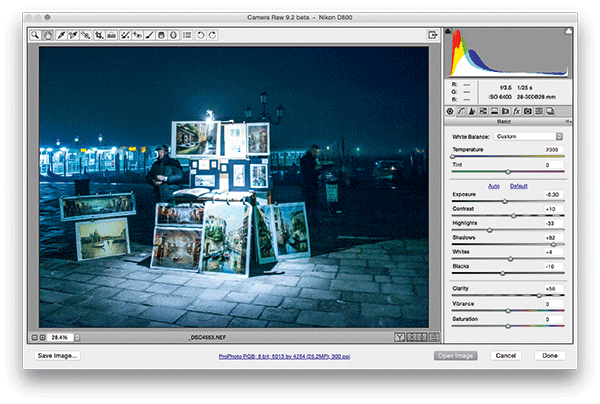
In the Basic panel I applied a custom white balance. The intention here was to apply a global blue tone to the scene and edit it later to provide some colour contrast. I adjusted the remaining Basic panel settings to ensure highlight detail was preserved and added more Clarity to boost the midtone contrast.
3. Add a Radial Filter
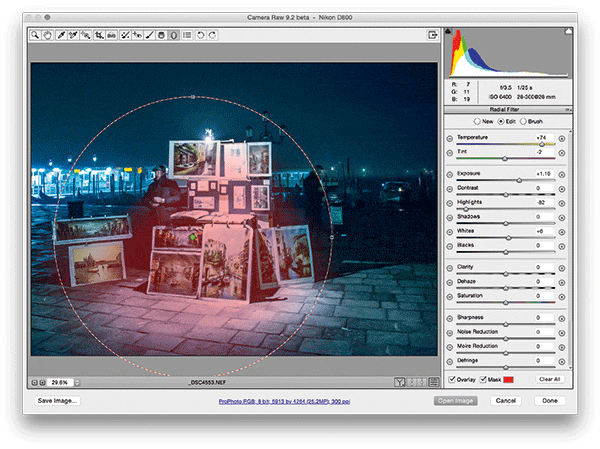
Finally, I added a Radial Filter adjustment. I then increased the Exposure and combined this with a negative Highlights adjustment. I set the Temperature slider to +74 to counteract the global blue/white balance adjustment and made the selected area appear warmer relative to the blue background colour.