
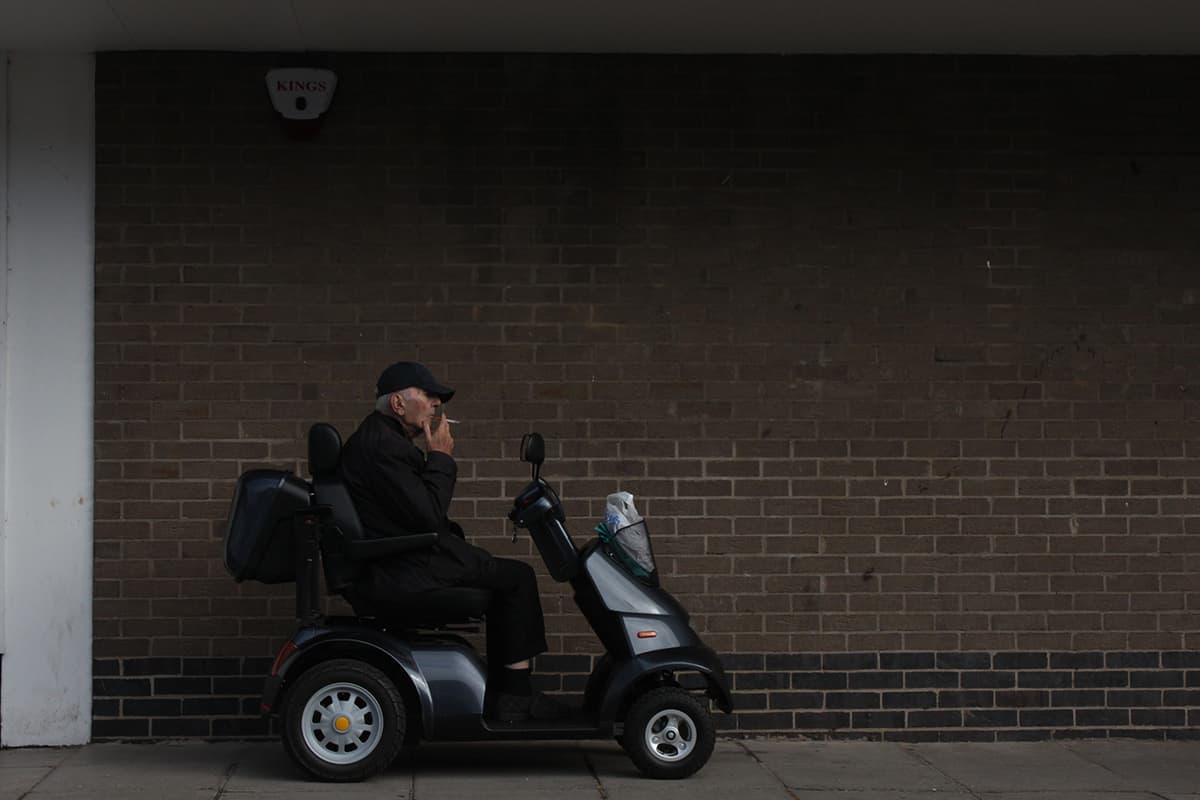
Before
I like this candid portrait by Josef Thobroe, and how the strong graphical composition enhances the photo. You will notice that no Transform adjustments were required here. The cropping was important, though, as I wanted to remove the distracting white wall to the left and the ceiling. I chose to keep the burglar alarm in because it was a key element that aligned precisely with the scooter’s rear wheel. Mainly I used Exposure lightening and Graduated Filter adjustments to balance the tones to create a greater sense of emptiness around the man.

After
1. Crop the image
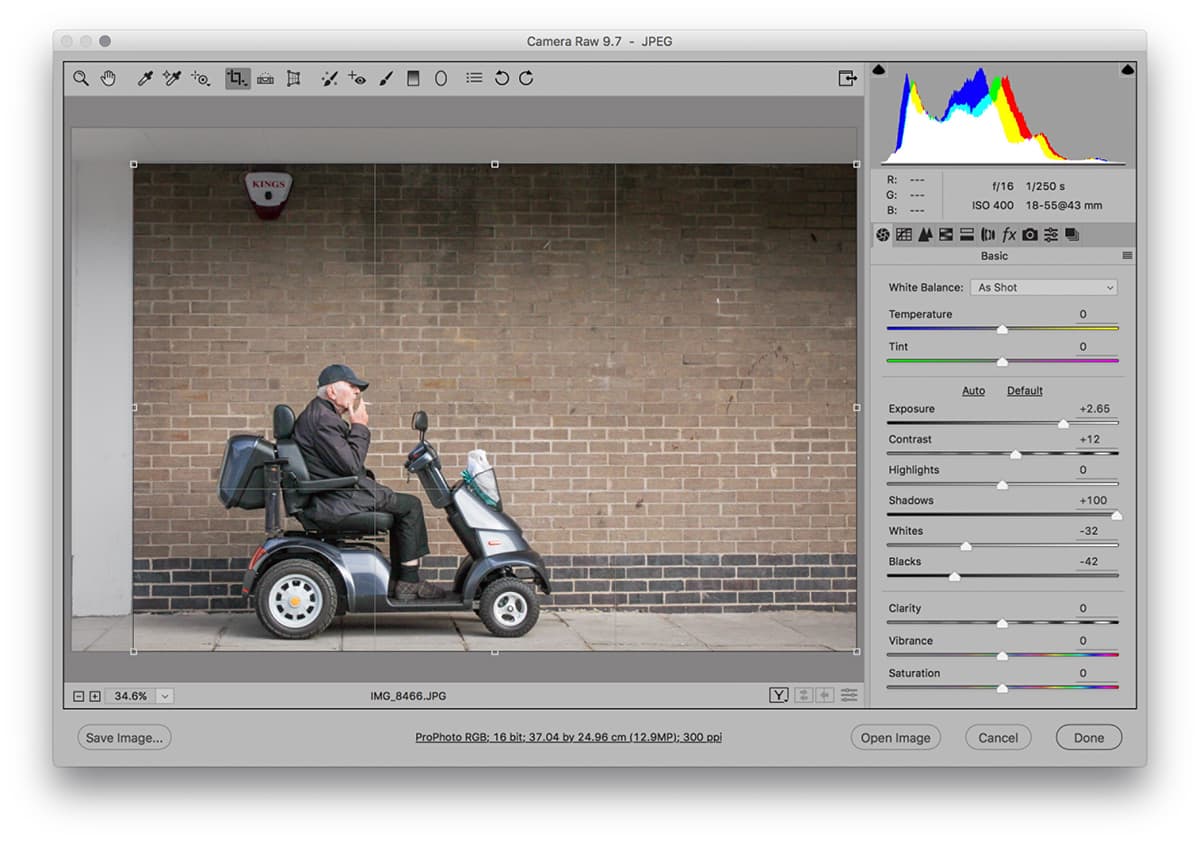
I selected the Crop tool and adjusted the handles to remove the white wall on the left and the ceiling above. In the Basic panel, I then set the Exposure to +2.65 to substantially lighten the image. I also set the Shadows slider to +100 to lighten the deep shadows in the man’s clothing and the scooter.
2. Boost contrast and colour

I added more Clarity to boost the midtone contrast and to give the image a more ‘gritty’ appearance. I also set the Vibrance to +100 to boost the colour saturation. In the Lens Corrections panel I enabled Lens Profile Corrections plus Chromatic Aberration, and in the Effects panel I added a darkening post-crop vignette.
3. Add filter adjustments
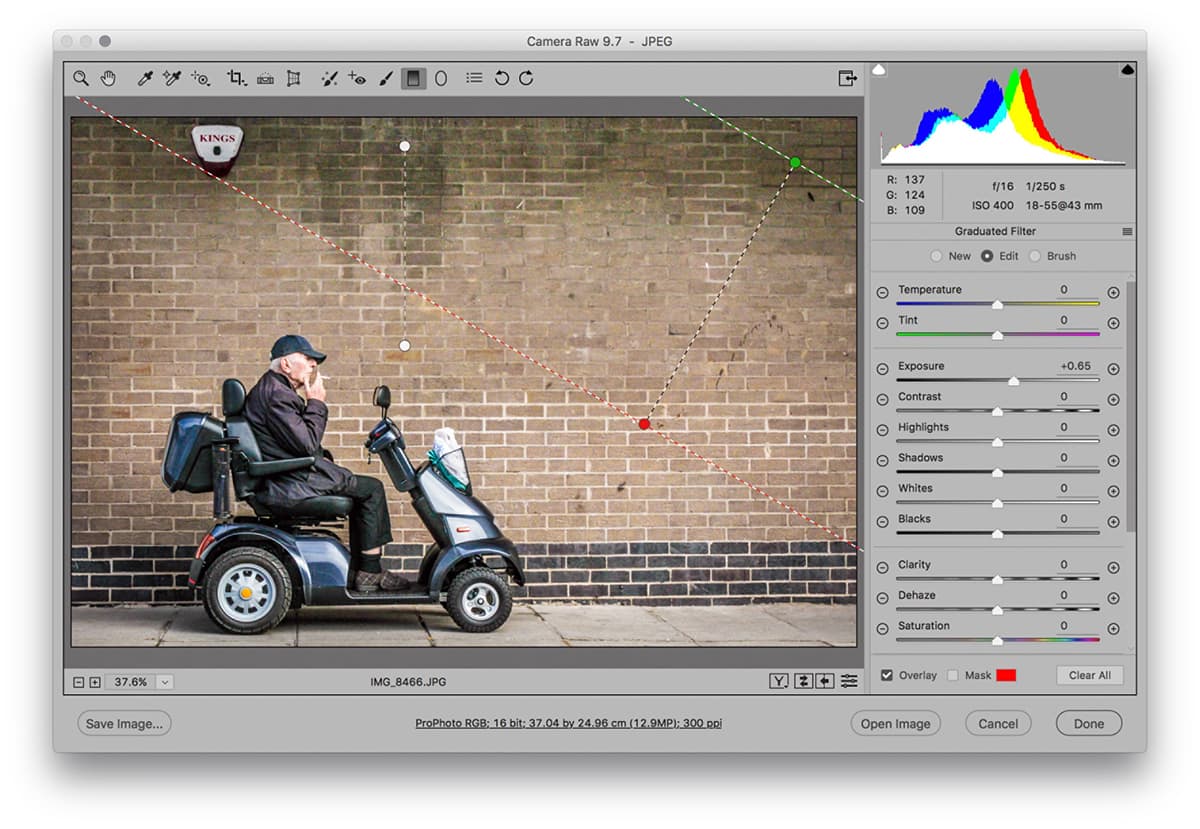
As a final stage of the process, I added a heavily feathered Radial filter adjustment on top of the man and scooter that applied a darkening adjustment outside the filter area. I also added two Graduated Filter adjustments to balance the exposure top and top right.


