
The AS-Shot white balance in this image was quite warm and it looks as though the camera may have been set to a daylight setting. This was either because Grzegorz Gniady was using this as the default setting, or because he deliberately wanted to record a warmer balance to enhance the candlelit scene.
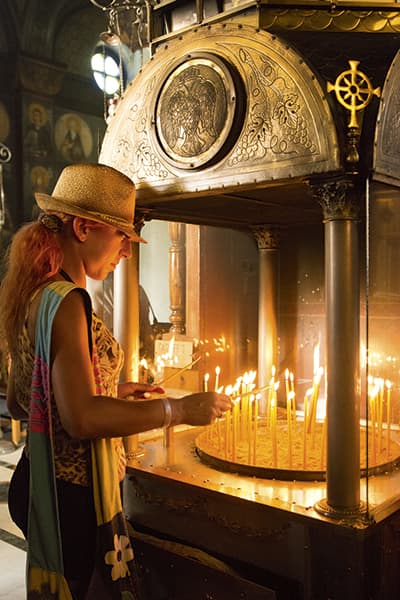
Before.
However, I found that by setting the white balance to 2,950K, the background appeared as a nice cool blue, while still retaining the lovely feeling of warmth from the candles in the foreground.
This trick also created the impression of increased depth, because when things in the distance are bluer, they can appear to be further away. For example, in a landscape scene, distant objects can appear bluer due to atmospheric haze.
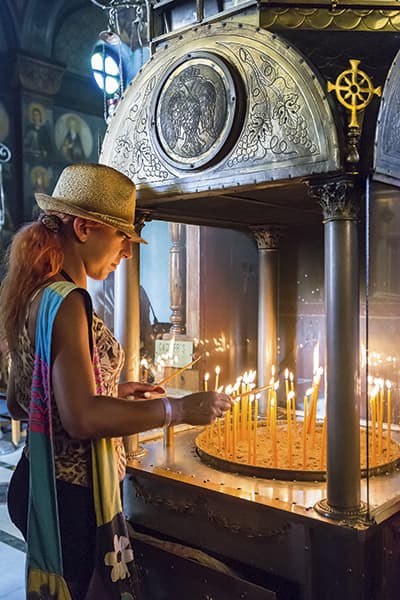
After.
1. Adjust white balance
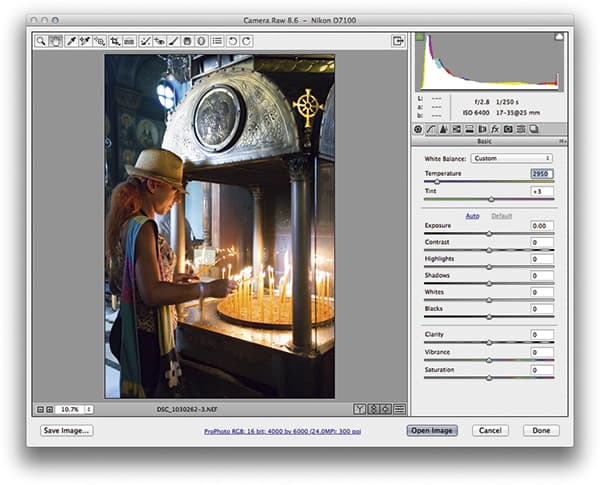 The first step was to adjust the white balance. My aim here was to strike a balance between the extremes of the cool daylight
and the very warm candlelight. This adjustment gave the image more depth and helped differentiate more between the foreground and background.
The first step was to adjust the white balance. My aim here was to strike a balance between the extremes of the cool daylight
and the very warm candlelight. This adjustment gave the image more depth and helped differentiate more between the foreground and background.
2. Highlight detail
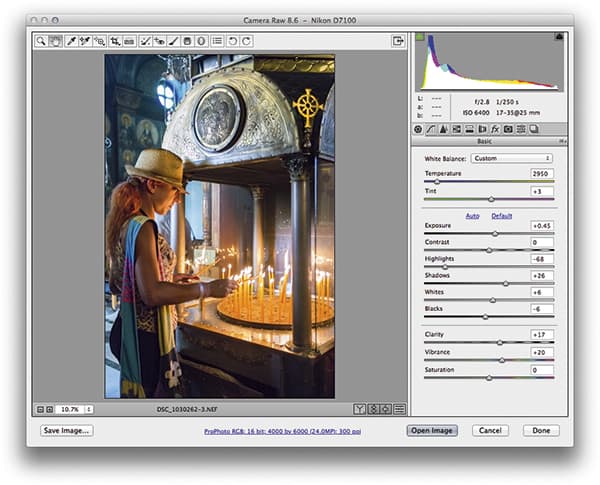 In the Basic panel, I then applied some further adjustments. First, I increased the Exposure setting to make the scene lighter. After this,
I reduced the Highlights slider to reveal more highlight detail in the candlelit areas. Finally, I boosted the Clarity and Vibrance slider settings.
In the Basic panel, I then applied some further adjustments. First, I increased the Exposure setting to make the scene lighter. After this,
I reduced the Highlights slider to reveal more highlight detail in the candlelit areas. Finally, I boosted the Clarity and Vibrance slider settings.
3. Reduce noise
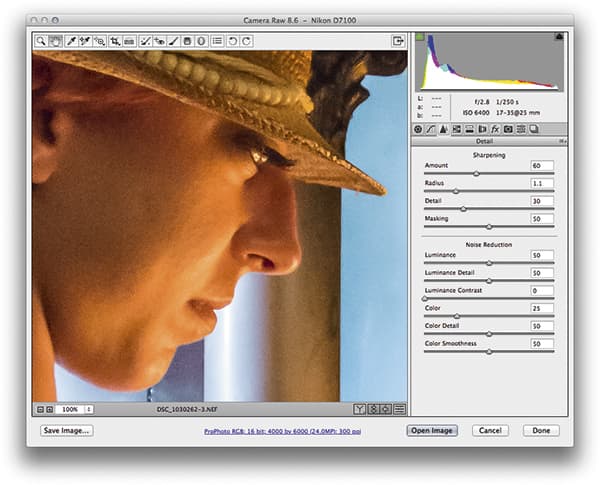 It should be noted that this photograph was shot with the camera set to ISO 6400. The sensor in the Nikon D7100 has certainly managed to capture a lot of sharp detail, but I still needed to visit the Detail panel to adjust the Noise Reduction sliders to smooth
away some of the noticeable luminance noise artefacts.
It should be noted that this photograph was shot with the camera set to ISO 6400. The sensor in the Nikon D7100 has certainly managed to capture a lot of sharp detail, but I still needed to visit the Detail panel to adjust the Noise Reduction sliders to smooth
away some of the noticeable luminance noise artefacts.
White balance adjustments
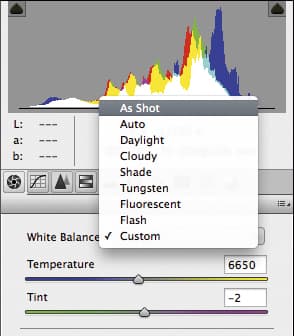
The Camera Raw controls allow you to adjust the white balance in a number of ways. When you first open a raw image in Camera Raw, the White Balance menu will say As Shot. You can override this by selecting a different menu option, such as Daylight, Cloudy or Tungsten, for example. Or you can choose Auto and let Camera Raw determine a suitable setting. You can also use the Eyedropper tool to click on an area that should be a light neutral grey to set a correct white balance.
Lastly, there are the Temperature and Tint sliders. You can manually adjust these to assign a desired white balance setting. For example, you can drag the Temperature slider to the right to make an image appear warmer and drag to the left to make it appear cooler.


