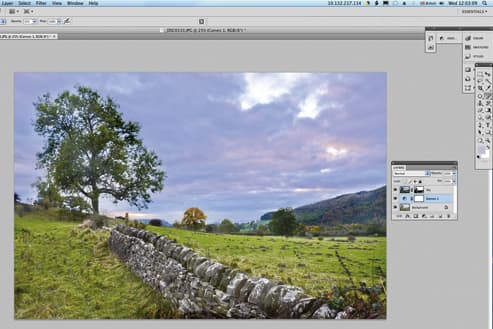

The layers palette is central to managing the layers that make up an image. It contains options to hide or reveal layers, alter how they blend with the layer below and to create masks that reveal only certain areas. When an image is opened for the first time there is only one layer, called Background. The starting point for many adjustments should be the creation of a duplicate layer (Layer>Duplicate Layer) so that the background remains untouched when the image is worked on. Alternatively, an adjustment layer can be created.
Layers can be reordered in the palette by clicking on them and dragging them up or down the stack. Moving a layer from the bottom of the Layers palette stack to the top makes that layer visible. If this layer contained an image of an interesting sky with the landscape beneath cut out, for example, dragging it above a layer with an image of a landscape with a dull sky would effectively paste the better sky over the dull one to create a more attractive landscape.
Layers may be turned on or off to make them (and their impact) visible or invisible. In Adobe Photoshop and Elements, and Corel PaintShop Pro X4, this is controlled by the eye icon in the Layers palette. If the eye is visible, so is the layer. Clicking on the eye makes both it and the layer invisible.
Multiple layers can be selected by clicking on one and then holding the Shift key down while clicking on the others. Any adjustment applied to a linked layer is automatically applied to the layers it is linked with. In Photoshop, layers are linked by selecting them in the Layers palette and then clicking on the chain icon at the bottom. This is helpful when two or more layers are used to make up a section of image. For example, if two layers of a blue sky each with a single cloud are used to create one with two clouds, try merging them into a single layer called ‘Sky’.
Each layer’s blending mode may be set using the drop-down list in the top left of the Layers palette. The Background’s blending mode cannot be changed from Normal.
Two sliding controls at the top right of the palette govern how transparent each layer is. The key control here is opacity. Reducing the opacity of a layer makes it less visible and will reveal the layer below. The Fill control is very similar, but only the layer contents are affected and any applied effects retain their full opacity.
How to Use Layers in Photoshop – Our Top Tips
1. Use layers to protect the original
Think of layers as a pile of pictures stacked on top of each other, but all contained within the same file. When the top layer has the Normal blending mode only it is visible, but this can be changed by using different blending modes or removing parts of the uppermost layer. A layer can just be a duplicate of the original (Background) image and is useful to allow adjustments to be made while still preserving the starting point.
2. Use the Alt key to hide/reveal layers
With multiple-layer images, clicking on each layer’s eye icon can be laborious, but if your click on the eye icon of the layer that you wish to see by itself while holding down the Alt key, all the other layers are hidden. Repeat the exercise to reveal them again.
3. Use adjustment layers
Adjustment layers are extremely useful as they contain instructions about how to adjust a layer without actually affecting the pixels directly. Photoshop allows all the most common adjustments, including Levels, Curves and Color Balance, to be made as adjustment layers. The settings of the adjustment layer can be changed at any time, even after the image has been closed and reopened, provided it is saved in either TIFF or PSD format, which preserve layers.
4. Copy layers between images
Once a layer has been created, it can be copied to other images by simply clicking on it in the Layers palette and dragging it across to the other open file. This is especially useful for copying adjustment layers between images.
5. Use layers to work on different parts of the image
By using multiple layers and revealing specific sections using masking techniques, it is possible to create a composite image. This may be made from several copies of the original image (layers made from the Background) that have been adjusted in different ways, or sections of different images can be combined. For example, a dull sky can be replaced by a more interesting one.
6. Use Opacity to merge layers
The opacity control is a useful and simple way of subtly merging two layers, by making the upper layer less visible to reveal the one beneath.
7. Cycle quickly through the blending modes
When experimenting with different blending modes most people use the drop-down list, but in Elements and Photoshop you can toggle through all the various modes by holding down the Shift key as you press the ‘+’ or ‘–’ key when the layer is selected.
8. Use Load Selection to copy selections
When the same selection area, or the opposite area, is needed for two or more layers, click on the first layer in the Layers palette and choose Select>Load Selection.
9. Create a new layer from existing layers
Once you have created and edited the content of the layers, it can be useful to stamp them into another layer by pressing Ctrl/Cmd+Alt+E. The original layers are still visible and can be edited, but the new layer merges them into one. This can be useful towards the end of adjusting a landscape image, where different treatments may have been applied to the sky and the foreground. Any dodging and burning can be applied to the new layer, all the while preserving the original layers.
Learn how to use the blending modes

The diagrams show how the different blending modes work when a black-to-white gradient layer is placed over a series of different coloured circles. Experimenting with how different layers are blended can create some interesting effects
When the default Normal blending mode is selected, the uppermost layer is visible, but alternative blending modes can be used to reveal aspects of the layers beneath. The best way to get to know their impact is to experiment with them on a regular basis.
In Photoshop, there are 24 blending modes organised into six groups depending upon their effect. These are:
Standard: Normal, Dissolve
Normal is the default mode, while Dissolve makes the lower layer take on the colours of the upper layer. Its impact increases as the top layer’s opacity decreases.
Darken: Darken, Multiply, Color Burn, Linear Burn, Darker Color
These generally darken the image. Darken compares each pixel value of the upper layer to the corresponding values of the lower layer and displays the darker of the two. Multiply darkens the lower layer based upon the darkness of the upper layer. No part of the image will get lighter. White in the upper layer becomes transparent.
Lighten: Lighten, Screen, Color Dodge, Linear Dodge (Add), Lighter Color
These effectively lighten the image. Lighten is the opposite of Darken and in this mode the lightest pixel value at each point is used. Screen brightens by lightening the lower layer based on the brightness of the upper layer.
Contrast: Overlay, Soft Light, Hard Light, Vivid Light, Pin Light, Hard Mix
These blending modes lighten and darken the image to boost contrast. Overlay multiplies the light colours and screens the dark colours.
Difference: Difference, Exclusion
These modes compare pixels between layers to reveal differences.
Hue: Hue, Saturation,Color, Luminosity
These blending modes influence the colour or brightness of the final image. Hue/Saturation changes the hue and saturation of the lower layer to those of the upper layer, leaving brightness as it is. Luminosity changes the brightness of the lower layer to that of the upper layer while leaving hue and saturation as they are.


