
When it comes to noise reduction, DxO PhotoLab 2 (and its previous iteration, DxO Optics Pro) has a deserved reputation as one of the best in the business. Powerful features like the Prime command not only offer excellent results, but are also simple to use. With tools like this you can shoot with confidence at high ISOs and in low light, safe in the knowledge that unsightly image noise can be improved in post. As such, these tools will be of interest to those who shoot astro, weddings or gig photography. Many photographers – even those who primarily use other editing software like Lightroom – are turning to DxO for its ability to tease maximum quality out of image files. Here we will explore the key features.
How to reduce noise with PhotoLab 2: step by step
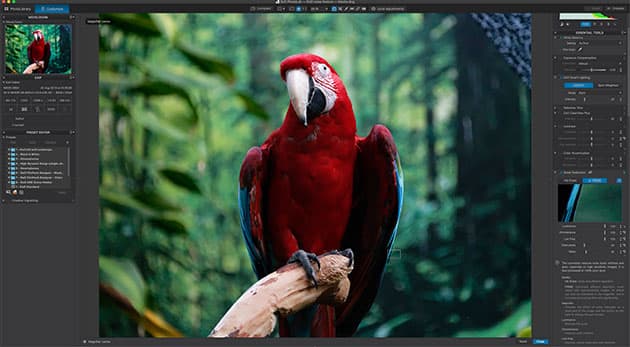
Credit: James Paterson
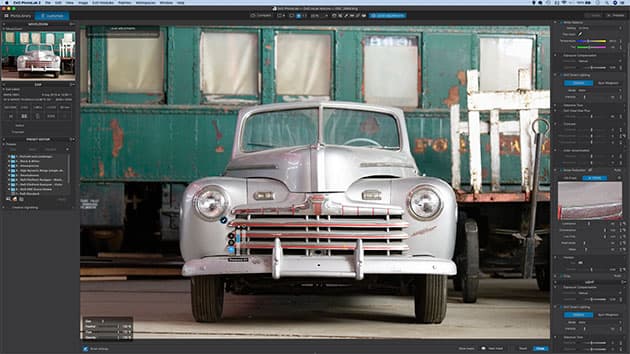
1. Open an image
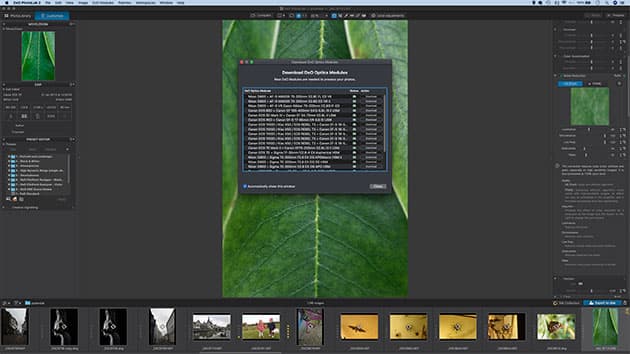
Every image that is opened into DxO PhotoLab 2 is immediately optimised to correct for inherent imperfections in the lens and sensor. So all you have to do is open something to begin seeing improvements to noise and sharpness. You’ll notice this when you first attempt to open a file, as you’ll be prompted to download an array of correction modules that relate to the camera and lens. These fixes have been developed in DxO’s labs through extensive testing of different lens and camera combinations. It means that intelligent noise correction and detail enhancement takes place right off the bat. This process is what DxO software is about – extracting maximum image quality from your camera.
Credit: James Paterson
2. Enable Prime
Exclusive to the Elite edition of PhotoLab 2, the Prime noise reduction command is the jewel in DxO’s crown. For many photographers – especially those who routinely shoot in low light – it’s the main reason to use DxO for their raw processing. On the face of it Prime is a simple feature, an unassuming button located in the noise reduction panel to the right of the PhotoLab 2 interface. After pressing the button very little changes. Aside from a preview of the fix in the noise panel, the image looks just as it did before. But that’s because Prime uses advanced noise-reducing algorithms that are too much of a memory hog to be applied during editing. Instead the fix takes place upon exporting an image (using Export to Disk – Cmd/Ctrl+K). As such, the export process can take a couple of minutes (depending on your processing power) but it’s rarely an inconvenience as you can work on other photos while the export takes place in the background. Besides, the results are worth waiting for. Simply put, Prime is staggeringly good at fixing noise.
3. HQ (Fast) command
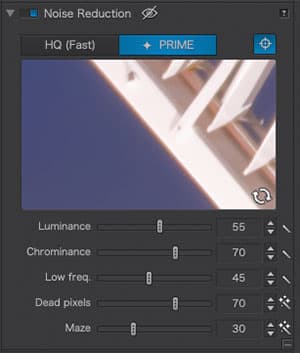
Like all raw editors, PhotoLab 2 applies a default level of noise reduction to every image that is opened into the program. Called HQ (Fast), the command is found in the Noise Reduction panel alongside Prime and offers finely balanced, simple noise reduction (to see how it works, try temporarily turning off all noise settings with the switch at the top of the panel).
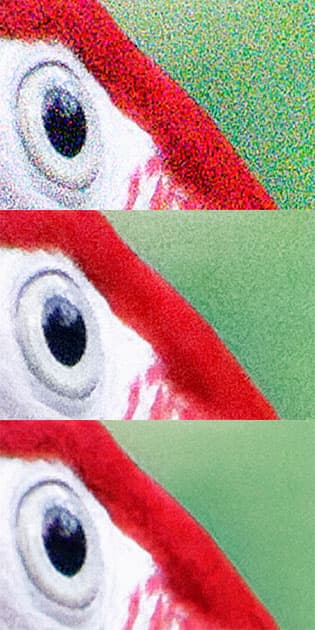
Top: no reduction, middle: HQ (Fast) mode, bottom: Prime mode. Credit: James Paterson
4. Retain details
The problem with noise reduction is that it introduces blurriness and softens details. Often the challenge lies not in the removal of grainy noise – as this is easily achieved – but rather in the retention of the fine detail. This is where PhotoLab 2’s Prime feature comes into its own, particularly with high ISO images. The unsightly grainy noise you see in high ISO images is automatically corrected, but not at the expense of fine detail. Effectively, it can give you the equivalent of an extra stop of ISO – so you’d get similar results shooting at ISO 1600 then using Prime as you would if shooting at ISO 800. A close-up of the macaw here (shot at ISO 11,400) shows the difference between no noise reduction, the HQ (Fast) mode, and Prime. With Prime, the noise is reduced but fine details are sharp.
5. Luminance
Alongside the HQ and Prime options are manual sliders for fixing noise. Unlike Prime, these can be applied to JPEGs as well as raws. The Luminance slider tackles the grainy noise that occurs when shooting with a high ISO. However, pushed too far it can result in a loss of sharpness.
6. Chrominance
Chrominance noise usually appears as green or magenta blotches of pixels, and it’s more prone to shadow details than highlights. This chroma or colour noise is easily fixed as it has no effect on the detail and sharpness of the image, although pushed too far the colours can begin to bleed into one another.
Credit: James Paterson
7. Low Frequency and Maze
These two sliders help to correct for common issues in high ISO images. Low Frequency fixes blotchy patches by smoothing them out. Maze is an unwanted crosshatch pattern that is caused by crosstalk – a phenomenon where angled light spills across your sensor.
8. Dead pixels
Sometimes sensors can go wrong. A dead pixel is one that is permanently black. Hot pixels are another issue. These are usually white and caused by the sensor heating up during a very long exposure. Hot pixels are temporary, but dead pixels are forever kaput. However, this handy slider automatically seeks out and removes them both.
9. Prime vs manual fixes
The results of using Prime can be as good – sometimes better – than what can be achieved manually, using either the noise reduction sliders in PhotoLab 2 or other tools like Lightroom’s Detail panel. Those who normally make the effort to adjust noise sliders manually could potentially save time by using the one-click, hassle-free Prime button instead. Of course, it means waiting for the Prime algorithms to kick in on export. But this might be preferable to manual adjustment, especially for those of us prone to endless slider-fiddling.
Use selective sharpening for great results. Credit: James Paterson
10. Selective sharpening
Noise reduction and sharpening are two sides of the same coin, so after applying noise reduction you may find that the subject looks slightly blurry or blotchy. This can be combated by applying selective sharpening to your subject. PhotoLab 2 offers an array of local adjustment tools that let you isolate and alter parts of your photos. Alongside the excellent control point technology (incorporated after DxO’s takeover of the Nik Collection plug-ins) there are also more simple tools such as the Brush. With this, we can simply paint over part of the image, then adjust the Detail settings within the control point to increase sharpness in the area.
James Paterson is as skilled a photo editor as he is a photographer. His work has appeared in countless magazines and books, and in 2014 he was appointed editor of Practical Photoshop magazine. His subjects range from portraits to landscapes, architecture and underwater scenes. For James, Photoshop is more than just a work tool.


