
 Martin Evening is a London-based advertising photographer and noted expert in both photography and digital imaging. As a successful photographer, Martin is well known in London for his fashion and beauty work, for which he has won several awards. In 2008, he was inducted into the NAPP Photoshop Hall of Fame.
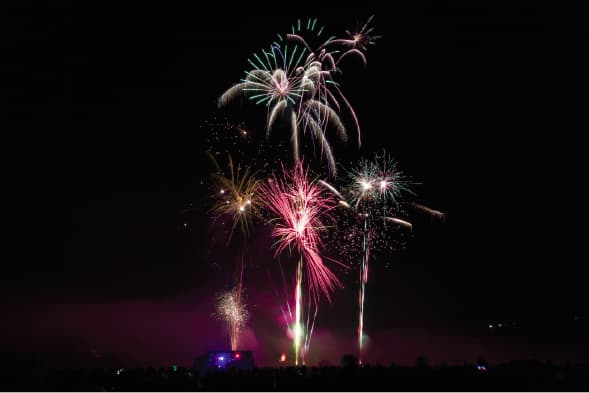
These firework photos were all shot with the camera set to ISO 100 using an exposure of 4secs at f/9 and the camera mounted on a tripod. I suppose you could just leave the shutter open for a very long time, but combining shorter-duration exposures allows you to photograph individual firework explosions with just the right amount of exposure time needed to capture a good display formation. It also gives you the freedom to decide which specific exposures will work best.
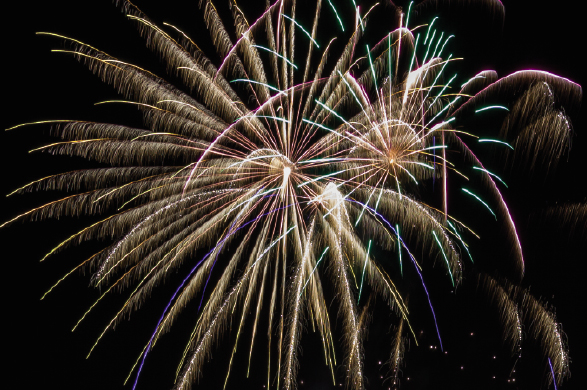
Using Photoshop to merge a series of photo exposures offers flexibility and is similar in approach to stack blend mode processing. You will notice that in this instance I have used the Lighten blend mode to blend the layers together. This allowed me to cumulatively merge the individual firework exposures. It is possible to blend more than just four images if you wish without affecting the night-sky background.
Another important thing to point out here is the use of Process 2012 to process the original raw files. The Highlights slider control is perfect for precisely controlling the brightness and detail of the firework trails. Through delicate balancing of the Exposure, Highlights, Whites, Clarity and Vibrance sliders, you have a phenomenal degree of control over the appearance of the firework trails. This only applies to working with raw originals, though, so make sure you remember to set the camera to raw mode because adjusting these slider controls won’t have much of an effect on JPEG images.
How to Edit Firework Shots in Photoshop – Step by Step
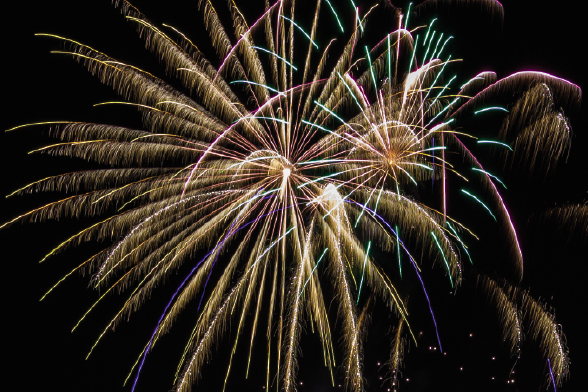
1. The Original Shot
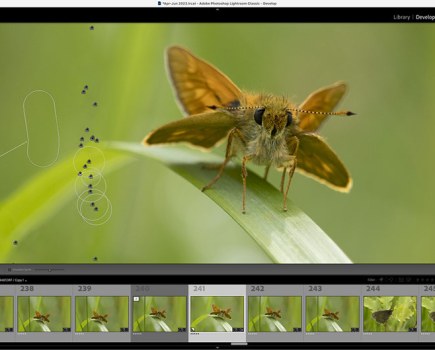
 This image shows a close-up view of a firework photograph, seen here in the Develop module with just the default Lightroom/Camera Raw tone settings applied to it.
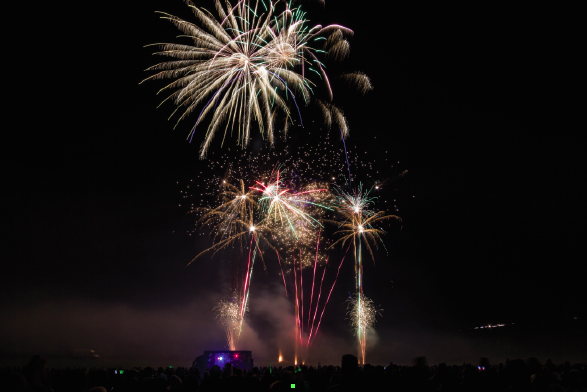
2. Process in Lightroom
 The first image was processedin Lightroom using Process 2012, and I adjusted the Highlights slider to reveal more colour and The first image was processedin Lightroom using Process 2012, and I adjusted the Highlights slider to reveal more colour andtone detail in the firework trails. I also adjusted the Shadows, Whites and Blacks sliders to balance the tones. |
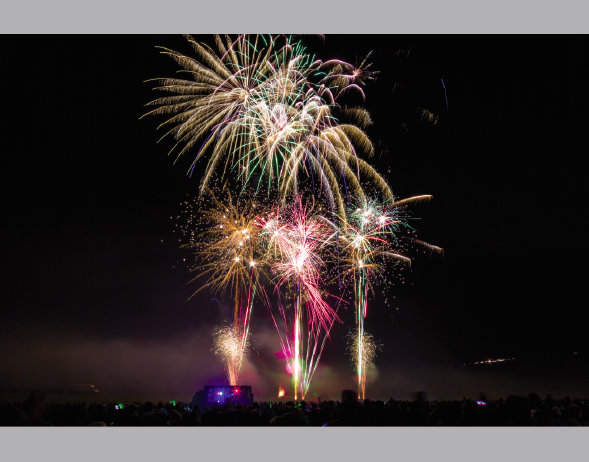
3. Increase Contrast and Saturation
 I then went to the Presence section and added + 24 Clarity to boost the midtone contrast, which added more detail to the firework trails. I also added +59 Vibrance to increase the overall colour saturation in the photograph.
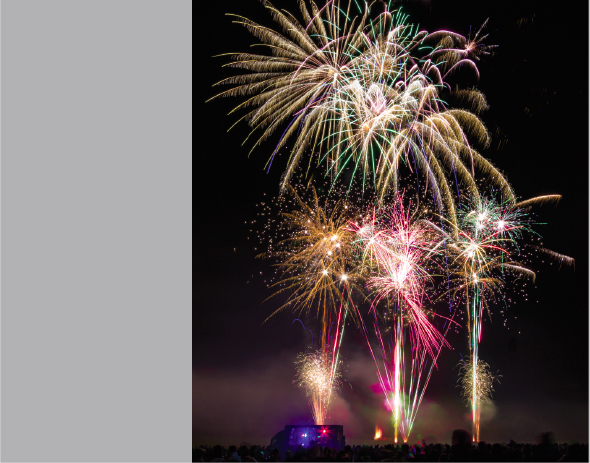
4. Select Images for a Sequence
 Next, I selected four images from a sequence of photographs that had been shot of the fireworks, where the camera position and lens zoom setting had remained the same. I synchronised the Develop settings across all four photographs.
5. Open as Layers
 I then went to the Photo menu in Lightroom and chose Edit in>Open as Layers in Photoshop. This generated the layered image seen here, where the uppermost layer obscured the three other layers below.
6. Adjust Layer Blending

 I started to adjust the layer blending modes for the layers, setting each to the Lighten blend mode. In this example, the first layer was blended with the bottom-most layer. I started to adjust the layer blending modes for the layers, setting each to the Lighten blend mode. In this example, the first layer was blended with the bottom-most layer. |
7. Lighten Blend
 In this step, you can see how the composite image looked with all four layers blended together in this way, all using the Lighten blend mode.
8. Merge and Crop
 In Photoshop, I merged all the layers and cropped the image. I added a new empty layer above the image layer and used the Spot Healing Brush (with sample all layers selected) to remove some of the unwanted light trails.
9. Add Final Layers
 |
 For this last step, I added a couple more image layers. These were silhouette photographs of trees. I set the blend mode for each of these to Multiply to create the impression that there were some trees in the foreground. For this last step, I added a couple more image layers. These were silhouette photographs of trees. I set the blend mode for each of these to Multiply to create the impression that there were some trees in the foreground. |
Visit Martin’s website https://www.martinevening.com/