Bad weather photography tips – 1. Protection
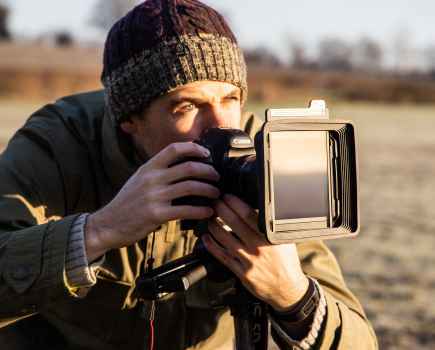
 It may sound obvious, but wandering off across the dales in jeans and t-shirt is asking for trouble. Even if it isn’t cold or raining when you set out, the weather can change and you should be ready for it. Wrap up warm, wear waterproof outer wear and a hat for insulation. A good pair of walking shoes is a must too.
We should also take steps to safeguard our photo kit. Choose a tough camera bag that offers water and wind resistance. Some brands come with a built-in rain cover.
Next, consider lens protection. All lenses will benefit from an inexpensive UV filter, which will help shield the precious front element from windborne particles and the type of salty spray found at the coast.
Rain or drizzle? Take an All-weather Protector (about £30 from Kata). This clear plastic sleeve will envelop your DSLR (apart from the lens front). Controls are accessed through side sleeves.
When you get home, leave your camera in its bag for five to 10 minutes to acclimatise. This avoids warm air condensing into mist as it meets the cold surface of the lens. And always keep silica gel sachets in your kit bag, as they help absorb excess moisture.
Bad weather photography tips – 2. Make the Most of Raindrops
 One thing that you can be pretty much assured of in Britain, come summer or winter, is rain. But has it anything to offer us photographically?
Capturing the motion of the speeding droplets represents just one interesting avenue of exploration, but another, more considered though equally satisfying, approach is to concentrate on their still form i.e. raindrops.
Of the man-made surfaces that might serve as a host, glass, metal and polished stone hold the water’s intricate form well, while waxed paintwork seems to offer the very best resolving power for individual droplets.
However, raindrops form almost anywhere: they hang gregariously beneath twigs; enthusiastically colonise the webs of spiders; will happily speckle the planks of a park bench and frequently adorn fluffy seed heads and all kinds of leaf.
Nevertheless, having a few pointers to help tackle this subject is no bad thing, and so, compiled here is a ready-made series of steps that will assist you in making the most of this often overlooked marvel of nature.
See our step by step guide to photographing raindrops
Bad weather photography tips – 3. Shoot the Breeze
 Purportedly, Britain is the windiest place in western Europe. While our fondness for the humble sprout can sometimes be held responsible for this blustery reputation, more often than not it is due to our long, exposed coastlines and low mountain ranges.
High winds do indeed entail hardship for us photographers, yet seldom insurmountably so. These problems seem small when set against the visual opportunities that this energetic element can offer: propellers that spin, windmills that grandly turn, clouds that stream, flags fluttering, lawns of daffodils bobbing, crops bowing in great waves to the changing air pressure, leaves whirling in a vortex, the canopies of trees crashing, waves driven against the shore and the hair of a loved one blowing madly in the breeze… What sublime poetry awaits us on a windy day!
And so to choices: how will this drama be captured? A fast shutter speed will freeze movement; a slower one will emphasise it and lend an artful twist.
In order to control the amount of blur present in the scene by having some parts sharp and some not, you’ll find that a tripod is an invaluable accessory. Hammocks that hang from the tripod’s legs are available for not much money. When filled with ballast they’ll lend stability even in very gusty conditions.
Bad weather photography tips – 4. Convert to B&W

Leaden skies can often make for disappointing colour pictures. So why not consider switching to the stylish tonality of black & white?
Photoshop’s Channel Mixer offers perhaps the most creative options in terms of monochrome conversion, but there is another method, utilising Lab Color Mode, that is easily carried out and can bring great impact to an image.
It is especially effective in dealing with tonally heavy photographs, the type frequently captured during stormy conditions, because it generally brightens dingy mid-tones.
See our step by step guide to converting to black and white
Bad weather photography tips – 5. Paint with Lightning
 Lightning is likely to be the most dangerous subject that any photographer will tackle, so personal safety is of utmost importance.
The only reasonably safe shelter during a thunderstorm is inside a substantial structure such as a house. If you do get caught outside then the fully enclosed body of a car will offer some protection. Exposed and elevated areas next to tall objects are the least safe places to be – so keep away from high places and trees!
Proximity is the other critical element of safety. Only attempt to photograph lightning that is at least five miles away. As sound travels one mile in five seconds, a delay of 25 seconds would indicate a secure distance. Furthermore, give a good 30 minutes before venturing out after the storm. For more detailed safety info take a look at: www.bbc.co.uk/weather/features/understanding/lightning_safety.shtml
Keeping the above in mind, the occasion of lightning can make for very unique and powerful photos. Though possible during the day, it’s much simpler shooting at night. Staying within easy reach of your car or a house, find a low-lying vantage offering a clear vista.
Set your camera on a sturdy tripod and attach a wideangle lens – f/8 teamed with ISO 100 is well matched to lightning at a distance of five miles, so set this on your camera. If the action is further away, open up to f/5.6 and zoom in. (If it’s nearer, take shelter!) Focus manually on infinity, set shutter speed to B and take a shot, holding the shutter open until you’ve captured one or two strikes.
A remote release is ideal, but if you don’t have one then set an exposure time of about ten seconds and use the timer function to take the picture. Bracket your shots for variety.
If you’d like to add a creative twist, try combining a multiple exposure with coloured filters. This entails taking several shots all on one frame, changing the filter between each. The combined results will be vivid and highly original.
Bad weather photography tips – 6. Fog and Mist

The air is loaded with invisible water vapour. Low temperatures can force these droplets to condense, forming mist and, if the mist becomes very dense, fog. Mist and fog are most likely to form when a reasonably mild day is followed by a long, cold night such as those in November to January; river valleys and other low-lying areas are the best locations.
Get up early so you can take some shots of mist lying in the folds of the land. Find a high vantage and use a long telephoto lens to sandwich the ethereal bands together for maximum impact.
However, fog is more likely to endure during chilly evening hours, when you can craft truly theatrical views. Street lamps seem custom made for great foggy pictures so use them, either in or out of the shot, to add drama. Fog has the action of distinctly separating foreground tones from those more distant, so include something close by or your image may lack weight. Use a tripod, and consider adding grain through ISO choice.
Finally, a superb way of dealing with the garish cast given off by street lighting is to tone your image in Photoshop (Image > Adjustments > Hue/Saturation (tick colorize box).
Bad weather photography tips – 7. Reflections

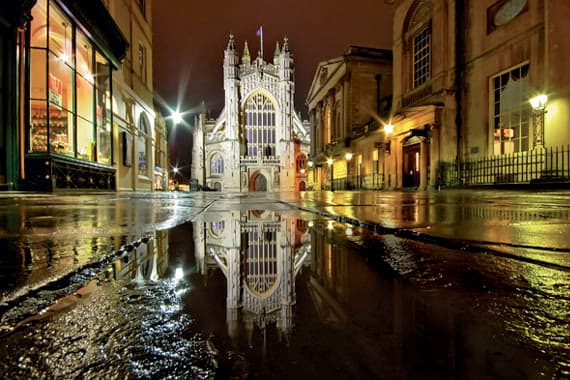
Sheets of water lying everywhere may not be everyone’s idea of a promising photo opportunity; however the natural consequence of rain ought not to be dismissed out of hand. Puddles and wet surfaces left over from a recent downpour act as mirrors, reflecting the light that is available.
This often invigorates dull scenes, making them into something worth photographing. These kinds of reflections also provide an unusual view of the world and can form the basis for intriguing abstract compositions.
Put to the purposes of an artful eye, a puddle can provide a good vehicle for a fascinating exploration into framing. Framing is the action of positioning your subject within the picture space, creatively.
One example of this would be to place your focal point dead centre. Yet, this certainly isn’t the only option worth considering – think of the intersections of thirds and above and below the centre point too. You shouldn’t need to change your picture orientation, your camera to subject distance or your focal length for this technique. All that’s required for a complete re-interpretation of the subject is a subtle adjustment in the viewfinder!
 Bad weather photography tips – 8. The Coast
The coast offers uninterrupted vistas, giving fantastic photo opportunities even in poor weather.
Here, you can make captivating studies, chronicling the changing moods of land, sea and sky, or focus on aspects of geology, or on the power of the waves.
If you opt for the latter, time your visit with high tide so that the waves are at their most energetic.
A telephoto lens, ideally with stabilisation, can be a boon here. It will keep you well away from flying foam and help counter the wind, and its quality of compressing perspective will also build drama by making the various elements of the scene seem on top of one another.
A tripod is a must too.
The coast is also a great place for people watching,even in bad weather, so don’t forget to keep an eye out for interesting candid shots.
Seafront piers, promenades, and amusement arcades can all be a rich source of subject matter.
Bad weather photography tips – 9. Creative ISO
In low-light conditions you might be tempted into increasing your ISO setting as a way of maintaining a faster shutter speed – perhaps to counter camera shake during handholding.
While most modern DSLRs can painlessly accommodate a few ISO rises, when pushed into the higher reaches – figures such as 800 and 1600 – a degree of image degradation in the form of noise is inevitable. However, this seems a reasonable trade-off for such flexibility and was just as true of high speed films of the past.
 Nevertheless, even in dim situations noise can be avoided by using a tripod, setting a low ISO figure and putting up with a longer exposure. Indeed, this method produces far less noise than combining a shorter exposure time with a higher ISO. Compare the two yourself – it’s a fascinating experiment.
Indeed, if properly equipped we can pretty much use any ISO setting that we want. Consequently, the decision we face is more creative than technical. Or in other words, do we want noisy/grainy images or not? Certain treatments and subjects, those requiring a high degree of fine detail and smooth tone, obviously won’t suit excess noise. But there are those others that will positively thrive from the experience.
Noise can be artfully applied to cityscapes and landscapes to add a gritty texture. It can also be employed for impressionistic effect with foggy or romantic views: imagine a lamp-lit street, a spooky graveyard or an ornate bridge striding across a river disappearing into the mist.
So, the next time that you reach for that ISO dial, make a decision for arts’ sake not just practicality you never know what might come of it!
Bad weather photography tips – 10. Broody Landscapes
 Poor weather is the best time to shoot low-key landscapes – images in which the majority of tones are dark. The dark clouds that aprear just before or after a storm can help create a terrific sense of impending doom, when combined with the right subjec matter.
Choose your view well, making sure you have a strong focal point. Graphic compositions like this one tend to work best.
You can darken a sky even further if necessary by using a graduated Neutral Density (ND) filter. Bias your exposure in favour of the highlights, letting the other tones slip away into nothingness.
Photoshop can also enhance a low-key image. Use the Levels control for overall darkening and contrast control, and the Dodge and Burn tools for tidying up small areas, while the Vignette facility (Filter > Distort > Lens Correction) can be very effective in adding a dark periphery to a shot.