One of the joys of spring is watching the landscape come back to life as wildflowers begin to bloom: bluebells and wild garlic in woodlands, cow parsley on the verges, and swathes of pink thrift across cliff tops. As the season progresses and turns into summer, these sights are replaced by fields of red as poppies spring up on agricultural land, and later in the summer, carpets of purples across heathland as heather reaches its peak. All of these make great subjects for landscape photography. Landscape, garden and nature photographers alike share their top tips for capturing stunning wildflower scenes.
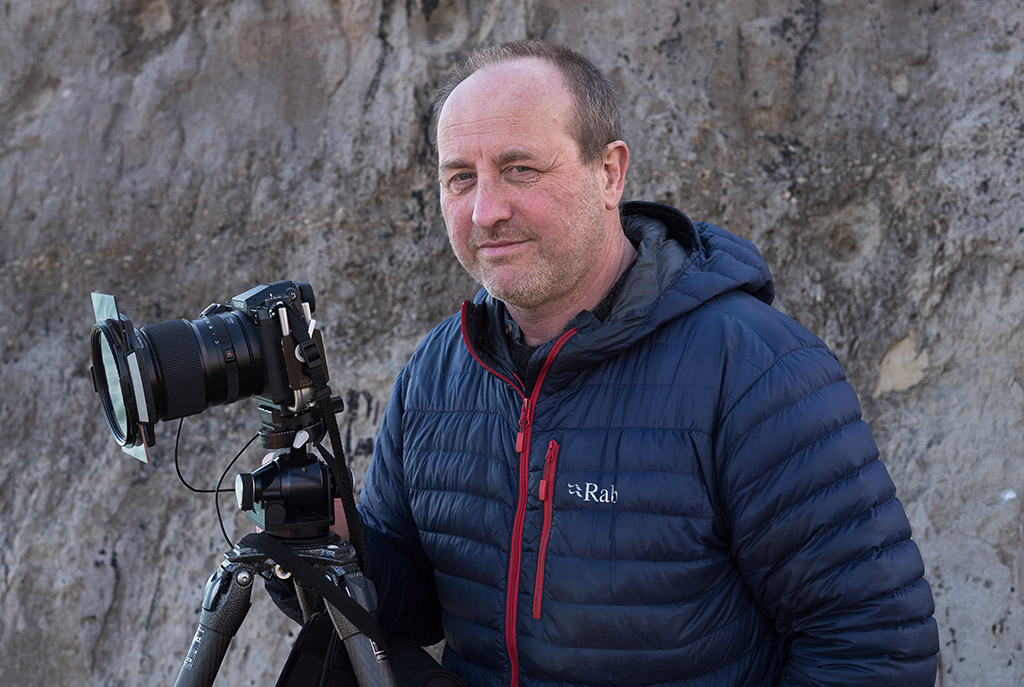
Colin Roberts

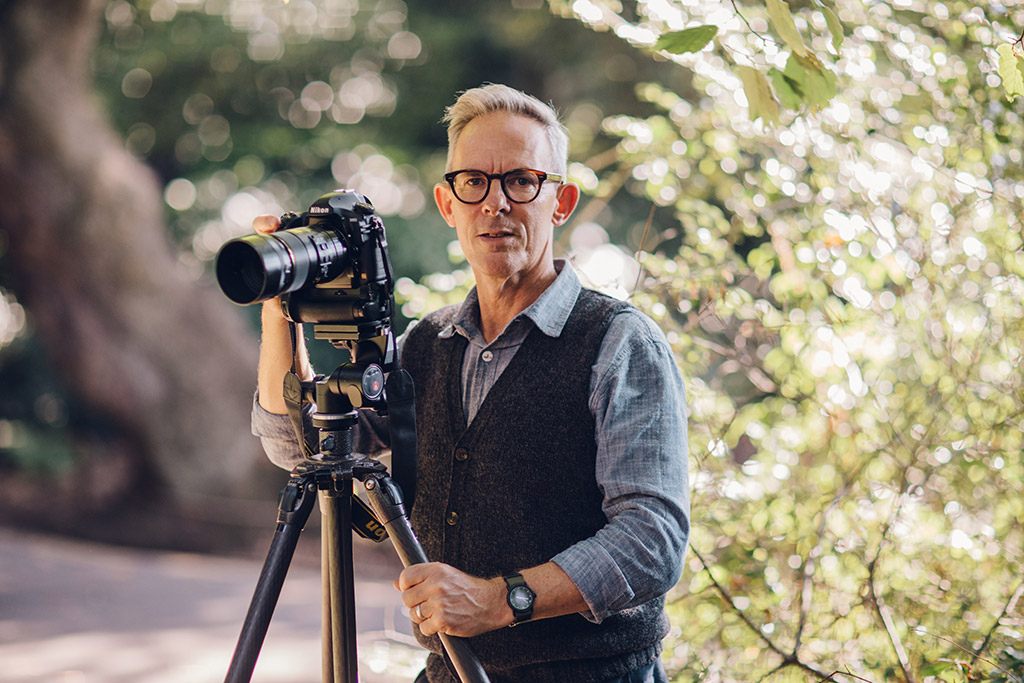
A specialist in landscapes and nature, Colin Roberts turned professional in 2005. He has received a number of awards for his nature images, including ‘International Garden Photographer of the Year’ and the Royal Horticultural Society’s ‘Photographer of the Year’. To see more of his images visit his website at www.colinrobertsphotography.com.
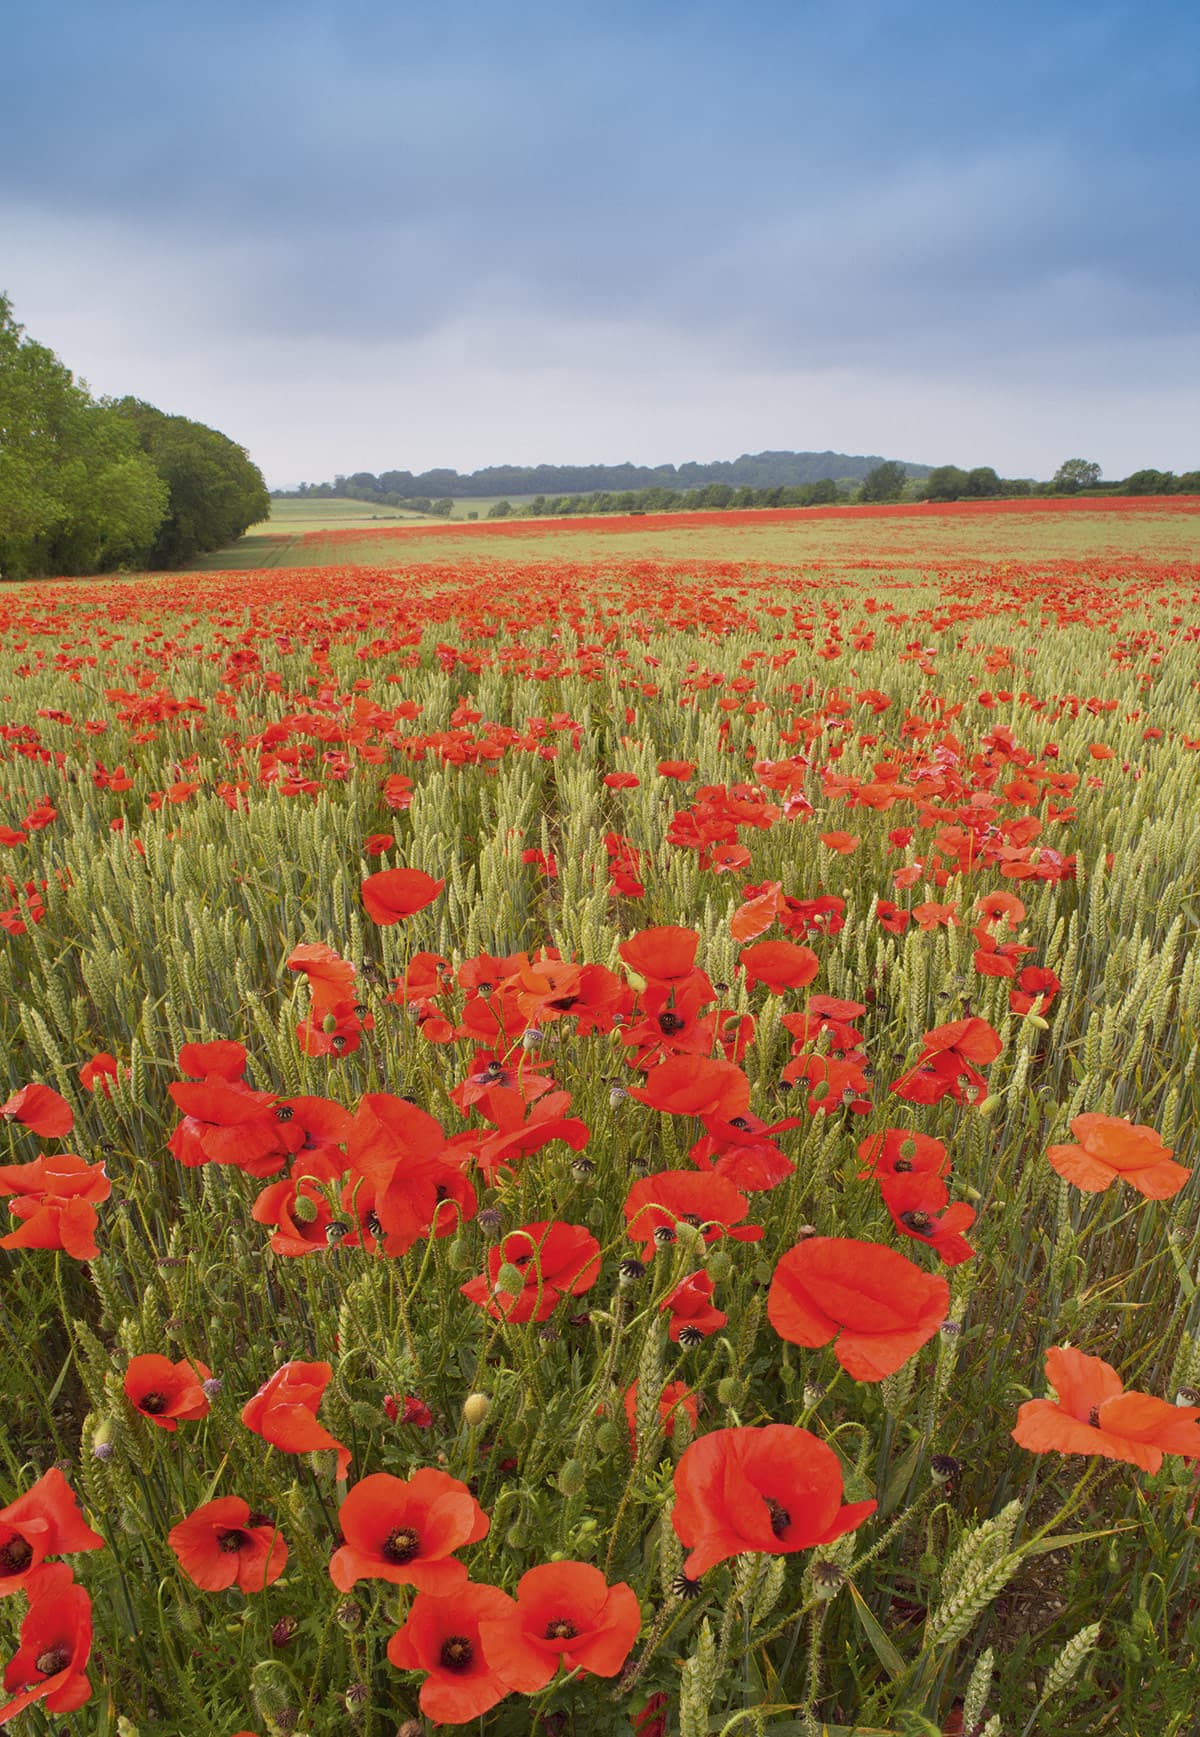
Few things enhance the landscape like drifts of wildflowers, and if they are growing en masse they become the dominant feature. Of course, they can be a challenging subject to photograph – short-lived, fragile, and sometimes hard to locate – but with a little in-depth knowledge and the right techniques they can make inspiring images.
Light
As with many natural subjects, light is a commanding factor, so it pays to think through the type of image you want to capture and visit your location when conditions are right. Soft light is always a good option for shooting flowers and foliage because the lack of strong shadows allows plenty of detail to be revealed – so take advantage of overcast weather whenever you can.
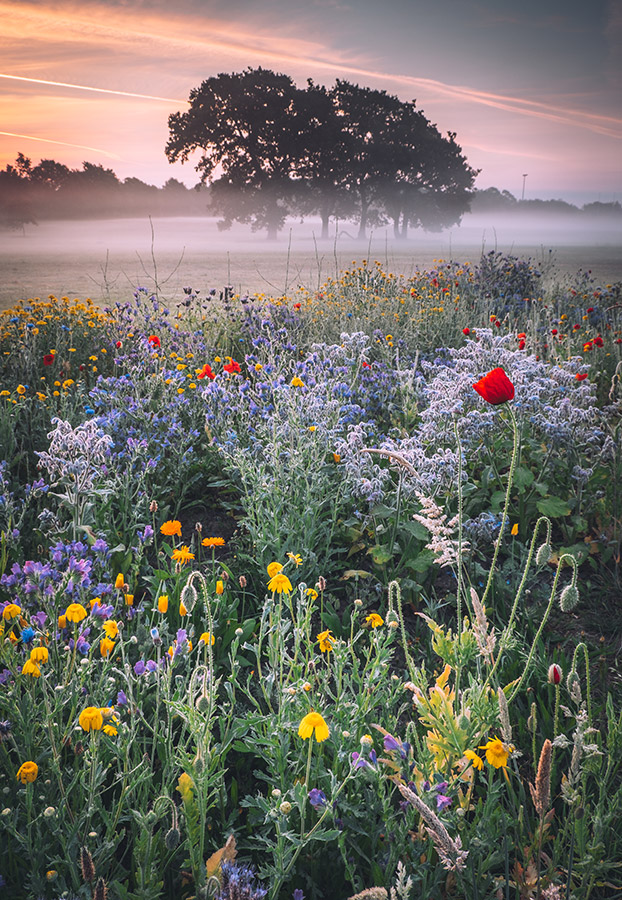
Of course, the strong sidelight at sunrise or sunset will inject a lot more drama, so if you want to capture a more striking image of wildflowers you’ll need to shoot when the sun is low in the sky.
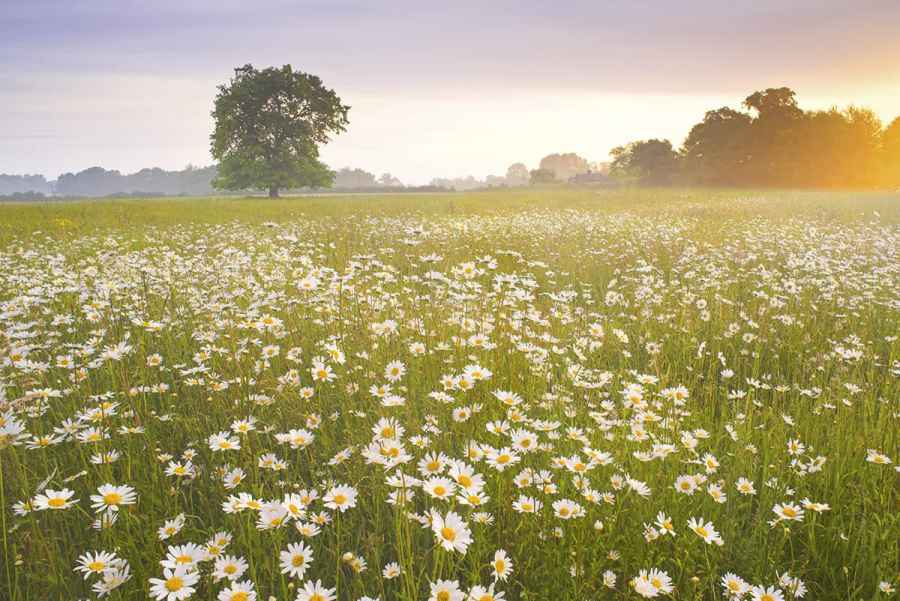
Soft light is always a good option when shooting flowers, such as these viper’s bugloss at sunrise. Image: Colin Roberts
Most of my favourite wildflower images are shot at first light, but this type of image doesn’t come easily. Being on location for sunrise around midsummer can mean setting out at 4am or earlier if you need to travel by car, and then on foot to a remote spot, so forward planning is essential.
A bit of research can reveal vital details – for example, some flowers only open when the sun is quite high in the sky, so they’re not suitable for low-light shots. Another factor to consider is that many wildflowers continually turn to face the sun, tracking its movement across the sky. This can affect your choice of viewpoint, especially if you want avoid shooting a meadow of flowers which are facing away from the camera.
Composition
The grandeur of a wildflower landscape can get lost if the composition isn’t structured carefully. In fact, being confronted with a natural spectacle can be dazzling, so it pays to work your way around the location, shoot handheld from several angles and then weigh up your results.
Bear in mind that images are often more effective if they are dominated by just one or two colours, rather than a combination of many, so in a meadow of mixed flowers try to isolate areas where one or two species prevail.
Images are often more effective if they are dominated by one or two colours. Image: Colin Roberts
Techniques for general landscape composition are all valid, so watch for focal points, try to convey depth, and incorporate any curving pathways that lead into the scene. Try tilting your camera angle downwards slightly in order to include more pull-in of the foreground – that way the flowers will be more prominent and there will be less sky in the image.
When shooting species with smaller flower heads, such as ox-eye daisies and clover, try moving in close with a wideangle lens to make them loom large in relation to their surroundings; otherwise they can look too small to have any real impact.
Water works
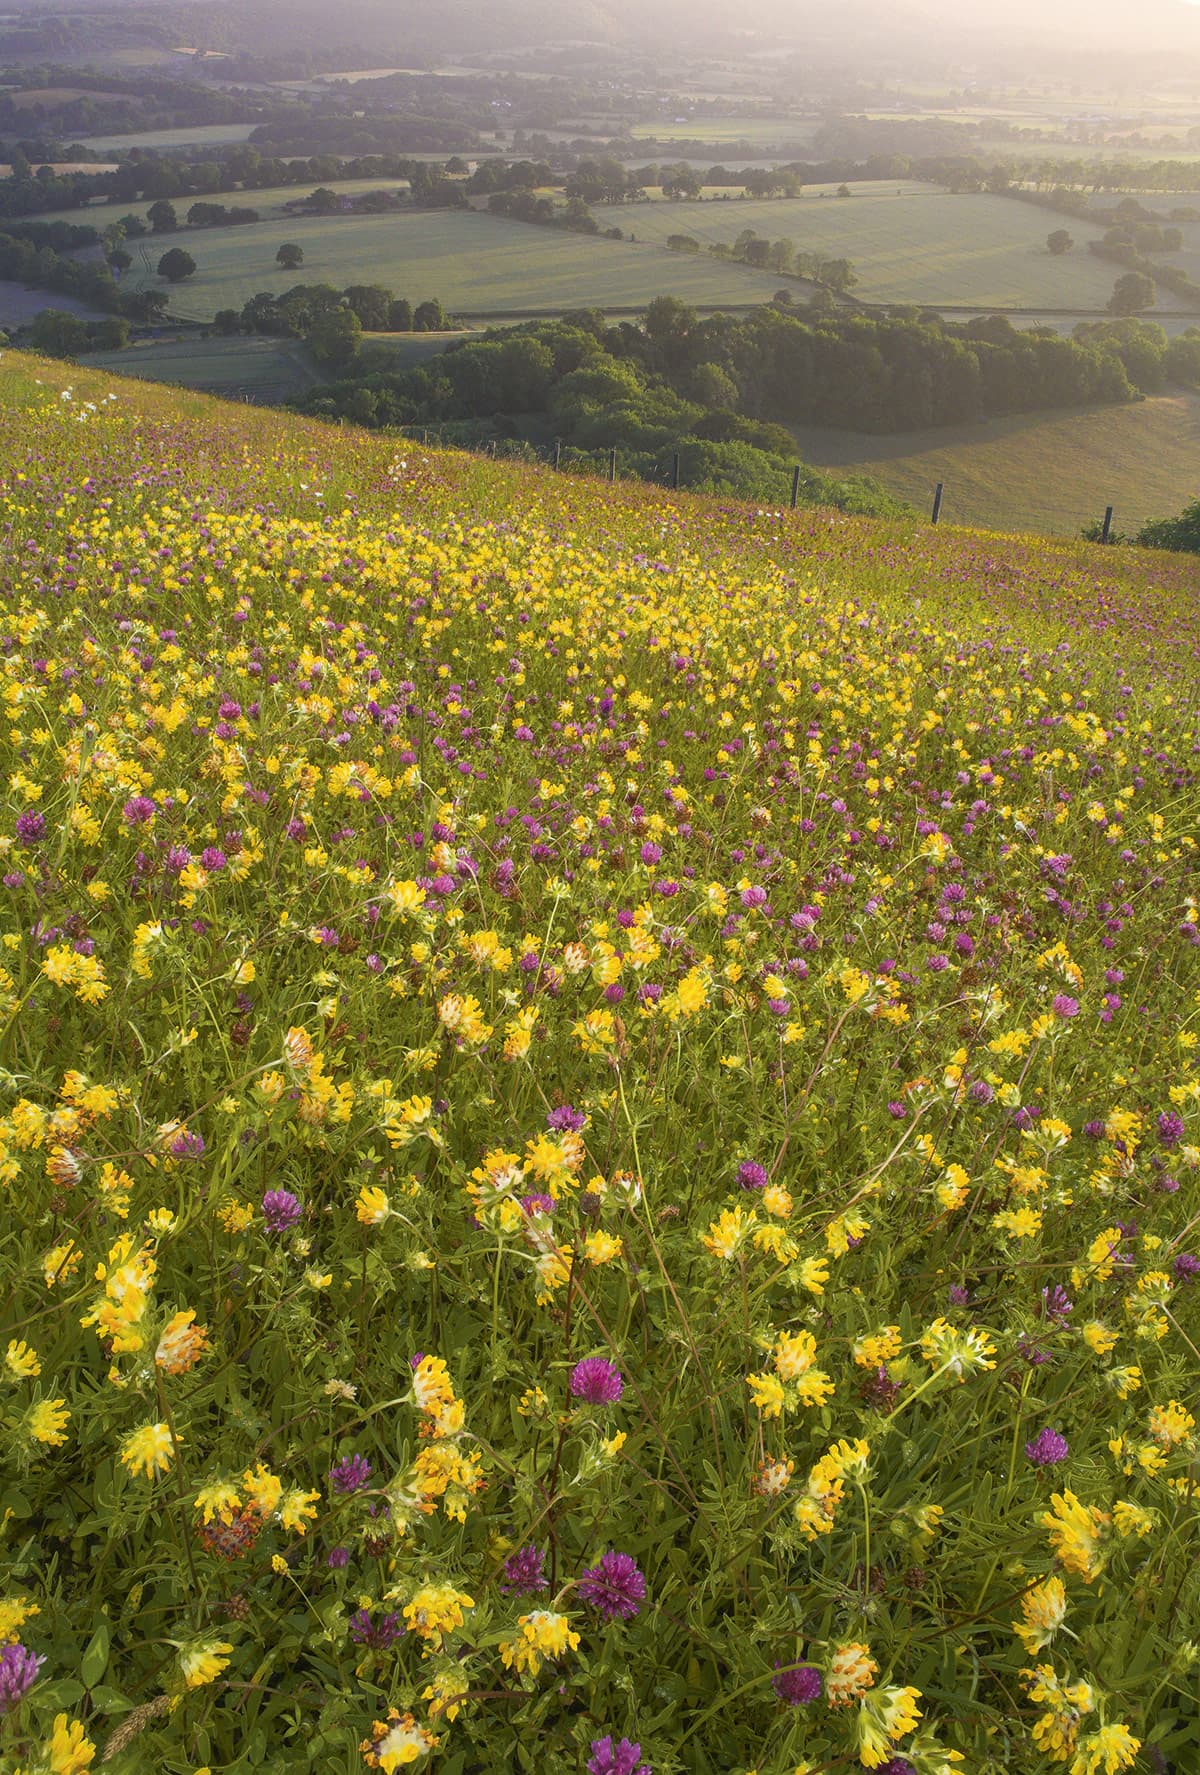
Vetch and clover at Butser Hill. Image: Colin Roberts
Moisture enhances the look of wildflowers, making their colours more intense, so try to capture them on clear mornings when the dew is heavy. Alternatively, shoot after rain while they’re still wet and their foliage has been washed clean and glossy.
Colour combinations
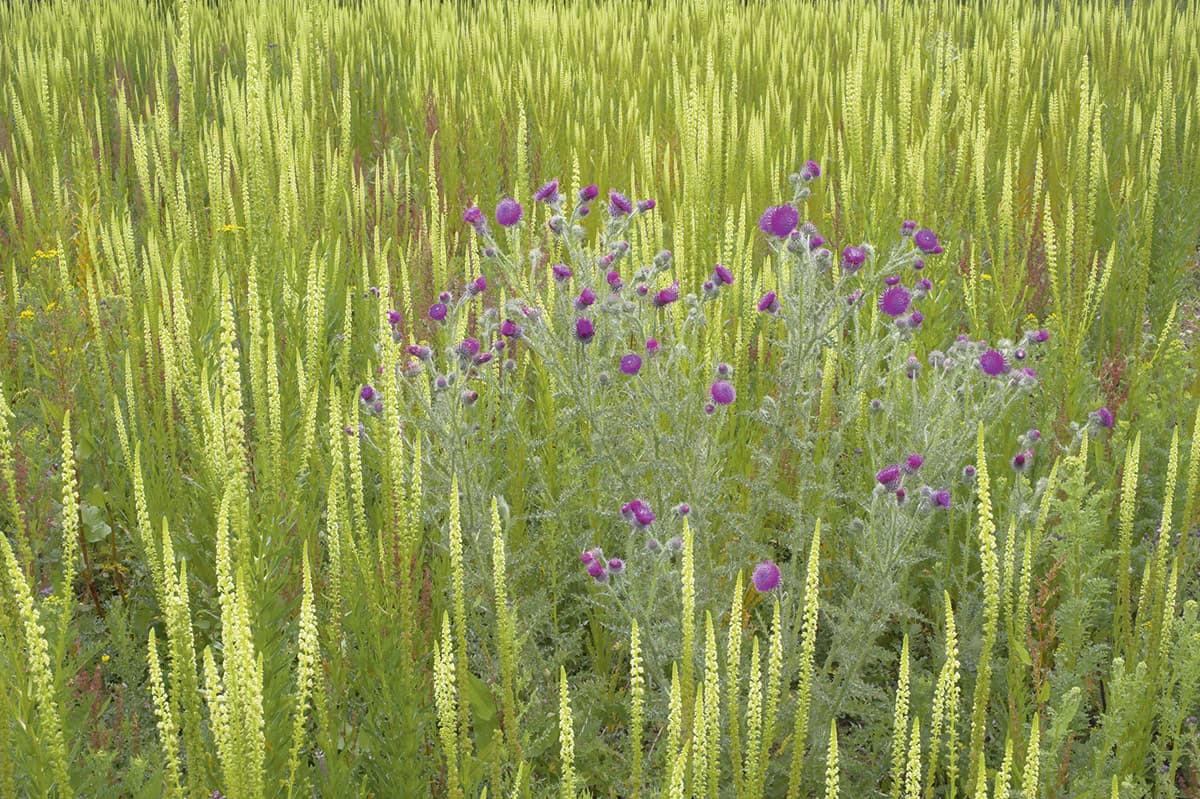
Image: Colin Roberts
Look for interesting combinations of colour where two species grow side-by-side. The mix can be harmonious, like red poppies and pink campion; or contrasting, like yellow weld and purple thistles.
Wind-blown
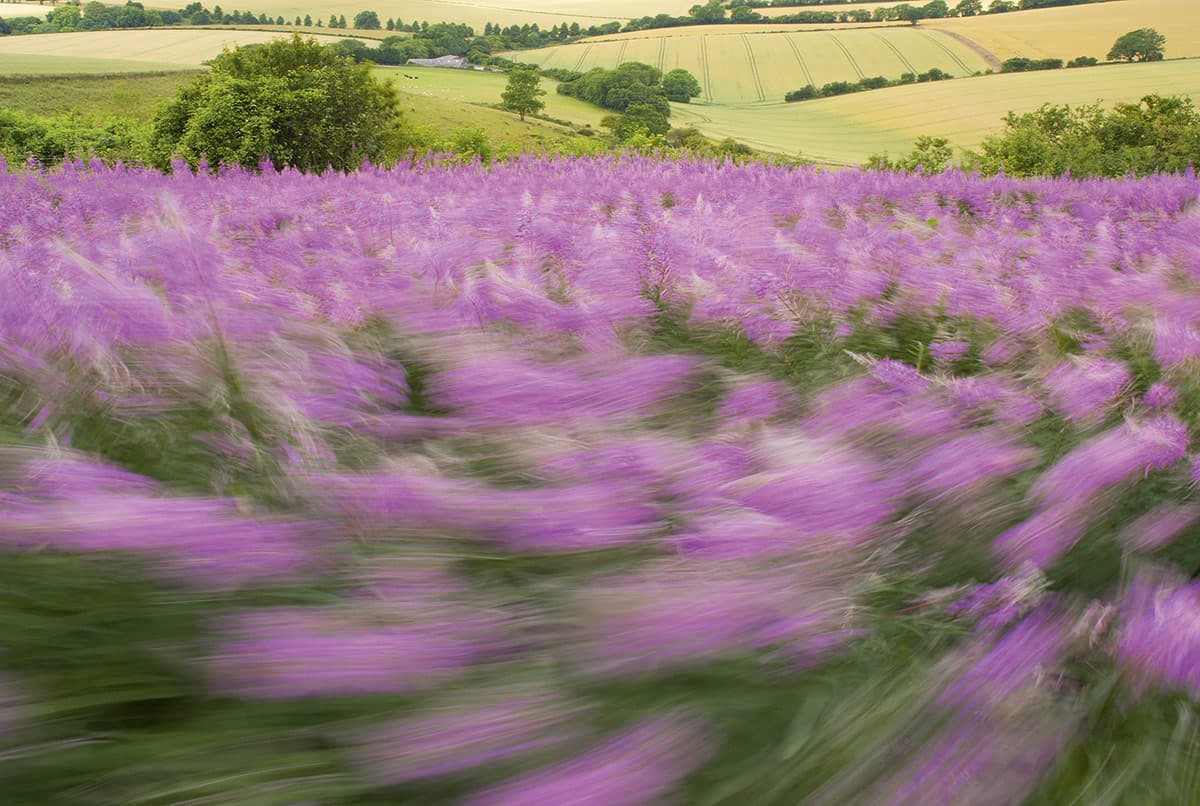
Image: Colin Roberts
Don’t be put off by gusty winds. One way to exploit the wind-blown effect is to lengthen your shutter speed and create an impressionistic effect by showing the flowers in motion.
In the mist
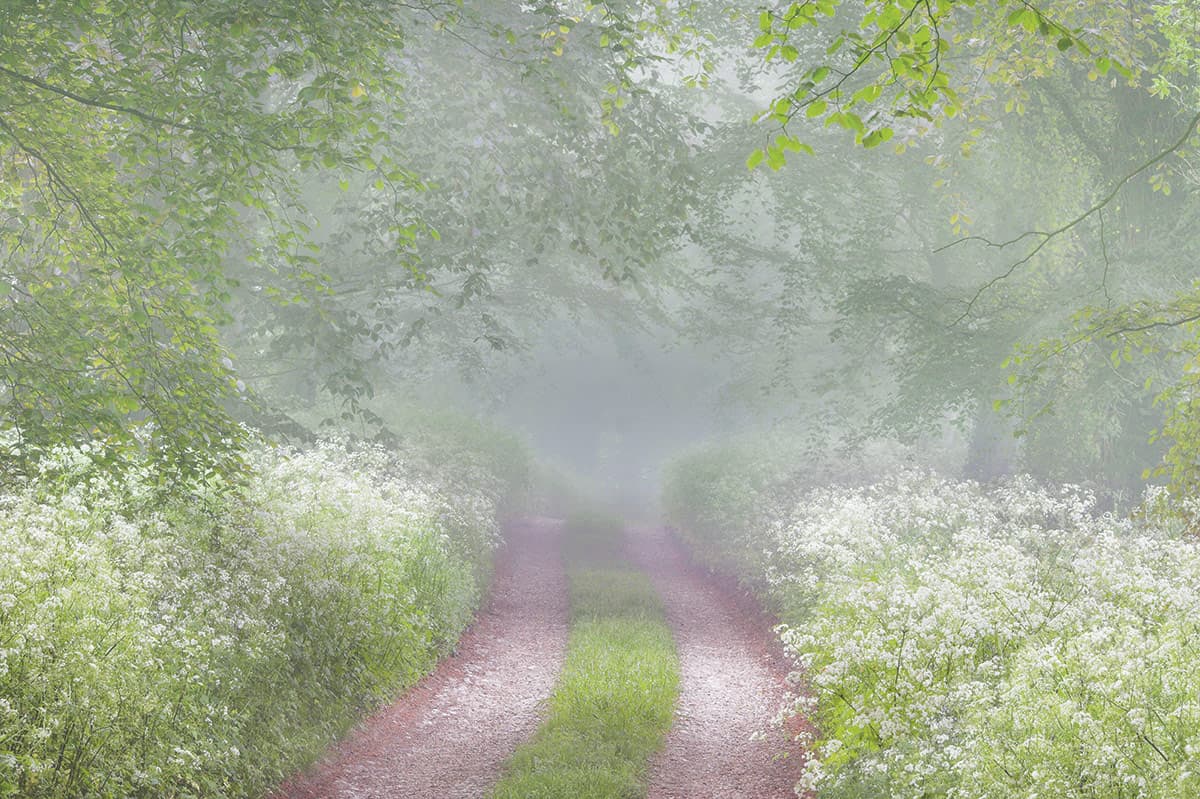
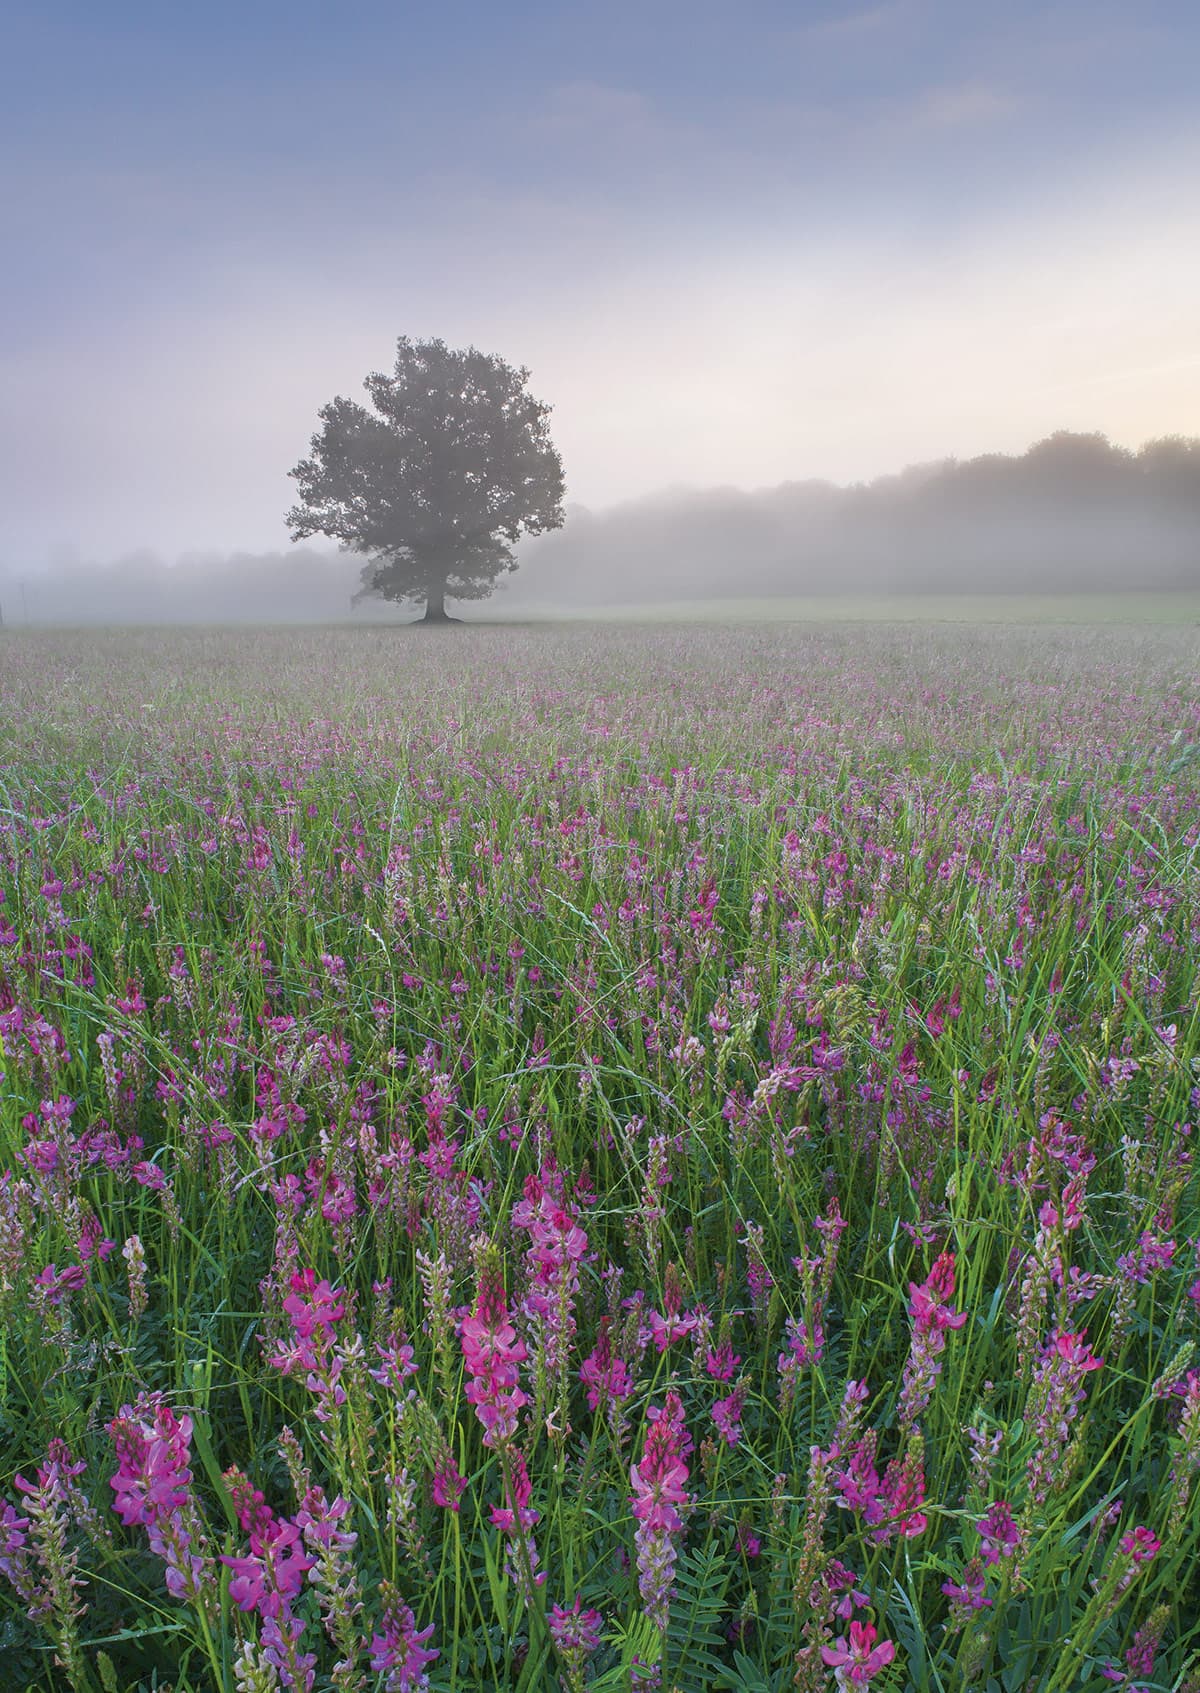
Image: Colin Roberts
Perfect conditions don’t come to order, but keep in mind the potential of a misty atmosphere during wildflower season. It seems there’s a natural fit between a morning mist and swathes of wildflowers, so make a beeline for the best locations when the time is right.
Closer views
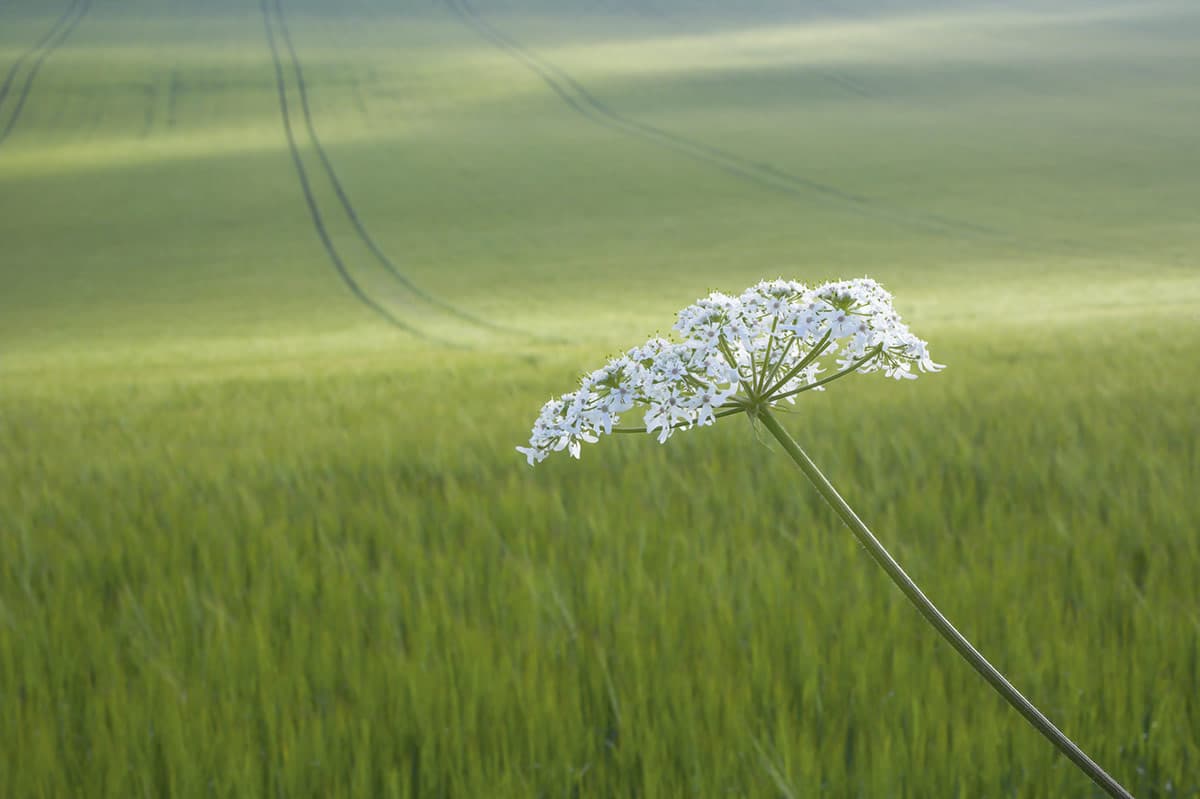
Image: Colin Roberts
Moving in close on one or more flower heads doesn’t mean you have to exclude the landscape. With careful framing it’s still possible to include the surrounding countryside, throwing it out of focus as a soft backdrop.
Colin’s recommended kit for photographing wildflowers
Polarising filter
I use a polariser on all of my wildflower images to cut reflections and enrich colour. The effects are especially marked when the flowers and foliage are moist.
See the best camera filters for photographers
Versatile tripod
Meadows and hillsides typically have marshy or uneven ground, so a tripod with legs that can be independently positioned is essential. I have both Benbo and Manfrotto models and find them perfect for the job.
Wildflower handbook
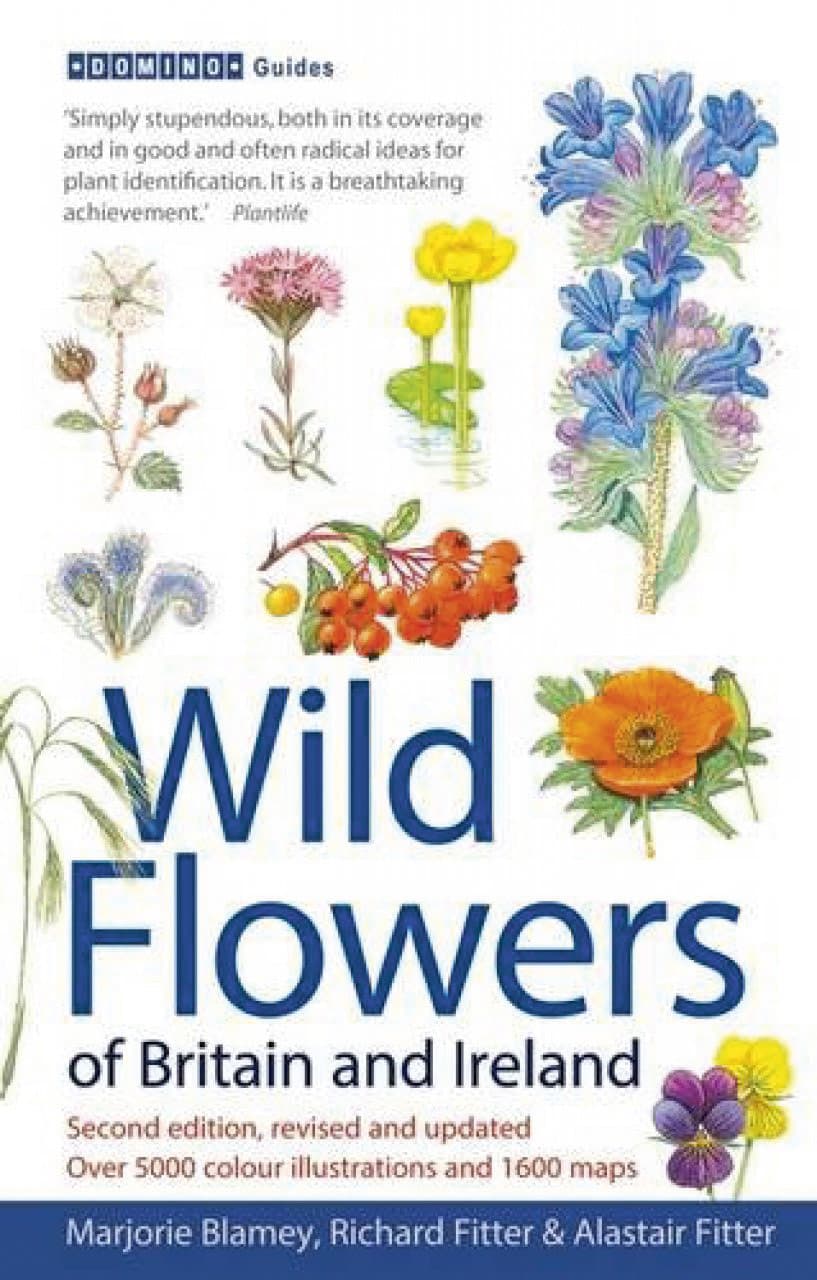
A handbook is useful for identifying wildflowers. It will also tell you how long each species will remain in bloom – handy if you want to return when conditions are better. Try Wild Flowers of Britain and Ireland (ISBN 978-0-71365-944-3)
See more of the best landscape photography books for inspiration
Mark Bauer
Mark is a full-time landscape photographer and author of eight photo books. A multi-award winner, his most recent success was winning the Wildflower Landscapes category of the International Garden Photographer of the Year. See www.markbauerphotography.com and @markbauerphotography on Facebook and Instagram.
Visit the coast
The coast may not be the first place you think of when it comes to wildflowers, but in spring, clifftops can glow with pink as thrift comes into bloom. While in some places there may be just a few individual plants dotted about, other locations feature a thick carpet of colour. Wideangles are favoured in these situations; get down low and close to the flowers to fill the frame. Position yourself so that there is an interesting background – perhaps a dramatic headland or sweeping, golden sands below – select a small aperture such as f/16 and focus carefully to ensure back-to-front sharpness. You can calculate the hyperfocal distance using an app such as PhotoPills, or use ‘double distance focusing’, where you focus twice as far into the scene as the nearest object you want to keep sharp.
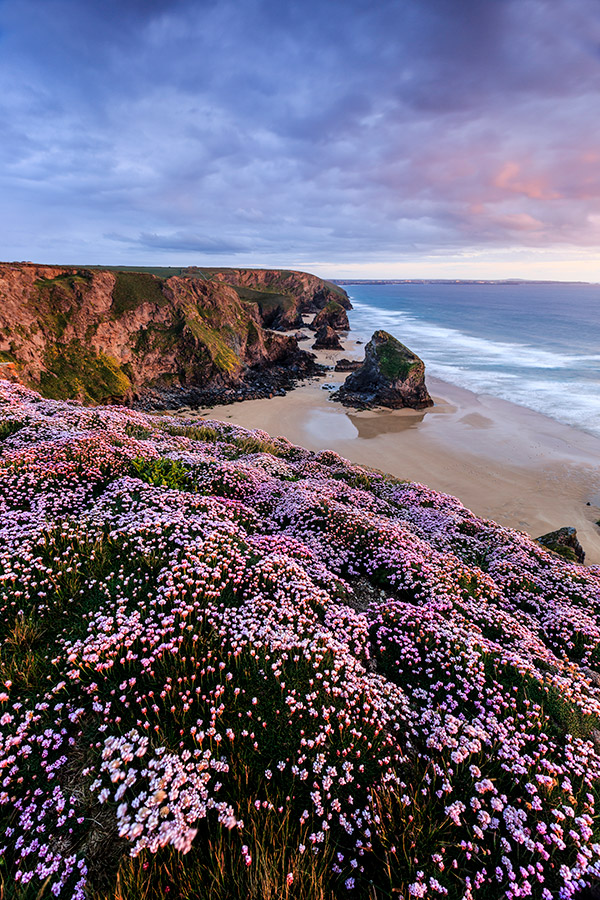
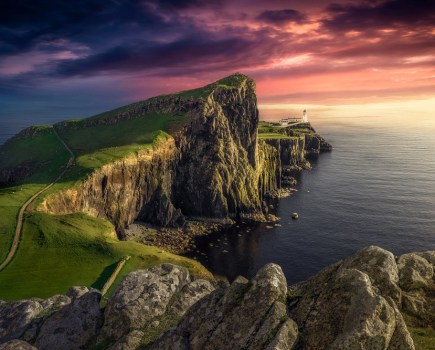
Bedruthan Steps at Dusk. Image: Mark Bauer
Shoot on still mornings
Unless you’re aiming for deliberate motion blur – in which case, you need to make things really blurry so that there’s no doubt in the viewer’s mind that it’s obvious – you don’t want your flowers to be moving. This means that you should shoot when the wind speed is as low as possible. Yes, you can always increase ISO to get a fast enough shutter speed to freeze movement, but even with the latest and greatest sensors, this will result in some loss of image quality.
So, keep an eye on the forecast and head out when conditions are still – wind speeds below 5mph are ideal, and they need to be below 10mph, unless you are shooting in a particularly sheltered spot. Early morning tends to be stiller than later in the day because wind increases as the earth warms up. If it has been still, clear, and cool overnight, mist is also a possibility, which can add a touch of mood to the landscape.
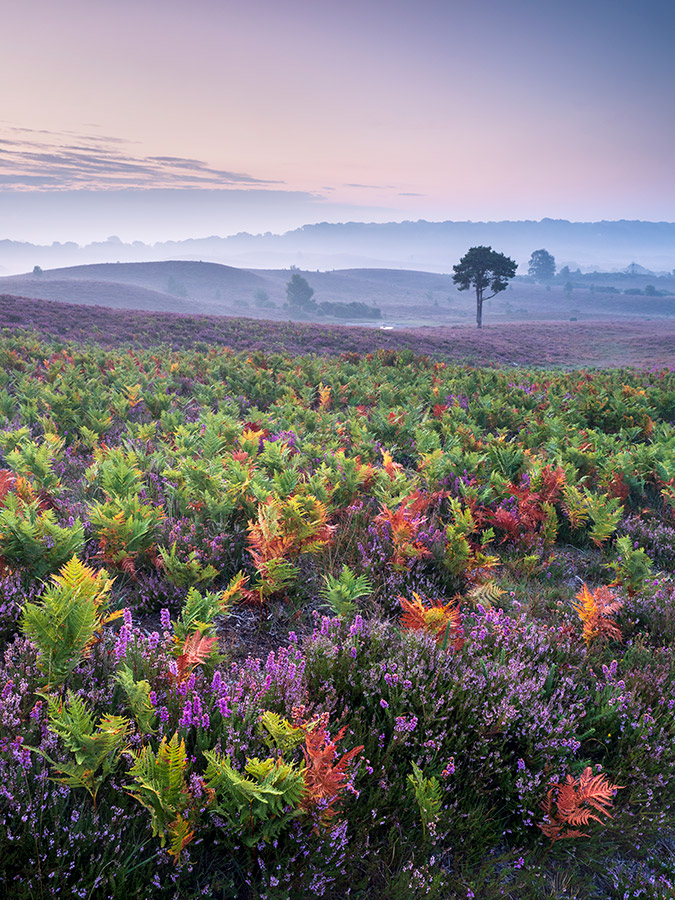
Strodgemoor Bottom, New Forest. Image: Mark Bauer
Use a telephoto lens
While a lot of wildflower landscapes are shot with wideangles, there’s a place for longer focal lengths, too. Telephotos work particularly well in woodland – they compress perspective, creating the impression of a thick carpet of flowers and increase the impact of tree trunks by reducing the apparent distance between those closer to the camera and those further away. Longer focal lengths also allow you to pick out patterns from the chaos of the woodland environment.
Telephoto landscapes require close attention to technique; with greater magnification, any movement in the scene is exaggerated, so when shooting, review each image thoroughly to check for motion blur in leaves and flowers. Depth of field is more restricted with longer lenses, too, so aperture choice and focusing becomes critical. Of course, this does open up the possibility of deliberately restricting depth of field and throwing the background out of focus to hide clutter.
Use a polarising filter
Polarising filters are best known for the impact they have on blue skies, but they can also make a huge difference to flowers and foliage. They remove surface glare, restoring natural colour saturation, which can enhance wildflower landscapes – even in woodland on an overcast day. Polarisers are easy to use – just rotate the filter and you will see reflections come and go, and colour become brighter and duller. When you see the effect you want, stop – it’s that simple! The only downside is that they typically absorb 1½ to 2 stops of light, which can increase the risk of subject movement.
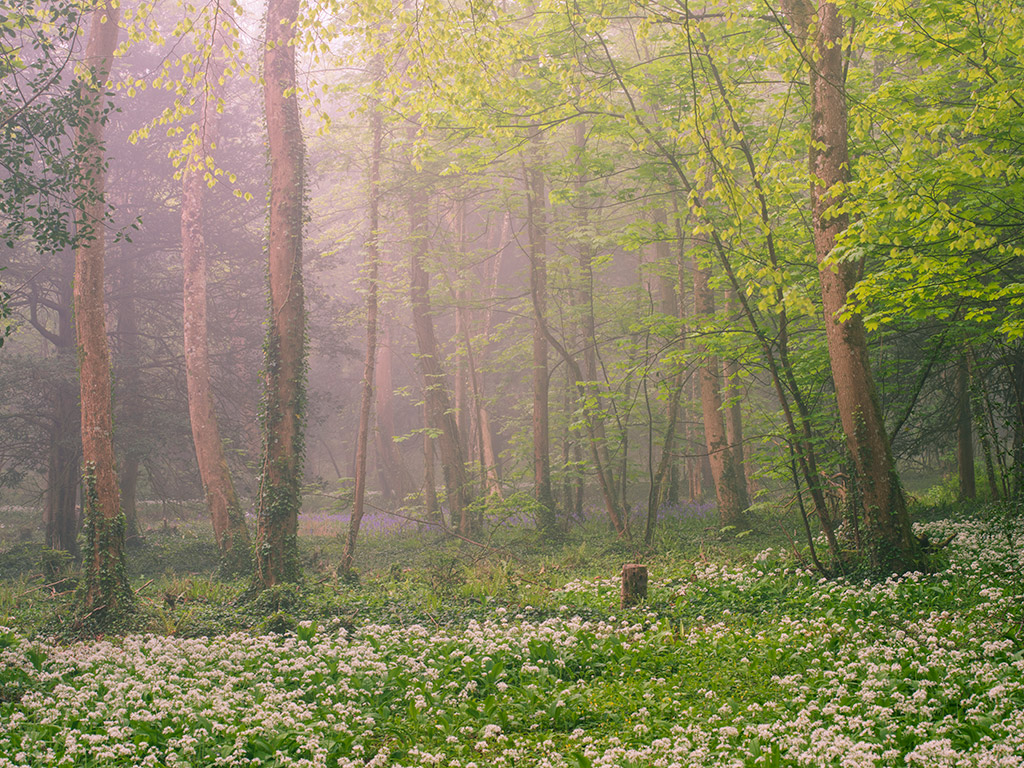
Kingston. Image: Mark Bauer
Head to the woods
In early spring, one of the best environments to shoot wildflowers is woodland. Bluebells and wild garlic can create some of the most impressive displays of wildflowers you’ll see, often with colour stretching far into the distance. The most photogenic woods are those populated with rows of regular, straight trunks such as beeches and where the forest floor is clean and clear of debris. It’s worth scouting locations before planning a shoot, even to a familiar location, as forest management activity means this can change a lot from one year to the next.
Try to avoid photographing in bright sunlight as contrast can be extreme and woodland rarely photographs well in these conditions. Instead, shoot on bright but overcast days, or in the golden light at the beginning or end of the day. Always stick to paths and take great care not to trample flowers; bluebells can take many years to recover.
Lighting
To make the most of the colour, shoot in the golden light of early morning or evening. The best time will depend on your chosen location and the direction of the sunrise and sunset. Still conditions are preferable, so that the flowers don’t sway during the exposure, but that said, their stems are quite strong and wiry, and as the flowers don’t grow very high, they remain quite still even in a fairly stiff breeze.
For maximum impact, get in close with a wideangle lens. The flowers will then seem to stretch out in front of the camera, exaggerating the size of the carpet. Try to frame your shot so that there is a clear focal point in the background – such as a headland, lighthouse or rock stacks. Traditional, well-balanced compositions work best, so stick to convention and follow the rule of thirds when you compose your image.
Warm light from a low sun will really enhance the colour of thrift, and reveal its form and texture. Use an app such as The Photographer’s Ephemeris to find out which end of the day suits your location best.
Mark’s recommended kit for photographing wildflowers
Sturdy tripod & head
Light levels are low in woodland interiors, so a tripod is a must. A good head, especially one with geared movements, makes it easier to make small adjustments.
Wideangle lens
A wideangle lets you get in close to wildflowers. You can fill the lower part of the frame to make a dramatic foreground.
Depth of field app
To ensure front-to-back sharpness with wildflower landscapes, you may need to calculate the hyperfocal distance. This is mostly easily done with one of the many smartphone apps available. PhotoPills (which has many other features) is very popular.
Emily Endean
Emily is a Fujifilm X-Photographer and brand ambassador as well as being on the Pro Team for 3 Legged Thing. She enjoys being outside as much as possible, and loves capturing the beauty of the world and chasing the light and the weather at its best. See www.emilyendeanphotography.co.uk, Instagram @Emily_endean_photography, and Facebook @Emily Endean Photography
Time of day
When you choose to shoot is very important as the light can change throughout the day. By heading out early or late you’ll be able to capture much softer and more interesting light. I find it’s best to photograph flowers either early in the morning or in the late afternoon. Those moments as the sun rises and sets provide the best low-angle light and can showcase the flowers in a warm, soft glow. Great light can really make or break an image. The harsh sunlight and shadows of midday will be too much and give far too much contrast in the scene, so I’d always avoid shooting during that time.
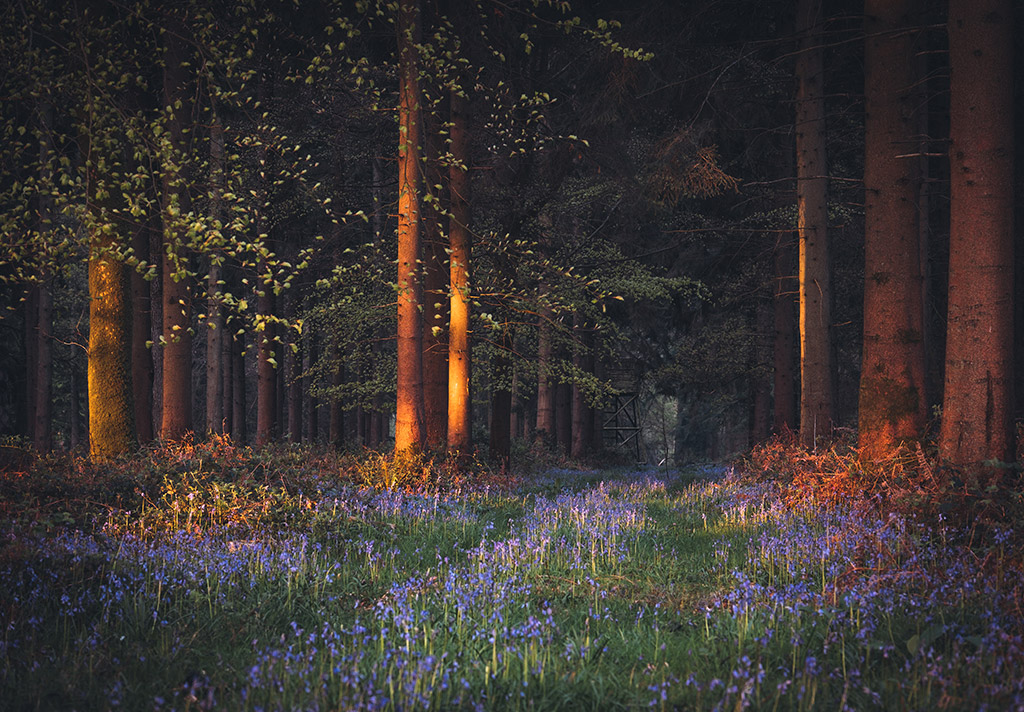
Morning light in the Dorset bluebell woodland. Image: Emily Endean
Depth of field
One of my top considerations is depth of field when I am shooting flowers. It’s always worth thinking about how you want to represent the scene: do you want a wide expanse of the landscape in focus or is your aim to single out a portrait of just one flower and fill the frame with its individual beauty? Using a small aperture of around f/11-16 will give a much larger depth of field and using a large aperture such as f/2.8 will give a shallow depth of field. There is no right or wrong – it’s completely up to you how you want to work, but for me, I always consider both ways so that I come away with varied shots from one outing.
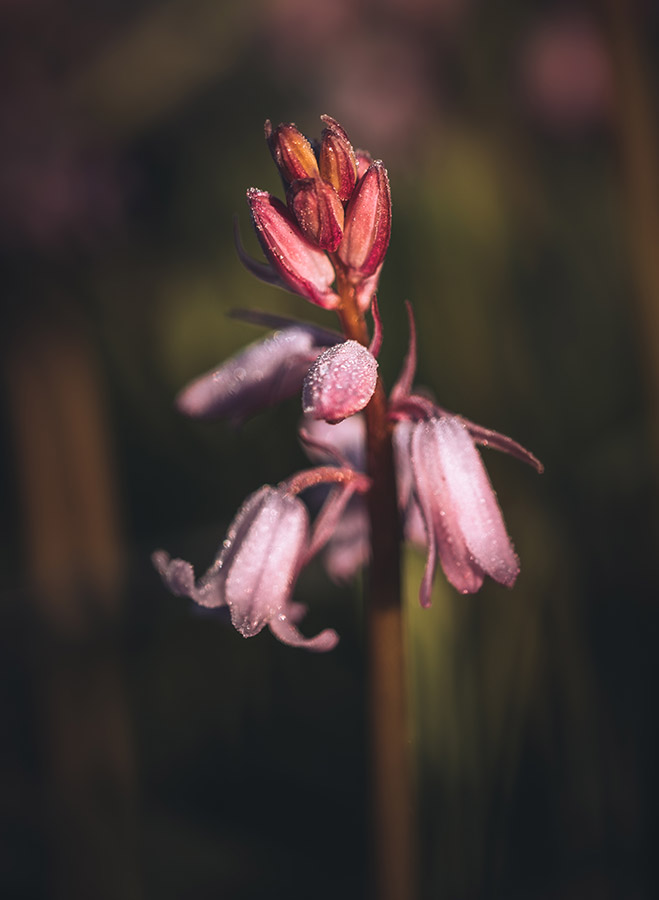
Image: Emily Endean
Panoramic shots
Stepping away from the idea of the up-close macro shots, do you have a huge field of wildflowers in front of you? Want to get in the expanse of the wider vista? Not only is it a great idea to have a wideangle lens on you for a different perspective, but I’d also go for several lined-up shots and stitch them together in Lightroom later to get the panoramic view. If you have an attractive-looking crop with a beautiful scene unfolding, say at sunset, with colour and light in all directions – why not photograph it all!
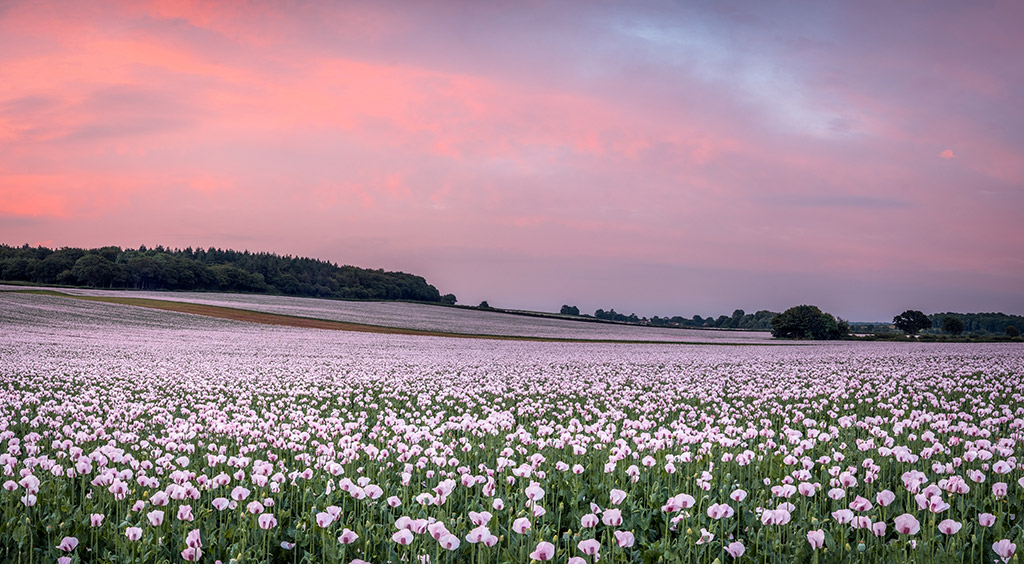
Image: Emily Endean
Weather conditions
Heading out on a misty morning to shoot bluebells in woodland just as the sun rises can transform a dull, foggy landscape scene into an atmospheric, eerie and surreal setting. Wildflowers in the frost or the morning dew droplets offer more great opportunities, too, especially with a macro lens to get that added detail. Any of these conditions offer up the potential for fantastic photographs but of course are all dependent on the weather, so I’d recommend keeping an eye on those weather apps when you are heading out and plan for something interesting!
A Touch of Mist. Image: Emily Endean
Perspective
When framing up my shot I’ll consider the perspective I want to capture. When it comes to individual flower portraits, I love to set myself up as low as I can. A tilting screen can be useful when composing shots from hard-to-reach angles or a low-to-the-ground tripod, as this will put your viewer on the same plane as the flower. Think about how your perspective portrays your main focal point. Low-angle shots will make your subject(s) appear larger, wider, taller and closer.
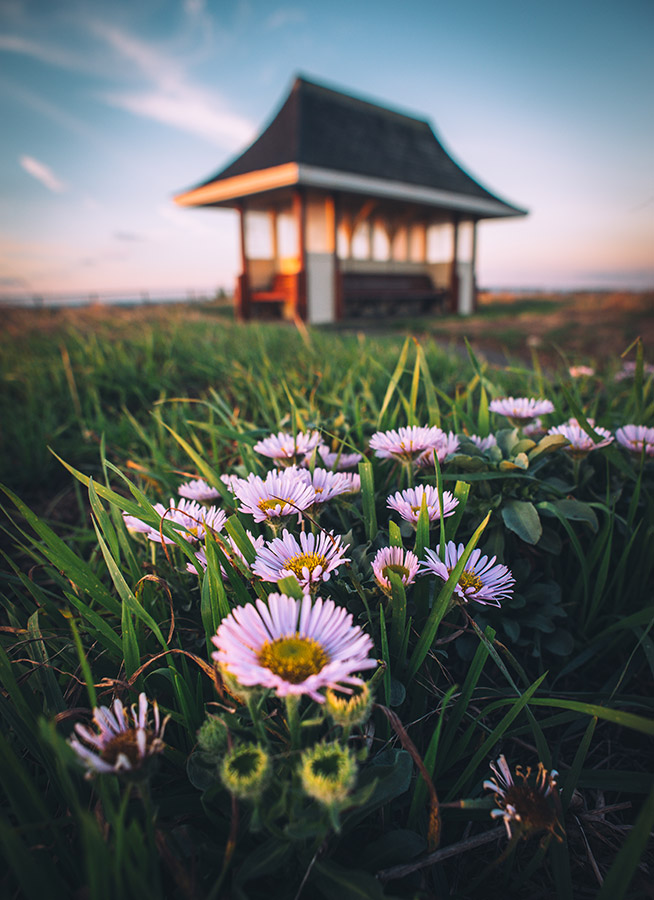
Southbourne Hut. Image: Emily Endean
Research and protecting nature
An important part of the process is doing the research. Whether that’s using the internet, books or just heading outside and exploring, you will find wildflowers everywhere. You can also use those sources to discover what time of year you are likely to see them and where. Once you’ve found your crop, you can plan for the best light and compositions. Looking after nature is so important and we all have a responsibility around this, so, when on location, stick to the pathways, the edges of the fields or clearings that you can access or go through without causing any damage to any of nature. We want to respect these beautiful flowers to protect them for many years to come.
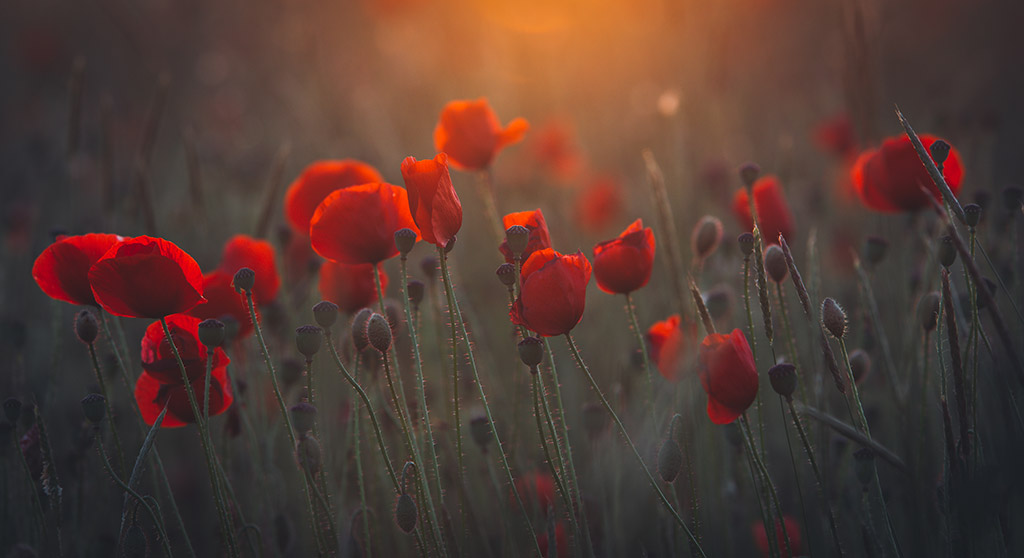
Image: Emily Endean
Emily’s recommended kit for photographing wildflowers
Macro lens
A macro lens is essential for those up-close details. I never leave home without my Fujifilm 30mm macro, especially when shooting wildflowers, as it really helps to get those individual portraits and details of the flowers. Exploring the world through a macro lens gives you an insight into a whole new tiny world, but if you don’t own a macro lens, don’t worry. You can still capture macro-style photos with a telephoto lens. By zooming all the way in, you get a shallow depth of field and a diffused background.
Tripod
The use of the tripod forces you to slow down and be more considerate with your composition, allowing you to frame up and find the best angle that works for you. Flowers aren’t moving anywhere any time soon, so it gives you the time to slow down, more time to focus and specifically more so in lower- light scenarios, extending the shutter speed to let more light in if need be (it can be quite dark on the forest floor!).
Justin Minns
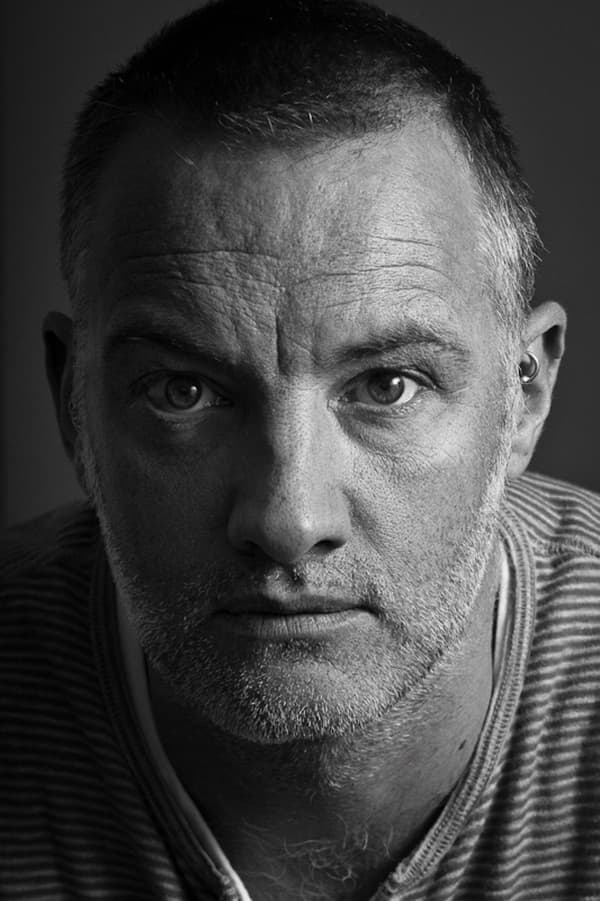
Justin Minns is an award-winning photographer, specialising in East Anglian landscapes for clients including the BBC and the National Trust. www.justinminns.co.uk
Best time to shoot
Heather flowers in late summer, a time of year when the light can be rather harsh during the day, so it’s worth getting out for the golden hours at the start and end of the day. Aside from the obvious prospect of a dramatic sunrise, the low angle of the light as the first rays of sunlight splash across the landscape adds shape and texture to the heather.
There’s no need for any special equipment. I took most of my shots between 24-40mm, a range covered by most kit lenses or compact camera zooms. A telephoto lens is useful for picking out details and when wildlife that lives among the heather makes an appearance. It’s worth slipping a couple of filters into your kit bag: a circular polariser to make the most of the riot of colour and a graduated ND filter to keep those early morning (or evening) skies under control. Here are the top 3 filters you need for landscapes.
Go abstract
Justin Minns
With its bold colours and stark contrasts, heathland can be a great place to experiment with different techniques. Try forsaking the small apertures and resulting shallow depth of field usually favoured for landscape images and shoot wide open, preferably with a telephoto lens. Focusing on a point of interest in the distance, a lone tree for example, will render the foreground heather as a glorious pink blur.
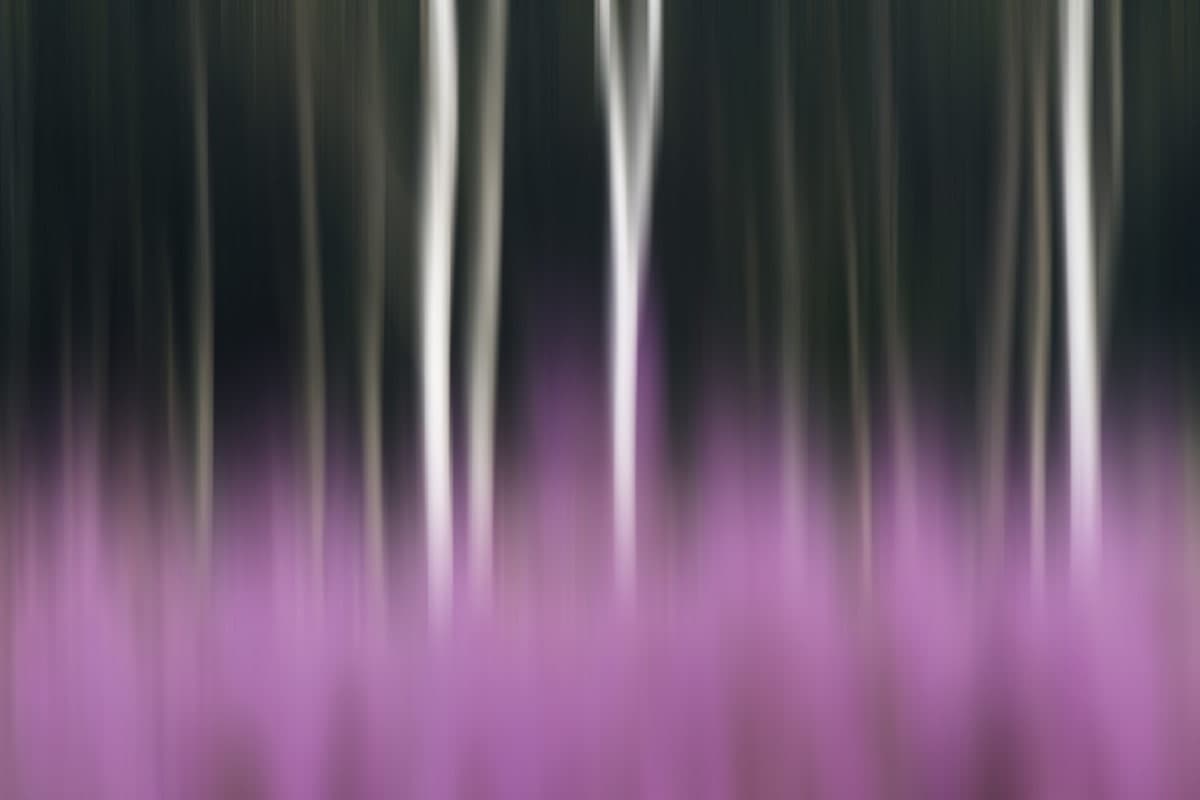
You can take this a step further by using intentional camera movement (ICM), a technique that involves deliberately moving the camera during the exposure. There are endless possibilities and permutations with ICM and a lot of trial and error to get something you’re happy with, but it’s a lot of fun. In this example above, using a fairly slow shutter speed I moved the camera smoothly from the tops of the trees down to the heather, pressing the shutter button halfway down.
Subject Suggestion: Heather and Gorse
It’s hard to believe that heathland is one of our most threatened habitats, rarer even than rainforest. Heathland can be somewhat open and featureless, which makes finding a composition challenging. Try to keep it simple, aiming to capture the spirit of the colourful spectacle without showing it all and use elements such as a lone tree on the horizon or a pathway cutting through the heather to act as a lead-in line.
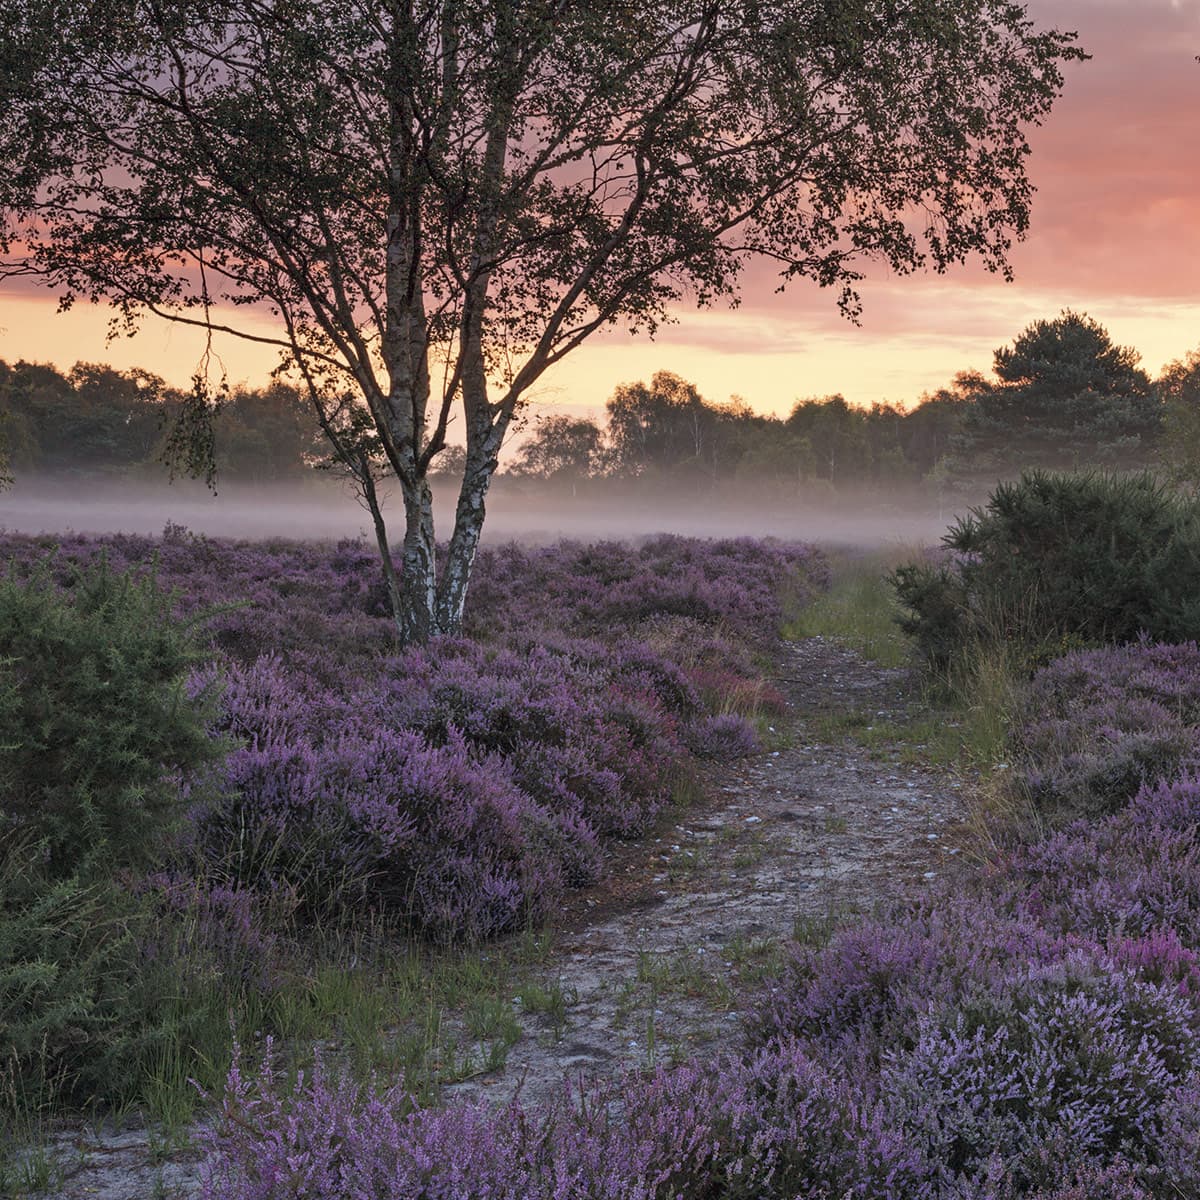
A low angle of light adds shape and texture to heather. Image: Justin Minns
In the details
Although the sea of colour is the obvious attraction, don’t overlook the details. Dew-covered spiderwebs, butterflies or backlit individual flowers can be picked out with a telephoto or macro lens and the colours of out-of-focus heather make a great backdrop.
Autumn gold
July and August, when the flowers are in bloom, are the best months for capturing heather, but autumn brings a range of earthy tones that combine beautifully with the gold and russets of the ferns and trees.
Jason Ingram
Jason is an award-winning garden photographer based in Bristol. He travels widely photographing gardens, plants and people for the UK’s leading magazines and provides photography for numerous best-selling gardening books. He has been awarded Garden Photographer of the Year by The Garden Media Guild six times, and Features Photographer of the Year twice. See more at www.jasoningram.co.uk and @jasoningram on Instagram.
Be prepared
Planning is essential to my work as so many conditions have to be in place for the shoot to be a success. I need to know that the garden is looking good, and that the light and wind speeds will also be in line. Wind speeds, as first thing in the morning I will invariably be working on a tripod with shutter speeds of around 1/2sec. So any gusts of wind can blur the planting schemes, which is not what I am after. I have a rule that any wind speeds over 10mph can create problems when shooting at dawn, so make sure you check the weather forecast. I find the Met Office to be one of the most reliable sources.
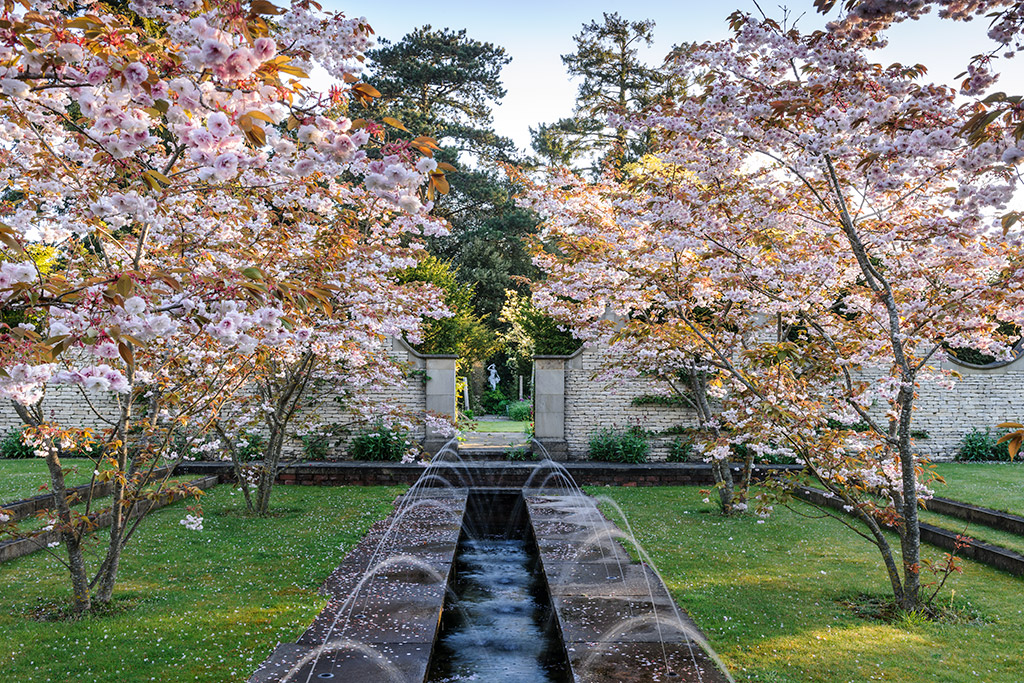
Image: Jason Ingram
Shooting into the light
This technique is one of my favourites; it really adds drama and can only be achieved very early in the morning or late in the evening. It relies on having a natural scrim that can diffuse the light
– this tends to be trees and foliage. You need to position yourself so that the light doesn’t come directly into the lens, and you may need to change position a few times as the sun moves quickly, but the end result is worth it. As a rule, I like to shoot my scene either directly into the light or with the sun coming from the sides, 10 to the hour or 10 past. I find that backlighting the subject always gives me the best shots and helps to create separation between the layers in the garden.
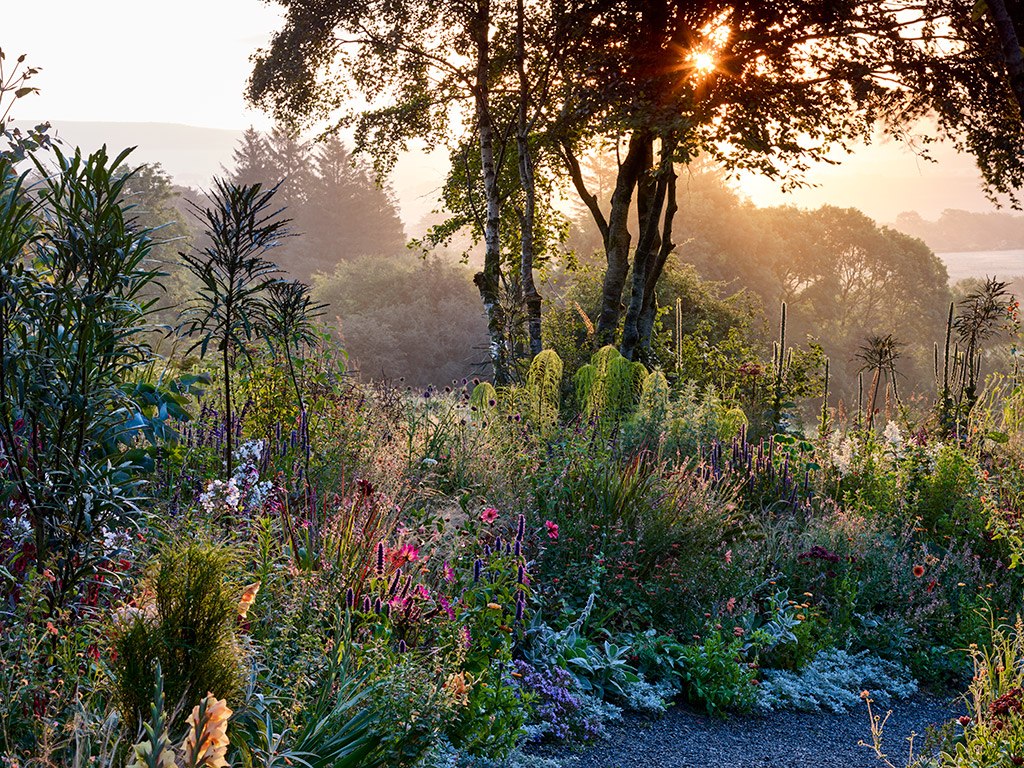
Image: Jason Ingram
Changing light conditions
As a garden photographer in the UK, you are at your busiest in the months of May and June when the sun is rising about 4.30am, and as a rule you need to be ready for shooting before this. As well as getting up early, you also need to consider how the light will impact your location. Light changes vastly throughout the day: soft milky and warm in the morning, cooler and contrasty throughout the day, and warm and sharper in the evening. I tend to prefer the first hours of the day as I like the chance of capturing mist which can really add that third dimension. If you only have access to a garden during the middle of the day then a high cloud day will work, as this will work as a huge diffuser.
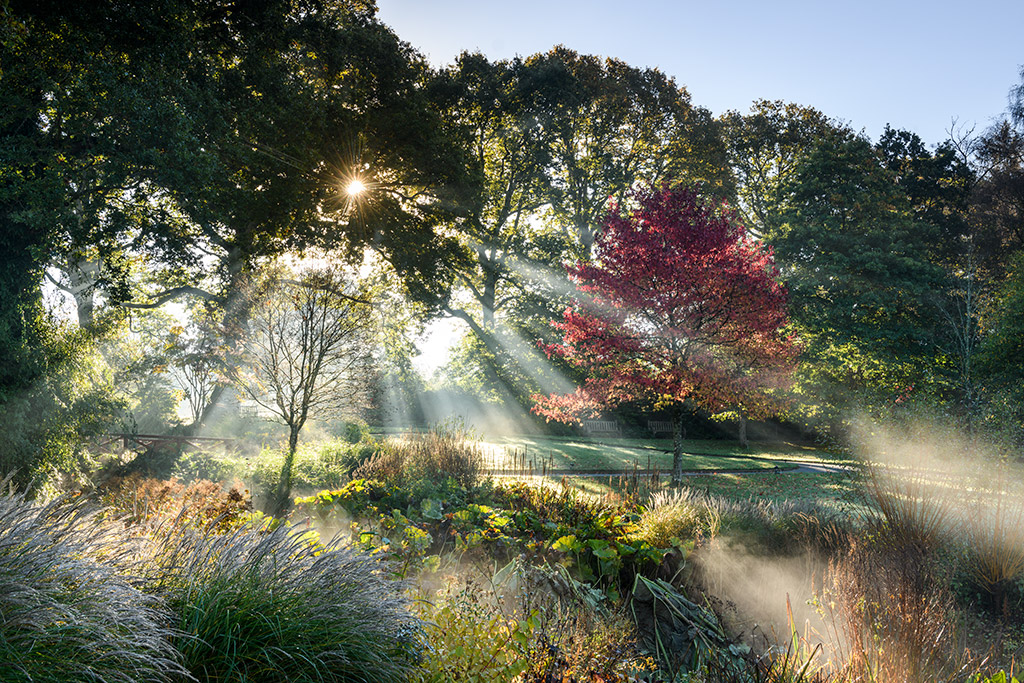
Image: Jason Ingram
Elevation
I never leave home without a small step ladder. Sometimes you only need a few feet of elevation, but the difference can be image-changing. Looking down on your subject can clean up the composition, as you start to see all the layers in the garden and the separation between the planting. If there is a path, this can add a dynamic layer to your shot, as seeing it meander through your composition from an elevated perspective is always a winner.

Image: Jason Ingram
Lens choice
The technique of previsualisation is really important when creating your compositions. Really get to know your lenses and their effects when used. I always have an idea of what I want to achieve before choosing my lens. Do I want front-to-back sharpness with a leading line, usually shot on my 24-70mm, or do I want to isolate a section of the garden and soften the background, in which case I’d use my 80-200mm? I find I can happily shoot an entire garden with these two lenses.
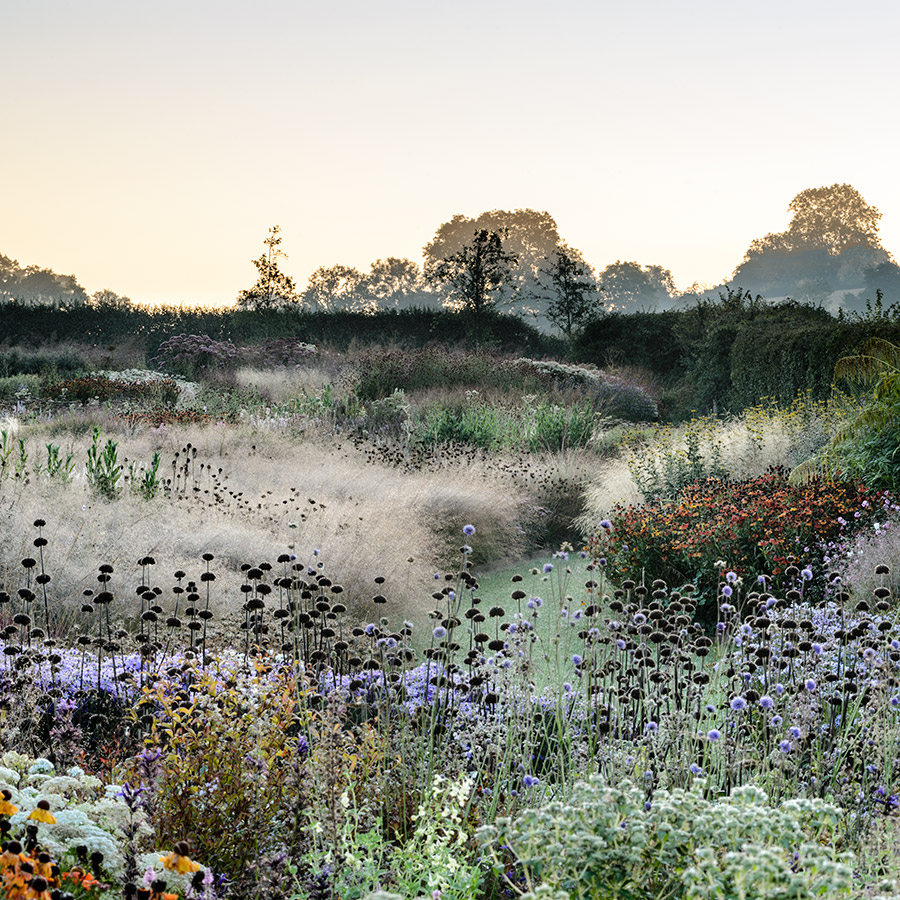
Image: Jason Ingram
Jason’s recommended kit for photographing wildflowers
Step ladder
This is essential for wide views; it only needs to be three steps as just the smallest elevation will open up your composition. I would suggest getting one with an integrated handrail for stabilising yourself.
Flag
My flag tends to be a scruffy old piece of black A4 card which I can use to keep the light off my lens. I like to backlight my subject as much as possible and sometimes even a lens hood is not sufficient for keeping the
sun off my lens.
A Garden & Plant Photography Masterclass with Jason Ingram: In July 2023 Jason launches his first online photography course with Create Academy, in which he helps to break down the theory, jargon and processes associated with photography in simple, step-by-step lessons. Developed for total beginners, enthusiasts who are interested to see how a photographer works and those in the design trade wanting to learn how to photograph projects to a professional standard, this course makes photography accessible to all: www.createacademy.com
The Landscapes round of Amateur Photographer of the Year 2023 is now open for entries! Submit your best landscapes here.
Want to improve your landscape and nature photography further? Have a look at our upcoming AP Photo Tours Landscape Holidays!
Related reading:
Best Camera for Landscape Photography
Transform landscapes with square format
Intimate Landscape photography
How to capture moody monochrome landscape
Complete guide to outdoor light in photography
Best photo editing software in 2023