I was in my early teens when I first became interested in photography and probably 15 when I bought my first SLR. As a keen youngster I was enthusiastic and grateful for all the advice I could get, yet as a novice I was also very impressionable.
One of the first pieces of advice I was given was: ‘Don’t shoot into the light – always have the sun over your left shoulder.’ At the time I was young and naïve, and it seemed like good advice – but it wasn’t. In landscape photography you will often be looking for cross lighting to bring out the texture and character of the countryside. This is fine, but I would also advise trying your hand at contre-jour technique, or to put it more simply, shooting into the light. This technique creates a striking backlight behind your subject and will help to emphasise lines, shapes and silhouettes.

Shooting into the light can transform flat, formless landscapes into something much more striking
As with any photographic technique there are certain factors to consider, the first and foremost of which is health and safety. No, you don’t need a high-visibility jacket and hard hat to shoot into the light, but you should avoid looking into the sun with a medium-to-long lens for any prolonged period of time, since this can damage your eyesight.
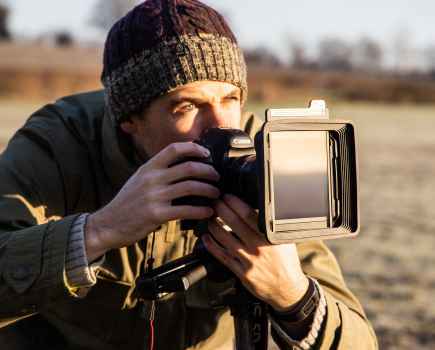
So, do you need any particular or specialist camera kit to shoot into the light? Well, yes and no. You only need a camera and anything from a wide-to-long lens, depending on your subject matter.
Quality lenses are a must, as you will often be pointing your lens straight into the sun, or at least the main and brightest light source. Flare and ghosting (non-image forming light) will be your enemy, so modern lenses designed for the digital era with flare-resistant coatings, such as Nikon’s Nano Crystal Coating, will certainly help with image quality.
Quality lenses are a must to avoid the risk of flare and ghosting
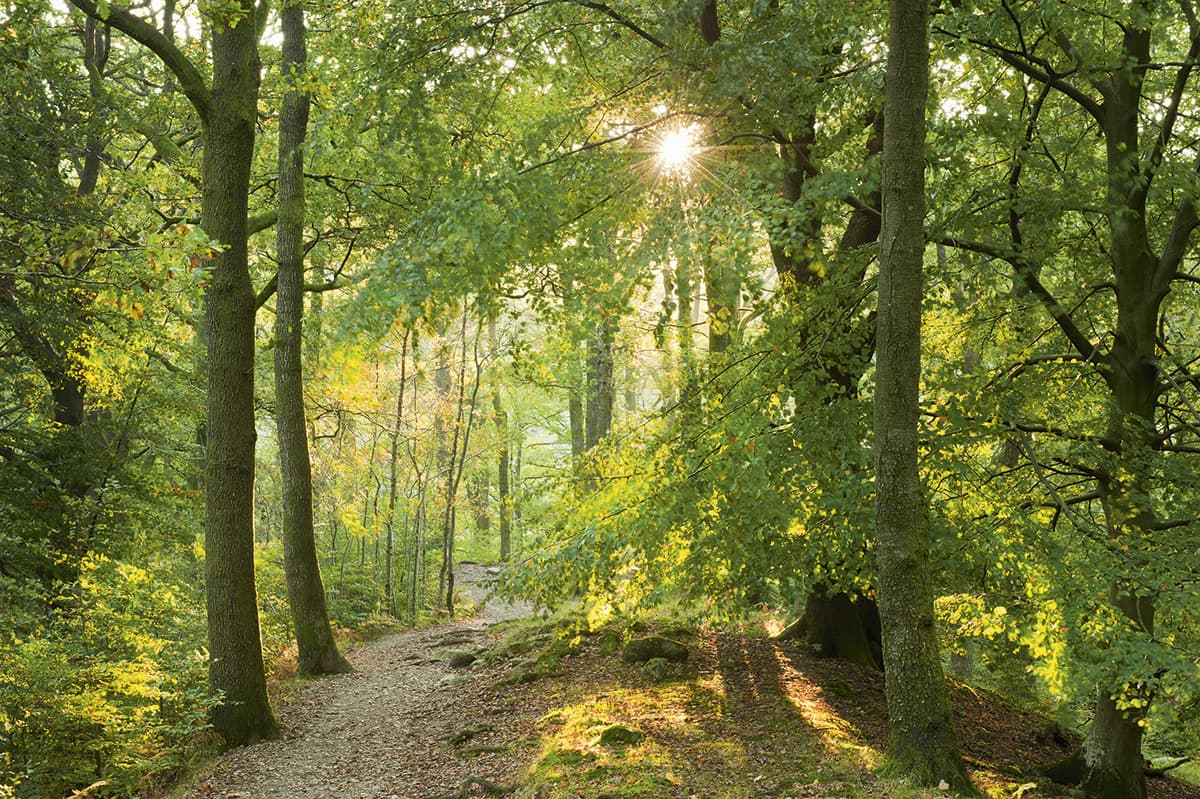
Using prime lenses rather than zooms will also help reduce the chance of flare, because the optical construction tends to be less complicated with fewer or simpler groupings of elements. From a purely aesthetic point of view, lenses with a nine-bladed diaphragm seem to create a better, cleaner, sharper ‘ping’ or starburst when shooting into the sun, which can be a useful effect. The more you stop down, the better the ‘ping’, but be aware of diffraction at smaller apertures.
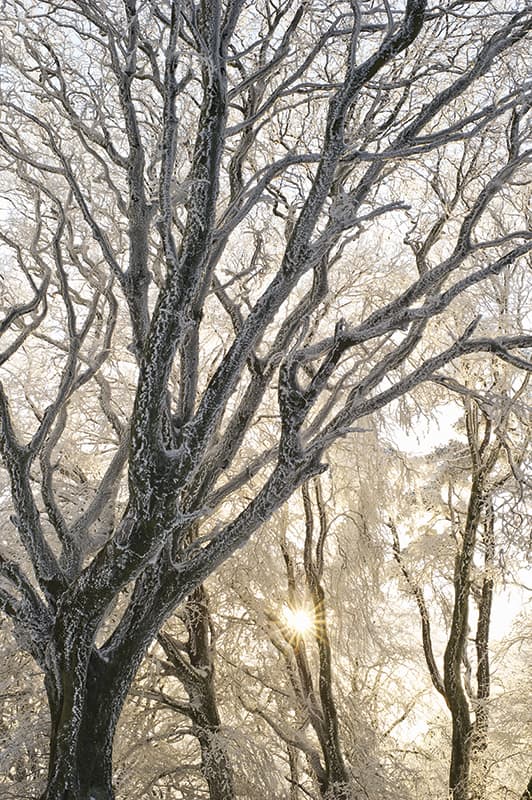
Try stopping down your lens to enhance the starburst effect from the sun
Metering
Contre-jour can be a tricky technique to meter and master, and takes some practice, but the results can be well worth the effort and are highly rewarding.
Try taking light readings with a multi-pattern metering mode like Nikon’s Matrix metering, rather than spot metering, as it will be a little more forgiving. The real key is to meter with the sun or main light source not directly in the field of view, in order to retain detail in the subject matter.
Simply compose your image and then turn the camera away, so the sun or main light source is just outside the main field of view. Then meter, recompose and shoot, and you should then only need to apply minor adjustments – if any. Of course, this is much easier if you are using a tripod and I strongly recommend that you do. If you are aiming for a pure silhouette and do not want detail in the shadows, meter for the brightest part of the scene.
With modern DSLRs having such a huge dynamic range and the ability to retain shadow and highlight detail, even in extreme conditions, you will soon be able to get the hang of what type of subject, light or effect does and does not work.
Modern DSLRs have such a huge dynamic range that you can easily retain detail
When shooting into the light you have to consider the subject matter as well as the technique. Landscapes, architecture or even people shots can be successful, provided the combination of subject, light and composition work together. The most important of these (as with many subjects) is the light: its quality, colour, strength and direction.
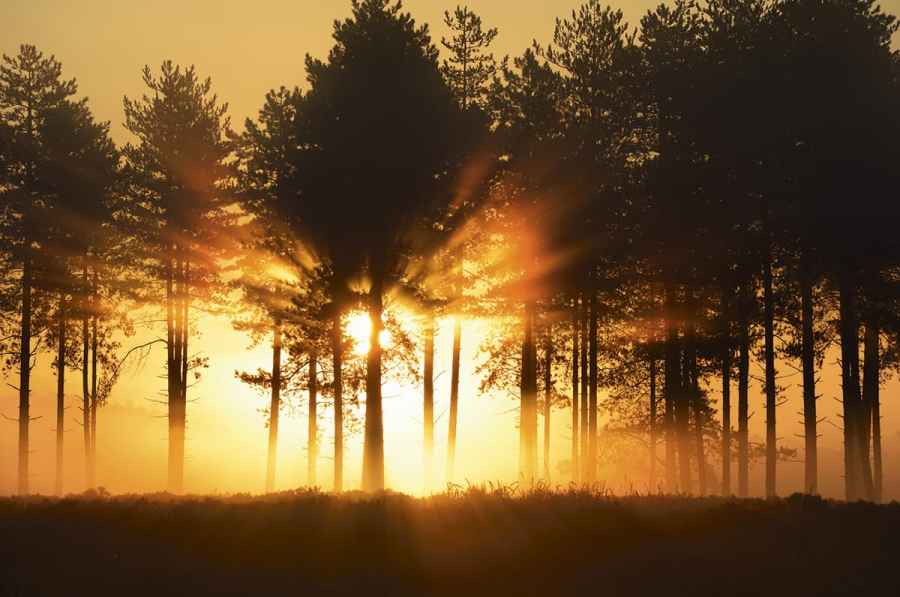
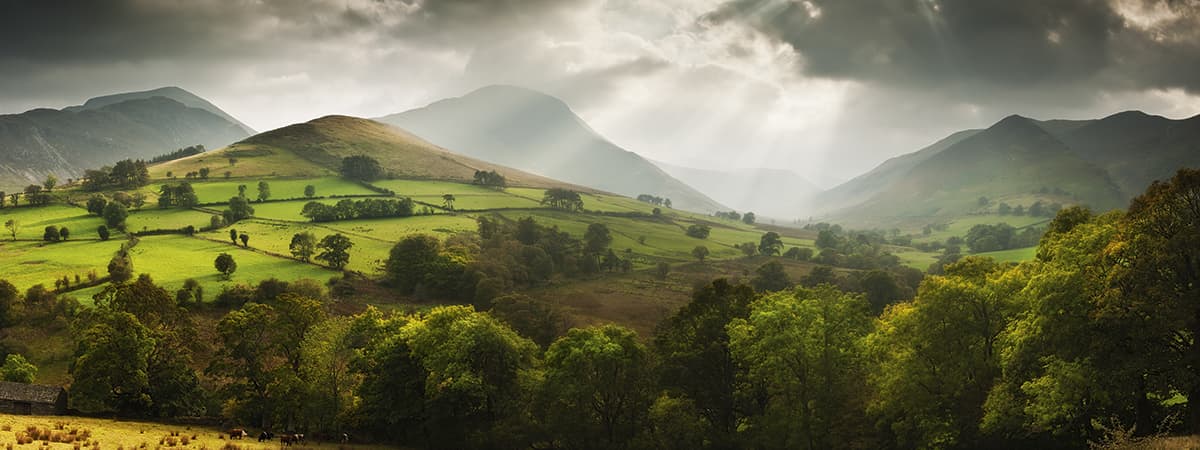
When talking about shooting ‘into the light’, it is very easy to imagine shots backlit by bright contrasty sunshine that cast long shadows. Certainly, this kind of strong directional light can be moody and dramatic, but soft sunlight through mist, fog or clouds should not be dismissed.
Techniques to try
If you are photographing a landscape, there are two main techniques to try when shooting into the light.
The first is to shoot pre-sunrise or post-sunset when the sun is below the horizon and the light can be soft and colourful with little contrast, especially if there is a clear sky. Think of misty mornings, lakes or coastal images. In this lighting situation a neutral density graduated filter is advisable to help balance the exposure from foreground to sky.
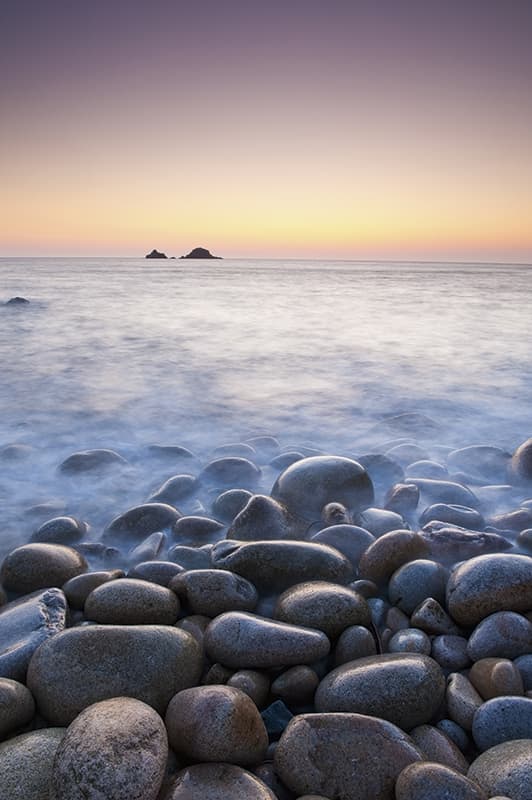
Even once the sun has dropped below the horizon, there’s plenty of colour
The second technique, which is applicable at sunrise, sunset or even when the sun is getting quite high in the sky, is to try to hide the sun, or at least part of it, behind a structure, a tree or even a person.
If you hide part of the sun you can shoot directly into it and minimise the risk of flare and get a perfect starburst effect. If shooting woodland, you will also backlight the leaves and still have an illuminated foreground.
The amount of shadow detail will depend on the density of the foliage. If you hide the sun just enough you can meter for this kind of scene with the sun still in the image, without it affecting the end result. With a little trial and error this will help you achieve excellent results.
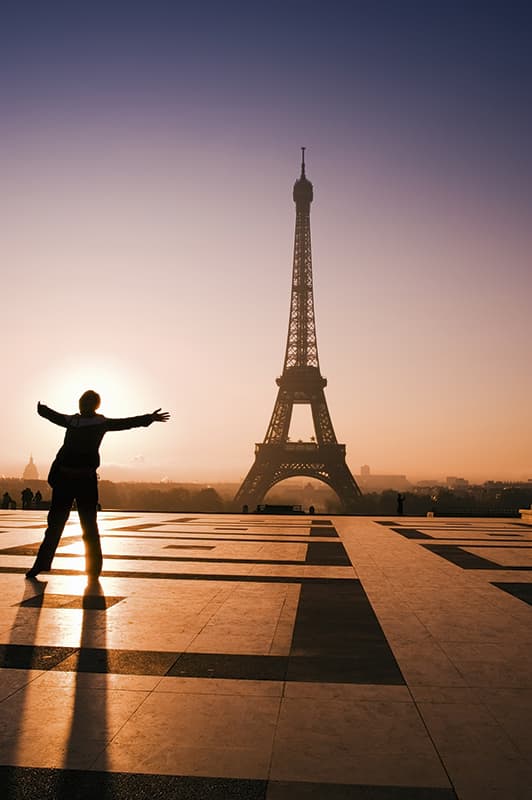
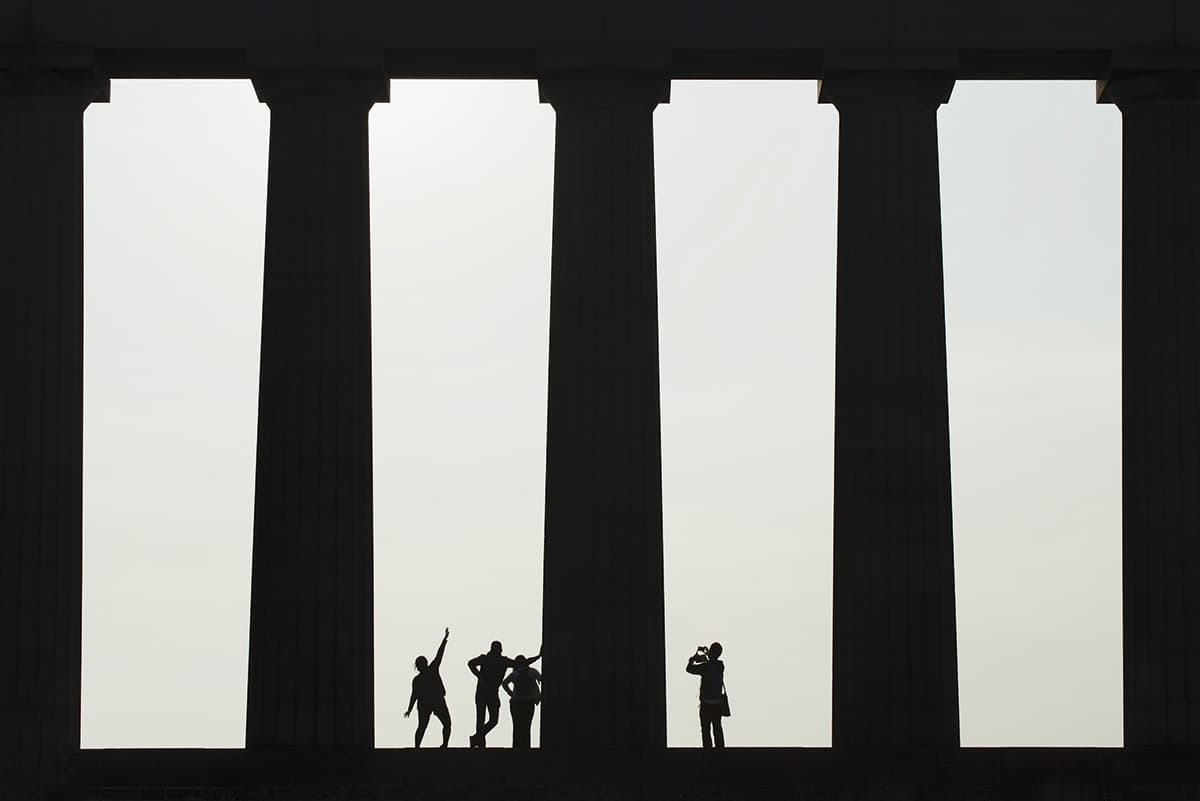
Another simple but useful technique for contre-jour is to use silhouettes to convey a strong sense of graphic shape and form.

Look for strong shapes and outlines when shooting into the sun
The sun can be either in the image or outside the main image area, but the technique is the same. You meter for the brightest part of the image, throwing everything else into shadow. Ideally, you should be interested in shape rather than detail. This can work well with buildings or subjects with strong shapes and lines that you can put against the sun, such as palm trees.
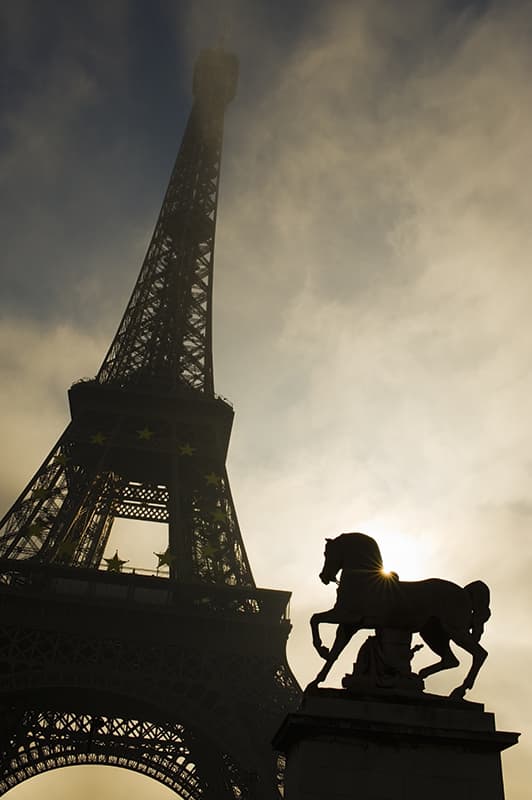
Use silhouettes to introduce a strong sense of shape and form to your shots
The next time you are out with your camera, occasionally look in the sun’s direction for shadows, shapes, form and colour to see what might work by shooting into the light, but do it carefully.
Try this
Using a neutral density graduated filter is common practice for balancing the exposure from foreground to sky, especially in a big landscape. If you are shooting directly into the sun there is no reason why the same technique will not work. Meter for the foreground and then use the grad to balance the sky. However, if you are shooting into the light you will often find that instead of a 2 or 3-stop grad, you will be combining filters and shooting with up to 5 stops of graduation. The only downside to this technique is that you may find the upper corners of your image becoming a
little too dark.
One that didn’t work… or did it?

Shooting into the light can be tricky, with metering, composition and flare all causing problems. Flare can be an issue, especially if you shoot straight into the sun, and it is usually something to avoid. Sometimes, however, flare can add interest to an image. While shooting in Death Valley in the USA (above), I managed to get flare across the image from the rising sun.
I didn’t know at the time as I was using a panoramic camera and there was no way of reviewing the image as I was shooting. Ask yourself whether the flare intrudes into the picture, or does it add a sense of oppressive heat and mood to the shot?
Jeremy’s top five tips
Look for lines and shapes
Find strong, bold lines and shapes that convey a story. Meter for the highlights and let the shadows go really dark. If the sun isn’t quite strong enough a little post-production prodding will help – increase the contrast and push the blacks slider along a little.
Shoot in the golden hour

Shoot into the light about 20 minutes before dawn or after the sun has set. These are optimum times when the light can be colourful but contrast is very low, revealing plenty of subtle detail. Choose the right conditions and your image will never be flat and dull.
Reduce flaring effects
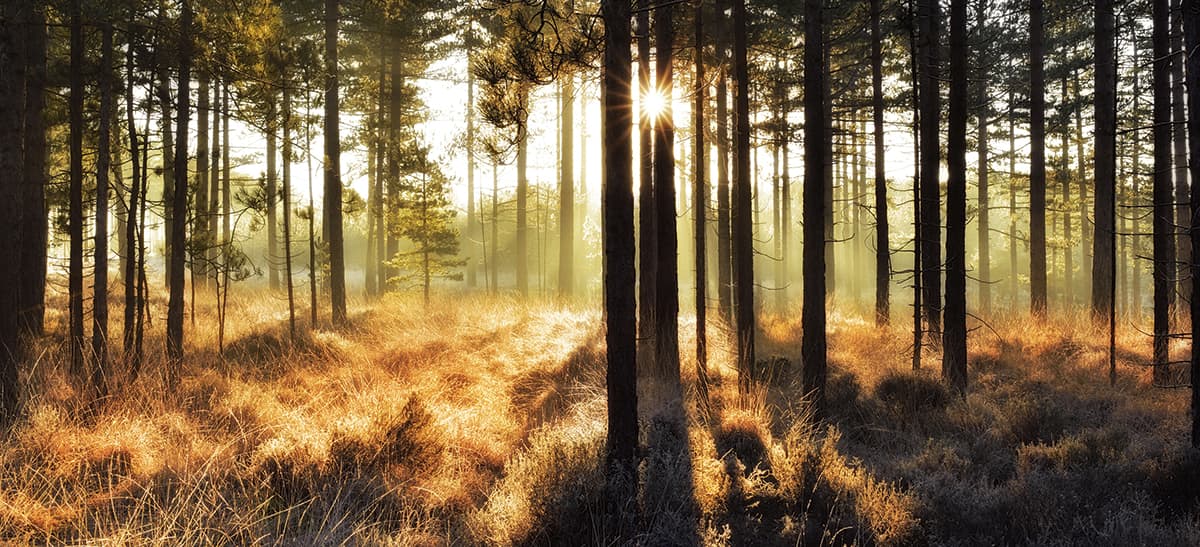
Partially hide the sun behind your subject to reduce flare. By stopping down to f/11 and beyond you’ll create a ‘ping’ or starburst (also with starburst software but a nine-bladed diaphragm prime lens produces better results). Note that stopping down increases diffraction.
High angles, high contrast
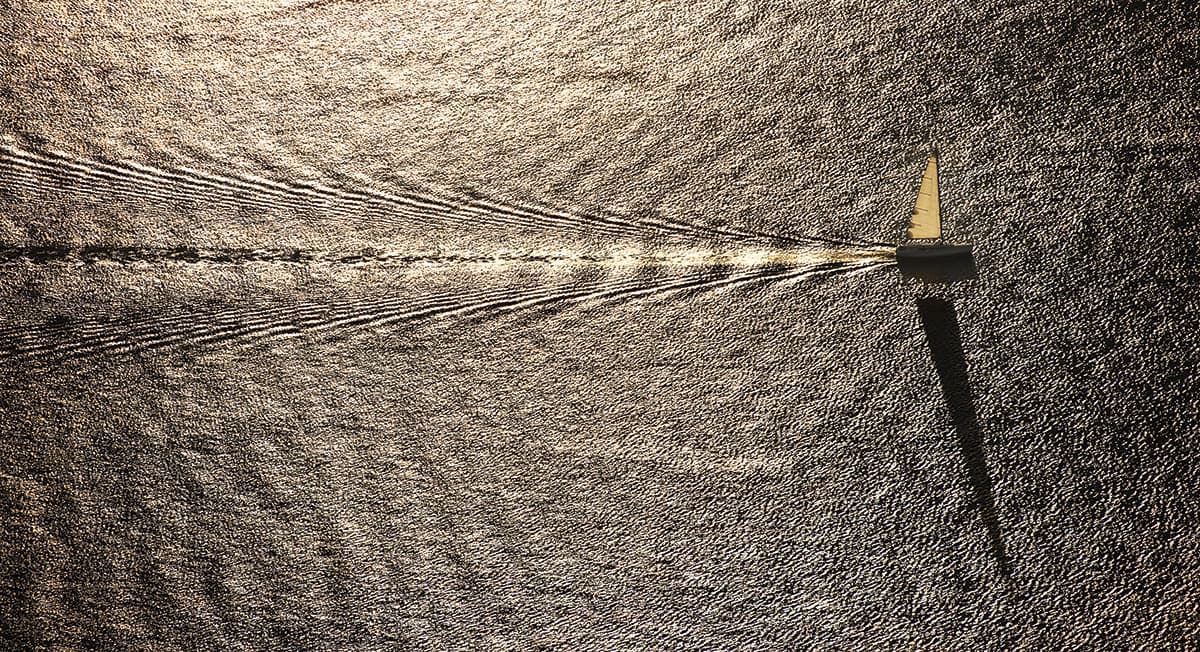
If you have a high-angle viewpoint down onto water and the sun is creating a strong highlight, meter for the highlight and even slightly underexpose it. The shadows and blacks will go really deep and dark to create a high-contrast monochrome effect.
Work with weather

Mist or fog will soften the effects of direct sunlight, or even hide the sun. Find a ‘see-through’ subject with simple shape and form, and use the mist. Meter for the brightest part of the image. Most modern cameras’ dynamic range will create shadow detail anyway.
Kit list
Quality lenses
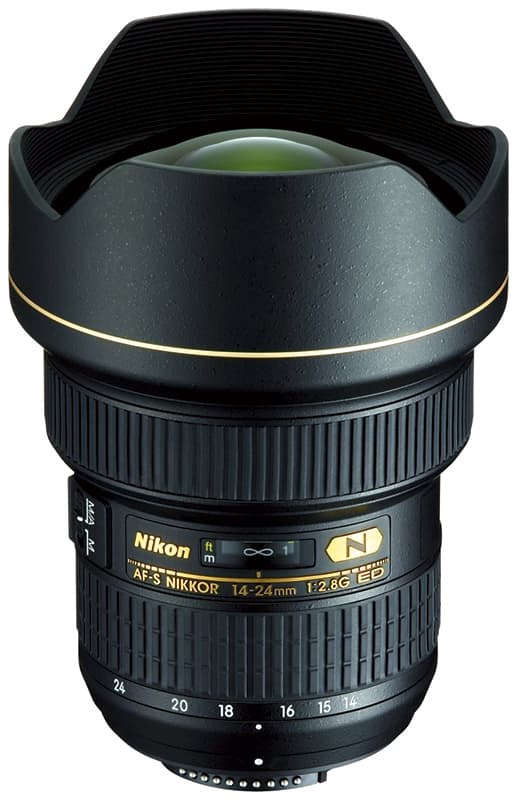
The better the lens quality, the less chance of flare or ghosting. The latest lenses with anti-reflective coatings should therefore be the optics of choice.
Prime lenses
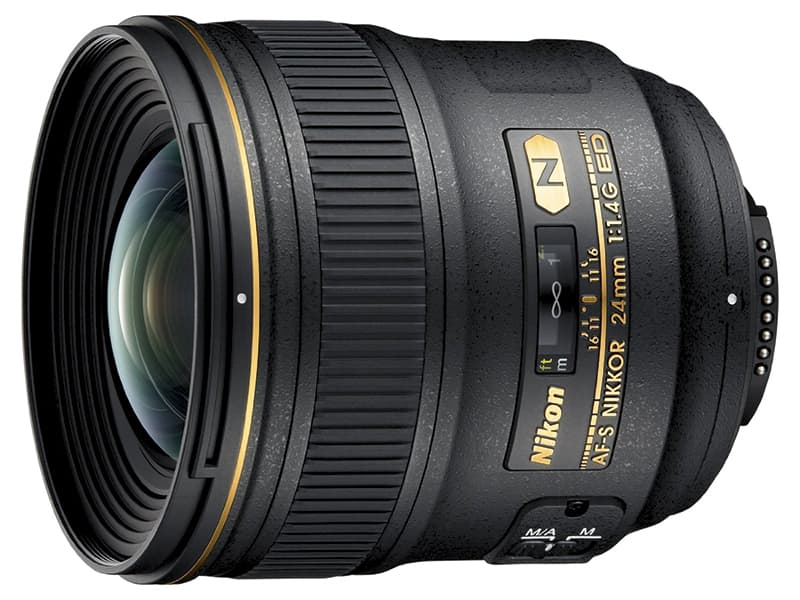
With less complicated element groupings than zoom lenses, there will be less chance of image degradation from flare.
A ‘Hoodman’or loupe
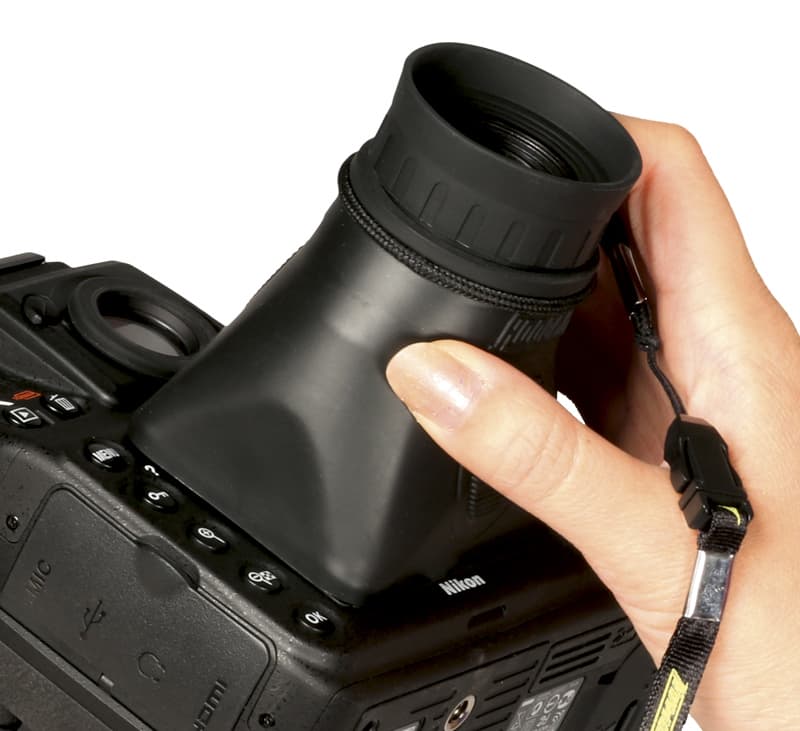
If you are spending much time shooting and looking into the light, your eyes will find it difficult to adjust to the small screen when you check the images on your monitor. Use a loupe with a magnifier that covers the whole screen to see more detail.
ND graduated filters
These hard or soft-edged grads are used for holding back the exposure of the sky and balancing it with the foreground, or for darkening a sky for added mood and atmosphere.