Need some tips for getting the most out of your Autumn photography? We asked a range of experts for their best advice.
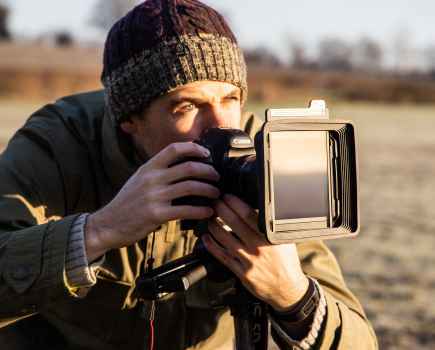
Jeremy Walker
Jeremy is an award-winning photographer specialising in high-quality landscape and location photography around the world for use by advertising, design and corporate clients. www.jeremywalker.co.uk
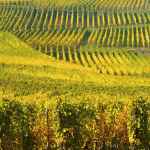
1. Autumn panoramas
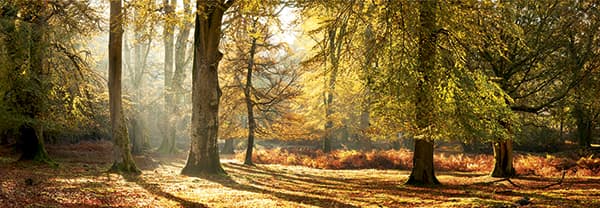
If you ensure your chosen scene fits the panoramic format, an autumnal panorama will look stunning.
Shooting panoramas allows you to visualise the world slightly differently, without the constraints of the viewfinder rectangle. This is a great advantage when shooting landscapes, but particularly useful when capturing autumnal images like woodland interiors or rolling banks of mist and fog.
The first and most important consideration for a panorama is whether the subject suits the format. If you’re not used to visualising a panoramic image, cut a 3:1 ratio aperture in a piece of black card and use this at arm’s length as a visual guide. You’ll soon learn what will and won’t work and how certain subject matter will fit into the panorama format. The key is to have the right subject matter for the format to work.
While some cameras with a high pixel count mean you can crop a single frame and still have a decent file size, if you lack pixels you can stitch three frames together to create an image with an approximate image ratio of 3:1. The trick is not to use too wideangle a lens, no wider than 35mm, and shoot three frames horizontally, overlapping each frame by 30%. Also shoot in manual to avoid the exposure shifting.
In Photoshop go to File>Automate>Photomerge and select ‘Cylindrical’, then click OK. Photoshop will create a panorama, which you need to flatten in the Layers tab. It’s a simple technique with which to start and, once you’ve shot a few panoramas, is one that will become second nature.
2. Autumn still lifes
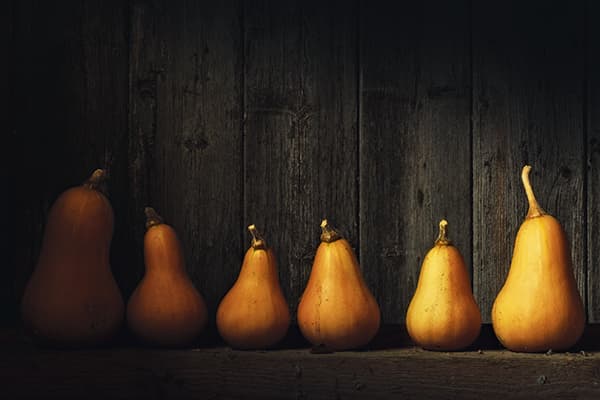
Gourds make for a great autumnal still life, but remember to keep it simple.
You don’t have to be a creative genius with complicated studio lighting to shoot a still life. Anything from a single leaf placed on an appropriate background, to plants and props carefully arranged on a bench in the back garden and lit with nothing but daylight and a reflector, can make a great shot.
Having access to lighting is always going to be an advantage, but it isn’t an essential – a single flashgun or even a torch will do a good job. However, there’s no better light source than the sun, even on a cloudy day. Cloud can be used to good advantage, as it will give a soft, low-contrast, shadowless light source.
Autumnal still lifes can encompass a whole range of subjects – not just golden leaves. Fruit and vegetables make excellent subjects, as do the various nuts and hedgerow berries prevalent at this time of year. But keep it simple. Take one main item and build around it, and try not to include the entire garden!
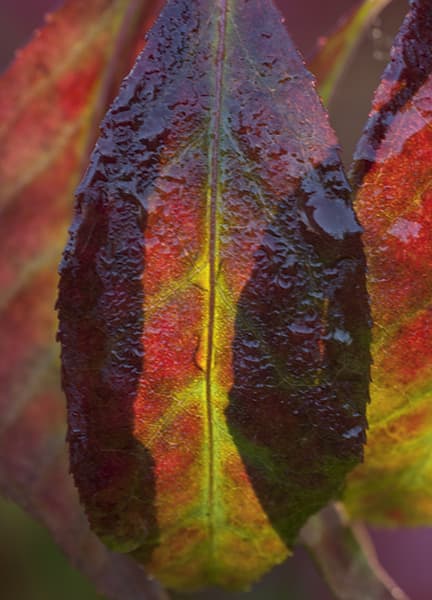
3. Patterns and textures
Shooting autumn landscapes on a misty morning is a landscape photographer’s holy grail and I still get a buzz from seeing backlit mist floating across a landscape. However, the reality on most mornings is that the mist hasn’t formed or it’s not where you want it to be. So instead of looking for the grand view, try looking for the ‘micro landscape’ – a detail, texture or pattern.
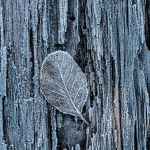
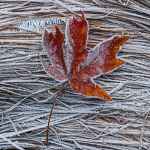


Analyse the light. Backlighting is good for patterns, while side lighting is best for textures.
The logistics of shooting a close-up are also much easier, as most of us will have a back garden or local park. Look for backlit autumnal leaves, textures on tree trunks, old pieces of wood or decaying plant life. If there’s been a heavy dew look for water droplets on the end of leaves or spiders’ webs – they all make for interesting patterns, details and textures. The first early frosts of the autumn are even better, with everything etched with ice crystals. Look for ice patterns in the puddles and on plants with the last vestiges of their autumnal colour. Concentrate on where the light is coming from: backlighting is good for patterns and side lighting best for creating strong textures.
Although a close-up or macro lens (like a 105mm) would be ideal, a set of relatively cheap extension tubes will enable you to get reasonably close to your subject. Also bear in mind that many modern zooms and primes can focus very close to the subject with no need for additional specialist kit.
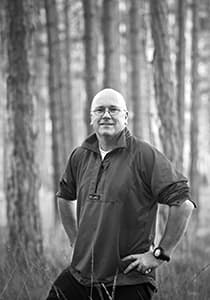
David Tipling
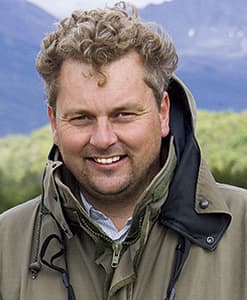 David is one of the most widely published wildlife photographers in the world. His pictures appear on hundreds of book and magazine covers, and have been used in many other forms, from wine labels to large projections across New York’s Times Square. www.davidtipling.com
4. Birds among autumn mist
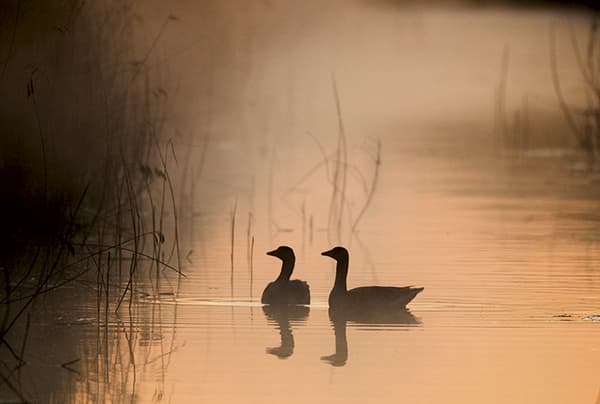
In autumn London’s Richmond Park provides reliably misty conditions.
Autumn’s warm, settled weather with frosty, cold nights makes for perfect conditions for early morning mists, especially over water. Combine these conditions with a few ducks, geese or swans silhouetted against the rising sun and you have the potential for some really moody bird images. Perhaps the most reliable location in the UK for such conditions are the ponds in London’s Richmond Park. These ponds are full of tame waterbirds making this type of photography very rewarding. An autumn visit can also be combined with photographing rutting red deer stags in mist.
But if you really want to experience the ultimate ‘birds-in-mist’ spectacle, then head to the Bosque del Apache Wildlife Refuge in New Mexico, USA. As the sun rises here in November over roosting ponds, it creates a fiery mist among thousands of roosting sandhill cranes, snow geese and Ross’s geese. It is one of Earth’s great bird spectacles.
5. Birds among autumn foliage
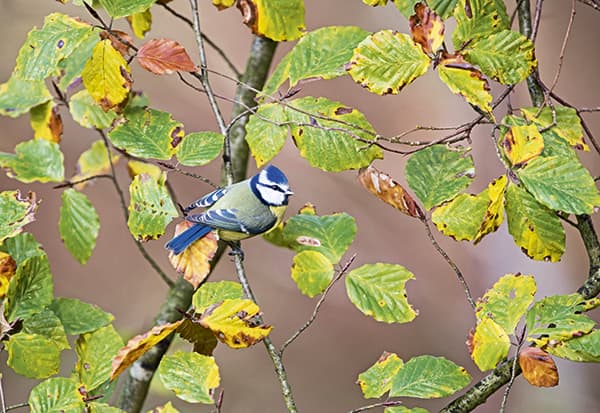
Set up your own autumn foliage scene by harvesting branches to use as bird perches.
For me, the pleasure of bird photography isn’t just in taking the picture, but also in planning and creating it. During autumn I search my local woods for autumnal colour and, using a pair of secateurs, harvest branches to use in my garden feeding station. With a little trimming and design you can create perches full of colour on which the birds visiting your food will sit before feeding. A little trial and error is normally needed to get the branches in the right spot so the birds use them.
Backgrounds need to be carefully manipulated to provide the best set-up, and birds tend to like to land initially on quite sturdy branches. A good tip is to use old film canisters as small food receptacles – they can be fixed with tape to a cane and placed directly below a perch. If you don’t have a hide to conceal yourself, try modifying your shed if you have one, or simply shoot from the kitchen window.
Justin Minns

Justin is an award-winning photographer, specialising in East Anglian landscapes for clients, including the National Trust and BBC. Alongside his photography he also runs landscape workshops. www.justinminns.co.uk
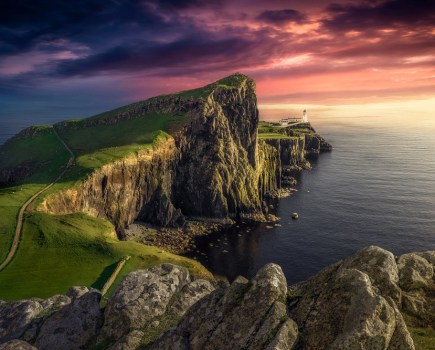
6. The coast during autumn
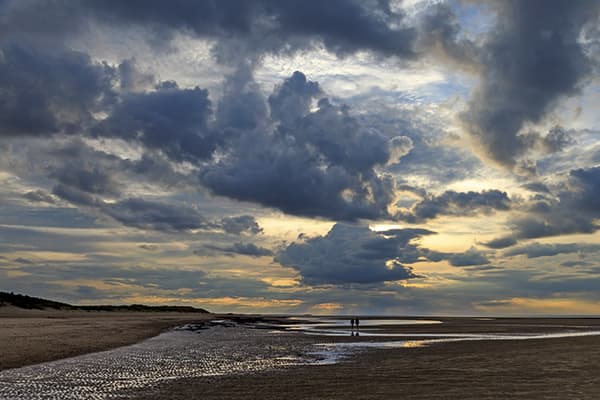
Don’t overlook the coast. Autumn brings great photographic opportunites and fewer people.
Autumn is unsurprisingly a favourite season with many landscape photographers. Vibrant autumnal colours are splashed across the landscape, early morning mist or crisp, frosty mornings add some drama and softer sunlight means more time to shoot. There’s always plenty to inspire you and, as an added bonus, shorter days mean later sunrise times.
Although trees and woodland are the undoubted stars of the show, don’t overlook the coast where autumn brings fantastic conditions and fewer people. Autumn is a time of wonderfully changeable weather and nowhere more so than at the seaside. Stormy weather blowing in from the ocean, windswept sand dunes, crashing waves and glimpses of sunlight between dark clouds are all conditions to get photographers salivating. Flat areas of coastline mean big, open skies, the perfect place for exploiting these dramatic weather conditions.
Along my favourite stretch of Norfolk coastline, reed beds become golden and on the saltmarshes, vibrant shades of green are replaced with deep purples and the bright crimsons of suaeda and glasswort plants contrast beautifully with the moody autumn skies.
7. Intentional camera movement
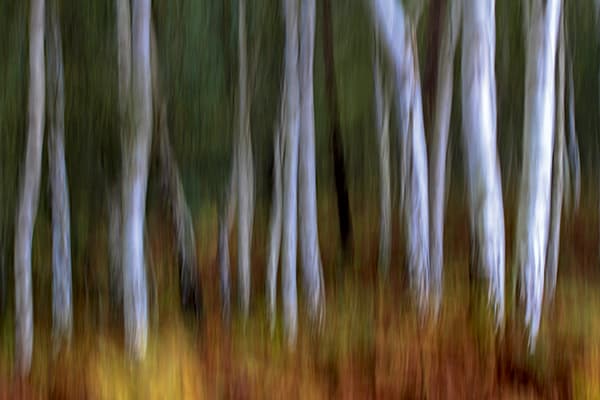
Use seasonal colour to experiment with creative techniques.
The creative technique of intentional camera movement involves moving the camera during the exposure for an abstract effect. With so many colours, autumn is a good time to experiment, especially if weather conditions aren’t perfect for more conventional techniques. While there are no strict rules, here are a few pointers.
Switch to manual focus. It might seem counter-intuitive to talk about focusing using a technique that blurs the photo, but I like to start from a point where things are in focus. However, using manual focus mode will prevent the lens from hunting for focus during the shot.
The exposure mode you use is down to you, but shutter priority is the obvious choice. Set a starting shutter speed and let the camera choose the appropriate aperture. Depth of field isn’t really important here, so aperture choice is used to control the shutter speed.
Your choice of shutter speed will depend on how much blur you want and how quickly you move the camera. Try starting at 1sec and adjust up or down until you get an effect you like.
For a smooth blur, start moving the camera first and then fire the shutter midway through the motion. However, also try moving the camera in any direction – it’s all about experimenting.
Neutral density filters can come in handy on brighter days to help slow the shutter speed, while a circular polariser will slow the shutter speed by up to 2 stops and boost saturation.Be prepared for a low return. It’s an experimental technique so you’re likely to take a lot of images before something works, but it’s fun and addictive.
8. Circular polariser
Invest in a polariser to deepen the saturation of golden leaves.
Filters are an essential bit of kit for many landscape photographers, but in autumn a circular polariser is a must. Although best known for boosting the colour of blue skies and making white clouds pop on sunny days, it’s useful whatever the weather.
I’ll explain briefly what a polariser does. Ordinary visible light is a mixture of many kinds of waves. Each of these different waves vibrates in many different directions as the light travels. However, polarised light only travels in a single direction. It can occur when the wavelengths bounce off a reflective surface, causing the effect we see as glare on water or wet surfaces. A polariser filter prevents polarised light entering the lens, thus cutting that glare and bringing back the colour and saturation. Polarisers work best when the lens is at about a 90° angle to the sun. To adjust the amount of polarisation, rotate the filter while looking through the viewfinder. Contrast and saturation will become stronger, then weaker again, and reflections will come and go. Keep turning the filter until you’re happy with the degree of polarisation. It’s worth noting that at its strongest the effect can be rather patchy and can look unsightly. This is particularly evident with wideangle lenses or blue skies, and in those cases turning the filter somewhere
between ‘on’ and ‘off’ will look more natural.
Even on overcast days a polariser will give the autumn colours a boost in saturation and will ensure they have greater impact within the image. A polariser is also invaluable for reducing reflections from wet rocks or the water, as well as cutting glare from wet foliage in woodland scenes and deepening the saturation of the autumn leaves.
Mark Bauer

Mark has been a full-time landscape photographer for more than ten years and his images have appeared in numerous publications worldwide. He is based in Dorset and takes his inspiration from the beauty of the surrounding landscapes in south-west England. www.markbauerphotography.com
9. Using roads, paths and streams to guide the eye
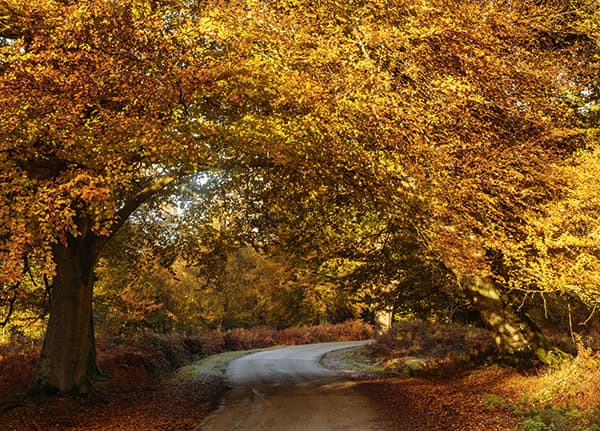
S-shaped curves are a subtle way of guiding the euye through a composition.
Autumn foliage can be eye-catching, but you can’t rely solely on colour for the success of your images. From a compositional point of view, woodland is one of the more challenging environments to shoot in. It’s fundamentally chaotic, so finding compositions with balance, order and structure can be very tricky. Without enough care, woodland images can appear cluttered.
The trick is to seek out any obvious structure and make that a strong feature in your composition. A successful way of doing this is to use roads, paths and streams in the frame. These not only provide a strong structural element to lend the composition coherence, but also guide the eye through the image.
Shooting along a straight road or path with a wideangle lens creates converging lines, which can be very dynamic, but subtlety often works better. Curves lead the eye more gently through the frame, allowing more time for the eye to stop off at different points and appreciate the composition. S-shaped curves work particularly well, helping to create balance and a sense of depth. They can also help with the atmosphere – paths leading out of the frame can offer an air of mystery and romance.
10. Make the most of showery days
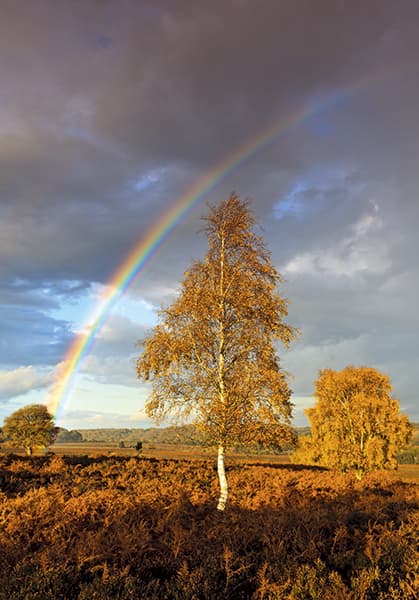
You may be lucky enough to see a rainbow. Use a polariser to enhance its colours.
Persistent rain is one of the few conditions in which it’s nearly impossible to get good landscape shots. Showery days, on the other hand, can produce some great light – fantastic clarity, dark, stormy skies and spot-lighting as the sun breaks through the clouds.
Dramatic post-shower lighting and golden autumn foliage is a potent combination. The best light on showery days is fleeting, so there’s no point waiting for a break in the rain and then setting up, as you’ll miss the moment. Find shelter to protect your camera, but wait with your equipment at the ready and your composition planned. As soon as the rain eases, be ready to shoot.
With the dark skies that you often get as showers clear, you will probably find that there’s no need to use graduated filters, but they can be used to enhance the drama of a stormy sky. Polarisers can be useful for saturating colours and for removing glare from wet foliage. If you’re lucky enough to see a rainbow, a polarising filter will really come into its own – rotate it until you see the rainbow ‘pop’ in the viewfinder.
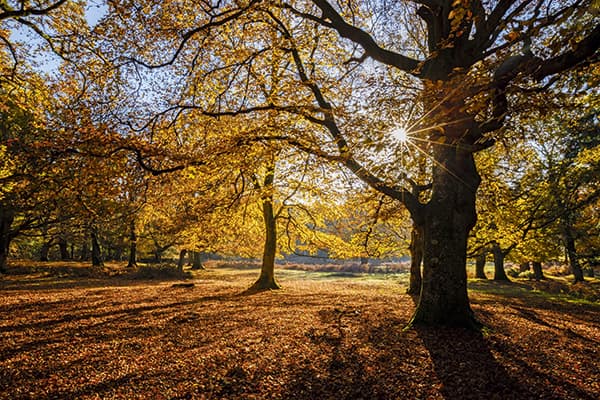
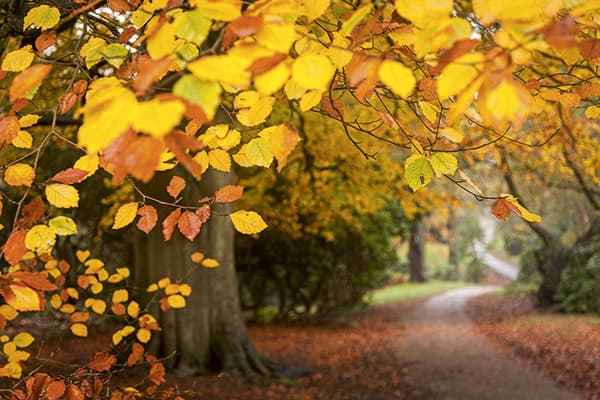
11. Get your timing right

For successful autumn landscapes, choose the right day and time. Early morning, with low sun backlighting the leaves can make the most of the colour.
Photographers love the vibrant colours of autumn. While good composition and the right lighting are important for capturing the best of the colour, you also need to get your timing right: colours won’t stay at their peak for long and strong winds can strip trees bare overnight. It’s therefore important to know when leaves are likely to start changing colour and then monitor their progress carefully until they look their best.
Leaves change colour because the lack of sunlight and cold temperatures cause them to stop producing chlorophyll, the chemical that gives them their green colour. This allows other pigments, such as carotene, to be revealed. So as summer ends and temperatures cool, leaves start turning. However, the exact time will vary from year to year, depending on the conditions. The best colours are produced when dry, sunny days at the beginning of autumn are followed by cool, dry nights, as dry weather increases the concentration of sugars in the leaves. So once you see these conditions, it’s time to explore. You can monitor the progress of autumn leaves online at websites such as www.forestry.gov.uk/autumn.
Where you are in the country also has an effect on when the peak colours occur. In Scotland, you can have good colour at the end of September, but in southern England locations, such as the New Forest, you may not see the best colour until early to mid-November. Different species will turn at different times, too. Horse chestnuts and beeches change colour before oaks, for example.
The time of day you shoot also influences how good the colours look. Early or late in the day when the sun is low in the sky can help enhance colours, especially when leaves are backlit.
Philip Smith
Philip is a professional photographer specialising in gardens and plants. He is the founder of the International Garden Photographer of the Year competition. The IGPOTY deadline for entries is 31 October 2015, and with categories that suit all types of photography there is a chance to win the top prize of £7,500. If you aren’t lucky enough to win a prize, Philip can provide feedback on your entries after the results are announced. www.igpoty.com
12. Autumn abstracts
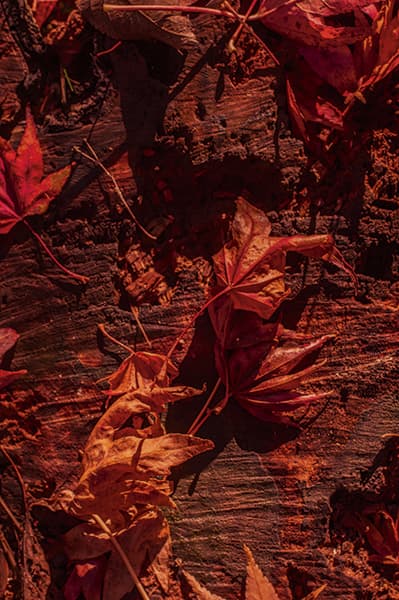
You can arrange autumn leaves in a composition, but if you simply look at what’s under your feet, texture and colour are slowly revealed.
In the autumn garden we think of mists and cobwebs and golden light bouncing off ruby leaves. Lovely. The only problem is that, if you’re not careful, you can spend the whole season staring out of the window at the dull leaden skies and hurricane winds waiting for exactly the right conditions. For me, the autumn garden is the time when all kinds of colour has its last joyful laugh before it all falls silent and gives way to muted browns, textures and forms. The coherence of the summer garden starts to break up, revealing unruly patterns that refuse to be tidy or symmetrical. I love this chaos as it provides so much for anyone interested in abstract photography inspired by the natural world.
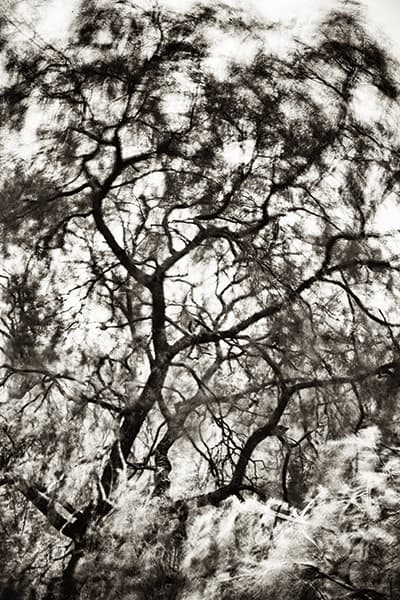
In autumn it’s likely thwe wind will be blowing a gale under grey skies. Try experimenting with long exposres to capture the massive energy of the trees’ constant movement.
Autumn mornings often deliver heavy dew. With warm directional light, all kinds of natural forms in the garden can take on a magical character.
13. Using wideangle and telephoto lenses
Wideangle lenses for views of gardens and telephotos for close-ups are a conventional way of looking at things. But mixing things up can open up new opportunities.
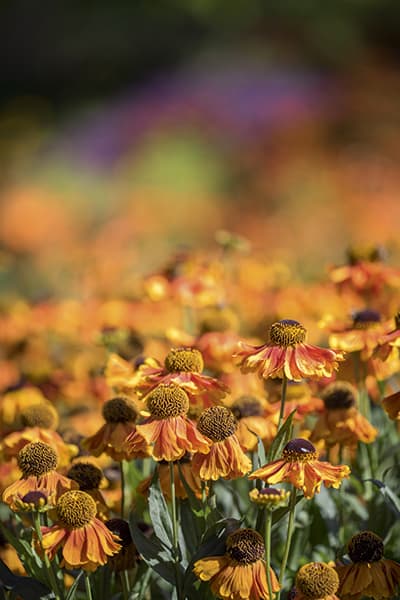
When faced with a long and luscious flower border, the instinct is to reach for a standard or wideangle focal length in order to capture the sheer volume of colour and vibrancy of the scene in front of you. But using a long lens – in this case a 185mm telephoto – flattens the perspective, creating a greater impression of abundance in the two-dimensional image. Add to this a wide aperture to blur the background, happily with some contrasting colour, and the rich tones of autumn step out of the frame.
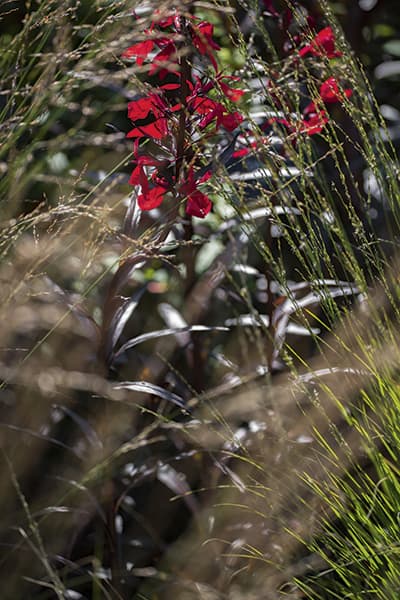
“This sums up the autumn garden for me. The vivid red of Lobelia cardinalis ‘Bee’s Flame’ shoots out from among the muted, almost wintry tones of grasses. Using a long lens flatterns the scene and creates a textured pattern of lines and shapes. “
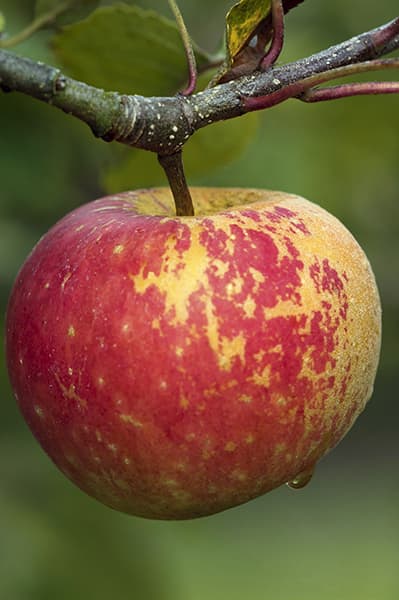
14. Plants to Look out for
1. Apple varieties have a complex range of colours and patterns. Below is ‘Sunset’- look our for old or neglected orchards by the roadside.
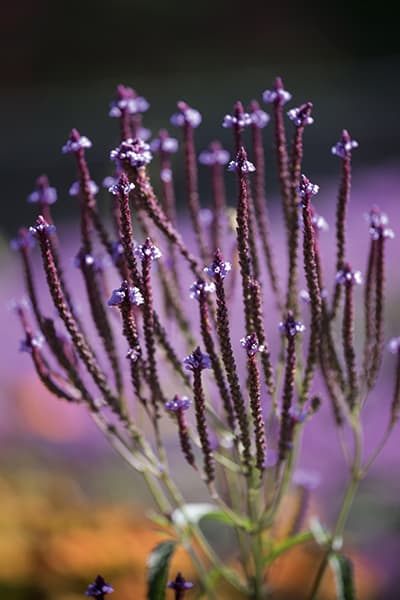
2. Verbena hastata is a wonderfully architectural plant that makes for great close-ups and lasts from the summer well into autumn.
3. Berries of all kinds abound both in gardens and hedgerows. Treat them like the beauties they are – use a reflector to bounce light back into them.