Want to sell some unwanted possessions and make some cash? eBay is the solution! Philip Andrews shows you the techniques you can use to produce eBay photos that sell.

Shooting for eBay – Producing Photos that Sell
The world’s largest online marketplace, eBay has revolutionised the way we can buy and sell possessions. Never before has it been so easy to get a sales pitch out to such a massive audience than via eBay and, as with most advertising, the eBay images you use with your listing play a key role in your item’s saleability and the price it’ll fetch. So, to help you eBay create photos that truly sell, over the next few pages you’ll discover the shooting techniques that’ll help send eBay bidders into a spending frenzy!
Our eBay Online Auction
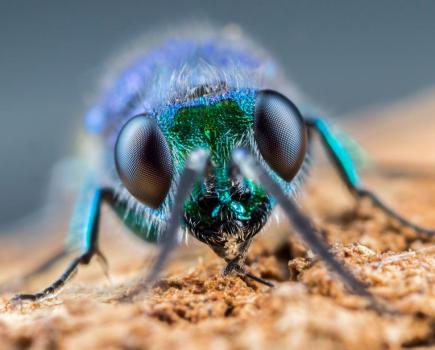
Throughout this project we’ve used the example of a fictional eBay seller promoting the auction of a Lensbaby 2. But whether you’re selling a lens, a lamp or even some lederhosen, you’ll find that the shooting and editing techniques covered will apply equally well to all your eBay items!
 Setting Up Your eBay Shoot
The perfect table-top set-up for lighting your eBay item will produce enough soft diffused lighting from above and to one side that skims across the product for the photographer to use a high-aperture setting to capture the photo. This can be achieved as simply as placing a piece of curved white card on a table next to an open window. The eBay bound object can then be placed carefully on the card and a white reflector positioned opposite the window to fill in the shadow areas.
Alternatively, a flash head or tungsten spotlight can be diffused through a white umbrella or reflected out of a silvered one towards the object. The shadows are again filled in using a white reflector. For cameras with hotshoe flash, a simple action of swivelling the flash upwards and then pointing it away from the object will allow you to bounce the light off a carefully positioned reflector simulating the flattering effects of soft window light.
Shooting for eBay – Showing Your Item in the Right Light
 Photographing an item that you’d like sell on eBay is essentially a traditional still-life exercise so, along with good composition and considered exposure, great lighting is the key to creating a successful photograph. There are three aspects of lighting that we need to consider – the amount, the direction and the quality.
The amount of light available will directly determine both the aperture and shutter speed that you will use to capture the photo. Set-ups where there is little light available will force you to use slow shutter speeds (where camera-shake becomes an issue) and small F-stop settings, which limit the depth of sharpness (commonly called depth of field) in the photo.
In these situations, always use a tripod. The extra stability will enable you to use slower shutter speeds and therefore higher F-stop numbers (aim for values of f8.0 and above) which will result in images where more of the item is sharply defined. This is doubly important when shooting for eBay, as your bidders don’t just want to see an enticing vision, they want to be able to examine the details and condition of a potential purchase.
Photographers use light to describe the subjects they photograph, and a key element of this is the direction from which the light hits your subject. Place a light in the same position as the camera and any items in the resultant photo will appear flat and textureless. To inject a sense of volume into the eBay item, you need to direct the light from the side of the scene. In these example shots, we used a main light positioned 45 degrees to one side and 45 degrees above the subject, and this set up is also a good starting point for many types of product photography.
The last element to consider is the light quality. Strong direct light like the sun in the tropics or camera flash creates harsh shadows that tend to hide important product details. Soft diffused light such as the filtered sun on a cloudy day or natural light from a window tends to create softer shadows and more even lighting overall.
Adjusting Your Camera Settings
You will also need to make some adjustments to your camera settings in order to make the most of your new lighting set up.
To start with, most of the tent-based arrangements fill the frame with white or reflected white areas. This can have a tendency of causing your camera’s meter to underexpose the scene as it attempts to average the tonal values. To compensate, take a series of alternative exposures using the exposure compensation feature to overexpose the photo. To ensure accurate colour, match the light source that you are using with the equivalent white balance setting. For the ultimate result use the preset or custom White Balance feature or place a grey card in a test photograph. The card can be used later in Photoshop as the basis of a midtone correction in Levels.
To ensure the sharpest results always use a tripod. For detail photos, switch your camera or lens to the macro mode and carefully adjust the focus. When working in close it is important to use high aperture numbers such as f16 or f22, as these will help ensure that as much of the item is as sharp as possible.
Now in Action
One of my favourite accessories during the past year has been the LensBaby 2.0, but now that I have the Generation 3 LensBaby in my hot little hands, my old faithful is a prime candidate for selling on eBay. So let’s see how to put the theory into practice as I shoot and prepare a photo for my listing.
 1. Set up the Lighting
The first step is to set up my lighting. In this case, rather than use my expensive studio flash kit, I thought that I would demonstrate what was possible with little or no outlay for fancy equipment. The light source is an open window to the right, producing soft diffuse light. The background support and reflector to the left are pieces of flat packing foam pinned together with long dressmaking pins, and the background is matte A3+ inkjet paper.
2. Test Shot, Review the Result
With my camera standard values set for exposure, white balance and focus, I make the first exposure. It appears blue and underexposed. The blue colour is due to the fact that the object is lit with open sky which has a high colour temperature; and the underexposure is due to the meter being fooled by the large amount of white in the scene. I also check the depth of field to ensure that the f16 setting is keeping everything sharp.
3. Adjust settings and shoot again
To account for these problems I adjust the camera’s white balance setting to preset, sometimes called custom, and photograph an all-white area of the scene to balance the light. I then use the Exposure Compensation setting and add in 1.0 extra EV orf-stop. In the absence of a remote release I set the camera to self-timer so any movement resulting from pushing the button settles before the shutter is released. I also make slight changes to the composition, then photograph a new image.
Shooting for eBay – Lighting Solutions for Tricky Surfaces
 Texture
To get the strongest sense of texture and volume in a photo, use a direct light (such as a spotlight) and aim from one side so that it skims across the surface of the object. You can fill in any dense, dark shadows with a white reflector board.
 Gloss or Chrome
Highly reflective surfaces such as gloss or chrome objects need to be tented in white diffused material. The light is then directed through the material from above and to one side. The camera lens is inserted through an opening in the tent. The object’s shiny surface reflects the white interior of the tent.
 Glassware
Do not aim the light directly on the surface of the glass; instead position the light source so that it reflects off the background and lights the glass from behind. For crystal add rolls of black card around the edges of the glass (out of shot). The object will reflect the black, and contrast it against the light coming from the background.
Top Tips When Shooting for eBay:
- Take the time and care to create a good photograph.
- Make use of good lighting by either modifying existing sources (window light) with reflectors or diffusers, or introducing and controlling your own (desklamps, flash or tungsten).
- Use a plain contrasting background that highlights the item that you are trying to sell.
- Control the quality of the light to minimise reflections, harsh shadows and hotspots on the surface of your item.
- Don’t use the maximum resolution of your camera so as to avoid large files sizes and long upload and display times. (Aim for 1024 x 768 pixels).
- Match your camera’s white balance setting with the type of light source you are using.
- Capture photographs of the whole item as well as detail shots. Get in as close as possible for these using the macro function on your camera if necessary. To fully inform your buyer, highlight both features and flaws in the detail photographs.
- Use a tripod to avoid blurry pictures due to camera shake during long exposures.
- Avoid using pop-up or on-camera flash units where ever possible as they create direct, full frontal lighting with harsh shadows. Instead fire the flash from one side or used light from other sources such as windows or a table lamp.
Accessories for the Table-top eBay Photographer

With in the past few years more and more accessories have entered the market that makes the desktop product photographer’s job a lot easier. Now a quick search on the internet will reveal at least a dozen manufacturers who produce portable light tents or specialist table-top light sources that are suitable for small product work. Check out the offerings from the following:
- Lastolite Table-top cube – www.lastolite.com
- Lowel Ego – www.lowel.com
- EZcube – www.ezcube.com
- Universal lighting tent – www.perlyinc.com
- Xpro light tent – www.xprogear.com
- SV light tents – www.smithvictor.com
Further Reading
To learn more about Still Life photography, including lighting techniques, then check out these books from Rotovision:
Still Life & Special Effects Photography by Roger Hicks and Frances Schultz
(ISBN: 2880466601)
Still Life (Black & White) by Terry Hope
(ISBN: 2880465494)
Shooting for eBay – Editing Your Seller’s Photos
Given the sophistication of the editing and enhancing skills of many of the members of the photographic community, you would think that the images they use to sell their items on eBay would be second to none. Sadly this is not always the case. Use the following steps to ensure that your eBay photos have the wow factor and always stand out from the crowd.
 Step 1: Adjust brightness and Contrast
As with most image-correction workflows you should start off your editing with some global changes to the brightness and contrast of the picture. Rather than applying these changes directly to the pixels it is better to employ a Levels adjustment layer (Layer > New Adjustment Layer > Levels) for the enhancing, to protect your original image. Improve your shadow and highlight points by dragging in the white and black input sliders towards the centre of the histogram until they meet the first group of pixels. Next adjust the overall brightness of the photo by moving the midtone input slider to the left to lighten and right to darken.
Step 2: Correct Colour Problems
Even with carefully chosen white balance settings it is sometimes necessary to remove an unwanted colour cast from the photo. Adding a Colour Balance adjustment layer (Layer > New Adjustment Layer > Color Balance) to the layers stack provides a non-destructive method for removing any unwanted hues from shadows, midtones and/or highlights. Simply drag the slider away from the cast colour – if the picture is a little yellow then drag the slider towards the blue end of the yellow/blue control.
Step 3: Minimise Background Distractions
If you’ve managed to capture the photos on a plain seamless background then you may not need this step. If not, here’s how to minimise distracting areas in the background. Start by selecting a poor background element using one of the selection tools such as the Lasso or Magic Wand. Pay particular attention to the quality of the edge selection. Add a small feather (Select > Feather > 1 pixel) to soften the selection edge and then invert the selection (Select > Invert). Now you can add a blur (Filter > Blur > Gaussian Blur) to this background section to defocus any distractions or, in the case of the example, run the Dust and Scratches filter over the whole area to remove any marks.
Step 4: Remove or Replace Background
With the background still selected you can take this process even further by replacing the background altogether with a solid colour or gradient. Again we will use a non-destructive approach for this change. With the selection still active add a new Gradient or Solid Colour fill layer (Layer> New Fill Layer). The selection will now be used to create a mask for the fill layer ensuring that the original pixels are preserved in the image layer beneath.
Step 5: Resize and Sharpen to Suit
When eBay hosts your listing photo it automatically creates multiple copies of your picture at different sizes to suit the web pages. The standard sizes are 400, 200 and 96 pixels (on the longest edge of the photo), with 800 pixels being used for the Supersize option. To get the best results from this system you should resize large photos down to approximately 1024 x 768 pixels before uploading. Use the Image > Image Resize command with the Resample > Bicubic Sharper option selected for this task. Next sharpen the smaller picture with the Filter > Sharpen > Smart Sharpen filter.
Step 6: Change Formats and Save
EBay Picture Services accepts pictures in the following formats: JPEG, BMP, GIF, TIFF and PNG and so, as the last step in the process before uploading, you will need to save the listing photo in a suitable file format. Use the File > Save For Web feature to save a copy of the original in the JPEG format. Adjust the Quality setting in the dialogue to balance the detail and level of compression (file size) of the picture. Ensure that the final file is no greater than 2Mb in size as this is the upper limit for uploads for the eBay Basic Picture Services website.
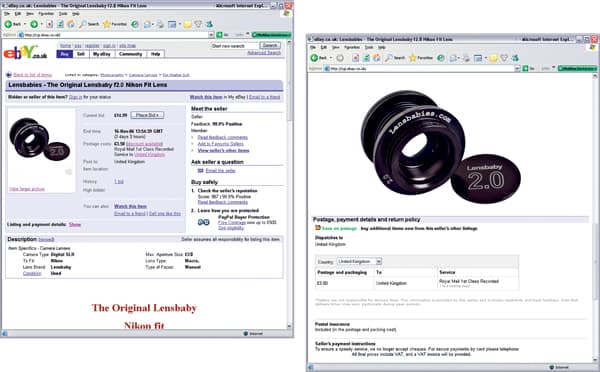
Shooting for eBay – Getting Your Pictures Online
When adding photos to your eBay listing, you have the choice of using your own web space for hosting the photos, or getting eBay to do this for you. This picture hosting service is called the eBay Picture Services, comes in two flavours (Basic and Enhanced) and provides an easy way to host your pictures. You can upload one photo free but there are also options for adding more photos, have them displayed as a slide show (Picture Show feature) or in greater detail and at a bigger size (Supersize Image option). See the eBay Picture Services Fees section, https://pages.ebay.co.uk/help/sell/fees.html

Shooting for eBay – Five Steps to Selling on eBay
After photographing then editing your sales pictures it is now time to get on with selling. Simply follow these steps.
1. Open a Seller’s Account
Click on the Sell link at the top of the eBay page and then choose the Create a Seller’s Account link. You will then be asked to verify your identity with a credit/debit card and banking details and be shown the fees associated with the listing.
2. Prepare Your Item for Sale
Do your research. Find out what similar items have sold for and how they have been described via the Complete Items search on eBay (go to the Search menu then Advanced Search, then select Completed Items). Be realistic about the current value of the item, its condition and the price at which you want to sell.
3. Create Your eBay Listing
Choose a format to use for selling – Auction, Fixed Price or Buy It Now. Capture, enhance and optimise your photos. Decide on a listing title, description and duration (1, 2, 5, 7, or 10 days). Add these details into the Sell Your Item Form which is displayed when you select the Sell button at the top of the eBay page.
4. Add in Pricing and Postage Details
The next step is to determine the reserve or starting price for your item. Also you need to select what method you will use to accept payment – cheque, credit card, money order or the online payment system PayPal. Now include the postage costs so buyers will know exactly how much the whole transaction will cost. At this point, decide if you want the option to ship internationally.
5. Manage the Sales Process
Once your auction is up and running, use the options in the ‘My eBay’ section of the site (you need to register and log-in to access this area) to track all the bidding and sales activity. Once the listing time is complete, organise the collection of the payment and send the item to the winning bidder.