The spring and summer months offer a plentiful supply of flowers to admire, but when the winter garden fails to deliver, a trip to the local florist, or even supermarket, will allow you to stock up on attractive blooms and plan an indoor photo session to create high-key florals, and so much more.
I like to try new techniques and so embarked on a new and exciting challenge when I bought a light pad a few years ago. Experimenting with flowers and high-key lighting, I realised that with practice I could create beautiful and dynamic images. High-key is a style that spans both photography and other visual arts, where the tones are primarily light as the bright lighting eliminates most, or all, of the shadows, giving pictures a bright, energetic feel.
Light pads emit a controllable, bright and even light; I always use mine at its maximum brightness. These devices are considerably brighter and a marked improvement over the older traditional bulb light boxes, especially when one is looking to use their light pads for photography.
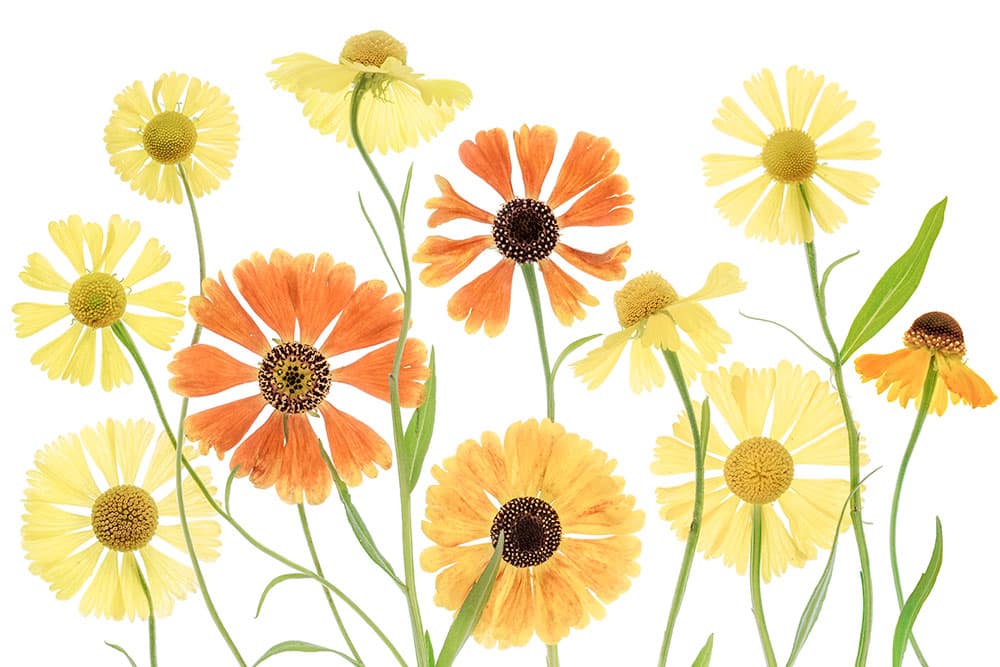
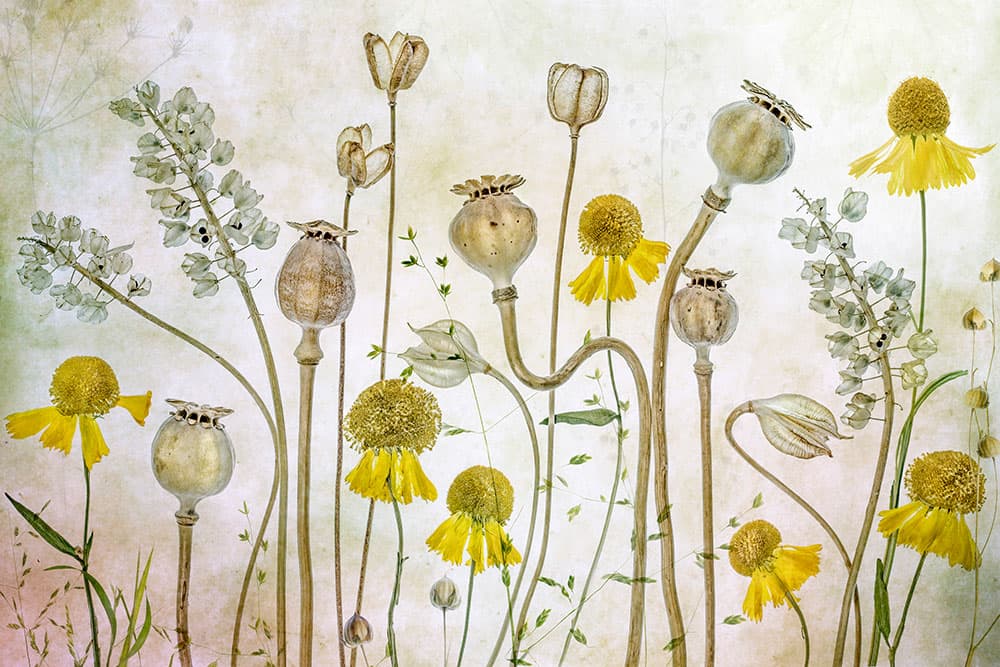
Carefully arranged heleniums make for a cheerful image. Canon EOS 6D, 100mm, 0.8sec at f/29, ISO 50.
Selecting suitable subject matter
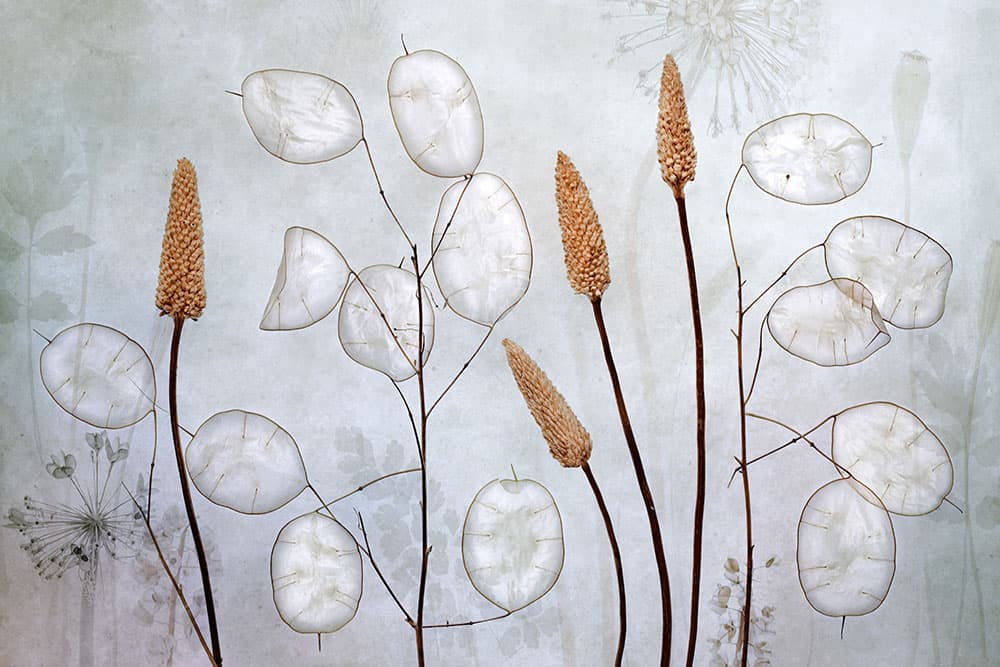
There are many different subjects that suit the light-pad treatment, so don’t restrict yourself to just flowers and leaves. Personally, I like to work with natural elements and have accumulated a nice collection of dried seed heads and pods that work well as subject matter. I like the array of shapes and textures: the fragile papery seed cases of lunaria or the delicate lacy cages of physalis. Other more robust subjects include poppy pods and teasels – if harvested and kept dry these remain woody and strong.
I love to use pressed flowers and leaves in my work too; over the summer months I collect lots of flowers and press them using a Microfleur flower press. This is a great gadget for pressing flowers fast. The Microfleur comprises two plastic plates that clamp together with the flowers sandwiched in between. As the name suggests it goes into the microwave for just a few seconds.
The traditional method of pressing flowers involves placing them between the pages of heavy books, which can take months. The Microfleur presses and preserves them in seconds, and the results can be good with practice. The time it takes varies depending on the thickness of the plant: a rose is quite dense and contains a lot of moisture, which makes the process more difficult to get right; whereas a flat daisy-type flower does not contain much moisture and takes far less time to flatten and dry out. It only takes a few seconds to overheat a flower and doing so will result in them becoming scorched and brown. I microwave subjects initially for 30 seconds, and then in 10-second bursts, checking after each blast until the right amount of dryness is reached.
Many types of plant, including fruit and vegetables, make excellent subjects, as do seashells, sea urchins, sand dollars and fossils as they come in many wonderful shapes and colours. Nature offers an amazing and endless supply of beauty, colour and texture for inspiration.
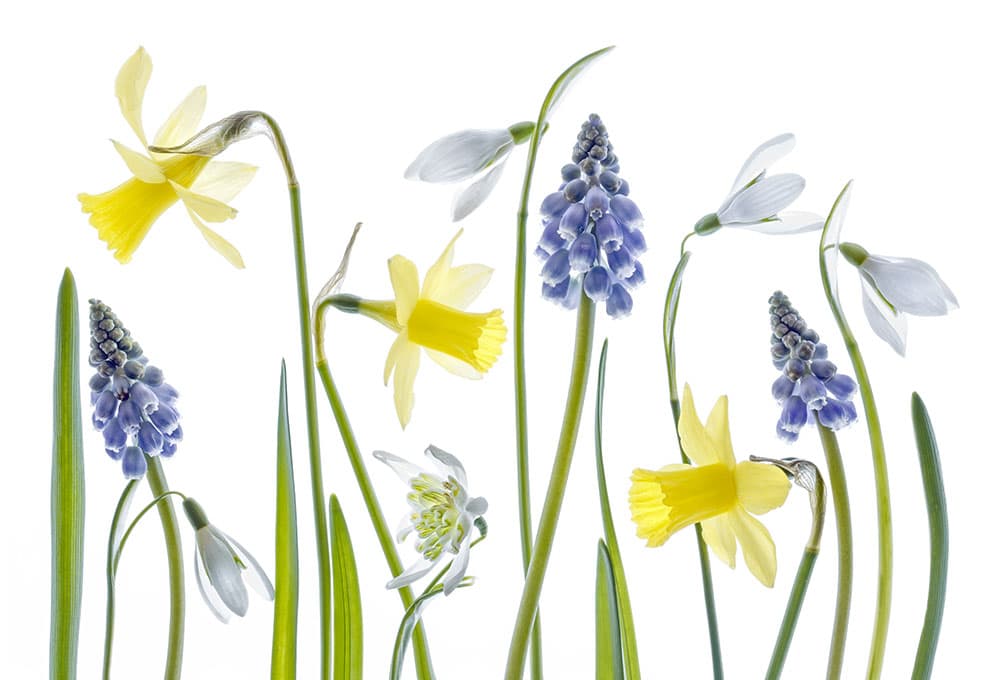
Late winter heralds the arrival of narcissus, muscari and galanthus. Canon EOS 6D, 100mm, 2 seconds, f/22, ISO 50.
Studio set-up
My studio set-up is basically a small, low table that is just slightly larger than the light pad resting on it. With the centre column of my Manfrotto 190XPRO tripod repositioned horizontally, I attach my Canon EOS 6D and Canon 100mm macro lens and position them so they are pointing downwards onto the light pad.
My tripod is quite heavy and sturdy but because the centre column is extended horizontally, and fixed to a very weighty camera and lens at one end, it becomes a little unstable and there is the risk of it toppling over from a knock or push. As a result, I use a counterbalance to provide more stability to the off-centre load.
I set up the height I need and make sure that the lens is perfectly aligned using the electronic level function in my camera to correct any tilt. If I need the camera and lens closer to the light pad I add a little more height to the light pad by placing a book or box underneath it – it’s much quicker than adjusting the tripod legs.

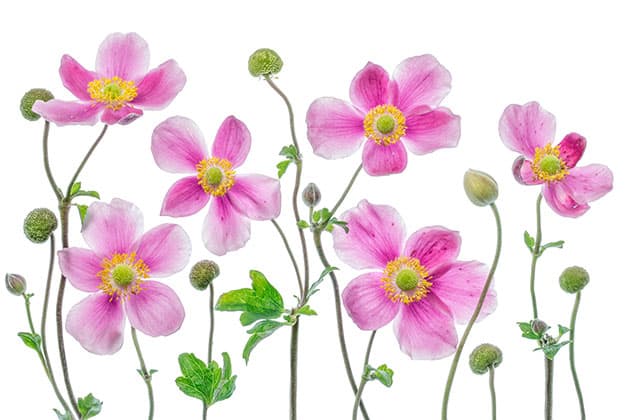
Getting in close captures the petal structure and cool blue tones of these hydrangea flowers. Canon EOS 6D, 100mm, 2 seconds, f/32, ISO 50.
Lighting considerations
You don’t necessarily need a macro lens to do light-pad work, but the light pad does need to be quite large. An A2 or larger size is needed to fill the viewfinder if used with a standard 50mm lens, and you can get away with an A3 size for macro lens work.
It’s useful to place a sheet of glass directly onto the light pad – a same-size clipframe glass is ideal as the edges are usually ground smooth for safe handling. Arranging the subject on the glass allows you to make changes to your composition, such as rotating or realigning with the viewfinder, without having to move the light pad.
My top lighting is provided by a softbox that houses two corkscrew fluorescent bulbs, positioned to the side of the light pad and tilted downwards to illuminate the front of the subjects. The light emitted is diffused, bright and even – perfect for eliminating the shadows. It works for me and remains my lighting set-up of choice. Other types of continuous lighting could be used: the available natural light from a bright window might be good, for instance. A reflector is really useful here to bounce some light into the shadows.
Camera settings
With my flowers arranged and my camera positioned, I take several shots at different exposures for comparison. I shoot raw in manual mode and use small apertures to obtain a wide depth of field. If I’m very close to the subject and overexpose the shot by 1, 2 or sometimes 3 stops my shutter speed can be anything from 1 to 8 seconds.
The camera’s histogram will be mainly to the right-hand side as there are a lot of bright pixels in the image. Settings vary depending on how close I am to the subject, but they are also governed by the luminosity or brightness of the flowers, and by how much of the subject is filling the frame. If I were shooting white flowers on a white background the camera settings would be different to those if I were shooting darker flowers under identical lighting.
Starting out with high-key is very much a case of trial and error – my aim is to get a good range of tones in the subject, avoid blown highlights and experiment with apertures and shutter speeds until I find a good balance.
A botanical beauty that’s been given an extra creative touch with texture overlays and colour. Canon EOS 6D, 100mm, 0.6sec, f/22, ISO 50.
Making minor adjustments
Importing the raw files into Adobe Camera Raw allows me to access tools to adjust exposure, white balance and tonal values, as well as tweak colours, saturation etc. I then export my files into Photoshop to fine-tune them, removing any flecks that may be on the white background – there are usually a few no matter how carefully I try to keep the light pad free from debris. These flecks are hardly visible looking through a viewfinder, but they become more evident at the editing stage. Thankfully they are really simple to remove either using the clone tool or spot healing brush. Sometimes I’ll need to make minor adjustments to colour and tonal values before sharpening the image.
Take your time
The great thing about creating a still-life image is the complete control you have over the scene, and the freedom you have to be creative with the content. It varies greatly from other types of photography such as landscape, wildlife or street photography where the scene is already set or waiting for the right moment to happen.
Arranging flowers into a pleasing composition on the light pad can sometimes be a lengthy process, especially if the flowers are very small and delicate, as they can be damaged easily. Hastily arranging the flowers won’t produce good results unless you’re very lucky.
A steady hand and nimble fingers are needed to move tiny flower heads into the desired position without upsetting the other flowers alongside them. As my fingers are not that nimble I prefer to use a large pair of tweezers to grab the stems or petals, adjust their position and move the plant subject around the light pad. A good deal of my work is close-up, and tiny adjustments can make significant changes when viewed through a macro lens.
Allow plenty of time to compose the arrangement, use your creativity and try out new ideas. I often look back at images and note that if I had spent a little more time composing the shot it could have been improved. Learning by past mistakes, I now make sure that I get it right in- camera as much as possible.
In the long run a relaxed, unhurried approach regarding the prep work will help you to create a more engaging and compelling image. It will also save you a great deal of time and effort in post-production. It takes only a split second to fire the shutter, but much longer to set the scene.
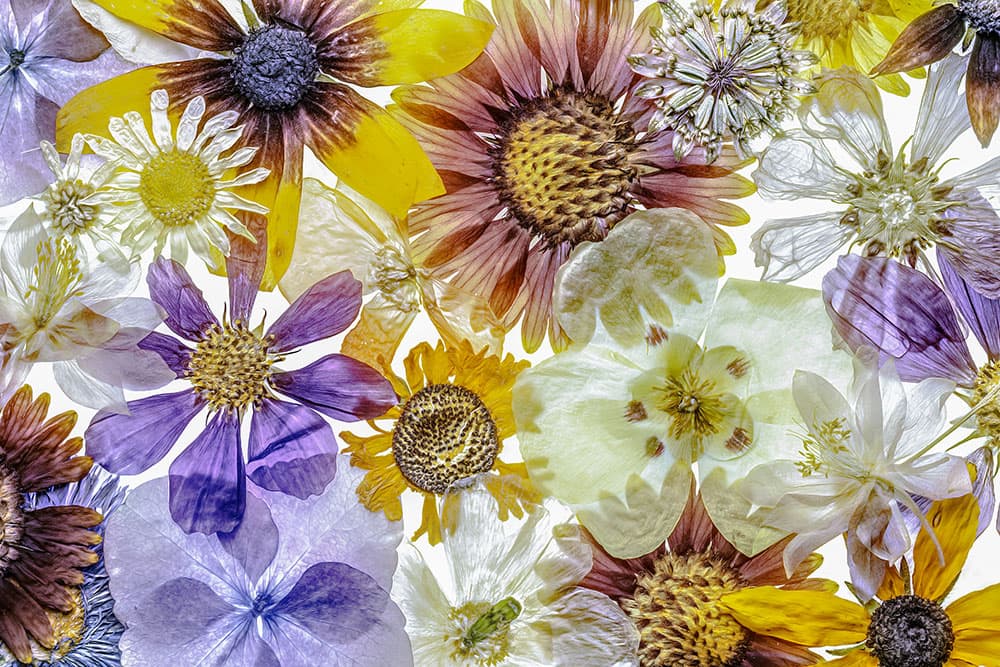
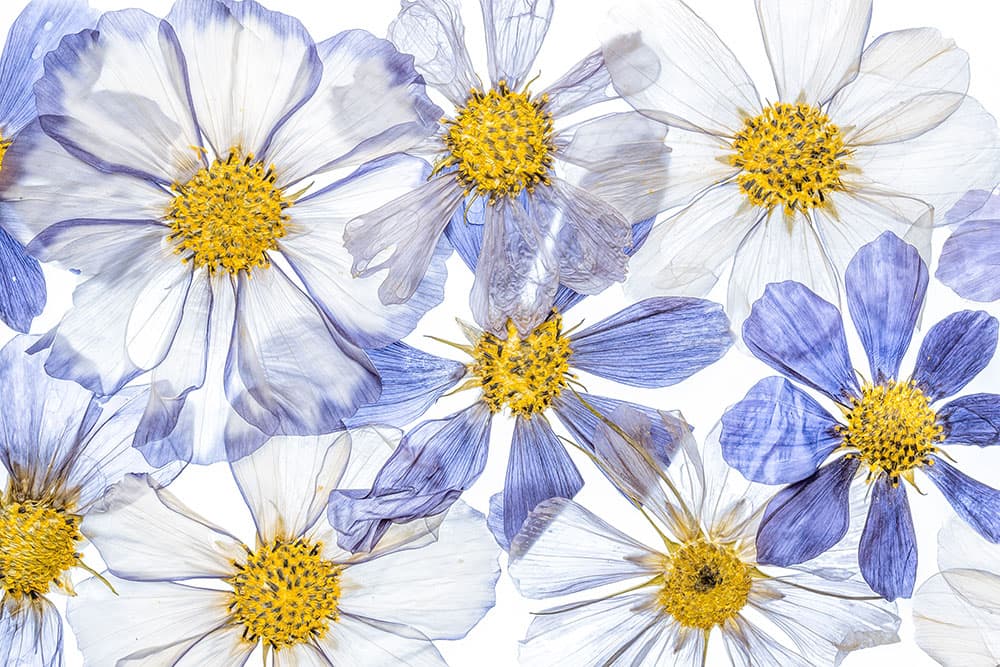
A mix of assorted pressed flower heads makes for a lively image. Canon EOS 6D, 100mm, 1 second, f/32, ISO 50.
Visual design
An eye for composition and an understanding of light, colour, form and shape is a valuable asset. It doesn’t matter how technically perfect a photograph is, if it has a weak composition it won’t hold your attention. A good structure of shape, and a sense of order and balance with colours that work well together all contribute to make an image that stands out and catches your eye.
I examine the different shapes, and pay particular attention to form, which is different to shape as it contains the contrast and depth of subjects too. I also look at the colours, small details and textures of flowers, using varying sizes of flower head. What’s more, I try to consider the different stages of a plant’s development from bud to mature bloom. I then consider where I want to place them within the frame of the viewfinder, repositioning the flowers until I find an arrangement that pleases my eye.
It’s important to not only think about how the elements work together, but also their relationship with the negative space in the frame. I place the stems meticulously, creating gentle curves and flowing lines that hopefully convey a sense of movement or emotion. They can also lead our eye, guiding us through the image.
I don’t consciously think about any of the rules or guidelines for composition as I think I have a natural ability to see when the scene before me looks right or wrong, it happens instinctively as I build the image, but I probably do subconsciously divide the frame into sections, each portion of the frame linking into the next floral filled space in a seamless way without even being aware of it.
Mandy’s Top Tips
1. Add a texture overlay
Once I’ve created a high-key image on a pure white background I sometimes play around by introducing a soft colour and adding a texture overlay to it. Occasionally I import elements to the scene, which I edit to appear understated in the background.
2. Try an oil paint filter
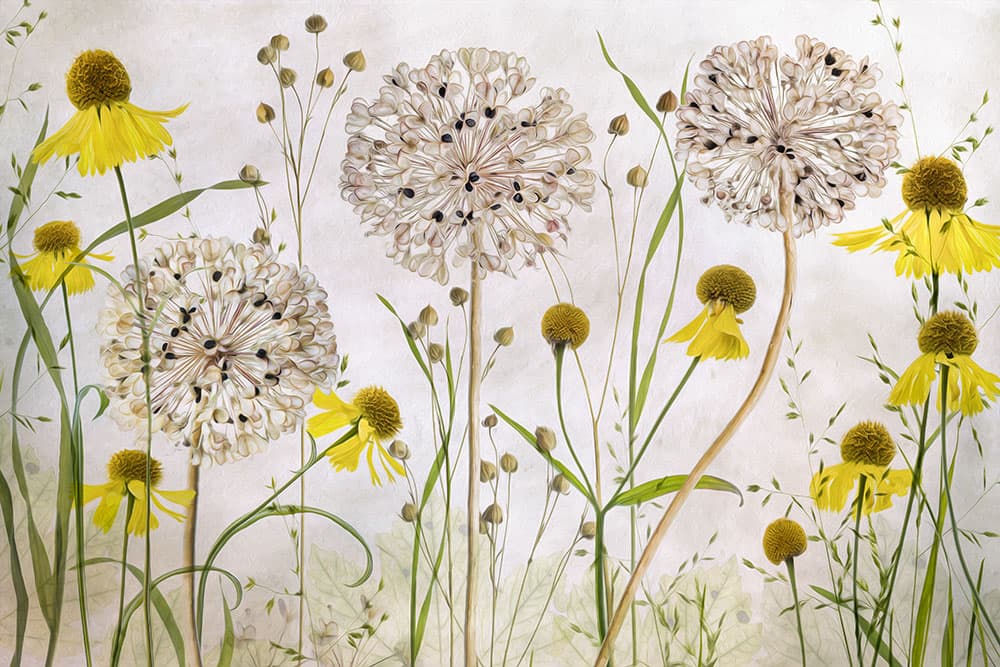
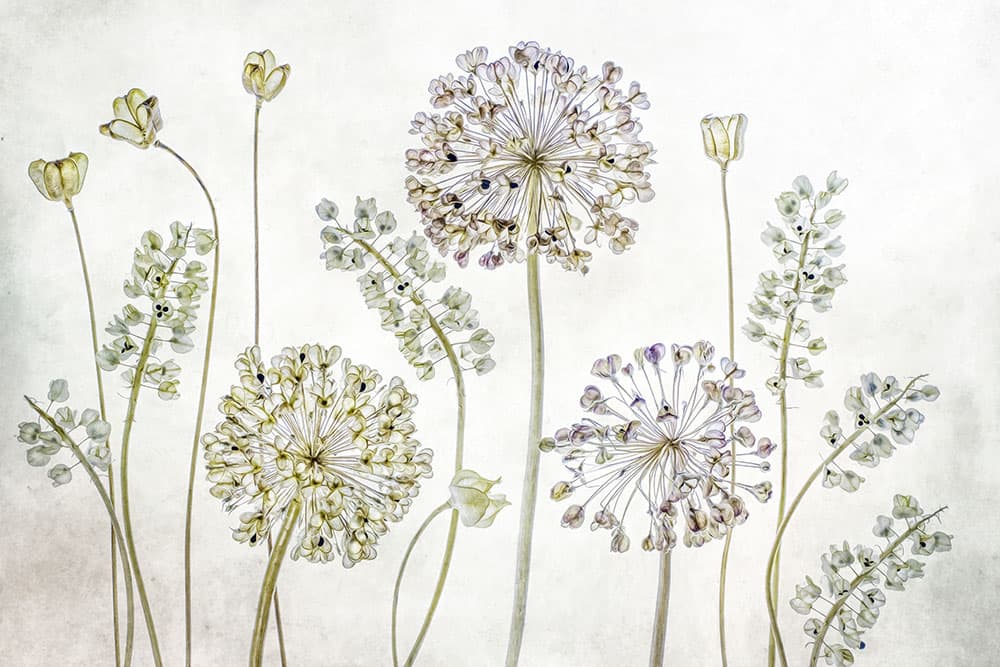
This allium image has the same processing technique as mentioned in the first tip, with an added oil paint filter. I love how this Photoshop filter smoothes the tiny details out rendering the photographic image into painterly wall art.
3. Use glass on the light pad
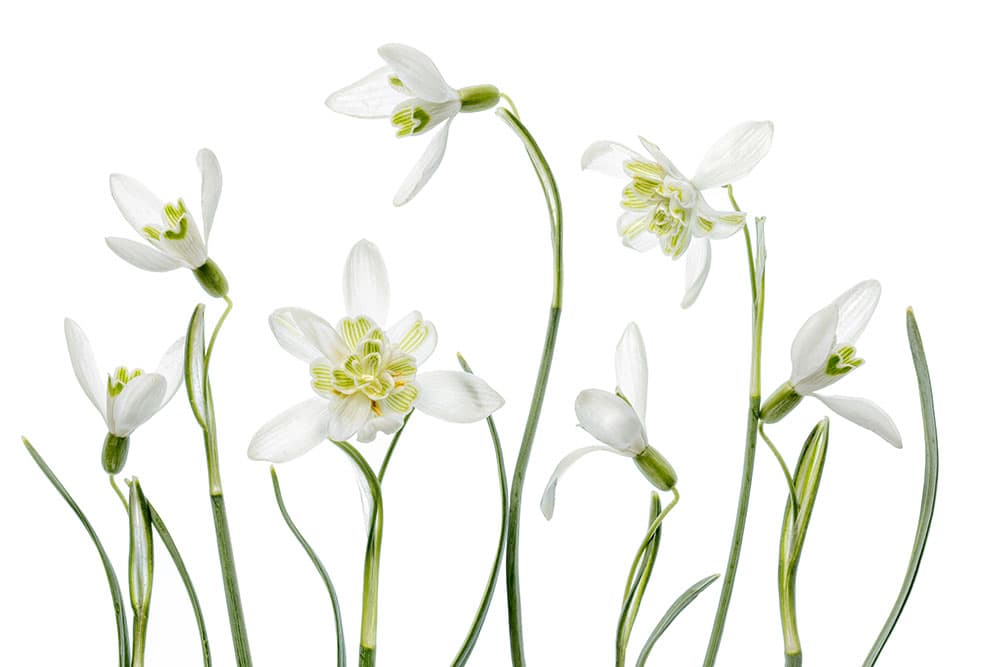
Snowdrops can be suprisingly delicate. When faced with such specimens it can be helpful to place them on a sheet of glass over the light pad and manoeuvre this, rather than risk damaging the flowers by constant handling and repositioning.
4. Experiment with fruit
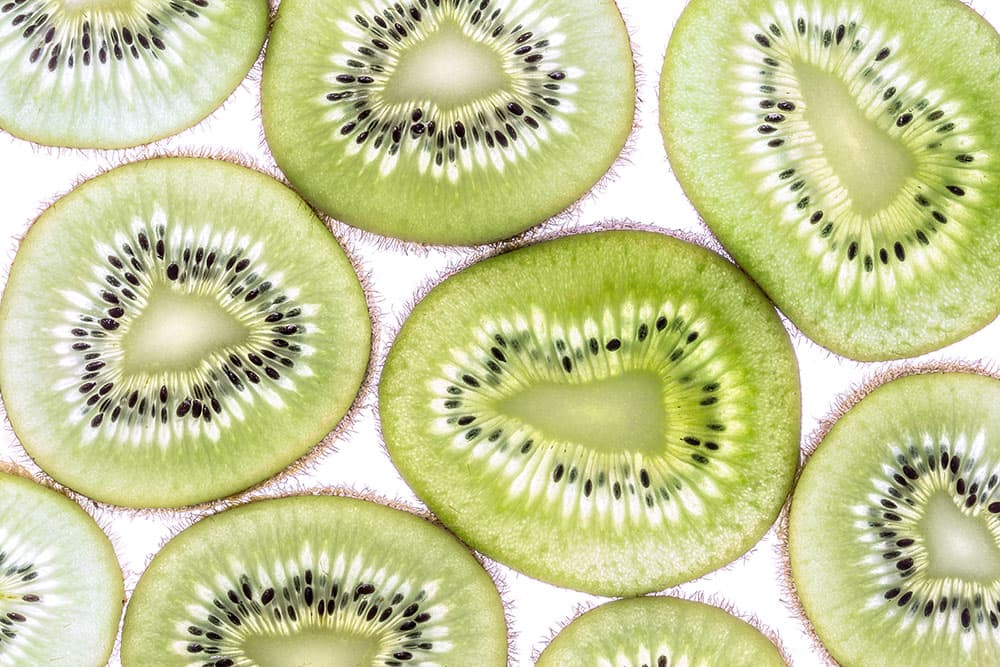
Don’t simply limit yourself to flowers and leaves on the light box, experiment with other bold, easily recognisable subjects, such as slices of fruit or vegetables. I love the way the hairs on the skin of this kiwi are so clearly defined.
5. Try using a flower press
The traditional method of pressing flowers involves placing them between pages of heavy books, but I use a Microfleur flower press, which is much faster. The time it takes to dry each specimen depends on the thickness of the plant.
6. Change the background
By using a sheet of glass over the light pad I can lift the arrangement off intact. One reason for doing this is if I would like to place coloured tissue paper or textured paper on top of the light pad and replace the arrangement back over it to vary the background.
Kit list
LED light pad
A modern LED light pad outputs a bright and even light. An A3 size is perfect for close-up work, an A2 or larger allows more freedom and a better solution for longer distances with standard lenses.
Counterbalance sandbag
Don’t risk the tripod falling over – a counterbalance costs just a few pounds or you could simply make your own by adding some weight in a strong holder, but make sure it is secured well.
Remote control switch
A remote control switch is an essential as exposures can be long. Firing the shutter by hand will only result in disappointing images.
Softbox
A softbox fluorescent continuous lighting system for a home studio doesn’t have to break the bank. Budget kits can be found on eBay and Amazon that are really good value for money.
Tripod
A good quality, versatile and sturdy tripod that features a sliding centre column that can be operated in the horizontal plane is essential for shooting parallel above the light pad.
Fine-art photographer Mandy Disher has built up an extensive portfolio since her interest in floral photography began 10 years ago. Mandy has achieved great success in the International Garden Photographer of the Year competition, being awarded winner of the Plant Portrait category for two consecutive years and Portfolio winner of the 2015 competition with her ‘Full Circle’ series of botanical images. Visit www.mandydisher.com