
Rather than getting a company to make a photo book for you, why not try making your own? It’s not as hard as you might think. Robert Sibley explains how it’s done
What you will need to make your photo book:
- Pencil
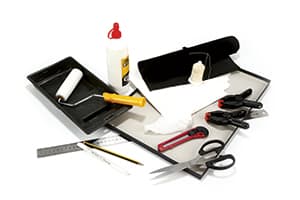
- White pen
- Metal ruler
- Craft knife
- Scissors
- Clamps
- Hessian
- Needle
- Strong thread
- PVA glue
- Roller
- Card
- Fabric for cover
- 12x double-sided
- A4 printer paper
- Printer
- Cutting mat
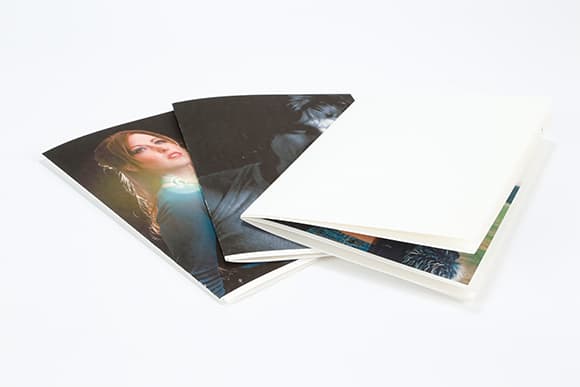
Although there are lots of companies that allow you to upload your images and print your own photo book, it is possible to a make and print a book yourself. You can control the size, the paper you use and how you want the cover to look. A handmade photo book can be a nice memento of an event and make a great personalised gift.
You might think that making a professional-looking book would be impossible without certain tools and skills, but the basic premise is straightforward, although it may take a few attempts to get exactly what you want. With this in mind, it is always best to make a few test books.
Make your photo book – Printing your pages
In this example, I have kept the process as simple as possible to show how easy it is to produce your own photo book. I have chosen A5 as the size. This is a sheet of A4 paper folded in half, so it means that an A4 printer can be used. Of course, if you have access to an A3 printer you could make an A4 book, or even a book that measures 20x20cm square. However, an A5 book is the perfect size for a gift, perhaps full of holiday photos or even a small wedding album.
One thing to remember is that you will need to use double-sided A4 paper, so make sure you put the paper in the correct way round when you are printing on the reverse. It is a good idea to do a dummy test run of the printing process, printing page numbers rather than images, so you can see which way round the paper needs to be loaded and how your book will appear once it is completed. See Page ordering (below) for a guide to how each of the pages and sections work together.
Make your photo book – Page ordering
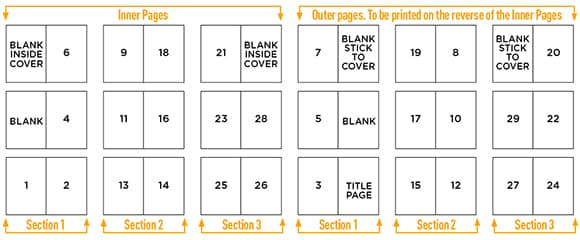
Ensuring that your pages are in the right order and printed on the correct side of the page is probably the most important part of the book-making process.
Printing a page in the wrong order may not only cause you to reprint that page, but possibly even the entire book, which could prove very costly. The book I am making here will consist of three sections, each with three A4 pages that, when folded, will produce 14 sides.
In publishing software such as Adobe InDesign, there are options that can automatically organise the pages for you. However, if you don’t have this kind of software you will need to do it yourself. For this guide I used Microsoft PowerPoint, as it provides an easy way to drop in images and see the layout of your entire book. Adobe Photoshop works just as well by creating an A4-sized image to act as a two-page spread in the book. Before using Photoshop, or any other image-editing software, make sure that you have a plan of where all your pages will appear. This will help when it comes to printing and binding your book.
To create the layout for an A5 portrait-orientation book, set up each PowerPoint slide or Photoshop image to A4 landscape and create a vertical guideline at 14.85cm. This will define the boundaries of the A5 pages within the book.
Start by ordering the inside pages, as shown in the diagram below. Work from the top to the bottom of section one, then move onto sections two and three. You will see that the sides have been left blank – these will either be stuck to the covers or will form the inside covers. Remember also to leave a 5mm bleed around all your images and text, as the book-block will be cut later. Next, order your outer pages, which will be printed on the reverse of the inner pages.
Making your photo book – Stitching the pages
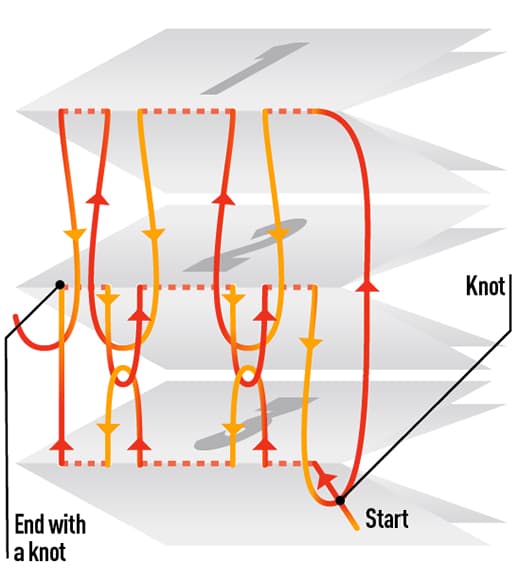
Although this stitching diagram may seem complicated, the process is relatively straightforward. However, it is worth practising on some inexpensive plain A4 copier paper a few times to make sure you get it right. The basic idea is to stitch one section and then the other sections in turn. Sewing through the loops created in the previous section will stitch them all together.
Start with section three, pushing the needle through the first hole from the outside and then threading it through the holes you have already created (this is covered in the step-by-step guide below). Continue along the spine of the section remembering to pull the entire length of thread through, leaving around 4-5cm at the end. Remember to always pull the thread along the spine to tighten – never do this at an angle otherwise you could rip the book or enlarge the holes.
When you reach the end, pick up section two, making sure it is the correct way up, and guide the needle through the first entry hole and then back out. As you come out of the exit hole after making the first stitch, take the needle and pass it under the thread from the section below, making a loop that, when tightened, will pull the sections together.
When you reach the end of section 2, before passing through the entry hole in section one, tie a knot with the length of thread that remains from the beginning of section three. Continue to thread through the first entry and exit holes of section one, then, as you exit, guide the needle under the threads connecting sections two and three, before continuing to the next entry point. This will secure section one to the other two sections. Continue along the spine until you reach the last exit hole. When you do so, guide the needle under the thread below to create a loop, then tie a knot to secure the thread. Cut off any remaining thread.
Step-by-step guide to assembling your photo book
Once you’ve printed your pictures, it’s time to assemble all the elements of your book. Robert Sibley explains how to fold, trim, stitch and glue the pages of your photo book together
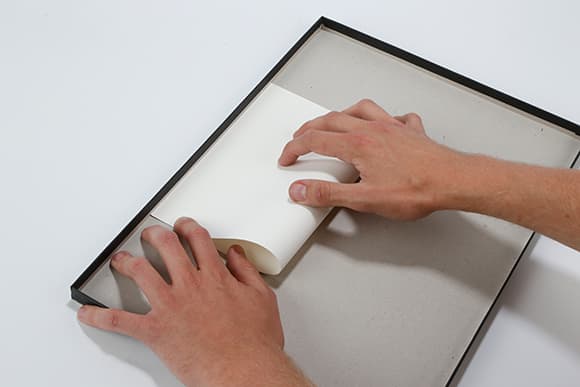
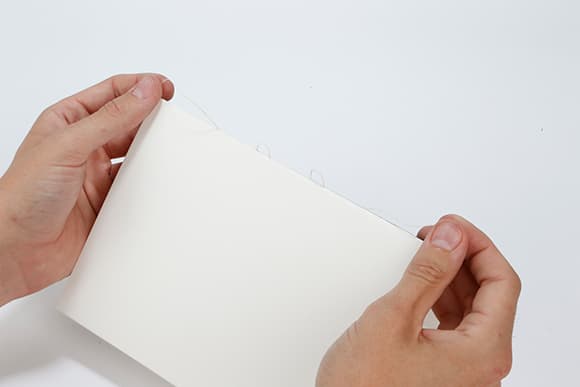
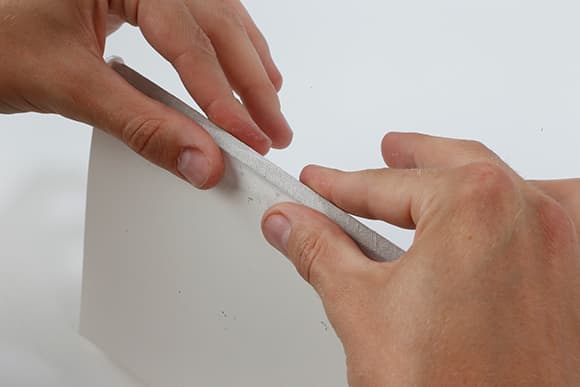
1. Use the inside of the paper box to fold your pages. By pushing the paper up against the side, it will ensure that the fold finds the middle of the pages. This is particularly important when images appear on both sides of your page, or if your images are full bleed.
2. Once folded, ensure that all pages have been folded in thecorrect way and that images and text appear in the right order. Any mistakes missed now will be very time-consuming to fix later.
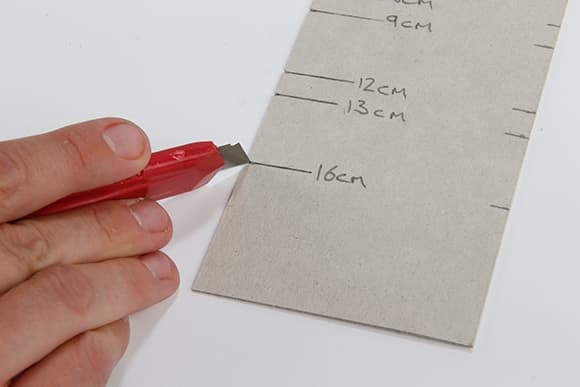
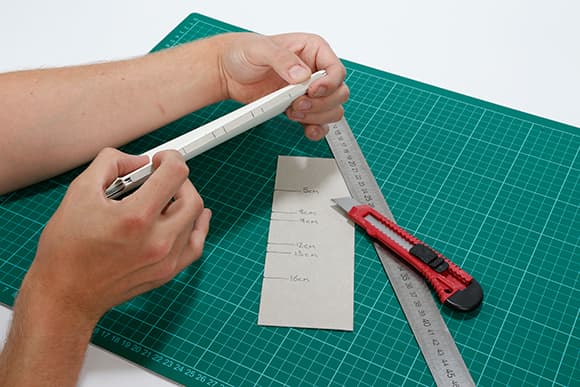
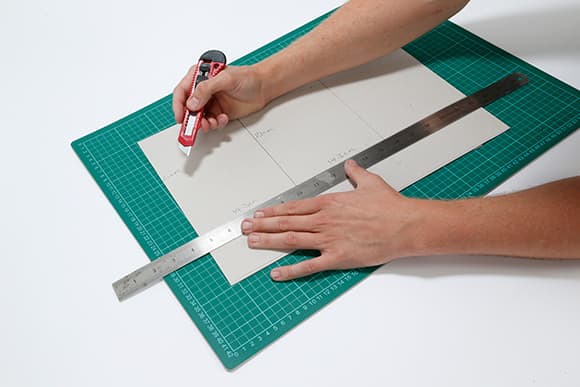
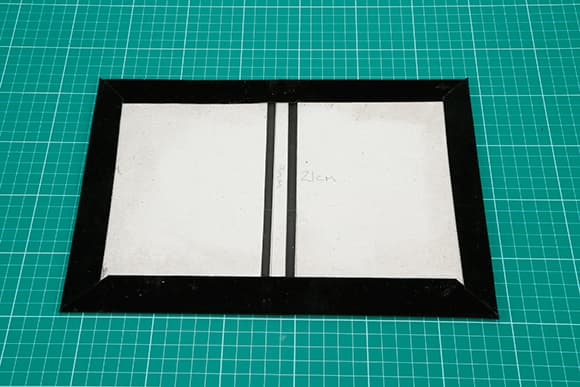
3. Now, using the paper box, you need to create a template that can be used as a guide when piercing the paper for sewing. The template should be the height of the book-block – in this case 21cm. A 5cm space has been left at the top and bottom with 3x 3cm spacing for the thread. Cut a small V at each measurement.
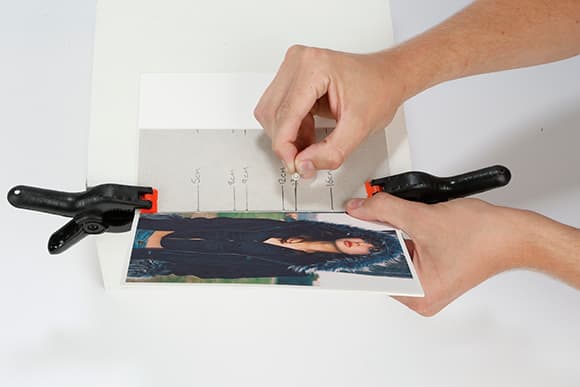
4. Butt up each section of the book in turn, from the top, to ensure your images look even from top to bottom throughout your book. Clamp your template to the middle of the section and, with it slightly overhanging your table, pierce a hole through every page where you have cut the V from the template. Repeat for each section.
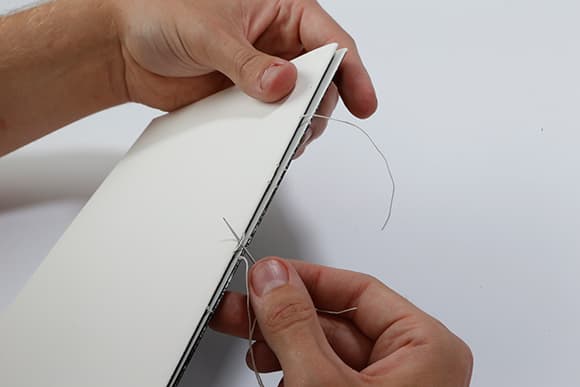
5. Cut a piece of thread that is 3.5x the height of the book-block. Starting with section 3, use your needle to pull the tread through each hole, leaving around 4cm at the end. To tighten the thread, always pull along the spine – never downwards, as this could make the holes bigger or tear the pages. For more details about stitching the sections, see Stitching the pages above.
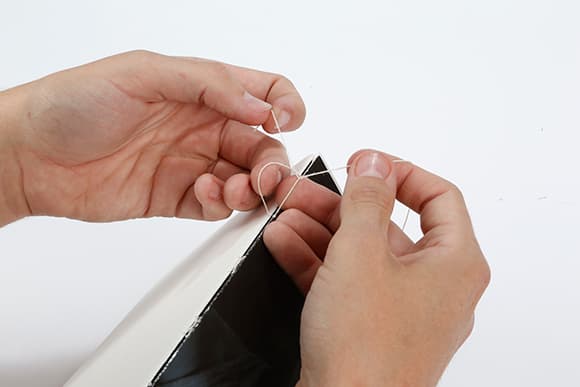
6. Ensure that section 2 is the correct way up and place it alongside section 3. After guiding the thread through the first sewing holes in section 2, as the needle appears sew under the thread from section 3 to create a loop, then continue back into section 2. This will connect the two sections together. Remember to tighten along the spine.
7. Continue the process with section 1. Remember that this time you’ll be threading the needle through the loops already connecting sections 2 and 3. At the end of the sewing, tie a knot with the remaining thread and the 4cm piece left dangling, as described in Step 5.
8. Now you must create a spine that will cover the sewing. Measure the depth of the book-block and cut out a spine from the template you created earlier. The markings will not be seen.
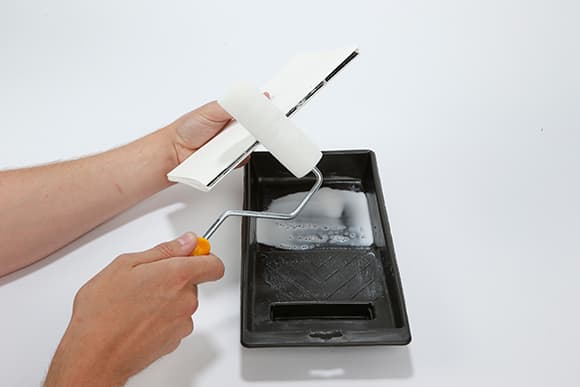
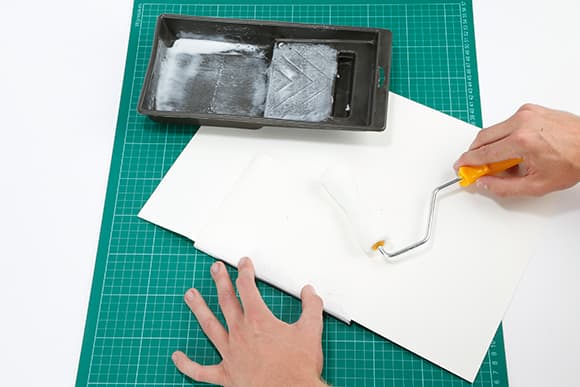
9. Use a roller to apply a very thin, even layer of PVA glue to the book-block. It is very important that it is applied sparingly, as any excess will result in glue seeping between the pages in the three sections.
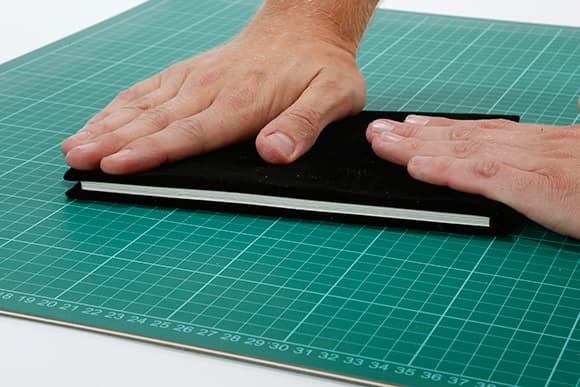
10. Cut a piece of hessian (or something similar) that is the height of the book-block and about 4cm wide. Use the roller to apply a small amount of PVA glue so that it feels tacky. Place the spine onto the book-block and then surround with the hessian, ensuring it has a tight, smooth finish. This will help to keep the spine in place as it dries.
11. Using the remaining board from the printer box, measure the front and back covers, the height of which will be the same as the book-block at this stage (5mm will be cut from the top and bottom later). The cover width should be 5mm less than the book-block’s width (you will see why later). For this A5 example, the front and back covers measure 21×14.3cm. The width of the spine should equate to the depth of the book-block plus the thickness of the covers.
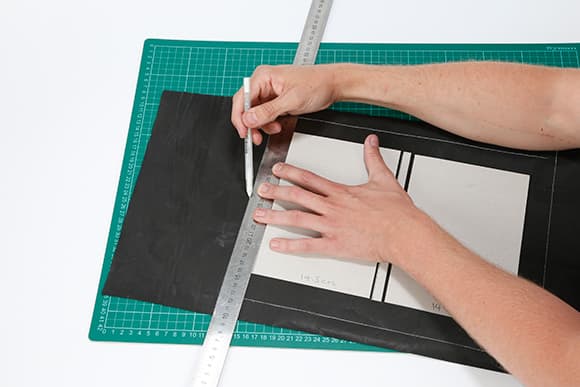
12. Place the pieces of board onto the reverse of your chosen piece of fabric. There should be a gap of 5mm either side of the spine. Once laid out, measure the folds of the fabric. For ease, I used the width of the ruler around all four sides. Cut this out, if possible, using the ruler and knife to ensure it is straight.
13. Roll the board with PVA glue and allow to dry for a moment until tacky, then place onto the fabric. Allow to dry for a few minutes, then cut the corners of your piece of fabric. Make sure that the line of your cut is around 2mm away from the corners of your covers. If it is cut too close, you will be unable to crimp the fabric and the corners of the board will show.
14. Use the roller to apply a layer of glue to the folds of the fabric. Wait for the glue to become tacky and then start to fold the edges inwards, followed by the top and bottom. Use a clean piece of card to help you ensure that the fabric is tight against the edges of the board, and that no air bubbles become trapped. Allow to dry.
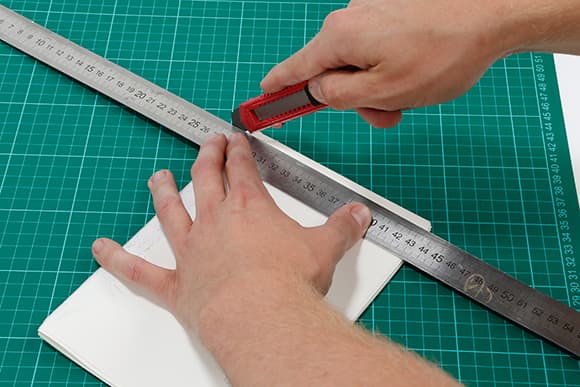
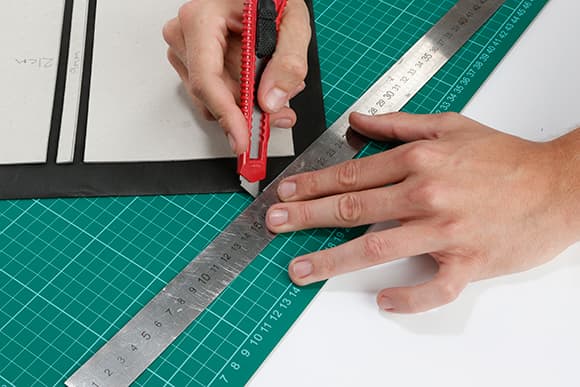
15. As discussed earlier, you should have a bleed of 5mm. From the top of the book-block, measure down around 5.5mm and draw a line. Always start from the top, as this is where you butted the edges earlier. Get a comfortable firm grip on the ruler and, bit by bit, cut through the block. Use a new blade for every edge and allow it to do the work. Don’t apply too much pressure as this could bend the blade. For the bottom, measure down from the new straight edge at the top.
16. Place a piece of paper between the first page and the rest of the block. Use the roller to apply the PVA glue and, as before, be careful not to apply too much. You want the paper to feel tacky, not damp.
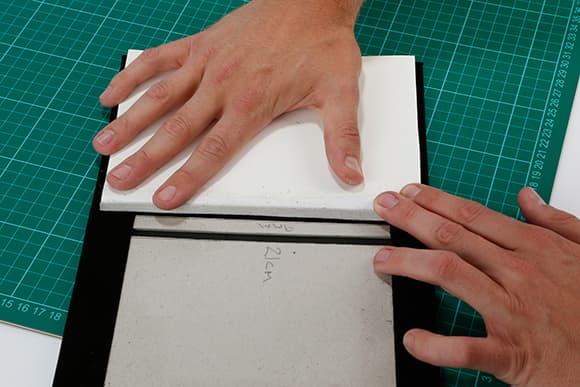
17. Line up the book-block on the cover and stick it down. It should overhang the gap made earlier between the covers and the spine by about 5mm. Ensure that the spine folds around the back of the book-block before firmly pushing down and allowing to dry for a few minutes.
18. Repeat steps 16 and 17 for the rear cover and then place under a weight, ideally overnight in a warm, dry place. Remember not to apply any glue on the spine.


