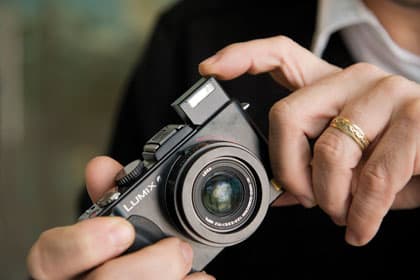
With care you can produce stunning results on even simple compacts. John Freeman shares a few tips, on how to use a compact camera
Keep the camera steady

Holding the camera at arm’s length when shooting is not conducive to achieving the sharpest possible images. There are ways you can minimise the risk of camera shake reducing the sharpness of your shots.
To provide greater stability bend your arms so that your elbows are braced against your body. Another way to avoid camera shake is to lean against a doorway or wall.
In lower light when the shutter speed is likely to be slow try to find something to place the camera on to keep it steady.
As an extra precaution set the camera to self-timer so that you eliminate the problem of shake when you press the shutter button. Better still, keep a small tabletop tripod in your camera bag for such occasions.
Use the right mode
 Getting the best results involves more than just setting the camera to automatic and firing away.
Compacts with manual controls obviously offer the most versatility and control the quality and ‘look’ of your images.
But even fairly basic compacts now offer various scene modes in the menu. If selected with care these will give you better results than you’d get from plain old Auto.
These modes adjust the parameters specifically for the subject you’re shooting – not just the exposure but the focus mode, white balance, colour, sharpening and other settings.
Use the largest image size
Selecting the smallest resolution on your compact might mean that you get many more shots on your SD card but it will be at the expense of image quality.
This means if you should want to make an enlargement from a part of the image, or indeed the entire frame, the picture will start to suffer from pixellation and your print will have a fuzzy appearance.
If your shot turned out to be good enough to be entered in a competition, be published or even hung on the wall this would be a distinct disadvantage. It’s better to carry a spare card, either in your camera case or wallet.
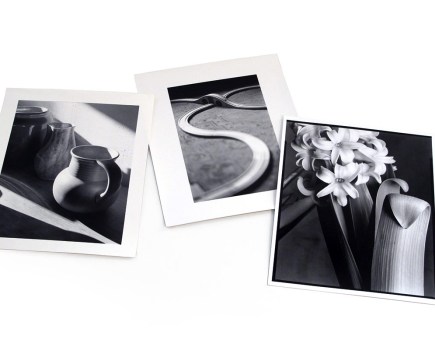
Compose carefully

Many photographers take great care with their composition when using a DSLR, but are much more haphazard when using a compact.
Using the LCD screen does encourage a more casual approach, but try to avoid falling into that trap.
Most compacts feature an option for having grid lines on your display to help you keep the camera level so that the horizon line in a landscape for instance, is straight. This assists you in placing your subject in their optimum position. This is known as the rule of thirds.
Of course, these lines do not appear on your finished shots.
Take control of your flash
 Most people assume that flash is there for shots when there is little light, particularly indoors.
However, even outdoors in bright light flash can be useful. For instance, if you are taking a portrait on a sunny day it is all too easy for the camera to read for the sky and underexpose the face, creating a silhouette.
By switching on the flash the camera will fire a small amount that will balance the subject with the background.
Always carry a camera
The best way to ensure you get great shots is to always make sure you have a camera with you. That way when the unexpected occurs you’ll be able to record it.
Having to lug a DSLR kit around with you can become a drag, which is where compacts score. Get one that will fit into a pocket, or a work bag, or the glove box of your car.
Make sure it’s charged and there’s plenty of space on the media card.
Shoot macro
 The smaller sensors of compact cameras make them especially suited to macro work.
By choosing the macro mode – usually a flower symbol – you will be able to get in as close as one or two centimetres.
Even at wide apertures, compacts have the advantage of giving greater magnification and depth of field.
Remember, just moving your viewpoint a couple of centimetres, backwards or forwards, is all that will be necessary to get pin-sharp focusing. When shooting this close make sure you do not cast a shadow over your subject with your camera.
Better portraits
 Selecting the portrait scene mode will normally tell the camera to choose a larger aperture than it might if set to auto.
The reduced depth of field that results will render the background slightly out of focus. This emphasises the subject and makes them stand out from the background.
Another way to reduce the sharpness of the background is to step back from your subject and zoom in by using the telephoto setting. This will also fill the frame, making a far better overall composition.
Shoot raw
Many compact cameras have the facility to shoot Raw and JPEG. The Raw format is the equivalent of a film negative, and contains much more information than a JPEG, which can compress data to reduce the file sizes.
Like a film negative you will have to ‘process’ a Raw image, which requires more time and additional software on your computer.
However, the quality will be far higher and the range of tones greater. You will be able to output the image at a far higher resolution than a JPEG so bigger and better quality enlargements will be possible.
Colour balance
When you set your camera to auto it will also select the colour balance for you.
In general shooting conditions this can be a time-saving advantage. However, in situations where the colour of the light adds atmosphere to the shot, such as when shooting a sunset, the camera may try to ‘cool’ that wonderful warm light that first attracted you to the shot in the first place. In this situation, make sure the colour balance is set manually.
Use the lowest ISO you can
 Most compacts deliver good image quality at the lower ISOs, such as ISO 100. However, due to their very small sensors few manage to maintain that as you go further up the sensitivity range. With most models it’s best to avoid straying above ISO 1000 except in emergencies.
Many cameras are set by default to Auto ISO, which means that it’s the camera that decides this important parameter and the user isn’t even told what ISO has been set. So the first thing to do is switch to manual ISO.
Next, select as low an ISO setting as the conditions will allow. Beware though that too low an ISO can be worse than too high, because the resulting slow shutter speed can induce blur due to camera shake.