As New Order once observed, the world’s in motion, so why not convey that in your pictures? Niall Benvie shares his creative blur techniques to teach you how to shoot subjects in motion.

The more detail our cameras are able to resolve, the greater our appetite, it seems, for ‘creative blur’. When I helped to judge an international nature photo competition in Italy, the percentage of deliberately blurred images was impressive.
This reaction against the literalism of regular photography reflects a wish to show things in ways people don’t normally see them, perhaps to encourage them to look anew at familiar subjects. Blur is a form of visual shorthand where there is scope for the viewer to fill in the details of the subject’s identity: the pictures are more involving.
Anyone can take a blurred picture. Many of us do so unintentionally, and then find we have an interesting image as a result. The trick is to learn how to control blur through a combination of camera, subject and photographer movement, as well as understanding their interplay with shutter speed and supplementary lighting. While one or two of my blurry images come from my slide archive, the majority are made digitally, where the opportunities to refine a look at minimal expense are far greater.
This experimental aspect of blur photography is a large part of its fun and the lack of repeatability makes each frame unique. With at least three variables in play at any one time – subject movement, shutter speed and how the camera is moved (if at all) – there is scope for infinite subtle distinction between each frame in a sequence. So, take plenty and don’t be afraid to make a rough in-camera edit as you go along. While ‘chimping’ isn’t generally a good idea, frequent reference to the captures you’ve made already will help identify what’s working and what’s not, more quickly.
Motion blurring, as opposed to defocus effects, is more plausible when used to portray subjects that naturally move. Blur can emphasise speed or dynamism and that’s just not appropriate with, say, a boulder. Having said that, many people enjoy making blurred images of trees by moving the camera up or down during the exposure, in harmony with the subject’s form; lateral panning during the exposure rarely works. Deliberately blurred photographs rely on strong compositional structure to hold them together much more so than sharp images do; a lot of blending of form, texture and colour is happening already and therefore the need for strong, obvious shapes is heightened if the picture is to be deciphered by the viewer.
Aside from the obvious portrayal of motion, blurring can also lend a subject an emotional dimension; with its identity ill-defined, it becomes more mysterious and intriguing.
I am especially keen on portraying people in a landscape this way because if you show someone in detail, the viewer can build a story round them with the setting taking second place. If, however, they are unrecognisable, they become part of that landscape, a mere presence moving through it. It also saves the need for model release forms!
How to Shoot Subjects in Motion – Motion at Night
We move into different emotional territory during the very long exposures needed as it gets dark – and the scope, by default, to represent movement. The latest generation of DSLRs have superb low noise capability and once cranked up to ISO 1000 exhibit (in a well-exposed shot) no more image noise than an ISO 200 image shot with an older camera.
Leave the shutter open for 15 or 20 seconds and you can shoot when it is too dark to see clearly. Skies will typically acquire a strong blue cast, sympathetic with that time of day, and the effect is particularly attractive when there are reflective surfaces such as waves or pale pebbles to borrow this cool cast. Most fascinating of all is to see the form that moving subjects – especially moving water – acquire during these long exposures, and how that varies between shots.
Within urban areas long shutter speeds present endless opportunities to convey subject movement, with the light trails left by moving traffic and the spinning lights of fairgrounds proving to be popular subjects.
We often hear people comment, favourably, that a painting looks like a photograph. Well, here is our chance as creative photographers to get our own back and make pictures that have a quality of distance from our normal visual experience, and in possession of an emotional content only ever found in the very best paintings.
How to Shoot Subjects in Motion – Know Before You Go
Camera Set Up
Set your camera to Shutter Priority (S or Tv) or manual exposure.
Set the camera’s drive mode to continuous.
Set the focus mode to servo, so you don’t have to wait for the lens to lock focus to take a shot.
Drive-by Shooting

Taking pictures from a moving vehicle is another way to capture motion. The obvious mode of transport is a car (make sure you’re a passenger, not the driver!) but this (above) was taken from the bows of a boat on a sunny day, with the blue sky, and reflections of other boats, creating the colours.
Photoshop
You might be tempted to create your blur later, using your editing software. However, the Motion Blur and Radial Blur filters in Photoshop look most realistic when used to enhance existing subject movement, rather than creating it from scratch.
How to Shoot Subjects in Motion – Subject Movement
If you want to contrast a subject’s movement with its still surroundings, mount the camera on a tripod and choose a shutter speed slow enough to give the desired degree of blur. This depends on how far the subject is from the camera and how fast it’s moving, but you can start off at 1/8 or 1/15 second and see how that looks. Pictures of birds in flight generally require faster shutter speeds and you may need to pan with them to achieve the right balance of sharpness and blur.

Nikon D3, 1/15sec @ f/4 Niall Benvie
How to Shoot Subjects in Motion – Moving Water
Look beyond the obvious waterfall picture and think about how water reflects colour, especially over long exposures. White water will reflect blue in after-dusk shots but for something different, look at the less turbulent parts of a river.

Nikon D2x, 200mm, 4sec @ f/16, ISO 100 Tim Gartside
In autumn, many leaves may be present in the water column and during a very long exposure they may alter the appearance of the river altogether. Use a small aperture or neutral density filter (or both) to gain a longer shutter speed without overexposing. A polarising filter will also give you about one stop.

Nikon D2x, 12-24mm, 8sec @ f/13, ISO 125 Niall Benvie
For an alternative view, you can illuminate the water using flash to freeze its motion, while allowing daylight to light the surroundings, which will be blurred if you handhold the camera during a long exposure.
How to Shoot Subjects in Motion – Panning a Moving Subject
The unpredictability stakes are at their highest when both camera and subject move, ideally with the former in pursuit of the latter. Horizontal panning delivers a streaky background while retaining a degree of sharpness on parts of the subject, and is a great way to convey that the subject is in motion. It’s an especially popular technique with subjects such as motorsport and horse racing but can be applied to any subject in lateral motion, as shown here.

Nikon D3, 80-200mm, 1/10sec @ f/18, ISO 200 Niall Benvie
The trick is to move the camera with the subject to keep it in roughly the same area of the frame. Press the shutter button while keeping the camera moving and continue to follow through for a moment after the picture has been taken. The shutter speed you’ll need will vary depending on how fast the subject is moving, and the effect you want to achieve, but for pictures like these a speed of between 1/30th and 1/4 of a second should produce a good result. Try 1/15sec as a starting point. In bright light you’ll need a low ISO and small aperture to achieve such low speeds.

Nikon D3, 24-70mm, 1/6sec @ f/22, ISO 200 Niall Benvie
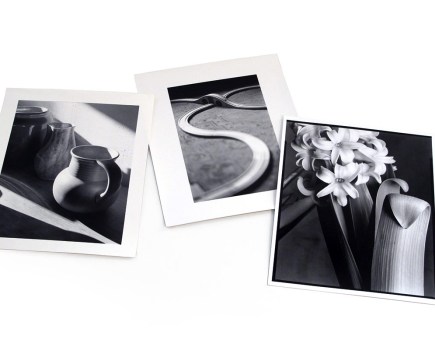
How to Shoot Subjects in Motion – Moving the Camera
Deliberately blurring a static subject puts your own stamp on a scene; the picture becomes about how you have moved the camera as much as the actual subject. Tree trunks lend themselves especially well to this treatment as it reduces the scene to its essential colours and forms.

Nikon D2x, 80-200mm, 1/4sec @ f/13, ISO 100 Niall Benvie
These two images were created in-camera. I started with a shutter speed of about a quarter of a second and, during the exposure, moved the camera either straight down, or sometimes with a little twist to create more texture.

Nikon D3, 80-200mm, 1/8sec @ f/10, ISO 200 Niall Benvie
How to Shoot Subjects in Motion – Capture Wind Power
Wind is a tricky thing to photograph, what with it being invisible, however it is fairly easy to record the effects of wind on the landscape – especially in the way it blows leaves and grass.
Mari Stirling took the seaside image late on a windy afternoon in February, during a brief moment when the sun peeped through the clouds. By fitting four stops worth of ND grad filters she was able to use a slow shutter speed of half a second which enabled her to record the motion blur of the grasses in the foreground dunes, providing a contrast to the sharply defined buildings and beach in the background.

Canon EOS 5D, 17-40mm lens, -4 stop ND grad filters, 0.5sec @ f/16, ISO 50 Mari Stirling
How to Shoot Subjects in Motion – Moving Clouds
To capture the movement of clouds across an open sky usually requires a long exposure time of several seconds. This means you’ll need a tripod and, if you’re shooting in the daytime, probably a neutral density filter over the lens to cut the light level down to enable slow speeds. Jesse Estes took this beautiful lake view in Oregon, USA, at sunrise. With a B&W ND3 Grad filter fitted to his lens, plus a -3 stop ND grad filter (to further darken the sky) he needed an exposure of 251 seconds. The cloud movements during this time have recorded as blurred streaks.

Nikon D300, Sigma 10-20mm, 251sec @ f/8, ISO 200, B&W ND3 Grad, -3 stop ND grad Jesse Estes
How to Shoot Subjects in Motion – Slow-sync Flash
Using flash during a long exposure can produce interesting effects, producing a sharp flash-lit image combined with a blurred ambient one.
Determine what constitutes a good daylight exposure first, and stop down by -1 to -1.5 stops to subdue the background, then adjust the flash (by setting the EV compensation to -1, for starters, or try different manual levels) until you have a pleasing balance between subject and background illumination.
If you can set your camera to rear curtain sync, then do so: the flash will fire at the end of the exposure rather than at the start, resulting in a more natural- looking blur which seems to follow, rather than precede, the subject. In this image, daylight is the junior partner and provides fill lighting for the flash.

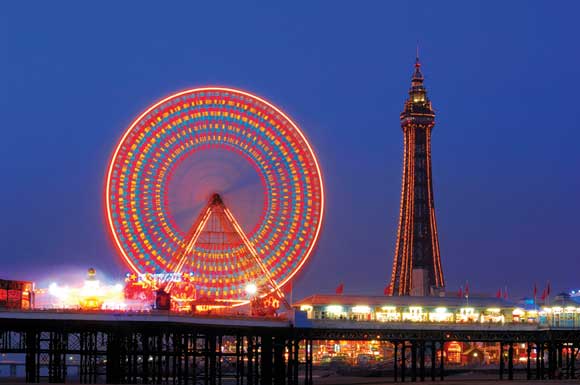
How to Shoot Subjects in Motion – Movement at Night
Night-time is a great time to capture motion – especially the movement of lights. Whether it’s the trail of car lights produced by the flow of traffic through the streets, or perhaps the moving lights of a fairground, results can be stunning.

Nikon D2x, 30sec @ f/16, ISO 100 Tim Gartside
Like other techniques illustrated here you’ll need a tripod and a longish shutter speed – in most cases several seconds to get the best effect. The tripod allows you to contrast the blurred movement with sharp areas like buildings and streets.
For good traffic trails find a spot with a constantly moving stream of traffic, and avoid areas such as junctions and traffic lights where cars will stop for extended periods. Remember that you’re not recording the cars themselves, just their lights, and traffic coming towards you will leave yellow trails while cars moving away from you will leave red trails. Start with an exposure time of around 10 seconds at f/11 at ISO 100 and experiment from there.


Some subjects will produce a very different image depending on when you shoot them. The images above were exposed for the same amount of time, although the wheel remained stationary in one of them.
How to Shoot Subjects in Motion – Zoom Bursts
Another great technique is to physically zoom the lens barrel during the exposure. You’ll need to experiment, but start with a shutter speed of half a second or longer and, if possible, use a tripod. Try different zooms such as 28-80mm or 70-300mm, and vary the zoom range and starting point for different effects.

Nikon D2x, 110mm, 1/10sec @ f/10, ISO 200 Tim Gartside
How to Shoot Subjects in Motion – Essential Gear
Everything you need to capture creative blurred images
 Camera
Ideally a DSLR with low noise and high-ISO capability for after-dark shots, and low ISO settings for long exposures on brighter days. If it has a live view histogram, you can speed up exposure assessment with the camera’s long exposure noise reduction turned on (as it should be), for every second the shutter is open, the camera will take an equivalent amount of time to process the image. This is a nuisance at very long exposures but the live view histogram saves you having to wait to see if the exposure is right.
 Flash
Flash
Popping a flash off at the end of a long exposure introduces an element of sharpness in an otherwise blurry image and adds extra dynamism to moving subjects. A TTL flash allows you to follow the action more easily, but a strobe with manual control works well too, once you’ve determined a good balance between daylight and flash.
Niall uses: Nikon Speedlite SB800.
 ND Filter
This reduces the amount of light reaching the sensor and allows you to make long exposures, even in very bright conditions.
Niall uses: A 0.9 (3 stop) Lee ND filter. alternatives: Choose round screw-in ND filters by Hoya, B+W, Tiffin or Kood (above), or square slot-in types for filter holders by brands like Lee and Cokin.
 Remote release with timer function
This is very useful when you want to make exposures that are longer than the camera’s timed speeds.
 Tripod
You thought you’d get away without one? Well you can for a lot of this work, especially if it involves introducing a deliberate shake to the picture. But for others that contrast still and moving objects, you’ll need a tripod to keep things sharp during long exposures. Don’t extend the central column if your tripod has one – you’ll greatly compromise stability, and extend the legs only as high as absolutely necessary. The fewer sections they comprise, the better. You can add to the stability of a tripod by hanging your camera bag from it with a bungee cord.
Niall uses: Gitzo 1340 alloy tripod with a Really Right Stuff ball head.
 Lenses
I use my 80-200mm a good deal for this sort of work, but try to avoid zooming the lens during a long exposure as the result looks very mechanical.
Niall uses: Nikon 80-200mm f/2.8 D ED.
Alternatives: Every manufacturer has its own equivalent fast telephoto, or you could look at one of these independent alternatives:
- Sigma 70-200mm f/2.8 EX DG MACRO HSM II,
- Tamron 70-200mm f/2.8 Di LD IF Macro.