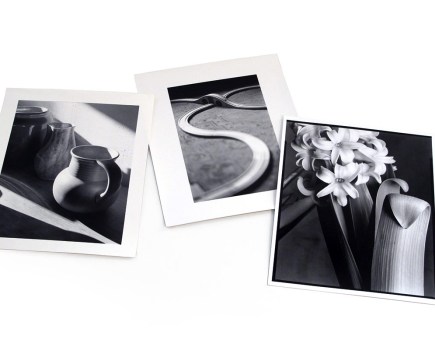
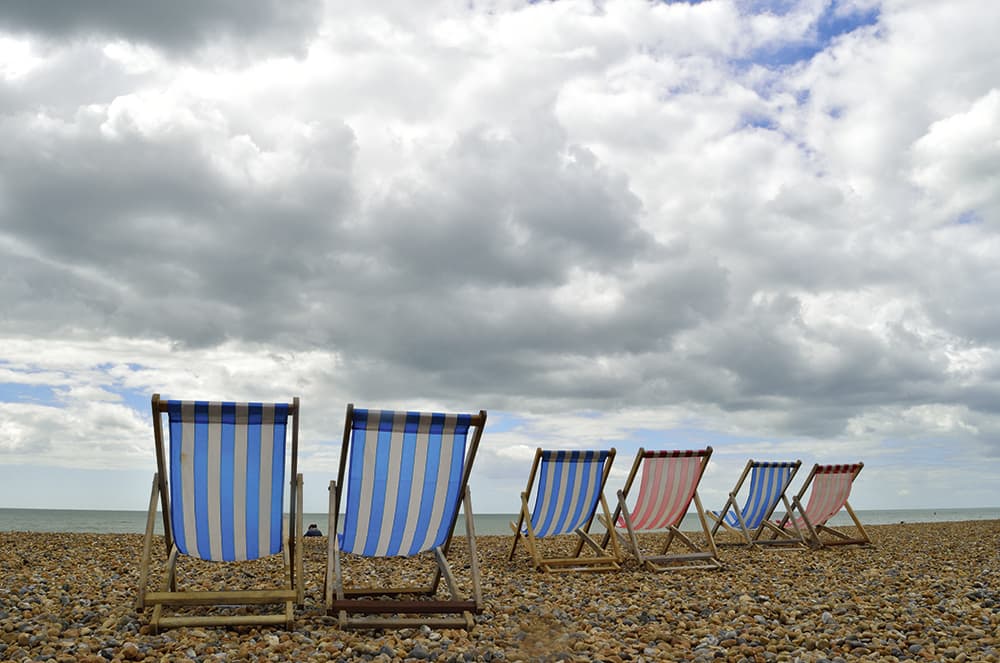
Photographs that feature large expanses of sky are particularly prone to showing up any errant dust particles. All images by Mark Higgins
Dust on the sensor. Those are the words that photographers never want to hear. Keeping your sensor clean is always a concern, but lenses need to be changed and mistakes do happen. Sometimes, little particles can creep into the places where you don’t want them.
You’ll find yourself noticing sensor dust most if you’re a landscape photographer. Images with lots of negative space – big blue skies or sweeping seas – will show dust spots most readily, as will images with a large depth of field. This isn’t to say that other kinds of photographers are off the hook, though – street photographers who use negative space don’t want dust interfering with their images, and if a portrait photographer gets a spot of dust on the wrong place – an eye, for example – it could ruin a great shot.
Nikon has included a function on its DSLRs to combat the encroach of dust on sensors, which is called Dust Off Ref. In this article, I’ll be explaining how Dust Off Ref works and how to use it, as well as giving you some general tips on best practice for keeping your sensor clean so that hopefully you don’t need it too often.
What is Dust Off Ref?
Put simply, Dust Off Ref takes a reference image on your camera designed to record the location of any sensor dust, which can then be used in software to clean up batches of images that have been affected by it.
It’s something that, if you can get into the habit, is worth incorporating into your workflow. It’s easy to do, as we’ll see in just a moment, and means that you’ll always be able to compensate for any dust that gets onto your sensor. Another reason for this is that Dust Off Ref images tend to only be really useful with images taken immediately before or after them, as dust can move around inside the camera. A Dust Off Ref image taken six months ago won’t be much good for dealing with dust on images you take tomorrow! The Dust Off Ref files – ‘NDF’ files – don’t take up any more room on your card than a regular Raw or JPEG file, so there’s no downside to taking them regularly.
Shooting a Dust-off Ref Image
This is the only bit of the process that I think is a little finicky – once you’ve done it, applying Dust Off Ref is pretty straightforward.
Go to the ‘Setup’ menu in the camera, then select ‘Image Dust Off Ref photo’. From there you simply select ‘Start’ – the camera will instruct you to take a photo of a bright, featureless white object from a distance of about 10 centimetres, with focus on your lens set to infinity. A sheet of white A4 paper will work, as will a grey card.
Once you’re set up, simply take the photo. The camera will reject it if it’s not right for any reason, much like if you take a white balance reference photo, but it should be fairly straightforward to get the exposure right.
One thing to note – in a lot of newer cameras you’ll see two options before you take the image – one to start, and one to clean the sensor and then start. This vibrates the low-pass filter to clean the sensor, in the way many cameras will when you turn them off. I would actually recommend not doing this – I’m not entirely sure why it’s an option, as it will remove the dust that you’re trying to record for reference!
When you’ve done it correctly, you’ll see a checkerboard image on the back of your camera. This represents the NDF file, which is Nikon’s nomenclature for a Dust Off Ref file. If you’ve taken it at the same time as the files you want to apply it to then that’s more to the good, as the next step is applying the correction in software.
Using Capture NX-D

You may not have used Nikon’s Capture NX-D software before, but as it’s completely free to download, it’s easy to incorporate it into your workflow, even if you’re a dedicated Photoshop or Lightroom user.
The software will do all the hard work in applying your NDF Dust Off Ref to your images – you just need to make sure that they’re in the same folder. Simply select the option to apply the Dust Off Ref in the toolbar to the right, as shown in the screencap. This will batch-apply the corrections from the NDF file to all the images in the folder.
Once you’ve done that, you’re done! Dust Off Ref is something that you should hopefully not have to rely on (see box on page 24 for some sensor maintenance tips), but it’s a great get-out-of-jail-free card for times when accidents happen.
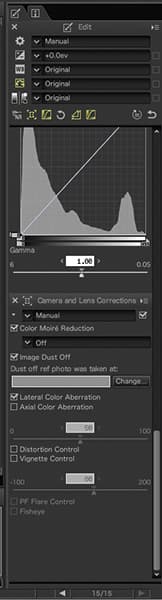
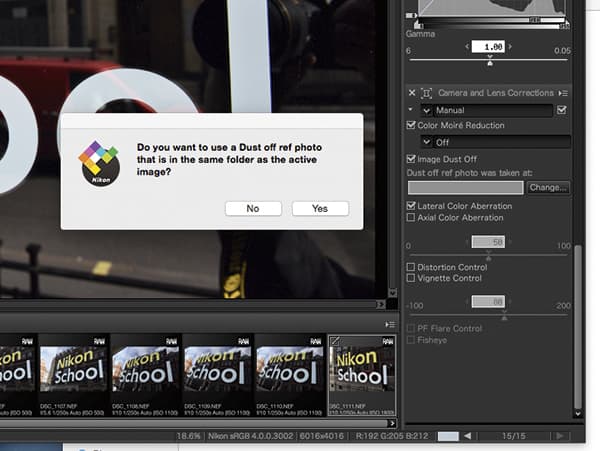
It’s easy to use Nikon’s free Capture NX-D software to apply NDF Dust Off Ref to your photographs.
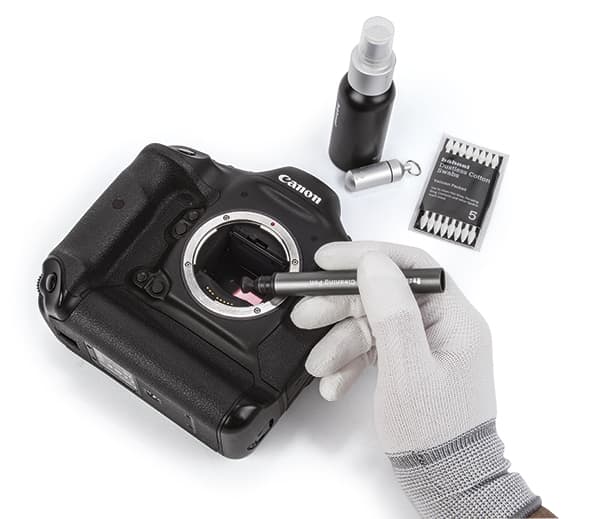
Keeping the sensor clean
 Keeping your sensor clean is very important, but it comes with one caveat: it’s probably not worth trying to clean it yourself. If you scratch it you could face a hefty bill – a D4 owner might expect to pay around £1,200, as the repair people would have to replace the whole sensor unit and put the camera back together from scratch.
It is perfectly possible to clean your own sensor, but unless you truly know what you’re doing, it is absolutely not recommended. Instead send it off to be professionally serviced – Nikon will do it for about £25, and Calumet will do it for a little more than that.
I speak from experience – a long time ago, the sensor of my first DSLR, a Nikon D70, ended up acquiring some dust. I attempted to clean it myself, and ended up making the situation much, much worse. I had to send the camera in for repair, and if I’d just gone for a professional clean in the first place it would have been a lot cheaper.
With that said, there are a few things you can do to prevent dust getting on your sensor in the first place.
Here are my top tips
1 Turn your camera off while changing the lens.
2 Regularly vacuum your camera bag to reduce dust.
3 Double-sided tape on the inside of the lens and body caps will catch any dust. Replace the tape from time to time if you think it is too dusty.
4 Point your camera down towards the floor while changing lenses.
5 Keep a rocket blower in your bag to blow away any unwanted dust particles.
How to set up your Nikon DSLR to use Image Dust Off ref
Select in the setup menu
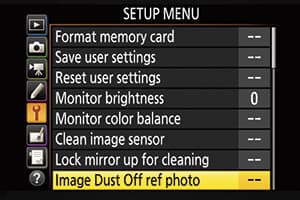
Navigate to the setup menu in your Nikon camera and you’ll find the option to set the camera up to take a Dust Off Ref photo. It’s a good habit to get into at the start of every shoot, even if you don’t end up using it.
Start
You’ll see two options: to start straight away or to clean the sensor by vibrating the low-pass filter and then start. If you’re taking the image in advance then clean the sensor, but otherwise skip this option.
Shooting instructions
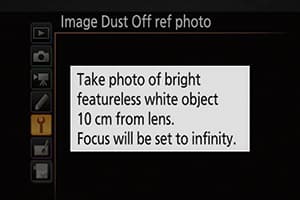
You’ll now see instructions for how to take the reference photo. A white piece of paper would do nicely, or a plain white wall. You’ll know if the photo isn’t right because the camera will tell you.
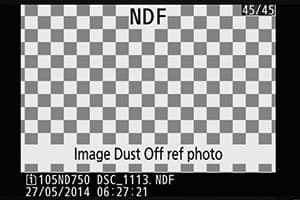
Indication of a successful reference image
Once you’ve successfully taken a reference image you’ll see this checkerboard pattern on your LCD screen. This is the visual representation of the NDF file which the NX software will use for reference.
How the NDF file will appear
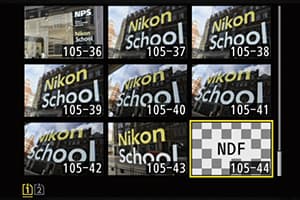
The file will look like this in among your regular image files. As long as you keep it in the same collection or folder as the images you want to apply it to, then the software will be able to do the work for you. Easy!
Words and pictures Mark Higgins