
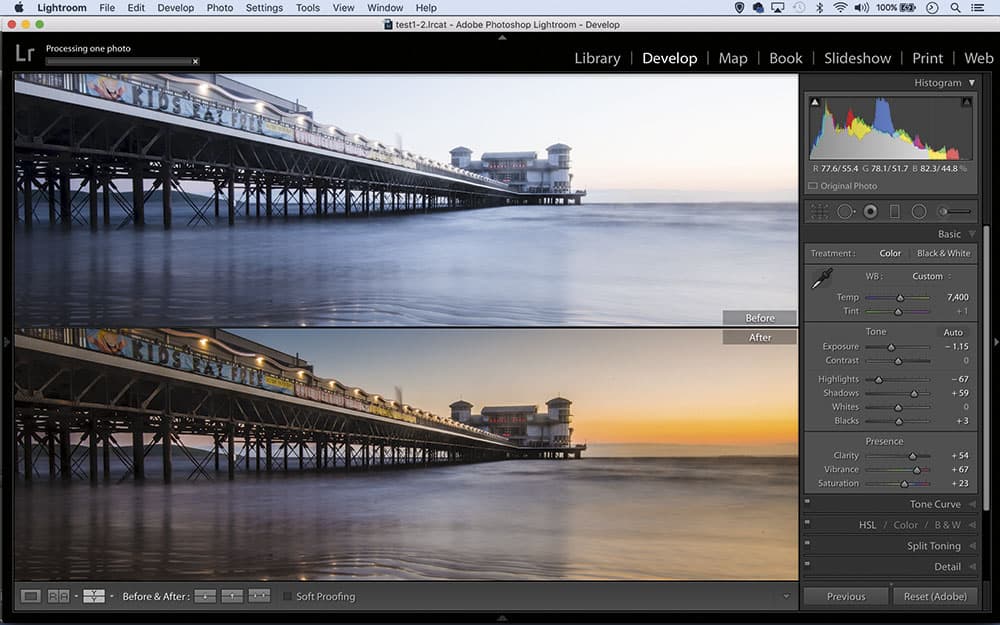
When we make changes to an image in a raw processor such as Lightroom we’re not directly affecting the image file but instead altering the parameters of the software displaying it
Despite what you might have heard, shooting with your camera set to raw will not dramatically improve your photography, increase your pixel count or give you sharper photos. What’s more, it won’t make you a ‘proper photographer’. What raw does do is give you more options by putting the final look of your images in your own hands.
Most photographers will, at some point, progress to asking, JPEG or raw? The big difference between the two is that a JPEG will be processed in-camera to enhance tones and sharpen details, so editing decisions are taken out of our hands. By contrast, a raw file contains all the unprocessed data the camera has stored about the image and we get to decide what to do with it. Shoot JPEG and all that extra information is thrown away.
The question is, what do we do with all the extra information in a raw file? Here’s where many people come unstuck. For those used to shooting JPEGs, the impenetrability of raw files can initially seem rather confusing. The great benefit of JPEGs is their universal compatibility with almost every screen and device. Raws, on the other hand, can only be viewed and edited in dedicated software.
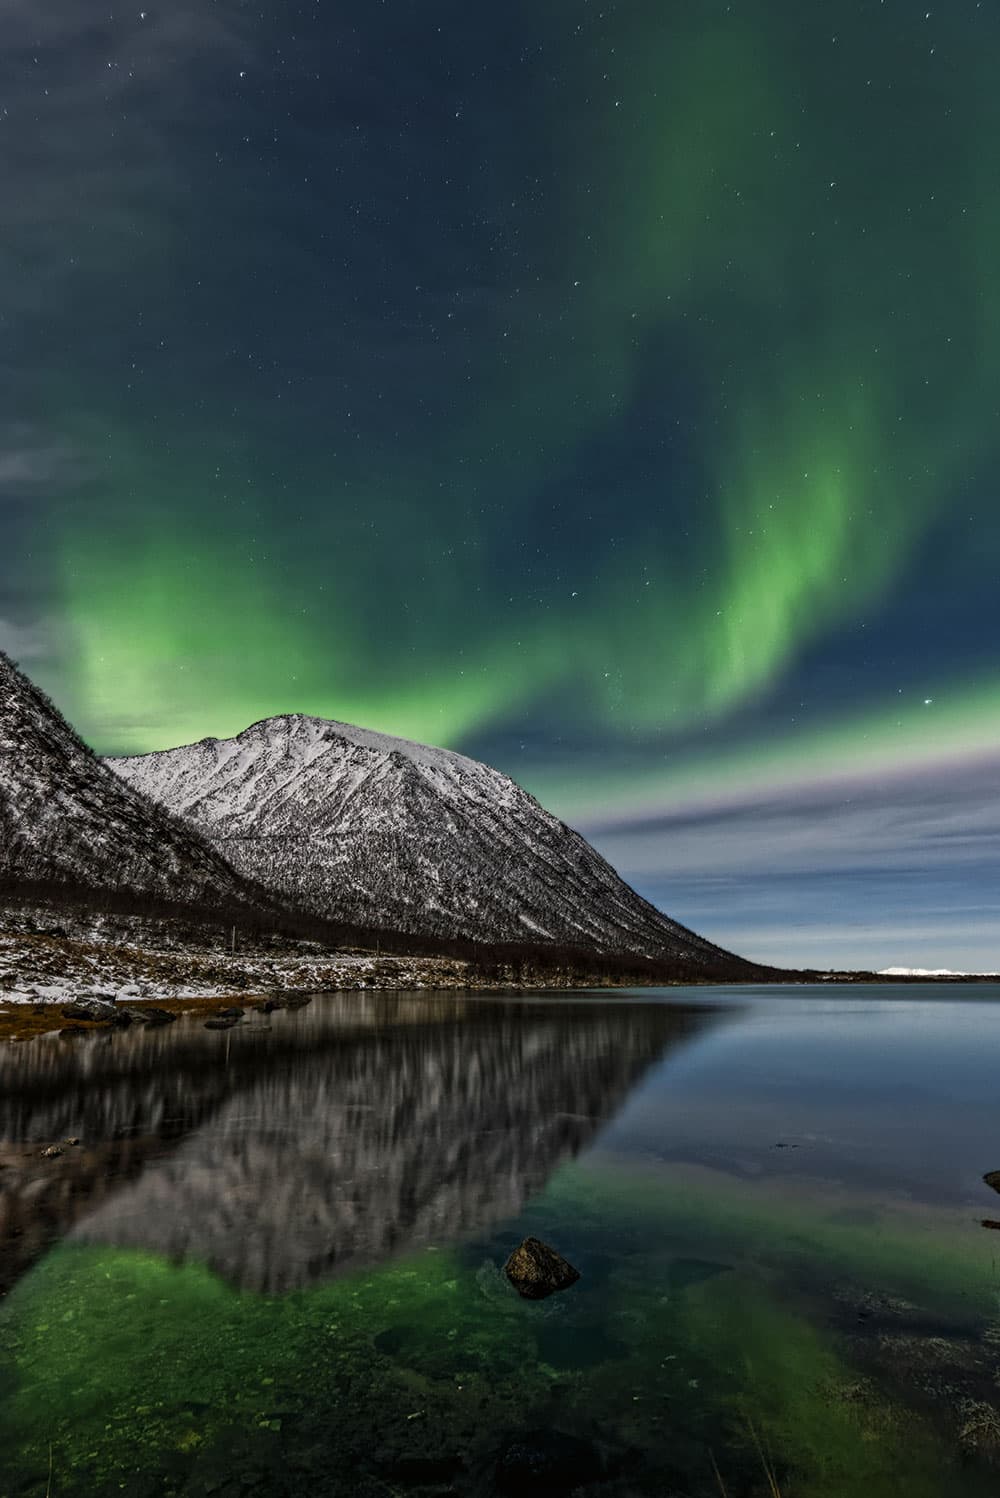
Raw holds an incredible amount of detail. Here, tones have been balanced and lens distortion fixed
So raw requires an extra stage of post-processing and thus more dedication. But mastering the raw workflow doesn’t take long and the payoff is greater control over the look of your photos. In a sense, a JPEG is a single image, while a raw is a hundred images in one – and you get to choose which version you want.
This leads to one of the main gripes about raws – file size. Because a raw contains all that data, it’s usually four or five times the size of a JPEG. So if you shoot raw, storage can definitely become an issue, especially if your camera has a large megapixel count. Your memory cards will hold fewer images and, if you use external hard drives for backup, they will fill up much quicker.
It might seem like a big drawback but there are also great advantages to having a raw archive of your photos. Raws are impenetrable files – we can’t change any of the data contained within them. As such, there’s never any danger of saving over our original image, as this simply isn’t possible. It’s always good practice to back up your photos on an external hard drive, and a backup of raw files is like a pristine, high-security archive.
If we can’t change the information within a raw file, how do we edit it? Dedicated raw processors employ ‘parametric’ editing. This means that, rather than altering pixels, they simply change a set of parameters that determine how the image is viewed within the software. Edits that we make – perhaps in Photoshop’s Camera Raw plug-in or DxO’s OpticsPro – are stored as accompanying data alongside the original file (this is why you’ll sometimes see a tiny ‘sidecar’ xmp file appear alongside the raw). When we’ve finished editing, we must output in a different file format such as a JPEG or TIFF before we can send our images out to the wider world.
The extra dynamic range within a raw file can be very useful for clawing back detail in bright skies
When to shoot raw
Serious photographers shoot raw, right? This is true to an extent but there are times when a JPEG will do just fine. The obvious example is when we need to squeeze a little extra space out of a memory card. JPEGs also have the edge for continuous, high-drive shooting, as we can rattle off more shots before the camera’s buffer fills up. And if we need to turn images around quickly – perhaps after shooting an event – then a JPEG is ready to go straight out of the camera.
In every other situation, raw trumps JPEG. The great advantage raws give us is as a kind of safety net for our photography. We’ve all been in shooting situations where things happen too quickly to work out a perfect exposure, or set the white balance properly. When we shoot raw, we can do so safe in the knowledge that these things can be tweaked later with greater headroom for editing than would be possible with a JPEG.
Ultimate control shooting raw
For many, white balance control is the single biggest reason to shoot raw. JPEGs have the white balance cooked into the file, but with raws we have endless control. So we can change things later and the results will be exactly the same as if we’d set the white balance before taking the shot. It’s the same with colour space. You get to choose whatever space suits your workflow after the fact.
Of course, good practice is to get white balance right in-camera. But imagine trying to set white balance correctly in the fast-paced, high- pressure environment of a wedding shoot, where the locations can move swiftly from daylight scenes to tungsten-lit interiors, perhaps mixing in flash. This is when raw offers greater reassurance.
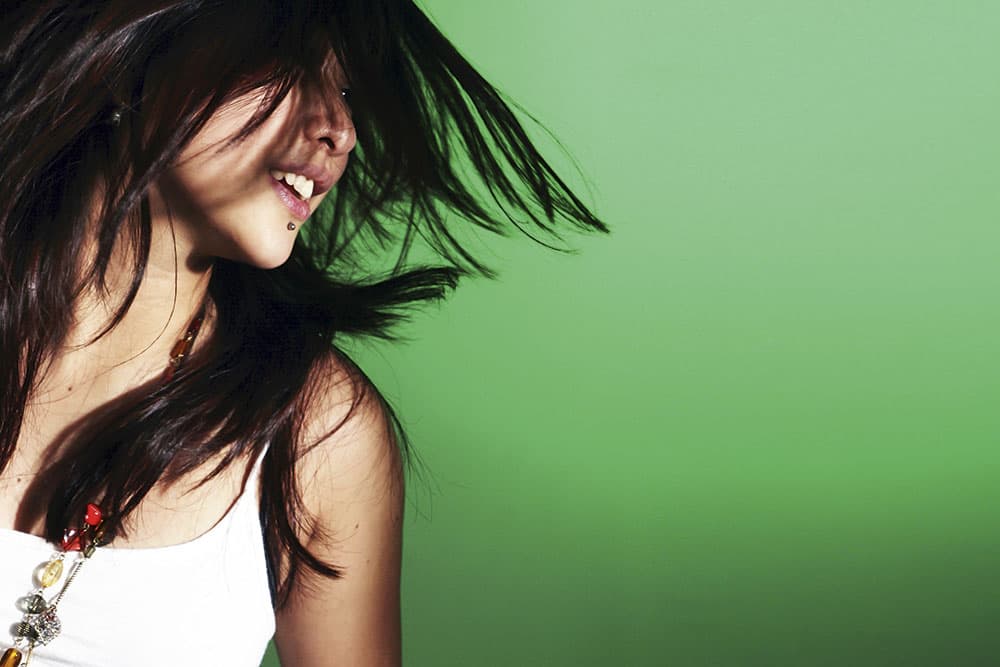
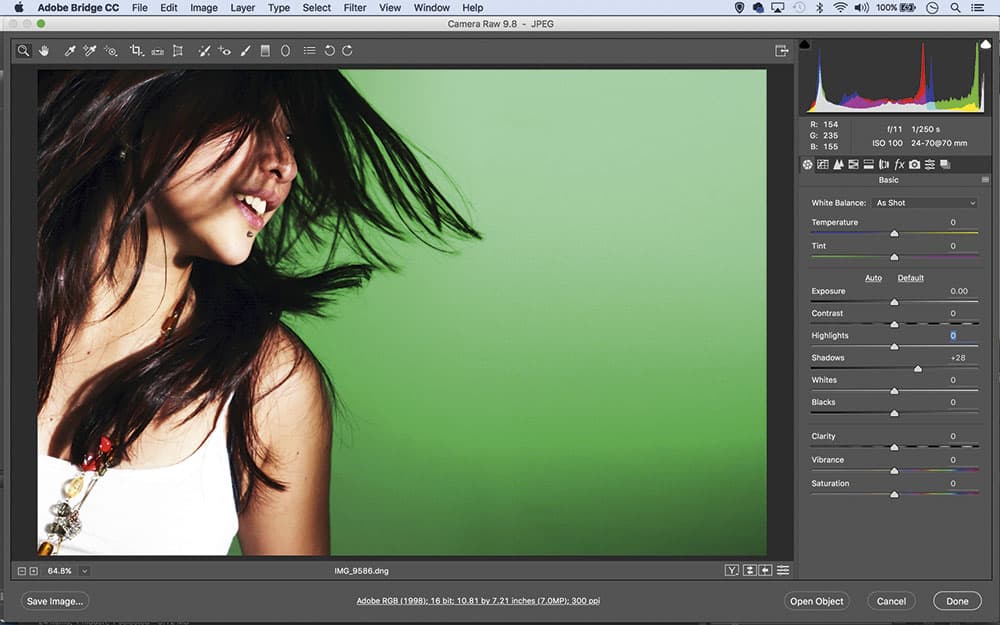
A slight lift to the shadows in Photoshop’s Camera Raw plug-in reveals extra detail in the dark hair
The other big reason to shoot raw – and one that is particularly appealing for landscape photographers – is the greater dynamic range held in a raw file. In practice this means the extremes of the tonal range hold greater information. So we can pull out details in the very darkest or lightest parts of the frame – often with an astonishing amount of detail. This is invaluable for landscape photographers and their endless struggle to balance out land and skies. It’s also helpful any time an exposure isn’t spot-on.
When it comes to sharpening and noise reduction, raw also gives us the edge. Again, shoot JPEG and these factors are cooked in, with rudimentary sharpening applied in-camera. Typically, when creating a JPEG, a camera processor will apply heavy noise reduction and lighter sharpening. But why let our camera’s processor make crucial decisions like this for us? We can make a much more informed judgement on the amount of sharpening and noise reduction required for our subject or scene, and raw software such as Lightroom or DxO is far more refined in its corrections than our camera’s processor.
Just because raw gives us a safety net for exposure and white balance, there’s no excuse for not setting these controls correctly when taking a photo. Whether we shoot JPEG or raw, the fundamentals of aperture, shutter speed and ISO remain the same. However, the fact that we know we’ll need to process the raw photo later may influence how we take the shot.
One camera technique favoured by photographers who shoot with processing in mind is the ‘expose to the right’ technique. This means shooting in a way that records the maximum amount of light – often seemingly overexposing the subject – but crucially, without blowing out highlights (the ‘to the right’ part refers to the weighting of the histogram).
The idea behind this is that, once fixed, images will display greater detail and less noise, as noise occurs mainly in areas of shadow. Even if the preview image looks too bright, as long as there is detail in the highlights they can be reined in later on.
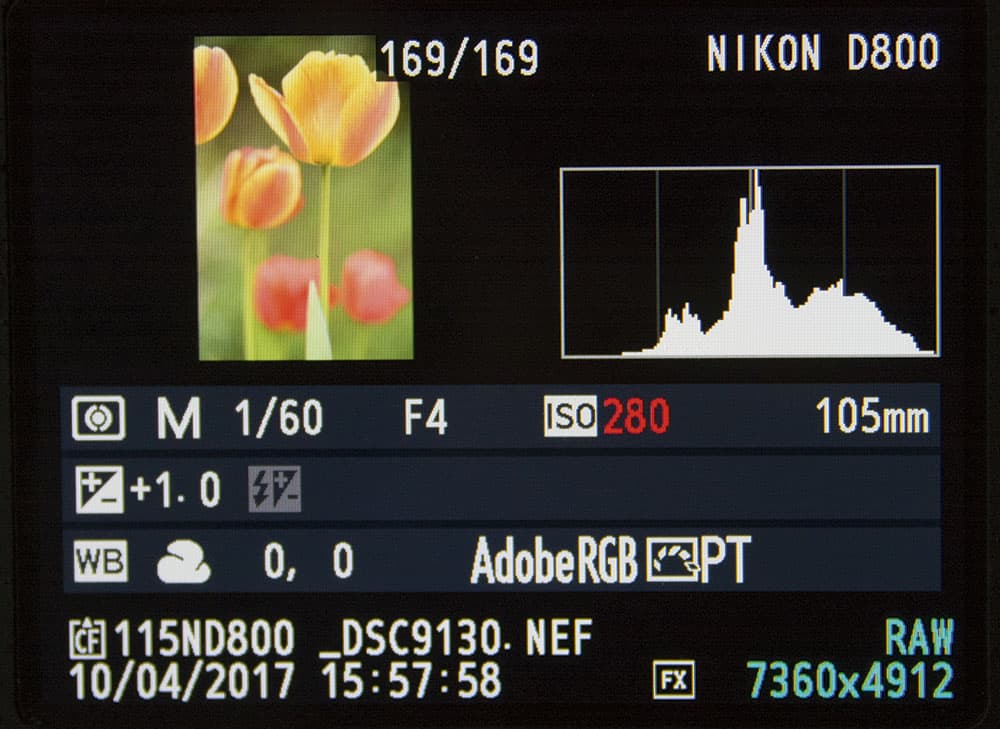
Making sure the histogram is weighted to the right helps to get the maximum out of your camera
It’s also worth noting that the preview on a camera’s LCD screen is not to be completely trusted. It’s a quick JPEG converted in-camera from our original raw, so keep in mind that it may not accurately display the range of tones captured within the raw. While useful, highlight and shadow ‘blinkies’ will not be 100% accurate. We might find later on that there’s more information contained in the file than our LCD initially displays.
For those who’d rather not spend time on the computer, many cameras feature basic raw conversion tools, so you can alter white balance, tweak exposure and apply picture styles before saving the image as a JPEG on your memory card alongside the raw file. This can bring other advantages, too. For example, many Fuji X-series users love the in-camera film simulations that mimic the look of classic films like Velvia and Provia. With raws, these can be added after the fact.
Considering the control the format offers, the decision to shoot raw is an easy one. Less simple is figuring out what to do with these strange, impenetrable files once we get them onto our computers. Here’s where things can get interesting, where minor mistakes can be fixed and images brought to life.
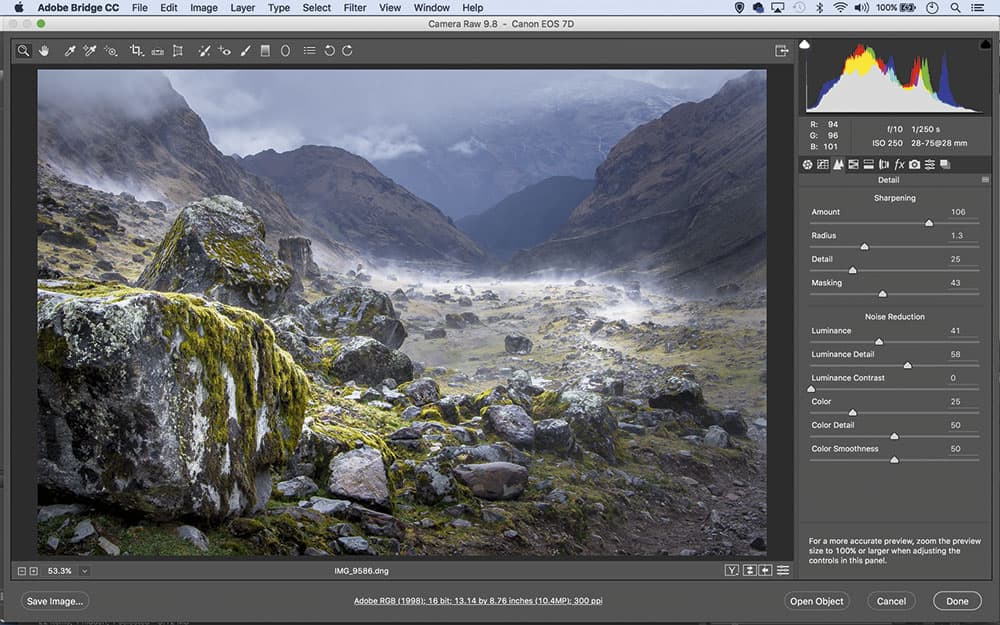
The Detail panel in Camera Raw and Lightroom applies a default sharpening value of 25 to raws but a higher figure may be required, especially if noise reduction is also added
Essentially, processing a raw file boils down to a series of decisions. There are certain edits that we would want to make on almost every image we shoot, and a typical workflow would be as follows. First, we would correct white balance to fix any colour cast issues. Next, we would tweak exposure by lightening or darkening the image and setting the white and black points to ensure we’re using the full tonal range. After this we would perhaps move on to lens correction to address any problems with distortion and colour fringing. From here we could begin to make creative enhancements – perhaps a boost in colour saturation and contrast. Finally, we would apply sharpening and noise reduction, before exporting the file as a JPEG or TIFF, or opening in other software for further editing and effects.
Each of these edits is a matter of judgement. However, the decision-making process begins long before this, with our choice of raw processor. There are pros and cons with each of the main raw processing options.
Which software should I use for raw processing?
For many, Adobe Lightroom or Photoshop are the top choice. Raw processing controls are near-identical in Lightroom’s Develop Module and Photoshop’s Camera Raw plug-in. Lightroom offers a complete workflow solution with tools for organising your library, editing raws, printing and more. It also has some of the best tools for selective adjustments. The downside is that you’ll need to pay for a monthly subscription to get all of the benefits and regular upgrades.
DxO OpticsPro’s intelligent noise reduction detects and reduces noise in high-ISO images
Another option, DxO’s OpticsPro, has a great reputation among amateurs and pros. It surpasses all others at certain tasks. Its database of lens/camera combinations and their associated pitfalls is second to none, as are the lens corrections it applies automatically on every image. OpticsPro is also renowned for intelligent noise reduction controls. If you regularly shoot at high ISOs or at night, the results of using OpticPro’s Prime noise tool – which intelligently distinguishes between noise and fine details – can be astonishingly good.
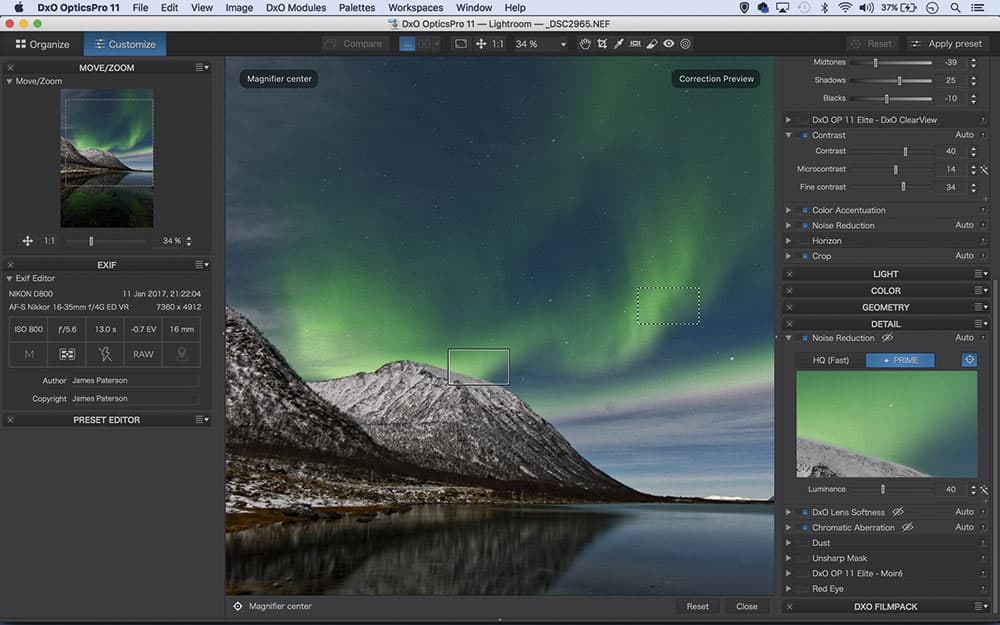
There are a few cons, though. OpticsPro doesn’t offer any selective tonal tools and the workflow features are limited. But it does integrate with Lightroom, allowing you to have DxO’s auto fixes for noise and lens issues, and Lightroom’s workflow tools and selective tonal controls.
Complete workflow solution
Capture One Pro is another strong contender. Beloved by studio pros for its tethering features (which are far more stable than Lightroom’s), it presents a complete workflow solution and offers excellent tools for colour controls and selective masking, as well as a focus mask that tells you what’s sharp or not. Its learning curve is a little steep though.
If you’re just getting started with raw then you might prefer to use the raw processor you already own – your camera’s dedicated software. Options such as Canon’s Digital Photo Professional or Nikon’s Capture NX-D are more basic but have their advantages. Unlike Lightroom, they will remember any in-camera picture styles and apply them to the raw file. Plus there’s a consistency to using own-brand software since it’s optimised for the raws your camera produces.
Whichever raw processor you choose, the benefits of shooting in your camera’s raw format will allow you to edit with greater finesse and give you ultimate control over the look of your images.

Capture One offers excellent colour controls that have enhanced the subtle reds in this sunrise scene
How much can you recover? RAW vs JPEG
Our original unprocessed image here (captured with a Nikon D800 set to raw+JPEG fine) is horribly overexposed, but how much detail can we claw back? After attempting to rescue highlights in both the JPEG and raw in Lightroom, notice that the raw – while not perfect – retains far greater detail. This demonstrates what is possible with the wider dynamic range on offer with raws. Notice, too, that the clipping warnings displayed on the LCD screen point to a lack of detail across most of the sky. But as the processed raw shows, this isn’t accurate. Clipping ‘blinkies’ are not always to be trusted.
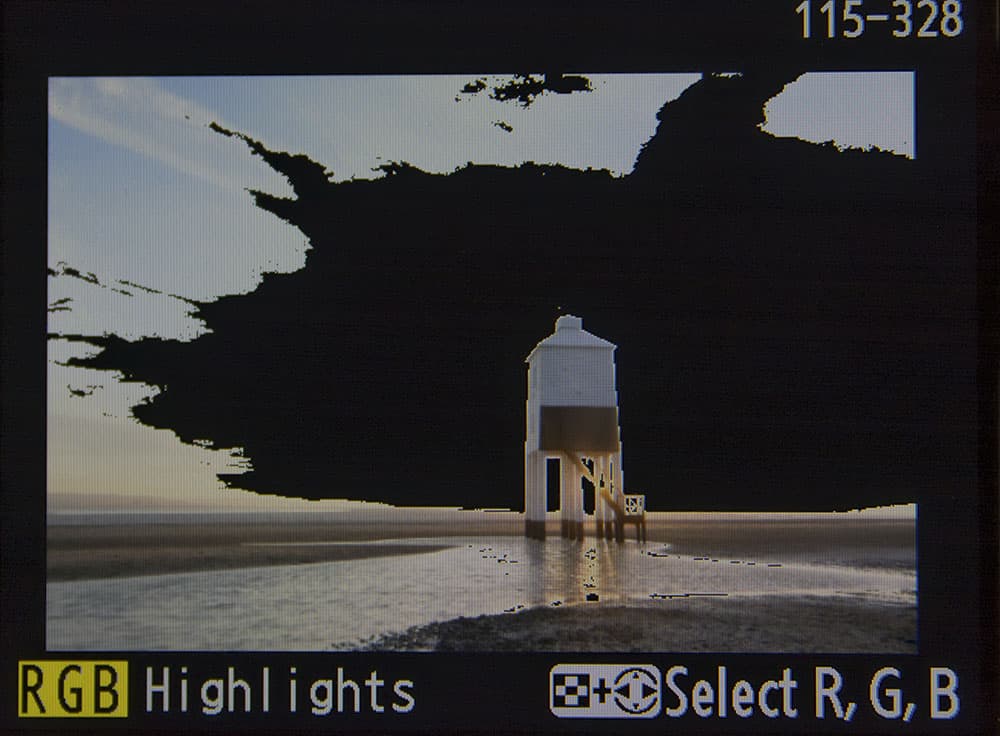
LCD display
Unprocessed
Processed JPEG
Processed raw
‘Lossy’ JPEGS
Raws and TIFFs are both lossless formats, so you can open and close them as often as you like with no loss in quality. By contrast, JPEGs are lossy. They’re compressed when you close, and uncompressed when you open. Each time this happens, a little data is lost. As an extreme example, the image here was opened, saved and closed 50 times, and the loss in quality is startling. In practice, the effects are minimal as we would only do this a few times. But it’s worth bearing in mind that every time a JPEG is opened and closed, it dies a little.
Still not sure which is best for you? Have a look at our Raw Vs JPEG article.
James Paterson
James is as skilled a photo editor as he is a photographer. His work has appeared in countless magazines and books, and in 2014 he was appointed editor of Practical Photoshop magazine. His subjects range from portraits to landscapes, architecture and underwater scenes. For James, Photoshop is more than just a work tool. Visit www.patersonphotos.com