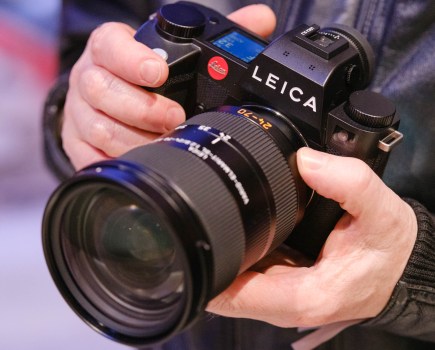
More than ever before, photographers are relying on their camera’s AF system to ensure that every shot is perfectly in-focus and pin sharp, even in the trickiest of situations – long gone are the film days where having to manually focus each shot by eye was the norm. With consumer expectations running at an all-time high, it’s not difficult to understand why over the past few years huge investments have been made by leading camera manufacturers to improve the AF performance within their digital cameras.
One example that stands out in particular is the AF system found within Canon’s 5D Mark III and flagship 1D X. With a truckload of highly advanced features and customisable options, this system is arguably the most sophisticated AF system found within the company’s current EOS line-up. To start, it features a whopping 61 AF points (41 of which are the more accurate cross-type points, with five dual cross-type) that cover over 50% of the frame, meaning that you’re unlikely to not be able to find an AF point right where you need it.
Although the 5D Mark III and 1D X may be out of the price range for some amateur photographers, the good news is that we’re slowly starting to see some of this advanced technology trickle down into the lower tiers of Canon’s DSLR range – one example being the 7D Mark II, which incorporates many of the 5D’s sophisticated AF features.
One of the biggest challenges for your camera’s AF is trying to focus on a moving target. Luckily, the AF system within the 5D Mark III includes a set of six AF Case sensitivity settings, which have been purposefully designed to enable the AF to perform at its best in a host of different circumstances. Over the next few pages, we’re going to delve deep into the advanced AF settings of the 5D Mark III to allow you to get the absolute most out of your camera’s focusing system for sharper shots every time.
Erratic subjects
Sports and wildlife photography are arguably some of the most challenging types of photography to try your hand at, but the results are often incredibly rewarding. With fast-moving subjects, not only are you required to think and act fast in order to capture the shot, your camera has to work fast, too. If your camera can’t lock on the target quickly and efficiently, it can often result in missed photo opportunities. This can be especially challenging when shooting subjects that are moving erratically and at speed, as the camera may struggle to predict and react to irregular movements as quickly as the human brain can.
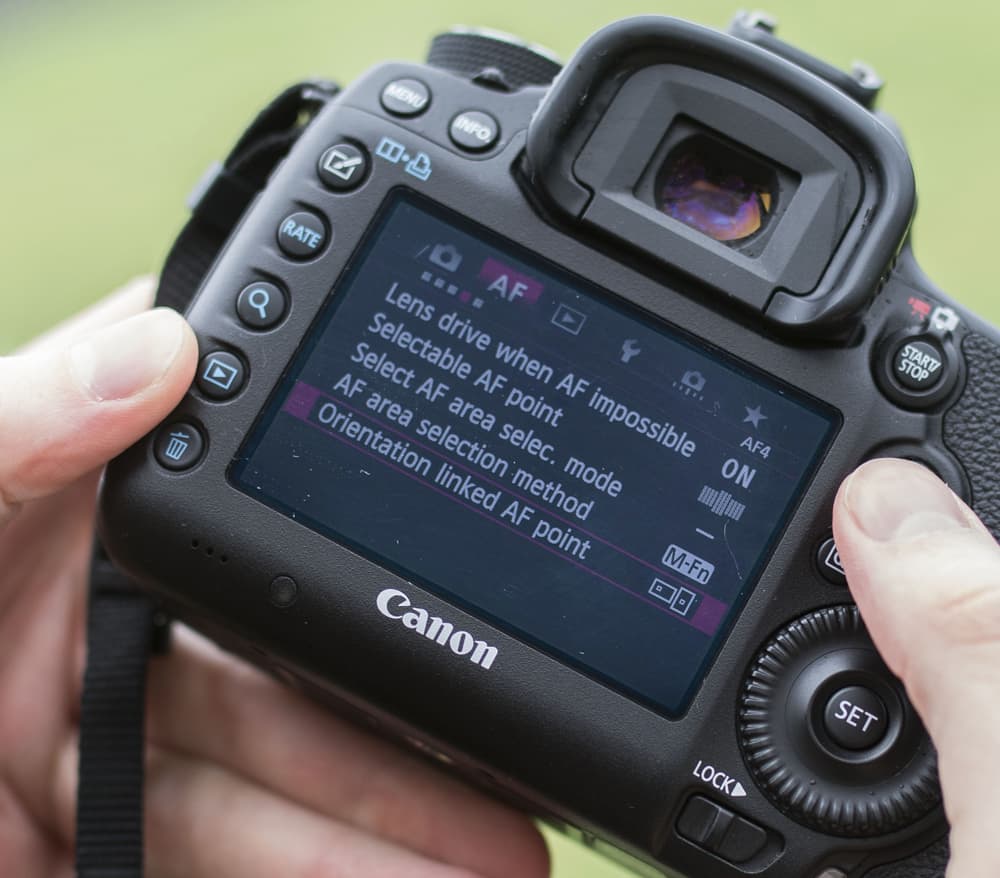
Luckily, the AF system within the 5D Mark III has been well prepared for a variety of focusing situations with its list of Case settings. If you’re unfamiliar with these options, simply press the Menu button and head over to the first set of options under the AF tab – this will reveal the six available Case sensitivity settings. Each of these options have been pre-programmed to alter the way in which your AF will track a target within the frame when the AF mode is set to AI Servo. Each option is suited towards a particular type of subject movement, so it’s important to ensure that you select the suitable Case setting before each shoot – this will dramatically increase your chances of capturing pin-sharp shots.
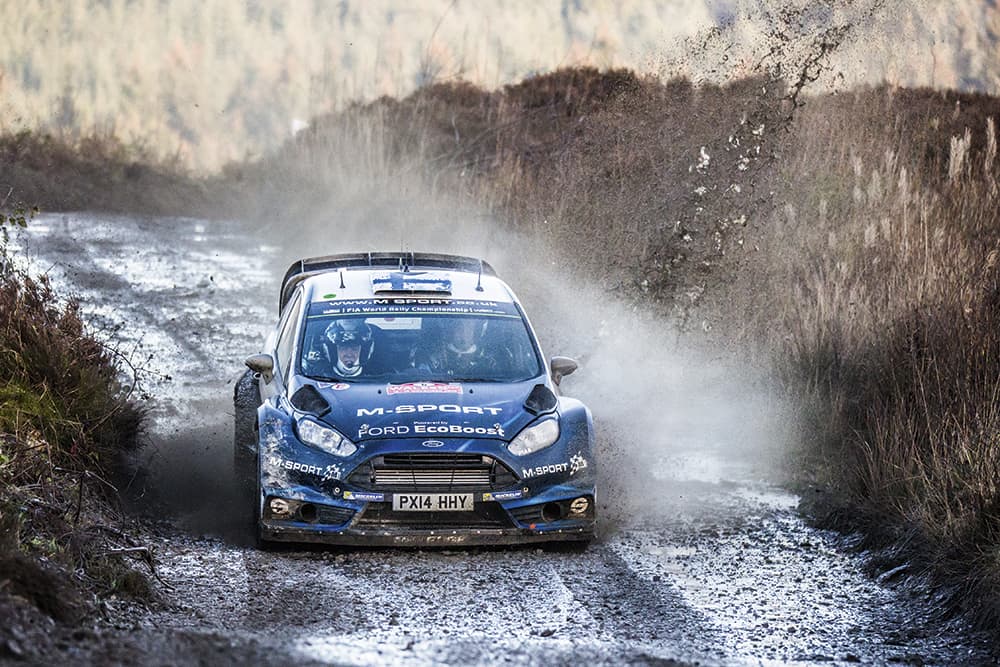
Fast-moving subjects require you to think carefully about what focus settings are best. For this action shot, Zone AF was used with the autofocus configuration set to the Case 3 option
AF Case Settings
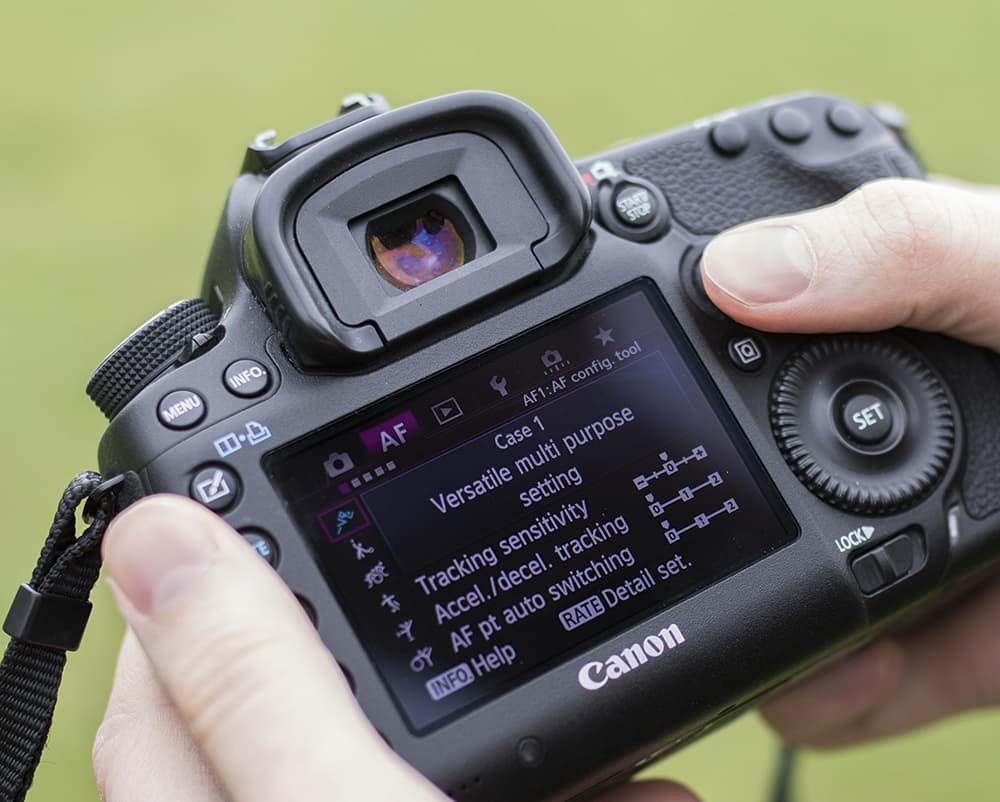
Starting at the top of the list of the six pre-programmed Case sensitivity settings, we have the ‘Versatile multi-purpose setting’. This option is widely regarded as the standard setting and is best for tracking subjects with consistent and predictable movements – i.e. a car driving in a straight line. By default, your camera will be set to this option.
Moving down the list, we next have ‘Continue to track subjects, ignoring possible obstacles’. As its title suggests, this option sets the camera so that it will continue to track the subject even if it briefly moves off the active AF point, or another object briefly passes in between the camera and the subject. This option can pay dividends when shooting in a crowded area where other bystanders are likely to briefly get in the way of your shot while tracking a subject.
Third on the list is ‘Instantly focus on subjects suddenly entering AF points’. With this setting active, when a new subject enters the active AF point area, the camera’s AF system will immediately lock on focus to that subject. This setting is most useful when you know a subject is about to come into the frame (i.e. waiting for a car to come around a bend in the road) and you want the focus to lock on as soon as it becomes visible.
Case number four is ‘For subjects that accelerate or decelerate quickly’. This option adjusts the camera’s AF system so that it can react much more quickly to subjects that slow down, stop and even change direction frequently – such as a rugby player weaving around other players on the pitch. This is the opposite of Case one.
Next on the list is the option designed ‘For erratic subjects moving quickly in any direction’. If you’re using more than one AF point, activating Case five will allow the camera to switch from point to point much faster, which is ideal when tracking erratic side-to-side movement, such as a wild animal running. This is particularly effective when combined with the Auto Selection AF point mode, as this mode grants the camera access to all 61 AF points across the frame, making it easier for the camera to track the subject.
Finally, there’s Case six, which is designed ‘For subjects that change speed and move erratically’. Just like Case five, this mode also increases the speed in which the camera can alternate between AF points, but in addition it also allows the AF to react more quickly to a subject’s change in speed, just like that of Case four. This is best reserved for fast-moving subjects that frequently change speed and direction, such as a bird of prey swooping through the sky.
Once you’ve become accustomed to each of the Case settings and how they affect the AF system of your camera, it’s also possible to further fine-tune these pre-sets to suit your own requirements. Simply hover over the Case setting that you wish to adjust and press the RATE button, located to the left of the rear screen. This will take you into the Case setting and will allow you to alter each of the three sliders that affect the Case setting’s behavior – Tracking Sensitivity, Acceleration/Deceleration Tracking, and AF Point Auto Switching.
Customisation
Starting at the top of the list, the Tracking Sensitivity slider affects the way the AF responds when the subject moves away from the active AF point. Moving the slider to the right towards ‘Responsive’ will cause the camera to react and re-focus faster when there are changes in what your AF can ‘see’. Moving the slider left to ‘Locked on’ will tell the camera to resist making changes and continue to track the original subject.
Acceleration/Deceleration Tracking allows you to adjust how the AF responds to moving subjects. There are three notches on the slider; 0 adjusts the tracking for continuously moving subjects, whilst +1 and +2 incrementally increase the AF’s sensitivity to subjects that change speeds or stop moving entirely.
Finally, there’s AF Point Auto Switching. Whenever you are working with more than one active AF point, this setting will determine how quickly the autofocus will shift between points in order to keep tracking the subject. When set to 0, the AF will provide gradual AF point switching, while the +1 and +2 settings will cause the AF point to move more rapidly as the camera detects subtle subject movements.
By adjusting each of these sliders to your own personal preference, the Canon 5D Mark III enables you to have incredible control over the AF system, allowing you to capture sharp shots every time.
Camera orientation
AF menu
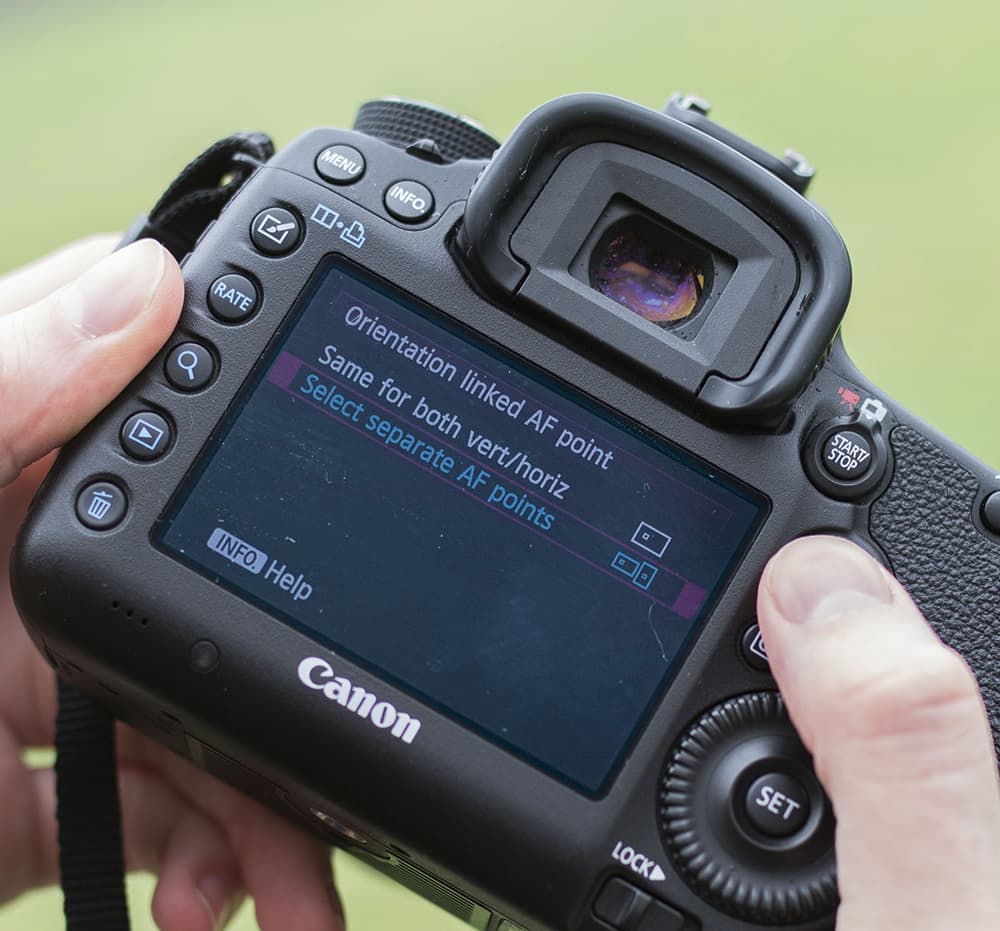
Did you know that you can set different active AF points when shooting in portrait and landscape? Simply press the Menu button and navigate to the fourth set of options in the AF menu. Highlight over the ‘Orientation Linked AF Point’ option and press the Set button, then choose ‘Select Separate AF Points’ and press the Menu button to back out. Now, while holding the camera in landscape, press the AF Point Selection button and set the active AF point to your desired location – half depress the shutter button to back out. Tilt the camera to portrait and press the AF Point Selection button again, then set the active AF point to a different location within the frame. While looking through the viewfinder, you’ll now notice that as you rotate the camera between portrait and landscape that the active AF point will automatically adjust according to positions you determined. This can be extremely useful if you frequently switch between orientations.
Linking the AF point
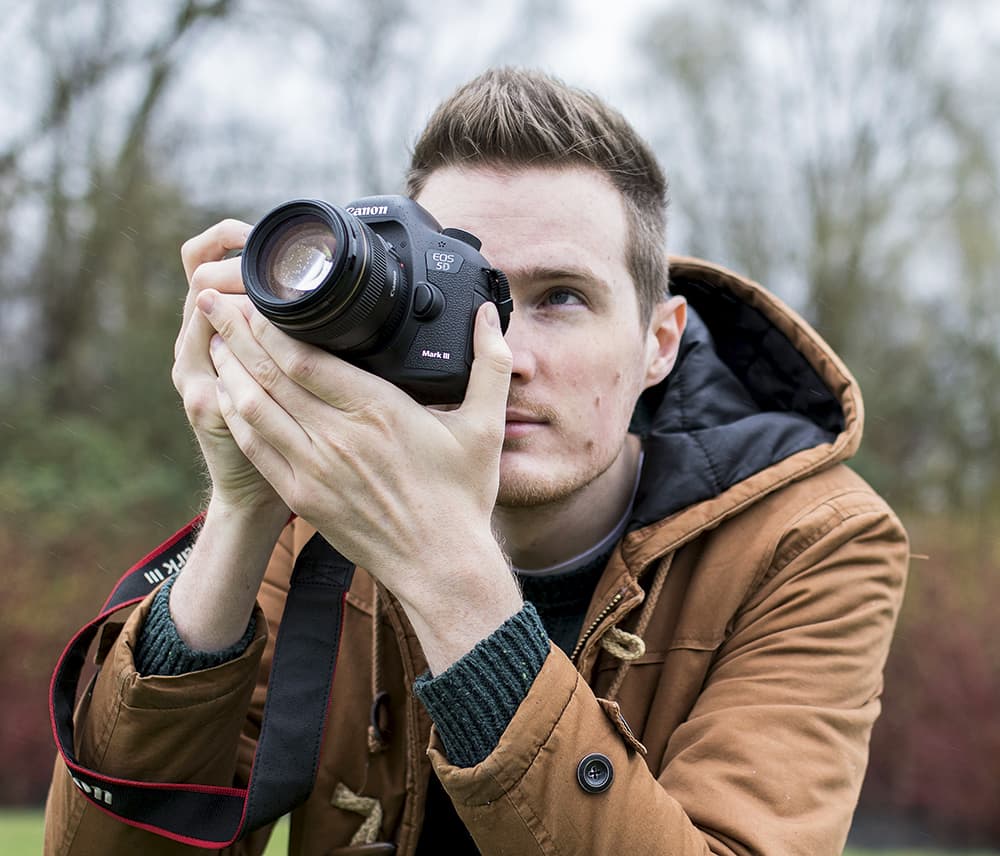
Setting up the AF on your Canon 5D Mk III
If you own a Canon EOS 5D Mark III you have a vast number of autofocus settings at your disposal. If you’ve never explored these before, it’s about time you do, so you’ll know how to set the camera up quickly for every eventuality.
Step 1
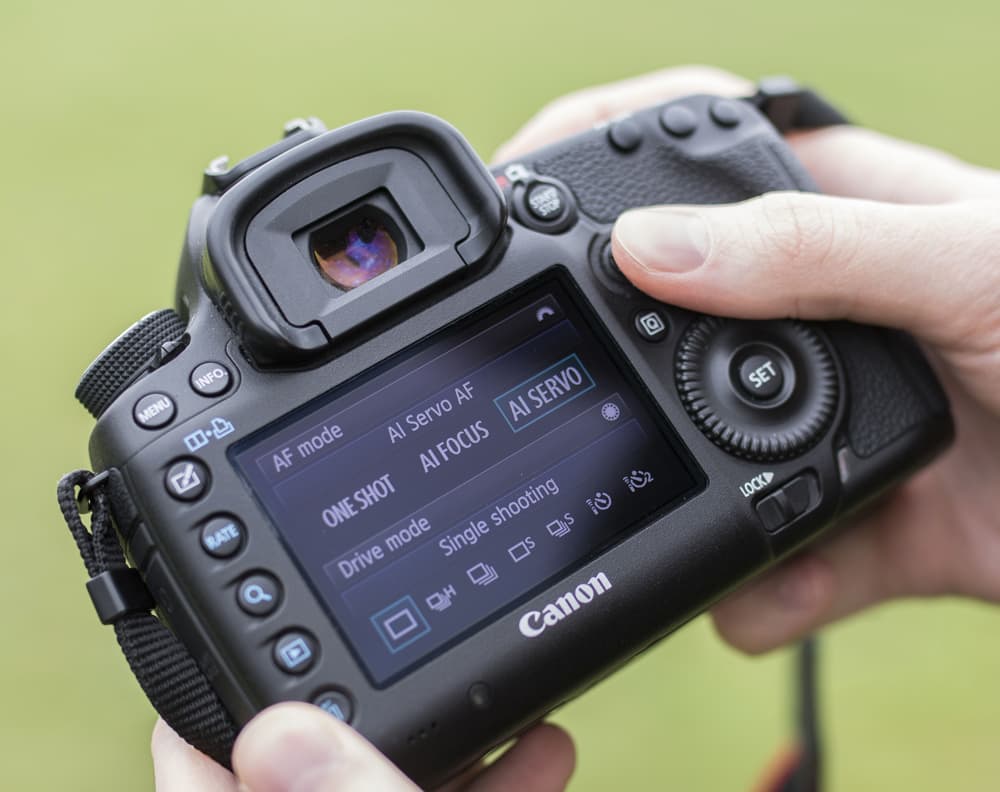
Adjust the AF mode Start by pressing the AF Drive button, then use the primary command wheel and scroll to the AF Servo option. With the AF Servo mode selected, the camera’s AF will continually adjust the focus so long as the shutter button is half depressed, which is better suited to moving subjects.
Step 2
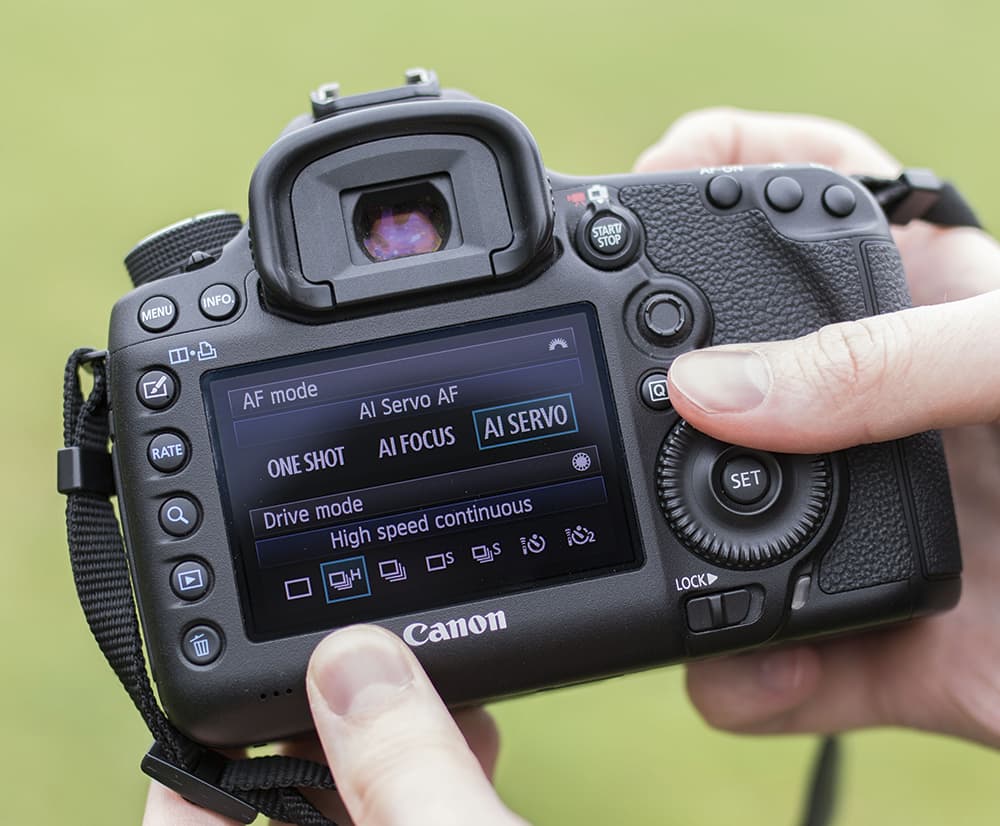
Set the Drive mode While still in the AF Drive options, use the camera’s secondary command wheel to set the Drive mode to High Speed Continuous. This’ll allow you to shoot in rapid succession, which is always best for rapidly moving subjects, as it’ll dramatically increase your chances of capturing a suitable shot.
Step 3
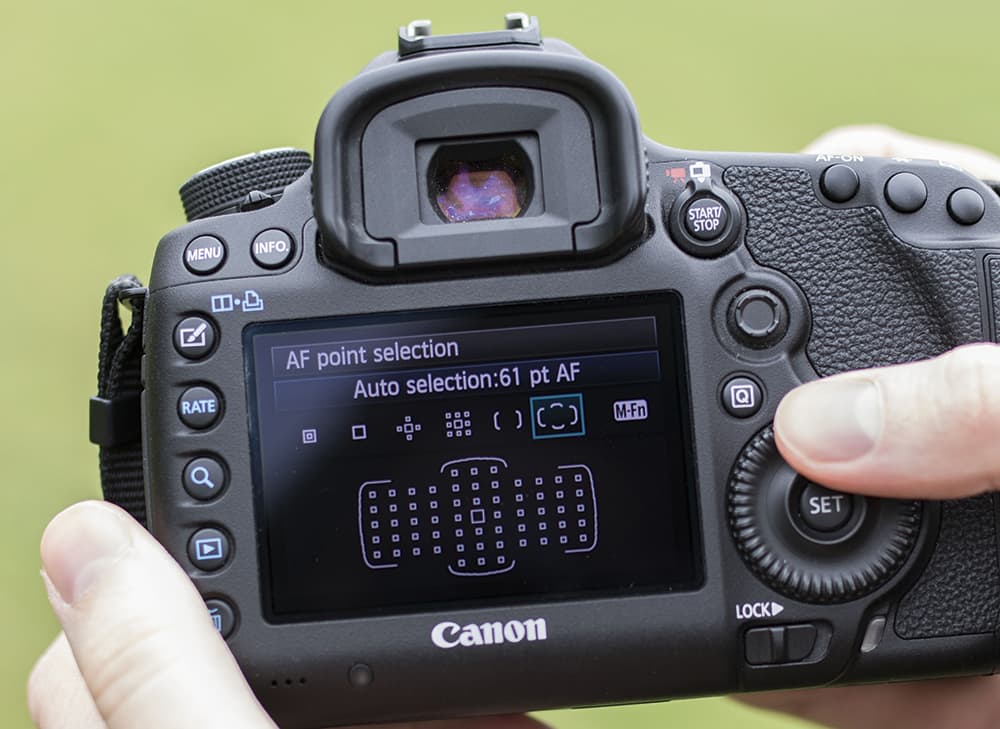
Select Zone AF Press the AF Point Selection button and then repeatedly press the M-Fn button (just above the shutter button) to cycle through the choices – select the Auto Selection: 61 points mode. This mode will allow the AF to freely use all of the AF points to retain focus on the subject.
Step 4
Adjust the Case sensitivity Press the Menu button and navigate to the first set of options in the AF menu to see the Case sensitivity settings. Look through the list and carefully decide which Case setting will be best suited to your subject’s movements. Selecting the right mode will increase the performance of your AF.
Step 5
Shoot and review Raise the camera to your eye and wait for the subject to pass in to the frame and over your AF points. Immediately half-depress the shutter button until the AF locks on, then fully-depress and hold the shutter to rattle off a stream of shots. Review the shots and repeat.