Prefocusing, as the word suggests, means focusing the lens in advance of taking a picture. But in this instance we’re not talking about the quick semi-depress of the shutter-release button before you press it all the way down, we’re talking about separating the act of focusing from the act of picture-taking, allowing you to be ready for action in an instant. Imagine, for instance, that you’ve been waiting for a golden eagle to return to its nest for hours. As the bird approaches, you fire away hoping at least one of the shots will be sharp. But when you review the images you are bitterly disappointed: the AF system couldn’t keep up with the bird, and your pictures are out of focus. If you had prefocused, however, the AF system would have carried out its job in advance, leaving you with the sole task of releasing the shutter at the optimum moment.
And it’s not just wildlife and sports photographers who benefit from this technique; it’s also popular with landscape photographers, too. In order to work efficiently, AF systems need contrast, detail, and a reasonable amount of light. When one or more of these features is lacking, the lens whirs back and forward trying to ‘lock on’. This ‘hunting’ can slow you right down, and stop you from taking a picture altogether. AF systems also struggle with highly reflective surfaces (such as water), geometric patterns, overlapping elements, and off-centre subjects. So if you are a landscape photographer shooting water in misty (low contrast) conditions you might be in trouble if you fail to prefocus.
How to prefocus using Focus Lock

In order to work efficiently, AF systems need a reasonable amount of light; when levels are low it can help to prefocus the lens
Now you have seen the advantages of prefocusing, it’s time to look at how it’s done. There are a number of ways to isolate the focusing from the picture taking, but the main ones are: Focus lock, Manual focusing, Back Button AF, and using a computer to control the camera (see box). The method you choose will depend on the subject and, ultimately, your personal preferences, but it’s important not to confuse things by trying all the different options in one session.
Let’s start with a method that most of us will be familiar with: Focus Lock. When we compose a picture we don’t always want the subject to be in the centre of the frame. In fact, sometimes we want the subject so far off-centre that it isn’t covered by any of the AF points. On these occasions we can lock the focus by covering the subject with one of the AF points, pressing and holding the shutter-release button down halfway, and then recomposing. Alternatively we can press and hold the shutter-release button halfway, press the AE-L/AF-L button, and then remove our finger from the shutter-release button, before recomposing. (Note that AE-L/AF-L button will lock focus and exposure unless you change its function via the Custom Settings menu.)
How to prefocus using Manual Focus

Switching to Manual Focus allows you to be extremely precise – perfect for close-up subjects where depth of field is limited
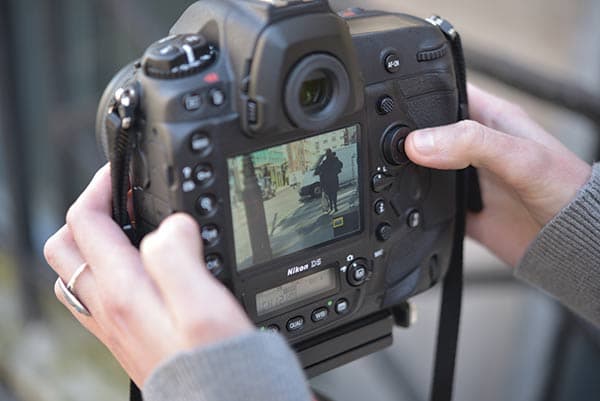
Another popular way of prefocusing is to switch the lens and/or camera to Manual Focus, allowing you to play a more active role in the process. If your lens features an A-M, M/A-M or A/M-M mode switch, slide it to the ‘M’ (Manual) position. If it doesn’t, press the Info button on the camera, and scroll down the options until you reach the Focus Mode menu. Select MF (Manual Focus). At this point you need to decide whether to compose your pictures via the viewfinder or the LCD screen (using live view). Unless you happen to be shooting in extremely bright conditions where viewing the screen could be difficult, live view has the edge here.
For one, composing in live view allows you to enlarge an area of the frame to ensure that your focusing is spot on (this is known as Live View Zoom Preview). To select a specific area you simply move a rectangle around the frame using the Multi selector, and then press the Zoom button to magnify your chosen section (up to 11x on the Nikon D5, but less on older models). Now all that’s left to do is to rotate the focusing ring on the lens until the area appears sharp. (A navigation window appears at the bottom of the screen to help you see where you are in the frame.) Alternatively, if you decide to use the viewfinder to focus you will need to look through the glass, adjust the diopter to suit your eyesight (see box), and then turn the focusing ring until the clear matte field appears sharp.
If you need some help to determine whether or not your subject is in focus via the viewfinder, you can activate the electronic Rangefinder (located in the Custom Settings menu). This tool uses the exposure indicator (the green lines along the bottom of the screen) to suggest whether or not the lens is correctly focused. When the lines are to the left of the ‘0’ the focus point is in front of the subject; and when the lines are to the right of the ‘0’ the focus point is behind the subject. When one line falls either side of the ‘0’ the subject is in focus. You need to adjust the focusing ring on the lens until this last state has been achieved. (To use the Rangefinder feature you need to attach a lens with an aperture of at least f/5.6.)
How to prefocus using Back Button AF

Using Back Button AF enables you to switch between static and moving subjects without having to switch between AF-S and AF-C modes
Once you’ve familiarised yourself with Focus Lock and Manual Focus you might like to try a more advanced prefocusing option. Back Button Autofocus enables you to completely separate the focusing from the picture taking (using a different button for each job). It has two main advantages: it allows you to focus the lens in advance of firing the shutter (saving you time and improving accuracy), and it enables you to switch between static and moving subjects without having to physically switch between AF-S (Auto Focus Single Servo) and AF-C (Auto Focus Continuous Servo) modes. Fewer buttons to push means more time to concentrate on framing and the like.
But before you go looking for a dedicated Back Button AF control on your camera, read on. In short, it doesn’t have one. What you will see is an AE-L/AF-L button (on older Nikon DSLRs) or an AF-ON button (on more recent models). If your camera has an AE-L/AF-L button you need to change its role from locking focus to initiating focus. To do this you must open the Custom Settings menu and select AF-ON. Alternatively, if your camera has a dedicated AF-ON button you need to go into the Custom Settings menu, select Autofocus, and choose AF activation. In the submenu you then select AF-ON only. With this done, the AF-ON button is now entrusted with the sole job of focusing, and the shutter-release button has the sole job of opening the shutter.
Let’s use the example of the golden eagle to demonstrate how Back Button AF can be helpful. As the bird comes into view you can hold down the AF-ON button and follow its path. As soon as it arrives at the nest you can lift your thumb off the AF-ON button to halt the focusing and hold down the shutter-release button to take a series of images. Seconds saved, shots secured. Simple.
Using Camera Control Pro 2
If you’re struggling to focus using the screen on your DSLR, how about using a bigger screen? Nikon’s Camera Control Pro 2 software enables you to link your computer and camera via a USB cable or wireless technology. Once the devices are connected you can activate live view, zooming in and out, or making changes as required.
Using Camera Control Pro you can also adjust the ISO, shutter speed and aperture remotely, which is great for wildlife photographers trying to keep a low profile. The program also allows you to view, select and delete pictures prior to transferring them to a computer, which saves time. Also by not touching the camera you can reduce the risk of internal vibration, which is great for close-up images (where depth of field is very limited) and landscapes (which often need a combination of small apertures and long shutter speeds).
It’s also worth experimenting with Nikon’s SnapBridge app which allows for Bluetooth supported connection between your camera and a compatible smart device such as a mobile phone. Once the connection has been established, it’s permanent, so there’s no need to repeat the process.
Step by step: Using Back Button AF for a moving subject
1. Handhold the camera. Adopt a solid stance with one foot in front of the other (not on the same focal plane). Keep most of the weight in the back foot.

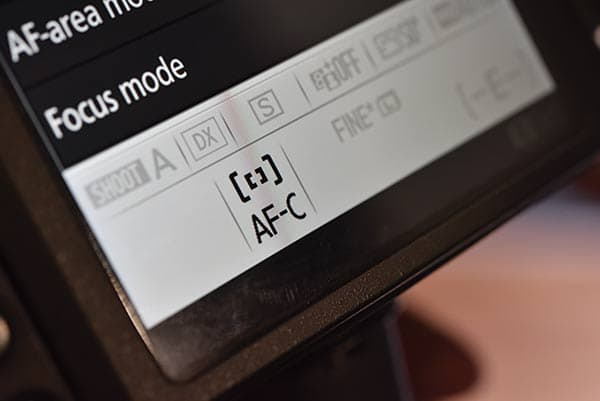
2. Press the Info button and scroll down the options until you reach the Focus mode menu. Select AF-C (Continuous-servo AF). Press OK.
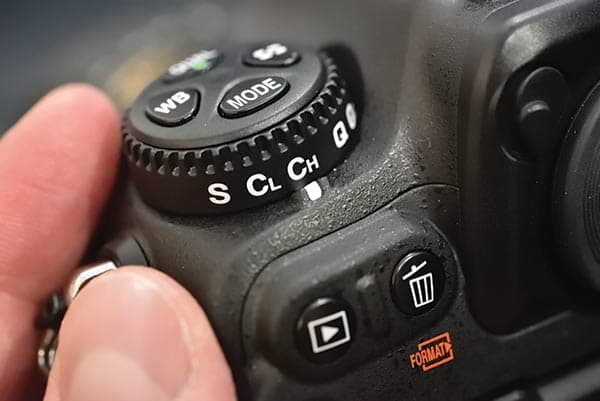
3. Instruct the camera to shoot a burst of images by pressing the Release Mode button, and scrolling through the options until you reach Continuous H. Press OK.
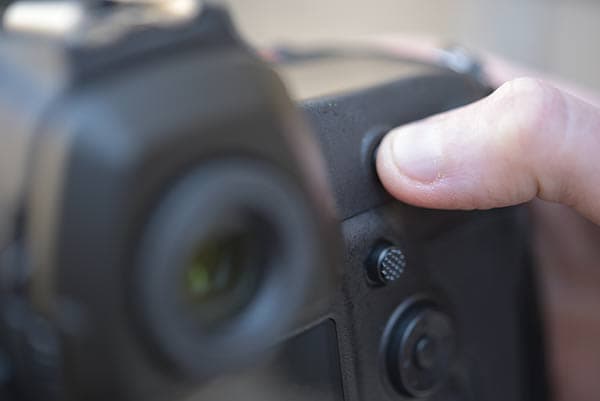
4. Place the focusing point over a part of the subject containing high contrast and/or fine detail. Activate Back Button AF by pressing (and holding down) the AF-ON button.
5. Continue to hold the AF-ON button down while you follow the action. When you want to stop focusing, remove your thumb. When you are ready to shoot a series of images hold down the shutter-release button.