From its compact cameras to mirrorless systems, Panasonic has gone to considerable lengths to make its Lumix models as customisable as possible. At a basic level, its approach has been to pack its bodies with a number of user-adjustable Function controls and extend these further into touchscreen- based virtual ones, with additional control provided over the options and controls with its Q menu system. Dig a little deeper, however, and you will find a range of control over many aspects of operation, with a particular focus on video recording.
For the benefit of those who may be new to the system, we’ve pulled out some of the more useful options currently available. These are based on the menus found inside the Panasonic Lumix FZ2000, although many will apply to cameras elsewhere in the Lumix stable.
Eye Sensor sensitivity
When you’re using the camera at ground level, it’s a good idea to switch the Eye Sensor sensitivity to Low
Eye sensors, which monitor the proximity of the user’s face to work out when to alternate between the viewfinder and rear display, have been incorporated into many Lumix cameras, and anyone in the habit of using both displays will attest their convenience. Some find, however, that their sensitivity leads to the rear display being deactivated too easily, when simply trying to operate the camera.
One way to make this less of a headache is to go to the Eye Sensor option in the Custom menu. Here, you can switch the sensitivity from the default High option to Low. This adjustment will no doubt be best appreciated by those whose models sport free-angle touchscreens, as these are likely to be used at ground level, where you will naturally be moving your hands around this sensor as you operate the camera and/or touchscreen.
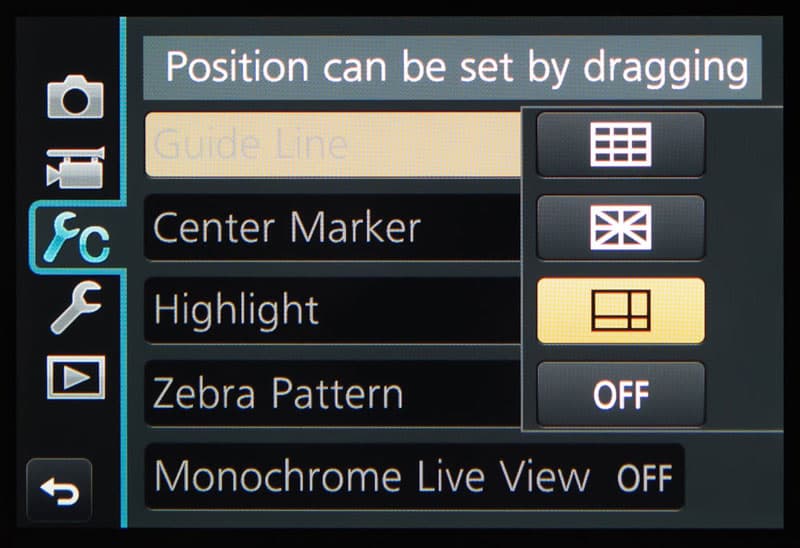
Adjustable guide lines

Using one horizontal and one vertical line as a guide, you can line up horizons or details at the edge of the frame
At first glance, Lumix models appear to offer the same assortment of tools to help you keep everything level, and horizons straight, as other cameras, such as the automatic levelling gauge and guide line displays. These guide line displays are provided in the standard grid and grid-plus-cross configurations, although a lesser-known third option works in a different way.
Using this third option, you are only provided with one horizontal and one vertical line, but you can use the touchscreen to drag these wherever you like across each axis. This is particularly useful for tripod-based shooting, where you might want to get the camera lined up against a horizon or another detail that may be quite close to the edge of the frame. This feature is very handy for photographing landscapes or modern architecture.
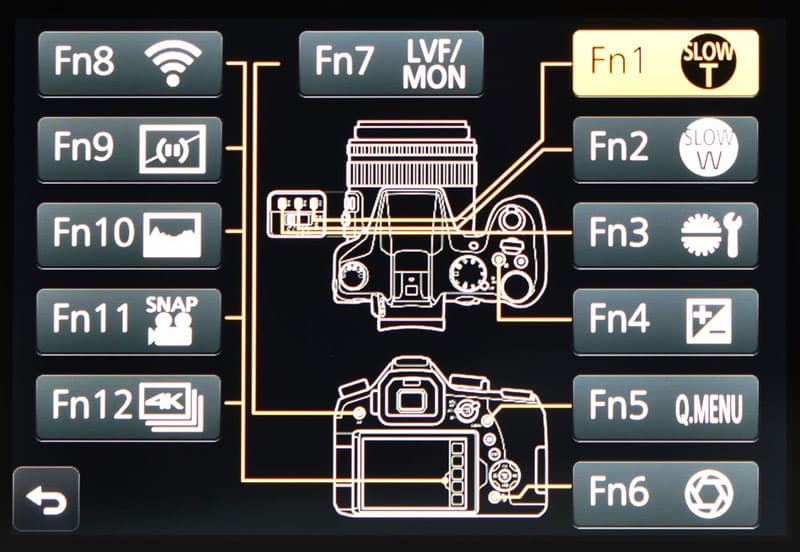
Basic customisations
Panasonic is generous with its customisable Fn buttons, going so far as to include virtual buttons that can be accessed through the touchscreen.
The latter are useful when recording videos, where the sound of operating the physical controls may be picked up on the recording. as such, anyone recording video regularly may wish to assign options that would be typically called upon during video recording to the virtual rather than physical buttons. These include the slow Zoom functions and Zebra pattern, in addition to 4K Live cropping and 4K Photo options.
It’s also possible to add, remove and reorganise options within the Q menu, and to reverse the operation of the command dial so that you can have shutter speeds and aperture running in the opposite direction to the default. The function of the AF/AE Lock can also be altered so that it locks either focus or exposure, or works like an AF-on control for back-button focus. These tweaks are made via the custom menu.
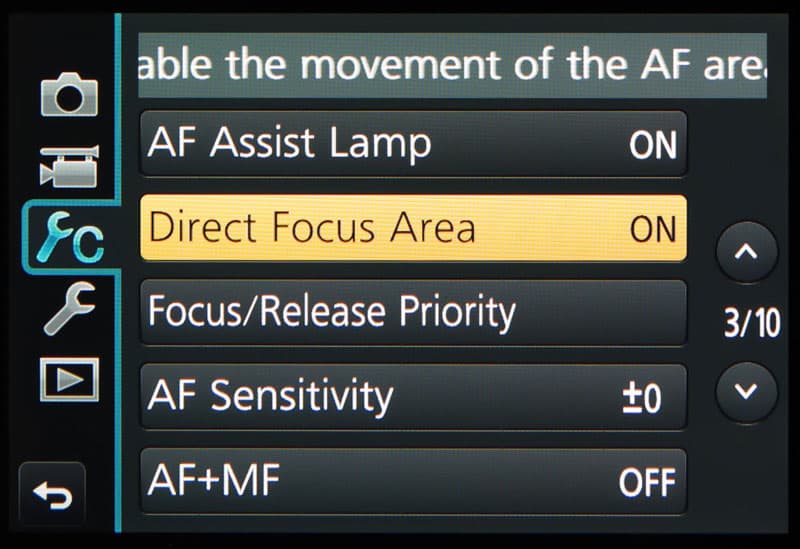
Direct Focus area
Most Panasonic models do not offer the same kind of joystick-type control on their rear plate as other cameras, which is a shame as this control is a useful way of speeding up AF-point selection. instead, users are required to press multiple buttons, or use the touchscreen or Touch Pad AF feature.
There is another option, however, that makes AF-point selection easier when using the viewfinder. Labelled Direct Focus area, and located in the custom menu, this option transforms the menu pad’s directional controls into instant AF-point-adjustment buttons.
This does mean that the controls these buttons access as standard need to be reached via some other means, although between the customisable Q menu and Fn buttons around the body, it’s not hard to find space for these.
This option will suit anyone who tends to compose their images in a more unorthodox manner, such as with the main subject towards the peripheries of the frame.
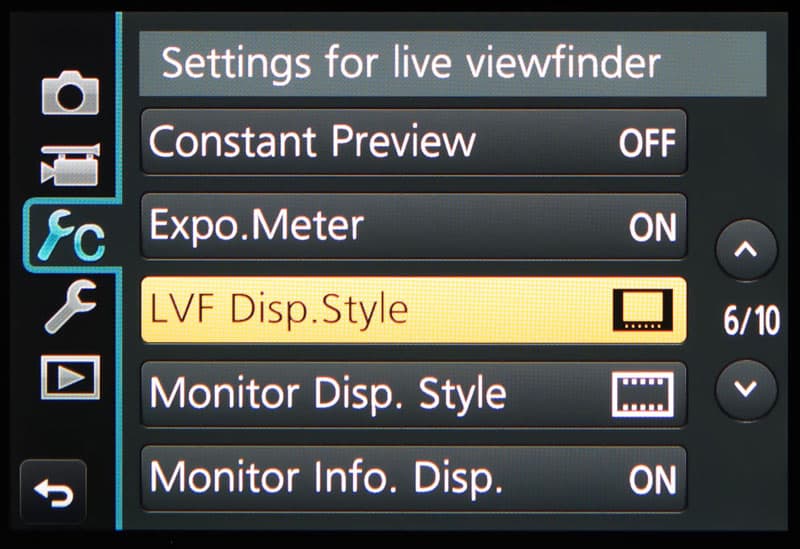
LVF Display style
One common issue with viewfinders is that the visibility of any information positioned over the main frame depends partly on what’s behind it. Information here can also obscure details in the scene, which can make it more awkward to compose precisely. While most cameras provide you with the option to disable some or all of this information, this clearly isn’t ideal if you need to refer to some of this information while shooting.
Lumix models have an easy solution to this, and that is the LVF Display Style option, found in the Custom menu. This places all shooting information outside of the frame on a black border, which removes this as an obstruction while providing maximum contrast to make it as clear to read as possible.
The drawback to this is that, in order to accommodate this border, the imaging area you see through the viewfinder will be slightly smaller, but the high magnification of many recent models means that this isn’t too great a sacrifice.
If you find this to be an issue when using the rear display, you’ll no doubt be pleased to learn that the option below this in the same menu applies this same effect to the display.
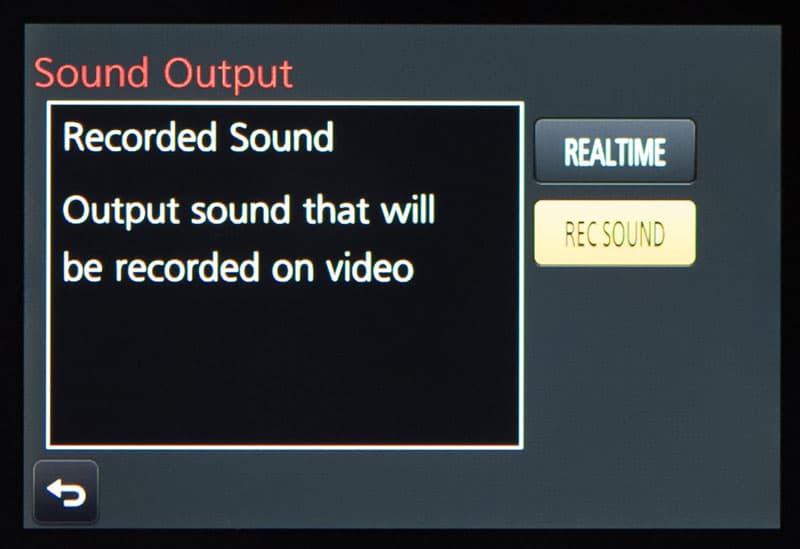
Better audio monitoring
Video recording has been a strong focus on recent Panasonic models; indeed, many have switched to the Lumix system for this reason. Many of Panasonic’s current models offer 4K video recording, and this is supported by a raft of tweaks to make life easier.
Anyone taking video seriously will monitor audio through headphones while recording, but what may not be obvious is that there is a more accurate way to monitor what’s being recorded than the default set-up provides.
This option, which is found in the Motion Picture menu and marked Sound Output, has two options: Real Time and Rec Sound. Real Time, which is the default option, allows you to listen to audio as it’s being recorded, but this comes directly from the microphone(s). As a result, it’s not entirely representative of what will appear in the final recording.
The Rec Sound option beneath this allows you to hear what the camera will actually record rather than simply what the microphone is recording, with the caveat that this is subject to a slight delay. While obviously less convenient, in most situations this is an acceptable trade-off when you need to monitor sound with precision.
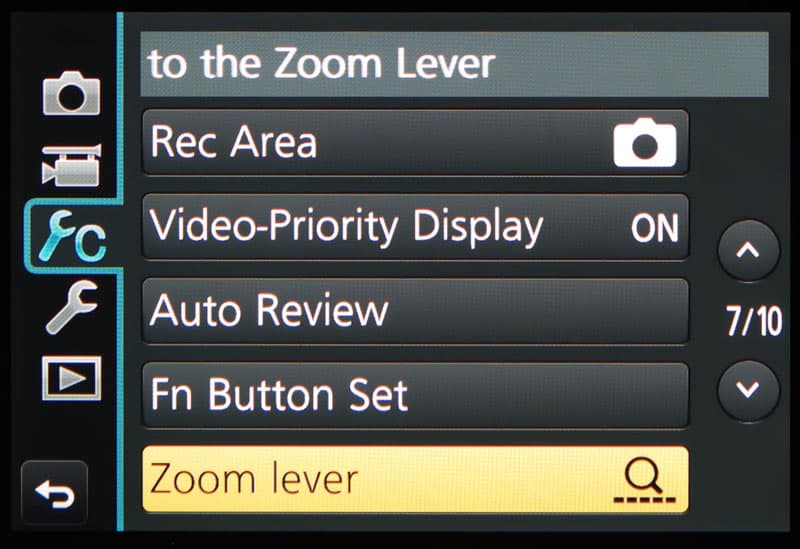
Zoom Lever

If you shoot street photography or portraiture you might find the Zoom Lever function useful
If you tend to use a Lumix superzoom camera for general day-to-day shooting, you may find it difficult to reach specific focal lengths without overshooting them with the zoom controls. Fortunately, the Zoom Lever function can be customised so that, upon being nudged, it travels to and stops at the next common focal length.
So, one quick nudge may zoom it from 24mm to 28mm, another to 35mm, yet another to 50mm and so on. Holding it in either direction, meanwhile, will operate the zoom as normal.
This will appeal to those who have come from using a previous camera with a selection of prime lenses and want to call upon specific focal lengths with ease, perhaps for street photography or portraiture.
Matt Golowczynski
Matt Golowczynski is a London-based journalist and photographer. He has contributed to countless magazines over the past 10 years and graduated from the University of Westminster with a BSc in Photography and Digital Imaging. Visit www.mattgolowczynski.com.