
Front focusing means the camera focuses just in front of your intended target. Here, the strings of the fiddle are sharp rather than the musician’s face
In many cases when you mount a new lens on your DSLR you’ll find that it works perfectly with the autofocus (AF) system, and provided you’ve got the AF point over the correct part of the scene, it obtains a sharp subject. However, modern cameras and lenses are made on assembly lines and everything is manufactured within tolerance limits. This can mean that some lenses won’t focus automatically quite as well as others. And if both your camera and lens are a little out of kilter, but within their individual tolerance limits, you’ll find that the subject never looks quite as sharp as you might hope.
Even if your camera and lens work in perfect harmony from the outset, a sharp knock, exposure to heat and the passage of time can see things change. A once-sharp lens can begin to deliver disappointing results with missed focus.
Thankfully, these days you don’t always have to send your camera and lens to a specialist to get them to play nicely together because many cameras now have an autofocusing calibration system that lets you make the adjustments yourself.
We have a problem
Ironically, the problem with inaccurate focus is often more noticeable with expensive lenses that have a large maximum aperture. With less expensive kit lenses that have relatively small maximum apertures the depth of field can mask any missed focus, so you and the camera get away with it. However, when shooting wide open with a more expensive and faster lens there’s very little depth of field, so if the focus is just in front or behind the subject it will look a bit soft.
The issue is compounded by the use of full-frame sensors that result in less depth of field than APS-C-format sensors for any given aperture, subject distance and angle of view. The quick drop-off in sharpness can make the missed focus very clear.
At first you may think that the subject moved a little or you just had the active AF point over the wrong point, but you’ll soon realise that it’s not you, the subject or your technique that’s at fault. With flat scenes the subject will just look soft, but with scenes that have some depth with objects a little in front of and behind the intended focus target, you may notice that the wrong area is sharp. If a point just in front of the subject is sharp your lens is front focusing, but if a point behind the subject is sharp then it’s back focusing.
Take a view
When you shoot with a DSLR in reflex mode (using the viewfinder to compose images), the autofocus system’s dedicated sensor mounted inside the camera detects when focus has been achieved. If there’s even a tiny misalignment of this sensor, the mirror that reflects light onto it or the imaging sensor, the focus may be off with some lenses making the problem look worse than others.
In live-view mode DSLRs act like compact system cameras (CSCs) and the image that’s shown on the rear screen is provided by the imaging sensor itself. This means if the subject is sharp in live view, whether you focus automatically or manually, it will be sharp in the image. It also explains why CSCs don’t suffer from the same focusing issues as DSLRs.
Live-view mode offers a convenient way of checking whether your camera’s AF system is focusing a lens correctly. All you need to do is shoot two images – one shot in live-view mode with the lens focused manually at the centre of a scene, and the other shot in reflex mode (with the image composed in the viewfinder) and using the AF system to focus at the centre of the scene. It’s important to use the same aperture for each shot because lenses produce softer images when the aperture is wide open or very small. The aim is to produce two images that are identical apart from the fact that the focus was achieved in a different way.
When you examine the two images at 100%, if you find that the subject in the image that was focused automatically is softer than that in the image focused manually, the AF system will need to be adjusted.
Putting it right
Many enthusiast and advanced-level DSLRs allow you to calibrate the autofocus response for a number of lenses to correct for front or back focusing. Canon refers to this feature as AF Microadjustment, while Nikon calls it Auto Focus Fine Tune. The process itself isn’t complicated, but it’s fiddly and repetitive, with lots of shooting, checking images and reshooting.
Nikon introduced a new automated Fine Tune process with the D500 and D5 that simplifies matters considerably, so let’s hope that other manufacturers develop something similar.
Autofocus calibration targets such as the Datacolor SpyderLensCal (around £50) are commercially available, but you can also make your own using charts that are freely available online for downloading and printing, such as the one from Andrew R Lawn. If you don’t want to do any printing you can use a ruler angled at 45° to the camera, but it pays to have some form of high-contrast focusing target level with the mid-point to give the camera’s AF system a fighting chance.

Focusing here is more accurate, with key areas staying critically sharp – the player’s face is sharp, and draws the viewer’s eye
Alternative options
If you don’t fancy adjusting your camera’s focusing system yourself, or if your camera doesn’t offer the functionality, you can send it to the manufacturer’s service centre or a registered service agent, such as Fixation (www.fixationuk.com), to do the work for you. Canon’s service centre charges £60 to calibrate an EOS 5D Mark III and 24-70mm f/2.8 together, with an extra £30 being charged for every additional lens. Meanwhile, Nikon charges £72.47 to calibrate a D810 and 24-70mm f/2.8 VR, and while it can take 2-3 working weeks the company will endeavour to get your camera back to you if you have a specific event coming up.
Fine-tuning the easy way with the Nikon D500
Nikon introduced a new automated AF fine-tuning system with the D5 and D500, which makes use of the live-view system. Here’s how to use it with the D500.
1. Find a high-contrast target
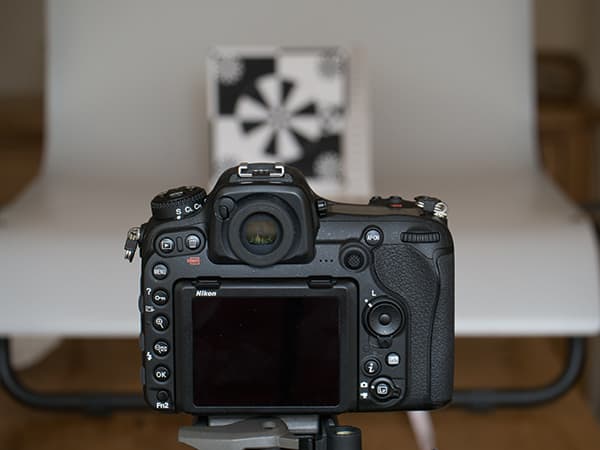
Mount the camera on a tripod and aim it at a flat high-contrast target that’s parallel to the sensor. An AF calibration target is ideal, but you can shoot something when you’re out with the camera. The target should be at a typical shooting distance for the lens.
2. Turn on live view
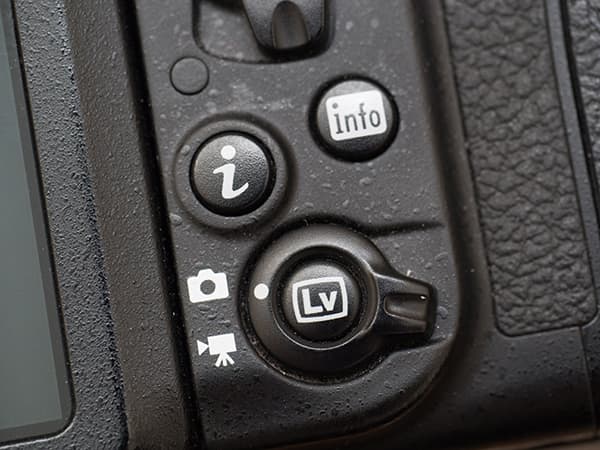
Now it’s time to active live-view mode on the rear of the camera. The D500 uses the live-view mode to compare the focus on the image sensor with what you’re getting on the autofocusing sensor.
3. Make sure you’re set to AF
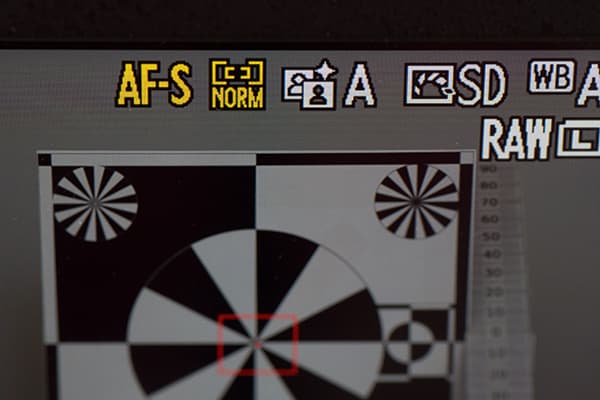
Set the focus mode to autofocus and ensure the camera is set to single AF (AF-S) and wide or normal AF-area mode. It’s easy to activate other AF options by mistake on higher-end cameras, so be careful you don’t do this.
4. Go for the centre
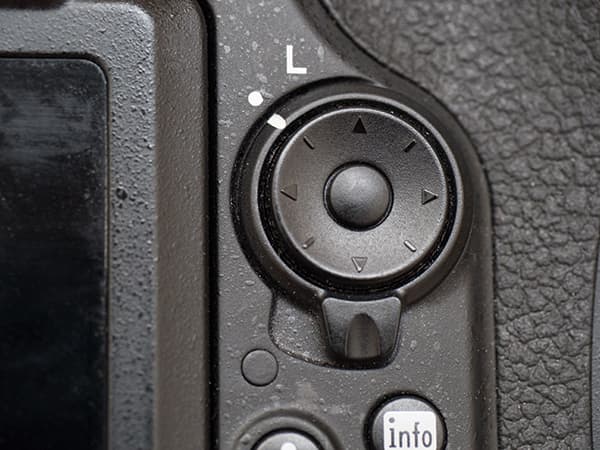
Press the centre of the multiselector to select the centre focus point. If at any time you get confused, always refer to the camera manual. AF adjustment is a complex area, so don’t be too proud to dig out the instructions that came with your camera.
5. Half-way measures
The next job is to press the shutter release halfway, which will usually focus the lens (unless you have set up back-button focusing). Then, zoom in on the rear screen to confirm that the subject is in focus.
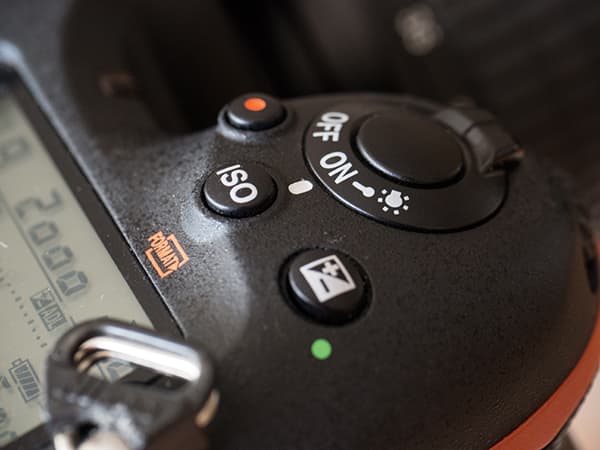
6. Double action
Press the AF-mode and movie-record buttons simultaneously and keep them pressed for a little over two seconds until the above dialogue box appears on-screen.
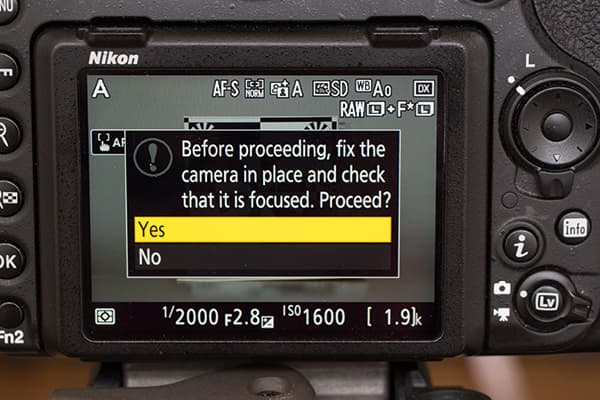
7. Save your values
Highlight Yes and press OK to save the fine-tuning value for the mounted lens (this only works with CPU lenses). Only one value is saved for each type of lens, so you can only calibrate zoom lenses once.
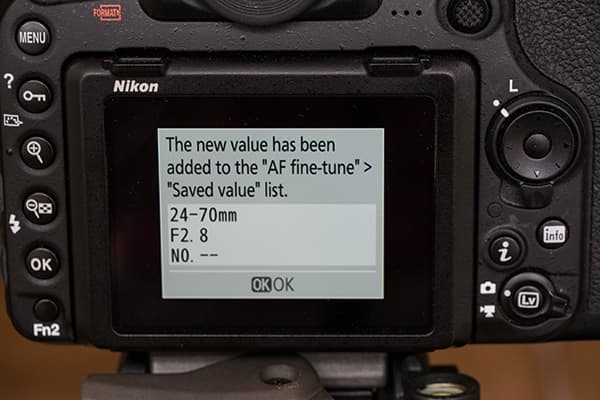
8. Check the menu
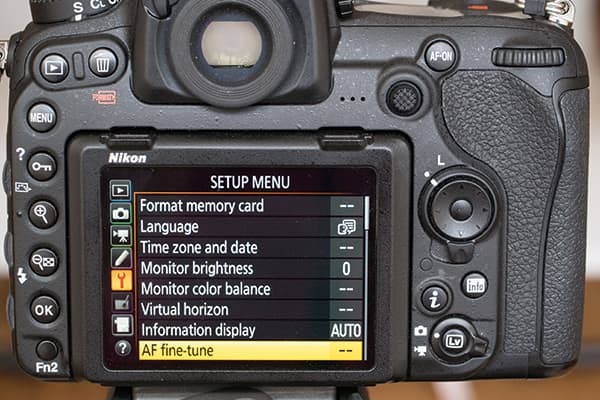
In the set-up menu, select AF fine-tune and highlight On before pressing OK. You should then be good to go. Zoom in carefully to your test images to see the differences in focus.
Calibrating your AF system
If you find your camera’s AF system is front or back focusing and there’s an option to adjust it in-camera, consult the manual for the precise process. In our example, we’ll explain how to use the Canon EOS 5D Mark III’s AF Microadjustment feature.
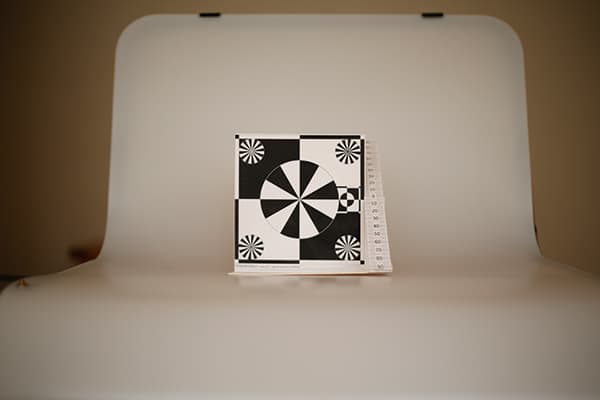
1. Set up the target
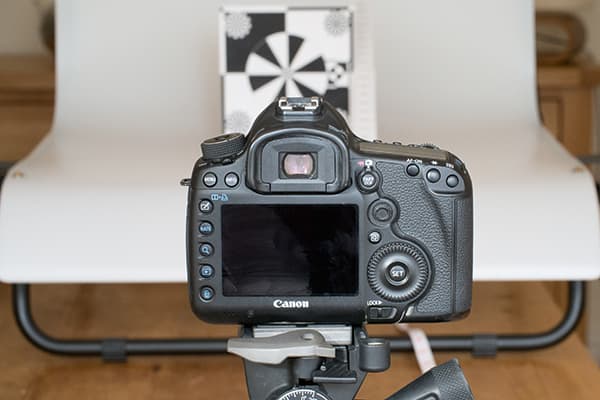
Assemble your calibration target and mount your camera on a sturdy tripod at least 25x the focal length of the lens away. With a 100mm lens this means positioning the camera at least 2.5m (8.2ft) from the subject. However, if you regularly shoot at a particular distance, it’s worth moving to that point.
2. Lock up the mirror
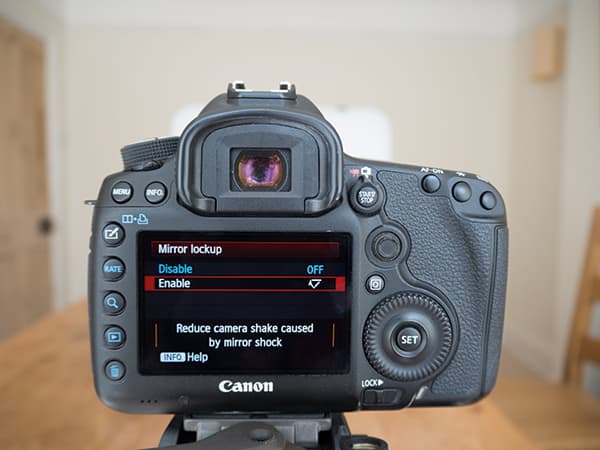
Select mirror lock-up or exposure-delay mode and use a remote release to ensure that you get shake-free images. Even the tiniest hint of movement recorded by the sensor will make it very hard to calibrate your AF correctly.
3. Shoot wide open
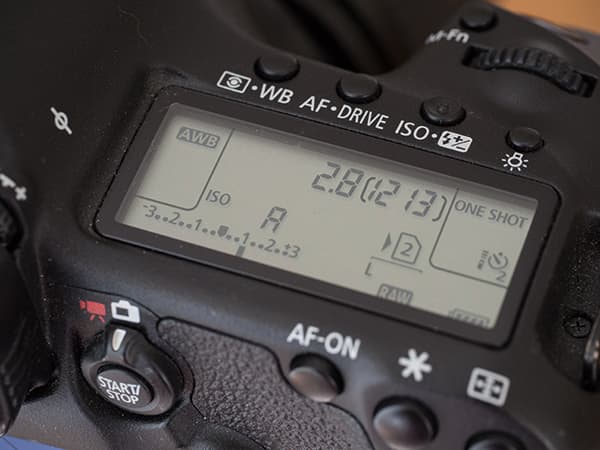
Set the camera to expose the subject correctly with the widest aperture selected. You shoot wide open to reveal any focusing inaccuracies. Looking through the viewfinder, put the centre AF point over the chart focus point (or the middle of the scale on the ruler) and take a shot.
4. Check on the computer
Now open the images on your computer and examine them at 100% on-screen. Examine the sharp zone of the image and determine whether the camera is focusing the lens in front of or behind the intended target. In the above image, the camera is focusing in front of the target.
5. Open the menu
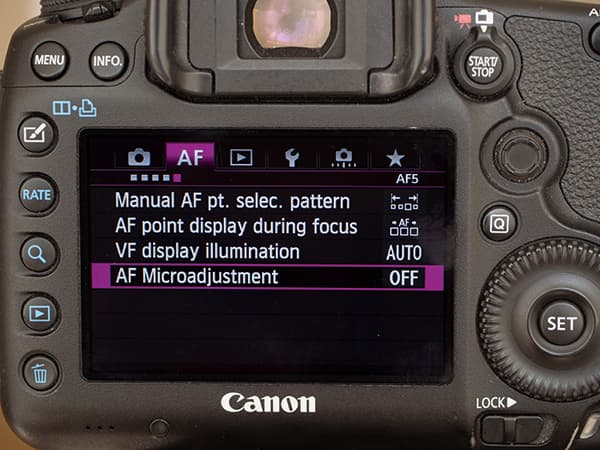
Next, open the camera menu and navigate to the fifth page of the AF options. AF Microadjustment is at the bottom of the list. Each camera is different, however, so check the manual.
6. Assess the various options
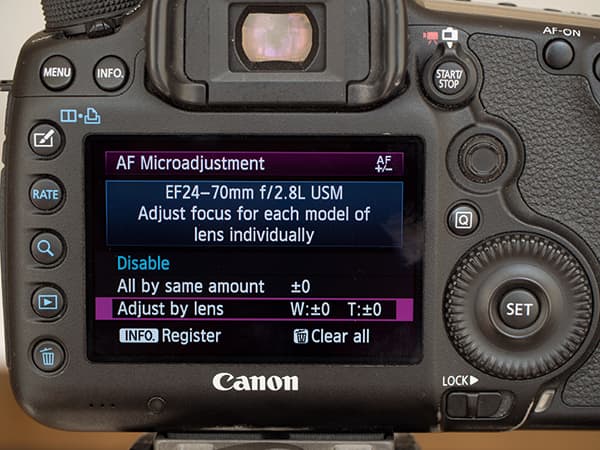
Press Set and scroll down to Adjust by lens before pressing the Info button to access the options. Spend some time understanding everything properly as AF fine tuning is not something you want to get wrong.
7. Confirm your choices
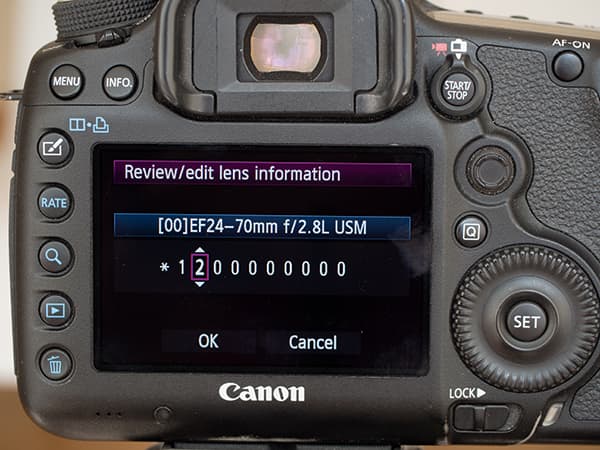
Press the Info button again to review the lens information and check its serial number. If the number is not visible and you just see a series of zeros, use the Set button and main dial to enter the correct number. When you’ve finished, select OK to go back to the AF Microadjustment screen.
8. Zoom with a view
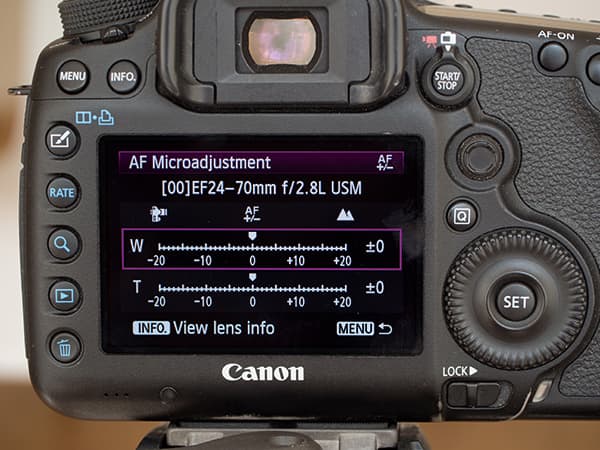
With zoom lenses you are able to adjust the focus point of the shortest and longest focal lengths independently, but just tackle one at a time. Use the scroll dial to select the focal length that you want to adjust, then press Set.
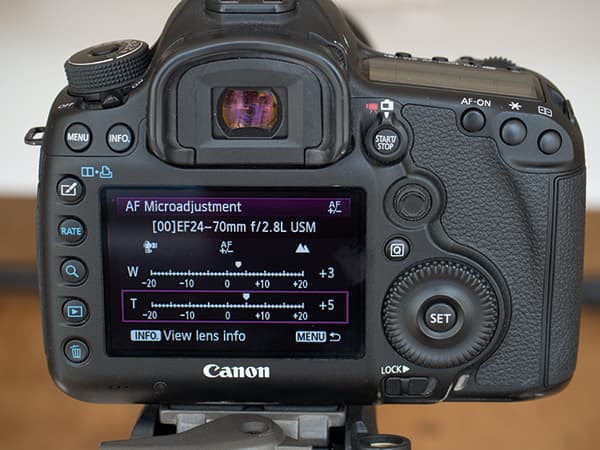
9. A matter of degree
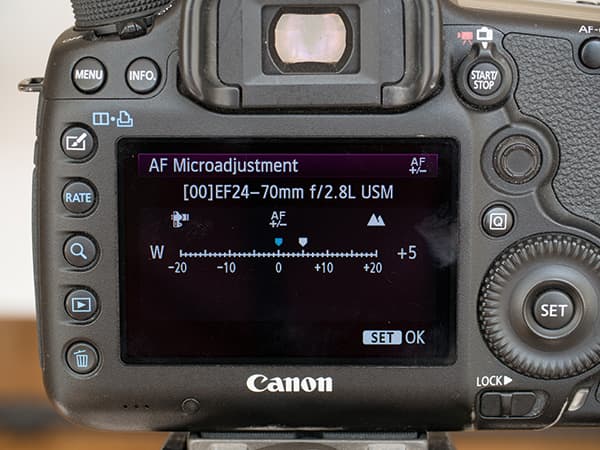
Now use the main dial to set the degree of focus adjustment to apply, with ±5 a good starting point. If the lens is front focusing you need to dial in a positive adjustment, while if it’s back focusing you need to apply negative adjustment. Press Set followed by the Menu button to confirm the adjustment.
10. Perfecting the calibration
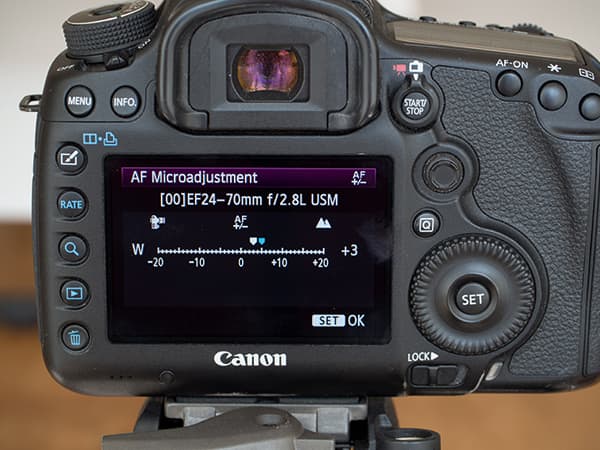
Shoot the calibration target again and examine the images to assess the effect of the adjustment. If necessary (and it probably will be), repeat the adjustment process to refine the calibration.
11. Repeat if necessary
If you are calibrating a zoom lens, repeat the adjustment process for the longest focal length, but only once you’re happy that the lens is focusing in the right place at the shortest focal length.
Not sure if you have an autofocusing problem?
Follow these simple steps to produce images that will make it clear if your camera and lens combination is causing problems for the autofocus system.
1. Find a suitable subject to photograph and mount your camera on a sturdy tripod.
2. Set the camera to expose the subject correctly when you have the widest aperture selected.
3. Activate live-view mode and switch to manual focusing. With the image magnified on the screen, focus carefully on the subject at the centre of the frame before taking a shot.
4. Now deactivate live-view mode and switch to autofocus mode. Use the central focus point in the viewfinder to focus on the same part of the scene as you did in live-view mode and take a shot.
5. Open the images on your computer and examine them at 100% on-screen. If you find that the subject in the image taken using autofocus looks softer than the one taken in live-view mode, you would need to tune the AF system.
Third-party adjustments
Although it is possible to adjust the autofocusing of third-party lenses in-camera, Sigma and Tamron offer alternative solutions. In 2013, Sigma introduced its USB Dock (around £39). This has a lens mount and enables owners of Sigma Art, Contemporary and Sports lenses to upgrade the firmware and customise the focusing via a USB connection to a computer running the company’s Optimisation Pro software. However, the adjustment process still relies on you taking shots to test whether the level of alteration is correct, and then trying again until you eventually find the right setting.
Tamron’s TAP-in Console was announced earlier this year and works in a similar way to the Sigma USB Dock, with some of the company’s recently announced lenses using the TAP-in Utility software. We have yet to test it.
Sigma’s USB Dock is compatible with the following lenses:
Art:
- 20mm f/1.4 DG HSM | A 24mm f/1.4 DG HSM | A
- 30mm f/1.4 DC HSM | A
- 35mm f/1.4 DG HSM | A
- 50mm f/1.4 DG HSM | A
- 18-35mm f/1.8 DC HSM | Art
- 24-35mm f/2 DG HSM | A
- 24-105mm f/4 DG OS HSM | A
- 50-100mm f/1.8 DC HSM | A
Contemporary:
- 17-70mm f/2.8-4 DC Macro HSM | C
- 18-200mm f/3.5-6.3 DC Macro OS HSM | C
- 18-300mm f/3.5-6.3 DC Macro OS HSM | C
- 150-600mm f/5-6.3 DG OS HSM | C
Sports:
- 120-300mm f/2.8 DG OS HSM | S
- 150-600mm f/5-6.3 DG OS HSM | S
Tamron’s TAP-in Console (TAP-01) is compatible with these lenses:
- SP 85mm f/1.8 Di VC USD
- SP 90mm f/2.8 Di Macro 1:1 VC USD
- SP 45mm f/1.8 Di VC USD
- SP 35mm f/1.8 Di VC USD