 Compact cameras have several important advantages over DSLRs, the most important of which is their vastly superior portability.
The golden rule is that any camera you have with you when a picture-taking opportunity presents itself is inevitably better than the very best camera that you left at home. The fact that many digital compacts now fit in a shirt pocket or the smallest of handbags makes them ideal for spontaneous picture-taking wherever and whenever the opportunity arises.
The greater ease of use offered by compact cameras can also be their downfall, however, as it reduces the need to think about the picture-taking process before the shutter button is pressed.
This means the camera is often left to make all the appropriate decisions – and clever though modern compacts are, they are most definitely not infallible. Therefore, on those occasions when there is enough time to judge the optimum camera settings manually it will often turn out that a moment or two’s extra thought will result in considerably better pictures being taken.
This article highlights the various factors that you might want to consider when seeking to eke every last drop of quality from a digital compact.
Shutters and apertures
Every picture is exposed using an appropriate combination of shutter time and lens aperture.
Rather than a single pair of values there is always a range of different combinations that can be employed in any given situation.

Use the camera’s focus lock to determine where you want your point of focus to be. Camera: Fujifilm Finepix F30
The relationship is an inverse one whereby a bigger lens aperture, which lets more light fall on the imaging sensor in any given instant, is matched by a shorter shutter time. Similarly, if the shutter time is increased then the lens aperture must be reduced to give the same total amount of light falling on the sensor to record the picture.
When a camera is put into Program mode its internal electronics set typically-successful shutter times and apertures that suit many picture-taking situations. In addition, there will be a selection of Scene modes such as Portrait, Landscape and Action or Sport. These labels indicate particular types of shutter and aperture combinations and can be used in any situation where they are appropriate.
Portrait mode normally sets a large lens aperture as this gives blurry backgrounds whereas Landscape normally sets a small lens aperture so that the background in the picture is as sharp as the foreground. Action/Sport mode sets the briefest shutter time to arrest subject movement but in the process it also sets a large aperture, so is very similar to the Portrait setting despite being deployed for a very different type of subject.
Image sharpness
There are two completely different things that can make an image look unsharp; inaccurate focusing and unwanted movement in the image. Sadly, these faults are avoided using contradictory tactics. Accurate focusing over a range of subject distances, so that the person in front of a tourist sight is as sharp as the landmark behind, requires a small lens aperture. On the other hand, reducing movement means setting a brief shutter time – and brief shutter times often go with larger lens apertures, hence the contradiction.
One way to reduce this problem is to ensure that the camera focuses on the most important part of the picture. If there is a person in the picture then often they should be completely sharp even if it means the background is slightly softer.
Fortunately, most automatic-focusing (AF) systems prioritise the object closest to the camera and this is often sufficient to ensure that the person in the foreground in sharp – provided that the person is within the AF sensor’s area of coverage.
To be certain about the area of the picture that will be perfectly sharp be sure to check that the screen’s focus-area indicator (if there is one) coincides with the most important part of your picture.
Some cameras have focus locks (AF-Lock) that let you focus on the desired area and then recompose the picture for a better overall effect. To check whether your camera has an AF-Lock, aim the camera at a nearby subject and apply half-pressure on the shutter release; if a green light illuminates and stays on even when you move the camera around then the chances are that the camera has focused and locked.
A final check can be obtained by maintaining half-pressure while you aim the camera at a more distant subject and fully depress the shutter button. The distant subject in the resulting picture should be out-of-focus.
This might sound pointless, since nobody wants out-of-focus pictures, but it means that even when you moved the camera the focus was unchanged, so you now know that you can separate the focusing and composition parts of photography – and that is one of the key skills for better pictures.

Many compacts are capable of very sharp results if used carefully. This image is actually stitched from four separate shots and is big enough for a bitingly crisp 12x10in print Camera: Olympus Camedia C5000
Quality settings
Like the shutter time and lens aperture, the ISO and file format settings both have a strong impact on the look and quality of the resulting photograph.
Setting a very high ISO risks introducing noise into a picture: this problem is not as serious as it once was but even so the best tactic is still to select the lowest practical ISO setting. Deselecting the camera’s Auto-ISO function, and setting one of the lowest values, is the best way to start taking control over your compact camera.
Be warned, however, that a very low ISO setting may, in low-light conditions, force the camera to set either a long exposure time (risking movement blur in the image) or a very wide aperture (risking a lack of focus sharpness). Clearly there is a three-way balance at work here and learning to make the best choices is part of becoming a better photographer. One way to expand the envelope is to mount the camera on a tripod when photographing static subjects (at twilight, for example). Another useful technique, this time for use with moving subjects, is panning – see Technique panel.

At indoor events where there’s a nice ambient atmosphere switch the flash off and increase the ISO instead. Compare this available light birthday cake shot with the flashlit one Camera: Panasonic Lumix FX2 (both shots)
Highly-compressed JPEG files introduce noise of a different type (and also accentuate ISO noise) so try to use minimal JPEG compression. The TIFF option, if one is provided, will provide better image quality but will also retard picture-taking because the resulting files will take longer to write to the memory card. TIFFs take up more space too, so make sure that you use a high-capacity memory card.
For the very best result, albeit with the need to do some post-capture processing, select the raw-data option if your camera has one. This will not help to avoid high-ISO noise but, as well as overcoming the compression problem, it also allows high-quality colour adjustments to be made later if necessary.

Moving the camera to follow a moving subject, known as ‘panning’, produces a better result. Image by P. Wei
Panning
If you are confronted with a subject that is moving across your field of view then there is a simple technique you can use to capture sharper images than would otherwise be possible. The trick is to swing the camera to follow the movement of the subject instead of holding the camera still and trying to freeze the subject’s movement as it flashes by.
Set-up the technique by deciding where the subject will be when you press the shutter button and stand so that this is dead-ahead of you. If your camera has an AF-Lock then you should half-press the shutter button while aiming the camera at the position where the subject will be when the picture is taken.
Hold half-pressure on the shutter button and twist your body towards the direction from which the subject will approach. As the subject comes into view, place it in the centre of the viewfinder and turn your body to keep the subject central as it crosses your field of view.
When the subject is dead-ahead, apply full pressure to the shutter button to capture the picture. Importantly, you must keep turning your body, with the subject still framed centrally in the viewfinder, after the picture is taken. This will give the best final result as a sudden halt to your twisting can jerk the camera and cause its own form of image blurring.
The great advantage of this technique, which produces characteristic side-to-side blurred backgrounds behind sharply recorded moving objects, is that it allows a longer shutter time to be used than would otherwise be the case. This in turn means that you can set a lower ISO value even under low-level lighting. It also produces a very pleasing effect in its own right and has the added bonus of reducing the shutter lag (the delay between the shutter button being fully depressed and the picture being taken).
Flash settings

Right: Built-in flash can’t light large interiors but leaving it on will keep the shutter speed too high to get a good exposure. Switch off the flash, raise the ISO and find a stable surface to rest on. Camera: Sony Cybershot V3
Left to its own devices, a compact camera will activate its flash unit whenever it feels there is insufficient brightness in the ambient lighting. This is a useful place to start when selecting flash exposures but it is only a starting point.
For example, if the ambient lighting is essential to the look of an image then using flash will ruin the picture. The best examples of such situations are pictures taken around a bonfire and blowing-out candles on a birthday cake.
In these situations you should always try a picture with the flash switched-off so that the ambient lighting can be seen to full effect.
Another reason to switch-off the flash is to avoid causing horrible reflections that can ruin a picture. Museums, especially those containing science and technology exhibits (including cars and aircraft) are places where this problem is particularly likely to arise.
You would do better, in such places, to take a steady grip on your camera, or use a tripod if this is permitted. Similarly, there are impossible situations where the camera fires its flash but has absolutely no hope of illuminating the subject. Pictures of night-time landmarks and outdoor music concerts are good examples.

When opportunity strikes, any compact you happen to have in your pocket is better than the DSLR you left at home – or in this case, back at the hotel. Camera: Canon Powershot S40
That said, the floodlit landmark situation can be accommodated by setting the flash to Night mode. This enables you to take nocturnal person-in-front-of-a-landmark pictures by using the flash to illuminate the person in the foreground and then extending the exposure so that the background is also recorded in the picture.
The fact that the exposure is extended via a prolonged shutter time means that the camera needs to be supported to avoid streaking in the background so once again a tripod could prove very useful.
As well as deliberately switching-off the flash when the camera might otherwise switch it on there are also times when the reverse tactic can be very useful.
This is particularly true when taking pictures outdoors on bright sunny days and in other situations where there is strong overhead lighting.
The problem that arises is one of strong shadows that can be a serious problem on people’s faces when their eye-sockets become very dark.
By switching your camera’s flash to Fill-In (or just On if there is no fill-in mode) you can help to lighten shadows cast by overhead lighting and get a more pleasing final image as a result.
The only disadvantage will be a small catchlight visible in the person’s eyes but this can easily be retouched out using an image manipulation program afterwards if desired.
It is extremely unlikely that a compact camera’s integral flash will be strong enough to swamp bright outdoor sunlight, or even bright theatrical lighting, so you should be able to use flash in these situations safe in the knowledge that it will only improve the quality of the final pictures.
Top tip: Get in close!
 One of the biggest mistakes made by most compact users is to shoot from too far away. The inevitable result is loads of useless space around the key subject which contributes nothing to the composition and at worst can distract from it.
Getting in really close and filling the frame used to bring its own problems in the days of 35mm compacts because the viewfinder saw a slightly different view to the film, and this difference (known as parallax error) became more apparent the closer you got.
Digital compacts however present no such problems, especially if you use the LCD screen or have an electronic viewfinder, because what you see is, more or less, what will be recorded.
So don’t be afraid to zoom right in to your subject and fill the frame, either using the lens or your own two feet!
5 Steps to better photos
Simple rules to guarantee quality results
1. ISO settings
Always set the highest quality camera settings (low ISO, raw-mode or minimally compressed JPEG, flash under manual control).
 2. Scenes modes
Instead of staying in Program mode, consider whether one of the scene mode options (Portrait, Macro etc) might give a better result for the subject.
3. Spot focusing
Use Spot Focusing (if provided) and AF-Lock (activated by half-pressure on the shutter release button) to ensure that the most important part of the photograph will remain in focus even if you subsequently recompose the picture for a better artistic effect.
 4. Flash mode
Use the camera’s flash modes according to the prevailing conditions, bearing in mind the danger of reflections, the impossibility of some outdoor situations and the possible need to retain ambient lighting indoors.
5. Tripod
A tripod will probably be your most valuable accessory because it will allow you to minimise camera shake and avoid using flash unnecessarily under low-light conditions.
How to hold a compact
You’ll get sharper pictures if you hold the camera properly
 Viewfinder cameras
When using a DSLR, pictures are normally composed by looking through the viewfinder with the camera held firmly against the face and supported on arms with tucked-in elbows.
This tried-and-tested pose helps to provide a stable support for the camera and reduces the risk of camera-movement, which might otherwise cause slight blurring of the image.
If possible it is best to hold a compact camera in the same way but to do this presupposes two things; the camera needs to be equipped with a look-through viewfinder window and all of the camera settings must have been previously made using the LCD screen (as the viewfinder itself will often have nothing more than a ‘good to go’ green LED indicator light).
LCD screen cameras
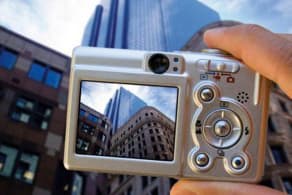
 Digital compacts that have only an LCD screen must to be held away from the face, at whatever distance provides comfortable viewing.
The important thing is to hold the camera firmly, either with one hand at each end or with your right hand gripping the right-hand end of the body and your left hand supporting the protruding zoom lens.
Beware, however, that you may need to release your grip on the lens if you re-zoom to change the composition.
Allied to a firm grip is the option to mount the camera on a tripod or clamp. The good news here is that lightweight compact cameras can be mounted on ultra-compact tripods with enormous success.
A fold-flat travel tripod can be tucked into a pocket very easily and is also (if you missed the give-away) a very inexpensive purchase.


