Off-camera flash is a creative lighting technique that involves the off-camera placement of portable flashguns – or sometimes larger studio-style heads – to take control over the direction and intensity of light it produces. The technique can be used whether shooting in midday sunlight, or shooting in sunset and sunrise. It’s especially useful in portraiture and has long been used by wedding, commercial and fashion professionals. Off-camera flash is also now popular with enthusiasts and amateurs, thanks largely to the increased availability of cameras with built-in flash-triggering technology and a fall in the price of wireless flash triggers and other flash-related accessories.
The idea behind off-camera flash is that rather than mounting your speedlight on your camera’s dedicated flash hotshoe and shooting with the light it emits facing forward, you instead remove your flashgun and position it anywhere you like in relation to your subject. While front-facing flash can be effective, it can also lead to your subject looking flatter and more one-dimensional. By moving your flash off-camera so its light bathes your subject at an angle you can create portraits with a much greater sense of depth. A more advanced technique is to position several strobes at different angles and set them to different intensities to create pro results.
Essential equipment
Using off-camera flash is an effective way to achieve studio-style portraits while shooting out in the field
To experiment with off-camera flash you’ll need three items: a camera with a flashgun hotshoe, and which allows you to shoot in Manual mode; a flashgun that’s compatible with your camera and which provides a Manual mode that allows you to control its power output; and a device to allow the camera and the off-camera flash to communicate with each other. Broadly speaking, you have three further options here: a TTL flash extension cable, a set of wireless flash triggers, or in certain circumstances (depending on the make and model of your camera) your camera’s built-in pop-up flash.
Using a TTL flash cable to provide a wired connection between the camera and your flashgun is the most straightforward option. TTL flash cables cost £30-£50 for around three metres of cable. Slide one end of the cable onto your camera’s hotshoe and the other onto the bottom of your flashgun, and you’re good to go. While using a cable lets you retain automatic TTL flash functionality as well as Manual control, they limit how far away you can position your flash from the camera. Also the cables can sometimes get in the way.
Investing in a set of wireless triggers is the most flexible and practical way to bridge the gap between your camera and an off-camera flashgun. While a few flash triggers employ infrared technology, most use radio signals as this is a far more reliable way for your camera to communicate with a flashgun (or multiple flashguns) without needing cables. For a wireless trigger system to work, you will need to use a transmitter that slots into your camera’s hotshoe (sometimes called a commander unit), and a receiver unit that attaches to your flashgun.
Once everything has been correctly set up (which involves ensuring all the constituent parts are assigned to the same channel so they are operating over the same frequency) pressing the shutter button will cause your off-camera flash to fire. The maximum distance that wireless triggers can operate over ranges from 30m to 500m. Most will be good for at least 100m, giving you scope to place your flashes just where you want them. Unlike infrared or other optical-based systems, radio triggers do not require a direct line of sight to work.
The cheaper wireless triggers will usually do little more than trigger and are generally not compatible with your camera’s TTL flash-metering system. This means you’ll need to put your flashgun into Manual mode and dial in the flash’s power output settings before triggering them remotely. If you want to change settings midway through a shoot, you’ll need to stop what you’re doing and manually adjust each connected flashgun. Spend a bit more, though, and you may be able to change individual flash settings remotely using the commander unit attached to your camera. And more advanced triggers often let you work in TTL or Manual, giving you the creative freedom of Manual mode with automatic TTL flash metering as backup.
Not all wireless triggers support shooting at shutter speeds above your camera’s native flash sync speed. To shoot at higher speeds of, say, 1/2,000sec, you’ll need a set of wireless triggers that support this. Finally, some wireless triggers double up as a remote shutter for your camera, which can be useful.
Built-in optical pre-flash systems

The technique takes a lot of time and practice to master, but the benefits of using off-camera flash are plain to see
Another way of remotely triggering off-camera flashguns is through optical pre-flash technology using a DSLR’s built-in pop-up flash. Nikon has long employed this with its Creative Lighting System (CLS), while Canon and Olympus employ a similar approach with some of their cameras. The way it basically works is that your pop-up flash emits a series of pre-flashes into an optical port of the receiving flashgun. As well as being cheaper than third-party wireless trigger systems, the main benefit of an optical approach is that it allows you to work in TTL flash mode, whereby your camera will automatically work out all the correct flash settings for you. While the minutiae of TTL technology varies between the manufacturers, it has generally become very reliable. You can still get creative using off-camera TTL too; simply divide your connected flashguns into separate groups and then adjust the flash compensation values for each as you see fit. For example, in a simple two-flash setup you could use your main flashgun as fill-light at its full TTL power, but dial in -1 or -2 flash compensation to an additional flash acting as a rim light for a more subtle effect. Also, most optical systems let you remotely control your flash settings from your camera – far more convenient than manually adjusting each connected flashgun.
While optical systems are generally reliable, easy to use and dispense with the extra costs of a third-party wireless trigger, there are some limitations to be aware of. The main issue is that the effective operating distance of an optical system is shorter than one that uses radio waves. Most manufacturers also recommend that their optical systems are used with a direct line of sight if possible. Also, direct sunlight or other bright lights can sometimes interfere with the signal. That said, if you own a Nikon, Canon or Olympus camera that has built-in optical wireless technology then you have nothing to lose giving it a go.
Off-camera technique and settings
Learning how to use off-camera flash takes plenty of practice. But the creative benefits make it one of the most versatile techniques – especially for portraiture.
The big question for many is whether to use automatic TTL flash metering or to go fully manual. Off-camera TTL technology has advanced significantly in recent years and is now capable of getting consistently good results. For this reason it’s especially useful when time is short and you want to grab a well-balanced shot with minimal fuss. That said, shooting with your flash set to Manual mode will give you a better understanding of how light works, along with how to balance the light from your flash with any available ambient light. If you’re using a cheaper set of wireless triggers that lack TTL functionality then you’ll have to use Manual mode anyway. So it’s worth exploring how things work in Manual mode in slightly more depth.
When shooting manual off-camera flash, everything – including your camera – needs to be put into Manual mode. The reason for this is consistency. With your camera in Manual you will be able to adjust the shutter speed and aperture in isolation, knowing that other key settings will be unaffected.
In contrast, using your camera’s semi- or fully-auto modes will cause your camera to continue metering and to compensate for any changes you make to other settings; taking control away from you and making the result much harder to predict.

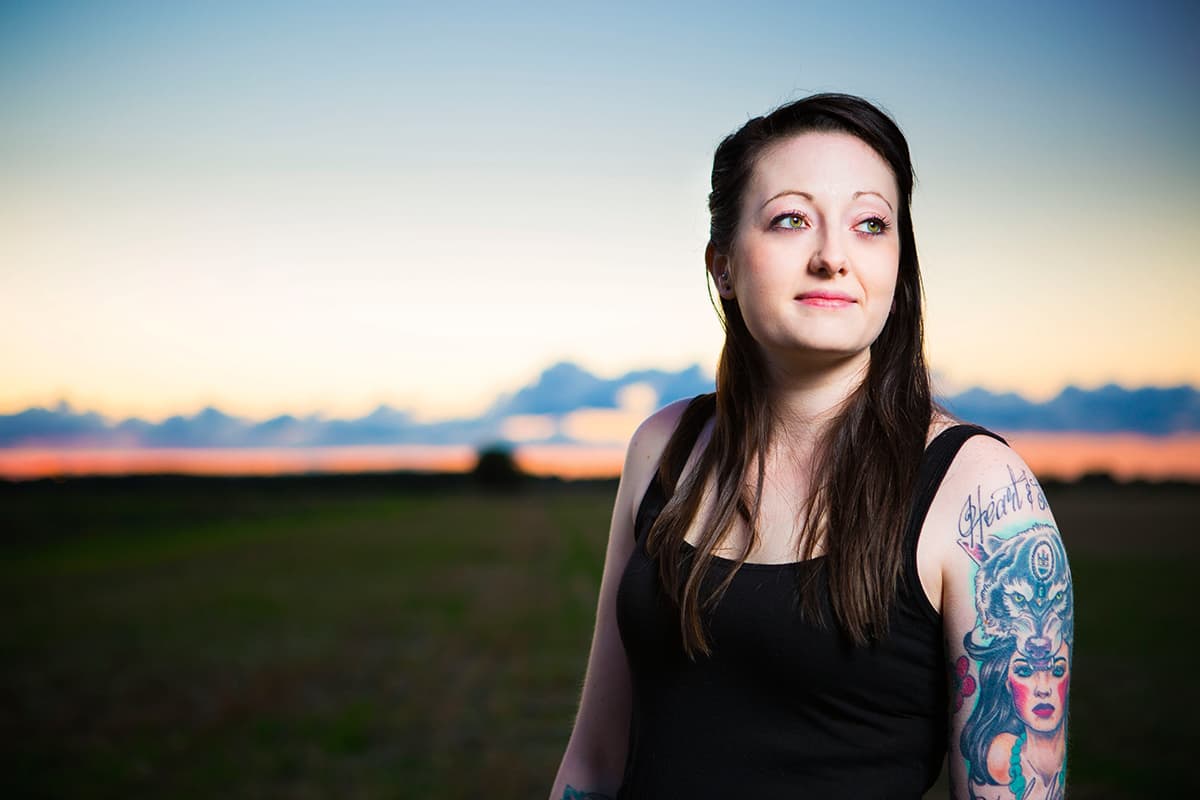
Balancing off-camera flash with natural sunlight can produce some eye-catching results
Shooting in Manual mode is essentially a two-step process: the first stage is to meter for the background so that it is perfectly exposed and the second is to add flashgun light that pulls your subject out from the background. Your goal, especially when starting out, should be to learn how to balance the ambient light with the light emitted by your flashgun so the final image looks as natural as possible. It’ll still ‘pop’ and have plenty of depth, but it will also look balanced. Once you’ve mastered this delicate balancing act, you can experiment with more dramatic looks – say, by deliberately underexposing the background by a stop or two so the main subject is more pronounced.
The golden rule when shooting in Manual mode with flash is that shutter speed controls the amount of ambient light reaching the sensor, while aperture controls the amount of flashgun light that reaches it. Note that if your wireless flash triggering system doesn’t support FP/High-Speed Sync, you’ll need to settle on a shutter speed that falls below your maximum flash sync-speed, which is usually around 1/200 to 1/250sec depending on the make and model of your camera.
Once you’ve settled on a shutter speed and aperture combination the next step is to set your flash output. Once you’re familiar with your flashgun’s output levels in Manual mode, this will become much more instinctive. As a starting point, try setting your flash to one quarter (¼) power at a distance of eight feet and adjust from there. Learning how to use a lightmeter can save you a lot of time here, as it will tell you exactly what flash settings to use for any given shutter speed/aperture/ISO combination for a balanced image. If you don’t have a lightmeter to hand then remember you can also use your aperture to decrease or increase the level of flashgun light that reaches the sensor, though changing it will of course also affect the depth of field. If you decide to reposition your flash and this changes the distance between it and your subject then remember to account for the inverse square rule: every time you double the distance your flash will produce a quarter as much light. Also bear in mind that you will need to increase the flashgun’s power if you are using a softbox or other modifier, as these reduce your flash’s output by a stop or two.
Aside from your camera and flash settings, the other key thing to consider is where to place your flashgun(s). If you’re just using one then, as a starting point, try positioning it at a 45° angle to your subject. This will create a sense of depth, without leaving too much of your subject in shadow. If you’re only using one flashgun, avoid positioning it any wider than 45°; placing it at 90° to the subject, for example, will result in one side of them being much darker – dramatic, but not necessarily all that flattering. Also, try to keep the flashgun at the subject’s eye-level (using a light stand or tripod), or even a bit higher and angled slightly down. This produces the most flattering light and will reduce any harsh shadows in their eyes. Placing a reflector on the opposite side to the flash can also be beneficial as it will add a bit of fill light on the shadow side.
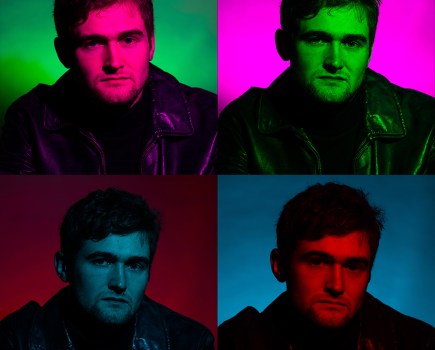
If using multiple flashguns you can start to widen the angles, using one flash as a key light and the other (on a reduced power setting) as a fill light. Alternatively, you could try positioning one directly behind your subject to produce an ethereal rim light around them that further helps distinguish them from the background. Or you could use one flash on your subject and position the other so as to illuminate parts of the background, thereby adding extra interest to the shot. The trick is to play around, experiment and see what works for you. If you’ve not already tried off-camera flash, you’ll be amazed by how many effects, moods and looks you can create with no more than two small flashes.
Flash modifiers
Once you’ve mastered the basics of off-camera flash, the next step is to learn how to shape and modify the light produced by your flashgun(s). This is where dedicated flash modifiers such as diffusers, softboxes and umbrellas come into play. Different shapes and designs will alter the direction in which the light travels, either focusing it into a narrow beam (e.g snoots) or spreading it as wide as possible (e.g umbrellas). Softboxes are considered by many to be a good halfway house as they diffuse and soften the light from your flashgun, but spread it in a more controllable way than an umbrella. This makes it easier to illuminate specific parts of the frame without too much light spilling out into other areas.